Printed Router Accessories

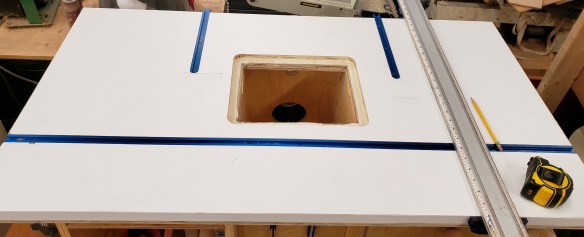
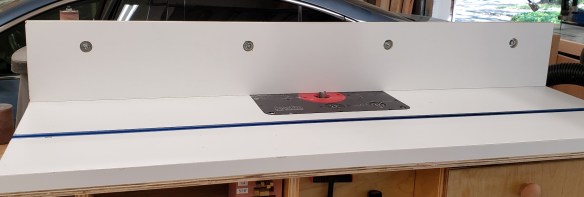
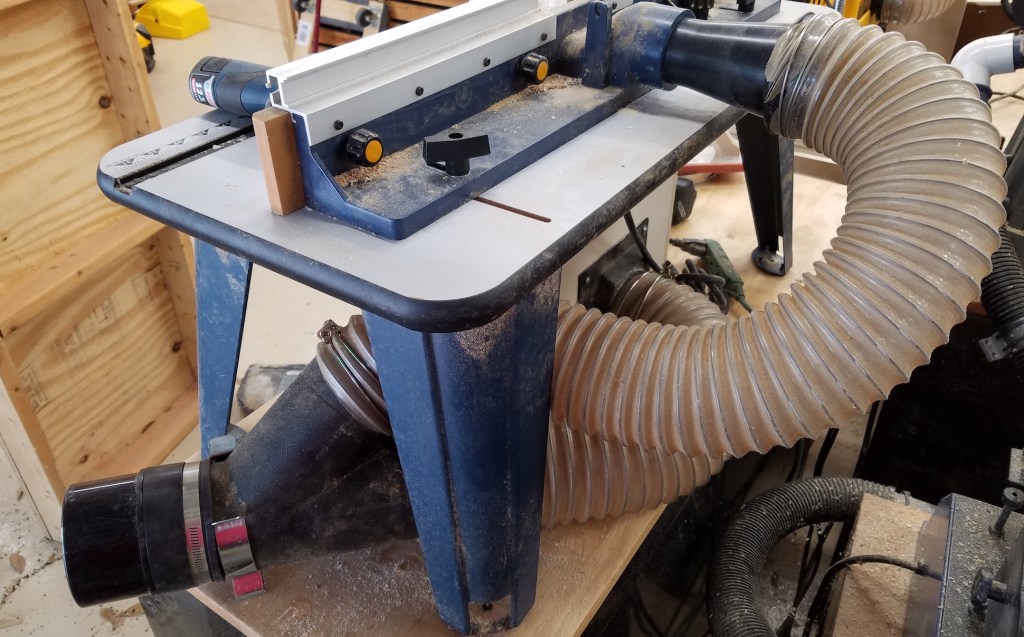
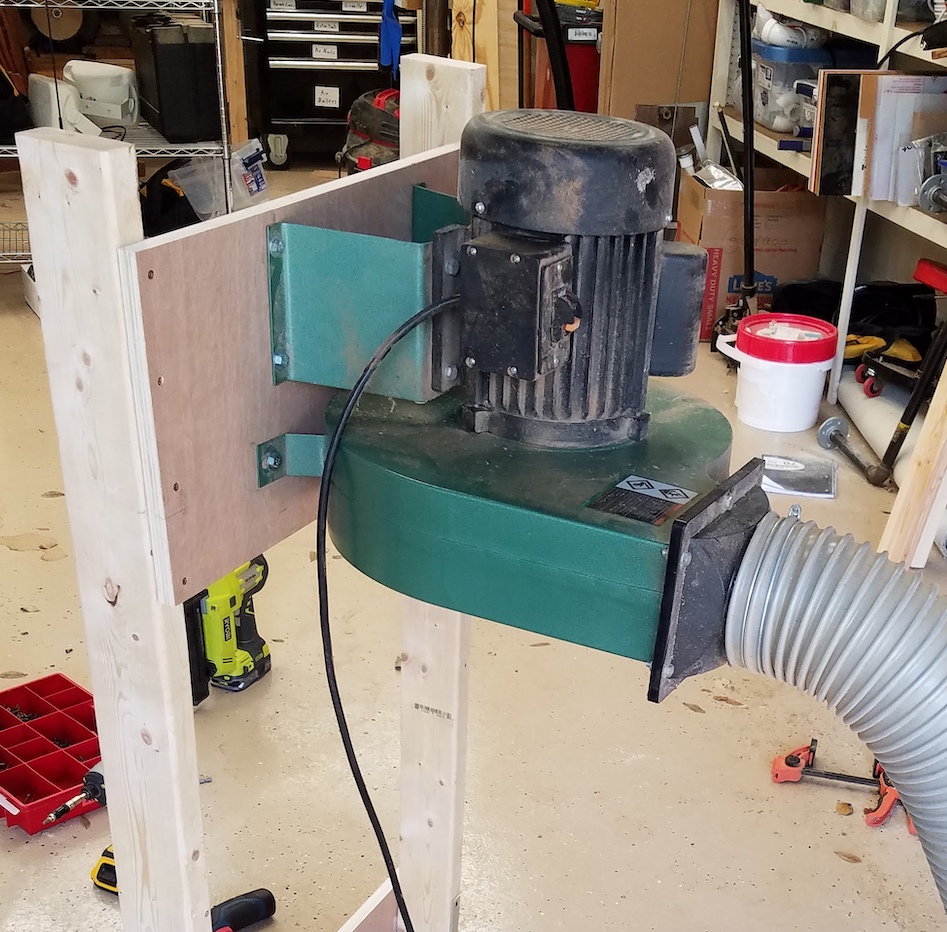
I have been making good use of my new router table. It was already very capable with a flat surface and adjustable fence, but there is always room for improvement. I am going to trick it out with a few printed accessories.

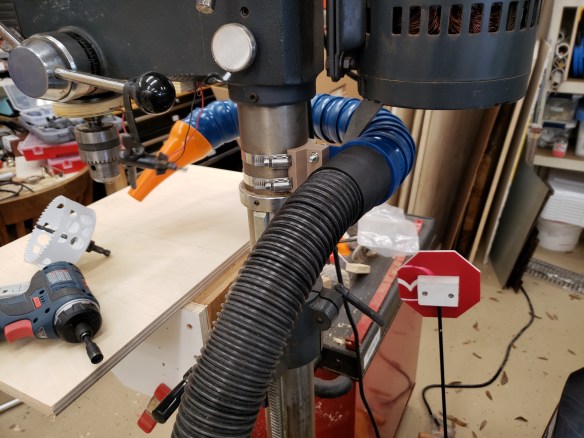
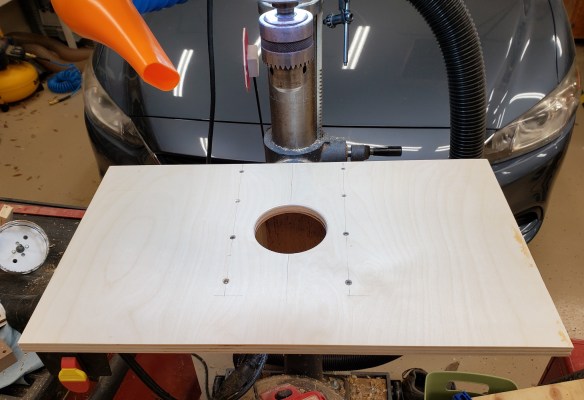
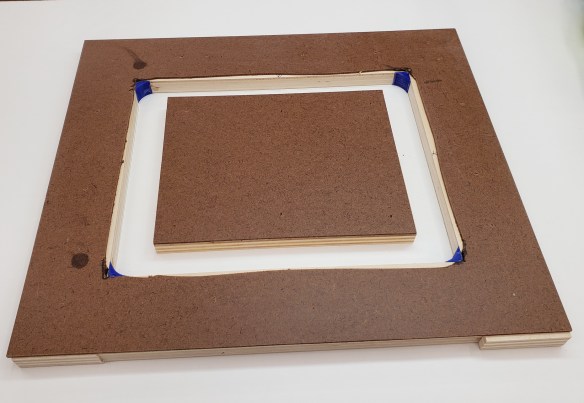
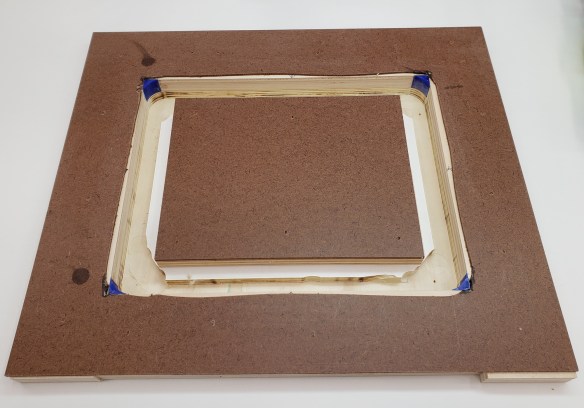
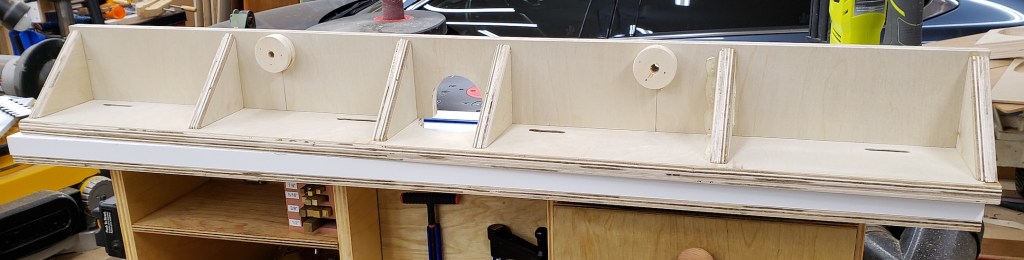
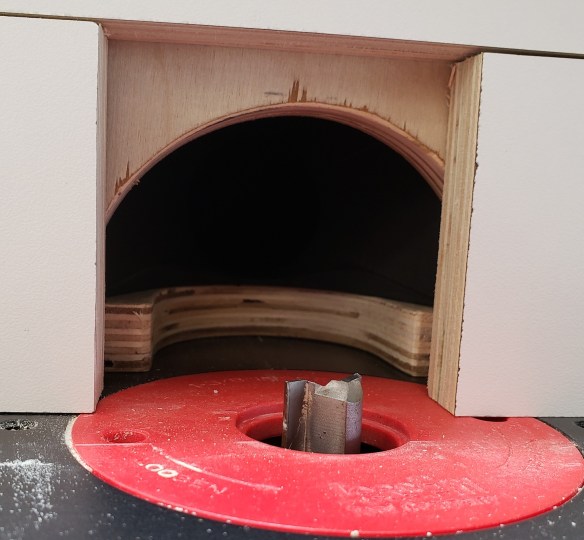
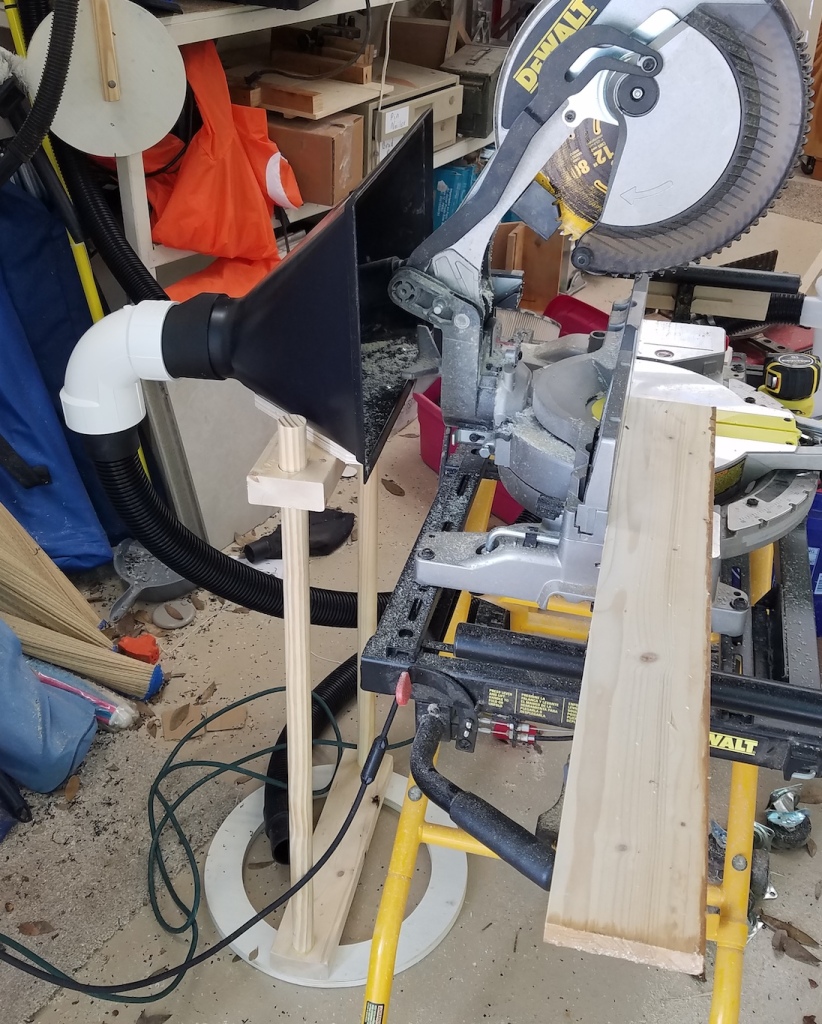
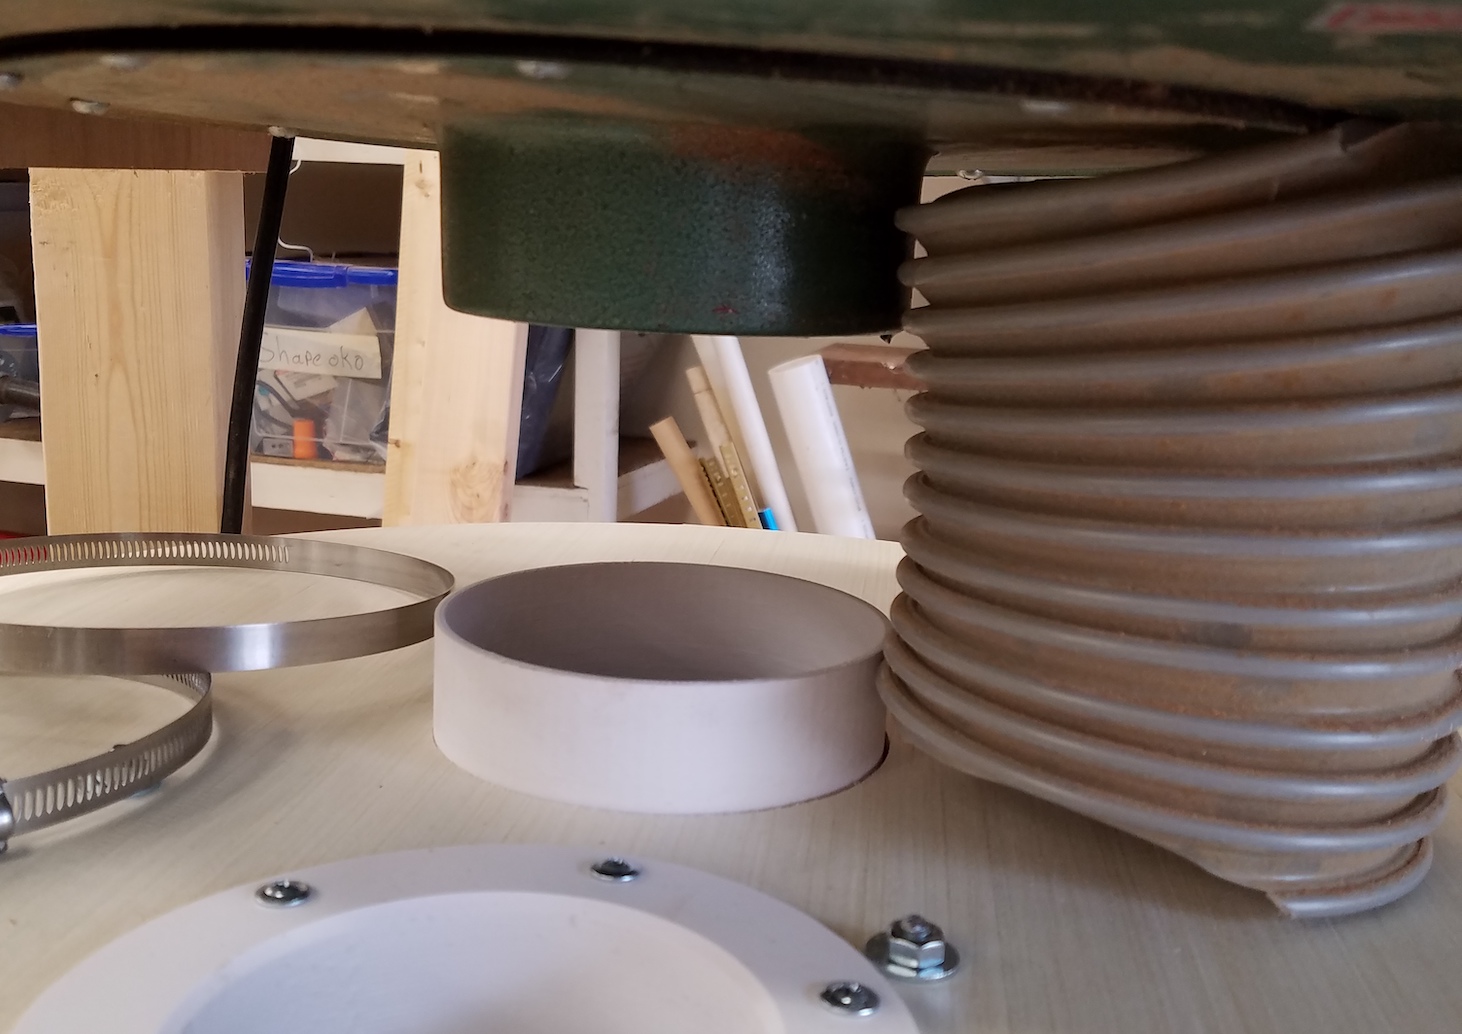
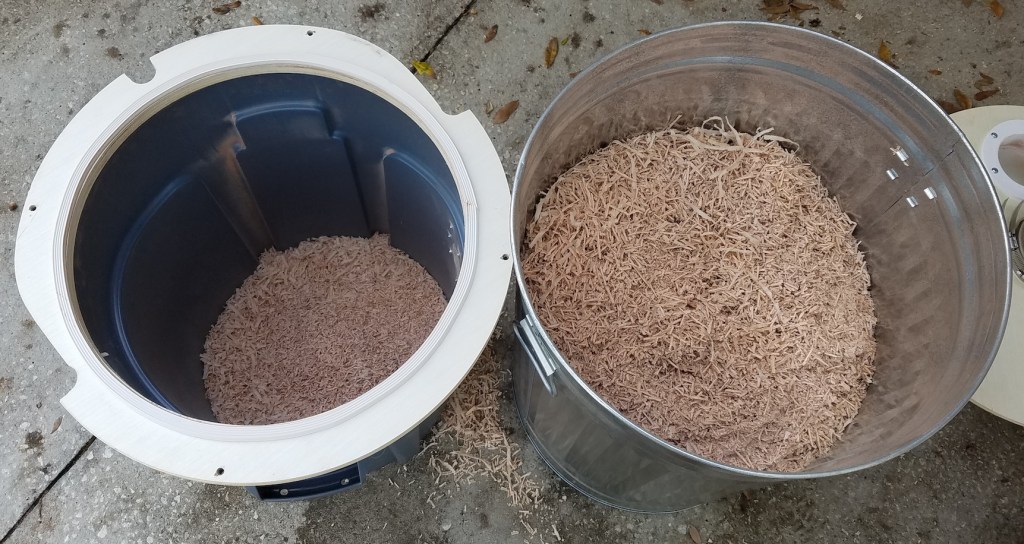
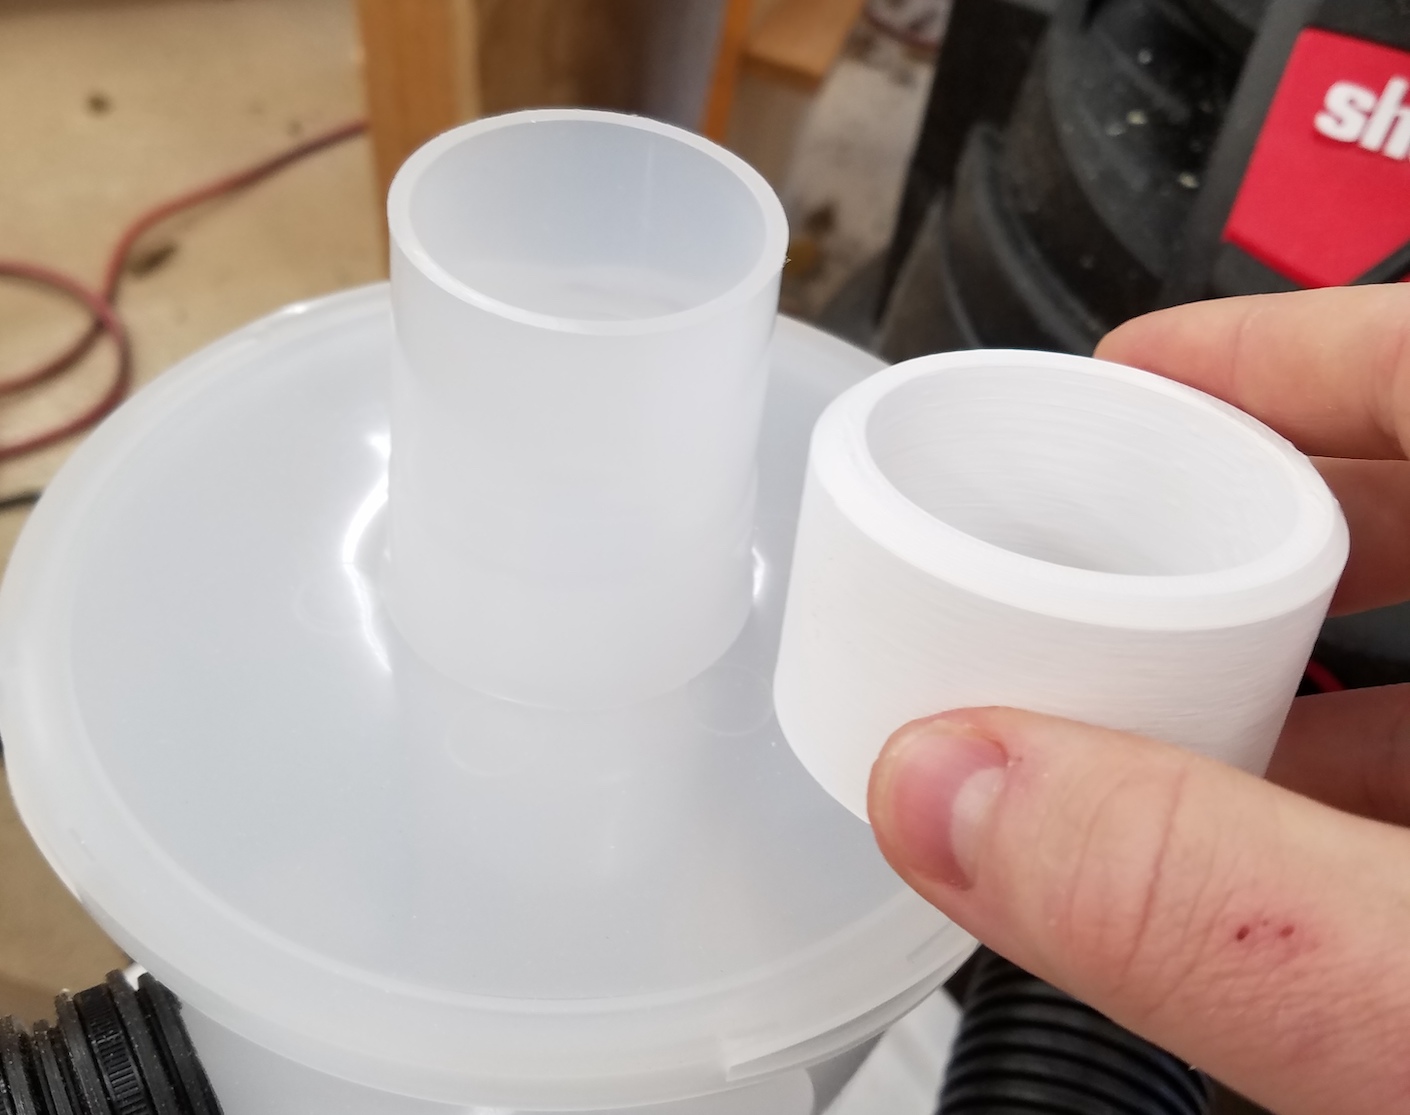
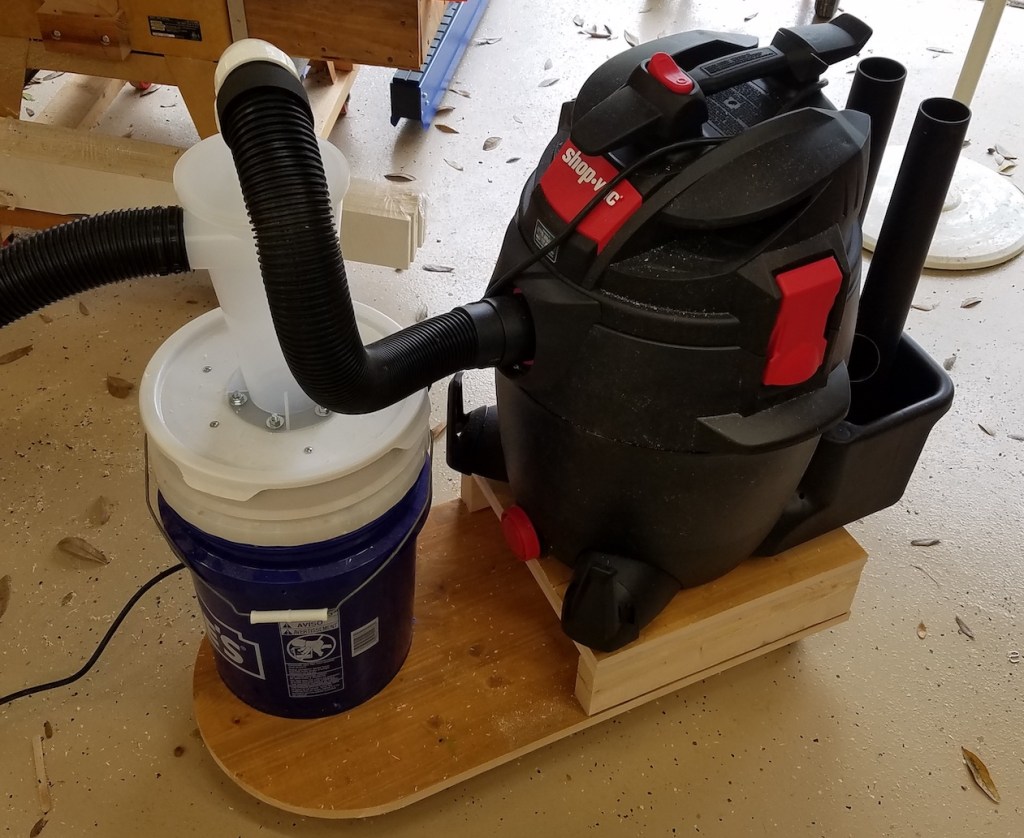
I have seen dust collector chutes that sit at the end of the table and suck up dust from dado cuts. I have a big enough table that I can do some pretty wide cuts before needing to break out the handheld router. First up, here is what the critter looks like. It sits at the end of the router table and collects the dust that blows out from the slot you are cutting when doing dado work.

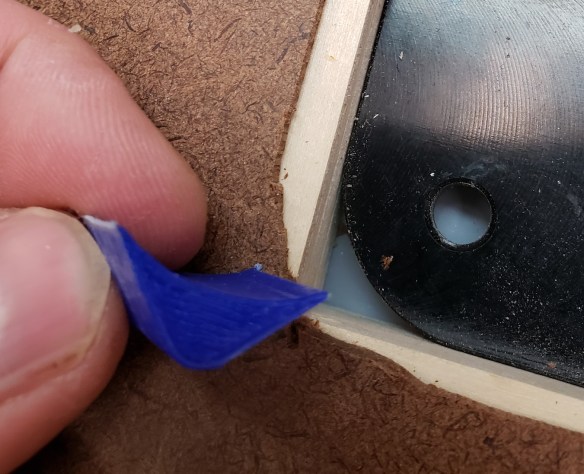
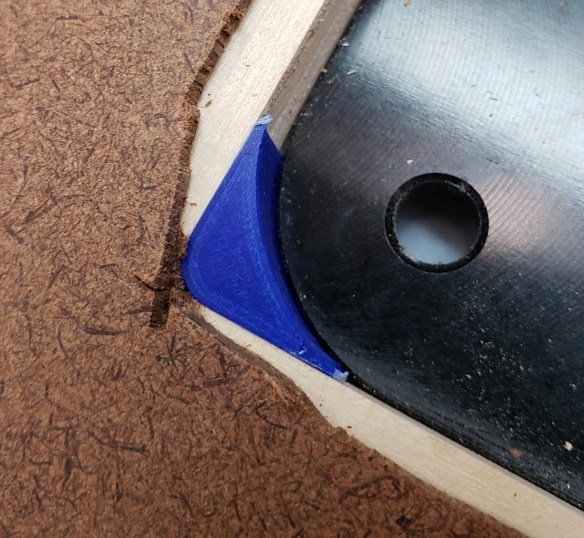
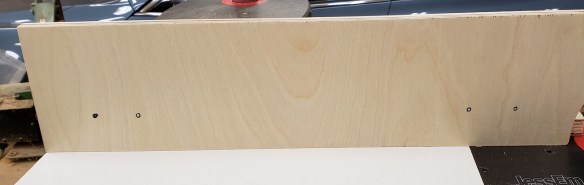
I made a housing with a groove around the edges that would accept some brush material from a door sweep. It turns out if you remove the brush material it comes crimped in a little metal frame. That can be cut with a heavy pair of diagonal cutters. Doing that pinches off brushes so that nothing falls out. I cut up 3 segments and glued them into the housing.

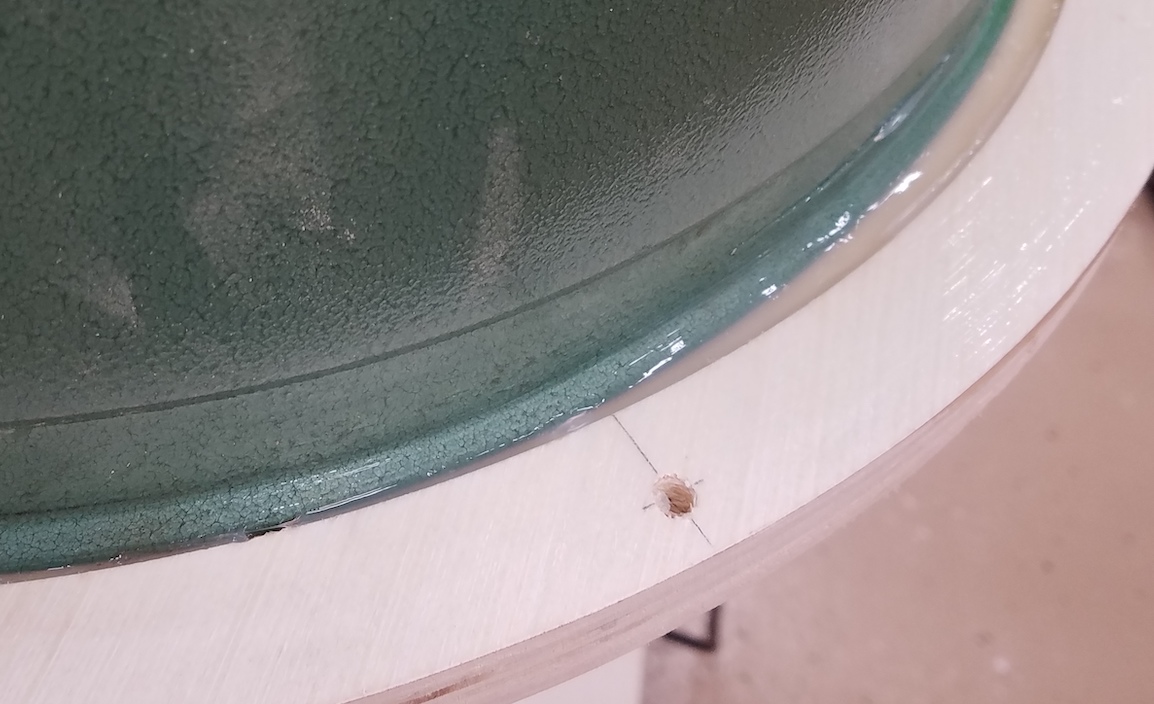
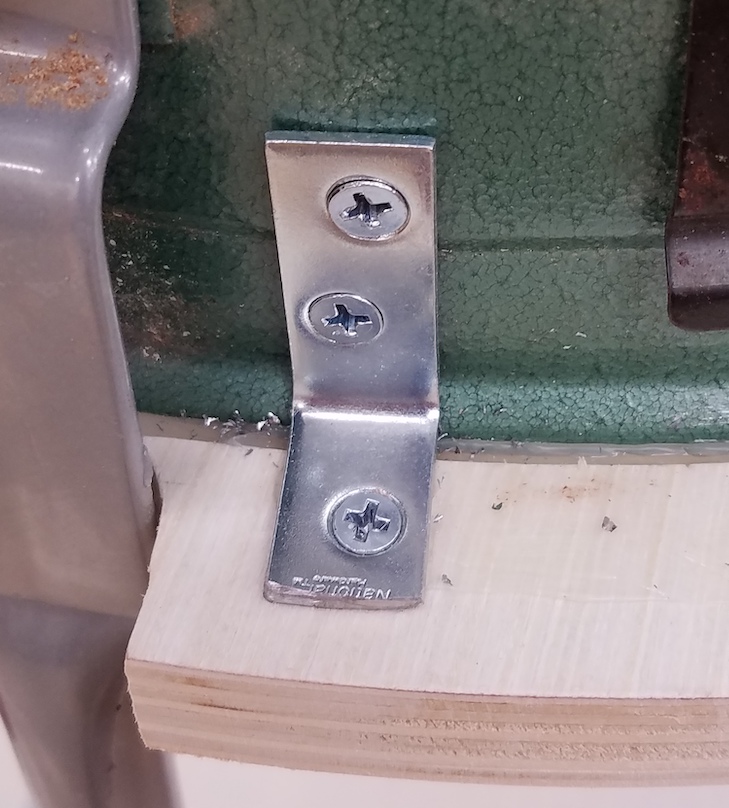
To hold it down to the table I printed a bracket with alignment features and slotted screw holes. Now the dust chute can be raised and lowered or removed. The brushes will help catch dust, but won’t interfere with a board passing over the table’s edge. It certainly isn’t an accessory I will use every day, but it was a fun build and will come in handy from time to time.


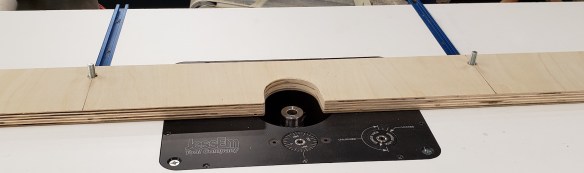
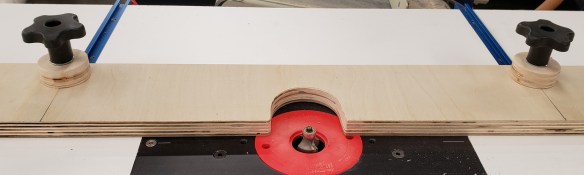
An accessory that will see far more use is a pair of rolling stock guides. They are based off a design that Jessem sells. Theirs are made of metal and the wheels don’t allow kickback. I think my version is good enough given the price difference. I found a pack of cheap rubber wheels for luggage. There is an infeed and outfeed version with the wheels angled slightly towards the fence. They can adjust to accept thin or thick stock.

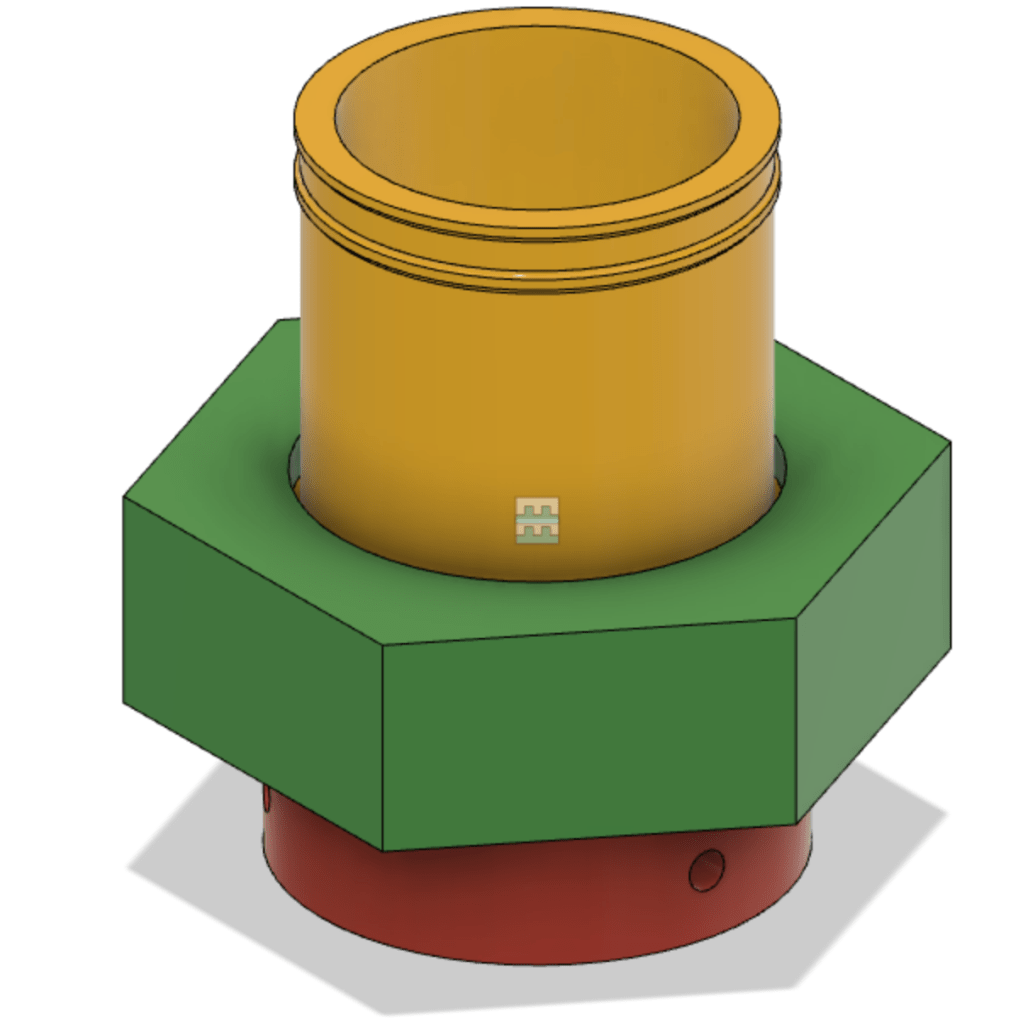
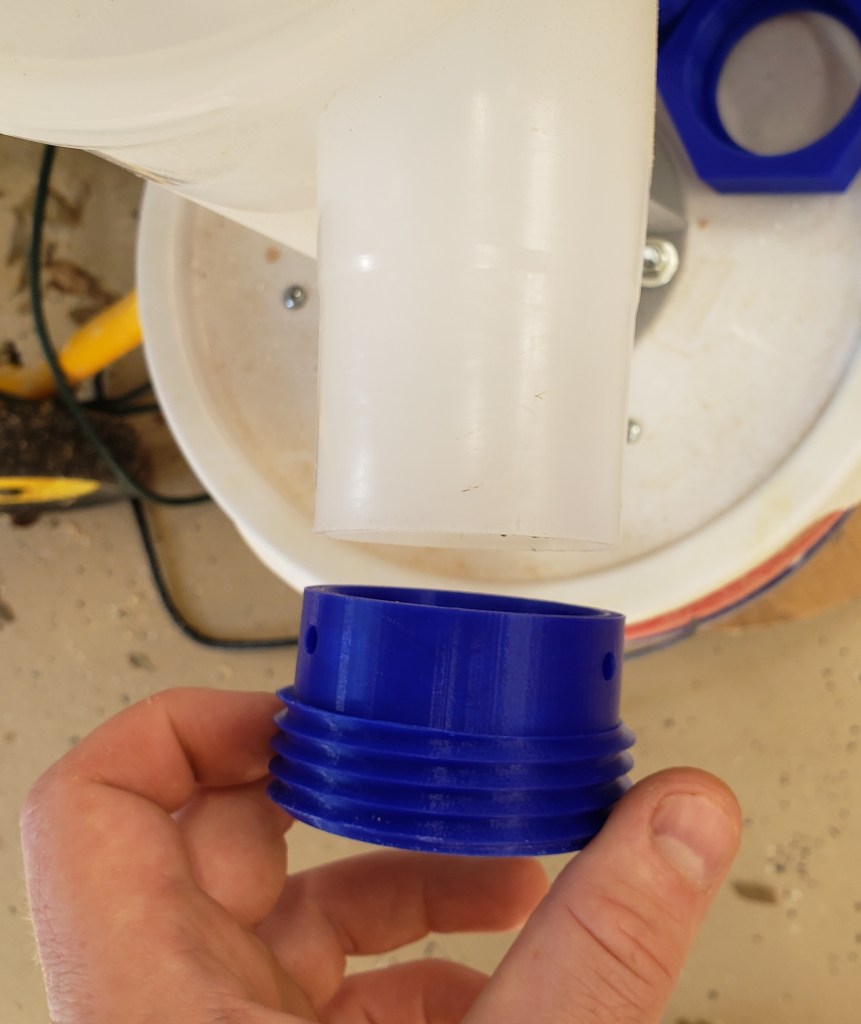
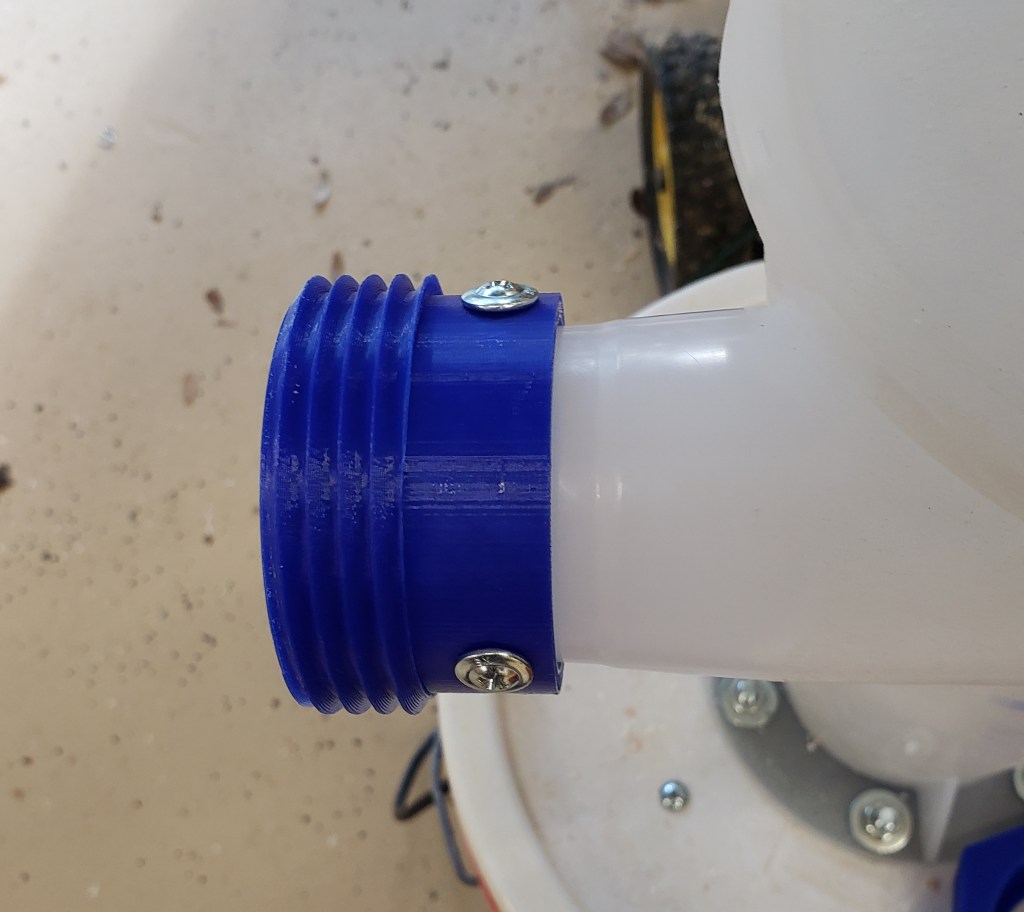
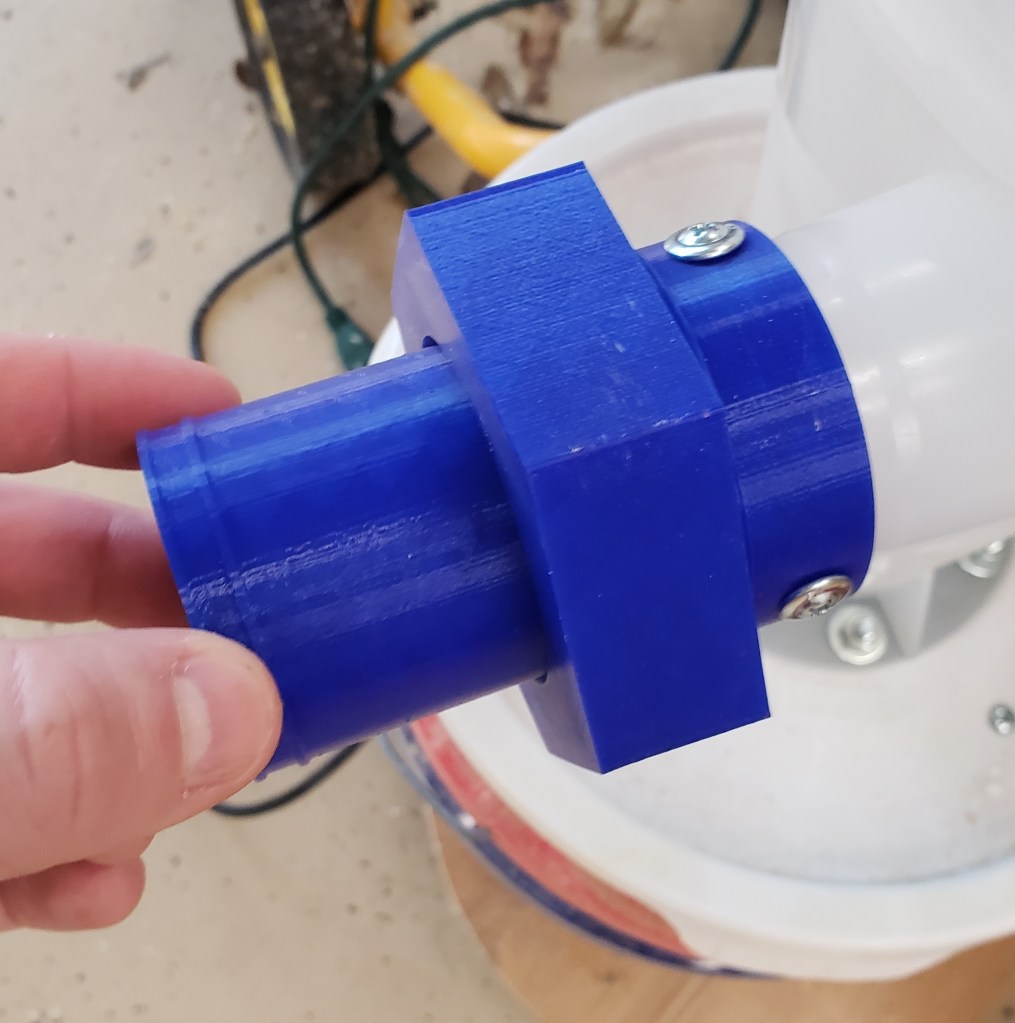
I needed a few small knobs for this job and experimented with using coupling nuts. The tall nuts give a lot of surface for the printed part to bear against. I tried tightening one against a vice, and couldn’t twist it hard enough to break it by hand. I will be making more of these in the future!

Here is a quick animation of it in action. The guides keep it pressed down to the table and the angle of the wheels guides the board towards the fence. I purposefully started the board away from the fence to illustrate it being guided in.


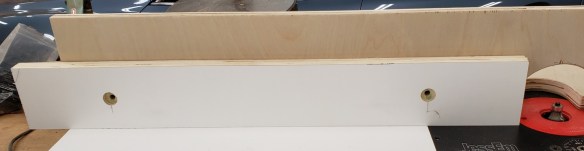
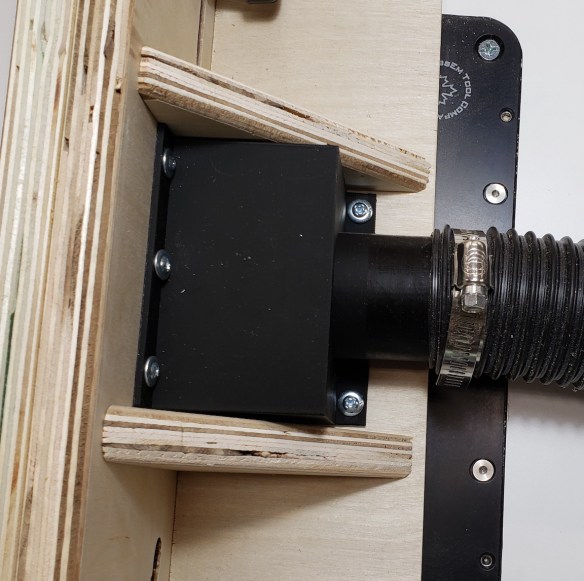
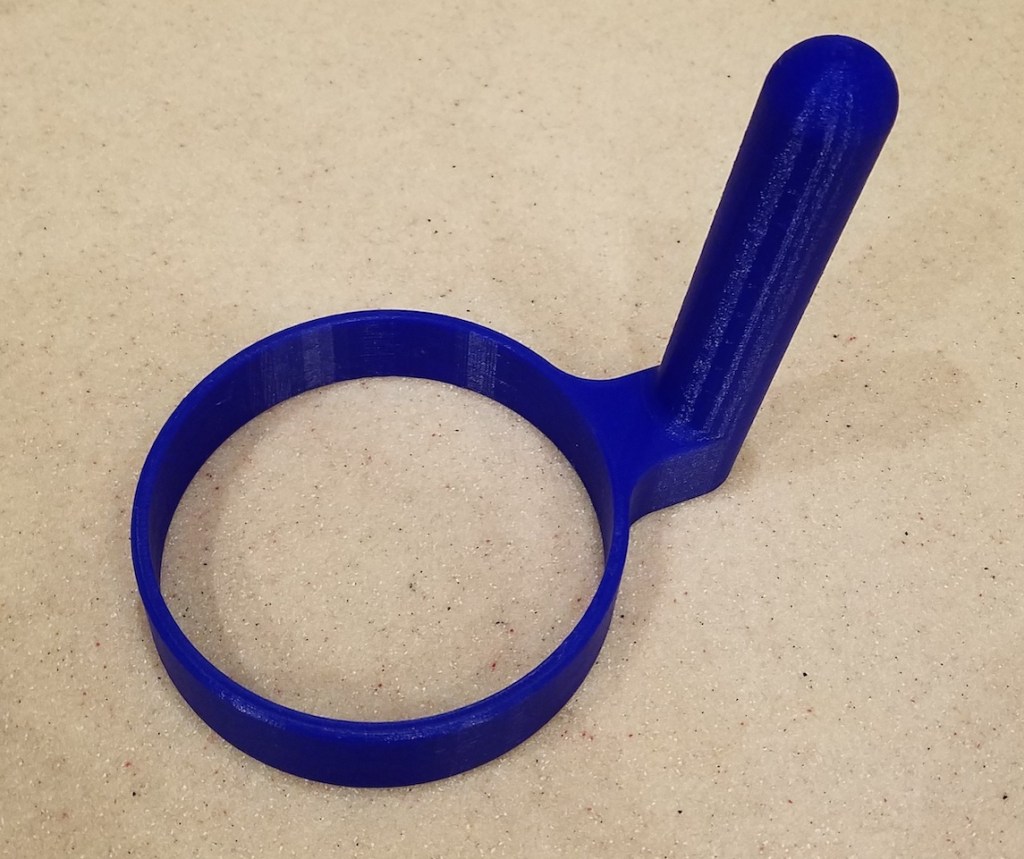
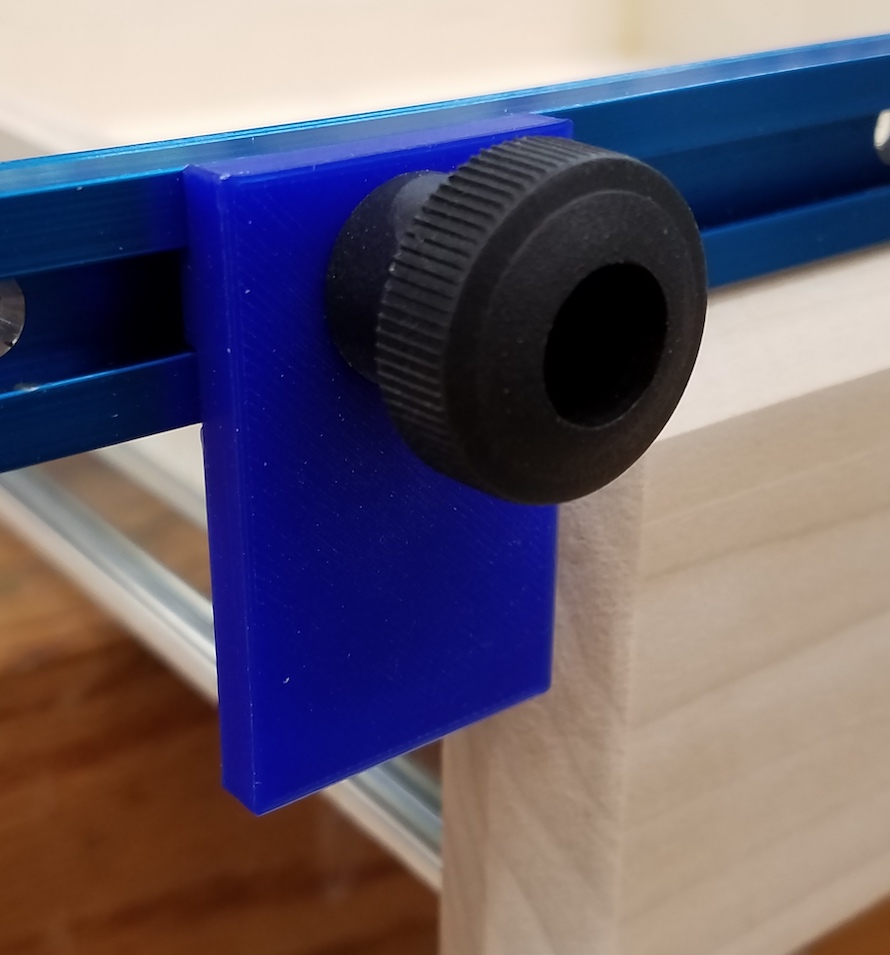
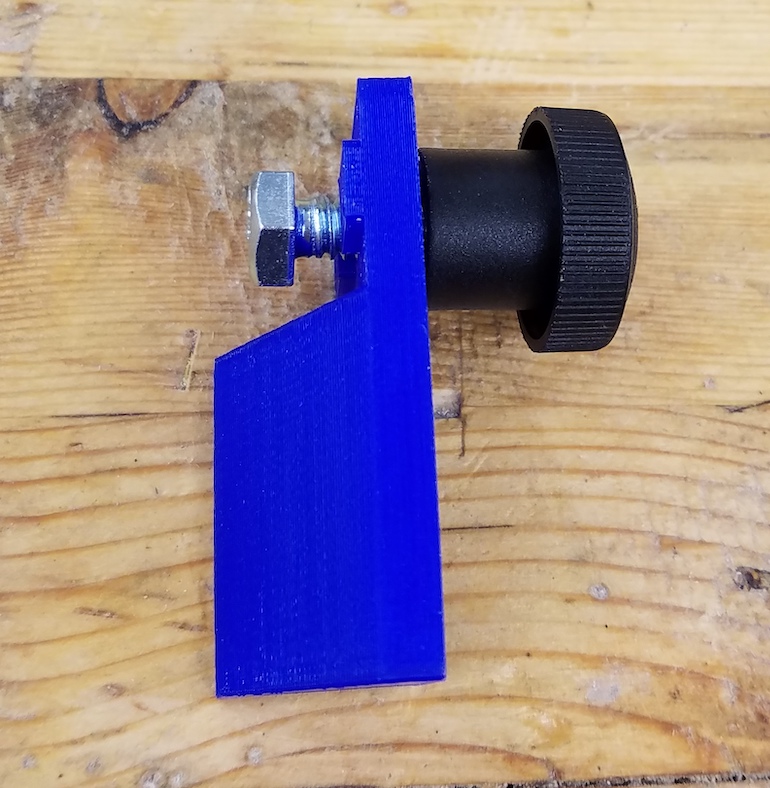
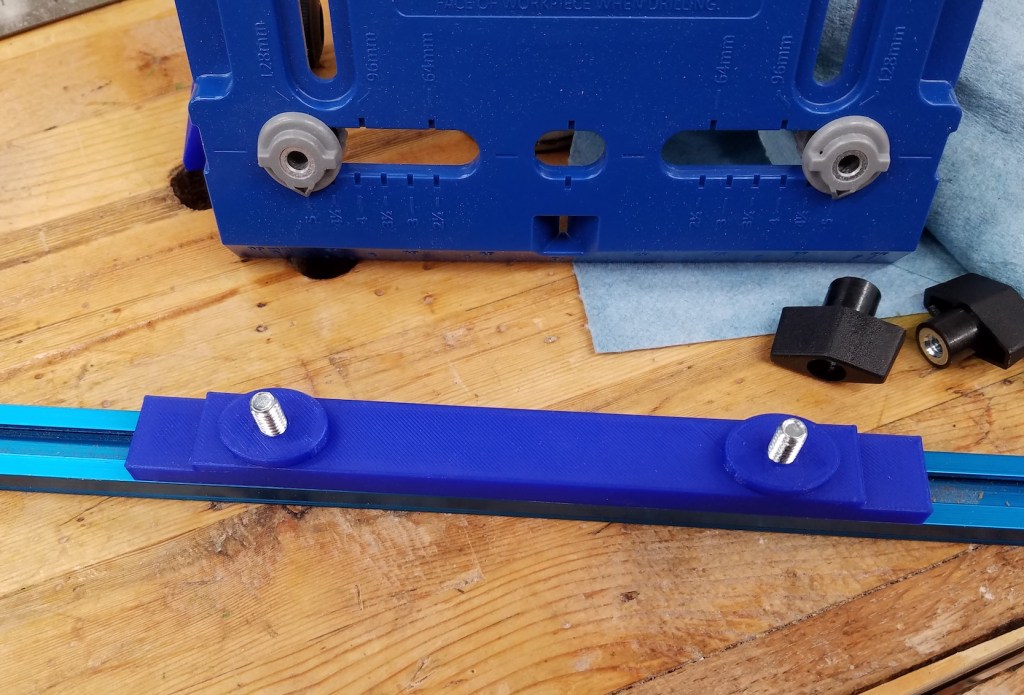
Lastly, I spent a lot of time making sure everything on this router table was flat and precise. I want to be able to do precision joinery, and that requires fine adjustment. It can be frustrating when you are trying to fine tune in a joint and just need a little nudge out of the fence. These little jigs will secure down via the T-track on the table and run a fine screw up against the fence.

The front of the screw has a ball bearing glued into a coupling nut. This means that the fence is only touched by the very tip of a hard bearing. When you rotate the screw it is a consistent touch point centered on the axis of rotation. The bottom of the jig has rubber bumpers so it doesn’t slide around on the slick table top. The shaft is a 10-32 screw. That means every rotation is 1/32″ of an inch. The mounting block uses another coupling nut and the handle is just threaded plastic. With one of these on either side of the table you can square the fence, or move it in very carefully prescribed movements. 1/8 of a turn of both handles will adjust the fence by about the thickness of a sheet of paper!

Drill Press Table

I built a new drill press table when I dropped my press before the move. It was a good table for how quickly I turned it around with what I had on hand. There are a few issues though. I made it small because my last one was too big and would collect junk storage. It is a little too small and stuff overhangs a lot. The 2.5″ insert is a lot smaller than many of the bits I use, which means the top has a lot of damage from my 4″ hole saw. More importantly though, the fence is unusable. I put the t-tracks right in line with the rotating handle. Every time you bring the press down it bonks on the fence knob. A few inches to the left or right and things would have been fine.

To start with, I had been fussing around with dust collection solutions on my drill press for ages. I finally broke down and bought some big locline hosing (blue and orange in the pictures below) and 3D printed an adapter to attach it to the back column. The adapter has passages for hose clamps to pass through it and clamp it securely. I had already wired in a switch at the front, so you just turn the vacuum on and start drilling.

With dust collection solved, I attached the first layer of the table top. The large hole in the center will let me reach up from underneath and pop out the top table’s insert. Notice the dust collection switch already attached at the bottom left.

Next I printed a template and routed out a square section for the inserts to go into. Previously I had a smaller insert. I found myself using the 3 and 4″ hole saw at the drill press often, and it damaged the tabletop outside of the insert area. This new one is 4.5″ wide. I cut a pile of inserts to make sure I wasn’t going to run out anytime soon. They got their corners and bottom edges rounded to fit in the cutout better and prevent dust in the corners from letting them sit properly.

Last but not least I made up a set of fences. I find myself rarely clamping to the fence, and often wishing it was very short. I made both a tall fence, that could have stop blocks clamped to it, as well as a flat fence. The t-track is far enough out on the table and the clamp knobs are short enough that the drill press handle shouldn’t ever be an issue.

Flat Fence
Tall Fence

Router Table Top and Fence

I have been using my new router setup for a number of weeks now. The lift is fantastic, the top is a little wonky and too soft, and the fence is barely adequate. I am settled enough on some of my other projects and have spent some time thinking out how I want to build a final top and fence. So, let’s get building and address all the issues my first top created.

The first thing to fix is the cutout the router lift fits into. The radius required is a size of router bit I don’t have. My last attempt didn’t go well. This time, I have a good plan. First, I put the router lift down on a piece of hardboard and snugged up pieces of plywood next to it. I then glued and weighted the plywood to the hardboard so it would provide a very tight hold of the lift top plate.

That all made the edges fit snugly, so I know there won’t be any wiggle when I drop the router lift in. Next, to solve the radius problem I just 3D printed some corners that take up the extra space. Now, the router bit I have will follow the contour and there won’t be any gaps at the corners. I used thin CA glue to hold the printed corners in place.

With the cutout template finished I double sticky taped it down to a big piece of laminate faced plywood and got routing. The first pass hogged out the lip that the router lift will sit on. A jigsaw opened up the rest.

I checked the fit and it is wonderful. There is almost no slop, and the corners match the lift well.

I cut a piece of 3/4″ plywood to go under the laminate top to act as support. I sat the two pieces on my flat table saw top and went around with a straight edge and flashlight to check everything. I found some slight bows and used cawls to clamp everything flat, then slowly brad nailed everything together.

With everything tacked together I moved the top to the router base I built earlier. I found some slight dipping in the center, so I cut brass shims to bring the top back to flat when everything was screwed down. With the top in place, flat, and securely fastened, I added edge banding all the way around to help protect the laminate from getting chipped.


Next I wanted to add a number of t-tracks to the top for featherboads and to keep the fence in place. My router produces a ton of dust when doing a big cut and my fixed base porter cable 890 series doesn’t come with any collection port. A few iterations of printing got me this two piece design that I glued together. It goes in where the edge guide would normally plug in.

The start of the cut usually generates a lot of dust, but once the grooves got going the shroud did a good job picking up most of the dust. There probably aren’t any 100% solutions, but this does save a lot of mess. The grooves turned out well!


The top is nearly complete. I just need to do the final installation of the lift. First, I wanted to reinforce the places where the leveling set screws will land. The plywood is too soft, and I expect they will sink in with time. On my last top I used CA glue to shore up the area. This time I found some 1/16″ brass to line those areas. Once bonded, the leveling went quickly. All the effort I spent getting the table top level means the router lift plate can be perfectly flush all the way around. No catches or dips at the transitions.


The Fence

With the table top finished, I was ready to move on to the fence. Having it clamp at the edges worked in my last fence adaptation, but the center tended to flex. That is the most important place to keep still, so I added the t-track in closer to the center to keep the fence stable near the bit. I cut out some 3/4″ plywood to act as a base an front face for the fence.

I put in knobs to clamp the fence down, and added spacers to move the height of the knob up. The fence is tall enough it needs a little boost to make it easier to reach.

I cut out laminate plywood sections to make movable fence faces. I set them against the front of the fence and marked the spots where a slot would need to start and top. I should have drilled out the ends of the slot and routed the middle. The full depth cut got a little squirley in places. Oh well, the fence faces open and close easily.

Now that I know where my hands will be going to tighten the fence and faces, I know where there is free space to add ribs. These triangular ribs will stabilize the fence front and keep it stiff. I just glued and nailed them in place.

To finish off the fence I cut a strip of laminate to go across the top of the moveable faces. It makes the total height 5 inches and holds a t-track that goes the whole length of the fence.

The fence is done, but it still doesn’t have any dust collection. I printed a duct section to screw down just behind where the router bit will be. This combined with the dust collection built into the cabinet means that very little dust will escape this unit.

That puts the final touches on the fence. While I was at it, I cut a hand full of extra moveable faces and screwed them to the back of the table cabinet as spares. I also cut a full length extra tall fence that moves the total height up to 6 inches.

These upgrades should make the whole router setup really clean and fast to operate. Combined with the base I built earlier I am all set on the router front and am ready to tackle a lot of new future projects!

Swiveling Dust Collection Fitting

My dust deputy cart is doing a reasonably good job of helping me keep clean. One place that falls short is the hose that attaches to the inlet of the dust cyclone. The inlet part is tapered and the plastic is quite slick. A picture from my original post shows that I originally held it in place with zip ties. I moved on to a hose clamp, but that didn’t work either. It always gets twisted up during use, and it falls off constantly. I need a connection that can swivel and stay attached.

My solution to this issue is to 3D print a tapered ring with threads (red below). A loose tube butts up against that (yellow), and is held down by a nut (green). I did a cross cut shot to show what it looks like when assembled (lower right). My CAD software introduced a few new colors to confuse the issue.

I had a lot of blue filament lying around so I made everything out of that. The tapered base goes on and screws into place to keep it from falling off. I then screwed on the big nut to capture the 2″ hose adapter. The nut threads interfere heavily, so it won’t move without a lot of effort.

I tightened the nut down enough to form a reasonable seal, but loose enough to let it swivel. To connect the hose to the swivel section I again used a hose clamp. This time I printed and glued on a little handle so you don’t need a tool to loosen or tighten the clamp. Ask me in 3 months if I like it or not.

April 2019 Prints

RTIC Tumbler Handle

For some reason RTIC has changed the shape of their 30oz tumbler. Not sure if YETI did this, and they followed suit or what. I suspect it is a plot to sell more handles and accessories. As it stands, the old handle I designed doesn’t fit on the new style of cup any more. The taper angle and diameters are just a little different.

My old handle was printed in 2 parts because most low end printers (including the one I owned at the time) couldn’t print something that big. Now a days at least a 6×6 bed size is pretty bog standard. This new design will be all one piece. The cup is large enough in diameter that getting my calipers on it wasn’t going to work. I printed some rings of different diameters and used them to estimate the taper angle of the new cup.

With that figured out I just printed a new handle that looks a lot like the old one, only with slightly more finger room and a longer grip. Thingiverse link

Drawer Pull Centering Jig

I picked up a Kreg cabinet handle jig for one of my recent projects, and because handles are something you install pretty frequently. It is certainly possible to do them well without a jig, but that always makes repetitive work easier. The jig does a good job of setting the height and width of the holes. It doesn’t center them on the drawer though. I made a few add ons to help with that.

I took a length Kreg track that you would normally imbed into a table to make moveable hold downs. Instead, this becomes part of the top fence used to set depth. Now with a spacer it registers across the whole top edge of the drawer. That also lets you use an edge stop. Now it is all centered. Once set you can put handles in the same drawer position over and over again with no more measurements or adjustments. The only downside is that there was a scale on the back of the jig for setting depth. That no longer measures true because this vertical stop doesn’t register where the old one did.

Router bits

Storage and organization is a place where the printer continues to be endlessly helpful. I have had this nice router bit set for years, but always had trouble getting the bits back in their slot. They end up clanking around the drawer and taking up more space than they should. A simple printed tray gives them each a home and takes up a lot less drawer space. For smaller prints like this, a label maker works better than trying to 3D print the text.

More Dust Collection Adapters

Woodworking Dust Collection Rule 1: No two dust collection ports are ever the same size… EVER

Once again I find myself trying to fit a dust collection hose on to some of my tools and wind up having to 3D print a custom solution. Why is it always like this? This time it is a port for my random orbit sander to 1.25″ hose (which isn’t really 1.25″), one for my belt sander, and an adapter to go from that hose to my dust deputy inlet (which has some funky taper on it). The good news is that the ridges left over from 3D printing these always helps the adapter stay in place, even if it isn’t perfect. This is exactly why industry standards and groups like ASME and SAE exist.

Router Table Dust Collection

The next item on my dusty hit list is the router table. I have a dust port in the back of the fence, but that only really gets half the mess, and depending on what kind of operation you are doing it might get none. A lot falls down below the table and gets everywhere. The router is a high speed cutter and makes a lot of fine dust. Here is what the surface below the router often looks like.

I need some kind of box to go around the router and capture most of the dust that falls below the table. They can be bought online, but for 100+ dollars I will make my own. I made a back and bottom with dust port in the back to take a 4″ hose.

I wanted all the other sides of the box to move out of the way when I am working on the router. I attached the left and right sides with hinges so they can swing closed or wide open to let you get your hands in and work.

To hold everything closed and attach a front door, I put strips of magnets on the front edges of the side walls and the front door. It just snaps into place and keeps the side walls from swinging open.

I attached the bottom of this box directly to the toolbox base that the router table sits on. There is a small gap between the top of the box and the underside of the router table, and a large gap at the front wall. These gaps help by drawing air in and pulling the dust away. If this box was completely sealed you wouldn’t pull any dust out.

The quarters are a little tight under there, but the front door just pulls off and comes out any way you want. The sides naturally swing open a little and there is all the access you could ever want to the router for adjustments.

In the back I attached a duct splitter and have one hose going to the box and the other to the fence. Hopefully the 50/50 split will always be enough to get the job done. I wanted to add blast gates to adjust which side got more flow, but didn’t have space. Maybe a 3d printed part that acts as a flow control valve is in my future!

To test it out I routed a bunch of rabbets in some random plywood. There was a little left in the bottom, but most was removed. Any left over dust is at least confined to this box instead of in the air and all over the shop.

Miter Saw Dust Collection

Miter saws are incredibly useful and one of the first power tools I bought that wasn’t a hand tool. As useful as they are, they produce a lot of bad dust. The high speed cutter makes a fine dust that gets kicked back and up out of the tool. The little catch bag that comes with them helps, but much of the dust still escapes and becomes airborne.

I tried attaching a vacuum to the dust port in the back, but that only catches about half the dust. The rest just blows right by. Instead a big funnel would guide all the high speed dust into a vacuum port. That was the thought at least. It works a little better than just using the saw’s dust port, but not much better.

I had some plywood rings left over from my dust collector upgrade and thought this one would make a nice base to start with. I attached a 2×4 with holes in it for dowels to elevate the dust catch.

The big gulp dust catcher attaches to a similar piece of 2×4 with some plywood in between to help spread out the load. The upper 2×4 had the holes reamed out so it would slide easily. A set of screws goes through the 2×4 into the dowels to keep everything at the right height. I didn’t know exactly what height would be ideal, so I made it adjustable.

To adapt from the big 4″ port to my mobile shop vac I printed some adapters with a 3″ PVC elbow. Once again, 3D printer to the rescue when it comes to adapting dust collection fittings.

I am still getting a lot of dust blown all over the place, even with this large catch. Using a large dust collector instead of my shop vac might help, but I feel like dust is deflected in too many directions by the time it gets to this big gulp. I have used this for a few weeks and haven’t come up with a good solution yet. It may require a better catch on the pivoting saw bracket. I will include any updates made.

Dust Collector Upgrade

I picked up my current harbor freight dust collector probably some time in 2010. For the price it is an awesome deal, but after these years it is time for an upgrade. The motor (lower left in left picture) pulls in dust and blows it into the upright section. Everything swirls around so big dust falls to the clear bag while finer dust gets filtered in the white upper section.

It is an ok principle, but has issues. The upper bag filters down to 5 micron, but no further. A very fine dust will land on everything in the shop when using this for a while. Those finer particles are bad for your lungs. The bag is a pain in the butt to replace and often gets rips in it from sucked up chunks of wood.

I spent about $350 on this upgrade. Over half of that was the filter. Considering a new harbor freight dust collector can be had for about $180, that is ludicrous. A new tool with good filtering and easier disposal is in the $1,500 neighborhood. We have had a ton of house expenses, so maybe a diy upgrade isn’t so ludicrous after all. I want to keep my lungs clear, so let’s get started. With a dust mask on, I ground off some rust spots and repainted with whatever green I had lying around.

I had thought about doing a lesser version of this many years ago, but never got around to it. I spent a lot of time thinking about how to do one upgrade and make it count. I will show where we are going, then explain the journey in steps.

The motor has been turned sideways from where it originally was. Below it is a pre-separator (red). It pulls out most of the junk before it gets to the filter area. As everything swirls in the upright the leftovers fall into my new bag replacement (blue), and finally out through a new hepa filter (green). Everything gets attached to a mobile base. Let’s start there.


Dropping Some Base

I was going to need more space for the pre-separator and wanted nicer casters than the original assembly, so I started with a cut bit of 3/4″ plywood. A set of 2×4 uprights with plywood and angle brackets support the motor in its new configuration.

The motor is really heavy and caused the base to flex a lot. I added a rib along the right side and eventually a 2×4 underneath to further stiffen the bottom. With that I had a good mobile base for my new dust collector.

I reused the circulator and upright rods to attach that section to the base.


Pre-Separator

Before hitting the motor or clogging up the filter most dust will be caught in the pre-separator. The design is called a Thien Baffle. The exact dimensions seem to be debated, so I just made it up as I went along. Basically everything comes in through a right angle port so it swirls around and gets flung to the edges. Gravity takes over for the particles and the air goes up through the center.

My circle cutting jig came back in full force with a lot of inside and outside cuts. I love this thing! I cut out a top for the separator and added a groove for the weather seal that would go up against the trash can top (left). Next I cut the baffle that keeps dust in the bin from getting pulled back up (right).

I clamped the two together and match drilled the 1/4″ threaded rods that hold the two sections together. I used the circle jig to drill out the 4″ inlet and 5″ exhaust ports. The inlet port is sized to allow a 4″ right angle dust fitting to slip into the top. The bottom goes onto a 4″ tight PVC drain elbow. I custom printed this to work with the parts I had around. I used silicone calking to seal it and screws to hold it in place. The center is larger and will accept 5″ hose to go between the separator and motor. Same method of silicone calking and screws to seal and hold.

I bolted the bottom baffle on and fitted it all to the metal trash can. This section is before the motor, so it will be under vacuum. I think the metal can will do better than a plastic one in preventing collapse.

I added weather stripping to the lid where it interacts with the trash can overlapping the interface to help form a better seal. With everything underneath I just needed a short segment of 5″ hose to attach the two.

Here is the pre-separator fully assembled and in place.


Bag Replacement

Ideally, most of the dust is already out by the time it passes the motor. Some will still exist and it will need a place to go. Instead of a thin plastic bag that rips and is difficult to install, I wanted another rigid bin. A 20 gallon rubbermade can was just about the right size. I temporary attached two pieces of 3/4″ plywood and match cut the interior and exterior diameters, the cutouts for clearing the metal upright bars, and holes for screwing the two halves together.

The upper section had a groove in it to lay a generous bead of silicone calking to help it seal with the metal ring of the circulator. It turns out that ring isn’t very circular, so the gap in that groove varies wildly.

I didn’t trust the calking alone, so I cut down some right angle brackets and drilled/screwed them into place to help support this mating ring.

The bottom half of the mating ring will attach to the 20 gallon trash can. I installed 1/4-20 T-nuts so a bolt can come in from the top to draw the can up and seal it. I put another thick bead of silicon calking on the ring and screwed the can down through the lip. The combo of screws and silicon made for another slid connection.

It is pretty important that you don’t let this section get too full. Otherwise the circulation of dust might get up to the filter and damage it. I cut a thin section of clear plastic and added a viewing port to the can.


Last but not least is the filter. Made in America from Wynn Environmental, the filter is a majority of the cost of the project. The new filter gets down to 0.3 micron instead of 5 micron. That doesn’t hamper flow though, instead of the 30-something square feet of filter the bag had, this one has over 200. The kit comes with little cleats that look like modified hose clamps to strap everything down from the inside.

To test out my new vacuum rig I had 20 board feet of 4/4 maple to plane. I got through all the boards and looked into the grey plastic bin. I was horrified to see a pile of shavings in it. I thought the pre-separator had failed to… well separate.

Turns out the pre-separator was past full and the shavings had gotten up past the baffle into the final stage. Good thing emptying both sections is easy and only takes a minute. The newly revamped dust collection rig works well and the pleated filter on top makes it breathe even better than before the pre-separator was added. Very happy with this upgrade.

Vacuum Cart

I am trying to make a commitment to do better dust collection in the new shop. I want to prevent the thick layer of sawdust the was on everything in my last shop, and I want to keep my lungs healthy for another half century or so. I have a few projects coming up that are aimed at those goals. The first being a shop vacuum cart.

I have used a small shop vac for specific applications, but never had a general one to use at different places around the shop. My portable sanders, router, miter saw, and other dust generating tools often went un-vacuumed.

I picked out a decent sized vacuum that had good specs but wasn’t the highest end you could get. It seems like for another 100 bucks you got a few features and a marginal increase in performance. The next level above that would go to the pro-sumer version at 5x the price. Not gonna happen on my current budget. I took some of the old counter top material left over from the previous owner and routed a nice radius on the front.

I picked up the milescraft circle cutting jig for an upcoming project, but decided to give it a test run here. What a great jig! Well worth 40 bucks. There is going to be a 5 gallon bucket pre-separator before the main vacuum. I screwed a bucket to the base to hold the separator bucket and built up a platform to get the shop vac higher.

I did a lot of positioning and found that moving the bucket to the right side and rotating the vacuum to the left let the inlet hose clear more easily. I screwed the shop vac down through the base into the platform. Hopefully these screws don’t rip out. If they do I will lose a lot of vacuum pressure.

I got a dust deputy brand cyclone separator. It is supposed to spin the dust out to remove most of it before it gets to your filter. The hose port situation is a little awkward. The port up top goes to the shop vac. Even with elevating the vacuum it is an odd stretch. The hose wants to kink in on itself.

I took kind of a step back and had a think. This calls for some 3D printing. The top of the dust deputy has a tapered shape to it. I printed a matching ring that fits into a 2″ PVC elbow. The printed part got epoxied into the elbow and fits on the top of the dust deputy. The friction fit holds it well and makes a good seal, but lets it be removable.

With the elbow taken care of I created another fitting to push onto the end of the corrugated vacuum hose. This one works a bit like the fitting that comes with the vacuum. It slips over the outside and locks into the ridges. They are a 1/4″ pitch. I made a fitting with ramped one way rings inside. It pushes on easily, but is tough to remove. That should form a decent seal as well.

I might bond this part in eventually, but for now, the hose can be removed, and so can the elbow. It makes taking the bucket lid off and dumping the dust easier.

All assembled, I wanted to perform a test. I dumped out the main vacuum body and the removable bucket. I then went around and vacuumed a section of the shop floor around my miter saw and where I had been working on this project. I came up with a few cups of dust, a bunch of leaves and some chunks of stuff. The vacuum chamber was basically empty.

This is great news. Now I can easily empty the smaller bucket instead of the big vacuum. Instead of running a standard pleated filter I can use a bag. The bags get disposed of, but have a finer filtration level. With 99% of the junk getting caught in the vortex, the bags will last a long time. Plus, anything that might puncture a bag will get filtered out.

I have been using this a lot with my router for a really big dust job and everything has been working wonderfully. If you are thinking about adding a dust deputy to your shop vac, do it!

June 2018 Prints

A bountiful harvest of prints this month.  I had a lot of work going on in the shop, and that typically ends up producing different jigs and prints to help out.

First up, I reorganized all of my machine screws into one central organizer.  To help with organization and to tell them apart I printed a screw ruler and hardware guide.

20180617_152833

The ruler measures screw lengths of either flat head or other style.  The guide has through holes that match my common hardware styles along with examples of washers and nuts.  It makes matching a random bit of hardware easier.


I do a pretty good job keeping my eye and ear protection on when in the shop.  Dust masks are another thing.  A lot of my tools have vacuum, but certainly not all.  Most masks I have tried don’t work well with the beard and mustache, and most are pretty hot.  This one works well for me.  I built it a little home to prevent damage, and so I always know where it is.  I feel a little like bane when I wear it.

I took a photo of it on the cutting mat, then used the lines to help design an appropriate housing shape.  The hinge required a single screw and nut, and a magnet in the lid and body keep it closed.  The backplane screws down so I tucked it under a cabinet with other PPE.


I had a lot of flat parts that needed holes drilled in them in the same location.  Instead of marking every one I made a drill template with bushings.  The bushings are sized so a particular drill bit just fits inside.  It keeps the bit on location and perpendicular to the surface.  They will wear out eventually, but are easy to replace.  These all fit in a 5/8″ hole and have two screws to keep them in place.  Once built this saved me a ton of time and increased repeatability.

20180612_203922


Dust collection fittings never fit.  There was an article about it in one of my woodworking magazines.  The guy basically threw up his hands and told the industry to get their act together.  I emailed him with my solution.  He said it was cool, but a workaround for an issue that shouldn’t exist.  Agreed, but here is my workaround for my miter saw.

DSC_1305


I switched to using these small bottles from woodcraft for my glue.  I like them a lot better than the bottles that most glues come in.  The only trick is that the little red caps blink out of existence once dropped.  I did a few test prints with a segment missing to get the taper size and groove right for this one, but I think I have a winner.  It is much easier to handle, harder to lose, and is more easily replaceable.


I had kind of a failed attempt at a vacuum system for degassing epoxy.  I might revisit it at some point, but for now it is a defunct project.  I needed to tap some polycarbonate for pipe fittings and bought a pipe thread tap.  It didn’t come with any case or even pouch, so I printed one.  I sprayed it good with oil to prevent rust.  Hopefully stored this way it will not get lost, broken, or rust.