Height Growth Ruler

Our little guy is growing fast and I wanted a way to help document that. Kids are usually interested in seeing how big they are, so I decided to make a height ruler. I started back in July because I wanted to be done by the time his birthday hit. I got done in time, but hit a bunch of snags along the way, and still have trouble getting him to hold still for a measurement.

First up, I bought some pine boards to experiment on and 3D printed this guide to make the ruler marks. This took a few iterations, I was trying to use a pattern bit, but ultimately a bushing and plunge route was the best way to go. You can flip the template around to continue the pattern and route the whole ruler with one template. I based the marks off of an old folding wooden ruler I have.

The first big issue I ran into was inlay. I wanted to route a pattern, then mix black epoxy to pour into the cut grooves. The epoxy kept wicking into the grain. I tried poplar, it wicked too.

I tried sealing the grain with multiple rounds of shellac and still ran into some issues on the poplar samples. I should have started with a hardwood of some sort.

I eventually got enough sealing done on pine and filled another test piece. There was still some grain seepage and in trying to plane through the top surface and get to flat inlay, I kept hitting bubbles. I tried vacuuming the epoxy and still couldn’t get it to be void free. Here again, the rough pockets that are left by the routing might be allowing air pockets. Again in retrospect using maple or something would have been better.

Finally I settled on a quick clear coat to seal, and spray paint. It makes the router cuts dark and visible, and is easy to apply. The sample board turned out well enough, so I moved on to the real thing. I will work on improving my epoxy inlay techniques later.

I printed letters to make the ruler clear to read. Each letter has an alignment line underneath so you can see the foot mark line when putting it down. I had a few knots and checks that were in the way so I used clear epoxy to fill the voids so that the spray paint wouldn’t get inside. I then routed everything and sprayed the entire surface.

I planed off the top surface to reveal a decent inlay. Everything got a few coats of finish, then hung up on the wall. The hardest part now, is getting him to stand next to it. He pulls himself up to standing constantly, but always has his own agenda. This picture was the best I could get in nearly 2 months of trying. Never work with kids and animals they say.

Modular Buffer Stand

While I was building my Anvil Stand I was also building this buffer stand. I love my bench grinder stand to death, and want to have my other grinder setup as a buffer full time. I read about a chisel sharpening technique called unicorn sharpening, and it calls for a buffer. I tried it, and it worked well for me!

I made a basic box shape out of 2x8s (pricey these days) and attached them to a piece of 2×12 left over from the anvil stand as a base.

For the top I made a template out of hard board and labeled it with the orientation and hole info. Every tool base base that goes on top will have two T-Nuts embedded in them so 5/16″ bolts can come up from underneath to attach. That way you are always 2 bolts away from taking a tool off an installing a new one. I keep the template attached to the back of the stand so I can easily add new tools in the future.

Like the bench grinder stand I clad the cavity in plywood and filled it with sand. This shot is of it 2/3rd full, I had to go back to the store and get more sand because of all the filled projects I have been working on.

So I don’t have to go to the toolbox and remember which wrench is the right one every time, I made a palm wrench that fits the bolts. The bottom is rounded to make it easy to rotate in your hand for fast installing, and the outside hex shape lets you get good torque on it. A print like this can be surprisingly strong without any modifications and only 20% infill.

The buffer is all ready to go and looks great. It is weighty and stable while in use. I only have one tool attached now, but might get another grinder or buffer in the future. When I do, I’ll make another base and hang the unused tool off the side or back of the stand. Boiled linseed oil finished everything off.

Overcome Sign

Now that I have my wooden wall up, it is time to do some decoration. You might notice this broken pipe fragment from a previous engagement with our house. That is the pipe that broke off in the wall when I was trying to change out the supply valve. It was a deep low point in the renovation, but just a few days later I got the pluming and wall repaired and a new vanity installed.

I found a nice looking plaque at the hardware store, but wanted the scale to be a little different. I measured and copied the dimensions and 3d printed a template so I could replicate it at any length I wanted. I could also scale it up and down. The template goes on with double sticky tape, and a router template transfer bit copies the shape over.

With that made I routed the edges using a roman ogee bit and made a little mounting block to hold the pipe section on.

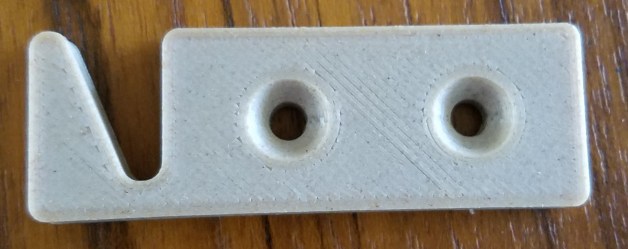
To hang this I was going to run a wire across the back, but the pipe valve’s weight would have the plaque leaning heavily from a center hang point. I needed some way to make two solid mounting points. I came up with this keyhole print. You drill a 1″ forstner hole about 1/4″ deep, and screw on the attachment. Now, a screw or nail head sticking out of the wall will register in the key hole. They make router bits for doing this, but my print is a lot easier to install. I mounted two in the back and hung up the plaque.

Last but not least this sign needs a word. I have always liked the unofficial motto of the Marine Corps. Improvise Adapt Overcome. This felt like an Overcome moment for me, so that is what I will use. I printed a two layer font white on black so that it looks like the IMPACT font with its usual white text and black outline. This is where a multicolor printer would come in a lot of handy. Instead I had to do it all with Z-height differences in color. Hopefully my next printer with come with some multi material options.

Now if I am ever in the shop working on a project that seems to have gone really belly up, I can look up and remember a worse situation I was able to overcome.

Garage Wooden Wall

The wall in our garage next to the house entrance has some issues. Multiple things had been attached and removed, and there was once a dart board. The result is a serious amount of holes. There are a lot of things I want to attach to this wall. They are often too small to use french cleats and I don’t want a million wall anchors. Why not use wood?

I picked up a pile of tongue and groove pine and covered the outward face in boiled linseed oil (BLO) to offer a little color and basic protection.

Everything got pulled away from the wall and I put in the first slat. I made really sure the first one was tight up against the wall and level. After that, things went pretty smoothly. I worked my way up the wall and got to some outlets that were disused. The house had a number of intercoms that were removed, phone jacks, and some switches I don’t need any more. I went through and measured everything’s position and saved it so I can reopen those boxes again if I want them in the future.

I put a corner mold on the outside edge and used a little scribe piece of pine to help smooth the transition between the door mold and the wood wall.

With everything up I could accessorize a bit. I bought wooden switch plates so the light switches and outlet would look nicer and blend in better.


3D Printed Enhancements

As I stated earlier, part of the reason for doing this is to support mounting options. I have a remote for my new AC system, an indoor/outdoor thermometer and a remote for the ceiling dust filter. The AC remote already had a mounting bracket, the others had to be designed and printed

While taking the garage door wall controls off the wall, the plastic started coming apart. The clips were breaking off and screw holes splitting. I printed a cradle that the housing would fit in and offer new mounting screw holes. The bodies were bonded into the cradle and allowed to cure overnight. The only place I had access to screw holes was under the main button. The base is thick enough to keep it from flapping under use.


I continued to add the signs and other accessories to my wall as I put the desk back and cleaned up. I was able to mount my shiny red metal first aid kit down low in easy reach. I also screwed a sealed CAT tourniquet to the wall. Hopefully that never comes in handy. Having the wall here has been nice. The space feels a lot warmer, and I have already added more items since taking this picture. I might pick continue this theme elsewhere in the shop, but not any time soon.

Bench Grinder Stand

My workbench has seen heavy use with lots of projects coming and going. I wouldn’t change a thing about it. My one complaint is that the bench grinder gets used so much it is always attached. Bench space is consumed, grinding grit and junk is often covering the work surface and vibrations tend to shake things off the table. Time for a dedicated stand. I had a pretty good idea of what to build in my head, but took this as an opportunity to practice drawing. I drew a few versions, a full assembly process (I found a better and worse order of operations when doing that), and finally tried to do a few perspective drawings. My ability isn’t great, but practice makes perfect and the process highlighted some minor issues with my original idea.

I picked up an 8 foot 2×8 and started cutting out a basic stand. The very bottom is a 2×12 bit of scrap I had that was about the right size. I screwed it all together and placed a long section of 2×8 on top to hold the grinder and an adjustable tool rest. I found some rubber pads to put on the bottom to keep the stand from walking around and cut down on vibrations.

To keep this thing in place I wanted to add a lot of weight. Sand is about the best thing I can think of that is dense, cheap, obtainable, and easy to store. It is about 100lb per cubic foot in density, and costs <$5 for a 50lb bag. Screws and silicone calking hold plywood to the uprights, making an open topped box shape. The space accepted a full bag of sand. A piece of 2×8 and just sits on top of the sand in case I want to empty it out at a later date.

I bolted down the grinder and attached a veritas tool rest that was previously on a small hand operated grinder. I think it will serve me better here on this highly used tool. The stand is a good height, access is easy, and the weight keeps the vibrations down.

Sharpening Station Stability

I built a sharpening station last year and like it a lot.  It has one issue though.  The whole thing wobbles badly during use.  The casters and small base don’t make a good combination.  I came up with a solution in this video:

It took a bit of messing around with feet material, but felt will work just fine for now.  I might find some kind of heavy duty rubber feet for longer term use.  Until then, stay sharp my friends!

Bunny Defense Network

Our two renegades rabbits are always looking for exploration and adventure.  Often they try to find it beyond the barriers we put up to keep them out of certain areas.  At first, opening up their exercise pen and placing the edges against the wall corralled them enough.  Now, they realize they can shove and move the fencing enough to get beyond.  I need a way to anchor the fence so they stop venturing beyond designated borders.

I started with sort of a three way corner thing to sit on the other side of the fence.  I wanted to add weight so the brace would be harder to move.  Boxing in the one leg segment and filling it with sand made the whole thing quite heavy.  I glued on a lid to keep from spilling sand all over the house.  I left off finish because I figured the little devils darlings would figure out how to chew on it through the fence.

This 20180114_162217all started when I had an idea for a simple 3D print that would hold the fence segments if you screwed them to something sturdy.  It seemed like a good idea, but eventually needed another iteration.

DSC_1037The brackets looked pretty good in wood filled PLA and held the fence well.  The issue I ran into was when it came to actually holding the little beasties beauties back.  On the first night they rattled it enough to knock two of the rungs off their hooks.  It only took them a few hours to figure out how to chew on my new creation as well.  Good thing I left off the finish.  I was going to need a deeper hook to keep them from breaking the fence section loose.

DSC_1039


In thinking about the design, it became apparent that the right half of that hook wasn’t needed.  The wooden upright would act as one side of the hook, I just needed to provide the other side.  I increased the hook size and stripped the part down till it was the bare minimum of what was needed.

DSC_1041

A few clear grippy bumpers on the bottom along with the sand mean it is impossible to shift this thing.  The new hooks ought to make it very difficult to disconnect the fence unless you are a human.  The whole thing tucks neatly next to a piece of well protected heirloom furniture.  Tyrion has been heavily inspecting and disapproving of my work since its installation.  Their hunger for items you value knows no bounds.


Jacked Up PushUp Bars

I built a set of pushup bars to go with my pullup bar from early last.  You grip them while doing a push up and it lets you dip down further than when using your hands on the ground.  That stretches your chest and gives a harder workout.  The only problem with them is that now I am flexible enough that my chest can touch the ground.  Time to jack them up a bit!  I started with the same 2×12 that they came from.

DSC_1017

It turns out old ratty 2x12s can be quite beautiful if you just give them a bit of planing.  Hand planing construction grade pine to make a piece of exercise equipment is probably some kind of sacrilege, but I like using hand tools when I can.  Besides, sanding is just the worst!

DSC_1018

I chopped this piece up to give two layers of material beneath each bar and glued.

All the load will be pushing down on these, so only a minimal joint is needed.  1/2″ dowels will be more than enough.  You drill in one side, insert these metal plugs with a sharp point in the center, align the other part and give it a wack.  The sharp points all transfer over the exact center of where you should drill to the mating part.

Some drilling, gluing, drying, and a fresh coat of boiled linseed oil later they looked smart.  Well not really smart, kind of chunky really.  If it were architecture I would call it brutalism.  Probably fitting for a room full of kettlebells.

DSC_1026

My beard touches easily, but my chest still has inches.  This is hopefully the last raise these will need for a long while.

DSC_1027

Battery Charging Station

I am mildly obsessed with flashlights.  These flashlights take fancy 18650 lithium ion batteries that can be recharged.  I have a lot of light accessories, spare batteries from laptops, and other things that need storage and organization.  Similarly cameras tend to have their own specialized batteries that need storage and charging.  I built a flexible station to hold all my chargers in one place.  Later I added an extras organizer from a repurposed storage box.

I started with all the specialized chargers I could find.  Two for flashlight batteries and two for cameras.  I decided to go for the pedal board route.  Guitarists can have a lot of effects pedals for their instruments.  Instead of having them all splayed across the floor they tend to put them on a thin box using velcro.  The box has slits that allow cables to pass inside the box out of the way.

DSC_0813

I built it to fit a shelf in my office closet and made it wide enough to expand with new charger capacity if need be.  Nothing special, just some pine I had hanging out.  The chargers are held at about a 60 degree angle, and there is space in the back to strap down a power strip.

DSC_0814

I wanted it dark to help hide the dark cables and velcro.  I never have good luck staining pine, but mixed up a water based dye blend.  It turned out great!

DSC_0816

With velcro and power strip in place I could start attaching chargers.

DSC_0817

DSC_0818

A 4×1 outlet extender lets you plug in chargers that are supposed to go directly into a wall outlet.  I added a device called a blackout buddy.  Eaton makes them and they are red cross branded.  It plugs in and charges itself.  When the power goes out it turn on the light so can see.  Now when our power goes out I can find my way to the flashlight stash in the dark.  It fit like a charm on the shelf in my closet.

DSC_0819


Next up I pulled an old drawer storage box thing out of the trash.  It used to have board games in it, but was destined for the dump.  I thought the all-wood construction it was worth saving.  After re-gluing a few bad joints it was in good shape.

20170512_191052

The bottom drawer houses all the extra batteries I had from laptop pulls and random purchases.  I printed a number of organizers to keep them from touching.  Every organizer positively holds the battery in place so they can’t come out and can’t touch each other.  Keeping them from touching is an important part of preventing battery damage and fires.  Plenty of room left to store more batteries.

The middle drawer has random flashlight stuff.  O-rings, manuals, cases, etc.  I printed some dividers to hot glue down to keep the drawer from being a mess every time you open and close the drawer.

DSC_0823

Lastly I threw some of my DSLR gear in the top drawer because I never really had a good place for it.  3D printing and woodworking come together to help organize and support my camera and flashlight fixations.  What a gorgeous synergy!

DSC_0824


Pullup Bar

I have been doing kettlebell and bodyweight exercises consistently for over 6 months.  I love the speed at which it kicks my butt and have been getting progressively stronger at all the exercises.  Aside from a variety of bells none of it requires anything more than a small bit of space.  The two exceptions are pull-ups and Turkish get ups.  Pull-ups obviously require some kind of bar, and Turkish get ups involve large series of steps to take you from lying flat on your back to standing up straight with a kettlebell overhead.  It takes a bit of room.

The plan is to kick out my treadmill and build a dedicated kettlebell workout area.  I have a doorframe pull-up bar, but want to build a freestanding piece of equipment.  Might as well use this as a chance to do some woodworking.  Start with some nice (Super rough!) untreated 4x4s and get cutting.  Even though they were supposed to be kiln dried they were wet enough that my normal tenon saw bound up an inch or two in.  Had to break out a panel rip saw!

With guns that big my joints weren’t exactly surgically precise.  Along those lines I didn’t really have the right chisels for the job.  An old 2″ framing chisel helped, but my only other option was a 1″ bench chisel for chopping the waste out.  Still I was able to bang out some bridle joints to attach the upgrights to the feet.  Things were going swimingly enough I was able to shoot a little assembly vid!

DSC_0731

Before doing any glueups or serious trimming I assembled the uprights with the pull up bar at the height I thought appropriate.  This let me do some basic testing to see if I was on the right track.  It was shaky, but even without glue or fasteners it held me!  Last but not least it let me play with different widths to figure out what was right for me.


DSC_0736

I started trimming excess and planning out the rest of my parts.  A shelf across the back holds kettlebells when not in use.  The shelf is dovetailed so it helps keep the assembly square.  All that weight comes in a lot of handy!  The right angle joints between the uprights and the feet got glued and pinned for good measure.  Everything else is going to stay friction only so it can be disassembled.

I tried trimming everything down as much as possible so it wouldn’t take up any extra space inside.  It looks compact, but beefy.

DSC_0738

I made one critical flaw though.  Those pins on the backside are pretty thin, and any force on them by the tails puts a lot of shear force along the grain.  It is a recipe for splitsville.

Yup, I was doing some assembly and it popped off.  I tried gluing and pinning it back in, but only managed to destroy the piece.  If I had made the foot extend a few more inches past the tail it would have been strong enough to survive.  Lesson for next time.

I installed some angled pegs along the back of the uprights to give myself storage hooks for grip trainers and other items.  The whole thing goes into the house easily, and assembles in a few minutes.  The pull up bar itself was pinned with some 1/2″ dowels though the upright from front to back.  That will keep it from rolling or working its way out.  The shelf and those pins are just held in with friction and gravity.  Assembled the device is too big to get through any doors, but by using carefully planned joints, I can take it apart to get it in and out of the house.  A coat of boiled linseed oil offers some protection and adds color to the pine.

All the wooden joints creak and groan and shift a bit when doing pullups, but it is super sturdy.  I might drill out the pull up bar and upgrade from a 1-1/4″ to a 1-1/2″ bar at some point, but for now this works well.  Those pegs along the back hold my chalk, a towel, and grip trainers.

DSC_0756