
I am trying to make a commitment to do better dust collection in the new shop. I want to prevent the thick layer of sawdust the was on everything in my last shop, and I want to keep my lungs healthy for another half century or so. I have a few projects coming up that are aimed at those goals. The first being a shop vacuum cart.
I have used a small shop vac for specific applications, but never had a general one to use at different places around the shop. My portable sanders, router, miter saw, and other dust generating tools often went un-vacuumed.
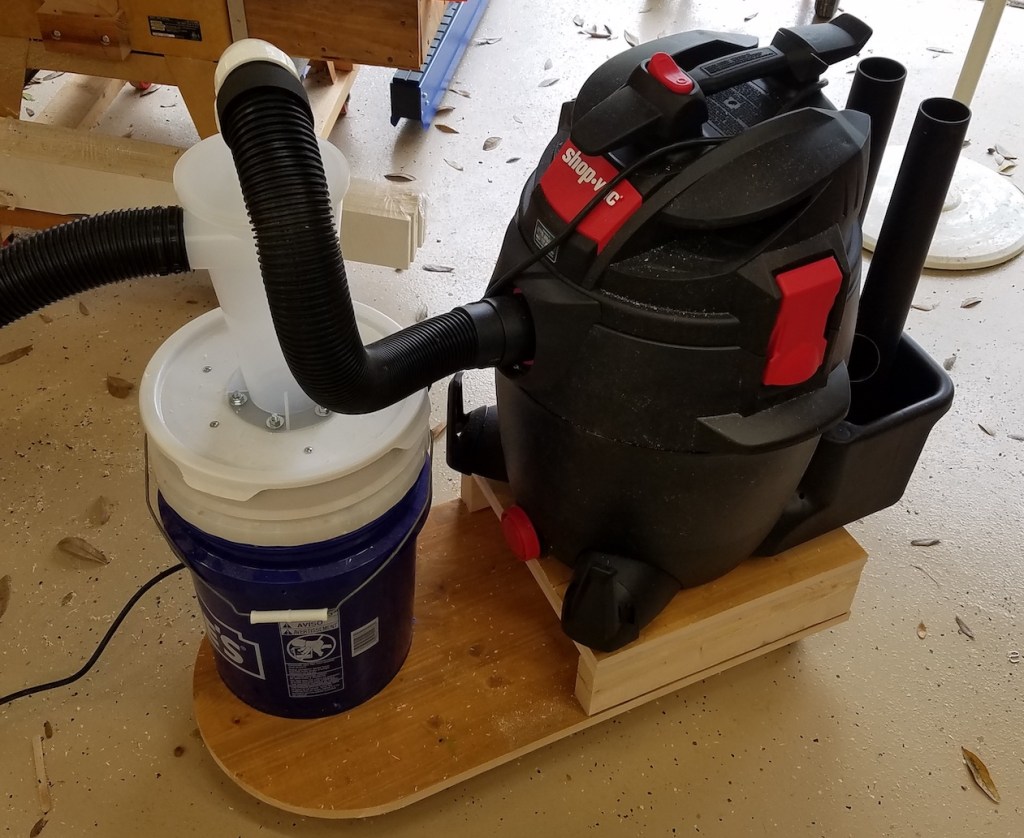
I picked out a decent sized vacuum that had good specs but wasn’t the highest end you could get. It seems like for another 100 bucks you got a few features and a marginal increase in performance. The next level above that would go to the pro-sumer version at 5x the price. Not gonna happen on my current budget. I took some of the old counter top material left over from the previous owner and routed a nice radius on the front.


I picked up the milescraft circle cutting jig for an upcoming project, but decided to give it a test run here. What a great jig! Well worth 40 bucks. There is going to be a 5 gallon bucket pre-separator before the main vacuum. I screwed a bucket to the base to hold the separator bucket and built up a platform to get the shop vac higher.


I did a lot of positioning and found that moving the bucket to the right side and rotating the vacuum to the left let the inlet hose clear more easily. I screwed the shop vac down through the base into the platform. Hopefully these screws don’t rip out. If they do I will lose a lot of vacuum pressure.

I got a dust deputy brand cyclone separator. It is supposed to spin the dust out to remove most of it before it gets to your filter. The hose port situation is a little awkward. The port up top goes to the shop vac. Even with elevating the vacuum it is an odd stretch. The hose wants to kink in on itself.

I took kind of a step back and had a think. This calls for some 3D printing. The top of the dust deputy has a tapered shape to it. I printed a matching ring that fits into a 2″ PVC elbow. The printed part got epoxied into the elbow and fits on the top of the dust deputy. The friction fit holds it well and makes a good seal, but lets it be removable.

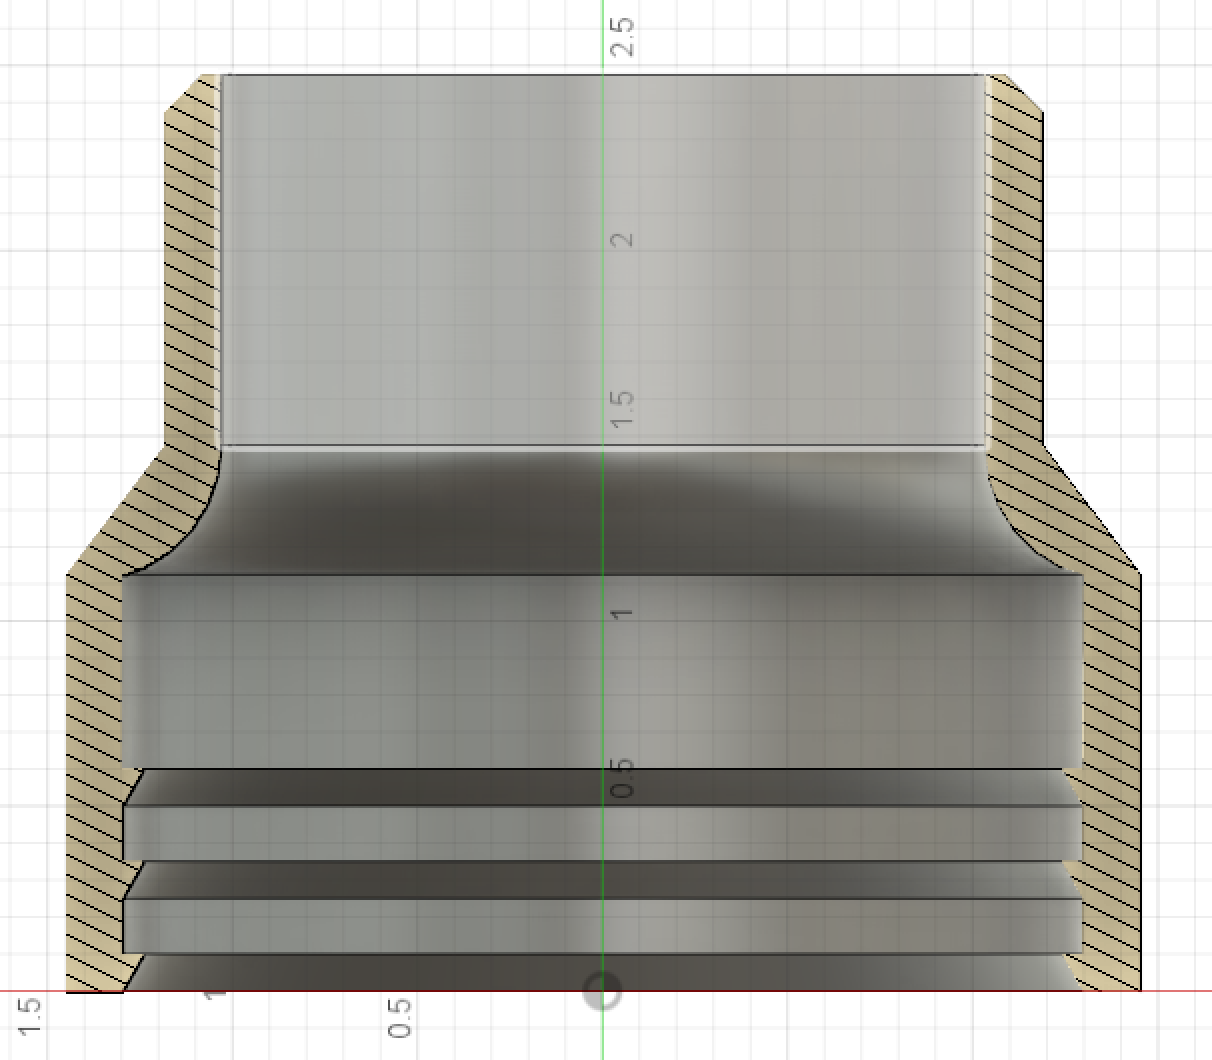
A cross section view of the printed fitting 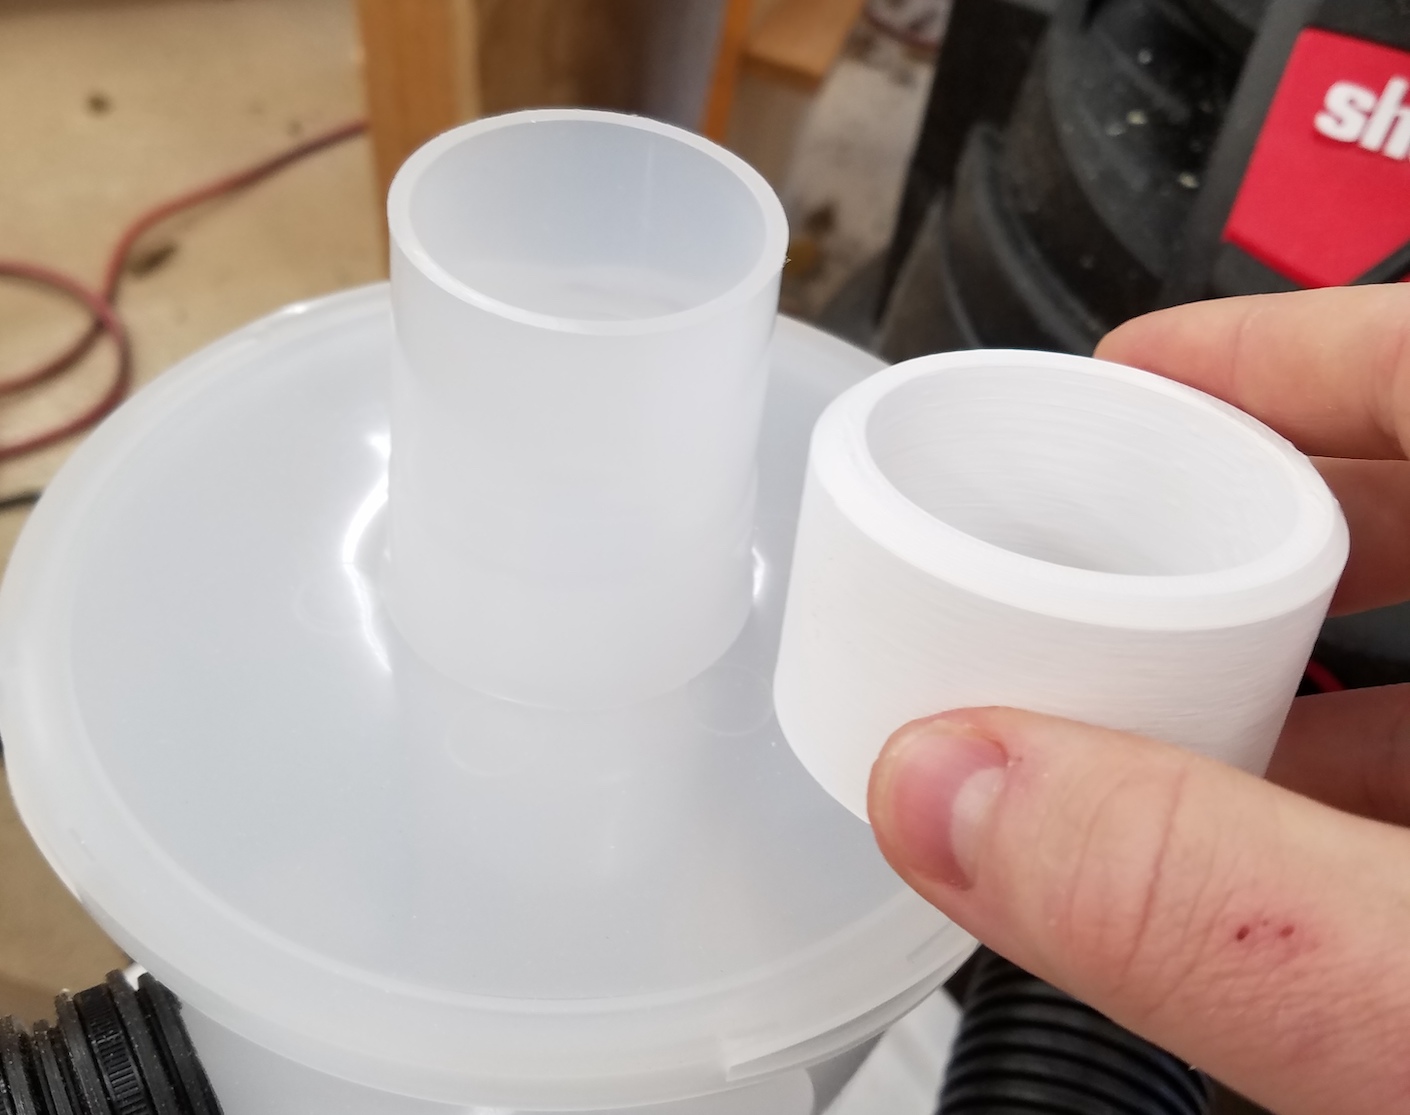

With the elbow taken care of I created another fitting to push onto the end of the corrugated vacuum hose. This one works a bit like the fitting that comes with the vacuum. It slips over the outside and locks into the ridges. They are a 1/4″ pitch. I made a fitting with ramped one way rings inside. It pushes on easily, but is tough to remove. That should form a decent seal as well.
Another cross section view 

I might bond this part in eventually, but for now, the hose can be removed, and so can the elbow. It makes taking the bucket lid off and dumping the dust easier.
All assembled, I wanted to perform a test. I dumped out the main vacuum body and the removable bucket. I then went around and vacuumed a section of the shop floor around my miter saw and where I had been working on this project. I came up with a few cups of dust, a bunch of leaves and some chunks of stuff. The vacuum chamber was basically empty.

This is great news. Now I can easily empty the smaller bucket instead of the big vacuum. Instead of running a standard pleated filter I can use a bag. The bags get disposed of, but have a finer filtration level. With 99% of the junk getting caught in the vortex, the bags will last a long time. Plus, anything that might puncture a bag will get filtered out.
I have been using this a lot with my router for a really big dust job and everything has been working wonderfully. If you are thinking about adding a dust deputy to your shop vac, do it!

Did anyone ever tell you that you’re a genius? Many? Ah, I am sure they did! And let me tell you this, you are amazing. I am sure this project took a lot of dedication and the precision speaks for itself. Hope you loads of success and thank you for sharing such creative projects!
LikeLike
Pingback: Swiveling Dust Collection Fitting | Kilted Craft Works