I experimented with beard balm years ago after my beard started getting longer than 5 or 6 inches. My beard oil was good at keeping it softer and conditioned, but didn’t have any hold. I hit on a commercial one really quickly, but years later, my favorite beard balm seems to have changed their formula. It smells bad and doesn’t have the same consistency. No worries, time to make my own.
I know from a lot of my other work that you can thin out wax with oils to get anywhere from paste wax to a fairly stiff mustache wax. I wanted to start with a base of my regular beard oil and try stiffening it with shea butter and beeswax. I went through a number of iterations over a few months to find something I liked.
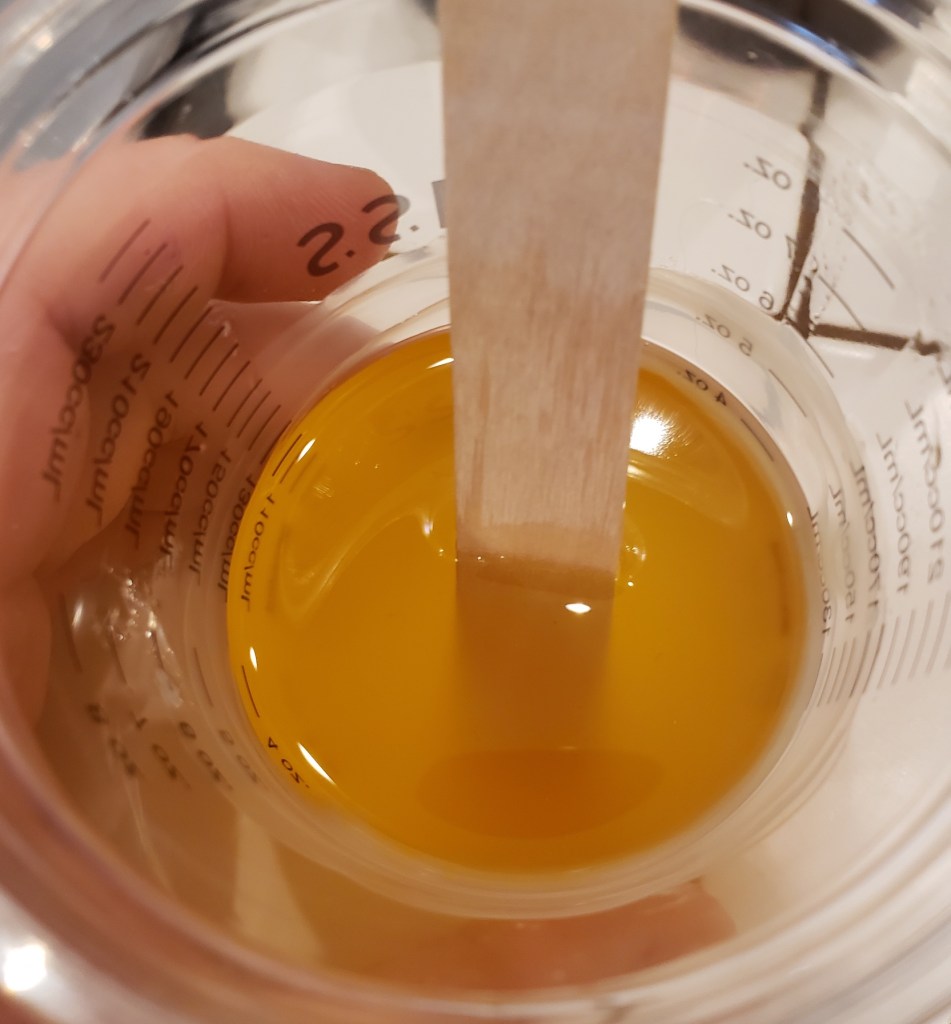
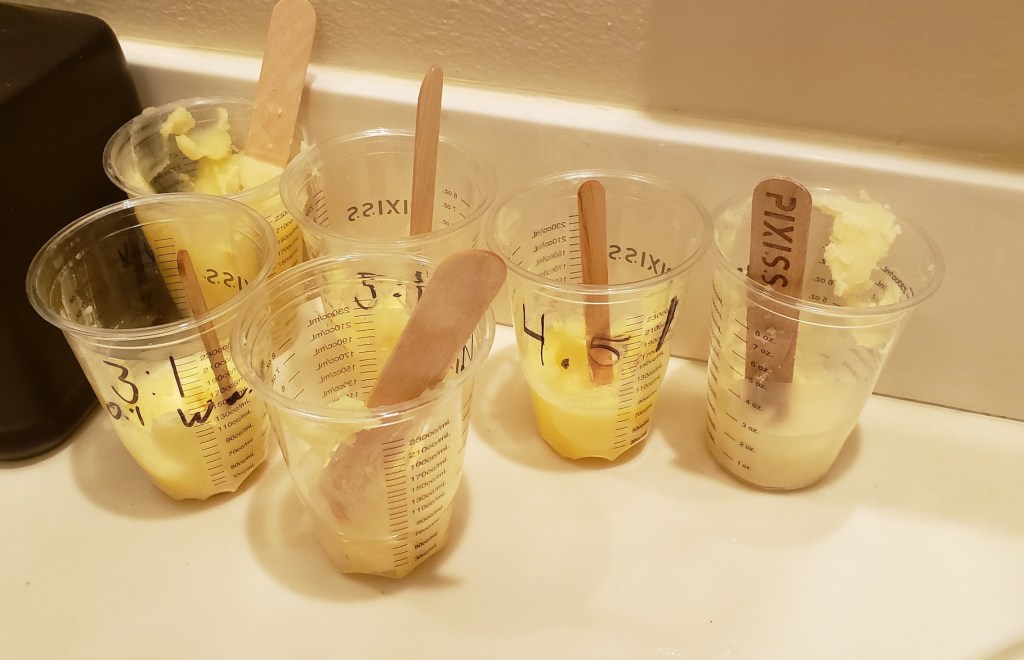
I would call it a hit or miss process, but it was mostly miss. Almost everything was too stiff. I kept adding oil to the first batch till I almost completely filled the cup. The ingredients for the oil are kind of expensive. I should have started with a cheap oil at the right melting point instead of my beard oil. The shea butter was making it difficult, so I removed that ingredient. In the end I found a 4.5:1 ratio of oil to wax that was soft enough to spread, but hard enough to hold. My bathroom was looking like an odd place for a while.
Final Recipe: By weight
4.5 parts beard oil
1 part beeswax
With that ratio established and having been used for a few weeks I went about making a lot more of it. Instead of using the PET (which will hold up to gentle heating) cups I upgraded to glass jars. I mixed up a big batch of the beard oil and got to work at the double boiler.
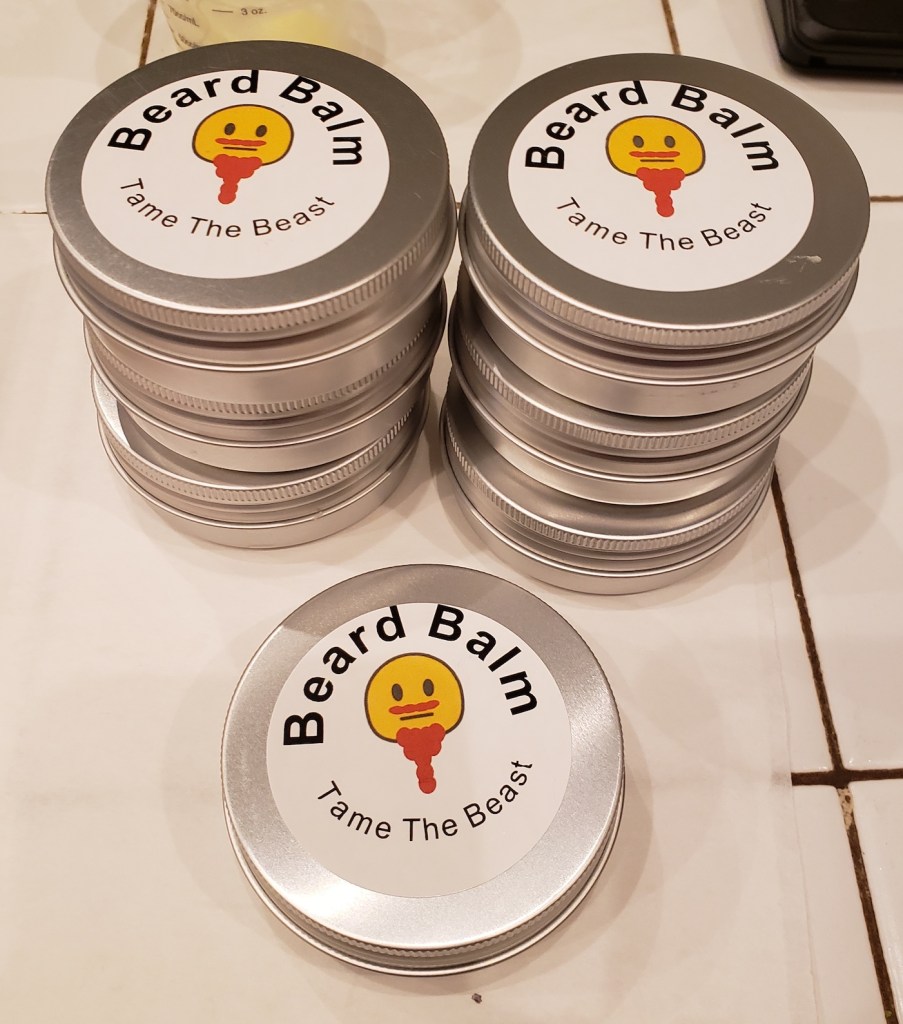
Jars and cups make it hard to extract the beard balm by hand, so I went with finger friendly 2oz tins for easy use. I managed to pour all of them without making a huge mess too!
A new beard product requires a new logo. I sculpted the beard so it looks a bit more like my real one these days. Over a foot long deployed, but only 3 or 4 inches when wrapped up. This much balm ought to last me for a number of years, or make a lot of nice gifts for my bearded cohorts.
While I was making oily messes in the kitchen I mixed up a whole pint of my shave oil. I use this every time I hsave and wouldn’t be without it. It makes good gifts and is cheap/easy to make for yourself. A pint of this stuff should last me for years as well.
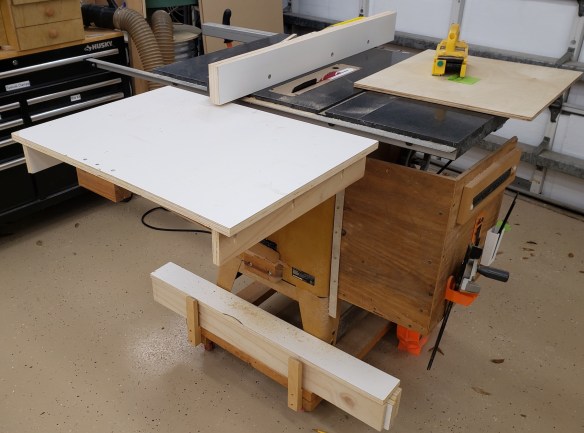
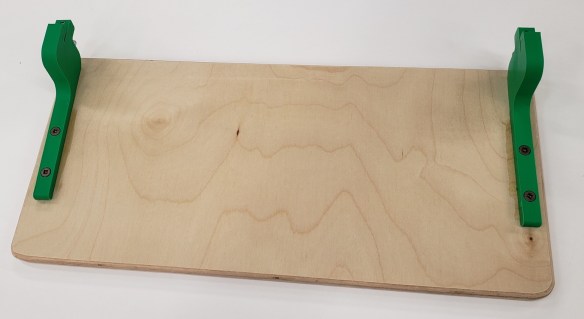
I already had an outfeed extension for my table saw. I only built it two years ago. Why make a new one? Well I love it and use it all the time, but often wish it was bigger. Wide sheet goods don’t get enough support on the side, and longer things still fall off the back of it. I have more space in my new house, and I saw a great idea from Wood Work Web. Colin over at that site used these clever folding brackets to hold the extension and in a followup added a really easy release bar. First, let’s say goodbye to the old extension.
How did I manage to get nice laminate faced plywood in these times? As it turns out if you order enough sheets of plywood from the cabinet store, they will deliver it all for a pretty reasonable fee. I got enough supplies to last me for months, supported a local business, and did it in a socially distanced manor!
The folding brackets are a cheap amazon versions of what was used in the video. They feel sturdy enough, but aren’t actually square. A deeper read of the comments would have highlighted that fact. They slope the table away from the saw. That is ok by me, but in a lot of other applications, that could be a deal breaker. After removing the old top, I was able to re-use the bolted on pine board that served as the anchor point for my previous extension. I spaced the extension far enough away to clear my fence and its hardware. There is a bolt head (circled in red) that sits well below the height of the table. I have to avoid it or risk limiting the fence’s movement. Once installed the extension folds very compactly.
Offending screw head on my fence
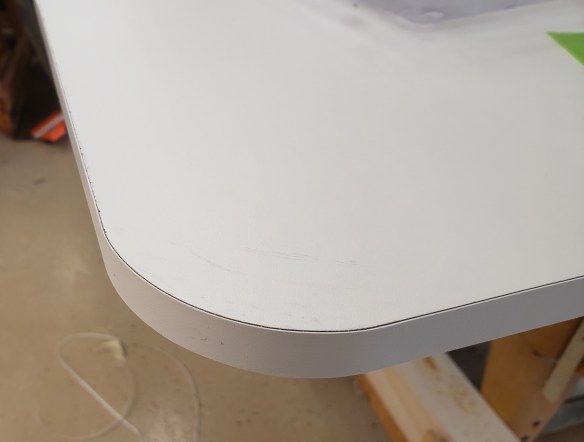
Rounded Corners
I really wanted to cut some corners on this build. I know I will be lazy and leave the extension up most of the time, and I work a lot around the table saw at my router and back into the saw and extension often. Rounding these edges would make them less painful. I started with a 2.5″ radius template and used it to mark and jig saw the corner off. Next I stuck it down with double sticky tape and used a template tracing bit to smooth out the remainder.
Once both corners were done I applied a white edge banding to all the edges. This should help protect the laminate top from getting chipped or damaged. I trimmed all the excess with a sharp knife.
Edge banding applied
Excess trimmed
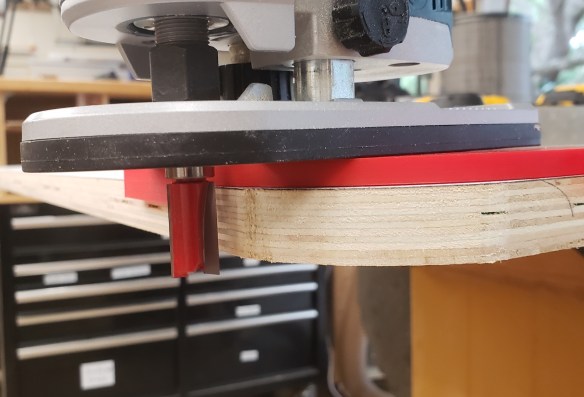
Miter Slots
My last extension didn’t have any miter slots. If I used any kind of sled or miter gauge they would bonk against the table. I took the time to install them in this top. I clamped plywood to the top just outside of where the miter bar would pass. I then used a short tracing bit route down enough to allow clearance for the bar. I then picked up the plywood, lined it up with the other side of the bar and routed again. It wasn’t as exact as a purpose built slot template, but was quick and worked well. With the two slots routed, I soaked the edges in thin CA glue to help reinforce them and prevent the top from chipping off.
Things were starting to look really nice and functional. I did notice that my last top had a slight warp to it. I may have stored too many things on it. To prevent warpage in this top, I took it off and screwed on a set of supports underneath. These should help keep it flat.
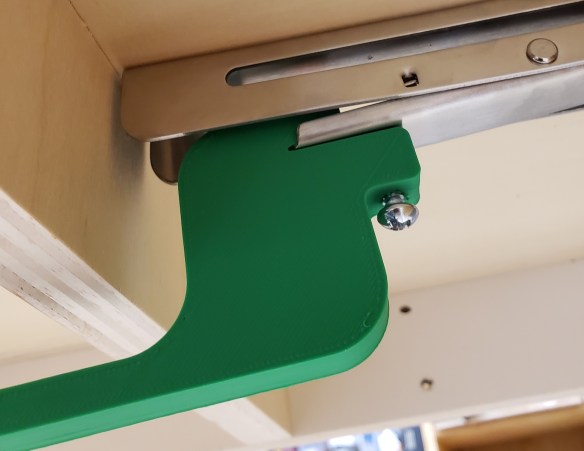
Release Bar
This was kind of above and beyond, but why not go all out? I wanted to add a release bar like Colin did. Between the supports I added, and the way it was anchored to the saw, there wasn’t room to do what he did. Instead I 3D printed a little funky zigzag bracket. It is threaded to accept a #10 screw. I drilled a hole in the bracket release tab so the screw would go into that hole and prevent the bracket from sliding off.
That printed part gave me a long arm to attach a wide piece of plywood. This would be the thing I press up against to release and lower the extension. I clamped it in place to make sure it was all working correctly, then screwed the release bar down.
The finished product is great! It holds a lot of weight, gives me plenty of support for wide and long cuts coming off the saw, and folds up really flat. I figured the ease and speed of pack and deploy had to be shown, so I made a short gif.
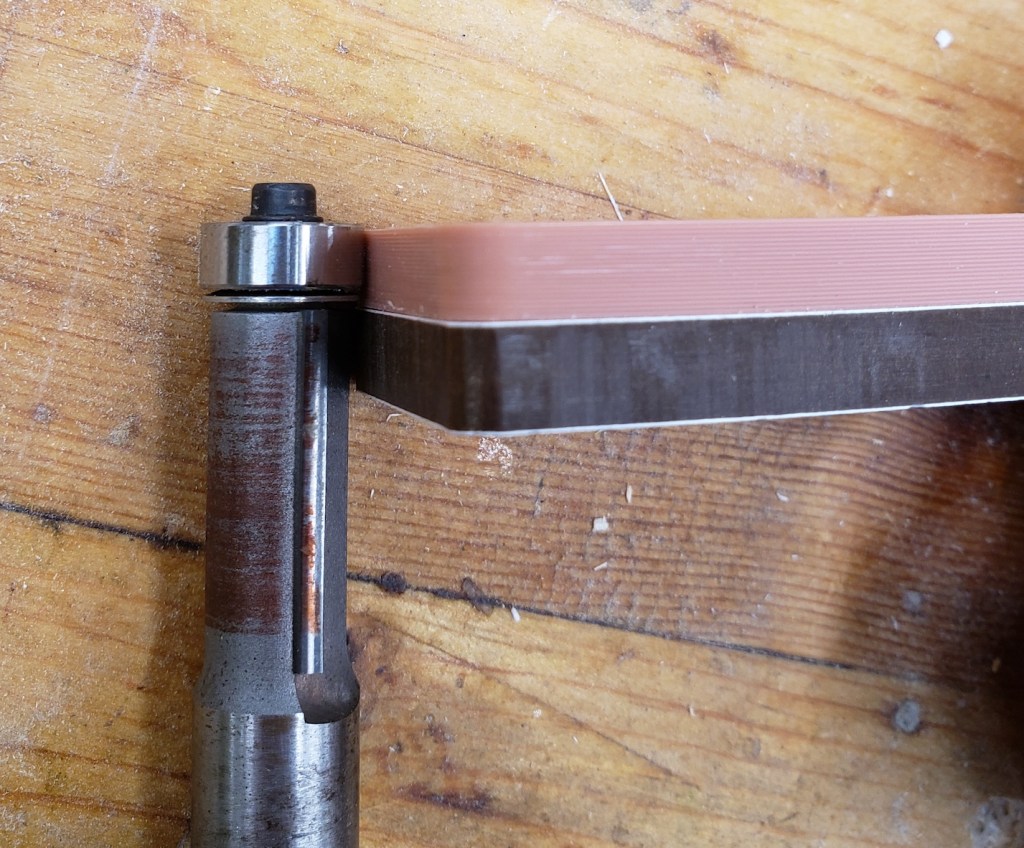
While building my baby bookcase I noticed the table top on my router was not flat. The joinery was poor enough I had to go to the table saw instead. 10+ years of Florida humidity and a heavy router finally did it in. The red arrow is pointing to all the light coming out from under the straight level.
I use my router table a lot, so I wanted something nice to replace it. A full professional router table setup can cost 1,000 bucks with all the bells and whistles. I want something of decent quality, but not for that much money. I did a ton of research and finally broke down to buying a really high quality lift, and building the rest. Say goodbye to my old friend! By the way, I took the mounting plate out and tried it on my tablesaw top. It had a very distinct rock, so it wasn’t flat either.
The Top
These days my building and blogging are badly out of sync. Some short projects get posted in a week or two, and bigger ones linger for months before getting posted. This one started right about the time we were all supposed to limit our trips out to essentials only. The hardware stores are open, but I can’t call this router table essential. A broken toilet or water heater, this is not.
I normally would have gone to pickup laminate faced plywood, but instead I looked around and decided to use this big piece of butcher block counter top. Some friends were having their kitchen redone and saved it for me.
I got to cutting off a nice hunk and my saw went a little nuts. It turns out the way they clamp everything together is with screws! Lots and lots of screws. If you look at the side, they even cut through some to make the counter top the right size, and just filled the void with putty. They must make these things in massive sheets, then cut down what they need.
Hello there little screw buddies
The side of the countertop as used
I took my number 5 to it and planed off all the old finish that was feeling a little gummy. It looks a lot nicer now. This is really soft pine and not as flat or as stable as I was hoping. There was some twist I couldn’t quite get out.
With the top mostly flat, I built up a set of guides to install my router lift. This part didn’t go quite as planned either. I tried to attach each piece together with pocket hole screws, but going into the plywood sideways with a screw caused it to de-laminate and bulge. I muddled through with double sticky tape and got to routing with a template bit.
Template in place
Recess routed
Once I had a recess routed that was the thickness of the router lift top, I went through and cut out the inside area. Those pesky screws came to bite me again, my jigsaw was not happy. When it was all cutout I marked the location of the leveling set screws and soaked the area with thin CA glue to stabilize the wood. I was worried the set screws would slowly sink into this soft pine otherwise.
Marked out leveling set screw locations
The top’s twist was a little evident in the fit of the router top, and the template bit’s radius was off. It turns out the lift has a corner radius of 3/4″ of an inch, and my bit is 3/4″ in diameter which yields a 3/8″ radius. I think we are going to call this a practice table top. I will eventually get a new material and make a better one. I put down a few coats of polyurethane to seal it up and give me a solid surface to wax.
Base
With the top basically finished I was able to move on to the base. Using the plywood I had available I made a 3 chambered base. The left was going to be for open storage, the center would house the router and collect most of the dust, and the right would have a set of drawers for bit storage.
I set the top down and the twist is even more evident. The bottom is really uneven, so I guess they only ever planed the top to flat-ish.
I thinned down some maple scraps and cut them up to make runners. I used a piece of hardboard as a template for the drawer side height, and it also served as a square and guide for installing the runners. I nailed and glued those in place, then hit everything with boiled linseed oil to finish.
Fence
I had some ideas about how I wanted to make a fence, but wasn’t quite sure which way to go. I was also running low on some materials, so to conserve, I just re-purposed the fence from my old router table. I added wings to make it reach out further. To hold it in place I made it go past the edges of the table, then used a little clamp paw to squeeze it down to the edge of the table.
To attach the wings I just screwed them down from underneath
Clamp system holds fence in place
It worked reasonably well, except that any time I pushed on the fence in the center, it seemed to bow outward. The system wasn’t rigid enough. I added a support across the back to help stiffen it up. That reduced the bow. Next time I will sink some tracks into the table top to facilitate more centralized clamping.
Drawers
Things were starting to come together. With the top in place and a working fence available I was able to employ it in making drawers. Nothing fancy, just some plywood sides with half lap joints and rabbeted bottoms. I added drawer fronts with rounded edges and finished everything with boiled linseed oil.
The top drawer holds my trim router and all 1/4″ shank bits. Only got this thing a month or two ago, but have found it to be an incredibly useful tool.
Next are all of my 1/2″ shank bits. They fit with plenty of space to spare. I 3D printed the holders for these because I didn’t have the right sized drill bits. A 1/2″ bit will leave a really snug fit. My next size up was a 5/8″ forstner bit. Too loose! Everything is kind of grouped and there is a lot of room left for new bits. The last drawer is empty believe it or not. Plenty of room to grow!
Finishing Touches
With the drawers set I was able to work on a few finishing touches. I moved the power switch over from the old table to the new one. This works great and will stay. There is a hole in the back for the router’s power cord to come through. I covered it with a custom 3D print cover. I put a cover over the front router cavity with magnets. It comes right off if I need to service something, but otherwise has gaps to pull air and dust through when in operation. On that cover I have two printed holders with magnets for the collet release and hex tool that runs the lift. Lastly I added a shelf to the left cavity. It holds common use accessories and a stack of different brass setup bars I cut from 12″ lengths of key stock.
I have been using this table for a few weeks and it has been working really well. The router lift was pricey, but is a dream to work with. It adjusts easily and locks down securely. The top is fine for now. The pine has already gotten dented and my install job has left some gaps. The fence clamps work well, but it flexes too much. I will take all these lessons learned and do a series of upgrades soon. For now, it is back to work on other projects.
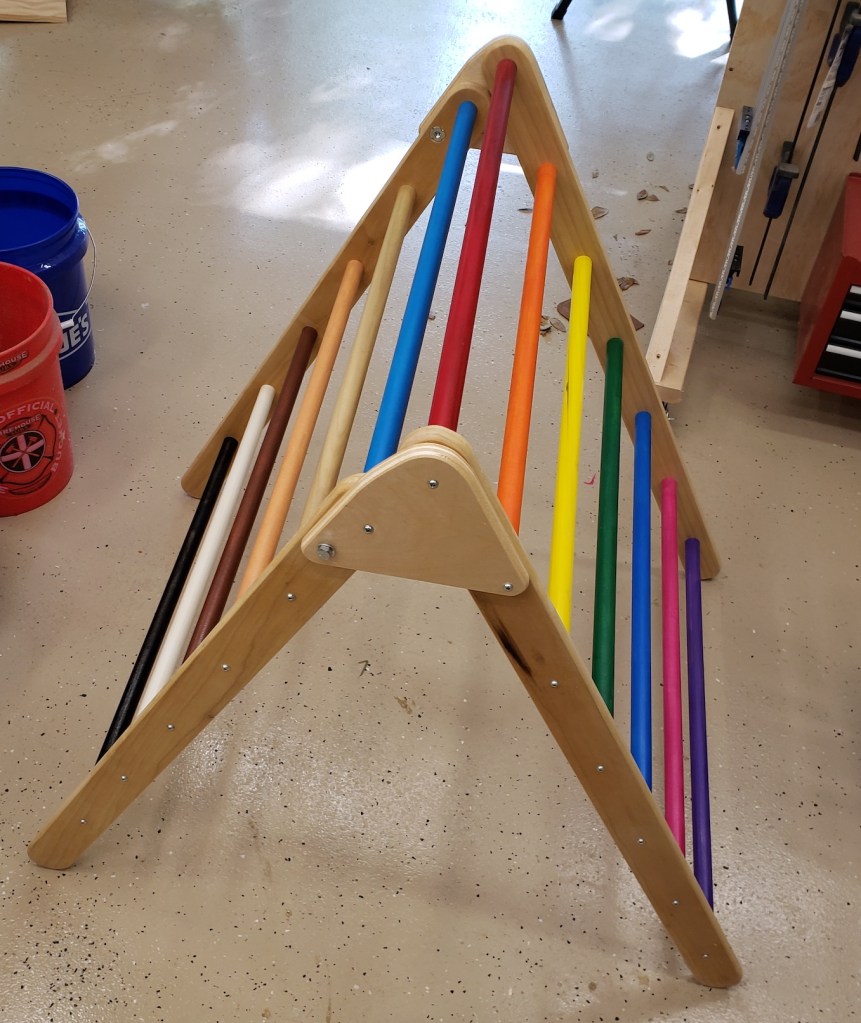
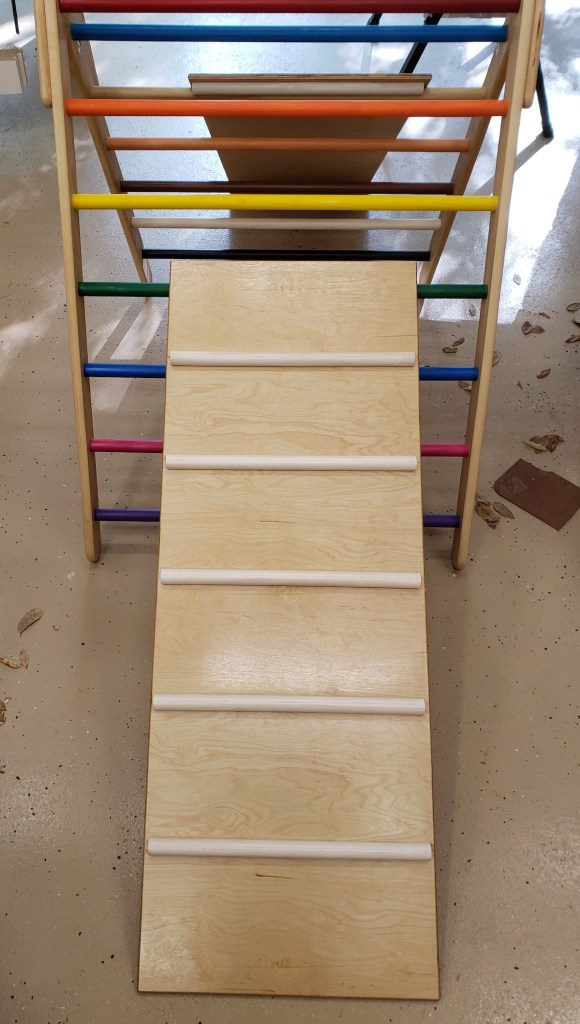
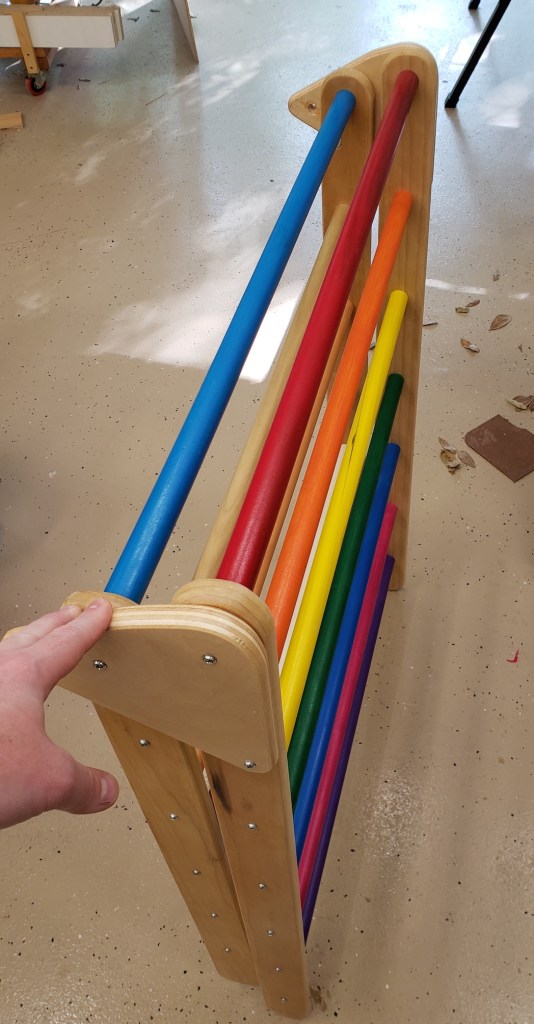
The baby goods continue. I saw this one as part of a way to give kids something to help work on standing when young, and an acceptable indoor outlet for climbing urges when they get to be toddlers. It folds up pretty easily, because we wont be using it for a while and I don’t need big furniture taking up space. It has colored rungs, and three ramps that can sit on any rung to make them more or less inclined. One is a slide, one a rock climbing wall with 3D printed climb features, and the other has rungs stuck down to make crawling up easier.
A colorful folding pikler triangle
Climbing rungs
3D printed rock climbing wall
Slide
I used poplar for the sides of the climbing structure. I rounded the ends and drilled spots for each rung.
Once again trying to make everything a different color took a lot longer and was more tedious than I had originally thought. Still, every rung is different and it looks great!
To attach rungs to the climbing ramp front I flattened them by hand. I was going to make some kind of sled to go through the planer, but I would have to adjust the planer multiple times for each rung, and they didn’t get pulled through well. By hand ended up being the easiest. I used a combo square as a depth gauge to know when to stop removing material.
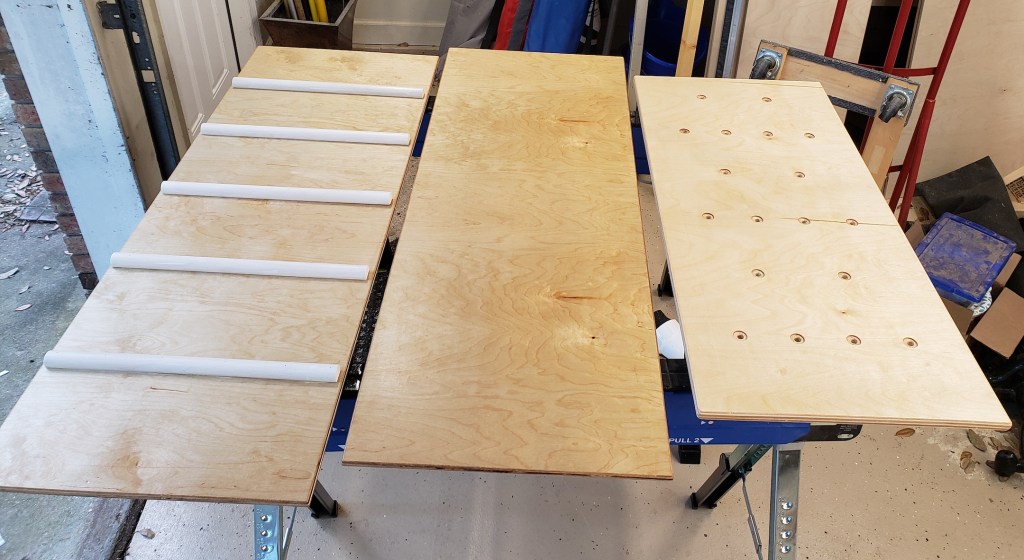
I attached two rungs to the back of each ramp so they would fit around the ones on the climber. They probably won’t do a good job on the highest rungs, but it holds really well on any of the lower ones.
Those two mounting rungs are where I made my only big mistake on this project. While finishing all the ramps I noticed an orientation issue. I used a forstner bit to drill recesses for the t-nuts that all those climbers attach to. The side with all the big holes should be the back, but I put the mounting rungs on the other side. I could rip them off, but it would really tear up the plywood surface. I glued and nailed them down. Instead I just lived with it. The holes are ugly, but sanded well enough to not be a hazard.
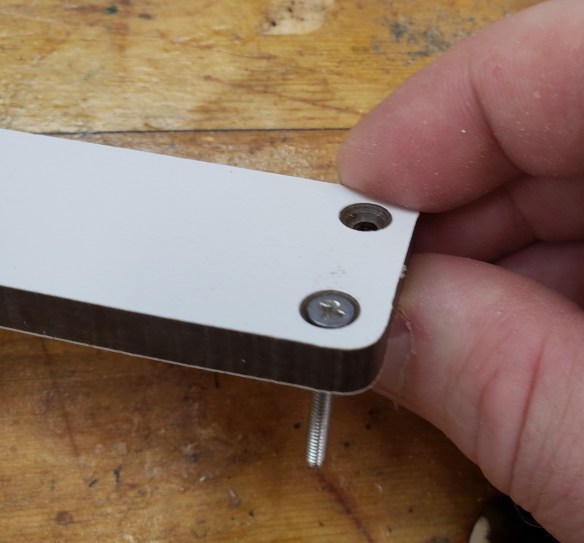
I rounded over the edges of the sides, finished them all individually and assembled the two halves. To hold the two segments together I shaped a triangular piece of plywood. It screws fixed to one side while using a set of screws as a hinge on the other. A bolt and t-nut allow it to be locked in the open position. Removed, it pivots around the one set of screws and folds up.
The climber folds up very compactly
Our little guy will be battle testing this design eventually. Maybe there will be an update in a year or two where he has figured out how to collapse it from jumping or something. Successful designs will have to get a #BabyProof update.
Not that long ago I went to great lengths to make zero clearance inserts for my table saw. I had fancy (expensive) phenolic resin plywood, set screws with brass threaded inserts, and anything else you could want. While working on my baby bookcase, I noticed the old store bought insert was getting wallowed out and needed replacing. “No worries” I thought, I made my own inserts. After messing around with the level of it, I realized there was a problem. It wasn’t flat.
It had a pretty strong cup in the center. I don’t know if it started like this or gradually shifted since I first made them, but I can’t use it with that much of a gap (red arrow shows flashlight shining through). I needed something, so I nailed down a flat piece of 3/4″ plywood to the back where the motor wouldn’t hit it. That reduced the cup, but it still wasn’t perfect.
Not Flat
Attached Flat thing
Less Not Flat
That was a band-aide let me get past the worst part of the problem and on to other projects. I needed a better solution though. The plywood inserts I made weren’t flat, and they wore out quickly. They plywood is just not going to stand up to any blade wobble. Gaps create tear out. I thought about buying more of the professional inserts. They are very well made (100% phenolic), but also kind of expensive.
Instead I thought about taking some of the 1/4″ material I bought for making miter saw inserts, and adapting that. After trying fancy plywood, 3d prints and pure phenolic, the phenolic wins hands down. My miter saw insert is still going strong 6 months later after lots of use. The printed ones were shot after a month or two.
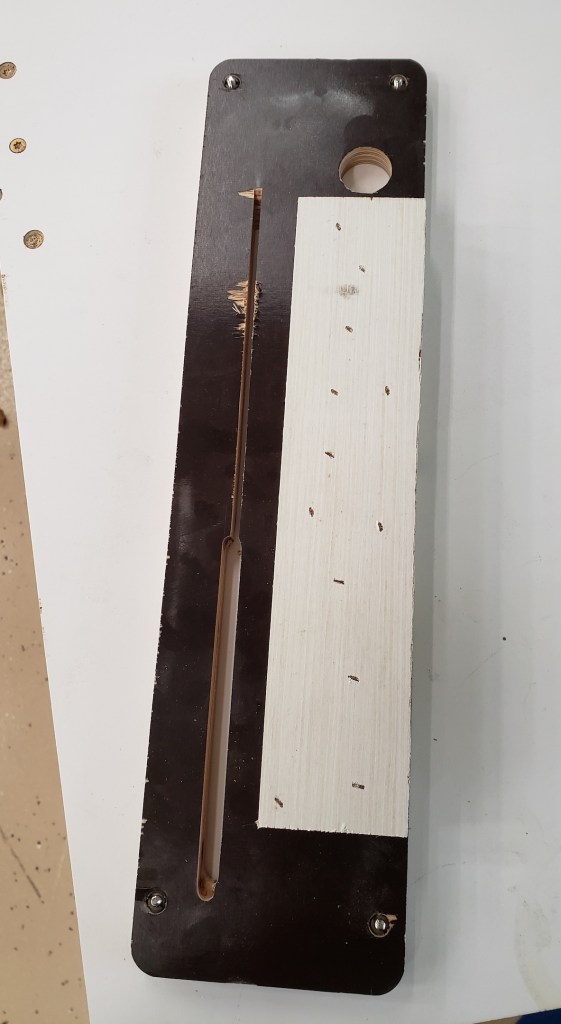
Speaking of 3D printing, I printed a template to go onto the professional insert and guide my router to make a pocket just deep enough for the 1/4″ sheets. It sticks on and lets me use a router bit and bushing to make an exact cutout.
With a recess pocket milled out, (I forgot the picture) I was able to use another printed template to cut out the insert. It uses a template cutting bit that follows the printed part with a bearing and cuts away the extra phenolic below.
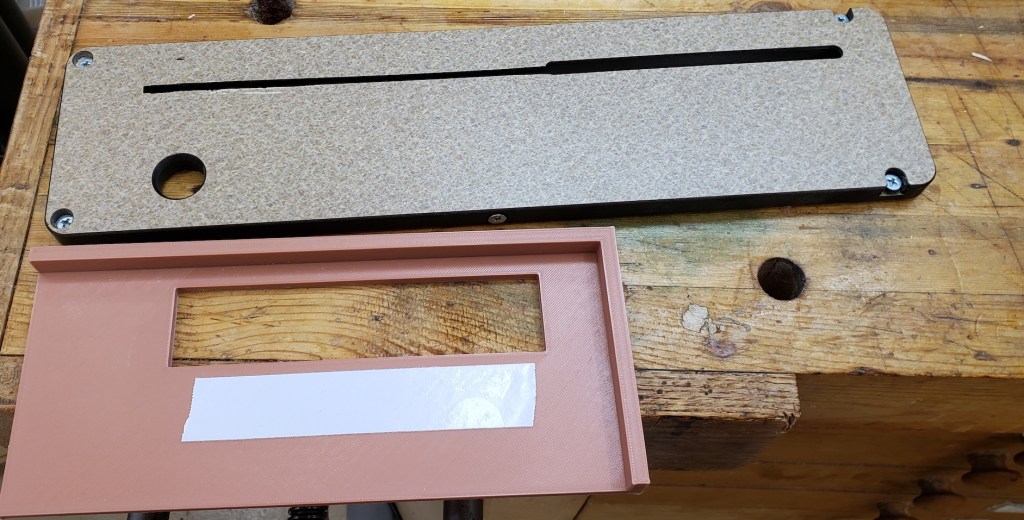
The holes in the brown printed plastic let me use a transfer punch to set the spacing for a few countersunk holes for 4-40 screws to bolt my insert to the store bought plate.
I again used a transfer punch to transfer the holes from the white insert into the larger store bought throat plate. Transferring holes like that means it will always fit and line up.
Top ViewBottom View
The only thing left to do was try it out. I sat the plate on top with everything adjusted in, moved the fence over to keep it from skipping out, and slowly raised the blade. I just so happened to buy a brand new blade at this time, so witness the birth of a new blade! A 20 dollar sheet of the white phenolic material can make a few dozen inserts, so I should be set for life with this system assuming the larger insert never gets seriously damaged.
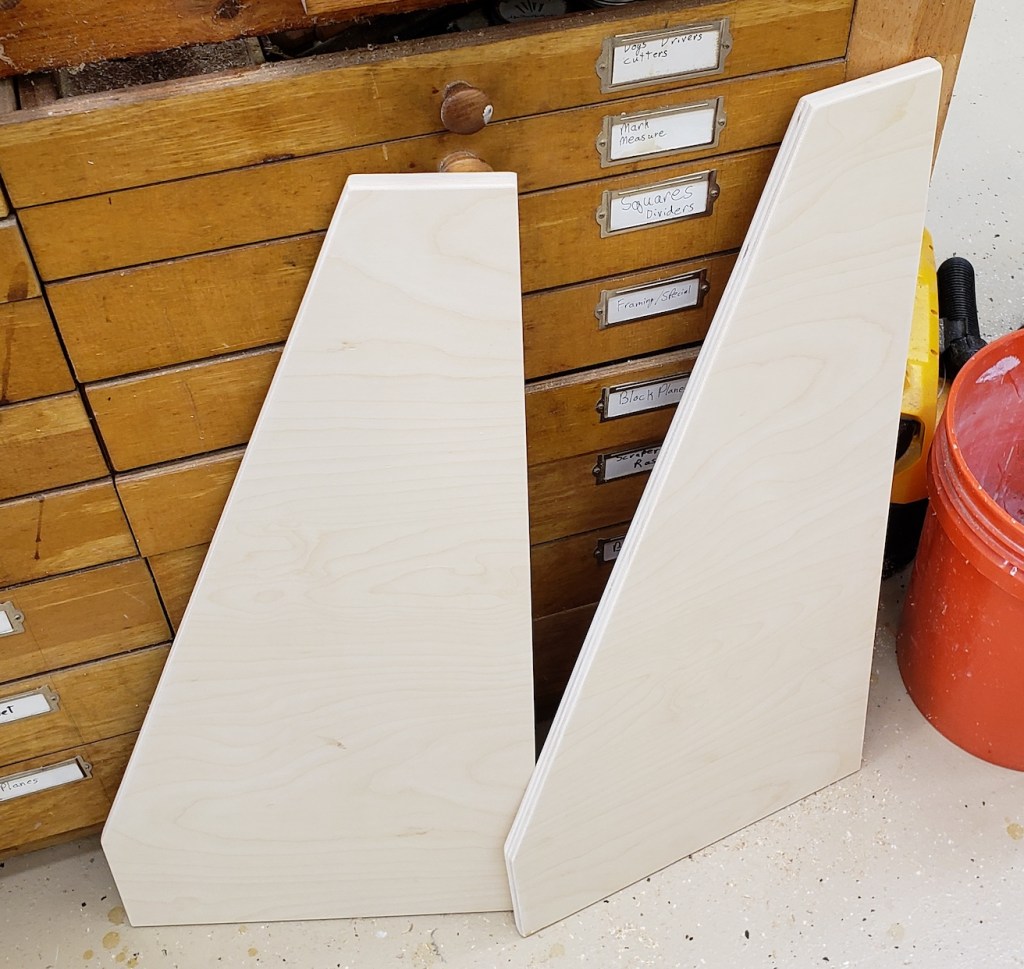
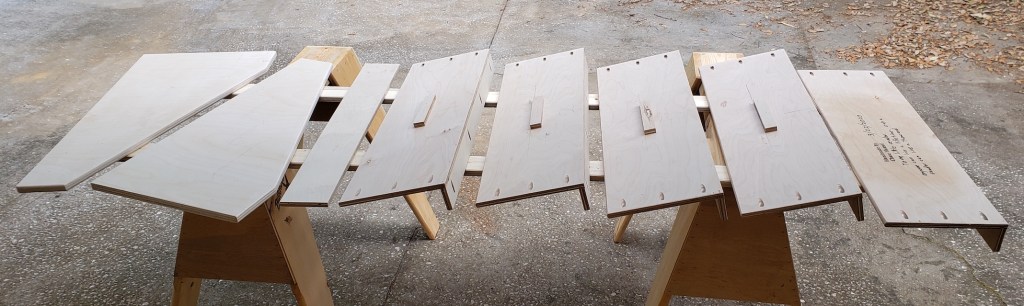
Our household bookcase is already pretty full with regular adult stuff. A new kid will require more book space. I always like those ones that would face all the covers forward. They of course sell for a lot, but with a bit of plywood I can make my own. Final product first, so you can see where we are going.
Our small collection of baby books ready to go! The only thing I would do different next time would be to make each pocket shallower. Lots of kids books are only 4 or 5 inches high, so they get half obscured.
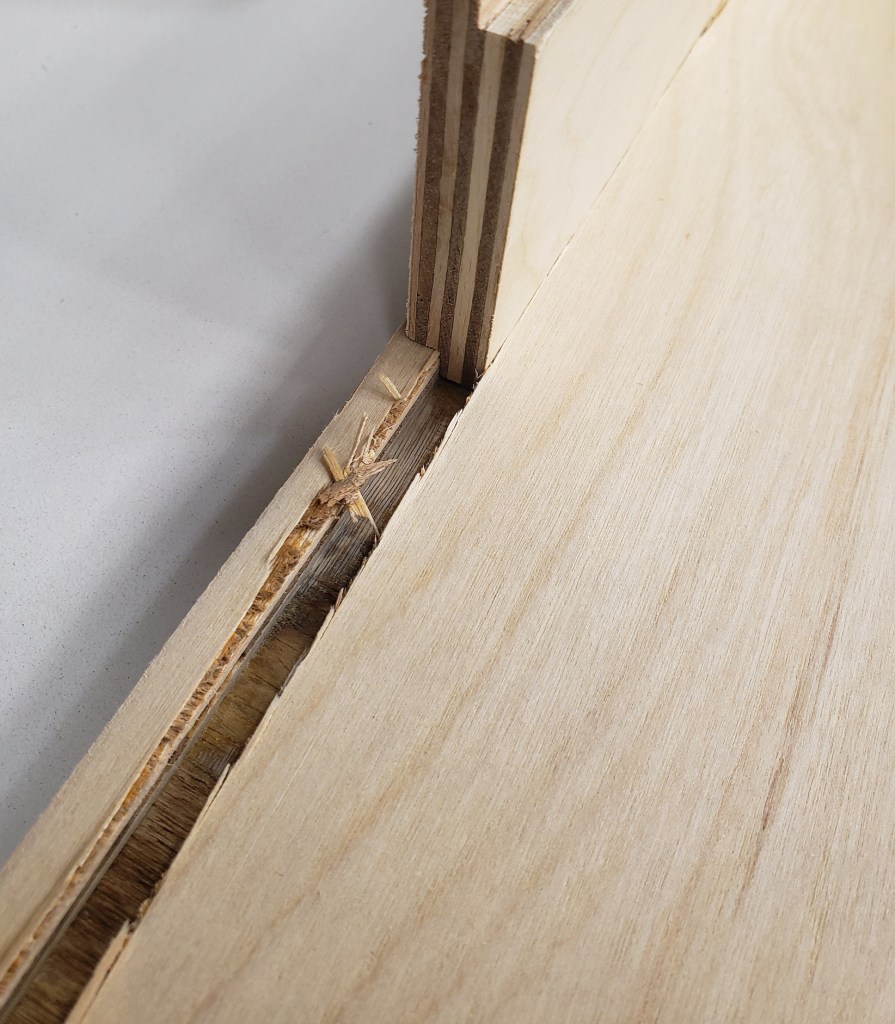
I wanted to make a locking rabbet joint to hold the bottoms of each shelf on to the back. I used a slot bit on my router table and had numerous issues. This plywood tears really badly without any kind of support around the small diameter slot cutter. Those Jagged edges are really nasty and will be a pain to deal with. Good thing I cut a spare shelf to experiment with.
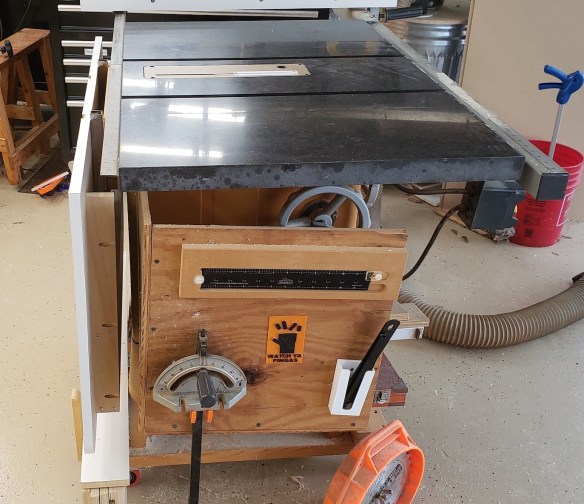
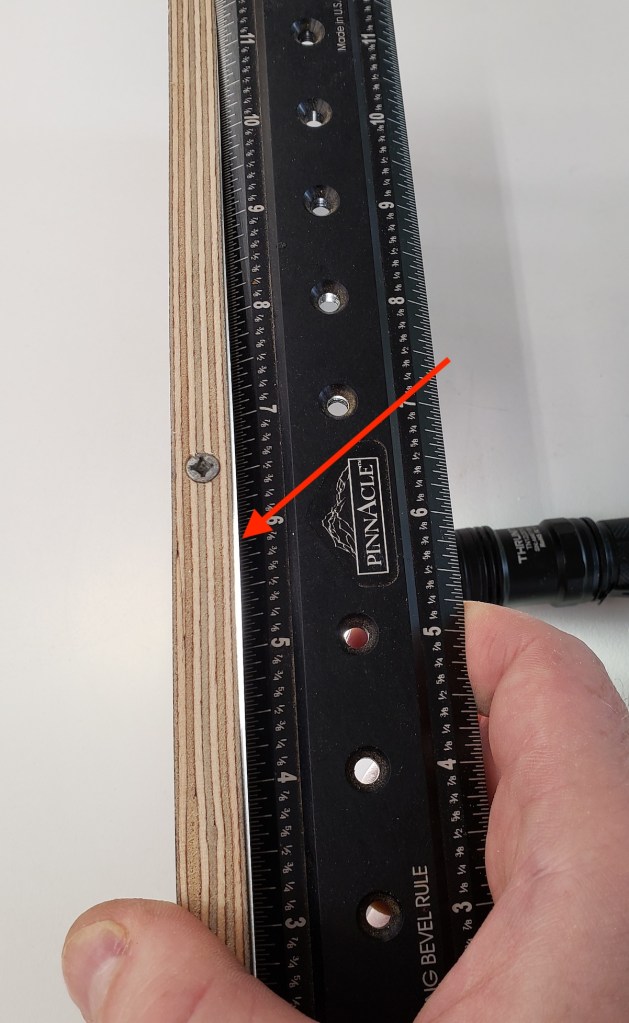
The other problem I was having was that my joint didn’t seat up very tightly across the wide shelf. I re-did it twice and still had odd gaps. I started looking at my router table and found the source. That is a straight level on the table, and the red arrow is pointing to a very large gap where the flashlight beam is shining through.
The router table is made of MDF, and the center plate that attaches to the router is plastic. Both had sagged after 10 years of weight and humidity. No wonder my cut wasn’t straight, my table isn’t flat! I will have to fix that later. I setup the tablesaw with a 1/4″ dado blade and cut all the joints. I hate having my table saw tied up for doing joinery, but it did make the cuts a lot cleaner than the router did.
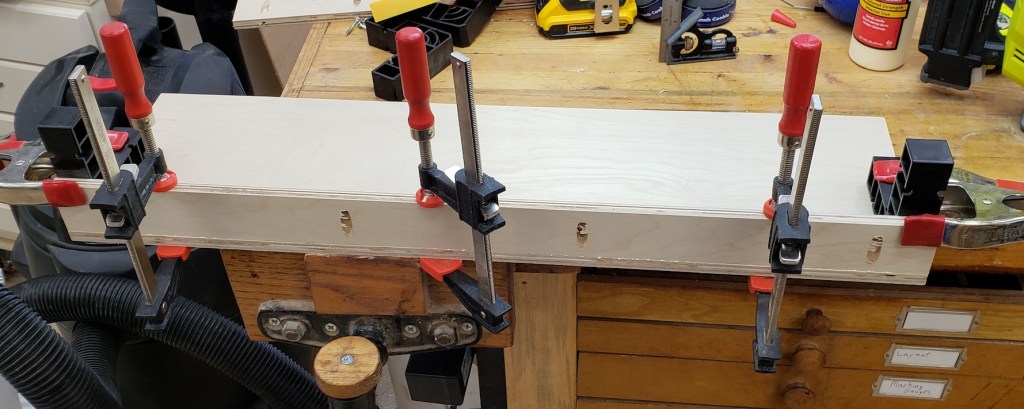
With that solved I assembled all 5 shelves. Each one has pocket holes in the base so it can screw into the shelf in front of it, and more pocket holes along the sides to screw into the uprights. I finished all the shelves and cut out the two outside uprights that everything else would screw to. Other than the locking rabbet to attach the back and bottoms of each shelf everything else is pocket holes. Not glamorous, but effective.
For finishing I decided to try my hand at spraying shellac. I broke out shellac for the first time in a while on the stacking block project, but picked up a compact HVLP spray gun to try this out with. I reduced the shellac down to a 1lb cut and sprayed away. I didn’t have the gun setup right the first round and wasted a lot of finish. The second time I got it tuned in and was able to apply a few coats in a very short amount of time.
BeforeAfter Shellac
The shellac is dry to the touch in a few minutes, and with a little buffing, the next coat is ready to go on. Once the solvent evaporates it is set. Each successive layer will re-desolve the previous a little, so it always sticks. Not the most durable finish, but kid friendly and easy to repair.
Some big changes are coming to the household. We have a tiny kilt coming soon! He will be born in September, so it is time to start making some toys and baby/toddler furniture. The nature of this blog will probably still mostly focus on my projects, but it might eventually include collaborations between me and the offspring. How old do you have to be to start learning to use power tools? 4 or 5 maybe?
Until then, I have a lot of time in the shop now, due to the pandemic. I won’t once the baby comes, so let’s get started on a bunch of stash busting projects and make some toys and furniture. My first project is something simple. A stacking block game. I found a board of poplar that would suffice. Each block is about 1/2″ smaller than the previous. They get a hole drilled in the center and all the edges rounded over.
I bought a variety of craft paints to make these and other projects more colorful and appealing to kids. Truth be told, this was the hardest part. Painting everything with multiple coats, cleaning the sponges, keeping the paints separated and whatnot.
I wrote a little note on the bottom of the block set base, but the spray coat of shellac I threw on there mostly blurred it away. As it turns out, even the industrial sharpies are susceptible to ethel alcohol. Next time I will have to spray lacquer over any ink-work to preserve it before using shellac. My wonderful wife’s grandfather would always write notes on the things he built, so I am going to take up the tradition. The wood, paint and shellac is all kid friendly and benign should someone start using these as teething devices.
I have a cooking corner on the porch. It has my grill, smoker, and the griddle cook-top out there. I wanted a kind of old western style sign to help indicate the area. Blacksmithed letters and old wood are the look I was going for. I don’t do much metal work but figured I could cut some basic letters if I had to. I started by 3D printing a B and a Q in the font I wanted. The print only acted as a tracing template, but it help me set the scale of the project and pick the right wood. I started with a jigsaw, but had trouble with the sharp turns I needed.
I tried using a friend’s plasma cutter but got pretty rotten results. Also I am not very good with a plasma cutter as it turns out. I found a cheap nibbler and ended up going that route. The nibbler is a little round punch that oscillates in and out and is powered by your drill. It can start from and edge and cut a swath, or if you drill a starter hole it can do inside curve work. It is hard to get right up to a line, and often you are left with little round cutouts as shown below.
I slowly went through and cut all the pieces out. I was showered in a sea of little crescent shaped metal debris. Those things are sharp as heck! A good magnet sweep is a must for a nibbler. After the roughing pass I used a carbide bit on my dremel to take everything up to the layout lines. The final result was pretty good. Only a few errant nibbler bites were present. To help add authenticity I heated the letters up with a torch to darken them.
Original
Blackened extra crispy
After the heat treatment I picked out a piece of cypress and coated everything in boiled linseed oil. The letters got drilled out at points so I could hammer them home with cut nails for the final touches. The firing and oiling got the color of the metal letters about right. As it sits outside on the porch it will continue to age and darken. Overall a pretty nice project once I got the basic metal cutting figured out.