A while back I made a few batches of pre-shave oil. It went over well and has served my skin nicely since. It is time to make more! After having used both numerous times I think the menthol was not a great choice. It has too much of a cooling effect which is not what you want in a warm shave. This time will be sandalwood only.
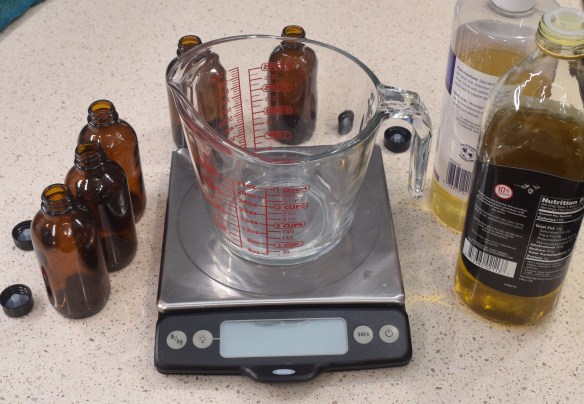
Step 1: Gather up some brown bottles, measuring and mixing supplies, and the oils.
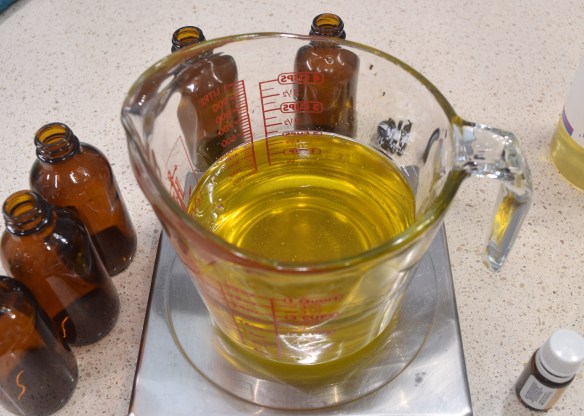
Step 2: Mix 2 parts castor oil, 1 part olive oil, and a generous dash of your favorite essential oils for aroma. The two oils have quite a different shade of yellow at first. They get almost cloudy when mixed until they mix completely, then it is all clear again.
Step 3: Bottle with a tiny funnel and put a zazzy logo on them. I wanted to use the phrase “For a shine that is hard to beat… and look directly into”, but it didn’t fit on the label.
My name is Chase and I have a flashlight problem. OK, not really, but I love flashlights. The modern surface mount LEDs can be really efficient and have gorgeous color rendering. Gone are the days of blueish sterile white light. I have a small fleet of flashlights that run on 18650 lithium ion batteries. The lights run a long time, are rechargeable, and have a variety of light settings from stun to kill.
Most of them come in some form of all black tactical form factor. That is great for clipping to a belt, or holding in the backyard. What they aren’t always the best for is home projects. They tail stand ok, but are easy to tip over. I need something that will give me a stable base and let me point the flashlight where I want. Enter loc-line.
Pointing up
Pointing down
I started with a finished shot because it is a little convoluted if you aren’t familiar with some of the components. I had left over loc-line from a CNC mill vacuum project. This is 3/4″ line, and can be found in kits for reasonable prices from amazon and elsewhere. I started by prepping a base from some 3/4″ plywood, painting it a zazzy orange, and attaching a screw down base.
The loc-line will snap onto that orange base, and provide flexibility to point the flashlight. To hold the flashlight I found this snap on 1/2″ PVC fitting. It came with the cutout, and a threaded female fitting. Most of my flashlights fit nicely in the opening and their clips help keep everything in place.
A threaded 1/2″ PVC fitting went on some 1/2″ pipe. This will all fit inside the open end of the loc-line. I thought about using epoxy to bond the two together, but I don’t know how well glue sticks to the blue plastic and there is a huge gap to fill. Small screws in pre-drilled holes did a really good job of fixing both halves together.
Once fixed I spray painted the PVC holder section to match the blue loc-line as much as possible. In retrospect it would have been easier to paint before I attached. Live and learn. Now I can have blinding light pointed in any direction when I am under the sink, changing outlets, or anywhere else.
There comes a time in every beekeeper’s life where he or she will want to harvest some honey. This is usually done with a centrifuge extractor. These start at a few hundred dollars for a very cheap unit, and the price goes astronomical from there. I spent quite a bit of time and money building test articles and doing mini test extractions, but ended up with a really good design that can be had for 50 dollars and a minimal set of tools.
VIDEO UPDATE
Due to the attention on this post I felt a video was needed to help with some of the questions. Enjoy and thank you for watching.
This spinner is specifically designed to hold medium super frames. Slight adjustments will be needed to make this work for shallow super frames. Does NOT work for large frames. The 5 gallon buckets are too small. Maybe find a larger trash can if that is your preferred frame size.
The above images show what a loaded out spinner looks like. The spinner now needs a container to catch all the honey. I really wanted to use 5 gallon buckets for their price and size. One bucket isn’t deep enough, so I cut the bottoms out to use them as height extenders.
I used a mix of firehouse pickle buckets and white food grade buckets I bought at the hardware store. I cut the bottoms off of two buckets to stack them inside each other to increase the height and allow for a good spin without messing up your kitchen.
The bucket with all the holes in the bottom holds the bottom shaft from the spinner and keeps it stable during a spin. The center hole is just big enough for the 3/4″ PVC pipe. The others are there to help the honey drip down into the white bucket with the honey gate.
The stack up is: White bucket with honey gate, red bucket with holes, and two bottomless buckets for height. It is a very small setup that will quickly process two frames at a time. I just did 20 frames with this tool and had a really good time with it. Best of all it doesn’t take up much space in the house.
The Spinner Build
You will need the following items for the spinner. I included the prices I paid for everything, though your prices may vary. Not included in the list below is the buckets and the honey gate. The white food buckets can be had for 4-5 dollars each at lowes. The firehouse pickle buckets can be had for 2 bucks each! They do require a bit of soaking to get rid of the vinegar smell though. Honey gates can be had for 5-10 dollars.
In total you will spend about 50 dollars on the whole setup. Filters, a capping knife, honey bears, and others will cost you more, but a whole extraction and bottling setup for under 100 dollars is very attainable.
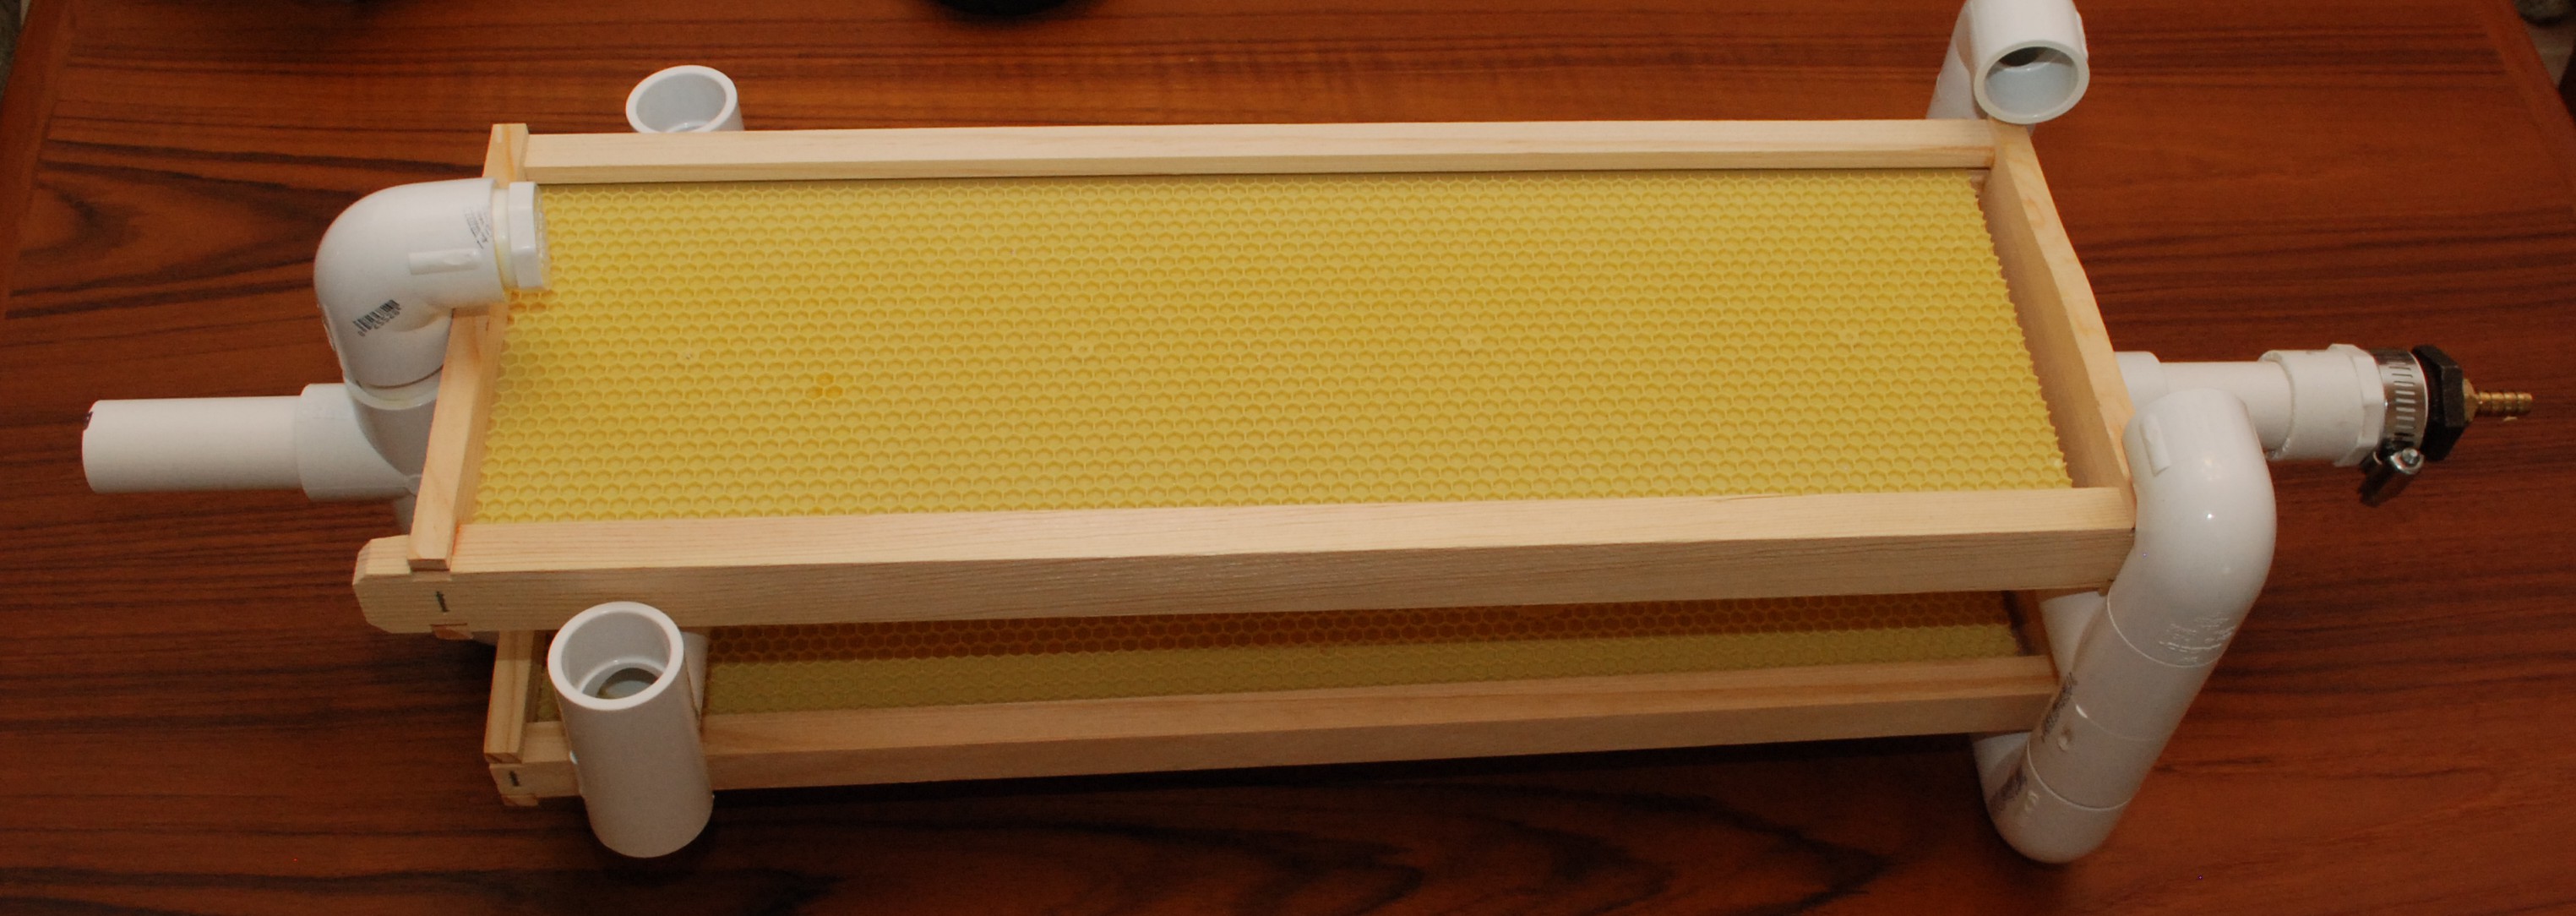
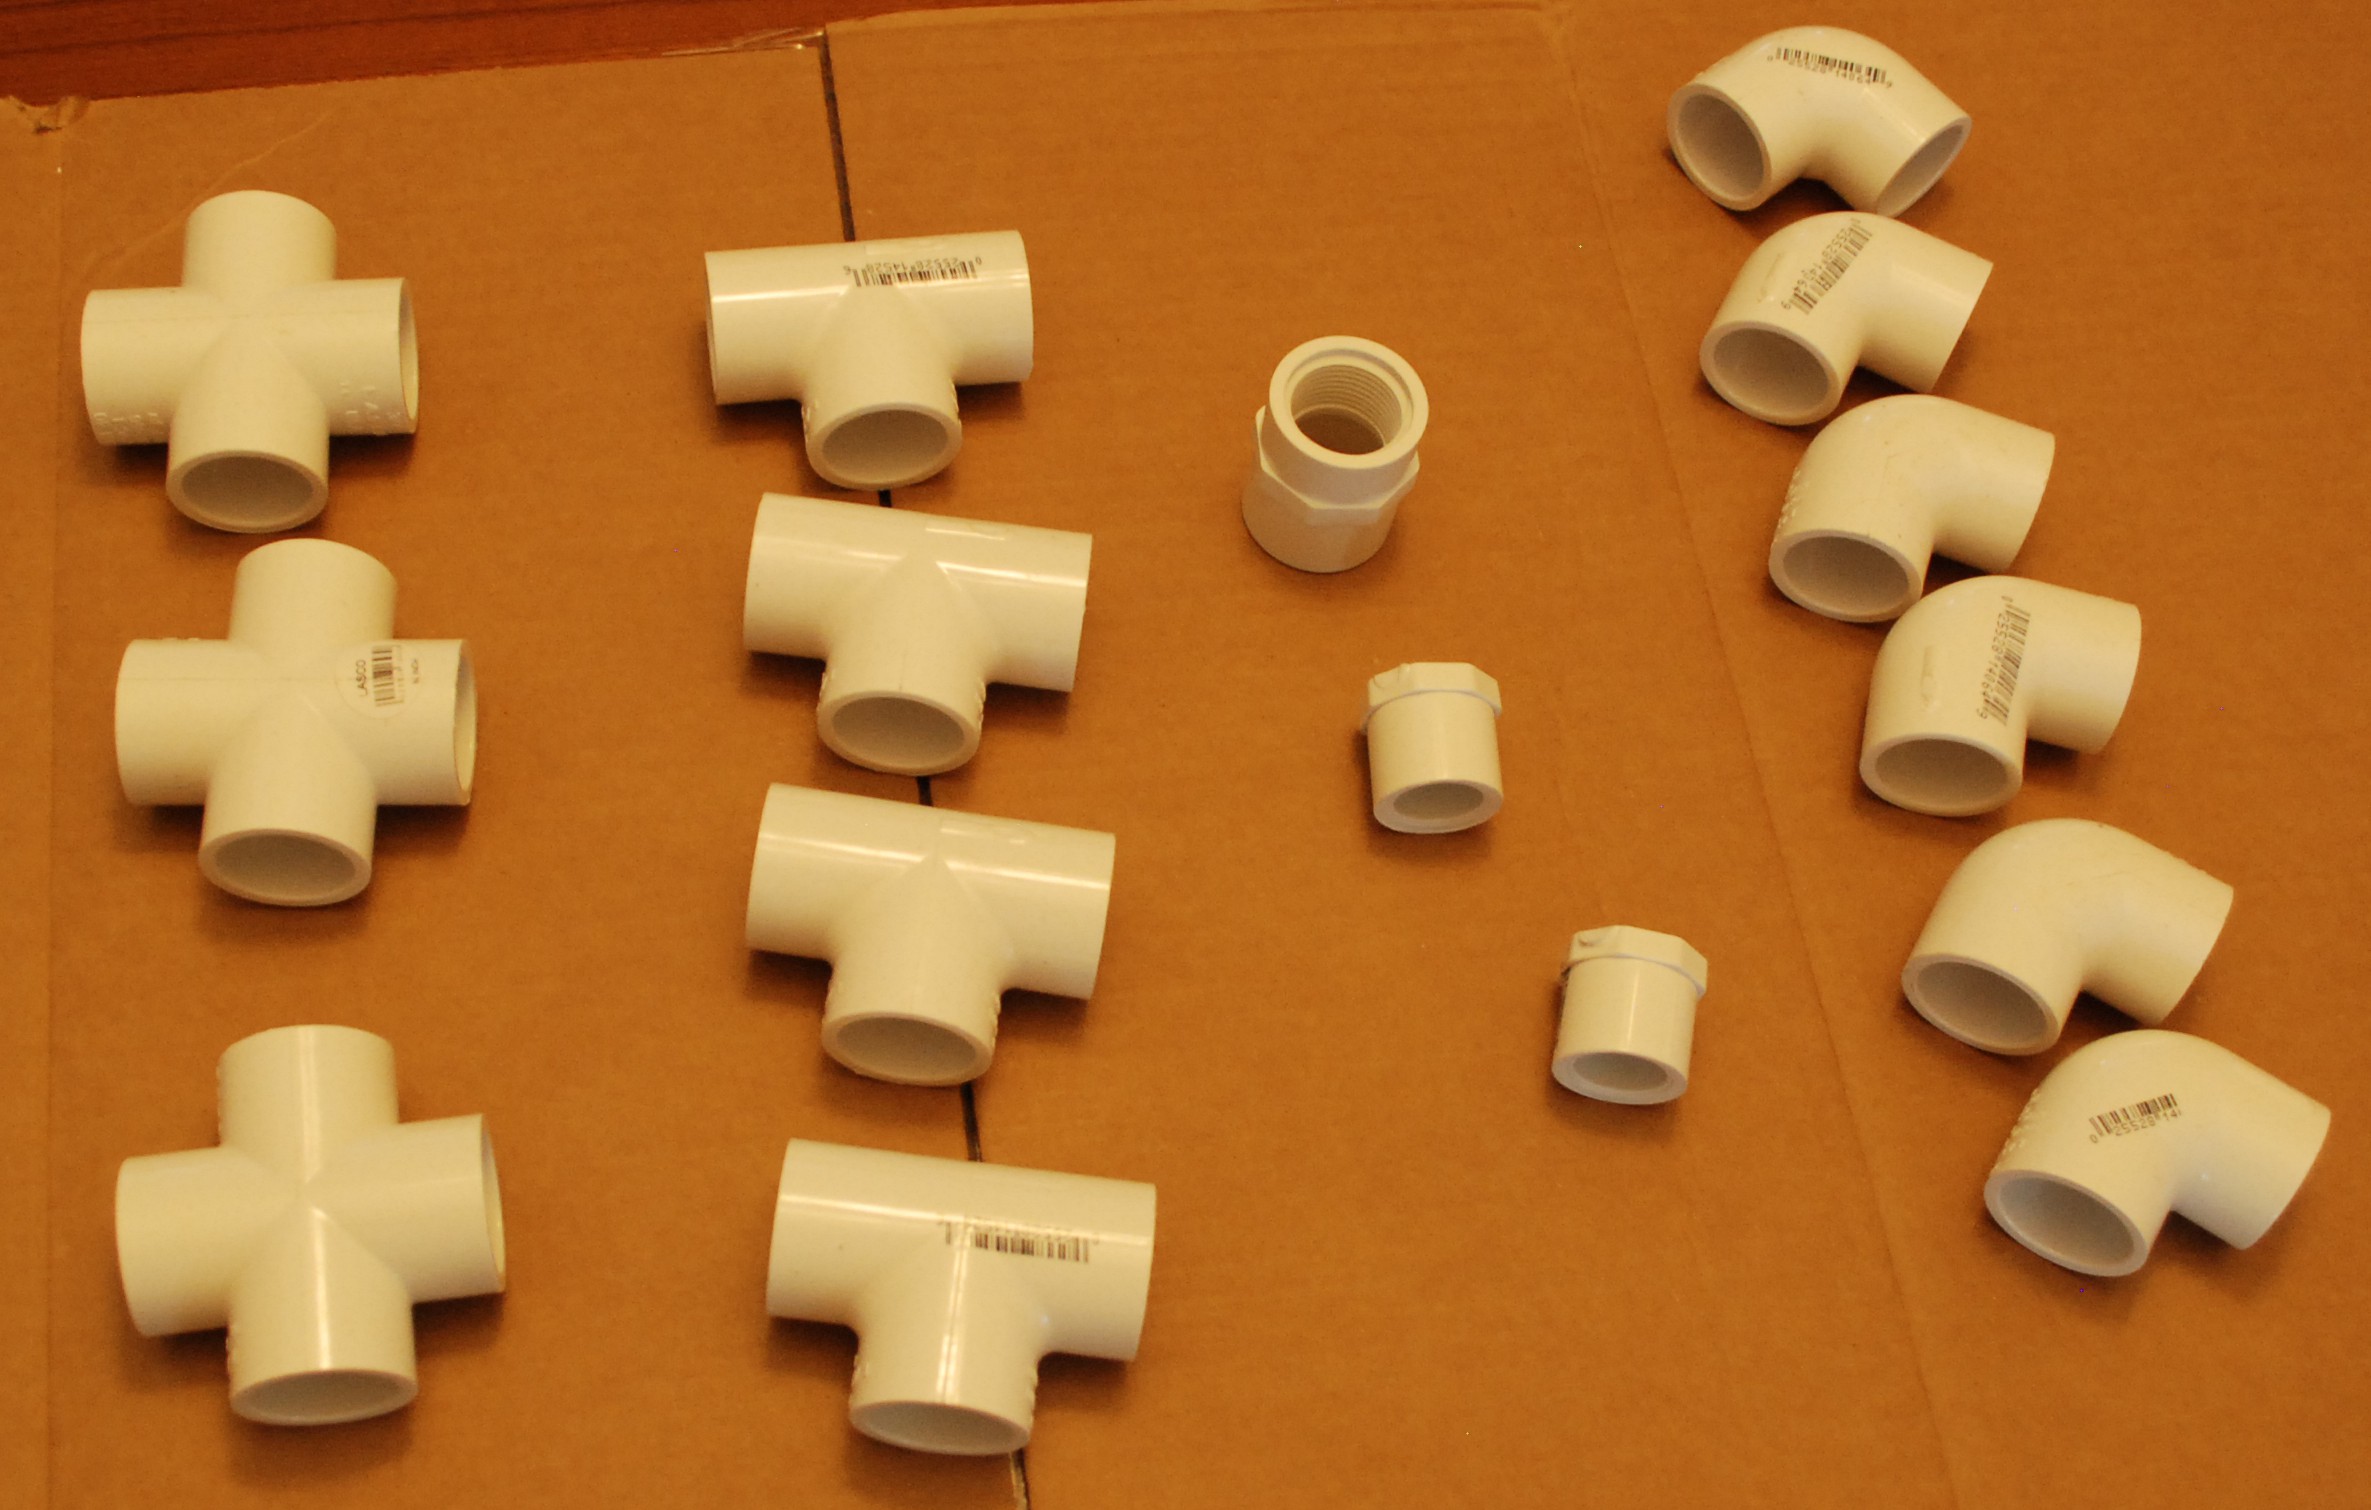
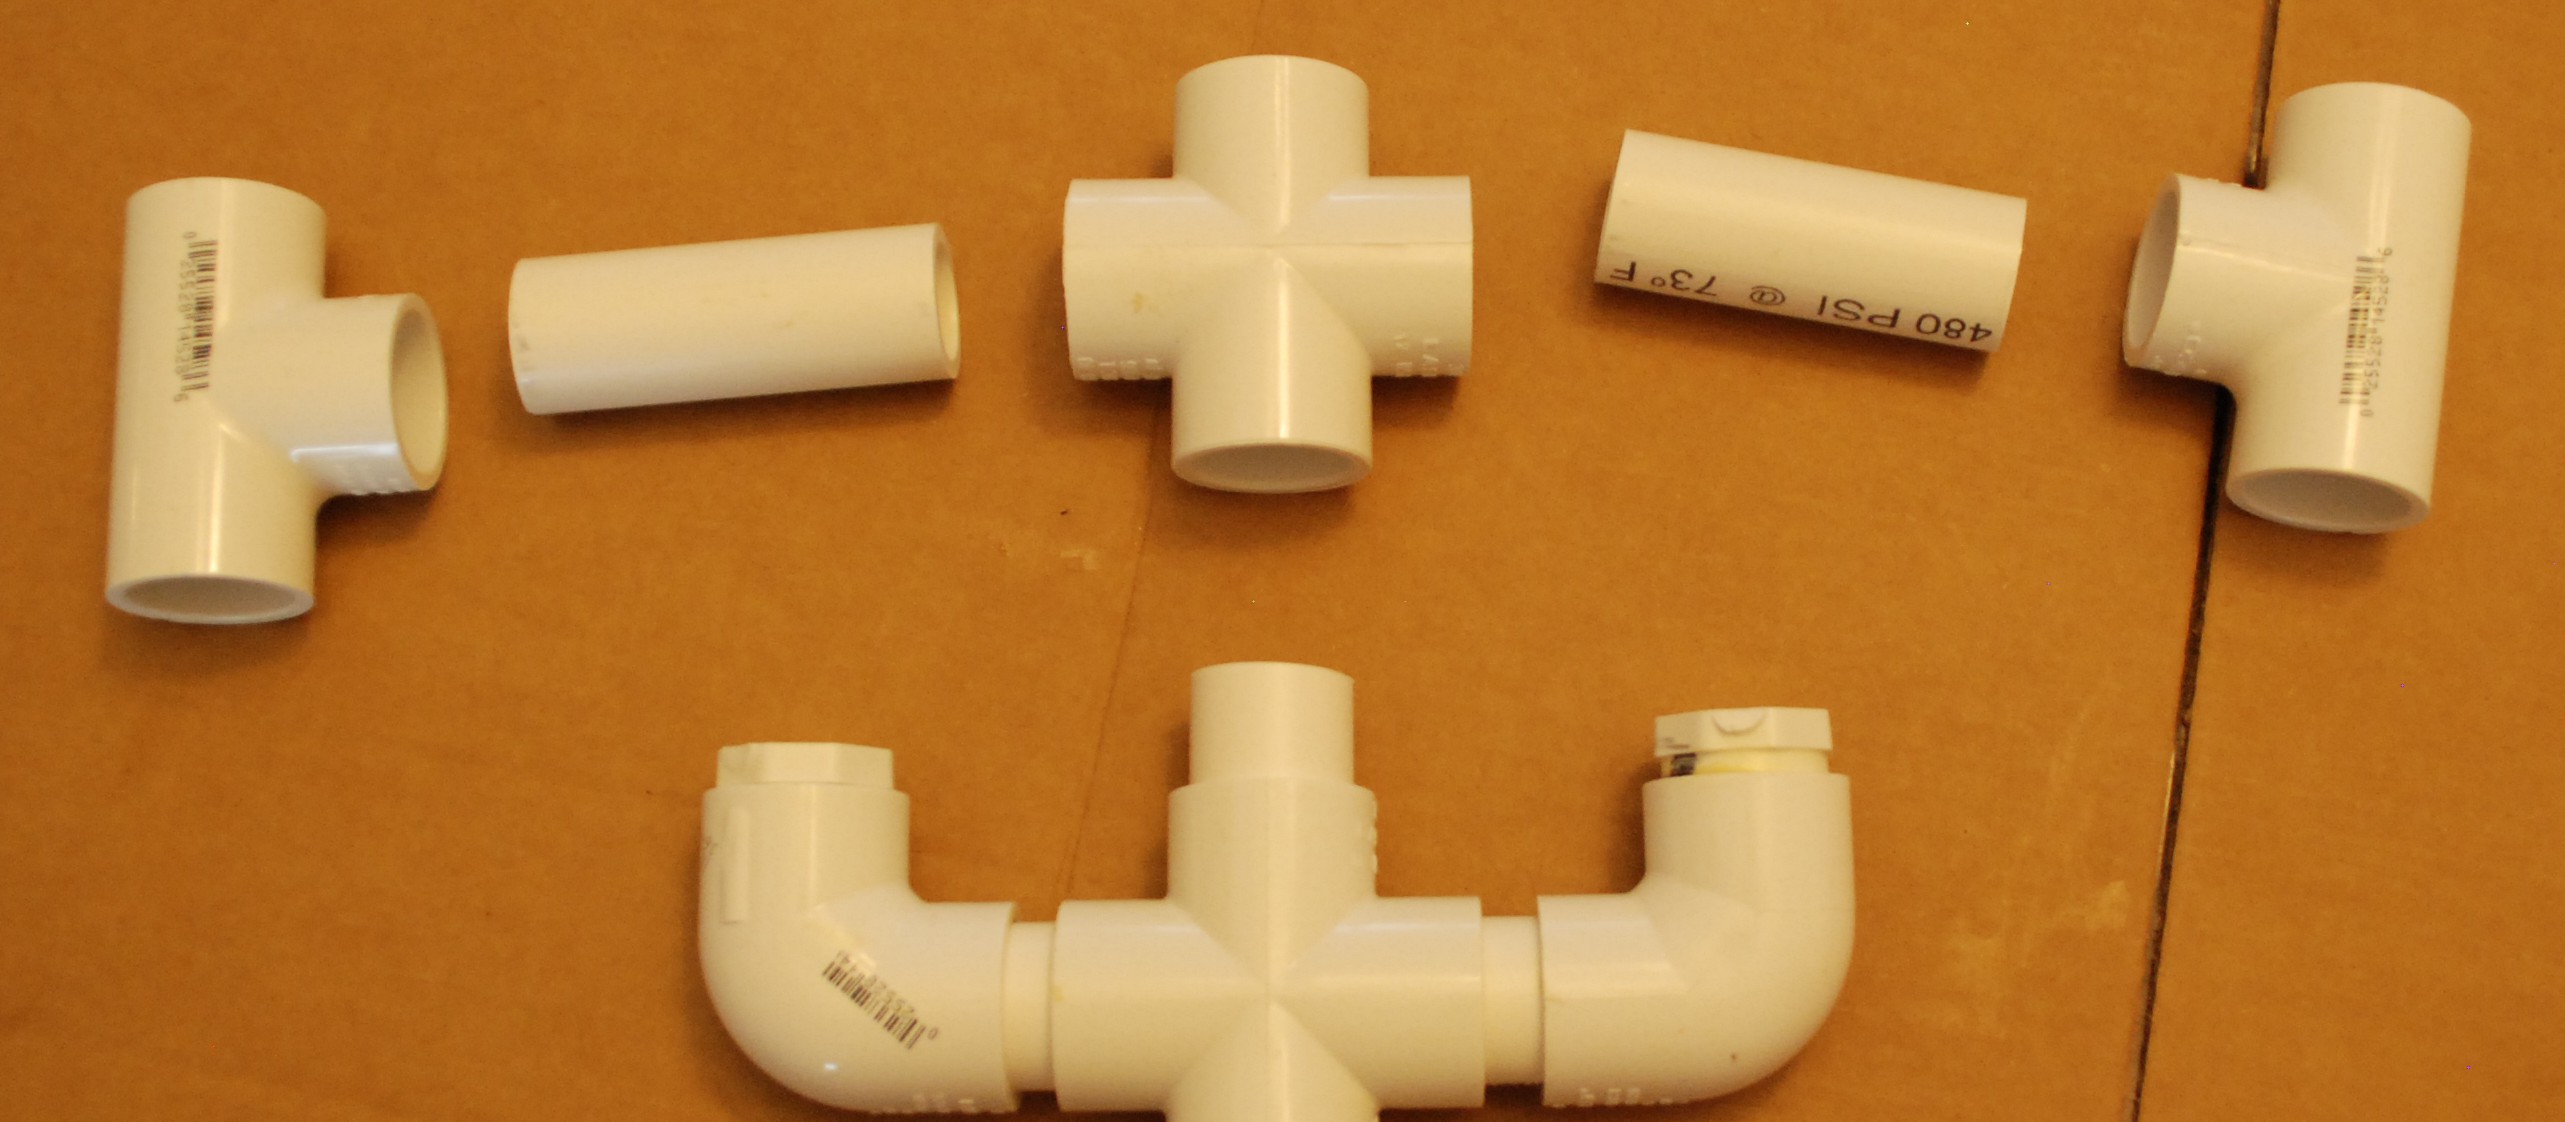
From a tools standpoint you will need PVC pipe cement, a saw or PVC pipe cutter, tape measure, and a marker. The pipe parts should look like those shown below.
UPDATE: Fresh PVC cement can be helpful. Fresh glue allows longer open working time than old glue. You only have a few seconds to get it right, so if your glue is old, get a new one.
While assembling the sections be mindful of how much cement you use. Too much will drip on your work surface, and will drip down inside to the sections you want to glue in the future. Work slowly and purposefully. Once you put two segments together, they are permanent in just a few seconds. Dry fit everything beforehand to make sure it all fits with your frame hardware.
UPDATE: Dry fitting is really important! Some stores may sell fittings with different sizes and depths. Dry fit every stage and check it often with your frames and bucket. Use multiple frames, as there can be variation in their construction as well.
Bottom Hooks
These features are the depth stops for the frames. Gather a cross, two elbows, two plugs, and cut 2x 1.75″, 1x 1.5″, and 1x 3″ sections of pipe.
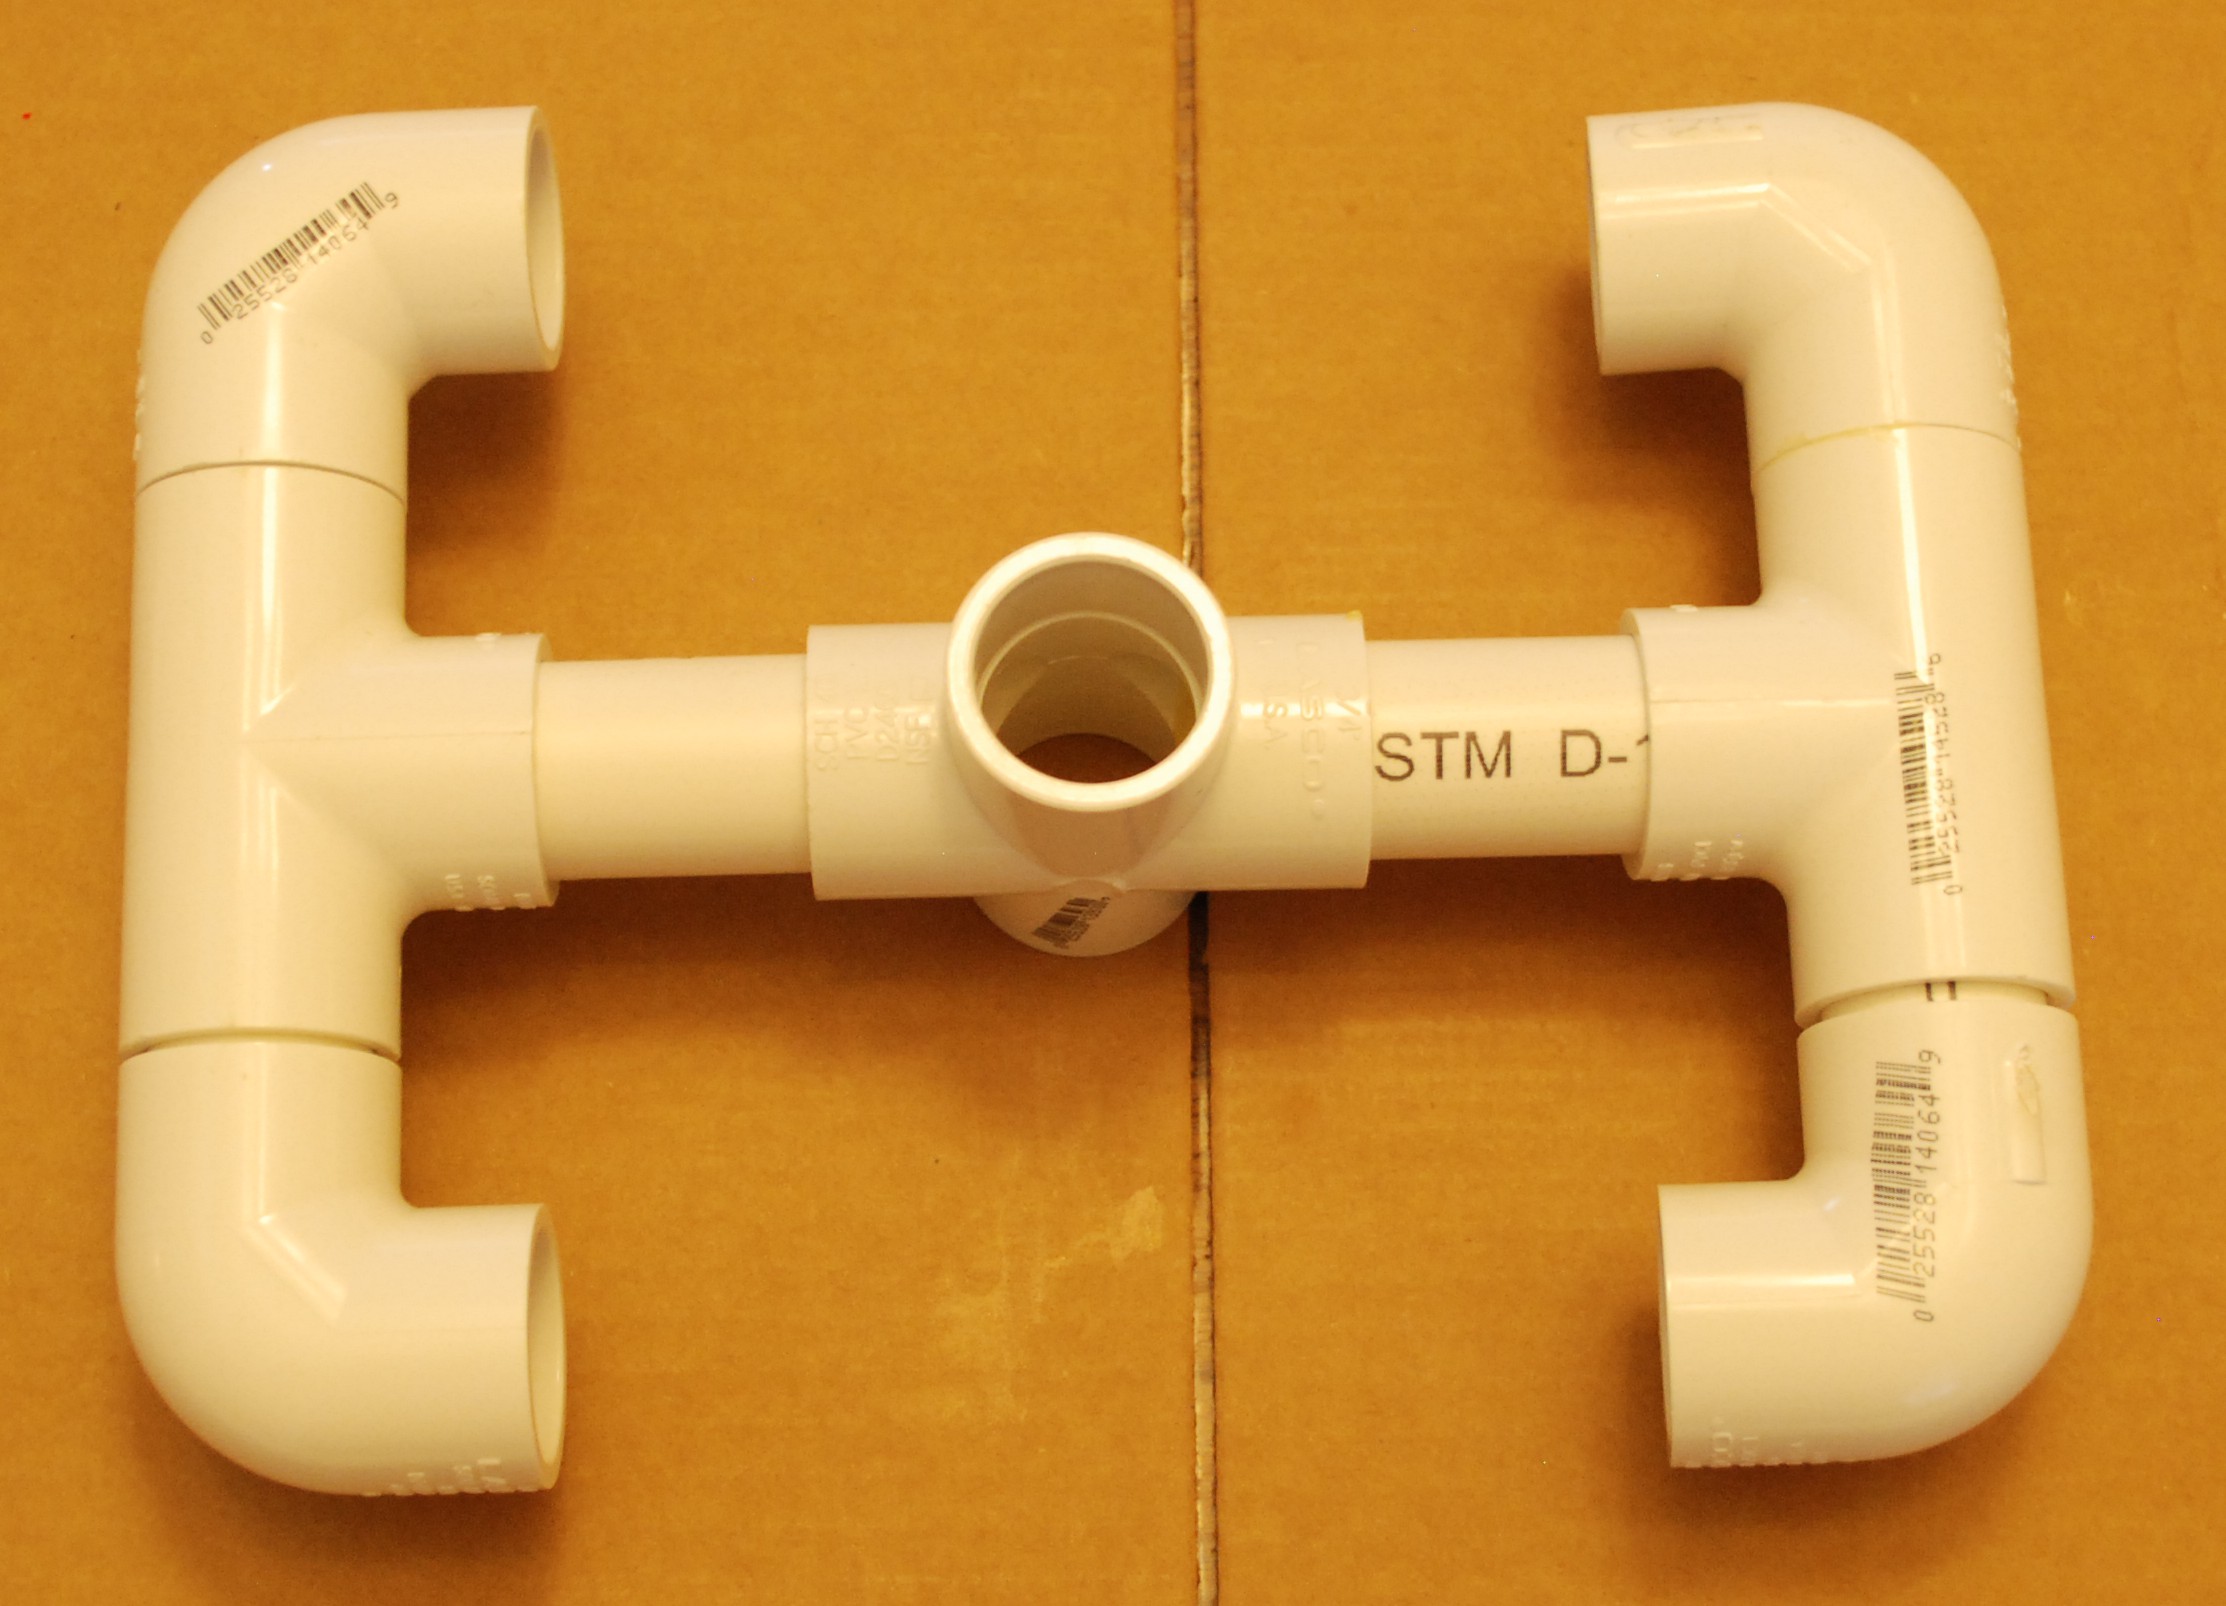
The 1.5″ section of pipe will connect to the bottom guide, the two 1.75″ pieces will hold in the bottom hooks that keep the frames from sliding down any further. I used plugs to keep honey out of the lower section of the spinner. This is what the finished part should look like
Bottom Guide
Next comes a bottom guide to keep the frames from sliding left and right. This step requires a cross, two tees, and two 2.75″ pipe sections. Be careful with this step. Too narrow and your frame will not fit, too wide and it will not fit in the bucket.
Assemble the sections and attach it to the bottom hook as shown below. Now the frame will come down into the hook and be held from sliding left and right.
Top Guide
The top guide will hold the top end of the frame and prevent it from going out during the spin, and from going left or right. Gather a cross, two tees, four elbows, 2x 2.75″ pipes and 4x 1.5″ pipes.
It is probably best to assemble the two outer arms first, then attach them to the central cross.
Drill Post
A short 3 inch section of pipe and the threaded pipe fitting goes on top to allow for the drill to be attached. I chose 3inches for that length, but it could honestly be longer or shorter.
Central Post
A single 14.5″ piece of PVC attaches the top and bottom half. Dry fit this piece to make sure it holds your frames correctly. The two sets of guides should line up so that a frame can be slid down through the top guides into the bottom hook.
Drill Barb
A threaded coupling was installed at the top of the spinner earlier. Now comes the final piece of the puzzle. An iron pipe threaded adapter takes the size from 3/4″ to, I think, a 3/8″ female thread. That allows a brass barbed fitting to thread in. The brass fitting is small enough to fit into my drill. Most drills can chuck onto anything smaller than 3/8″ in outer diameter. I used a hose clamp around the PVC threaded fitting to help reinforce it. My dewalt drill runs it pretty well on the lower speed setting. Just accelerate slowly, and stop slowly and everything will be ok!
Update: A good alternative is to cut the barb off and use the remaining brass hex portion as a nut. Get an adapter for your drill and put the appropriate socket on there. Now you don’t have to tighten your chuck every time, just slip on the socket and drive!
One of the steps of saw sharpening is getting all the tops of the teeth even. If one tooth is taller than the others, it will catch. Shorter teeth will not do anything cutting at all. This job is accomplished by running a file across the tops of the teeth until you have hit them all. Not too hard to do by hand, but a jig helps. Many were sold back in the day, but they are pricey now on ebay. No matter, I will build one. Here is my file and wood of choice.
I cut a section off, and carefully cut a wedge shape about 3/8″ into the maple. The waste was zipped out with a narrow chisel. Now the file will fit inside nicely leaving room for a wedge to firmly hold it in place.
Cut edges with saw
Remove waste with narrow chisel
File fits nicely
I had a thin piece of walnut that would work perfectly. The only trick is that tapering such a small piece will be difficult. I found that my scrub plane worked really well across the grain. I held it just a little proud of the vice and slowly carved away till I had the desired shape.
To use, simple wedge the file in gently with the walnut, and then run along the top of the saw teeth.
A perfect scrap creation for an everyday woodworking problem. Now to buckle down and actually do all that sharpening. But first
Saw Nut Driver
Most saws use split nuts that standard screwdrivers make a mess of. The slot is very narrow. I have seen people convert old spade bits into split nut drivers. That sounds like a good plan, but requires oodles of grinding and the sacrifice of a bit. Instead, I took a recently reclaimed piece of saw blade and made a driver bit. The blade is thin and hard, but too flexible to make a long driver. Short and stubby should be just fine for this task.
I used a hack saw to cut the part out. It took two blades to finish. I would recommend using some kind of cutoff wheel for anyone looking to make something out of saw blades. At any rate, the bit works like a charm. Some of these nuts were damaged and difficult to turn even with a good flat ground screwdriver. The homemade bit works great.
Now it needs a nice handle. I did a quick run on the lathe and came up with this handle. The tenon had a slit sawn down the length to help seat the metal bit. The brass made everything so tight that I couldn’t pound the bit in as far as I had wanted. Oh well it is very suck now. Not quite centered either, but nothing I can do about it.
I gave away some Vanilla Extract for Christmas, and it was pretty popular. I ran out of my 4 month batch pretty quickly. I almost broke open the second pint slated for 6 months, but was able to hold off. Next Christmas there will be enough for all!
The first batch was small and before my blog, so lets get bigger! The golden ratio is 1 ounce of vanilla beans to 1 cup of vodka. B grade beans offer a more robust flavor, and a good clean multiple distillation vodka shouldn’t impart anything extra. I learned the basic technique from Vanilla Review. You can do it too, in just a few easy steps!
1. Obtain vanilla beans, jars, and vodka.
2. Cut vanilla into small segments. (finger for scale, 4 ounces pictured)
3. Place bean fragments into jars.
4. Fill with vodka, and seal. A date label is useful.
5. WAIT!!! Unfortunately, this is the hard part. My 4 month batch turned out pretty well, but I really want these to go the full 6 months. Occasional shaking is required. This batch was with 8 ounces of beans going into two quart jars filled to the top with vodka. Check back in 6 months for the extract reveal.
Another great gift ideas came from a previous post. Instead of doing a single batch of foaming hand soap at a time, you could make lots of the concentrate. It is barely any more work than doing one at a time, and you can give them away as gifts!
Instead of using measuring spoons I went with weight. The ratio of volume is 6 to 1 soap to oil, so I went with a similar ratio (messed up a little in the pour pictured below) to give me a bit over 12 ounces. I figured this would translate into about 12 fluid ounces and will fill three 4 ounce boston round bottles.
Castile Soap
Olive Oil
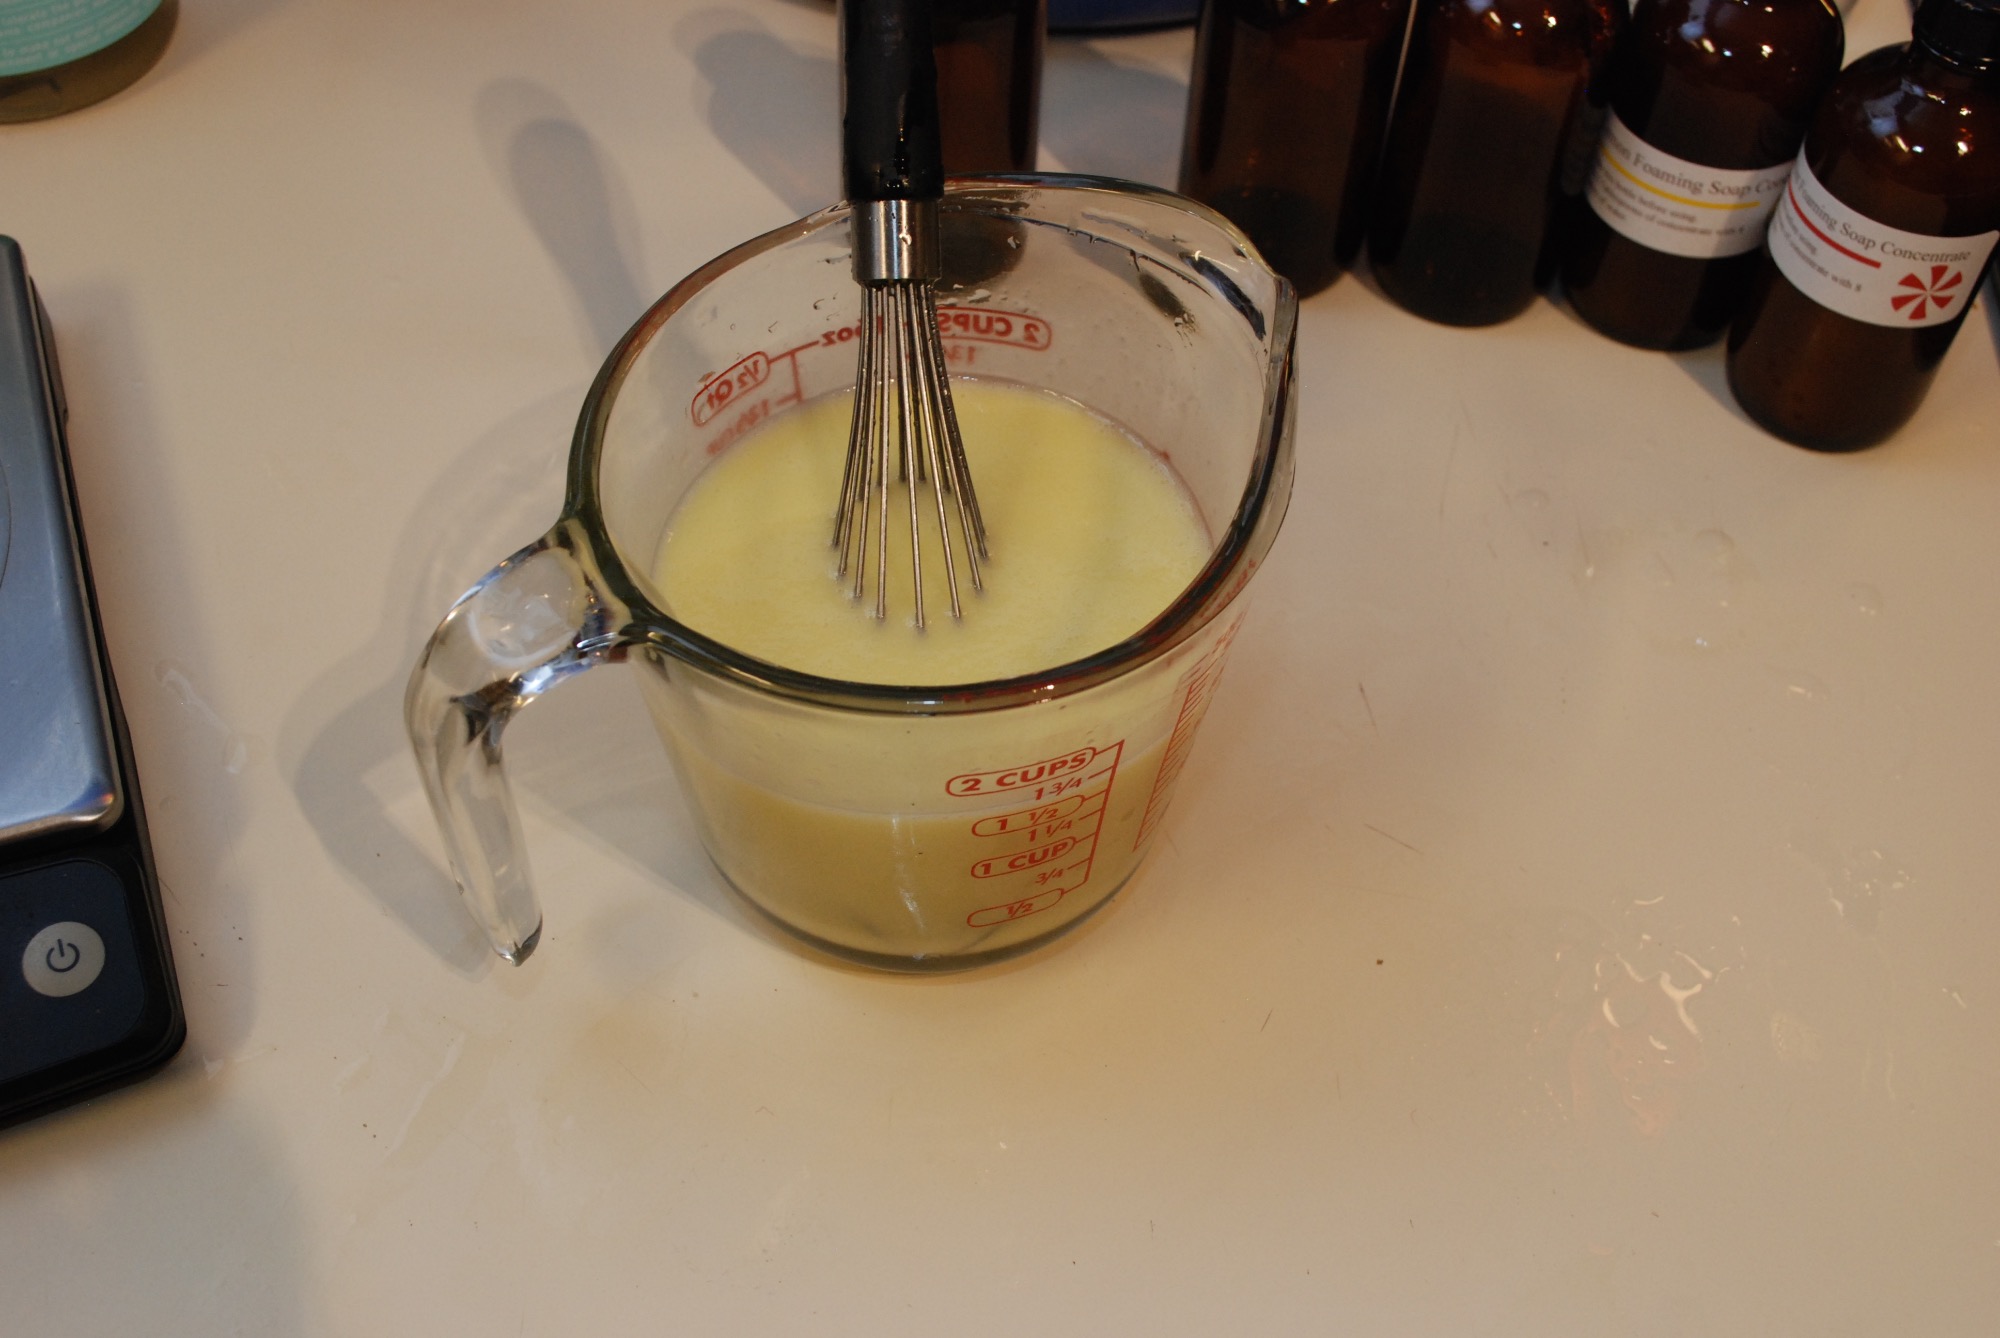
Once you have those two in mix the ingredients well with a whisk. It should come out looking something like this.
Now is a good time to add any essential oils for fragrance. I didn’t measure, but rather added by smell. Looking at the bottles it ended up in the half teaspoon range of essential oil used per 12 ounce soap batch. I made a festive peppermint, a sweet smelling lime, and a nice lemony version. They were all pretty well received with lemon going the fastest. A smart little label lets you know which is which and gives instructions on it’s use.
Cheap and easy to make, it is another wonderful gift idea for the holidays. You can purchase empty foaming hand soap bottles by the dozen for a few bucks a piece if you want to hand them out.
I don’t know when foaming hand soap became popular, but I have been buying it for a while. I love the instant lather versus regular liquid soap, but never liked how expensive it was. Not that it is a huge expense, but what can I say, I am cheap! Luckily I did some searching around and found out how cheap and easy it is to make. Now that I know, I am kind of pissed that I have spent so much money for what is 95% water all these years.
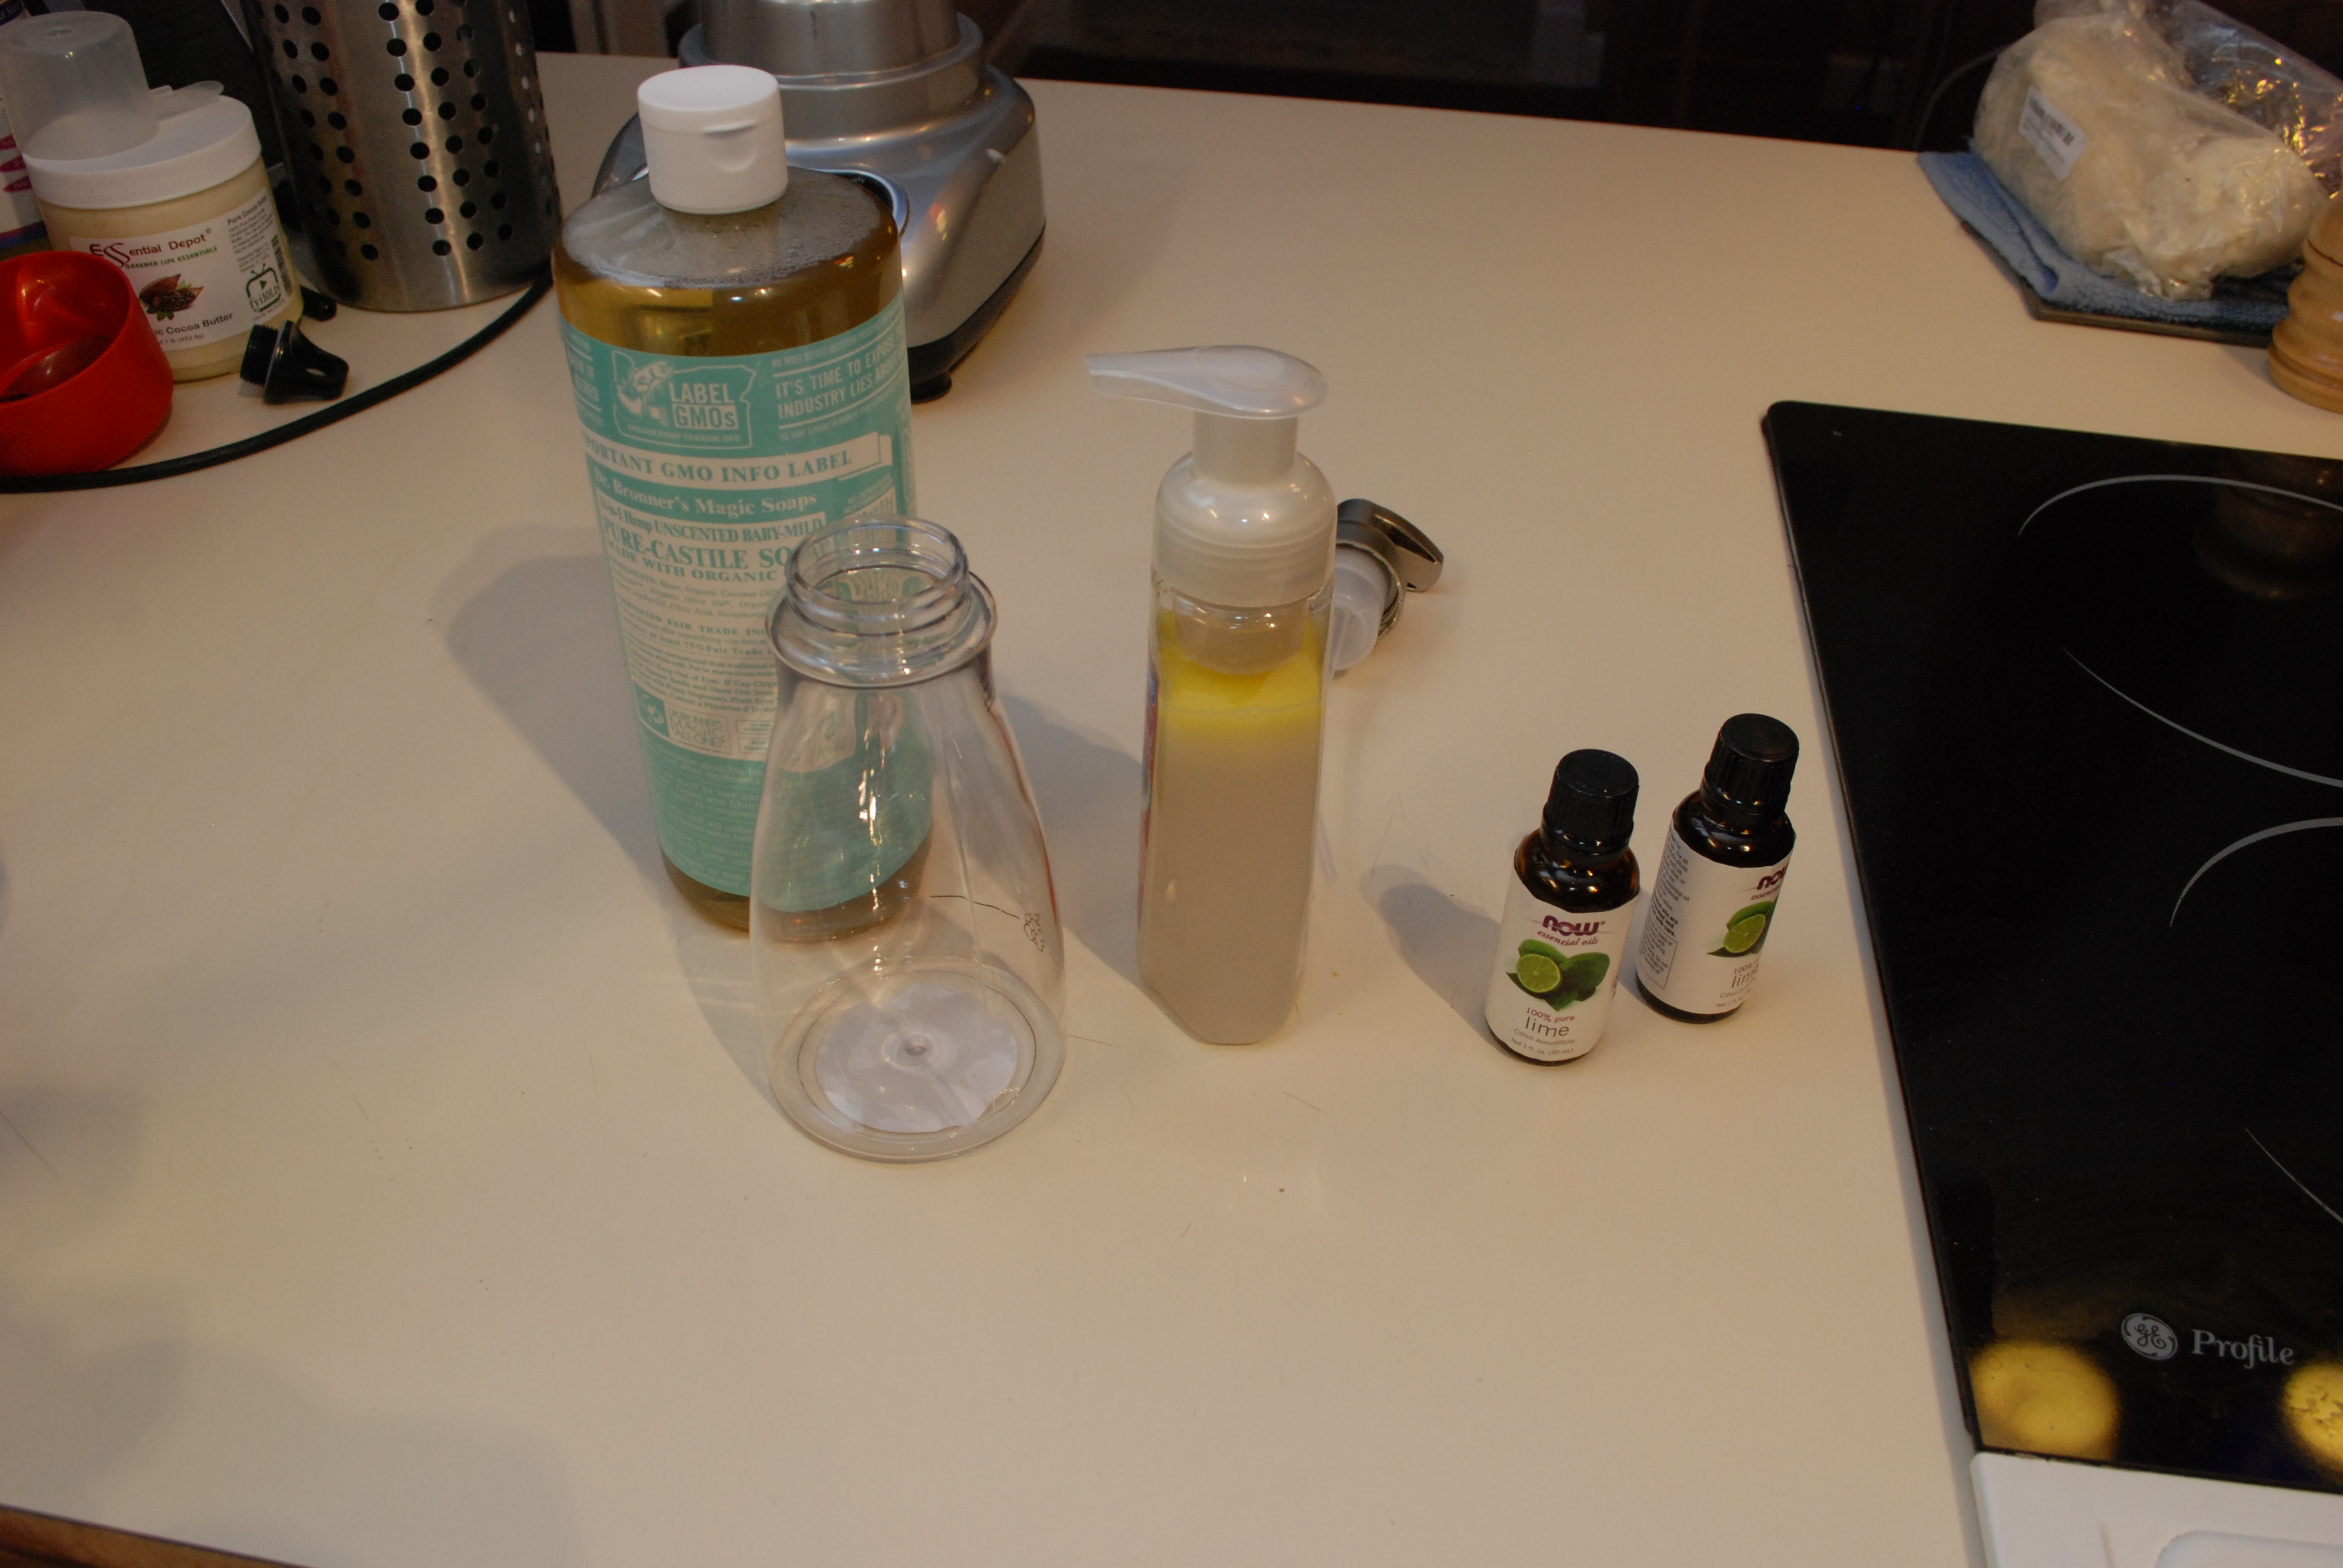
I made a few small experimental batches based on my reading and I think I have the ratios and process right. Grab your dispenser of choice. Pictured above is an old store bought foaming pump that we bought and have refilled for years, and a new one from amazon.
Directions:
Fill 2 Tablespoons of castile soap (olive oil based soap concentrate) for every 8 ounces of soap required. Add any desired essential oils. I used lime oil, because limes rock! 15 drops per 8 ounces of soap is a good place to start. Swish those two around in the container to mix, then gently fill the rest with water. Done! (Note, I modified the recipe slightly, see the update below)
You can make large volumes of the stuff for quick fills later. Use the 2 Tablespoons of soap, and 15 drops of oil to 8 ounces of fluid rule to make as much as you want.
My first batch was a festive peppermint hand soap. I started with water, then added the other ingredients. They didn’t mix as easily as doing the soap and oil first, so I would recommend main ingredients first, then water. Also on my first batch I added a teaspoon of olive oil. Some sources recommended it, some didn’t. It didn’t mix well, and a left vs right hand wash comparison with my non-olive oiled batch doesn’t seem to show any differences. Maybe because it didn’t mix well? If you want to try adding the olive oil, do it first, and get it combined well with the soap before adding water.
The bottle looks great in my bathroom! All these hand made soaps are translucent for some reason. The store bought ones are clear… Probably the soap acting as a surfactant has emulsified the essential oil. AKA, lots of tiny drops of oil in suspension make it look “cloudy”. Commercial ones must use alcohol based perfumes or something. Any who, both work great as a hand wash, leave a light smell, and provide a good lather. The picture above shows peppermint on the left, and lime on the right. The size and foam differences have more to do with the pump than the soap I think.
UPDATE!
I played around with a few more batches and have come to a different conclusion about the oil. It seems to help keep the soap and water mixed together better. Otherwise the soap wants to separate to the bottom. Also, the cloudiness fades with time. The final recipe is as follows:
Mix the following ingredients per 8 ounces of water.
2 Tablespoons of castile soap
1 Teaspoon of olive oil
15ish drops of essential oil
Mix those all together really well in the container and add the 8 ounces of water slowly. TADA! You made foaming hand soap.