Countersink Bit Set

Countersink bits are supremely useful.  Screws that are run flush look nicer, they are easier to install with the pilot hole, and are much less likely to split wood.  The set is from woodcraft and came in a plastic package.  It wasn’t useful for long term storage, and the simpler older set I had kind of rattles around in a drawer somewhere.  I wanted a better fate for this set, so I got to making a nice box for myself.

DSC_0455

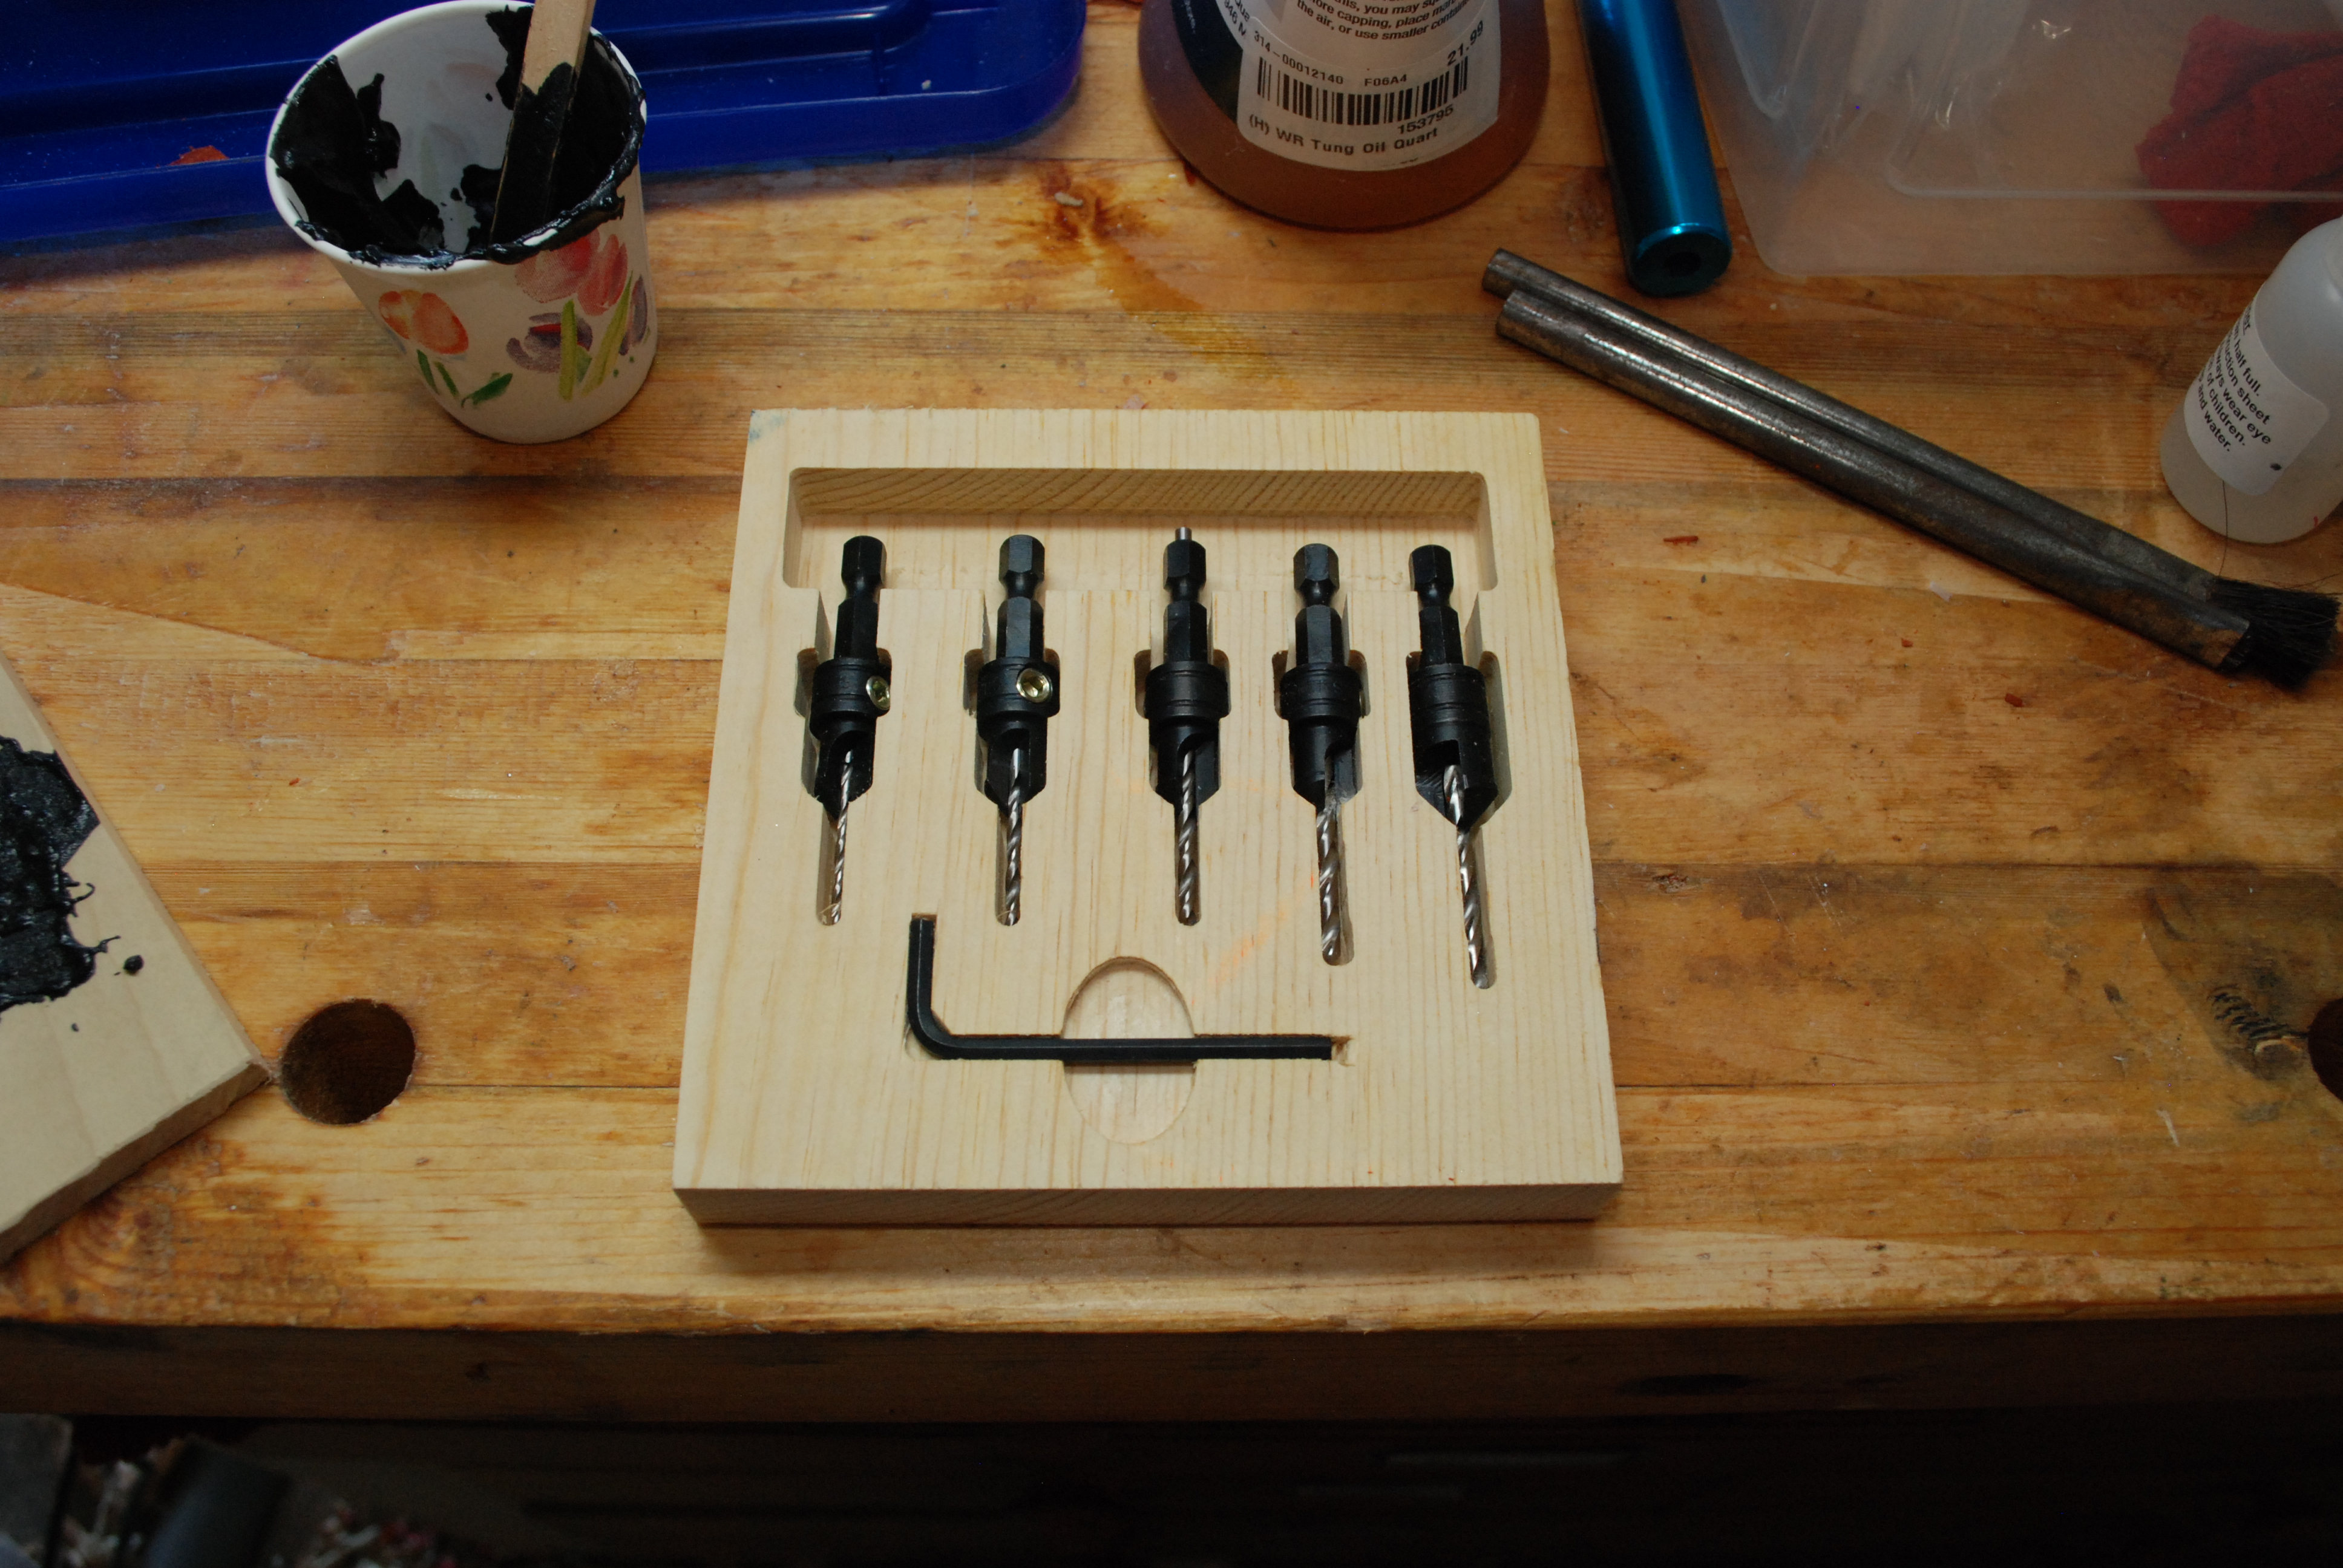
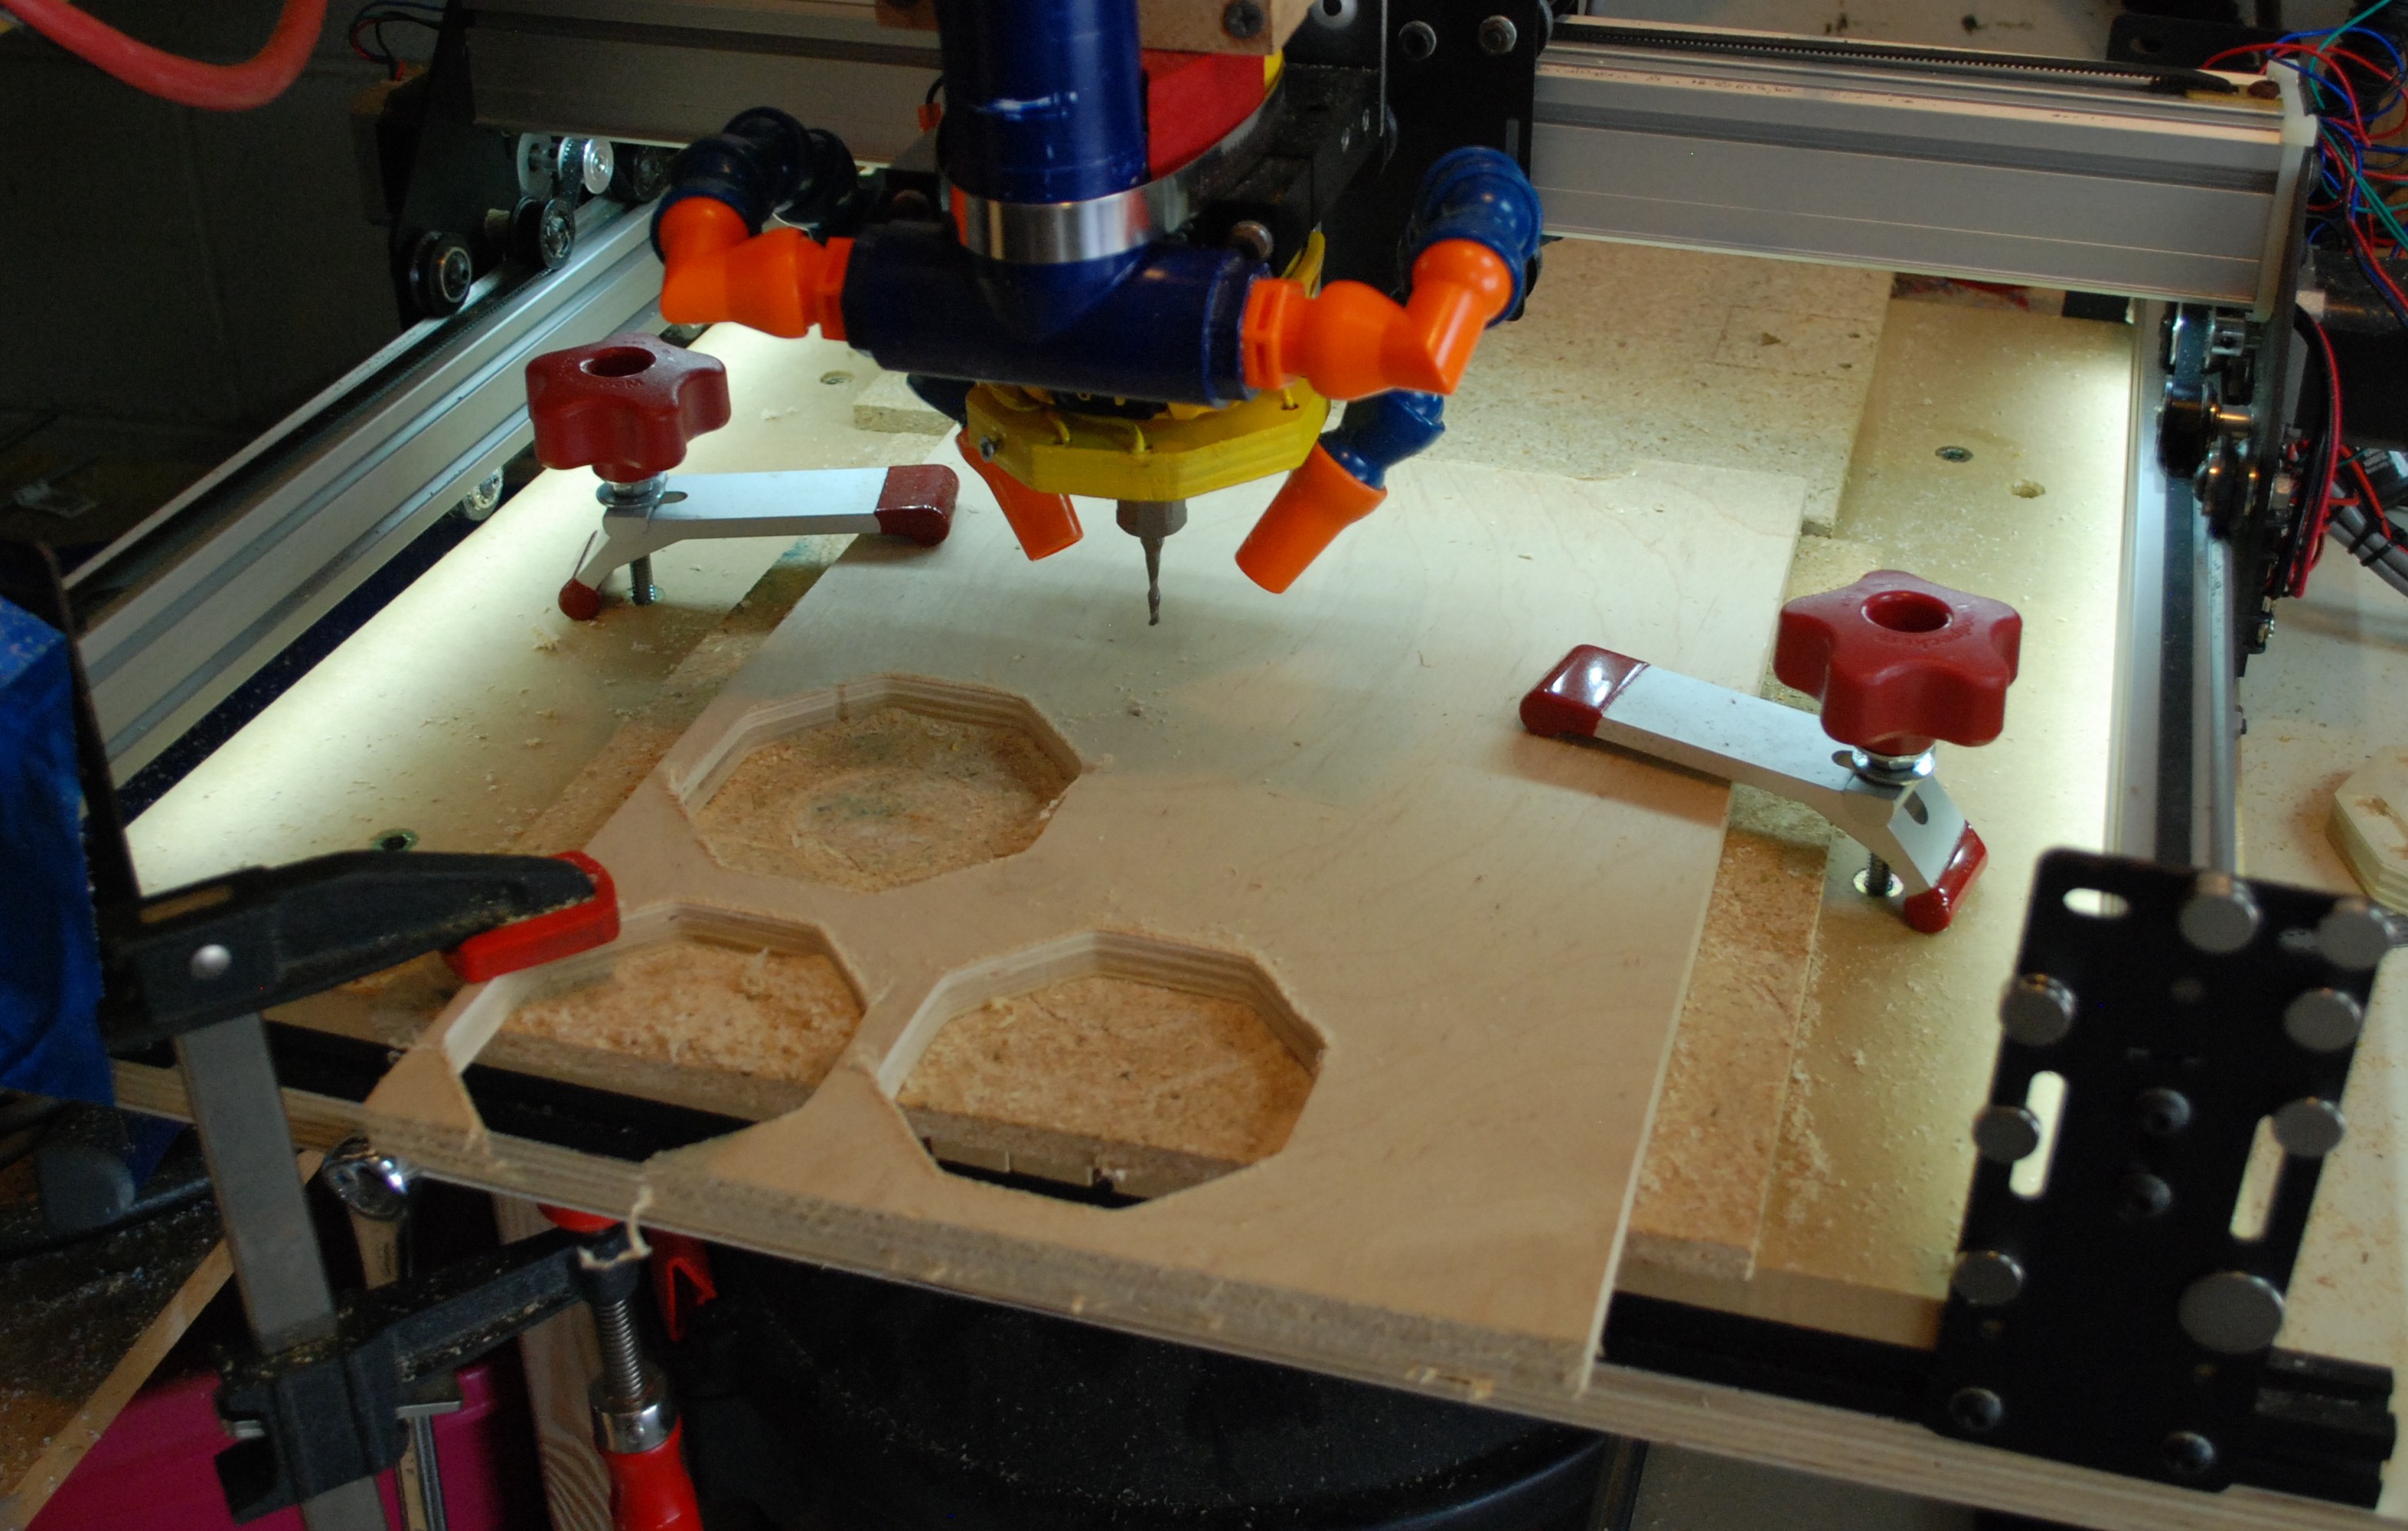
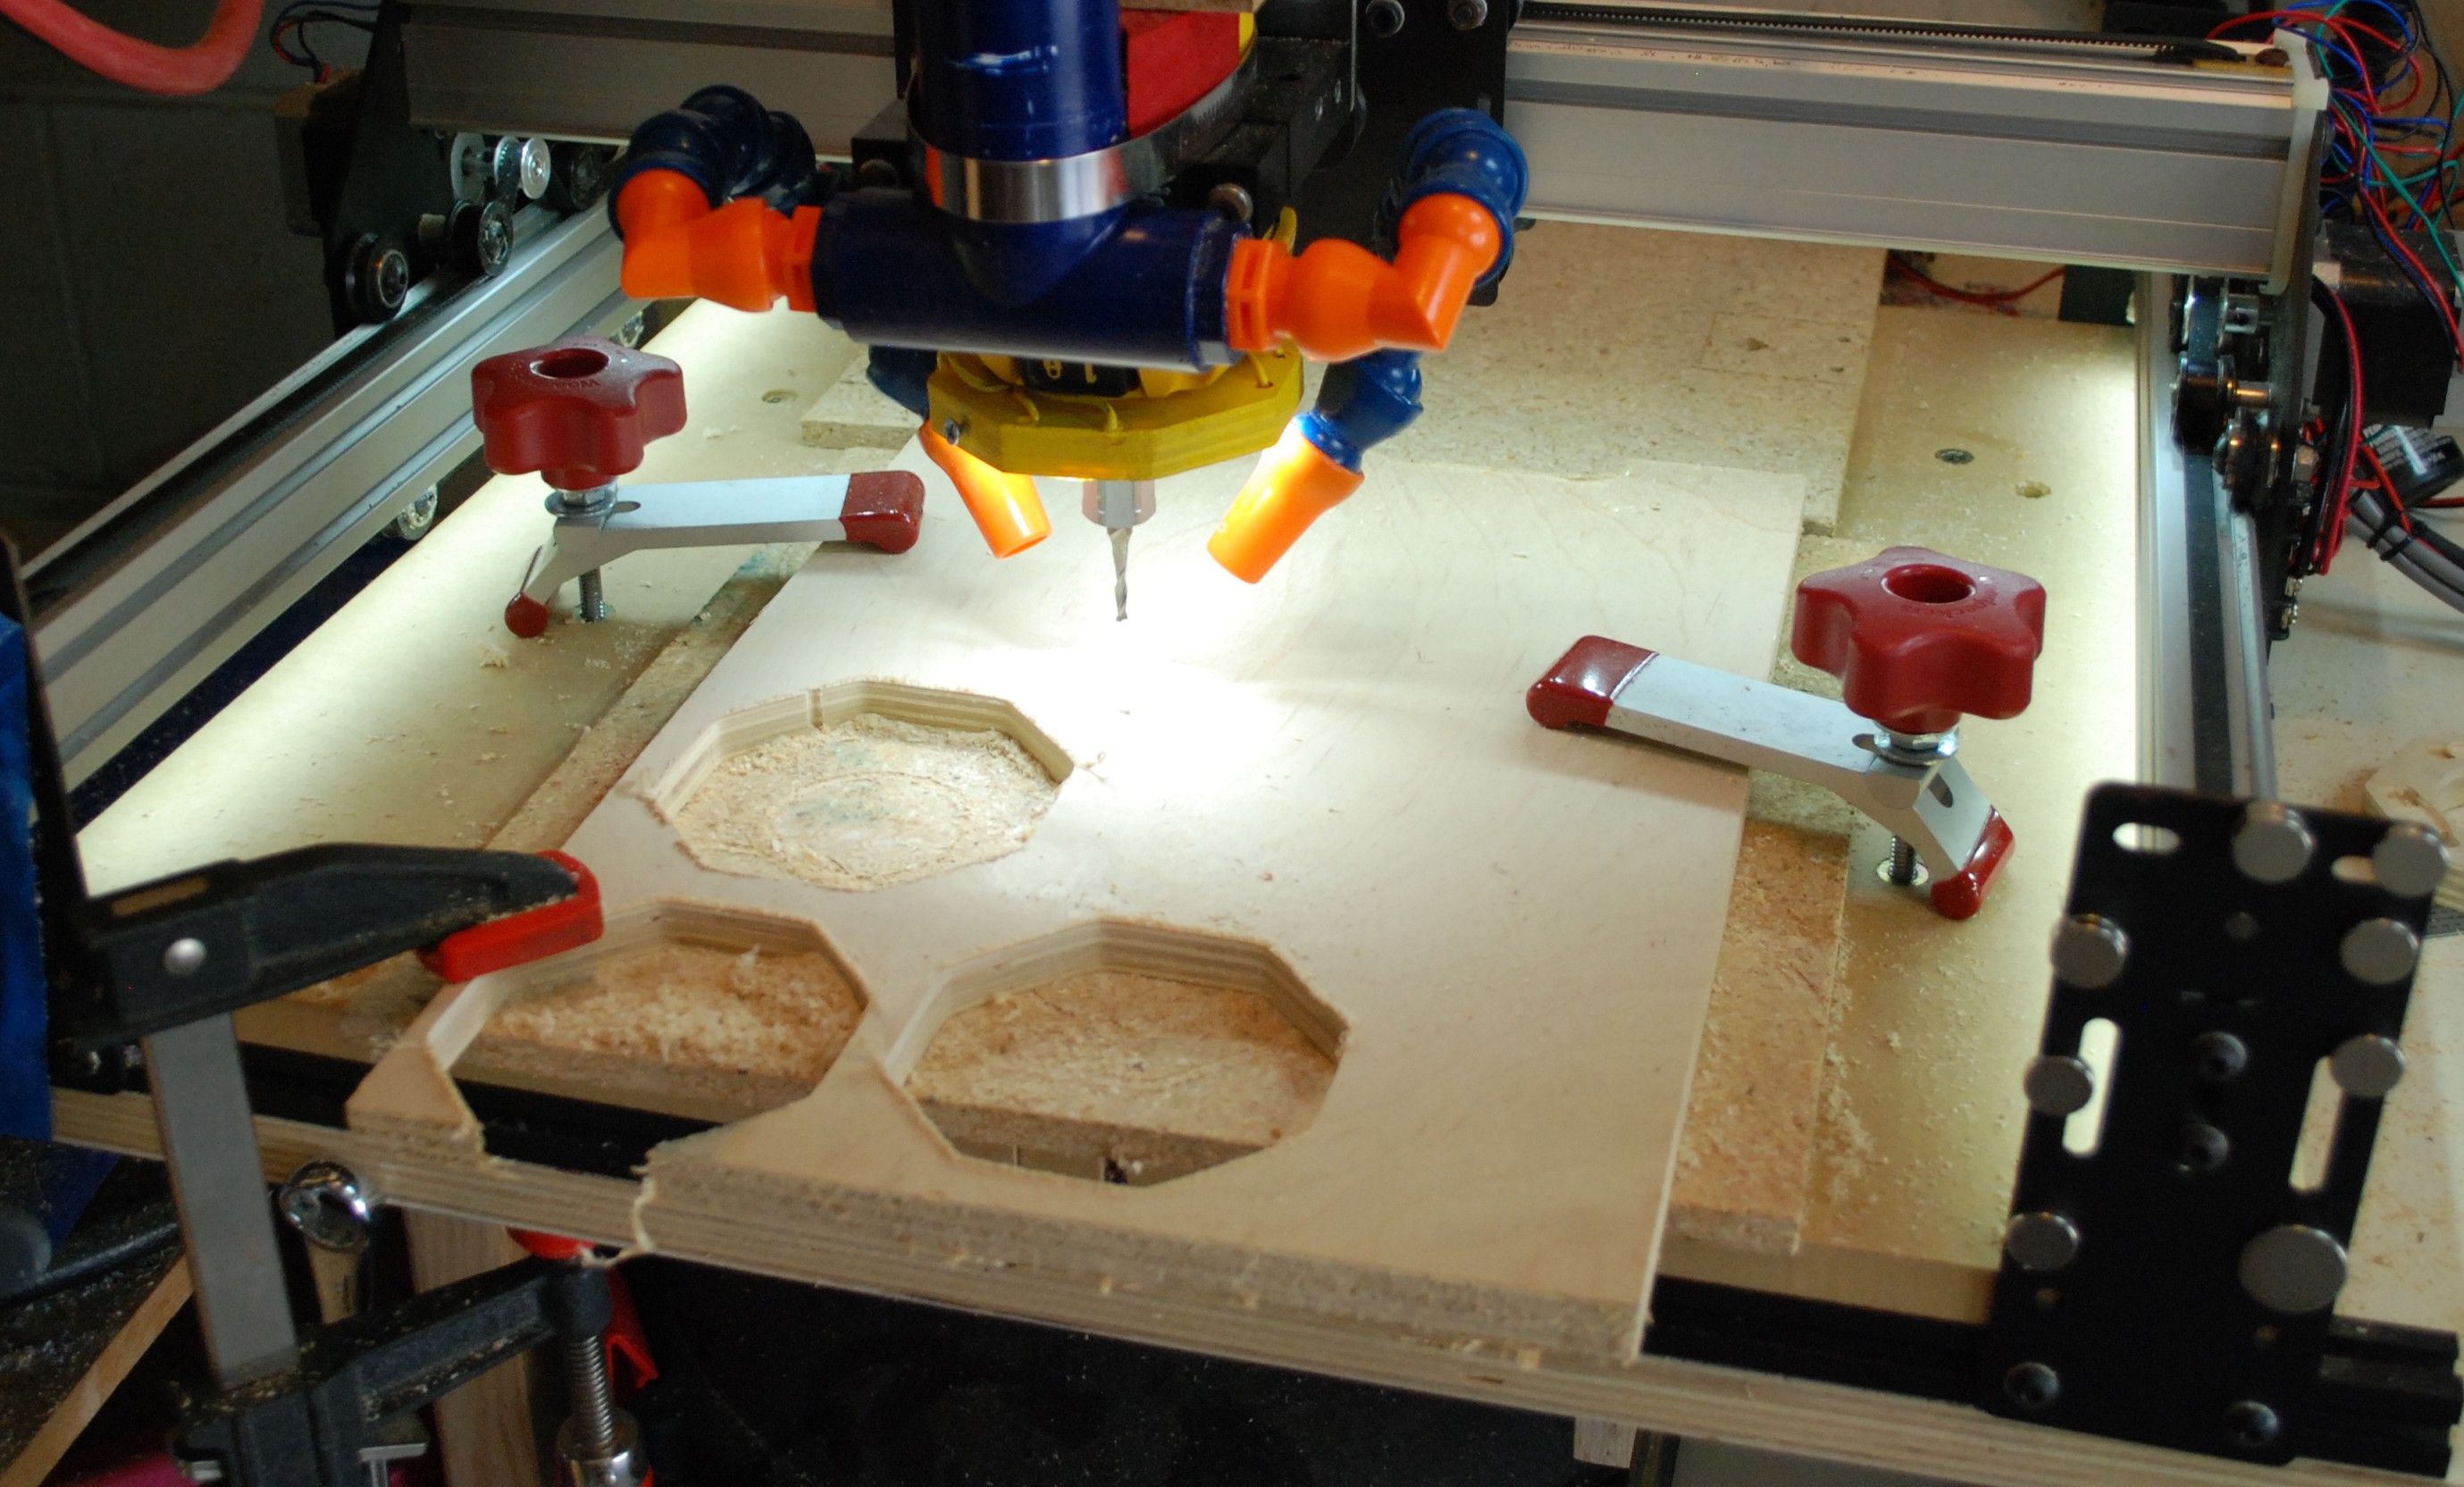
I started with a piece of pine in my mill.  I milled everything in the bit area to the same depth that would accommodate the thick ring with the set screw.  In retrospect I would mill multiple depths so the chuck posts don’t rattle around as much.  Nothing is going to fall out with the lid on, but it would have been nicer and rattled less.

I was thinking about milling some numbering in but It would have required a lot of cam work and careful milling to individually make each number.  Instead I used my punch set to put in corresponding numbers.  A fine black sharpie really makes them pop.  I did the sharpie before I spray lacquered the wood.  The marker bled a bit on the soft pine, doing it the other way around next time would be better.

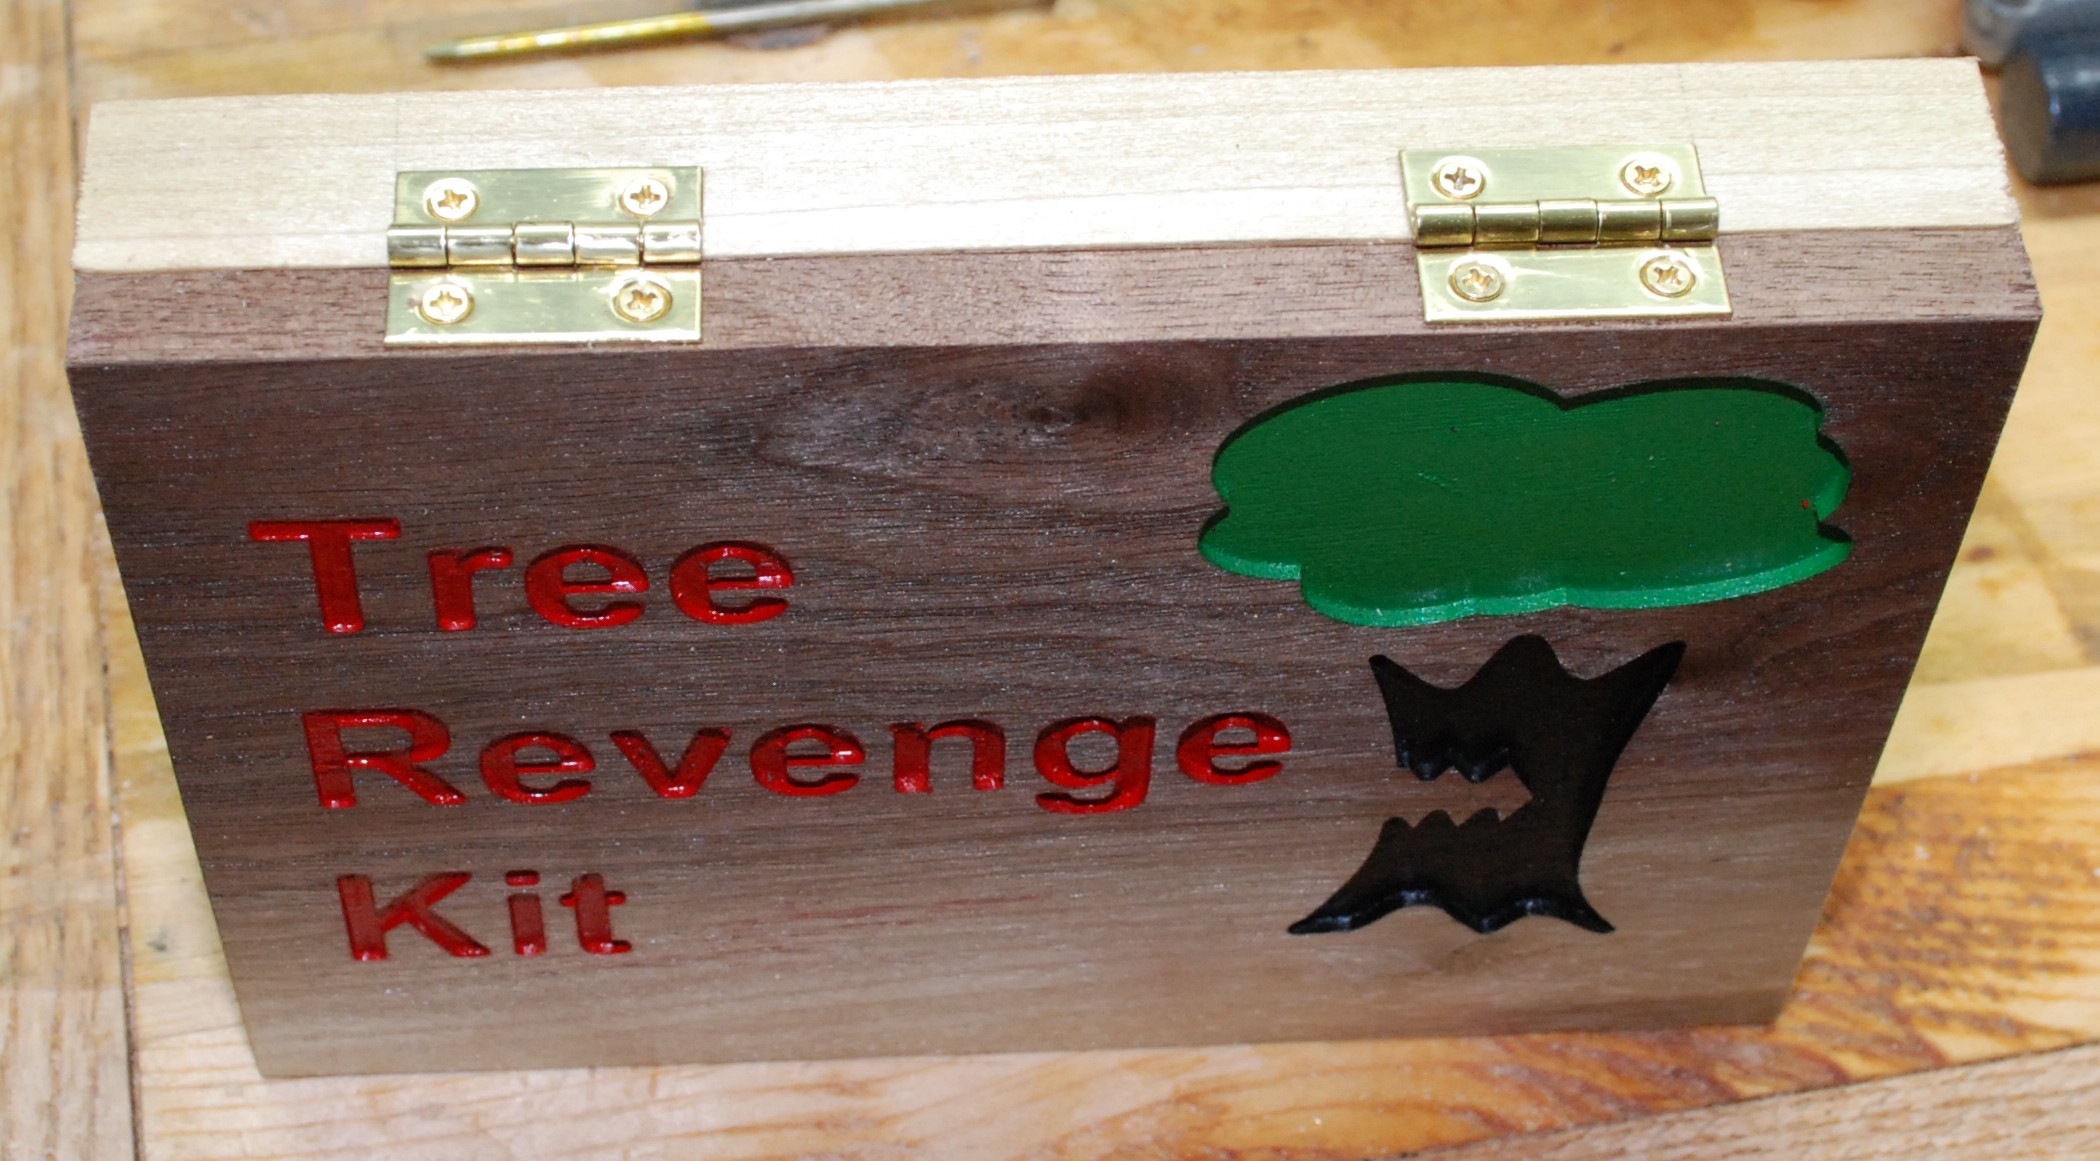
Next I milled a label into the lid and used some acrylic infill to make it really pop.

Everything got a coating of spray lacquer as a protectant.  A simple set of brass hinges made it an official lid, and some magnets keep it closed.  In retrospect, having magnets below each bit would have made this a really snappy cool set.  I guess its not too late!


Bonus Coaster

A co-worker I know is getting a tesla soon, so I figured he needed a nice coaster to go with it.  I was milling the day away, so why not?!  Also I am hoping this will get me a ride or two to lunch.

DSC_0457


Tree Revenge Kit

I love trees!  The whole oxygen-necessary-to-life thing is neat and all, but their dead dried carcasses are where it is really at!  Aged cherry, bright maple, dark smooth walnut.  Every once and a while these trees get their revenge.  Splinters don’t happen often, but when they do… OUCH!  Thus, my Tree Revenge Kit was born.

The kit sits right next to the entry to my shop and contains a single set of tweezers.  I like the ridiculous idea of a monster kit that has all kinds of fancy locks, and when you open it up there is only a small simple thing inside.  This isn’t that extreme, but the box certainly could be a lot smaller.  Or I could just put the tweezers in a drawer.


The Build

This is another mix of woodworking and CNC milling.  The lid is walnut and the base is poplar.  I started by making the top, and milling out the text and tree all in one go.  Each color got masked off and hit with spray paint.  I think this might be my new preferred method of inlaying color into wood.  It is quick and easy, and goes down well over a quick coat of spray lacquer.  Having done a number of color inlay projects at this point, nothing is faster or cleaner than hand planing off the excess paint on top.

Once the lid was cut out and finished I could cut the poplar base to match.  Nothing special was done to it aside from milling out a slot for the tweezers to go in, and some relief cuts for a set of big fingers to pull the tweezers out.

A really funny project would have been to cut the slit, but not the finger relief.  Then, make a tool (with magnets?) to extract the tweezers.  Maybe that tool would get its own box.  It should have a lock to keep people from stealing it.  I digress.

DSC_0214

A set of simple hinges hold the two halves together, and that about wraps it up.

Custom USB Stick With Bonus Disaster

I have a media computer hooked up to a TV that had been running windows 8.  After no end of having system updates failing and reformats I finally replaced it with Ubuntu.  I like the operating system.  It was easy to install, does everything I need on that computer, is fast, and appears stable.  Best of all it is free and can be installed with a USB stick.  I am going to be keeping a copy around from now on.  Might as well have a proper storage stick.

DSC_0200

That is the Ubuntu symbol in case you aren’t familiar.  So my spray painting job isn’t exactly perfect, but I am happy with how this one turned out.  I took a standard USB stick, painted it orange (Ubuntu’s color), then carved the logo into the paint to reveal the white plastic beneath.  It may seem like tons of work just to identify a jump drive, but when you have a mill, things like this MUST be done!

It wasn’t without issue though.  I bought two incase I messed up one.  Good thing too, because I forgot to reset the zero (starting position) in my mill software and plunged an engraving bit straight through the poor thing.

DSC_0197

Yes, that hole goes clean through.  Might as well try again.  The symbol milled into this drive was my second attempt.  It needed minor cleanup, but looks pretty good.  My attempt on the backup USB drive and was the finished product I showed first.

I think this speared usb stick can serve as a good example of what not to do.  Why not keep the engraving going and make myself a reminder sign?  I engraved some outline text into a bit of plywood, and sprayed it with black paint to highlight the lettering.

I went a little overboard with the paint, but after sufficient sanding I got through and had a decent looking set of letters.  I attached the USB stick and placed the new sign on the wall behind my mill.  Hopefully this will help keep me from making future mistakes… Yeah, probably not.

DSC_0199

CNC Mill Ring Light

There is a warm and fuzzy feeling that accompanies using my mill to make something for my mill.  Not quite a self replicating machine, but it helps make itself better.  I finally figured a ring light design I like.

I have made a number of different test parts and played with a few different LEDs before I settled on some LED dome light replacements.  They are from amazon.  They have 4 surface mount LEDs with a resistor built in, and are supplied with 12V.  The metal cones are meant to go into a car’s dome light receptacle.  I removed the cones with a soldering iron to leave a flat solder pads.

DSC_0589I milled a few test pieces and settled on a design that was compact but allowed enough room for the lights.  The mill did a fantastic job on 1/2″ plywood.  Once cut out I popped a quick hole in each pocket for the wires and glued the lights down.  A quick spritz of yellow paint will help it blend in with my dewalt spindle.

It goes right above the bit area, and two screws coming in from either end help hold it in place.  I gathered the red and black wires to a single connector each.  They connect to a set of wires that run up to the 12V that powers the under-mill lighting I installed a while back.

DSC_0026

I could fit more lights in if I wanted, but the 4 “bulbs” look great.  Very bright and easy to see what is going on.  The camera made it look a little blinding, but it is not.

DSC_0022

DSC_0021

I ❤ my mill!

Under-Mill Lighting

I shot some GoPro video a week or two back on my mill.  It was tough to get enough lighting over there.  That area of my shop just isn’t really well lit.  I could crawl up in the attic and try to wire another light, but I will probably move the mill before too long.  In comes LED light strips.  I picked some up to play with a while back and hadn’t gotten around to using them.  They are strips that are largely made of copper foil, the resisters are already installed, and you can cut it every few inches to the length you want.

DSC_0509

These narrow strips will fit perfectly under the rails used in my mill’s gantry system.  You can little double headed clip-on connectors to link multiple segments together or make turns.  I cut the one end off and used them to splice in power.  They have springy tabs that are supposed to connect to the round pads.  I found their connectivity wasn’t very solid, so I shored it up with solder.  Now vibration and movement shouldn’t be a problem.

DSC_0505

With all the connectors soldered and everything cut to length I pulled the backing off and carefully applied it to the underside of all my rail sections.  For the connector end I wrapped a zip tie around them so that any tugs on the cable wouldn’t rip the lighting off.  Everything got wired up in parallel to a 12V supply I bought from a similar amazon vendor.  The results are pretty good.

DSC_0507

DSC_0506

My camera was in full manual mode, so what you see is what you get.  One strip went under each Y rail (front to back) and I was able to sneak two under the X rail (left to right).  This doesn’t completely fix my lighting problems, but it feels a lot better work around the mill.  I will probably come up with some kind of ring light to give really good direct lighting lighting on the bit.

The total cost was about 25 bucks.  I bought a lot bigger power supply than I needed so I can add as many lights as I want.  About half the reel and a pile of connectors are left over.  If I ever make an enclosure It will probably get gobs of this strip lighting.

Loc-Line Vacuum Upgrade

One of the early upgrades I added to my mill was a dust shoe.  It was a copy of a common design in the shapeoko community.  It works, but I have issues with it.  The design relies on a skirt, which is never the length you want and doesn’t work well with small parts and height changes.  The other issue I have is that you can never see what is going on.  Some have created designs with clear materials, but those will get dusty fast.  Lastly the design restricts access to the collet locker.  It makes bit changing a pain.  In comes my savior, Loc-Line.  First a picture of the finished product so we are all on the same page. DSC_0477 They sell 3/4″ Loc-Line for a reasonable price on amazon.  I don’t recommend it however.  The stuff has a large internal diameter, but the bend radius is not tight.  I made an early version of this with the 3/4″ stuff and just couldn’t ever get the nozzle positioned how I wanted.  Instead I recommend this 1/2″ kit from amazon.  It comes with 12 segments, 3 different nozzle diameters, and two threaded NPT adapters.  One is 1/2″ NPT and I think the other is 3/8″.  I used two kits to outfit my mill.

Now is one of the many times I really really want a 3D printer.  I could print a perfect adapter to go from my tapered shop vacuum hose line to these Loc-Line threaded adapters.  Also a 3D printer would let you print all manner of nozzles.  Having some be flat bottomed or concave to sit around the bit would be ideal.  Alas I have no 3D printer, but luckily PVC piping got me there.  My shop vac line fits reasonably well into a 1″ PVC coupler, so I started with that.  I found a great tee to go from 1″ to 3/4″ pipe, and a set of 3/4″ plugs with internal 1/2″ NPT pipe threads.  Loc-Line threaded adapters go into those.  Take a look:

Just for the fun of it I went ahead and painted the PVC tee blue.  Why not add some color to life.  A shaped piece of wood conforms to the spindle on one side and the PVC on the other, and a hose clamp holds it all together.  I forgot to take a picture, but the SVG profile is below and you can see it painted red in the finished shot. rect3476   DSC_0478   Looks stylish, has a lot of adjustability, easy to see what is happening, and easy bit access.  Does it suck though?  I shot some video while finding out.  First I started by pocketing 1.2″ diameter hole as an easy test.  Next I moved onto a deep profile cutout to see if it could suck debris from the bottom of a trench.  As a bonus the nozzles hit the work surface.  Being flexible they moved and didn’t interrupt the mill.  I will probably chew up nozzles over time, but they are cheap enough.  If I had a printer I could make my own on demand!  Someday.  Anywho, video time.

GoPro Zip-Tie and Base Mount

When I was out in California I played around with the GoPro enough to know that I needed a few more accessories.  The first would be a decent base.  That plastic square that comes with the camera is nice, but it slides around and is bigger than it needs to be.  A sturdy non-skid base would be nice.

I picked up a rotating time lapse thing from amazon.  It winds up like an egg timer, and slowly rotates while you take time lapse photos.  It is a pretty sweet toy, but the base is slick, and the item itself is light.  That makes the whole thing top-heavy and likely to slide if what it is sitting on isn’t perfectly stable.

Two birds? One stone!  Enter my new default base!

DSC_0446 Resized

It may not look like much, but the 1/4-20 stud sticking out of the top will screw into my drift lapse base, and with a tripod mount, I can stick my GoPro directly to it.

The body is oak with black paint.  I used the mill to cut out the shape and do the counterbore for a hammer in threaded insert.  A short cut section of all thread epoxied in provides a short stud.  Hot glue holds the drawer liner gripper material.


Zip Tie mount

Zip ties can attach just about anything to just about anything else.  Why not use them to attach a GoPro to just about anything else?  Well, first you need a good zip tie mount!  I milled oak to accept an adhesive mount.  Two grooves allow zip ties to run cross to the camera orientation.  I rounded the edges of the zip tie channels by sawing and chiseling the corners.

I suspect most things I tie this to will be roundish.  A little sanding on the bottom creates a curved relief.  Peel and stick sand paper on the bottom should help it stay still.  Lastly, I wasn’t sure how well the 3M stuff would stick to wood, so I gave it a little 2 part epoxy at the edges.

I am really excited how this one turned out.  I need something to test it out with… how about this?  Spray paint GoPro anyone?  Oh well, it illustrates the point.

DSC_0441 Resized

Shapeoko Z-Knob

I have been wanting a Z-knob for my shapeoko for a while.  Moving that axis up and down by hand is a huge pain.  I typically do it with my xbox controller run via software but the unit isn’t always on, and it is often faster to turn the motors off and rough things in by hand.  Why not make one?

I generated a gear pattern in inkscape and overlaid a circle that would cut out most of the depth of the teeth.  I only wanted some small knobs sticking out for grip.  There are probably better ways to do it, but I am still not an inkscape guru.  The results were pretty cool though!

The plan was to drill horizontally through that beefy shaft, and tap it for a number 10 set screw.  I tried to press the knob onto the shaft of my NEMA 23 Z-motor and it wouldn’t go.  I reamed it out a tiny bit with a 1/4″ bit and tried again.  Once I finally managed to press it into position I realized I could stop.  Instead of going through with a set screw, I should stop.  The press fit turned out to be really good.  I turn off all the motors and it did a bang up job moving the stage up and down.  Success came early!

DSC_0445

DSC_0451

Cricut Cutter Adaptation

I have been trying to adapt a swivel cutter to my Shapeoko for months.  Not constantly, but I have been making lots of little attempts.  Swivel cutters enable you to easily cut small thin materials with CNC regularity and precision.  Paper, plastic and foam sheets, stickers, and hopefully leather.

I started by trying to chuck the swivel cutter directly into my spindle.  The spindle spins fairly freely on its own, and is already well attached to my Z-axis.  Most of that previous statement turned out to be true.  The spinning part wasn’t good enough as it turns out.  The blade didn’t rotate, it just grabbed.

The cutter has a wide flat head where the blade sticks out.  This helps keep the material stuck down and should prevent puckering.  Also, the blade spins much more freely in the cutter than in the spindle.  So ditch that idea, I really have to hold this thing somehow.  Time to build a support.  I went through a few iterations of holders till I came up with this version.  I wouldn’t call it perfect, but I think this will keep me going for a while.   The “square” cutout does a great job of holding the round cricut head once I saw cut it in half.

I machined 1/2″ delrin to hold the cricut head and attach to a 3/4″ down bar.  All the screws were #10-24s with a counterbore.  it made for a cleaner look and keeps the screw heads from interfering with anything.  I attached it to my shapeoko Z-head using two tapped screws into the aluminum bracket that holds my spindle, and two wood screws into the wood version of that bracket I made.  Attaching it to the side lets me keep the spindle in place.  Four screws to add or remove any time I want to use the swivel cutter.

Once everything was attached I made a simple circle with the follow patch operation from maker cam.  It cut well, but I held everything by hand.  My fingers slipped a little and the circle had a zag in the side of it.

DSC_0336 ResizedThe blade works well, but the clamp doesn’t.  Time to use the little grey cells!  I found a big 16gauge plate of metal, and stuck it under my cutting mat.  Magnets did a good job of holding the paper while keeping a low profile.

DSC_0360 ResizedNow that is a pretty decent looking circle.  I like it, lets move on to something more complicated and see if the swivel cutter can keep up.  If you search “fancy rectangles” you get a lot of great results.

DSC_0362 Resized

Another small tear where the magnets didn’t hold well enough.  I am getting some monster half inch ones on order.  Until then my clamping is going to be a little dodgy.  I used the same pattern to cut out some fancy rectangles from a sheet of vinyl chalkboard material.  Now I can make custom labeling stickers for anything I want.

Paper CHECK! Vinyl stickers CHECK!  I was feeling confident and went on to leather cutting.  It didn’t turn out well.  The blade can protrude far enough to get through the leather, but my Shapeoko lacks the power to drag it through.  Trying to do multiple passes didn’t work out well either.  The machine lifted after each pass and tried pulling the blade out.  The blade is only held in with a small magnet, so any pulling force will pluck it out.  The leather gripped it well enough to partially remove the blade.  When it tried to move the blade was stuck and it ended up breaking the tip off.

DSC_0365 Resized

My best results scored the leather but did not cut through.  I will order more blades and try again, but it doesn’t look good for leather.


Inlay Success (almost)

I think I finally finished my inlay journey.  See previous attempts herehere and here.   I made two different wooden projects with inlay, and aside from leaving out one important step, they turned out well.  The projects are my the “Cube Sweet Cube” signs that I have attempted to make over and over again, and a baseball bat trophy thing for my little cousin.  He is into tee ball, and has some game winning balls to display.

I milled out a deeper pocket (0.05″) and instead of filling it completely with paint, which didn’t go well, just tried to coat the inside surfaces with paint.  Thinning the acrylic with a little water helped it coat evenly.

The results were pretty good, the color was consistent, there wasn’t a voiding issue, and the surface planed clean really quickly and easily.  This was due to the very thin layer of paint on top.  The only thing that went wrong was a little bleeding into the grain.  It is worse on the red than the black.  The oak didn’t do this as bad as the pine did.  I was lazy and didn’t do any sealing, so I only have myself to blame.  No we know that is important!

5


Final Procedure

  1. Mill text pocket with either flat or round bottom mill to at least 0.05″ deep.
  2. Spray area with a sealer such as spray lacquer.  It is cheap and dries quickly.
  3. Mix desired acrylic paint color with a small bit of water to make it spread easily.
  4. Let dry overnight and either sand or plane off excess paint on top.

Trophy Bat

I used the shapeoko to mill out the somewhat complex area around the handle.  I could have cut this with drill bit and band saw, but this was quick and came out really well.  I don’t have enough travel to do the whole thing, so I finished the rest of it with my bandsaw.  A forstner bit made pockets for holding the balls, and a quick trip around the router made a nice round over.