I got my second publication! August 2018 edition of Popular Woodworking has this fine tip. I really like the illustration they did for it. It looks just like my picture from my post.

I got my second publication! August 2018 edition of Popular Woodworking has this fine tip. I really like the illustration they did for it. It looks just like my picture from my post.
*Update* I got this thing published!
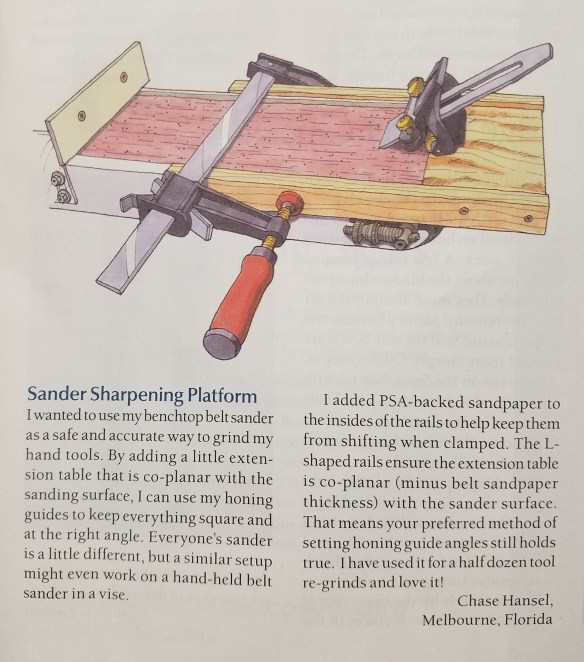
I have been wanting to move my hand tool grinding to a belt sander. My hand grinder works, but is really tough to get an accurate angle. Also despite the slow speed I have still managed to burn blades on it. Belt sanders remove material more slowly, but don’t get nearly as hot. The build is hard to explain, so I will start with the finished product.

It is essentially a small flat surface that sits on the same plane as the moving sanding belt. Because the table isn’t moving you can use your favorite honing guide jig to keep a really accurate angle.
The table is held in place with an “L” shaped piece of wood. I cut the groove on the table saw wide enough to catch the top of the sander surface, but not so wide it interferes with the moving belt.

I attached a piece of plywood to the inside of that L so that the top of the plywood would be co-planar with the top of the sander.


I took the table surface to the belt sander to cut that angled shape. It needs to conform as closely as possible to the flat top of the sander so you don’t end up grinding on the rounded section of the belt sander. I had issues with the pine sliding on the painted sander sides so I threw a few pieces of PSA backed sand paper on it to prevent the jig from sliding around. Finally a clamp keeps it all in place and very stable.

I reground a plane blade and a few chisels that needed resetting or bevel changes. The little table worked like a charm. I can go from the belt grinder to my honing stones without even taking the tool out of the honing guide!
I printed a freehand sharpening guide for my Ken Onion Work Sharp, and found it works a lot better than the guides that come with it for odd knife and handle shapes. Honestly at this point, it is the only way I sharpen with this tool.
Don’t own a 3D printer, no problem. Just cut a block of wood with the desired angles and sight down the edge of the wood.
I have a norton 4000/8000 grit waterstone that I use for most of my finer sharpening. It is a good stone, but requires soaking before using, needs frequent flattening, and you have to squirt water on it often when sharpening. I have made many messes on my bench while using the stone to sharpen and decided to try something else. Operating it at the sink makes the most sense. I had a long piece of UHMW plastic that would make a good starting point for a waterstone saddle.

The plastic is rigid, impervious to water, and left over from my table saw conversion (aka free). The tricky part was how to hold it down. I want it to be removable so screwing it down wasn’t an option. I went around and around thinking about it until I just printed something.
Two of these funny hook shapes sit really snugly on the top rim of my garage sink. A dab of hot glue on top held the plastic plank in place temporarily. I flipped it over and screwed the hooks on from the under side. You can screw into UHMW plastic, but you want to pre-drill and not over tighten.


With a really solid platform established I printed some cleats to keep the stone in place. I used the same hot glue trick to tack the cleats so I could drill and screw them without any sliding around.


I have used this a few times since making the saddle and it works well. I might add some kind of lip to keep sprayed water and swarf from dripping outside of the sink. Otherwise this keeps the waterstone in its natural aquatic environment.
While I was working on all of that I printed a rag hook that clips on under the lip of the sink to keep an old shirt nearby but out of the way for drying hands. Printing fixes everything.


I don’t always build sharpening equipment, but when I do I go overboard. With a more stable work station I can get deeper down the sharpening rabbit hole and focus on doing better work. I am trying to take sharpening from an afterthought to an everyday part of my woodworking. This post’s focus is going to be on flat backs.
It is important to have flat chisel backs and for the last inch or two of your plane irons to be flat. Pushing down on a small area gives me hand cramps after a while. I always want to cut corners in this area, but need to get better. Ideally when human frailty becomes a process issue I would advocate for robotics. I am not that rich, so a helper jig will have to do.
I started with the idea of embedding some magnets in a block of wood sized right to fit in your hand. Instead I found this magjig switchable magnet. It has a lot of force when you rotate the knob and align the magnets. I thought about woodworking a handle of some sort, but printing turned out to be a lot easier.


The magnet is be better than hands even without the printed parts, but they help spread the force over a larger area of the chisel, and makes for a better handle.

I made a gif of it in action. It holds really well and lets me put downward pressure across the chisel while controlling the back and forth motion. This works well on wider chisels, narrow ones don’t take long to flatten. Added to thingiverse.

Plane blades are a lot wider and thinner. That makes the magnet option harder. This jig I found in a popular woodworking article won’t have that issue. I started with a quite lovely short piece of maple.

I used to never make a jig out of anything but the cheapest material I could find. Now I am starting to get the idea of the jigs being tough and good looking themselves. That having been said, I made a complete hack job of this slot. It was an odd size so none of my chisels quite worked. I drilled out a little pocket so my handle bolt wouldn’t spin.


A big mushroom handle on top lets me grip with the whole hand and have a lot of control and force. The slot allows for a wide range of plane blades to be clamped.


It probably isn’t the best mirror polish the back of a plane blade has ever seen, but it is hands down the best I have ever done. Plus, it is a jack plane, so perfection isn’t exactly required.


I played around with the jig for a while before applying a finish. I made a second hole on the other side to move the handle closer to the edge. That seemed to control a little better. Adjustment there might be nice in the next version. The bolt that clamps down the blade was an issue too. I could only tighten so far before the head would spin. Sometimes the blade would want to rotate. I thinned a scrap of maple and cut another pocket. Now there is wood on metal instead of metal on metal (no chance of damaging the blade), and I can tighten to my hearts content.
Lastly a touch of tung oil made everything look gorgeous. This thing will probably be black with grinding good in a month, but for now it is gorgeous.


I built a sharpening station last year and like it a lot. It has one issue though. The whole thing wobbles badly during use. The casters and small base don’t make a good combination. I came up with a solution in this video:
It took a bit of messing around with feet material, but felt will work just fine for now. I might find some kind of heavy duty rubber feet for longer term use. Until then, stay sharp my friends!
Sharpening is one of those things that you know you should do often, but always gets put off. It is often said 90% of your problems with hand tools can be fixed by proper sharpening. I am getting better at free hand sharpening, and getting less lazy over time. It is hard to always have some dedicated space to sharpening though. I read an article in Fine Woodworking Magazine where someone suggested using a basic tool box plus custom top as a sharpening station. It is portable to follow you around the shop, and has all the right stuff where you need it. Instead of buying something I decided to stash bust and build one.


I have a ton of 3/4″ plywood around from my temporary kitchen counter tops, and some left over spares from the cabinet installation. I turned them into a 16×16 open fronted box, along with a few drawers.
Given that the case and drawers would be short I didn’t want to use my normal method of attachment. This typically involves building the drawer to just below the inside width of the box, and using pine as runners. It is quick and easy, but the drawers fall out if you pull too far. Instead I went with metal slides, and got to use my new drawer install tools.


I picked up a slide install tool and drawer guides from rockler. They help a lot, but are a little awkward to use. I wish I had do more research before buying. I think kreg might have a better system.
Instead of using some kind of gripy surface to hold all the various plates and stones in place I went with a small vise.


On the left is a small work surface with bench dog clamps to help hold sharpening plates. It is offset to the left to prevent drawer interference. On the right is a small granite surface plate I had. I added a protective cover to it eventually (seen in later photos). Now I can use whatever method of hand sharpening best fits the situation of the tool.

I built 3 sets of drawers to start with because it was all I thought I would need. Then I found enough stuff to add a 4th drawer. Once that was built and installed I found enough for a 5th. I probably have too much sharpening junk.


The project ended up stretching out over a month as I worked on other things and came back with more ideas. In that time I used a few different pieces of plywood for the front face of the drawers, so they don’t match well. I did cook up a cool side caddy for honing fluids though.

In all I think I am going to like it. It rolls nicely, tucks away under one of my other benches that didn’t have a use for that space, holds a lot of stuff in the drawers, and even has space on the bottom shelf for my work sharp tool box and saw sharpening clamp. The only thing it might need is weight in the bottom to help with stability. Now I have no excuse not to sharpen early and often.

There is a sharpening system known as scary sharp. It typically involves adhering sand paper down to glass plates. Start at a high grit, and sharpen your tool down through the grits. It is perfectly valid, and can give you a great edge. The only issue is the cost of sandpaper adds up.
If you only have a few tools to sharpen, it works great. Sometimes you want to clean up a really rough ebay tool, and don’t want to use a nice diamond stone on a rusty hulk. Flattening water stones is rough work, and best done with disposable sand paper. They can help flatten issues on cast iron tables. Basically lots of good uses.
I have some decent diamond stones, but still wanted some glass plates to do occasional sharpening and clean up with sand paper. I went to a local glass company and told them I wanted 1/4″ 4×10″ float glass for this purpose. I ended up paying 50 bucks for 9 plates. The edges are a little rough, but not sharp. Just not pretty. They even put nice little square foam pads as feet.
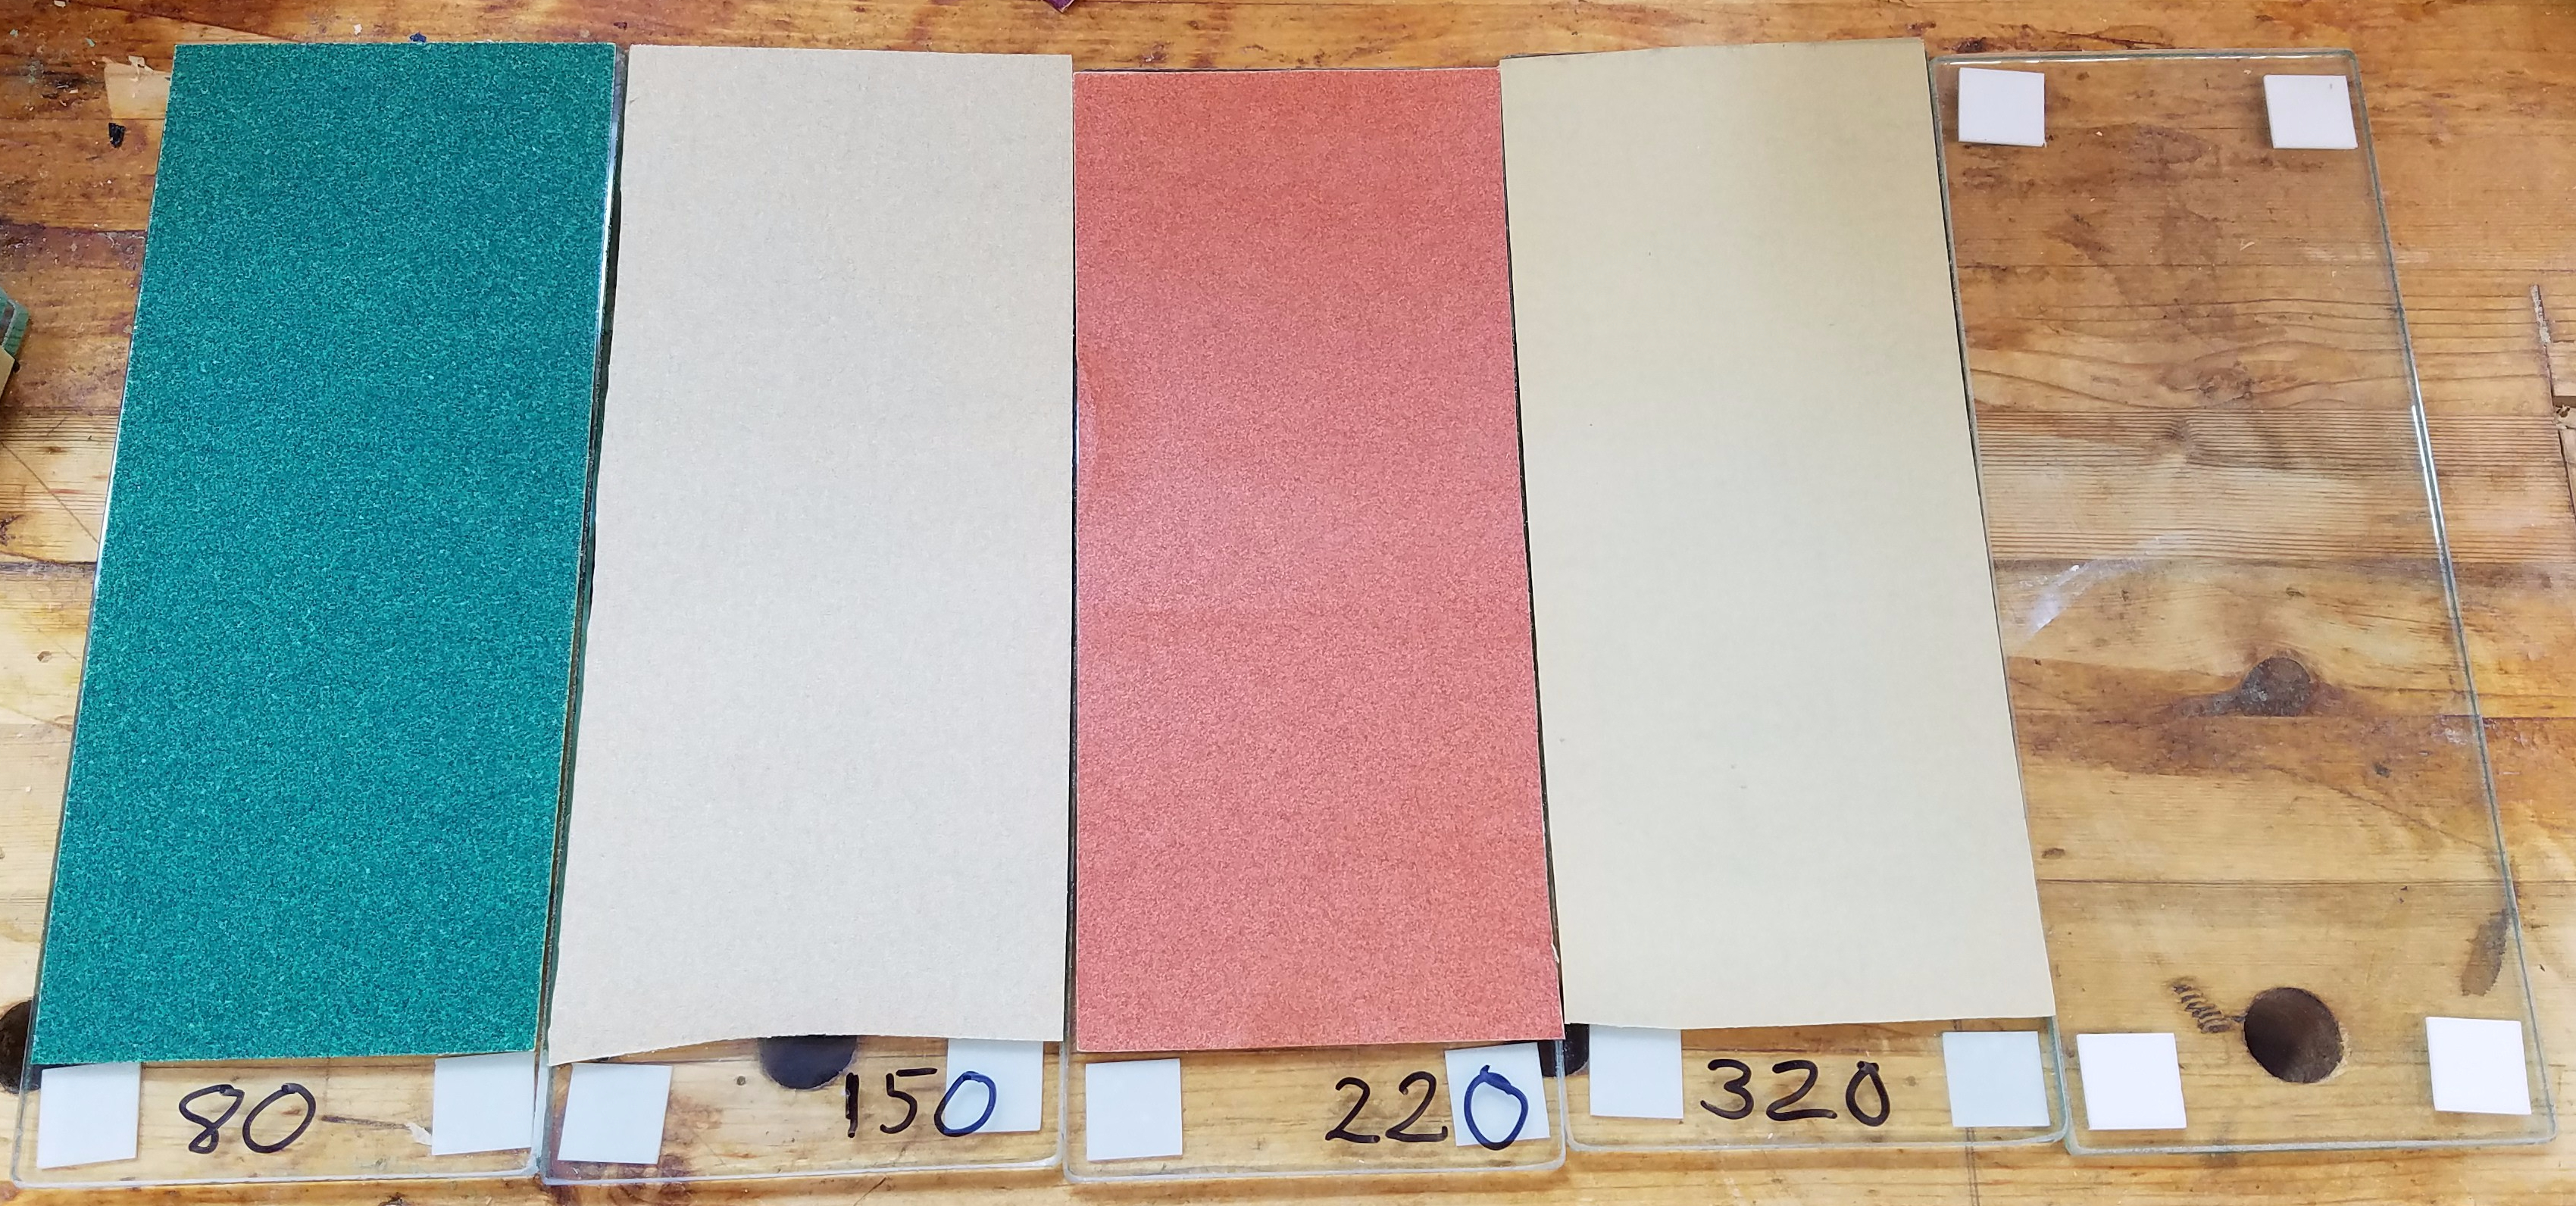
I am tickled pink at how nice and affordable these were. I don’t plan on using them a lot, but at the price I got how could I not go for a pile? This is probably a stash beyond life expectancy! I would urge woodworkers and tool users that need to sharpen flat objects to go to their local glass shop and see what they can do. A little super 77 spray adhesive to stick the paper down, and a sharpie, and you are in business.
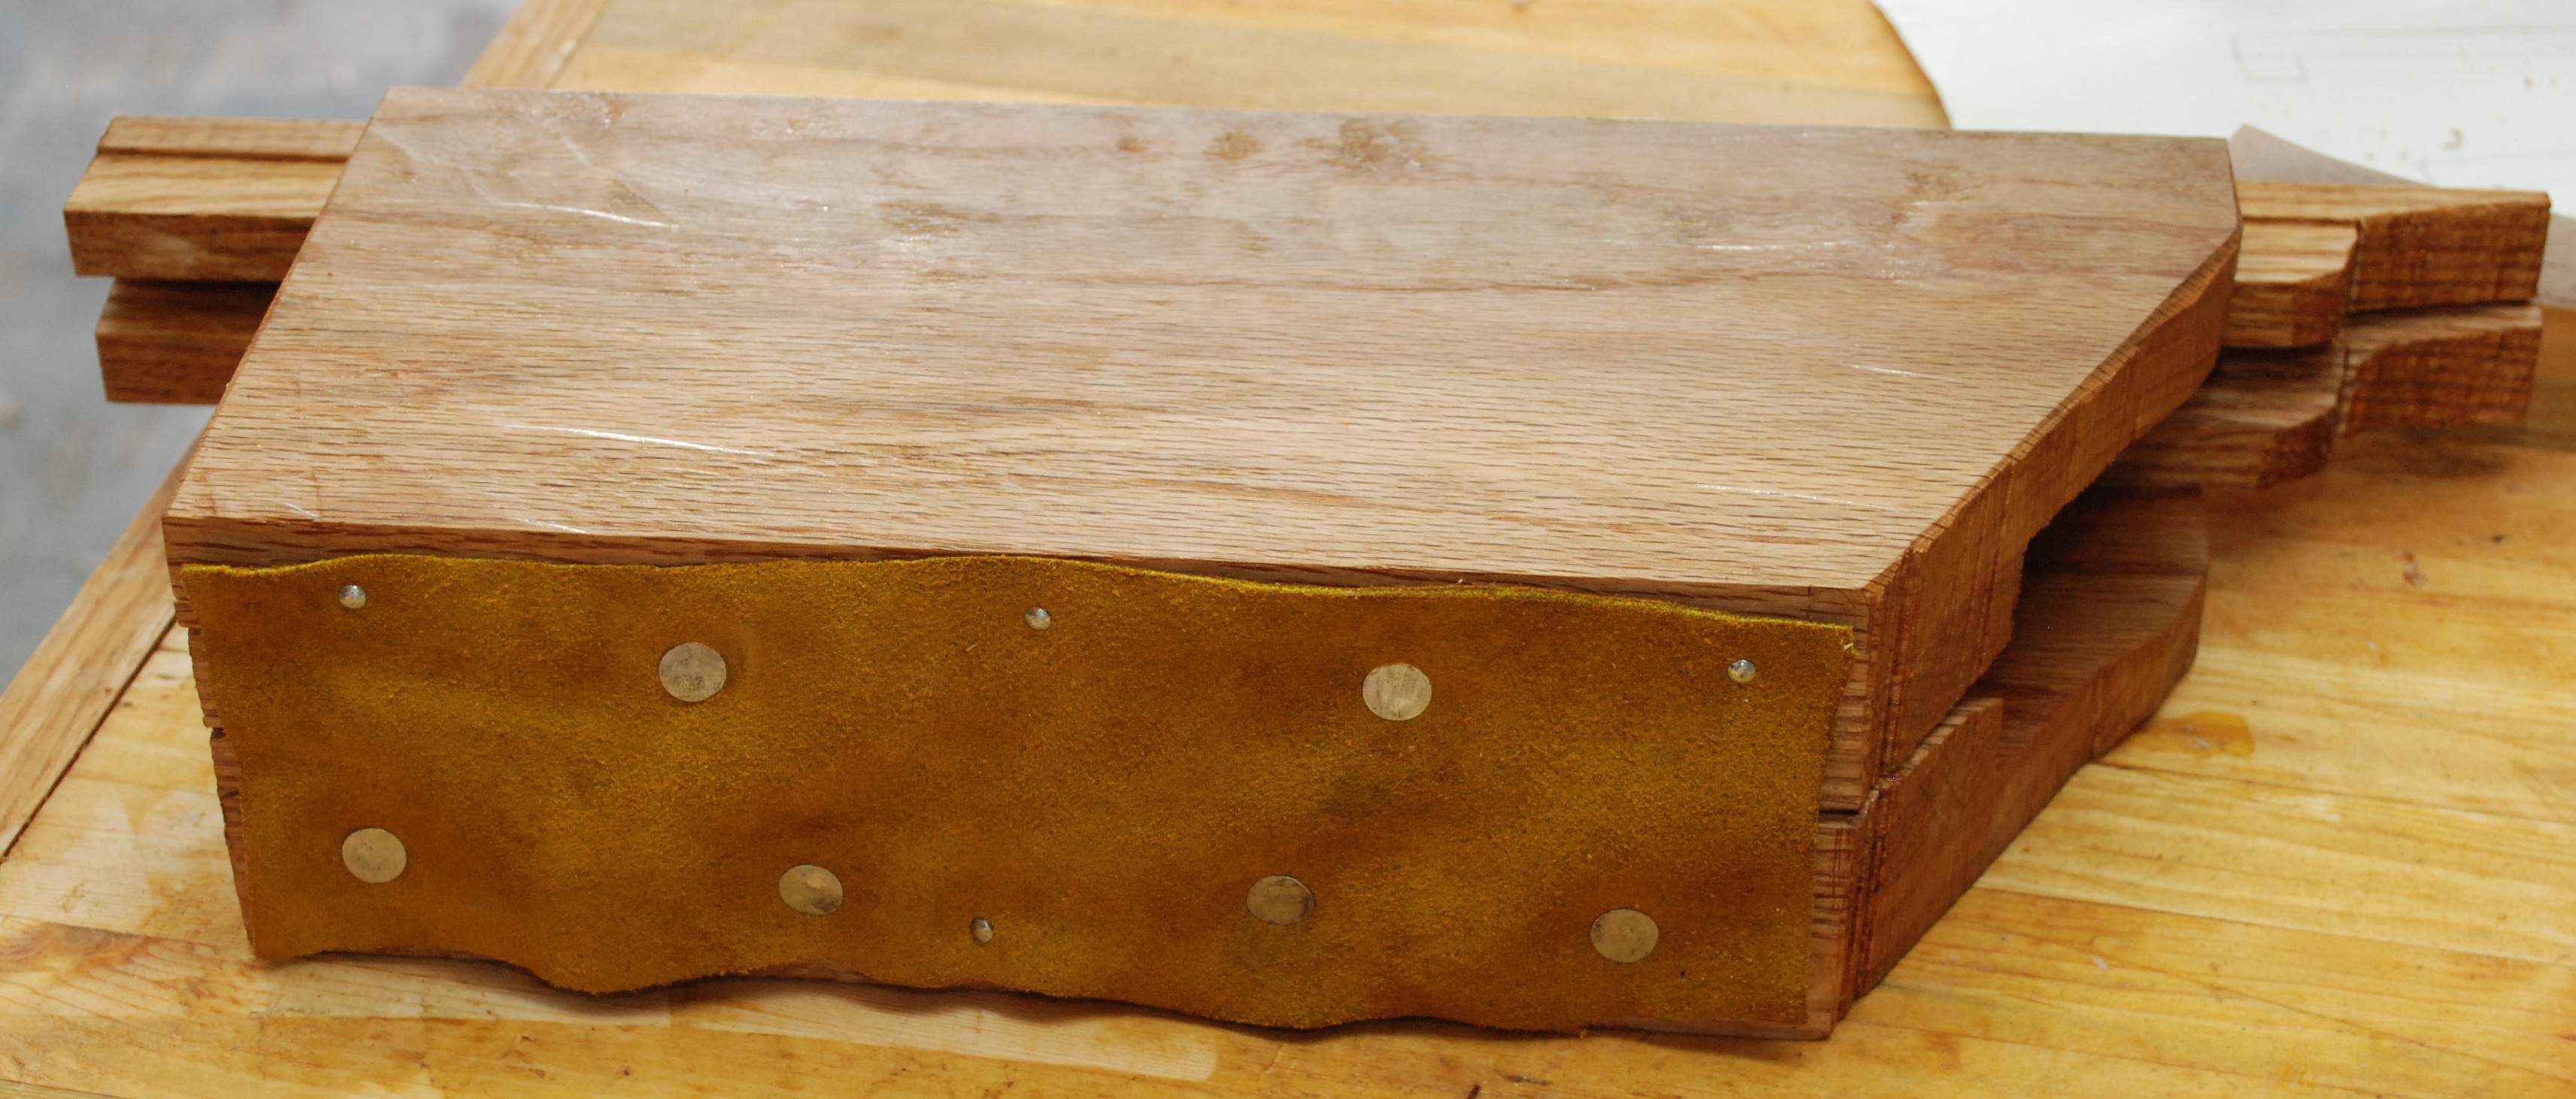
My Summer Saw Stravaganza! began with a lovely saw bench pair, and will continue with this saw vice. It is used to clamp a saw very near its teeth during sharpening. The design is similar to a number of others out there, but with dimensions that matched the scraps I had around.

The long pieces will contact the saw. I wanted them proud of the side plates to allow for more clearance for sharpening files, and depth for big saws. To align them during clamping I used my rabbet plane to make a shallow alignment recess.


Once both halves were glued up I took a rough plane and did some shaping. The bottom cleat was relieved at the top so I could get a taller saw in, and to make sure it pivots at the bottom. The top got a lot of rounding and relief to help the files have clearance. Lastly, the inside of the top jaws was sloped to make sure that the clamp engages at the very top, right below where the teeth will be.

I love hand tools for doing stuff like this. This is a rough jig and doesn’t require everything to look perfect. I can grab a plane and shave a little here and a little there. To help support saw teeth close to the handle I had to cut a number of notches out of the one side. It was mostly setup for by biggest rip saw, but should help accommodate all my saws.


I am happy with the results. This could operate as is, but I have seen people nail a strip of leather across the bottom to help act as a hinge. I used really light leather, so it doesn’t help much, but it should improve alignment while clamping. Before the leather went on I hit it with a coating of boiled linseed oil. Up next I will take some of my saws and attempt to refurbish them.
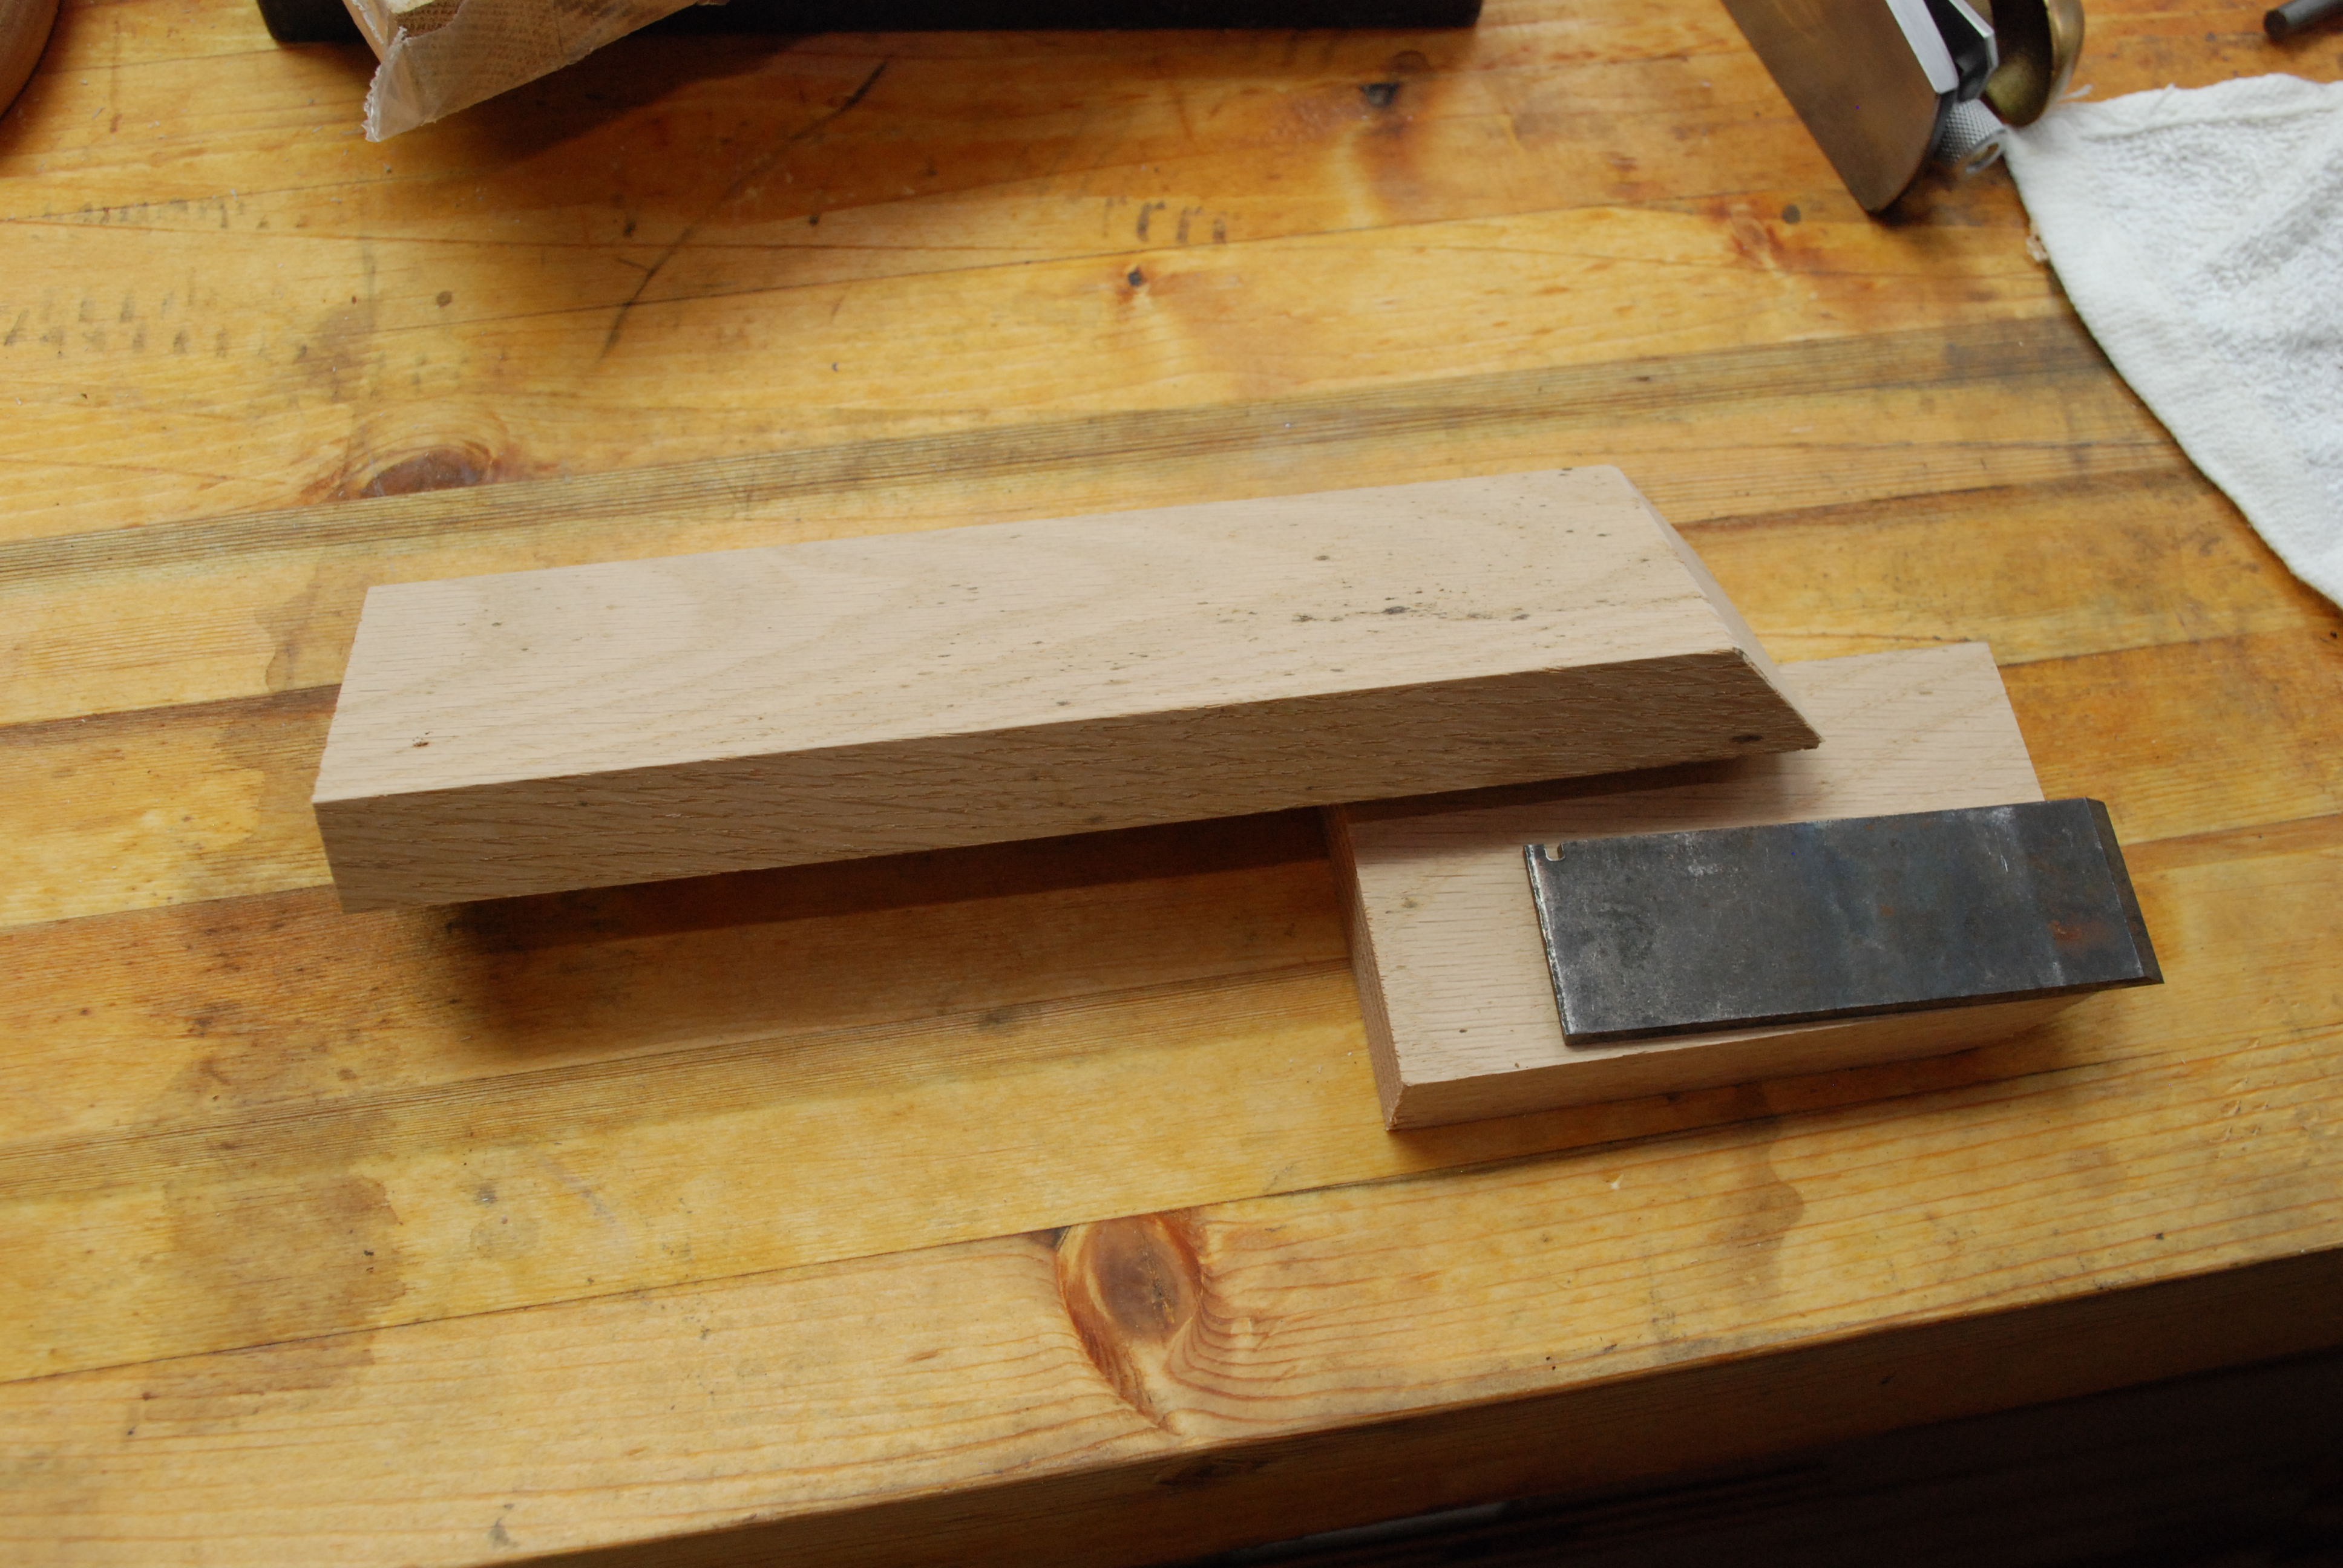
I recently picked up a Stanley no 45 plane. It has a lot of different blades associated with it. They can make beads, coves, fancy edges, and all sorts of shapes. The trick is that you have to sharpen each one by hand. There really isn’t much in the way of jigs to do the sharpening for you. That having been said, I did have an idea of how to help. A clamp that holds the small blades firmly, and indicates the angle used for sharpening. Finished product first!
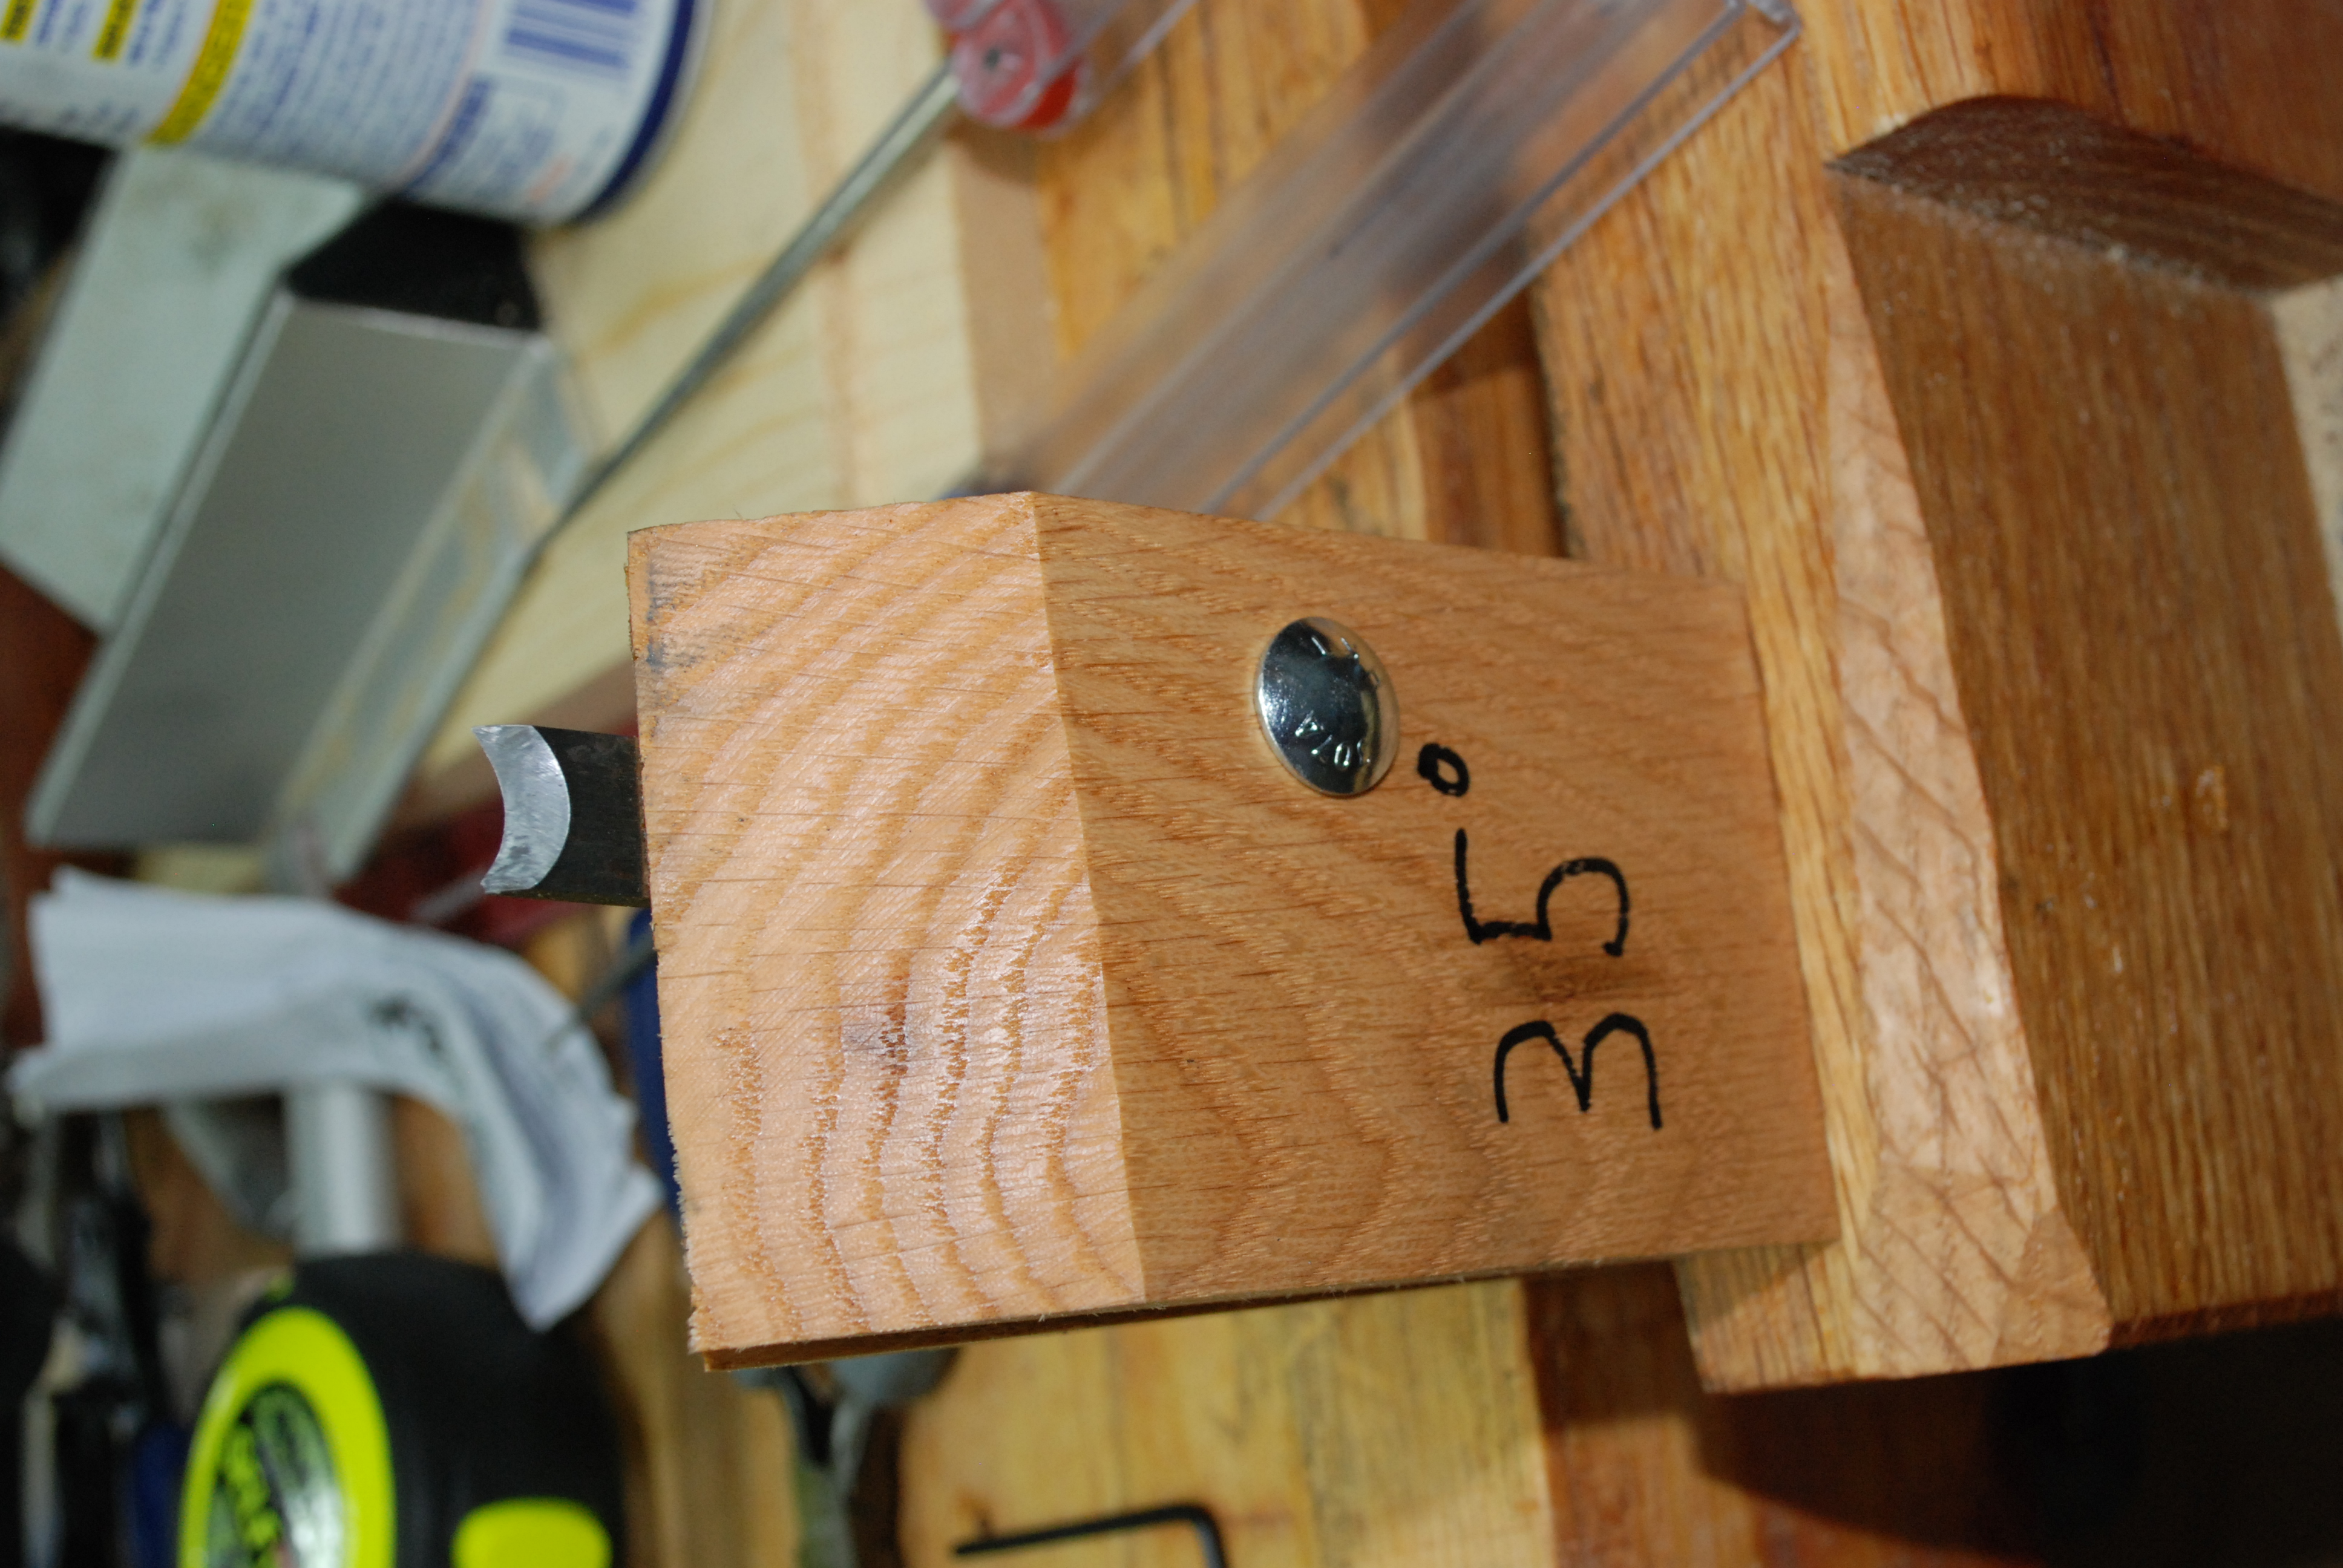 There is a long half the drops down into my vice, and a mobile half the opens up and lets me position the blade to be sharpened. I cut the top edges to 35 and 40 degrees. They help provide a loose guide while sharpening. It still comes down to your skill on sharpening, but it should keep me from getting too out of whack.
I started with two pieces of oak and cut their ends to the proper angle. In reality, I cut the wrong angles because I used the numbers on the miter saw. Oops, I needed 90 degrees minus that number. The correct angles show up in later photos.
Next I drilled an offset hole for a 1/4″-20 bolt and threaded handle. My hope was that It would be enough to hold a single blade with out rotating too badly once clamped.

If at first you don’t succeed destroy all evidence you ever tried. I guess by posting this I am not following that rule. I grabbed a piece of scrap oak, glued it to the inside of the clamp opposite where the blade will be, and shaved it down to the blade thickness. Low and behold the extra little part helps keep the clamp aligned and gripped firmly across the face of the blade. I played with it a bit and am happy with the results. Marking the angles will help me set the primary bevel and micro-bevel without confusion. Boiled linseed oil should keep the wood protected.


