I built a new drill press table when I dropped my press before the move. It was a good table for how quickly I turned it around with what I had on hand. There are a few issues though. I made it small because my last one was too big and would collect junk storage. It is a little too small and stuff overhangs a lot. The 2.5″ insert is a lot smaller than many of the bits I use, which means the top has a lot of damage from my 4″ hole saw. More importantly though, the fence is unusable. I put the t-tracks right in line with the rotating handle. Every time you bring the press down it bonks on the fence knob. A few inches to the left or right and things would have been fine.
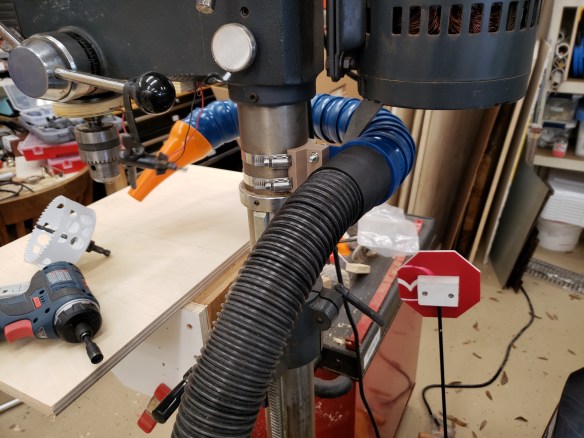
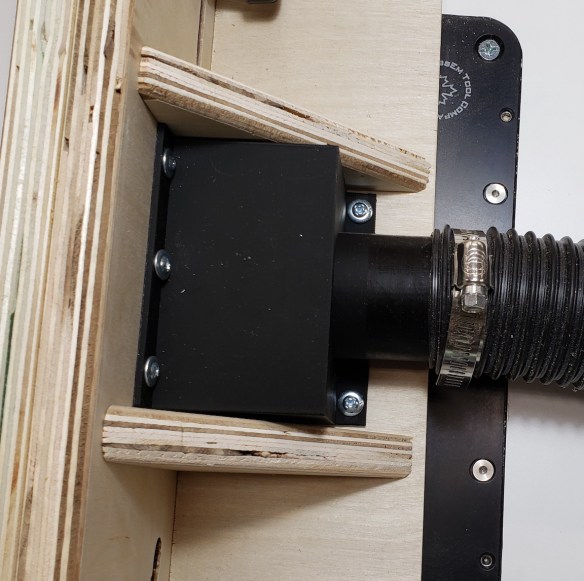
To start with, I had been fussing around with dust collection solutions on my drill press for ages. I finally broke down and bought some big locline hosing (blue and orange in the pictures below) and 3D printed an adapter to attach it to the back column. The adapter has passages for hose clamps to pass through it and clamp it securely. I had already wired in a switch at the front, so you just turn the vacuum on and start drilling.
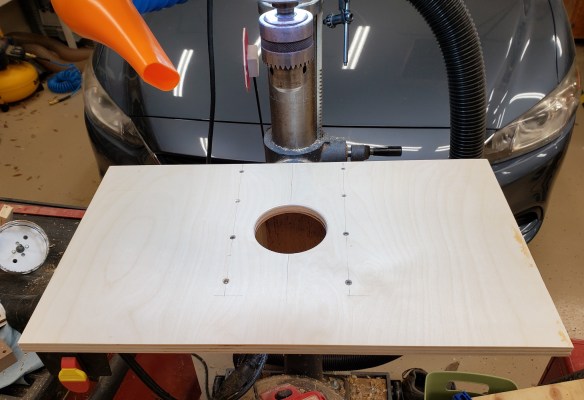
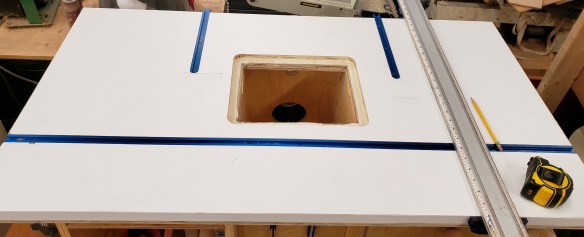
With dust collection solved, I attached the first layer of the table top. The large hole in the center will let me reach up from underneath and pop out the top table’s insert. Notice the dust collection switch already attached at the bottom left.
Next I printed a template and routed out a square section for the inserts to go into. Previously I had a smaller insert. I found myself using the 3 and 4″ hole saw at the drill press often, and it damaged the tabletop outside of the insert area. This new one is 4.5″ wide. I cut a pile of inserts to make sure I wasn’t going to run out anytime soon. They got their corners and bottom edges rounded to fit in the cutout better and prevent dust in the corners from letting them sit properly.
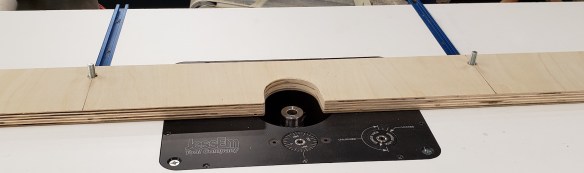
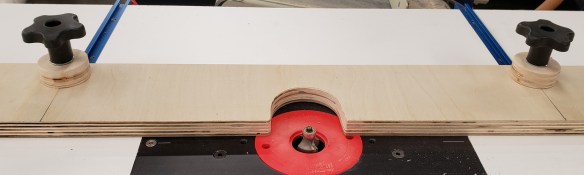
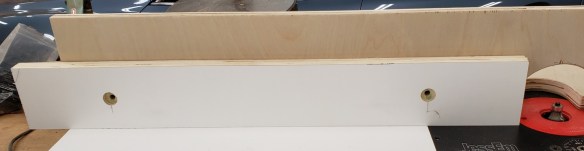
Last but not least I made up a set of fences. I find myself rarely clamping to the fence, and often wishing it was very short. I made both a tall fence, that could have stop blocks clamped to it, as well as a flat fence. The t-track is far enough out on the table and the clamp knobs are short enough that the drill press handle shouldn’t ever be an issue.
I have been using my new router setup for a number of weeks now. The lift is fantastic, the top is a little wonky and too soft, and the fence is barely adequate. I am settled enough on some of my other projects and have spent some time thinking out how I want to build a final top and fence. So, let’s get building and address all the issues my first top created.
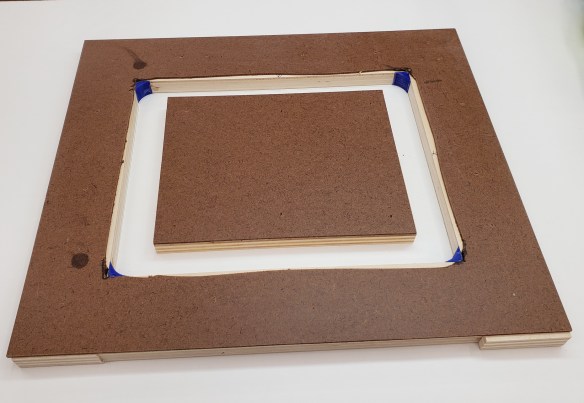
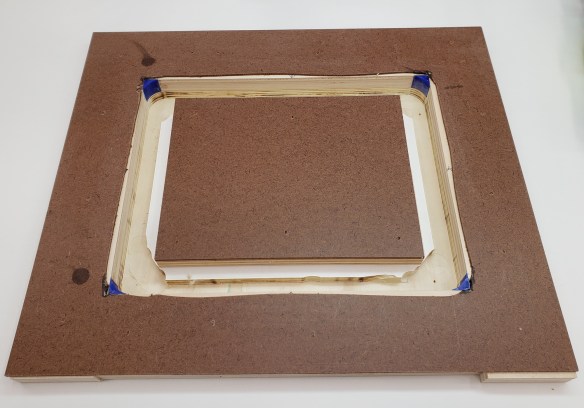
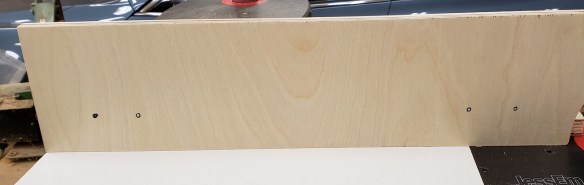
The first thing to fix is the cutout the router lift fits into. The radius required is a size of router bit I don’t have. My last attempt didn’t go well. This time, I have a good plan. First, I put the router lift down on a piece of hardboard and snugged up pieces of plywood next to it. I then glued and weighted the plywood to the hardboard so it would provide a very tight hold of the lift top plate.
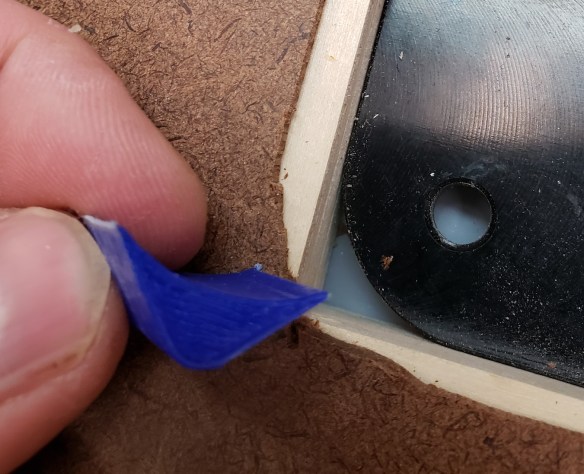
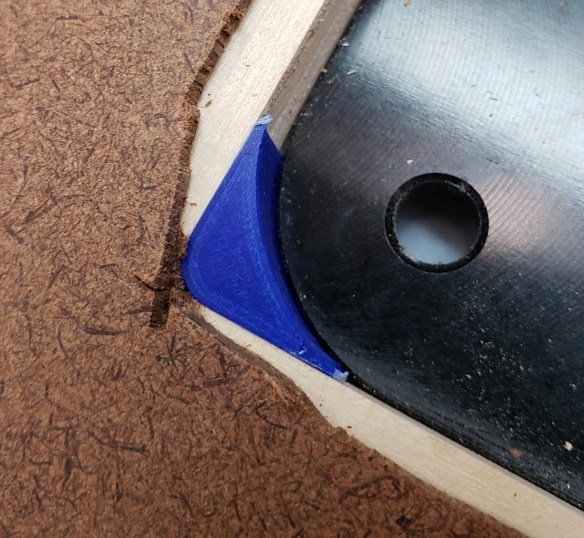
That all made the edges fit snugly, so I know there won’t be any wiggle when I drop the router lift in. Next, to solve the radius problem I just 3D printed some corners that take up the extra space. Now, the router bit I have will follow the contour and there won’t be any gaps at the corners. I used thin CA glue to hold the printed corners in place.
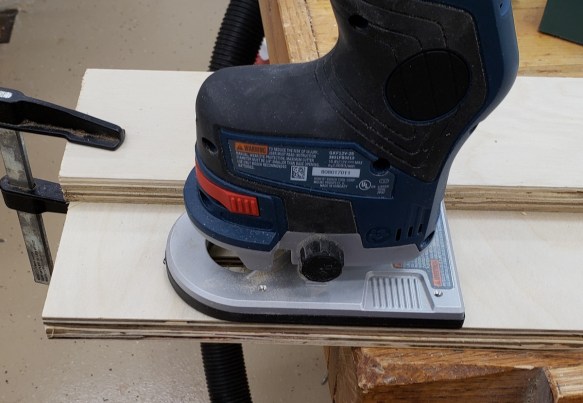
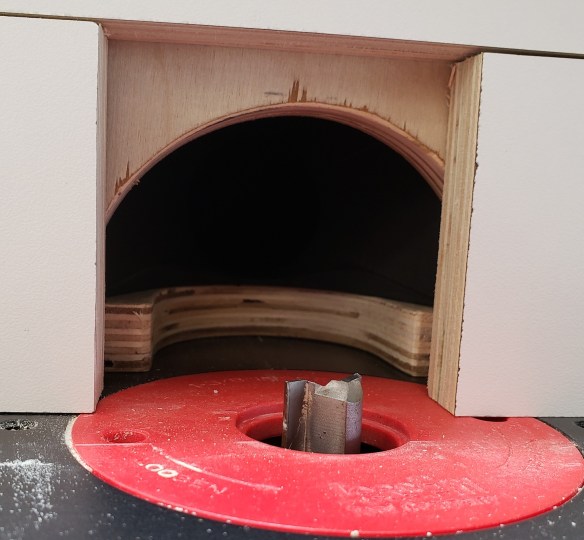
With the cutout template finished I double sticky taped it down to a big piece of laminate faced plywood and got routing. The first pass hogged out the lip that the router lift will sit on. A jigsaw opened up the rest.
Finished template
Template in place
Routed recess
Opening cut
I checked the fit and it is wonderful. There is almost no slop, and the corners match the lift well.
I cut a piece of 3/4″ plywood to go under the laminate top to act as support. I sat the two pieces on my flat table saw top and went around with a straight edge and flashlight to check everything. I found some slight bows and used cawls to clamp everything flat, then slowly brad nailed everything together.
Some light is peaking through. I used this plywood as a clamp cawl to flatten the top while I nailed.
With everything tacked together I moved the top to the router base I built earlier. I found some slight dipping in the center, so I cut brass shims to bring the top back to flat when everything was screwed down. With the top in place, flat, and securely fastened, I added edge banding all the way around to help protect the laminate from getting chipped.
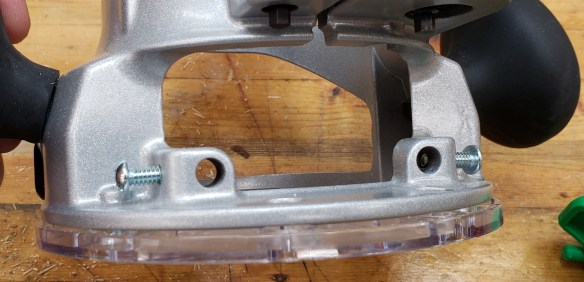
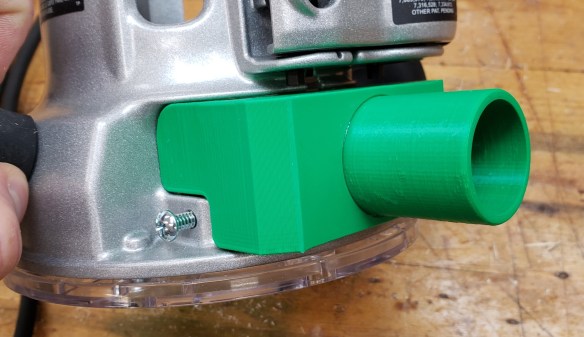
Next I wanted to add a number of t-tracks to the top for featherboads and to keep the fence in place. My router produces a ton of dust when doing a big cut and my fixed base porter cable 890 series doesn’t come with any collection port. A few iterations of printing got me this two piece design that I glued together. It goes in where the edge guide would normally plug in.
The start of the cut usually generates a lot of dust, but once the grooves got going the shroud did a good job picking up most of the dust. There probably aren’t any 100% solutions, but this does save a lot of mess. The grooves turned out well!
The top is nearly complete. I just need to do the final installation of the lift. First, I wanted to reinforce the places where the leveling set screws will land. The plywood is too soft, and I expect they will sink in with time. On my last top I used CA glue to shore up the area. This time I found some 1/16″ brass to line those areas. Once bonded, the leveling went quickly. All the effort I spent getting the table top level means the router lift plate can be perfectly flush all the way around. No catches or dips at the transitions.
The Fence
With the table top finished, I was ready to move on to the fence. Having it clamp at the edges worked in my last fence adaptation, but the center tended to flex. That is the most important place to keep still, so I added the t-track in closer to the center to keep the fence stable near the bit. I cut out some 3/4″ plywood to act as a base an front face for the fence.
I put in knobs to clamp the fence down, and added spacers to move the height of the knob up. The fence is tall enough it needs a little boost to make it easier to reach.
I cut out laminate plywood sections to make movable fence faces. I set them against the front of the fence and marked the spots where a slot would need to start and top. I should have drilled out the ends of the slot and routed the middle. The full depth cut got a little squirley in places. Oh well, the fence faces open and close easily.
Fence face test fit
Marked bolt locations
Routing slots
Not my best results
Face fully closed
Face fully open
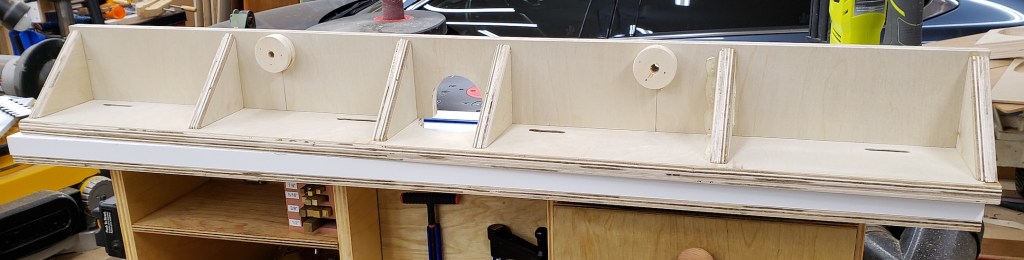
Now that I know where my hands will be going to tighten the fence and faces, I know where there is free space to add ribs. These triangular ribs will stabilize the fence front and keep it stiff. I just glued and nailed them in place.
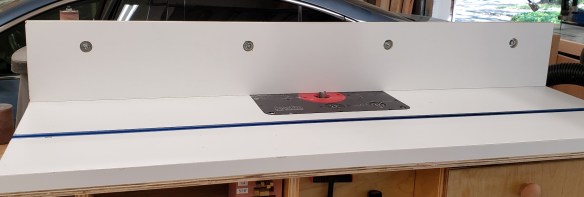
To finish off the fence I cut a strip of laminate to go across the top of the moveable faces. It makes the total height 5 inches and holds a t-track that goes the whole length of the fence.
The fence is done, but it still doesn’t have any dust collection. I printed a duct section to screw down just behind where the router bit will be. This combined with the dust collection built into the cabinet means that very little dust will escape this unit.
That puts the final touches on the fence. While I was at it, I cut a hand full of extra moveable faces and screwed them to the back of the table cabinet as spares. I also cut a full length extra tall fence that moves the total height up to 6 inches.
These upgrades should make the whole router setup really clean and fast to operate. Combined with the base I built earlier I am all set on the router front and am ready to tackle a lot of new future projects!
Getting back to baby furniture, I have seen different kinds of little pusher wagons that kids learning to walk can use to help them build muscles and coordination. A co-worker mentioned that his daughter had a plastic store bought walker that she was learning to walk with, but that it was so light that it would shoot away from her. I had him measure her height to the shoulder to act as a rough starting point
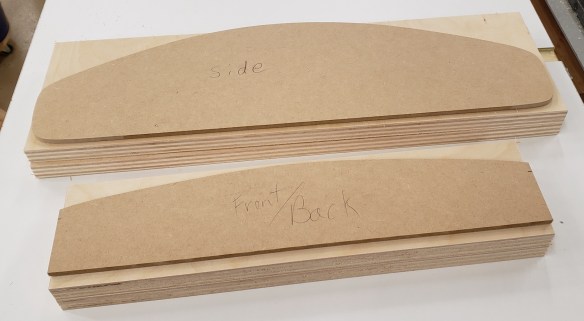
I will probably build one for us and a few for friends having kids. That means making use of templates to repeat the work once I figure out what I want it to be like. I broke out the compass and thin bandsaw blade and got curvy.
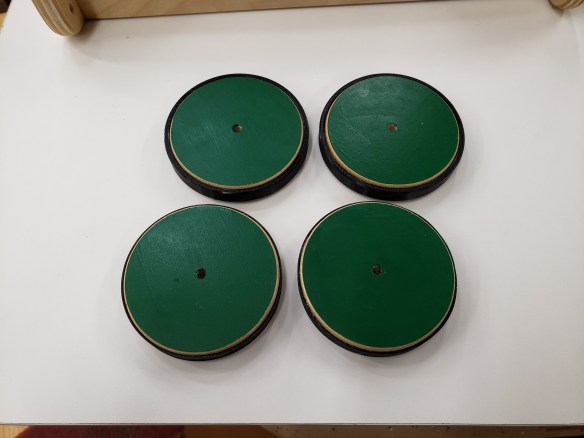
I added holes to the templates and used a transfer punch to copy those holes over to each part. That way the wheels will connect in the same spot, and the handles will go on evenly. To add a little color and flare I painted green accents to the handle and wheels and a racing stripe for +2 speed. When the paint was all dry I coated everything with polyurethane.
I was worried the walker would go skidding across the floor if placed on anything other than carpet. I printed thin TPU bands to act as tries and glued them to the wooden wheels. The TPU isn’t as grippy as a rubber tire, but I was able to produce it in house and it will grip better than the bare wood.
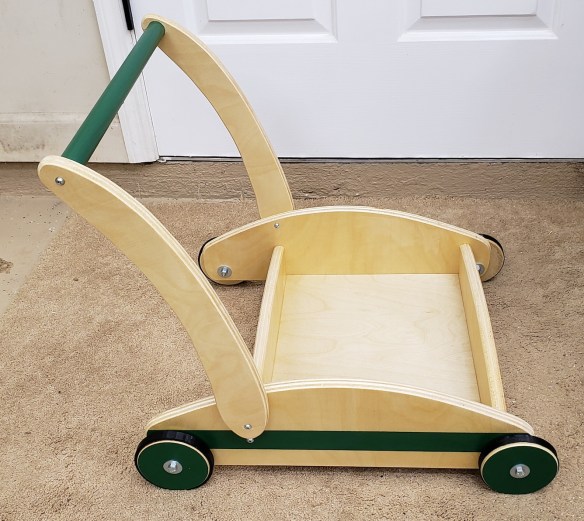
I spent some time fiddling with the arms, and probably built them a little too short. I will give this to the co-worker and have him test it out on his daughter.
The finished product looks nice. It is heavy enough that a child just learning to climb up will not have it shoot away, but light enough they can still push it. Lock nuts set the tension at the wheels, so there can be more or less resistance as needed.
I gave this one to the co-worker that was complaining about the plastic one his daughter was using. The only catch was that he had to report back how it worked, and let me tweak it if need be. A few weeks later the reports were in. The bigger kids liked to play with it too! They treated it like a bumper car and crashed it into a lot of things. Also they wrenched on the handle hard enough that the arms were flexing where they screwed into the body. Lastly, it was a little on the wide side.
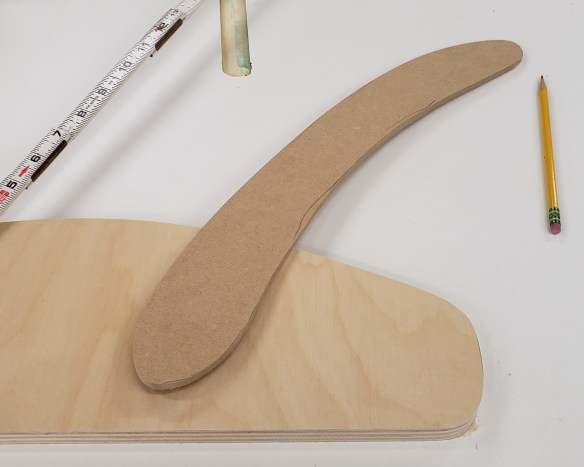
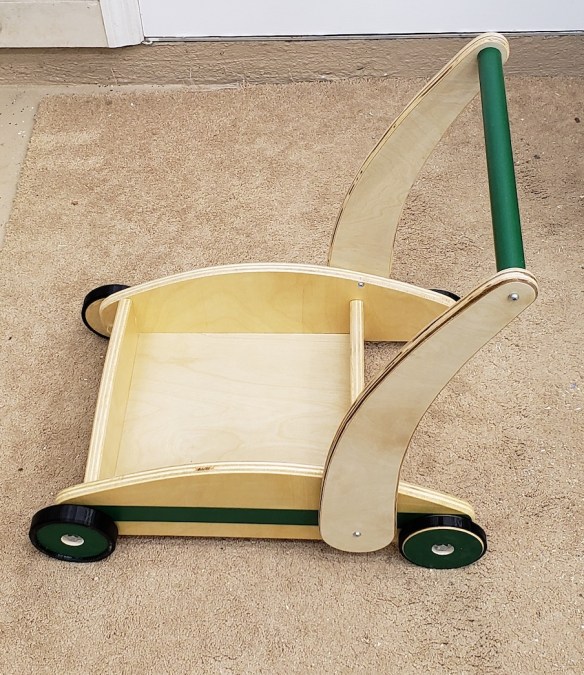
No problem, this is why I gave it to him! I didn’t like how the old arms turned out, so I went ahead and remade the template. Instead of freehanding some curves I got more systematic. I drew two circles that were the size I wanted each end of the arm to be, and drew them further apart than the original arm so I could move the base down lower on the cart. Then, to connect them, I set my drawing bow to a nice curve and connected the tangents of the two circles. The results look a lot better than my first arm template.
I assembled everything with pocket hole screws from underneath, and a few visible screws on the side. That let me take everything apart for alterations. I trimmed the center width down from 16 inches to 12. That should lighten the look and load of the thing and make it more maneuverable.
Original Width
Trimmed Width
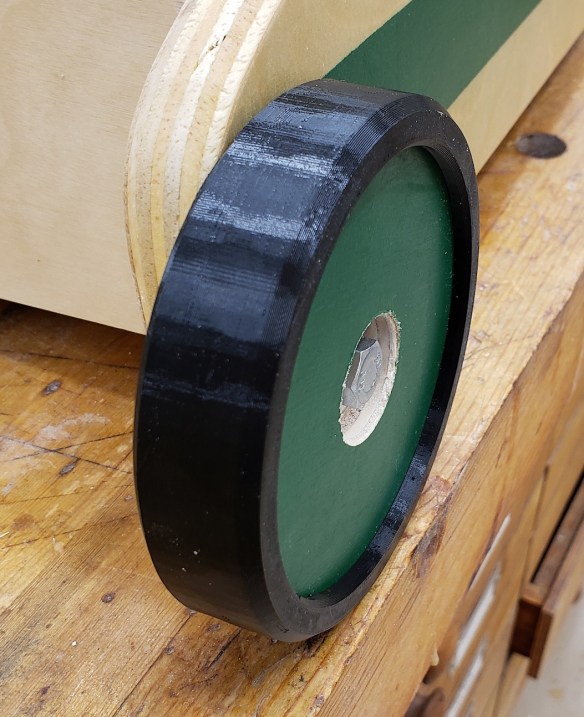
The bumper car comment had me wondering. I had left the bolt heads stick out beyond the wheel. If they caught a piece of furniture or baseboard, the bolt would probably fair better than the target. Also, there wasn’t much cushion to the tires. I mostly added them for grip, not as a bash protector. I counter-bored all the wheels, to recess the bolt heads, and upgraded to 5/16″ bolts as that was what I had available. The old tires were cut off and replaced with thicker ones that wrap around the outside face of the wheel. Now they shouldn’t be so offensive to fine features in one’s house.
With those upgrades complete I reassembled everything and gave it back to my co-worker. If there aren’t any more changes needed I can go into production and make a few for myself and other co-workers that are having kids.
A few years back I built two rolling cabinets to hold all of my screws and other hardware. They were a big boon, but I quickly converted one over to having only drawers. It looks like the other is about to have the same thing happen. I have lots of plastic organizers that are well labeled and sorted, but they have a few issues. The first one is that I go into them so often they pile up everywhere. I even added a pull out shelf so there was always a place to sit one. There tend to be 2 or 3 stacked up at any given time.
The other issue with them, and this is minor but super annoying, is that occasionally the dividers shift and start mixing all your hardware up like a bad drink recipe. Lastly, I find myself taking the organizer with me to the project I am working on. Sometimes you absentmindedly pull the wrong screw, and it takes up more space where you are working.
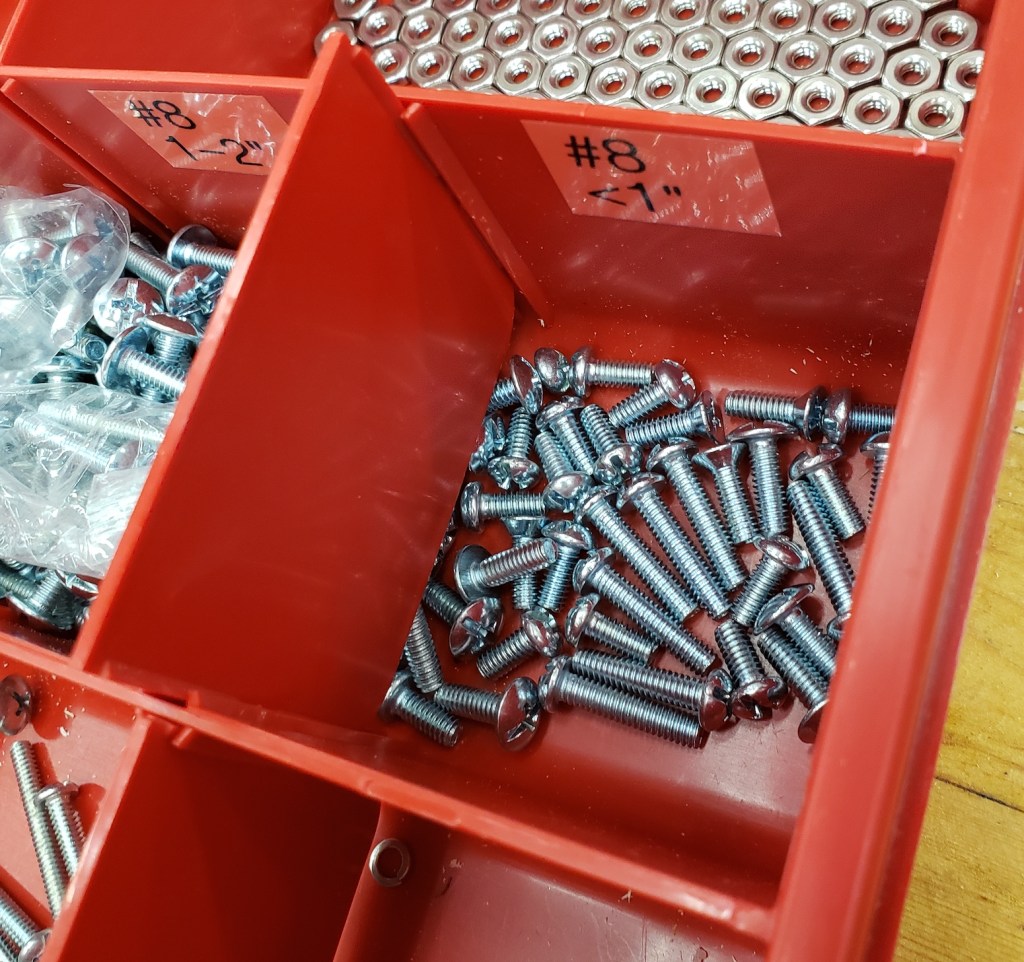
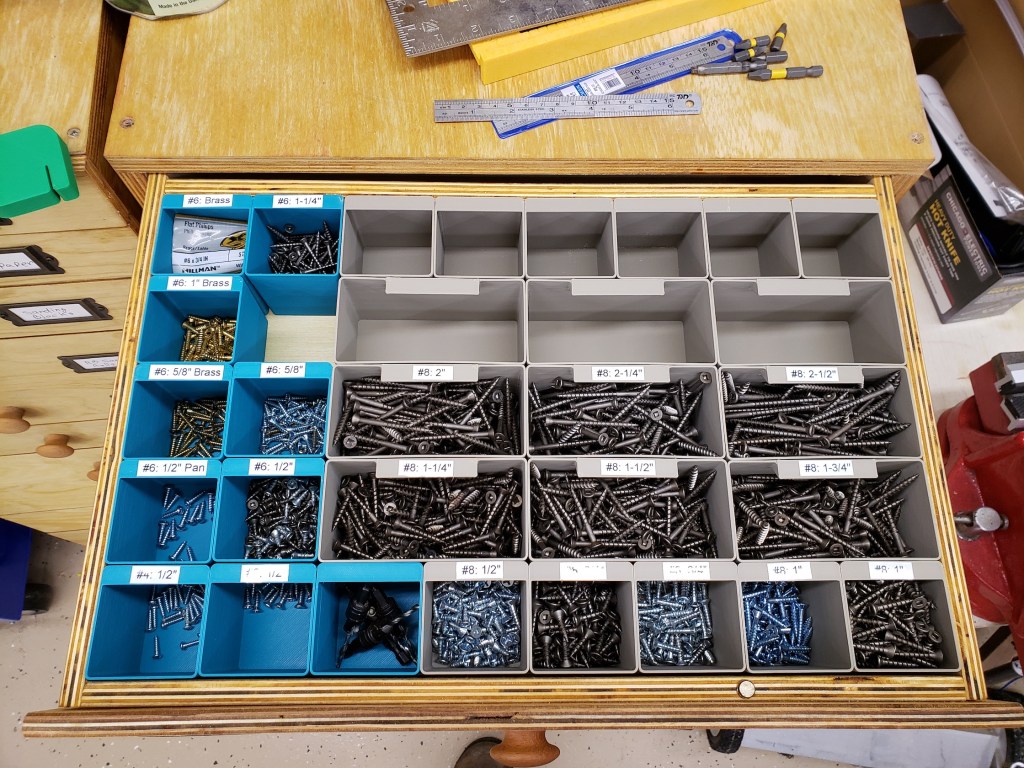
I was inspired by Alexandre Chappel’s video about printing little trays and using them to organize hardware. I printed out a few of his trays and thought the concept was fantastic, but had some issues with the wall thickness in the model and wanted more label space. I made my own instead. They have rounded corners to help speed printing, consistent wall thickness, a slight taper to the sides to make pulling them in and out easy, and a large label area. Now I can pull only the tray of screws I need and take it to where I am working.
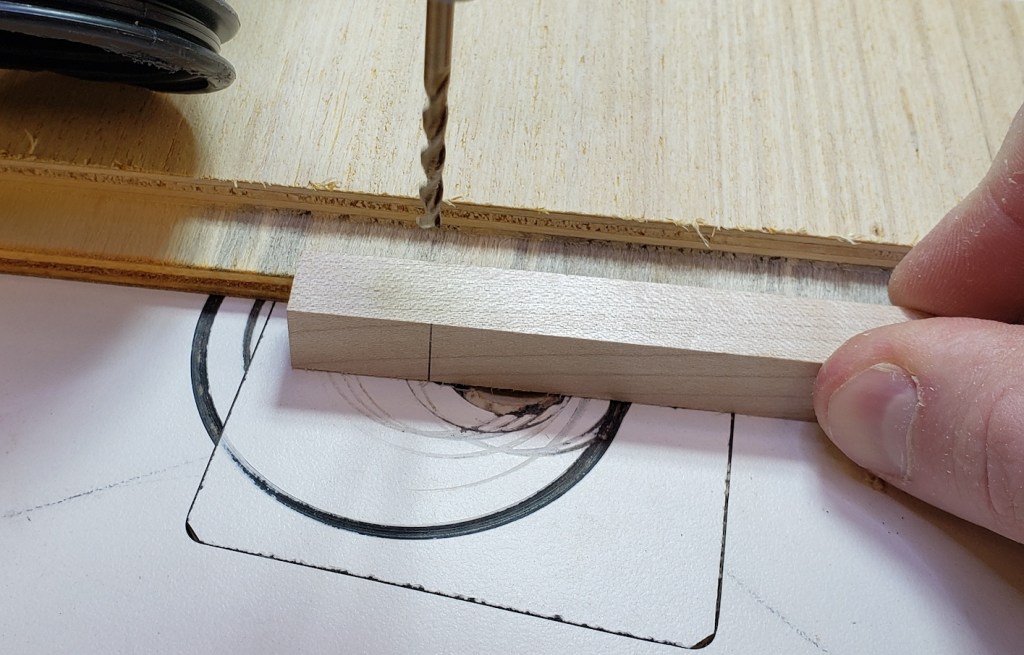
With the tray sizes worked out I did some measurements and found I could fit a drawer 8 trays wide if I was careful in how I cut everything. I went ahead and started installing runners in the cabinet. I cut a template that would set spacing and act as a router guide to cut a dado in the cabinet sides. Once again my trim router comes to the rescue. This will help with the drawer runner alignment and expose new wood for glue. The inside was covered in boiled linseed oil when I made it.
I took thinned maple and had a small production run of drawer runners. I sand the top and bottom smooth, marked the board for screw locations, ripped out each runner, drilled clearance holes for screws and then installed them. Each runner got glue, a few brads to keep it still, and 3 screws. There will be a lot of weight on these, so I didn’t want any movement.
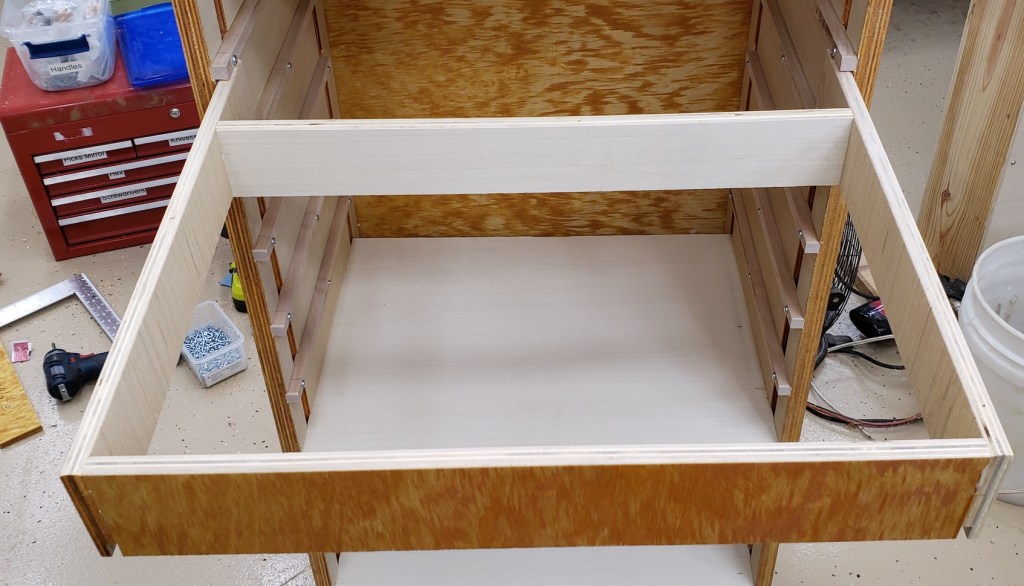
I planned out all the drawers to be the same, and installed runners for each. Before I went into drawer production though, I made a prototype held together with clamps. Good thing I did! The original plan was for the drawers to be 6 trays deep. Looking at the left picture below, I have the drawer pulled out as far as I dare given the weight. I can’t see the label or the contents of the last row. Dropping back to 5 rows leaves plenty of drawer still inside the cabinet for stability. Metal slides would cost more money and drawer width, but allow full extension. I could have had a few more trays had I gone that way, but I am happy with my decision.
6 trays deep, cant get to the last one
5 trays deep
With the drawer parameters set I went back into production mode. The cabinets originally had a number of shelves made for them. I didn’t need those anymore, so I figured out how to incorporate them into the new drawers. I am working really hard to minimize waste these days, so I don’t have to go out to the store. No fancy joinery, just a rabbet on the bottom to help keep the drawer bottom in the right position. For the fronts I attached new plywood and kept the orientation the same so the grain pattern would flow down the front.
Old shelves become new drawer sides
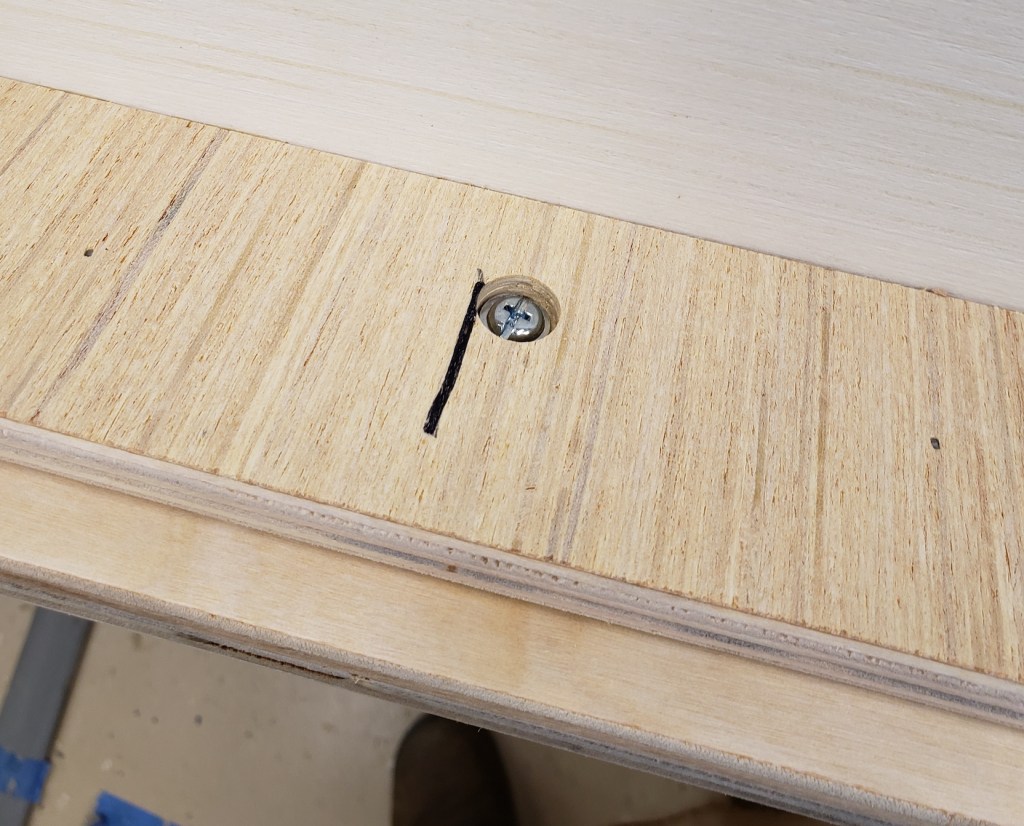
With the drawers all assembled and dried I needed to countersink the screws that hold the drawer pull on. Once again a template makes this repeated work fast and easy. The template goes inside the drawer and guides a forsner bit big enough for the drawer pull’s screw head. Countersinking like this keeps the head from interfering with my trays and protrudes the screw far enough so that It can bite into the drawer pull.
Drawer pull template in place inside the drawerHole drilled and drawer pull screw installed
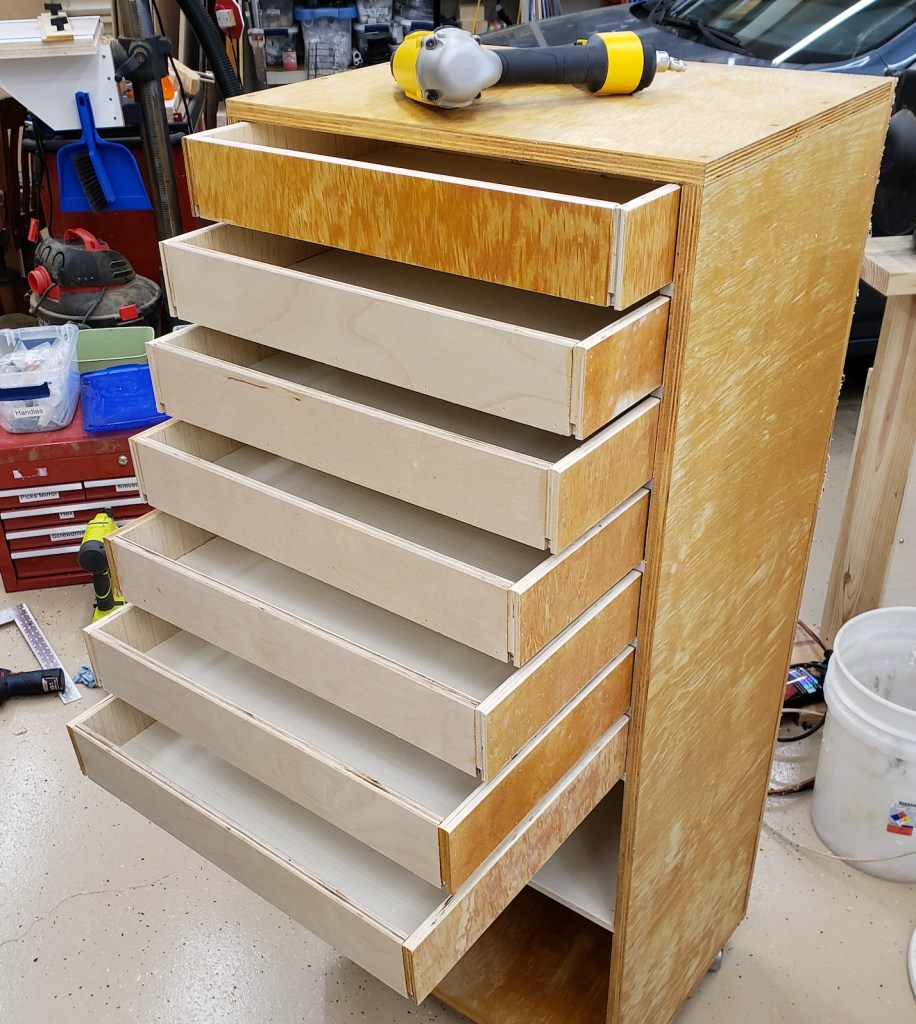
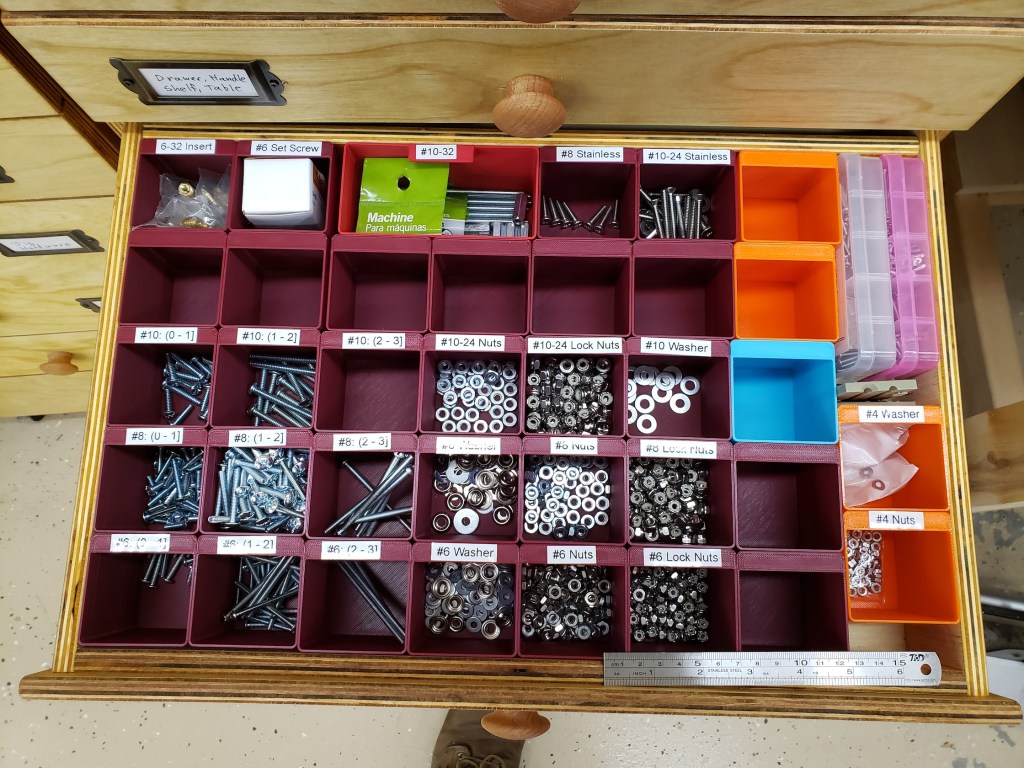
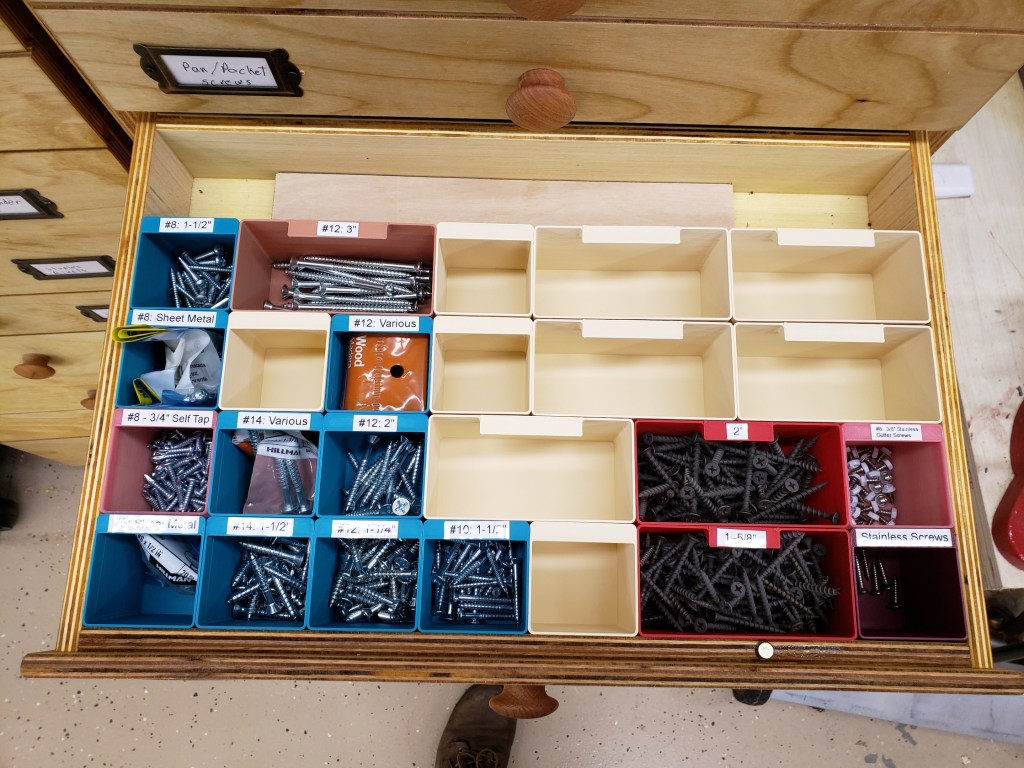
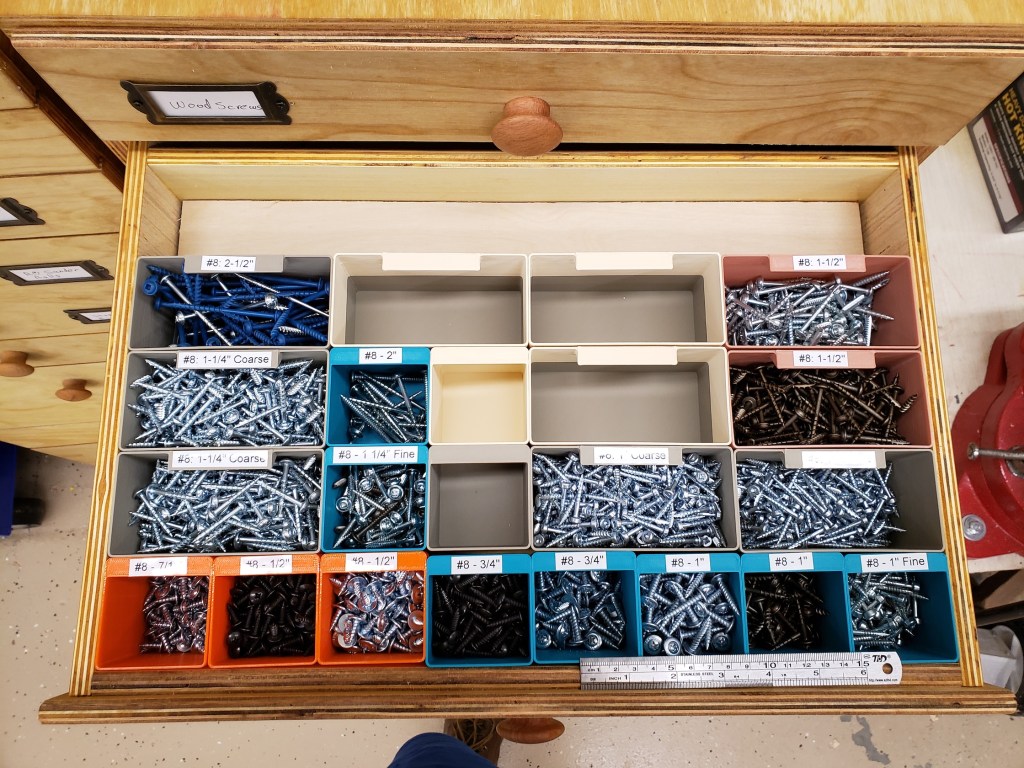
The finished cabinet looks gorgeous and I was even able to use the same label holders as I did on the other cabinet. There are still shelves below for organizers I thought were worth keeping. The shelf space below is at only 1/3 full at most, and the drawer space is 3/4 full. I doubt I will have to build any more drawers in the future, but the cabinet has enough space for another 5 or so. Each drawer has a magnet embedded in the front to hold onto a small steel ruler. That way you can double check what you pull out, and always put fasteners back in the right place.