Saw Renovation Wrap-Up

I finished my last round of saw renovations, and have ended up with a serious collection of panel saws.  Some were dropped some where chopped, but most made it through in decent condition.

DSC_0107

In all I did a major restoration on 3 sets of saws for a total of 9.  Some of the ones pictured above were purchased in pretty good shape, and didn’t need any serious restoration work.  Sanding all those saws was messy work and left my fingers stained black.  Luckily I put down a sheet of particle board to protect my bench.  I guess gloves are in order next time.  After 9 saws, the rust remover bath looks like used motor oil.

DSC_0105I like to think that after all the neglect these saws are happy to be back on the job and free of decades of rust.  Look, they have even taken up synchronized swimming!

DSC_0111


The last set of saws came from a really cheap lot purchase.  Any buy from ebay can be a crap shoot.  It is hard to tell quality from the pictures and sellers rarely take a picture down the length of the saw blade to show bends.  Still, for 15 bucks for the three, I am willing to take my chances.

Unfortunately the top most saw, in the left hand picture, was beyond saving.  I couldn’t get past the heavy pitting and bends in the blade.  I disassembled it and will keep the parts for potential future repairs of other saws.  If I could find another medium sized backsaw or two and a good miter box/saw my collection would be complete… yeah right!

Saw Renovations (Part 2)

The Summer Saw Stravaganza continues.  I took another set of three sad looking saws and gave them a run through the bath.

DSC_0094

The saw in the middle is a real mixed bag.  It is very old and has a nicely carved handle.  On the other hand it is badly rusted and pitted in places.  Looking at a close up of the blade you can see two neat features.  First, that carved dip of the handle as it comes around your little finger to meet the plate again.  That is called a lamb’s tongue.  Totally for decoration.  It needed some gluing back together.

DSC_0099

The other is that number 10 near the teeth of the blade (left side of picture).  You can barely see the 1.  They would typically stamp the number of teeth per inch there on the blade.  The trick is it was usually 3/8″ or further from the teeth.  This saw has seen a lot of use and resharpening.

Like last time the saw plate got a bath in Evapo-Rust, the handles got sanded and a coating of boiled linseed oil.  The middle saw needed a little banging on my anvil to straighten out, but it looks quite true now.  The transformation was quite stunning.

DSC_0103

The only thing that has me worried about these saws is the heavy pitting on some.  A saw should be tapered, wider at the bottom than top, and will have the teeth flare out (called set).  This means that only the business end should really be touching the wood.  That having been said, the plate is going to do a lot of sliding in the cut, and a smooth plate will slide better than a pitted one.  I really hope they work out, these saws are gorgeous, even with all the pits and stains.

Saw Renovations

I have been collecting old panel saws for a while.  Some are in decent shape and only need a sharpen, some have bad rust and hard bends in the saw plate.  In this endeavor, no saw will go untreated.  I tried to straighten when possible, but a shortening happens.  Check out these work horses of american history.

DSC_0079

They have seen better days, and the one in the middle has some serious bend to it.  Still, all indications are that the age of these saws is pre-WW2.  That was a golden era of saws where you probably can’t go wrong with anything you find.  I started by removing the handles and ran into my first serious snag.

DSC_0081

Someone had lost all the split nuts and decided to replace them with wood screws.  Based on the screws it was probably a number of decades ago.  They were screwed or pounded in, then had the tips bent over.  After a lot of messing around with pliers and cutters I eventually grabbed a hack saw and sawed the screw off between the plate and handle.

DSC_0084

Next the saw plates went into a shallow tub with Evapo-Rust.  I found that one of those under-bed storage containers was perfect.  Once again this stuff is amazing.  It works pretty well over night, but there appear to be no ill effects from leaving it longer.

After their bath they look almost black.  I tried a few different techniques and found spraying down the blade with WD-40, then scrubbing with a sanding sponge did the best.  A 220 grit 3M sandblaster sanding sponge did a fantastic job.  It holds together really well under wet conditions, even with the saw teeth raking it, it doesn’t get loaded, and it cut through the grime quickly.  Each side took less than a minute to clean.  I have never used sanding sponges, but I can see why they are popular.  This poor plate had to get cut down a bit, but I saved the cutoff for use as scratch stock and tools.

The handles were mostly in decent shape.  Lots of scratches, and small breaks from getting dropped.  The finish was stripped off with a corse sanding sponge.  Again these sanding sponges surprise me.  They do a really great job of adapting to all the handle contours.  Once smoothed and cleaned up I rubbed a coat of boiled linseed oil on each one and let it dry.  Everything went back together quickly.  The tall saw had to get a new set of hardware.  Luckily my local Ace had brass plated binding post hardware.  Not exactly authentic, but it is a huge improvement over the wood screws the last guy used.

DSC_0092

Sharpening is the next step.  I have everything I need, but my table is covered in saw rebuilding stuff.  I will keep the refurb train going until they are all done, then convert over to sharpening.  In the mean time I need to come up with a good measure for saw sharpness.  Maybe some time trials are in order.

Ultrasonic Tool Cleanup

I have been doing a lot of old tool cleanup lately.  Maybe half of it ends up on my blog because I doubt anyone wants to see yet another number 4 cleanup.  My technique hasn’t really changed since I first posted about it.  Maybe there is a better way however.  Maybe the power of ultrasonics can speed up the cleaning of old tools a thousand fold!  Or not as we shall see.

My subject is a Number 9 1/2 block plane, a pretty common model.  I picked it up from an antique store for a reasonable price.  All the parts were present, but they were very full of dirt and rust.  Specifically the adjustable shoe was completely stuck.

Now previously I would just soak it overnight in the ole Evapo Rust.  This time I put it in an ultrasonic cleaner with Evapo Rust.  The results were…. CRAP!  After nearly an hour of going in an out of the cleaner I had what appeared to be a wet plane with ever so slightly less junk.  A bit of google searching seems to indicate that rust removal is a big thing with ultrasonics.  My cleaner is an old all stainless unit I got from a surplus place years ago.  Time for a shaming!

wpid-20150111_183914.jpg

That should teach it a lesson.  Oh well this block plane and all its parts completely filled the basket.  I would never be able to clean anything bigger.  So much for time saving technology.  A new large unit would probably due the trick, but those are expensive.  I should just be patient and let em soak overnight.

There we are, no rushing this process I guess.   I’ll leave the flattening and sharpening for a later date.  While I was working on my big secret woodworking project I might as well soak something else.  I got an mixup of heirloom twist bits and brace accessories over christmas.  They look rough now, but a trip through the Evapo Rust cures all!

After the rust bath a soaking in WD-40 and a quick scrub with a scotch brite pad does a good job of getting into the twist areas.  After the block plane, the twist bits and another small project the tub of rust remover was starting to look like the black lagoon!

wpid-20150111_183941.jpgThe liquid is completely opaque.  I hope that in a few days the sediment will fall out to the bottom and leave a clearer liquid at the top.  If not, I will pour it through a coffee filter to keep the junk from contaminating my main supply of Evapo Rust.

Hand Grinder

As part of a big haul of heirloom (my great grandfather) tools I got a hand grinder.  It will hold a 6 inch wheel, clamps to a surface, and gets powered by tacos and coffee.  Gorgeous!

DSC_0398 Resized

It was pretty dirty when I started in on it.  A little brushing with a brass brush got rust and dirt all over my newly cleaned work top.  So much for a pristine work surface.

DSC_0399 Resized

I didn’t really bother with any rust conversions.  It wasn’t very rusty, just mostly dirty, and I was worried about getting wet stuff into a nook and not being able to get it back out again.

A flat piece of wood with a nice cleat attached served as a good base to clamp to.  I started with a single layer of oak, but later doubled up because it warped too much under heavy grinding.

DSC_0403 ResizedTime to accessorize!  I picked up a grinding set from lee valley.  The veritas set came with a soft 150 grit cool grinding wheel, Adjustable tool rest, blade holding jig, and angle setting guide.  I have to say it was pricey but feels really well put together.  Link to the product.

DSC_0023 Resized

I had to cut off the loop that would hold the original tool rest.  It was a simple right angle bit of metal with a screw to hold it in place.  With this upgrade I don’t think it will be missed.  To test it I pulled out an old Ohio Tools chisel.  It was part of a small lot purchase from ebay.  I really wanted the mortise chisel but wasn’t sure what to do with this guy.

DSC_0024 Resized

Still, no reason to get rid of it.  Ohio Tools made good stuff, and it was a socket chisel.  Instead of making another bench chisel I could use a skew chisel.  I don’t own any, and this guy requires a lot of grinding no matter what.  Lets get it clamped up and going.  The blade holder jig has pins that help hold the blade either square or at a 30 degree angle.  Handy for grinding a skew!

I was able to keep a finger on the back of the blade and control pressure while feeling for heat.  The slow speed and a close finger meant that heat damage was not an issue.  The whole process took a while.  150 grit leaves a great surface that will only need a bit of work at the stone, but moves slowly when trying to make a radical change.  I might use my power grinder to rough in something like this next time.

DSC_0029 Resized

A somewhat shiny new skew chisel for me all by hand, what a great feeling.  It is so satisfying to take old misfit tools and give them a good home.  Well, more of a work home.  No rest for the wicked!

As I mentioned earlier the single board was not stiff enough under heavy grinding.  The gearing ratio means it takes a good bit of force on the handle to keep the wheel spinning quickly.  I glued up another layer and put everything back on.  A quick test showed that this was what the doctor ordered.  Very stiff and very ready for its next job.  The whole thing sits on a shelf and gets clamped into my front vice when needed.

DSC_0034 Resized

Tractor and Engine Tools

I posted last week about my haul from the fall tractor and engine show.  It was a saw, drill, side rabbet plane, scissors, rasp, chisel, and wooden molding plane.  All in decent but not great condition.  I went through and reconditioned all of them in the past week except the side rabbet plane.  It was in great shape and didn’t really need anything.
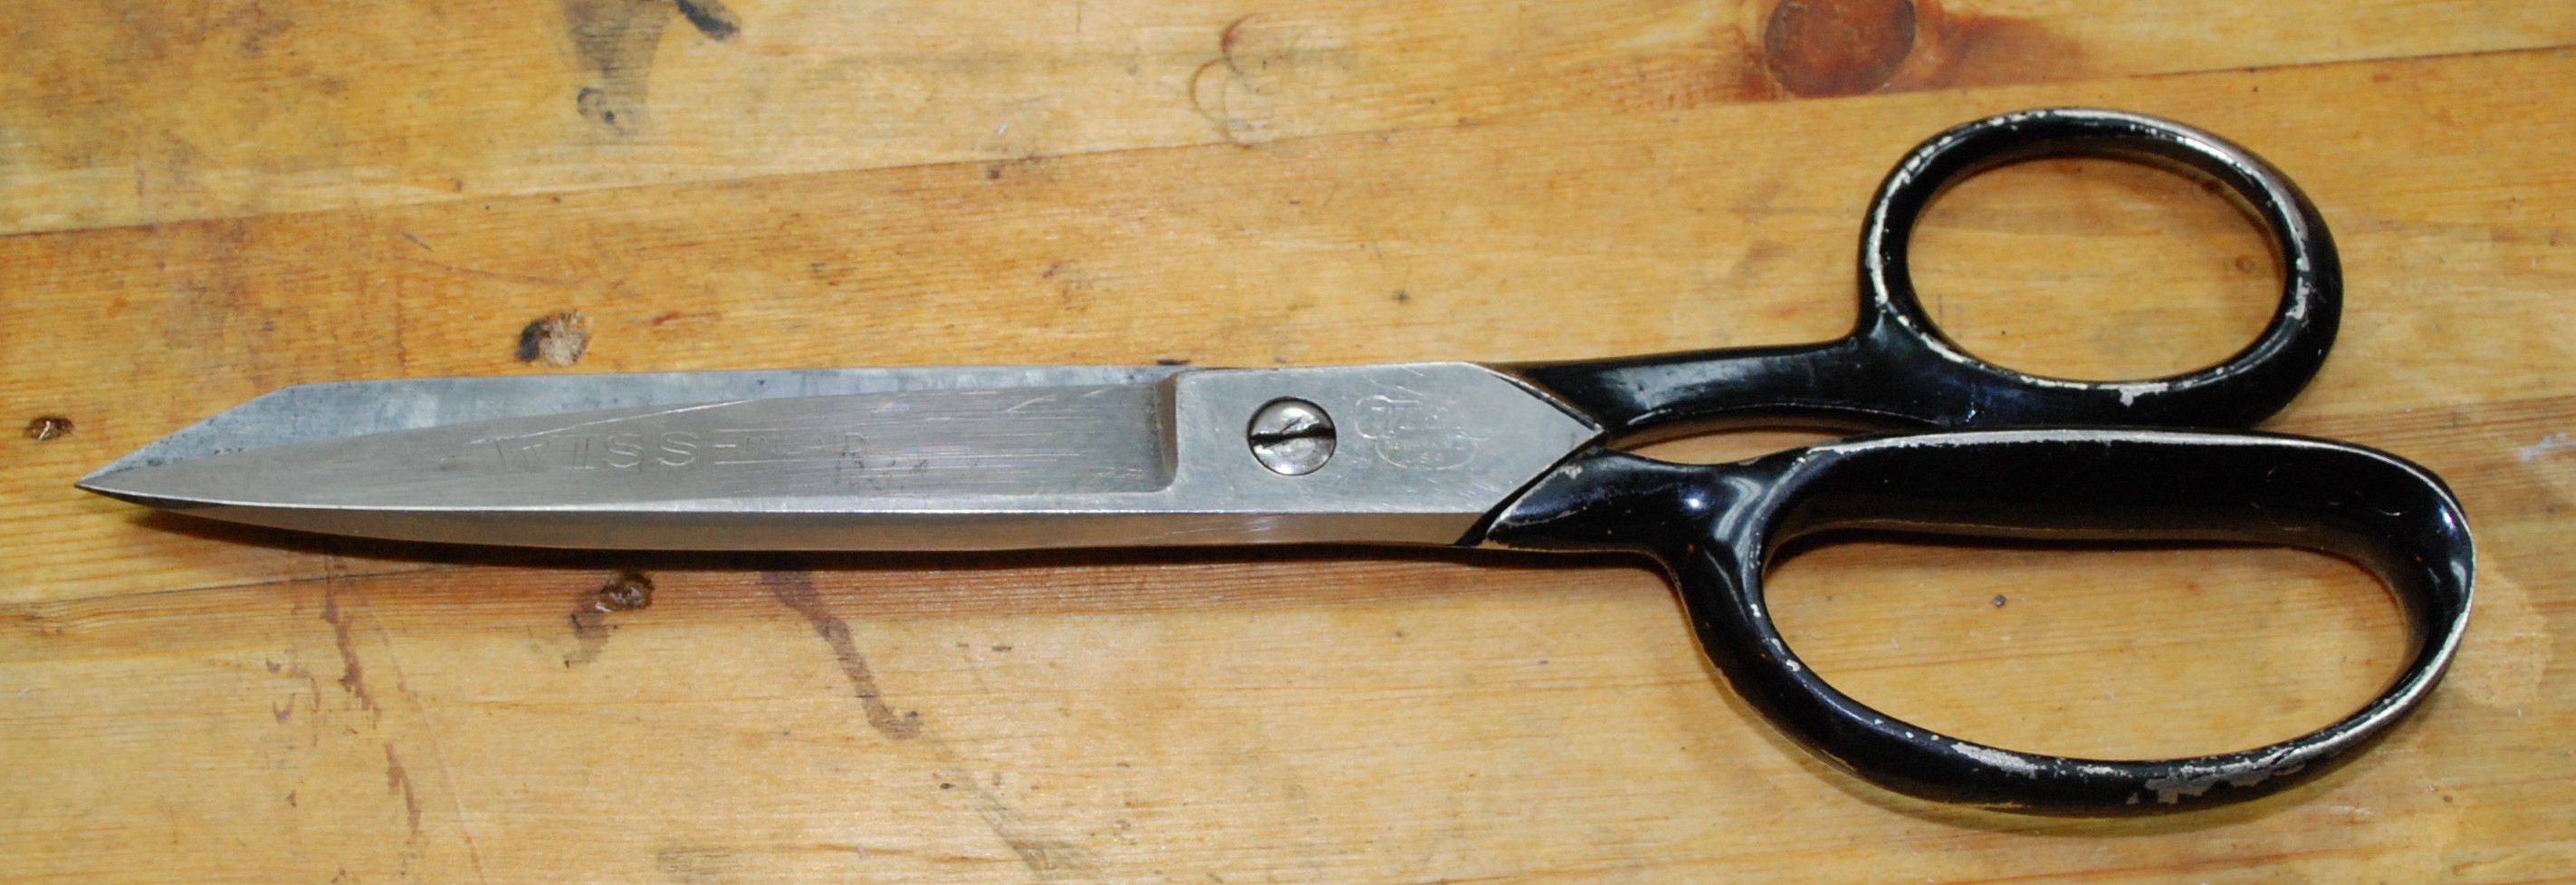
wpid-20141107_213701.jpg


 Scissors

These wiss scissors were probably not that old, but had a little rust starting.  I just gave them a scuff with a scotch brite pad, then did a little edge work to get them back in good cutting condition.  I used Paul Seller’s method of sharpening.  It may not be different from everyone else’s method, but credit due, that is where I learned it.
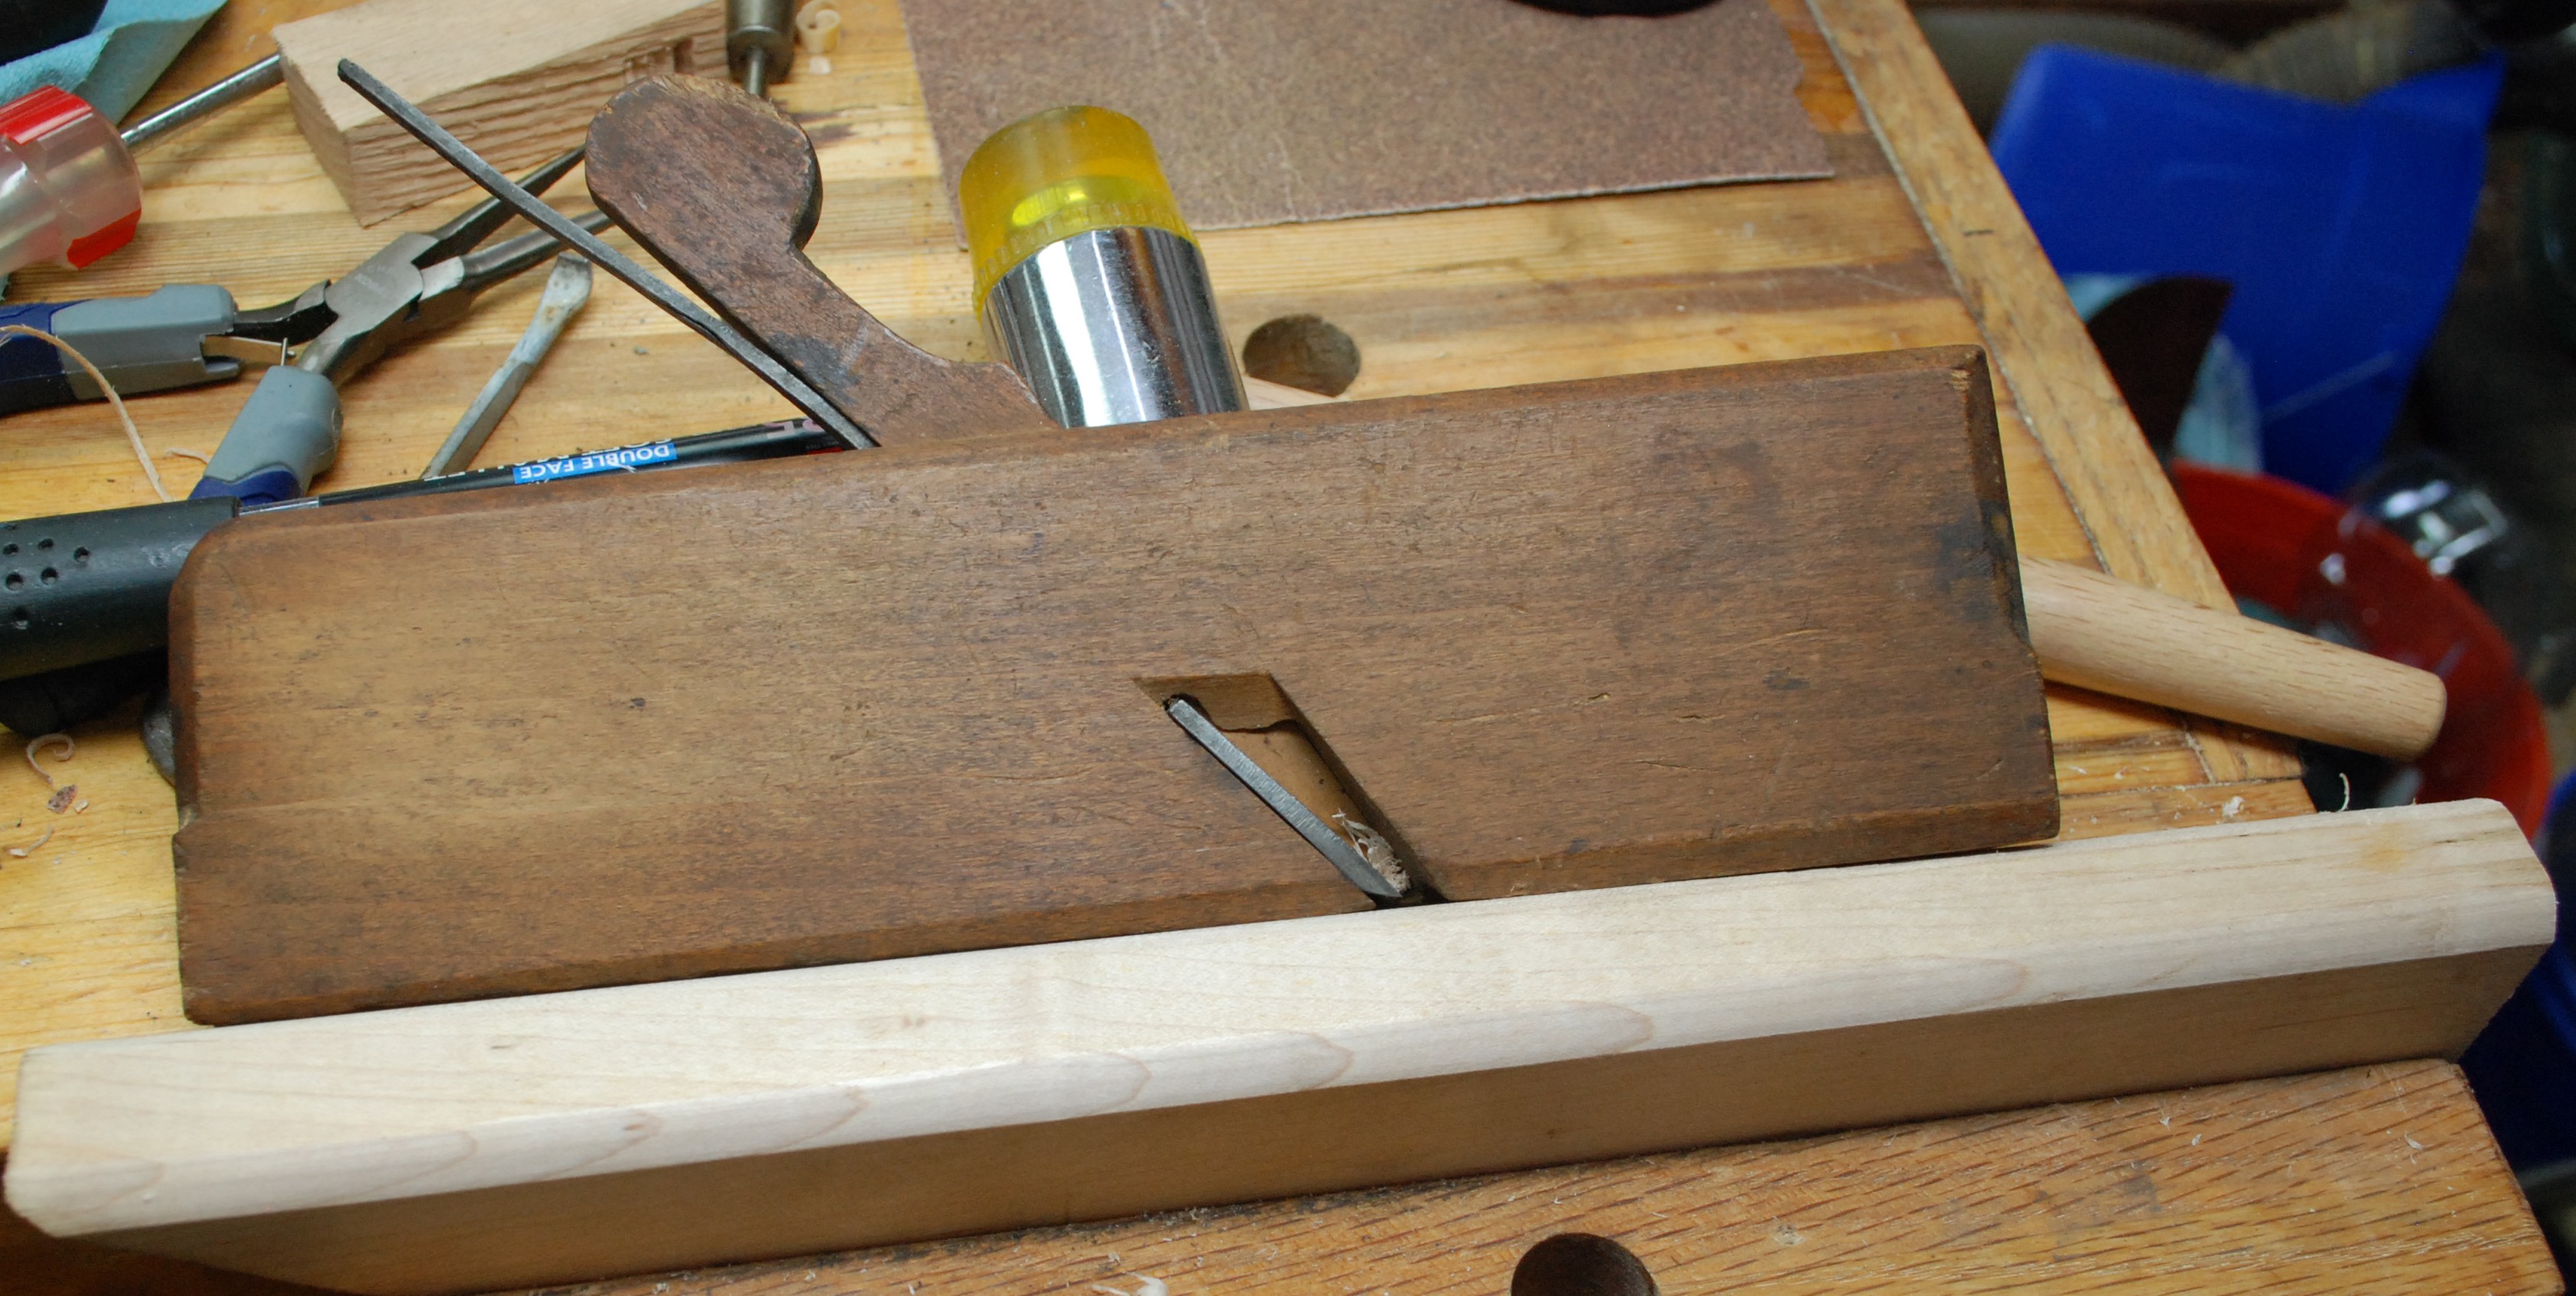
DSC_0193


 Molding Plane

This was another one that looked a little rough, but only really needed sharpening.  I re-flattened the iron, sharpened it up, and stuck it back in.  Depth setting is a little tricky, but I managed to get a nice looking round over on this piece of maple.  I might have to become a fan of wooden planes now!

DSC_0184


 Mortise Chisel

I didn’t have any mortise chisels so this was a nice find for only a few bucks.  It had seen a lot of use, but would still work with some love.  I removed the handle and gave it a good sanding.  Boiled linseed oil is my finish of choice for tools.  It is cheap, easy to apply and does a decent job of soaking in and protecting wood.

wpid-20141109_164940.jpg

I hit the iron with some brass brushing near the socket to clean the junk off.  The rest got flattening and a 35 degree edge for doing heavy mortise chopping.  I did a few test hits with it and was happy with the results.

DSC_0223

DSC_0225


 Rasp

Another cheap buy to help fill my collection.  This one is huge and aggressive compared to my other rasps.  I didn’t bother with trying to do anything to the surface, I just made a handle for it.  I bought some brass tubing a while back for just this purpose and put it to good use.  I turned the shoulder long expecting to trim off any excess when I pressed the brass down.  Once the brass was flush with the end I couldn’t get it down any further.  Oops, next time I will cut the shoulder to length.  I drilled out for the tang and pounded it home.  The handle is a little shorter than it should be for a rasp this big, but it beats the heck out of no handle.
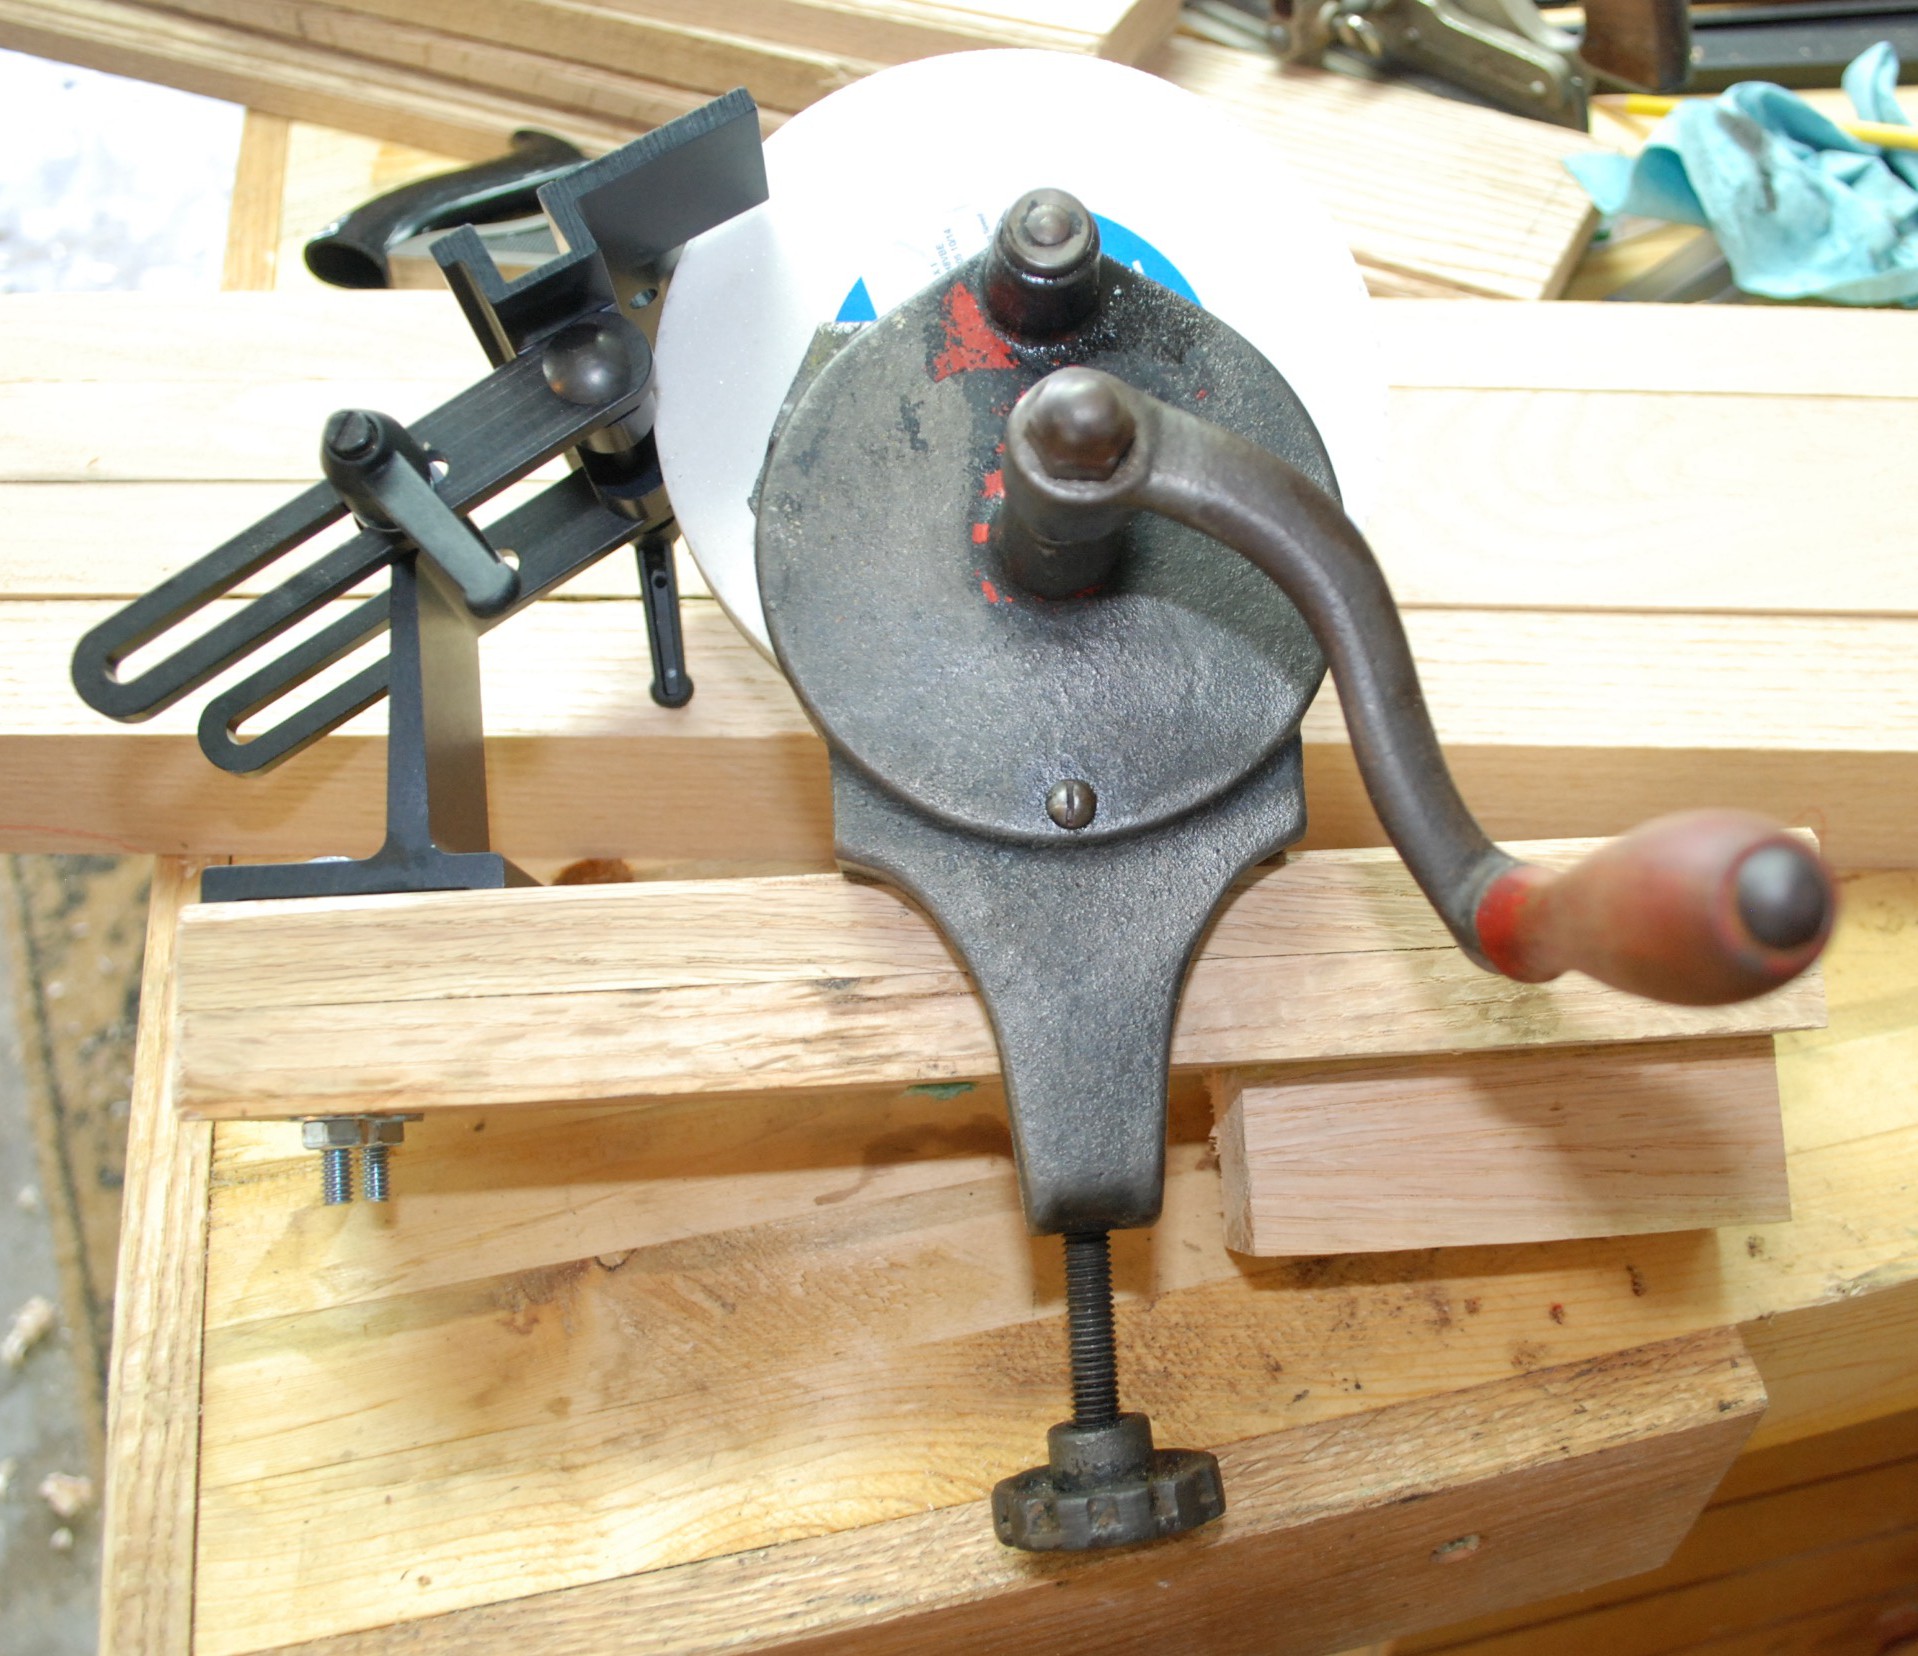
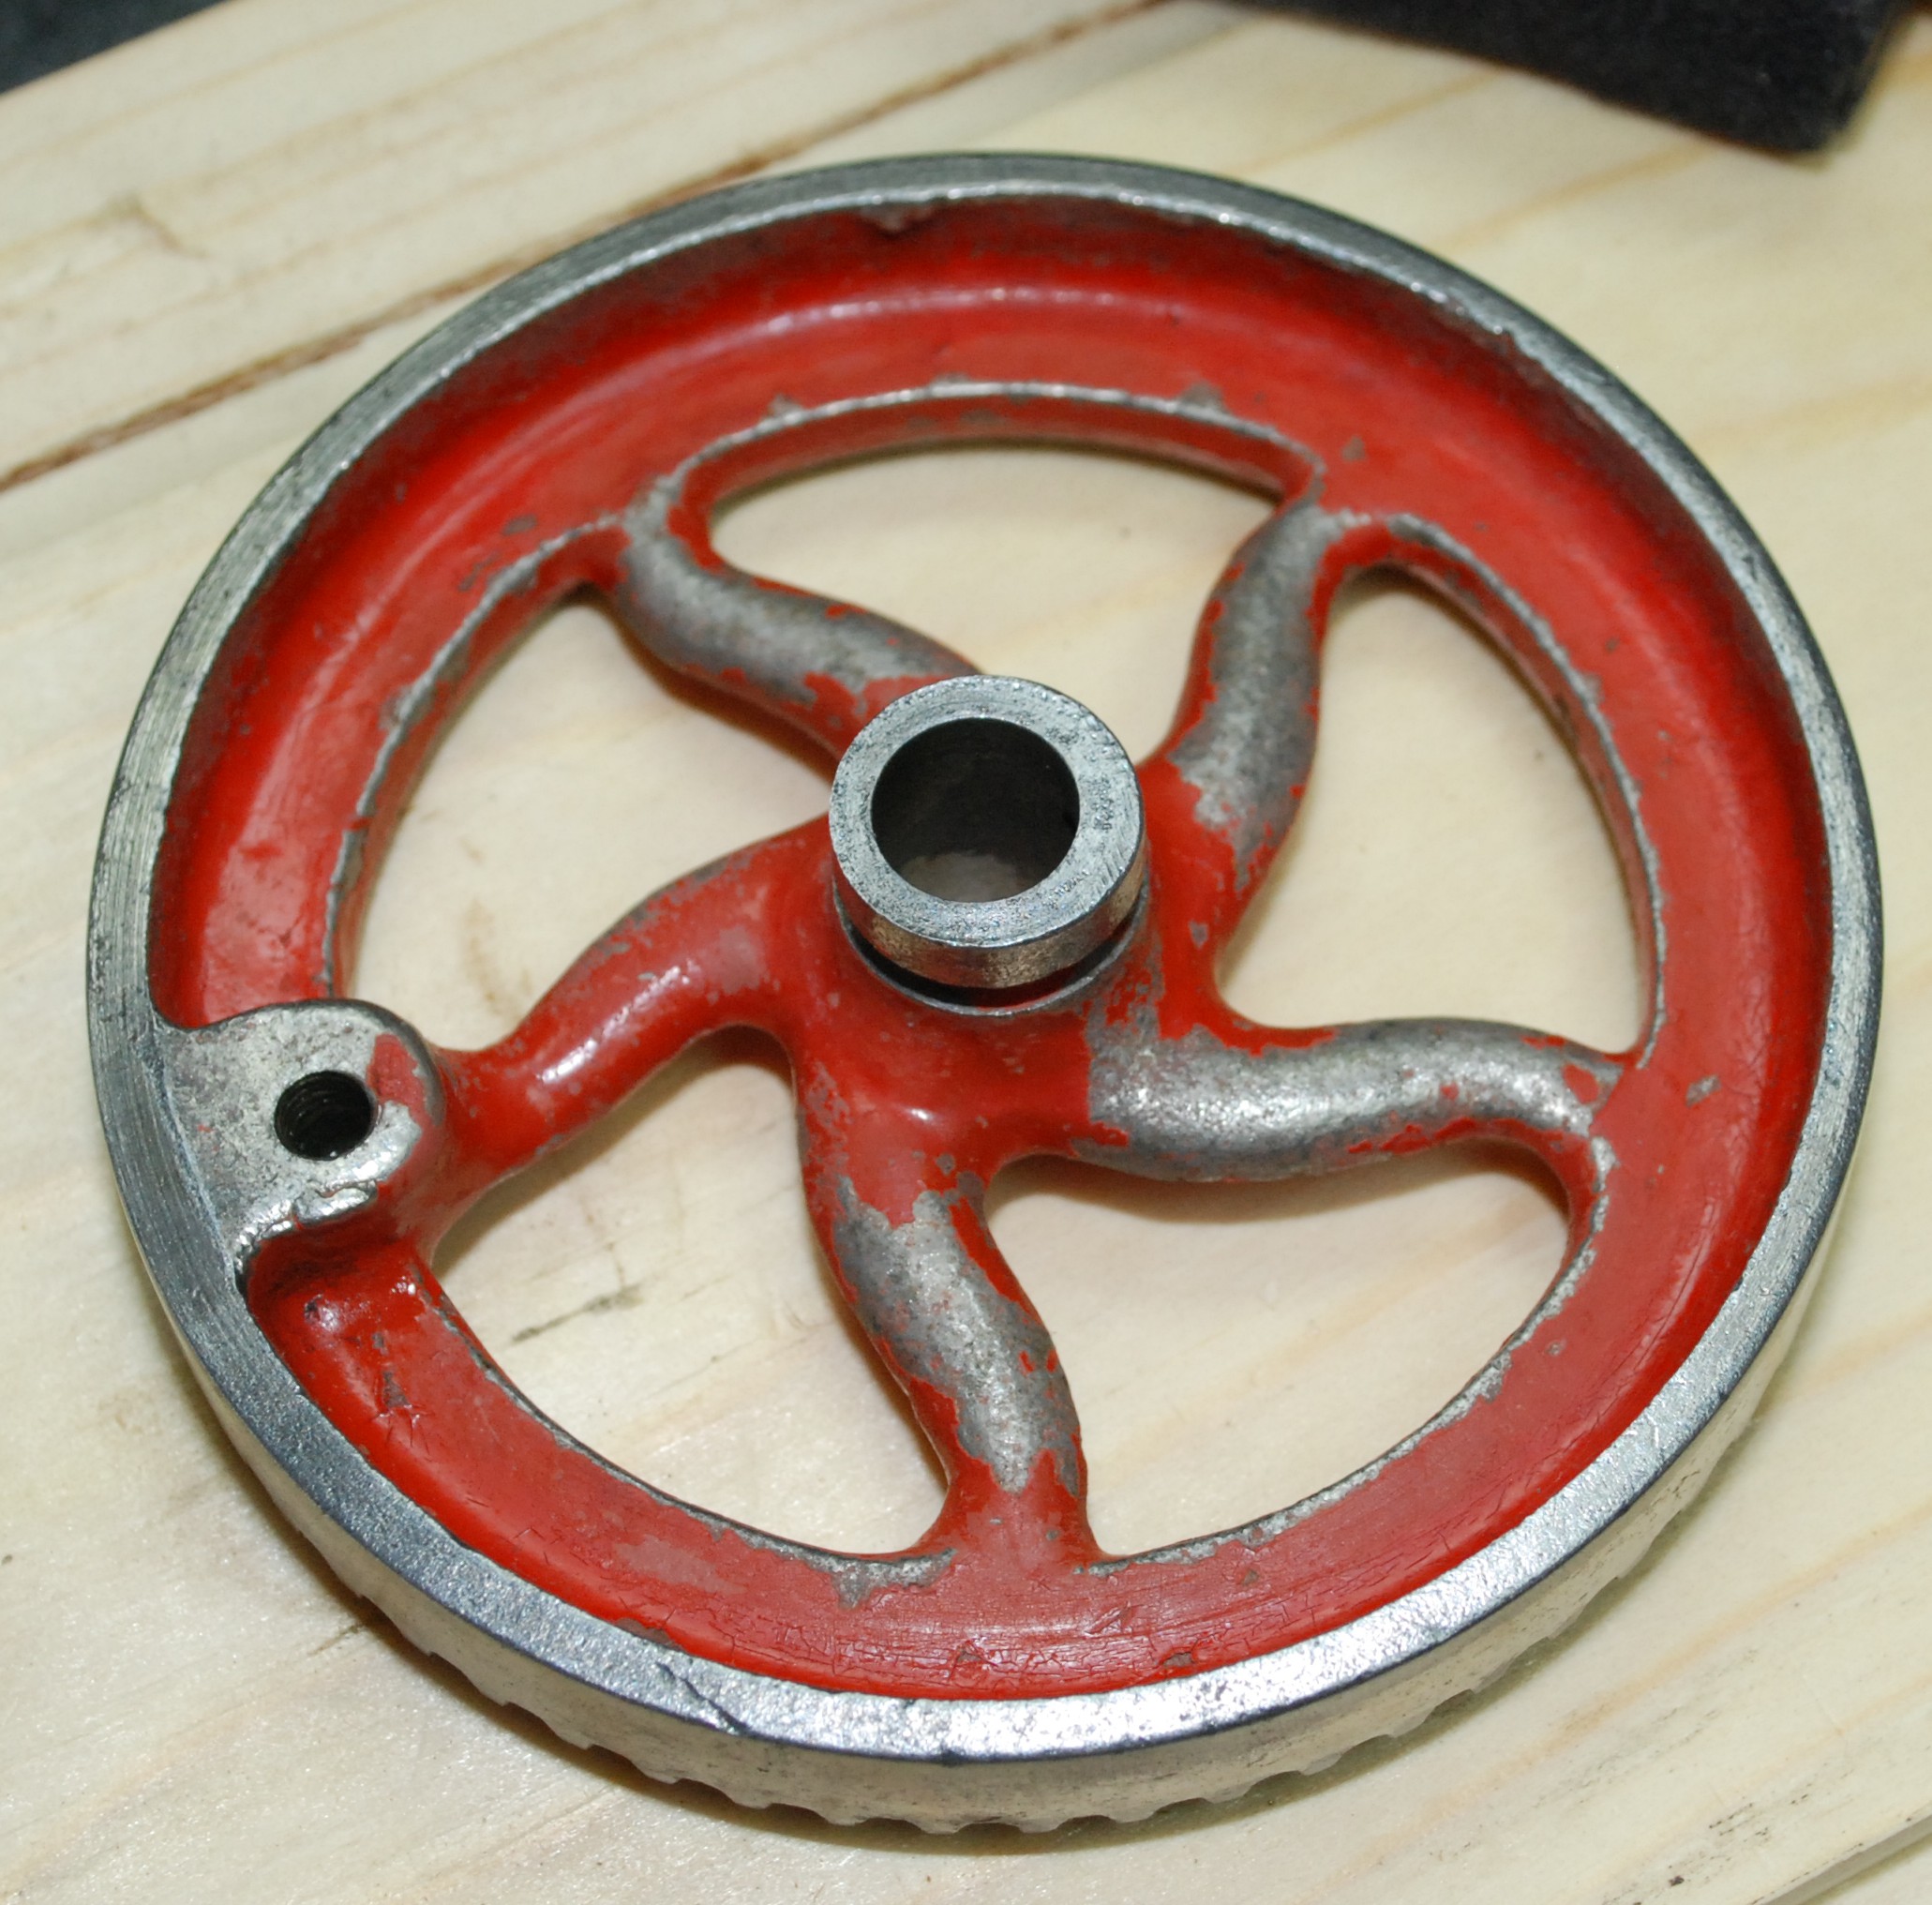
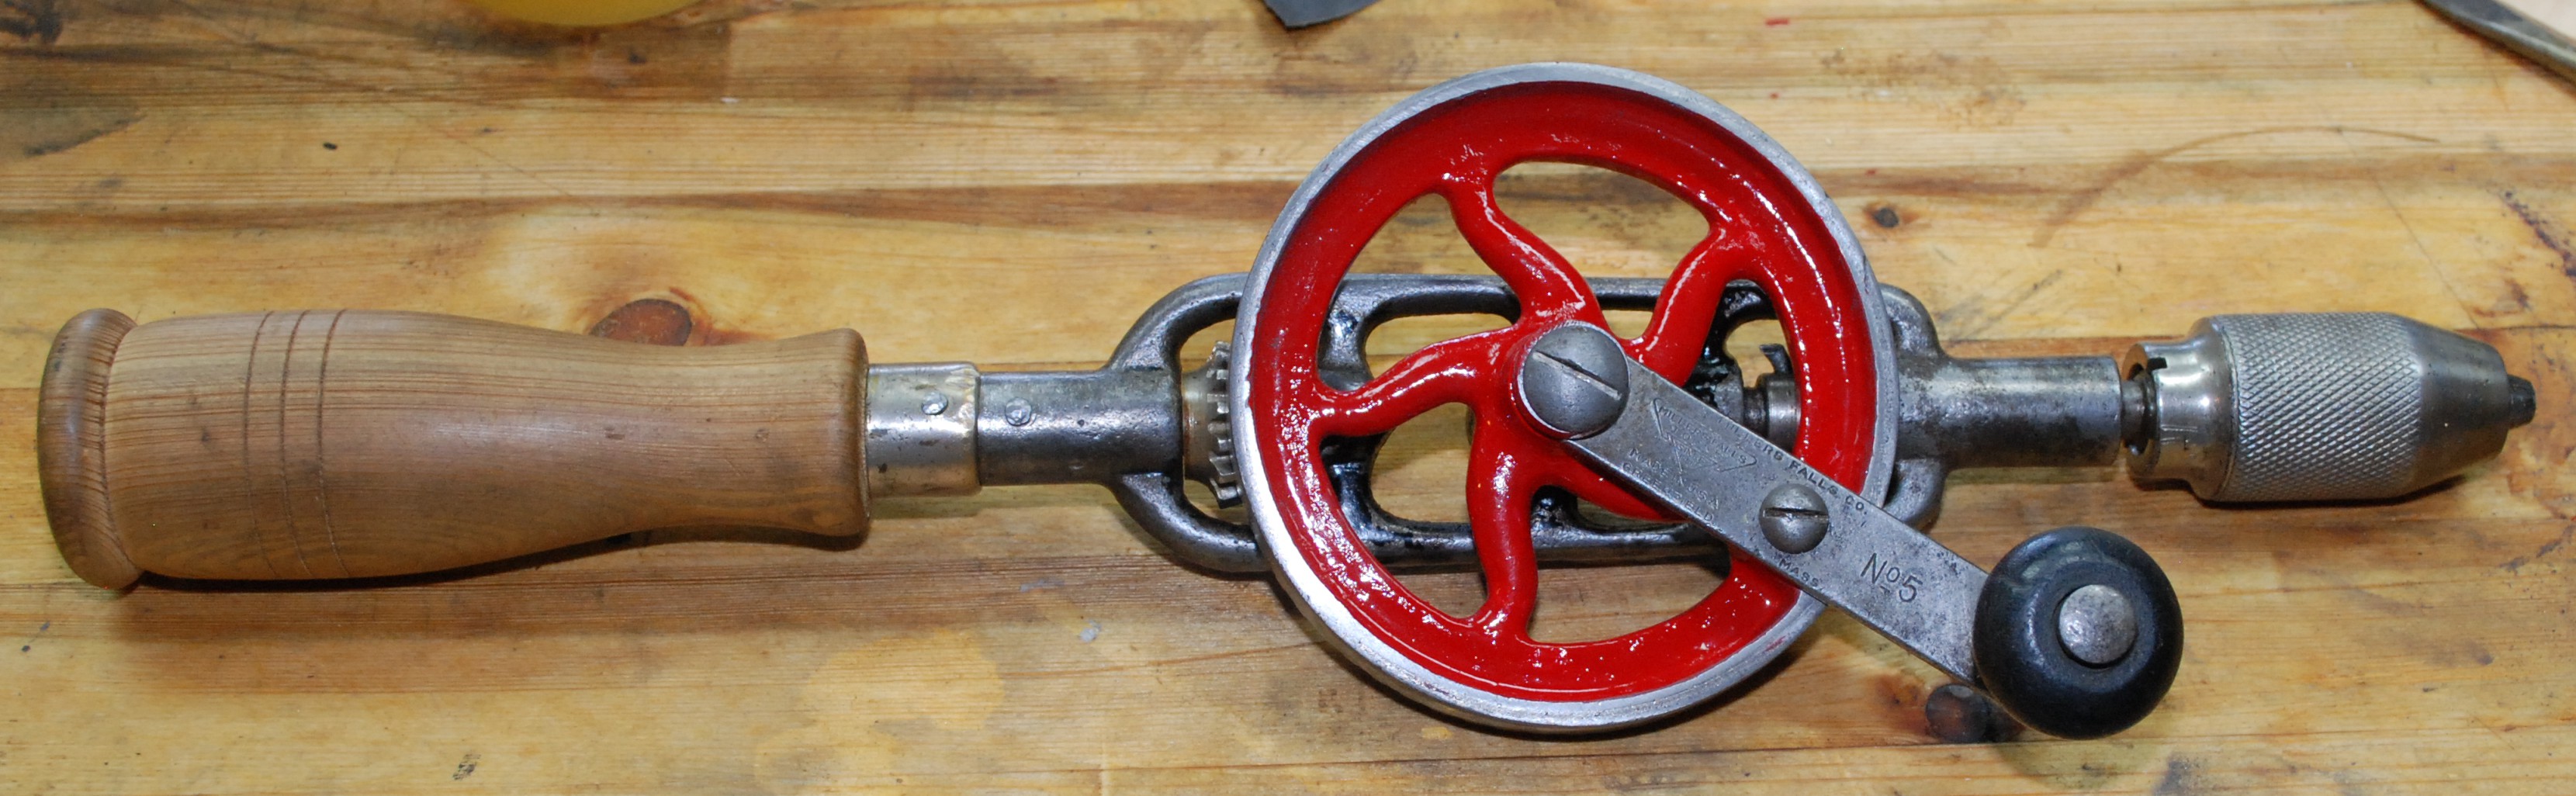
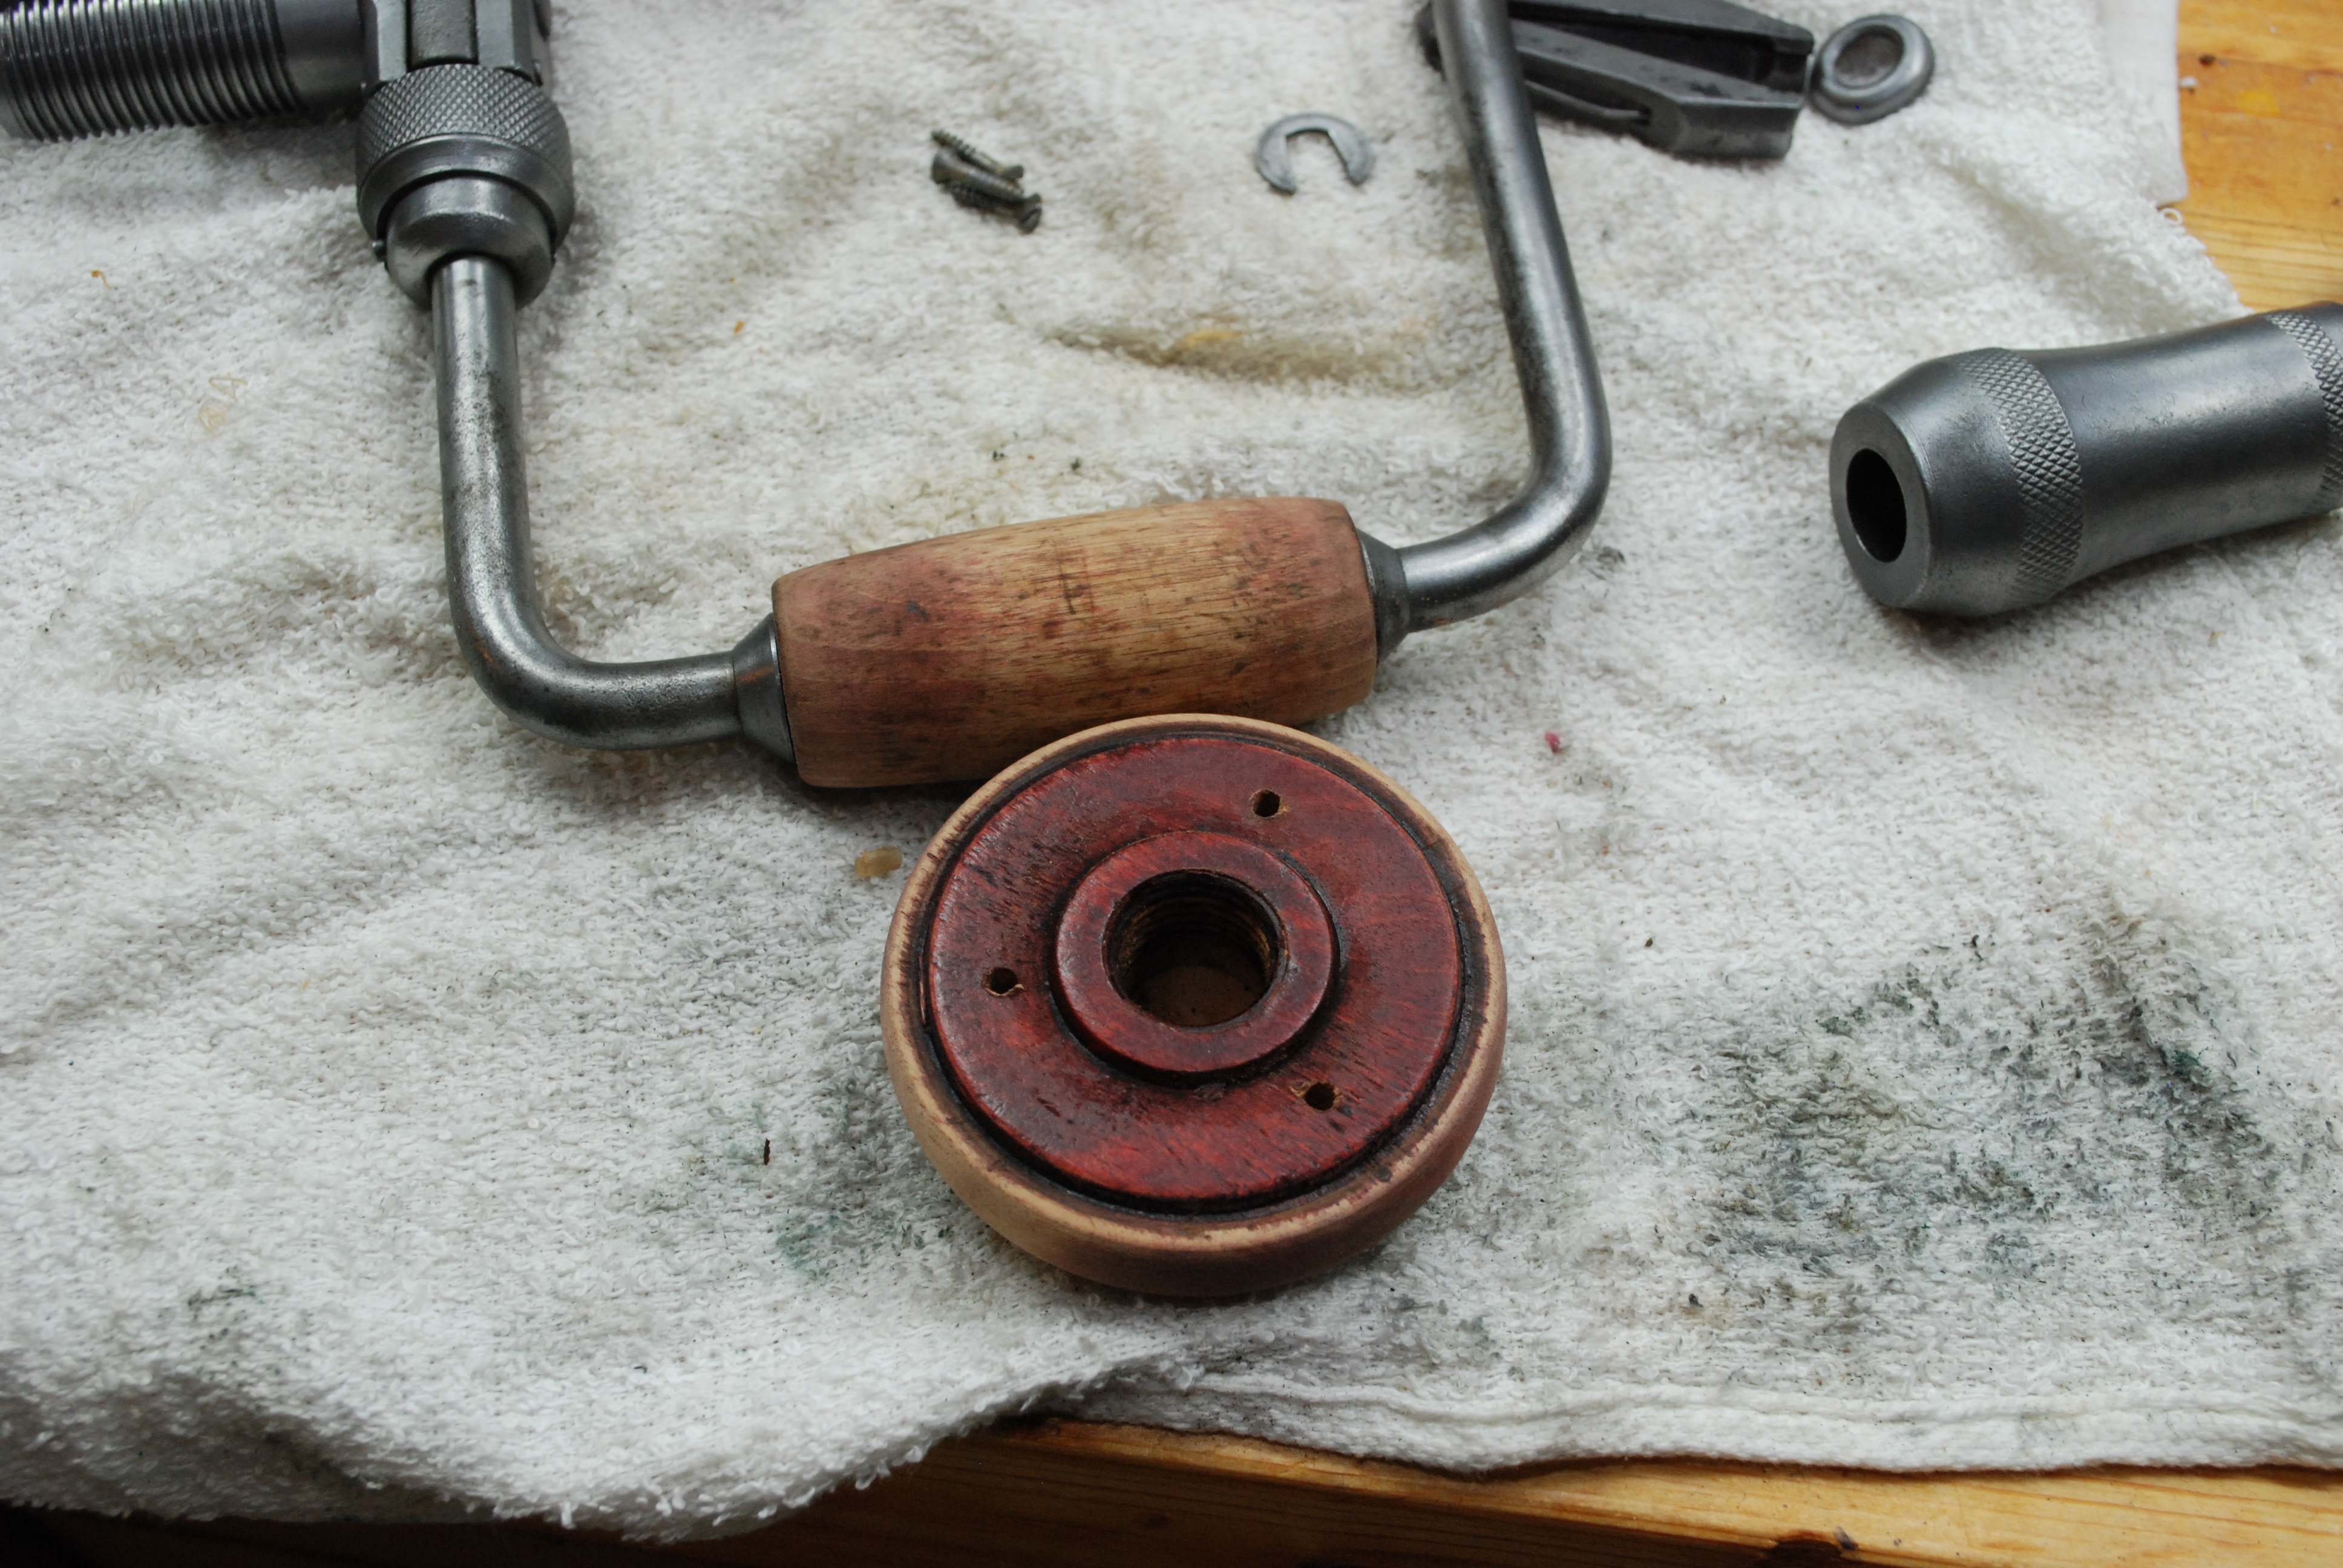
DSC_0191


Egg Beater Drill

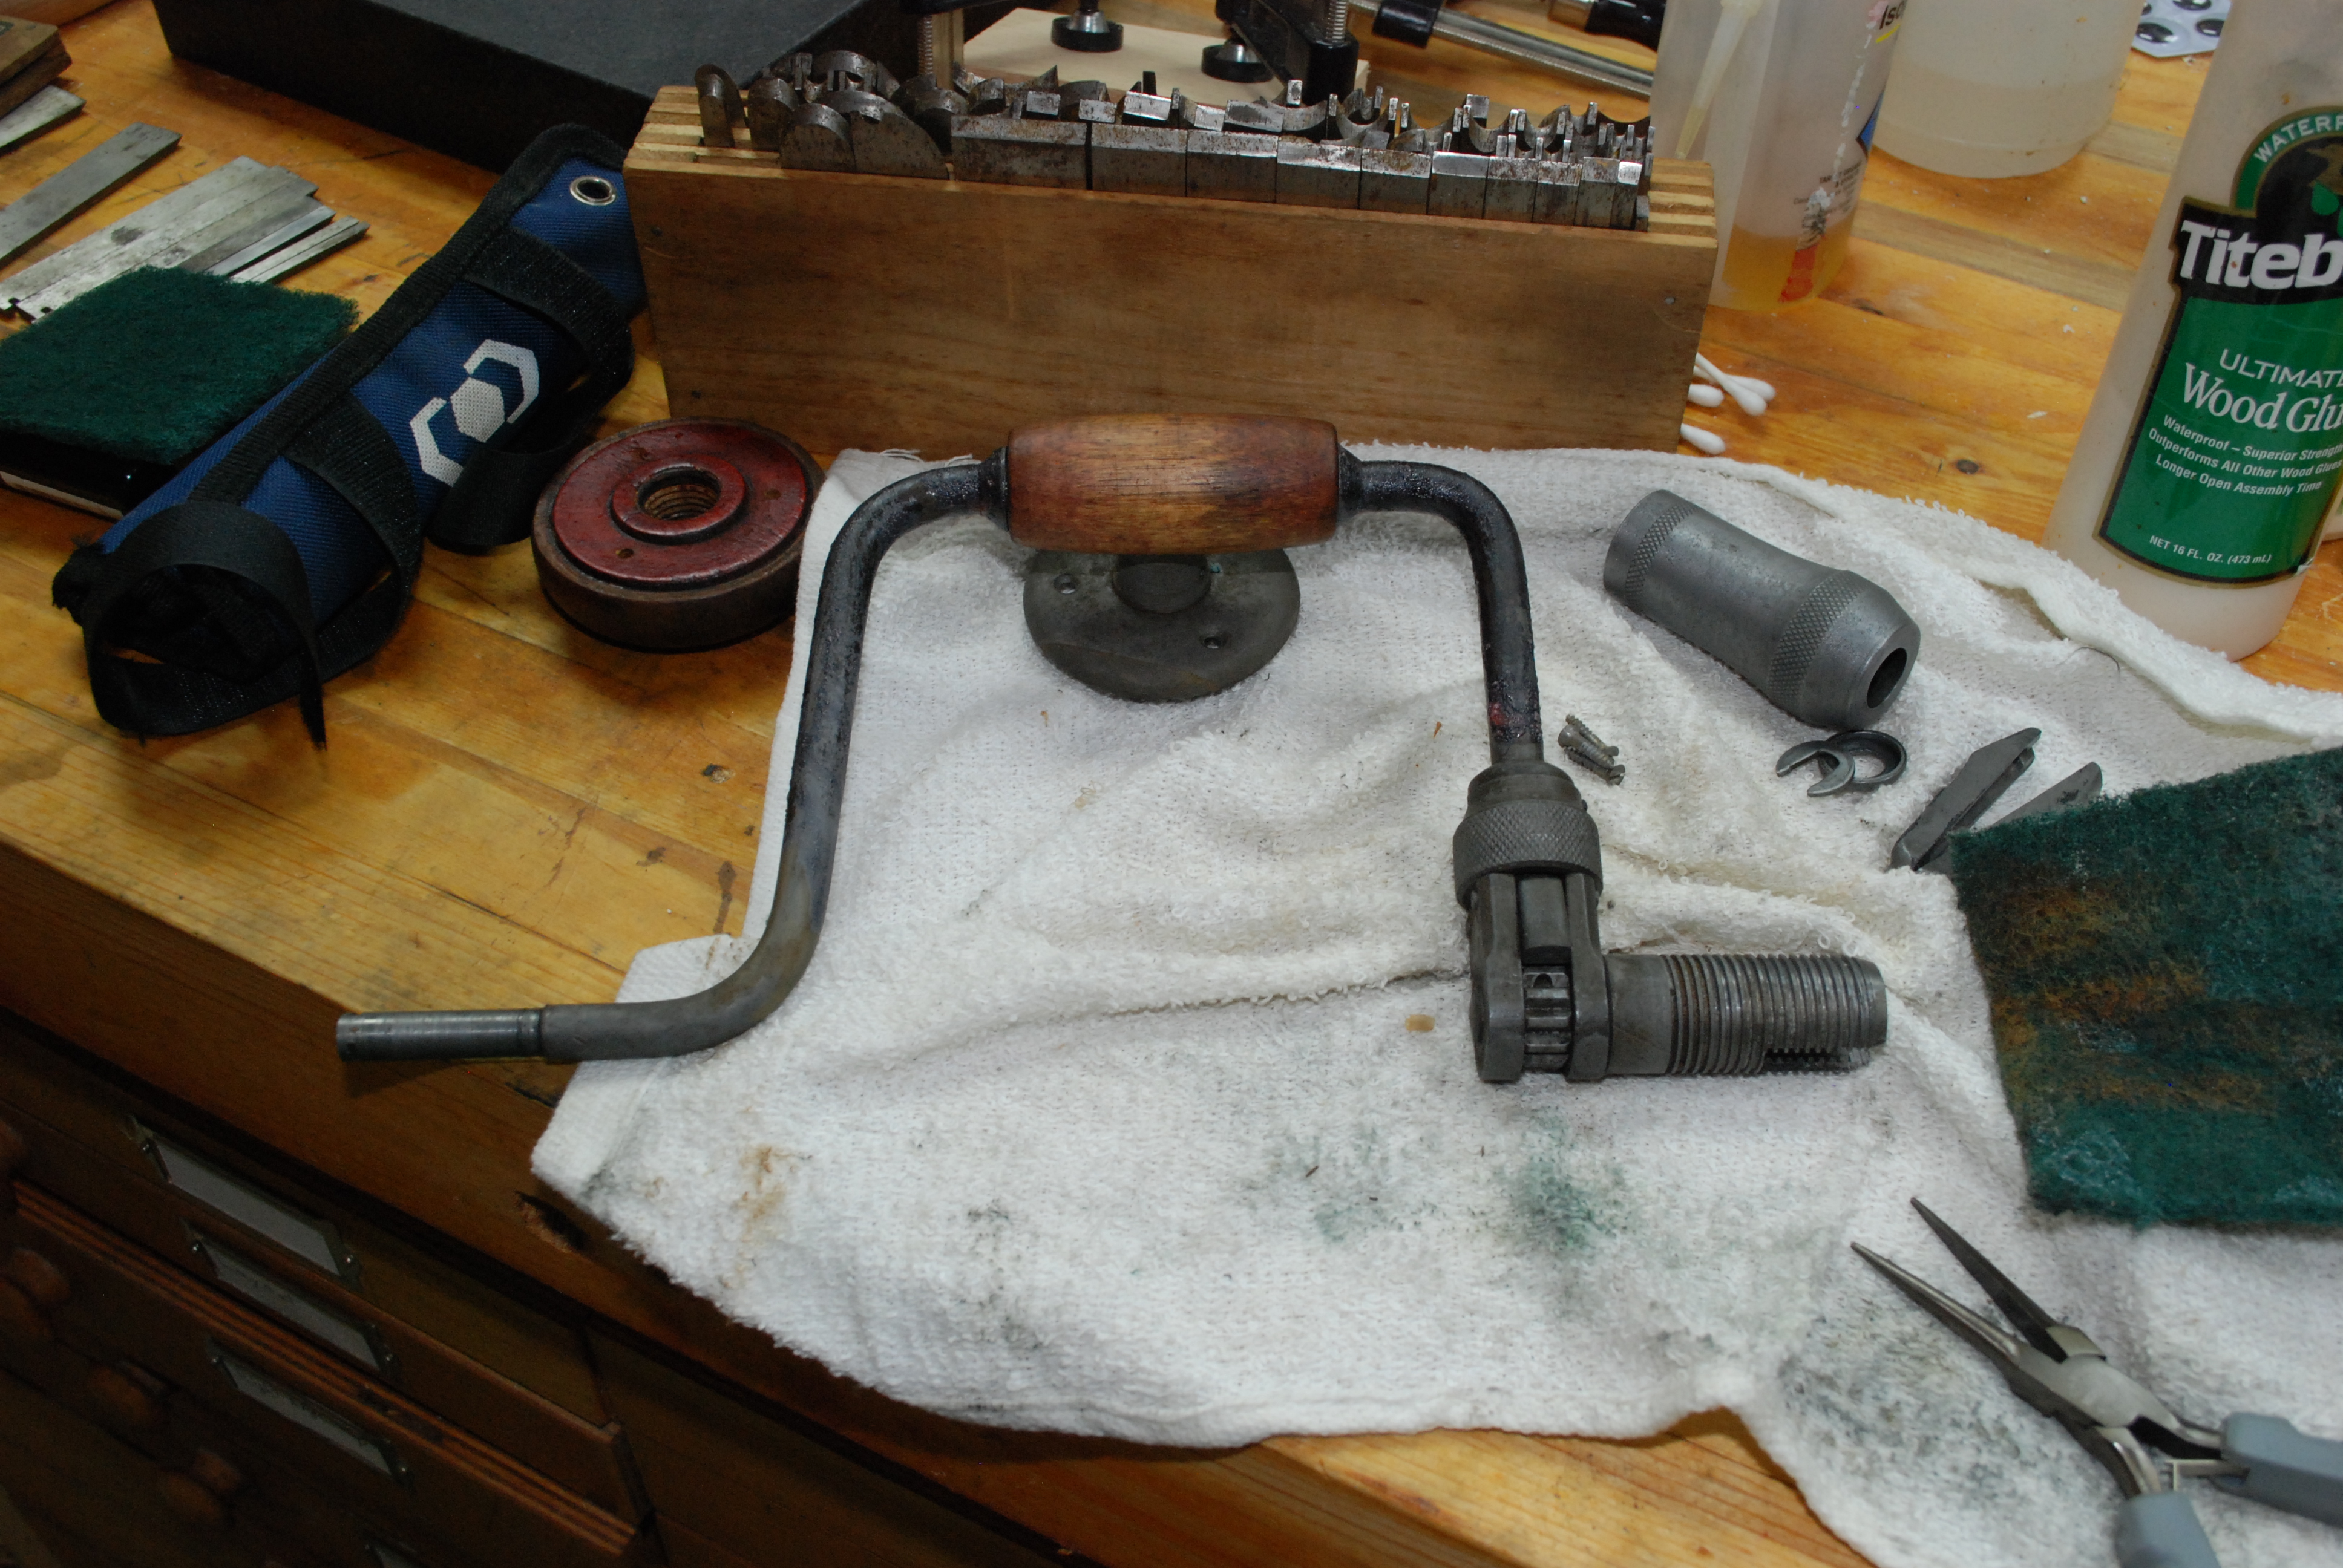
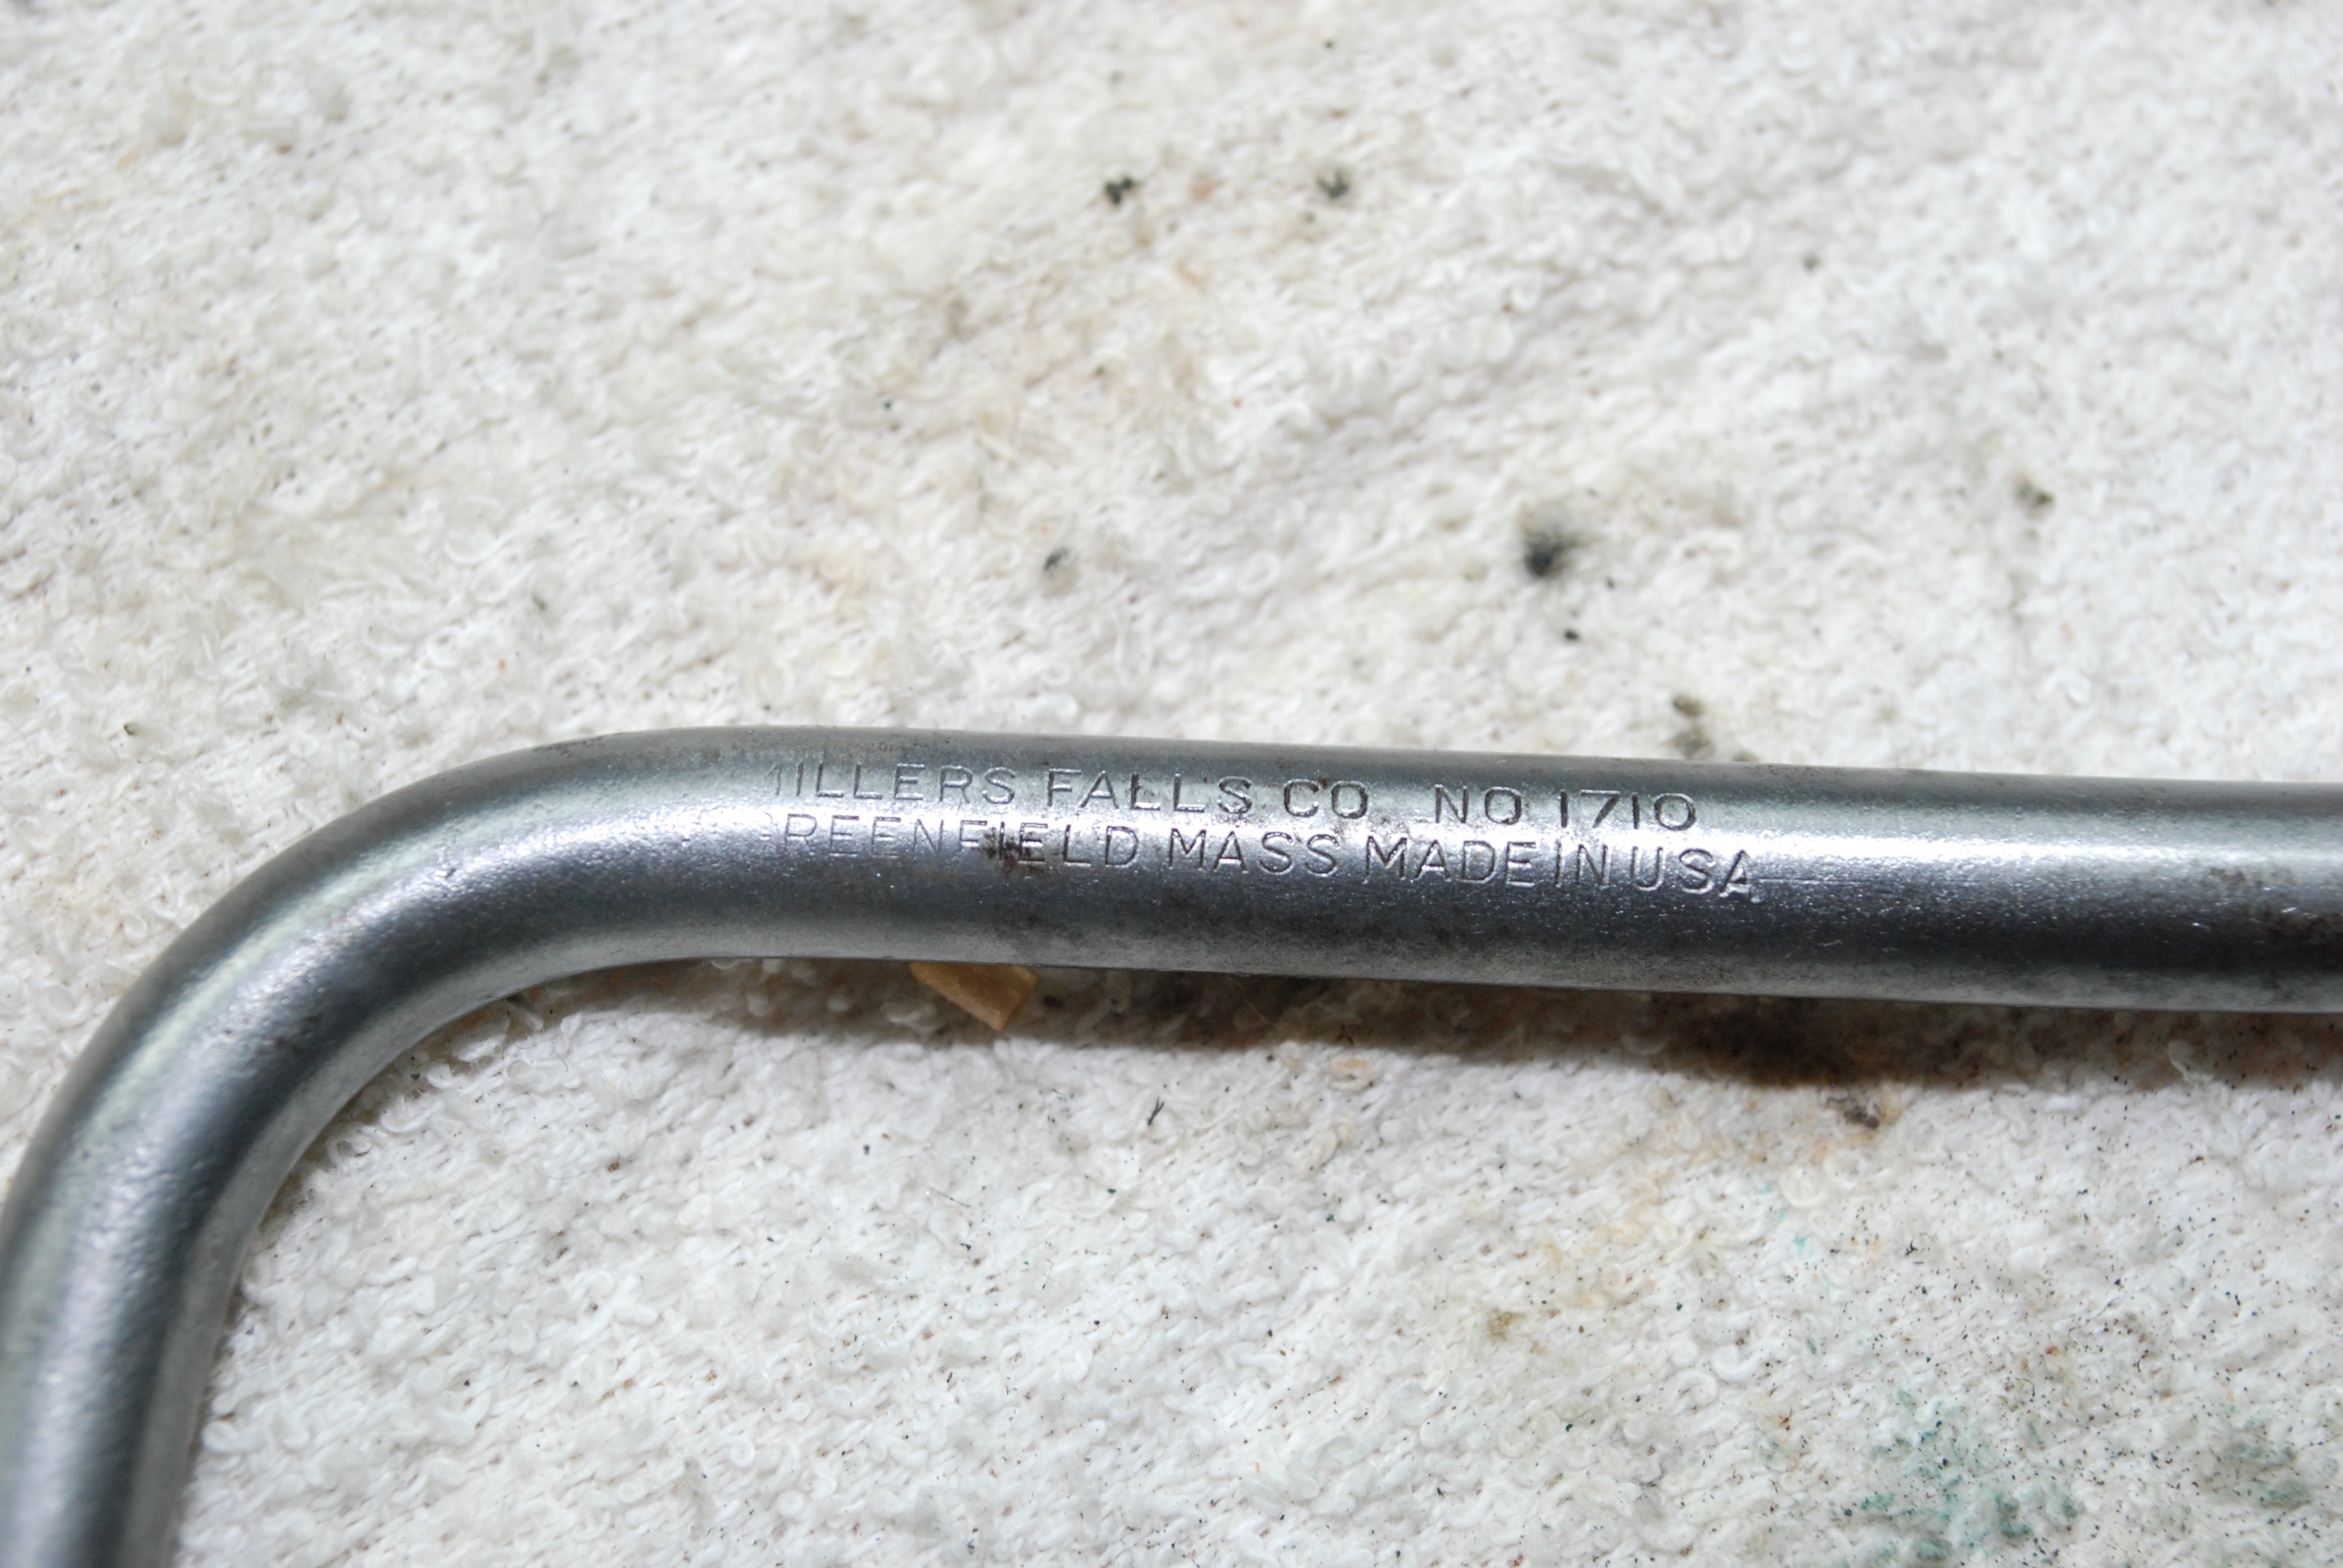
This is a lovely Millers Falls drill.  I would label it a medium size, but these are not my area of expertise.  A little scrubbing for rust and oil for movement was most of what this guy needed.  Just for grins I decided to try and repaint the center hub.  I used a foam brush to apply primer and red paint to all the insides.

DSC_0181

DSC_0217


It is a great looking drill and should give me a lot of years of service.
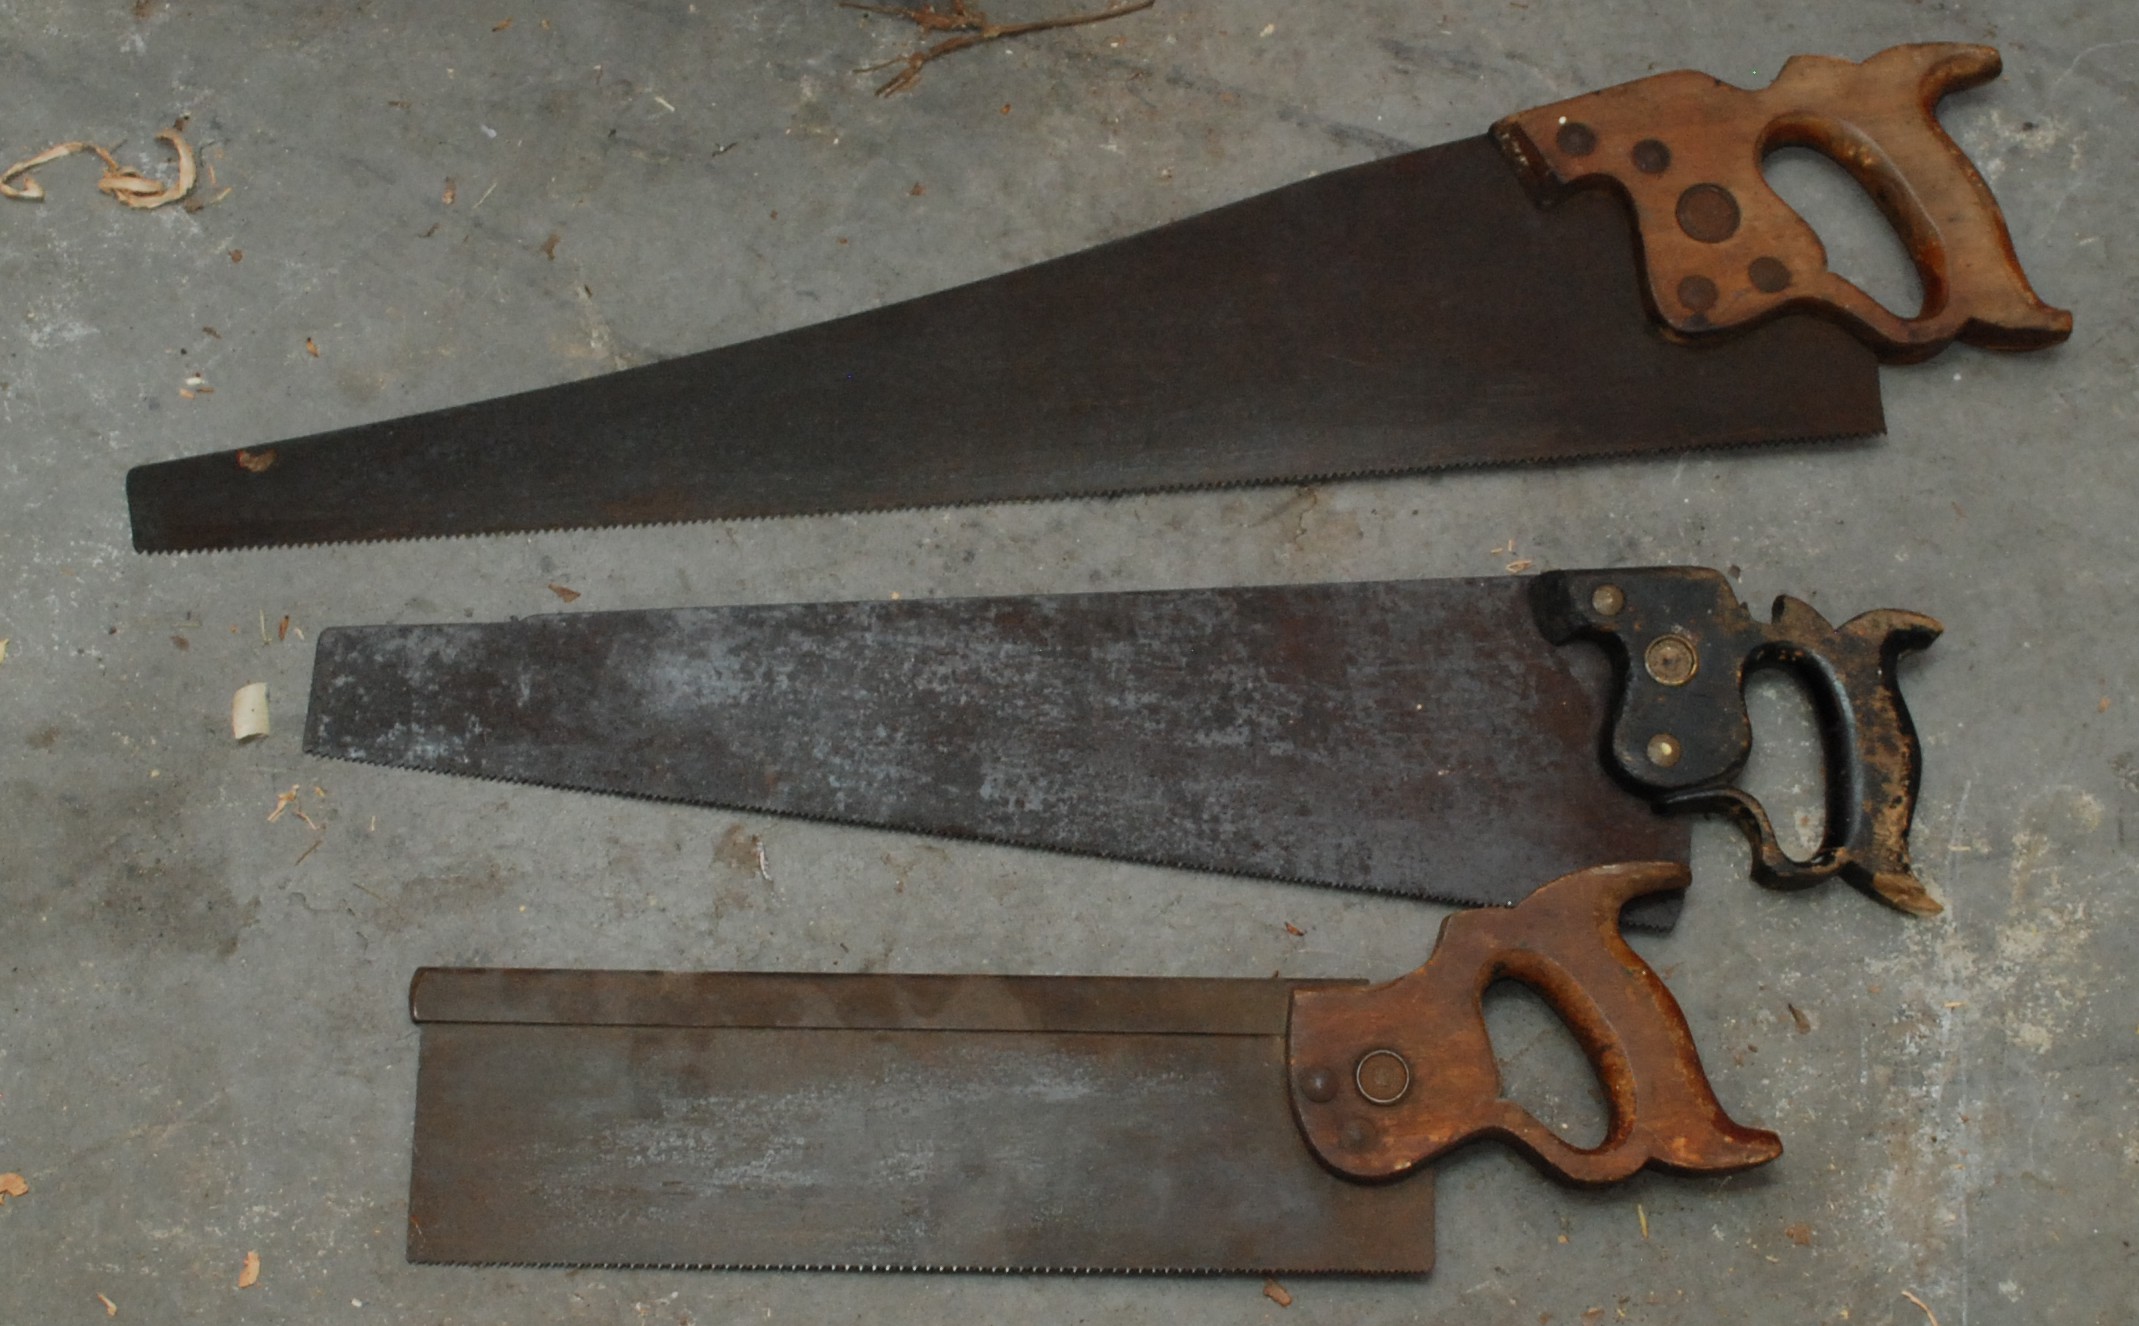
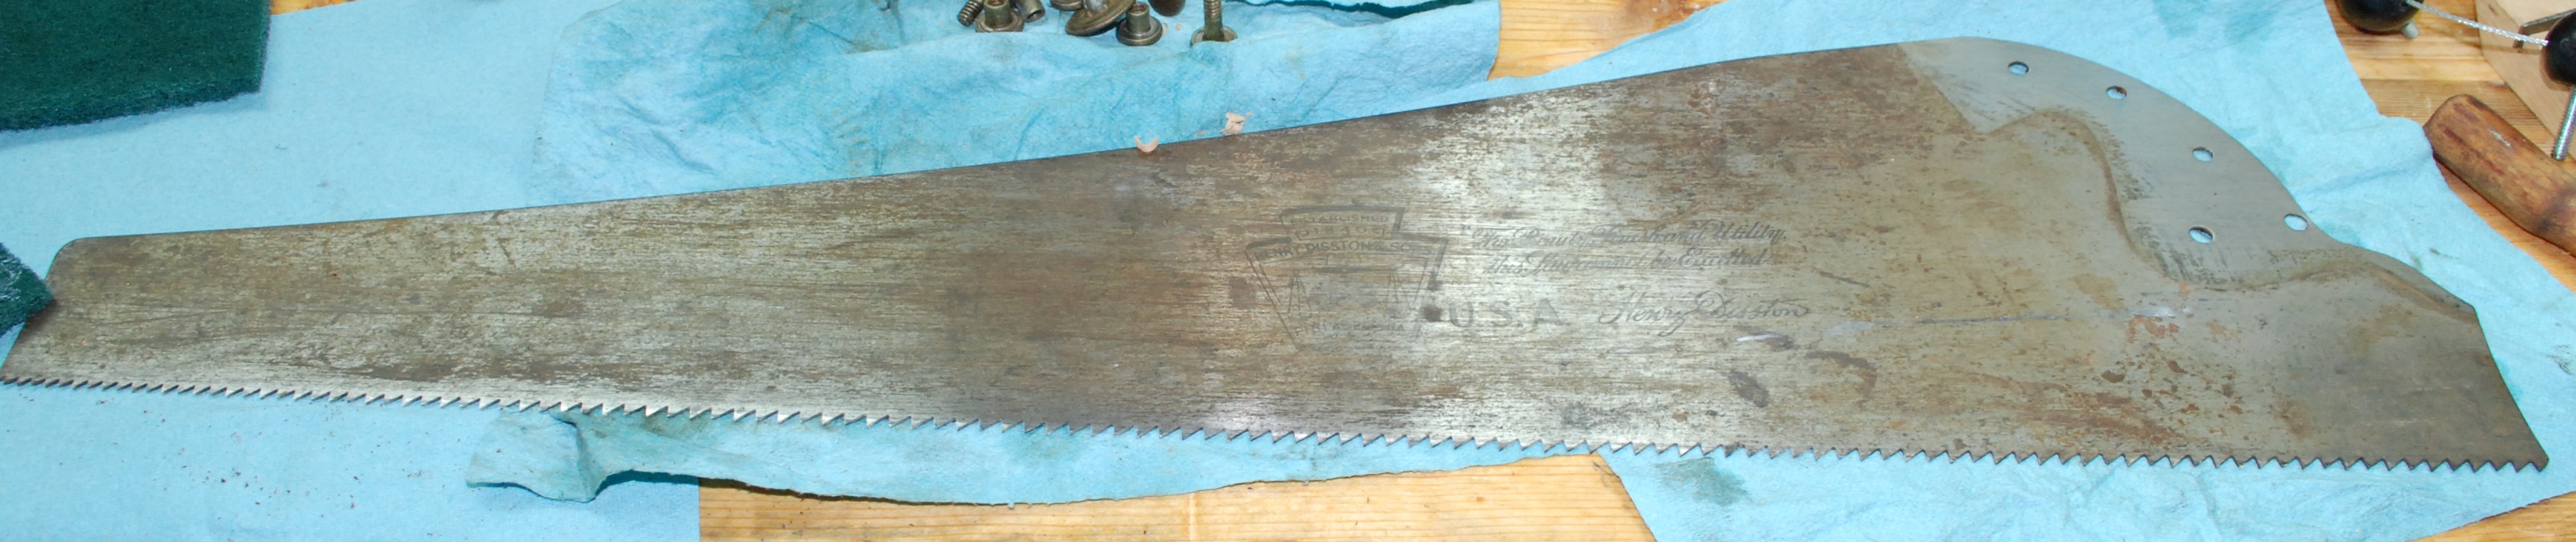
DSC_0216


Rip Saw

This was purchased mostly for practice.  I want to start sharpening saws, and am not willing to experiment on my expensive and still sharp lie-neilson back saws.  Big cheap panel saw to the rescue!

DSC_0169
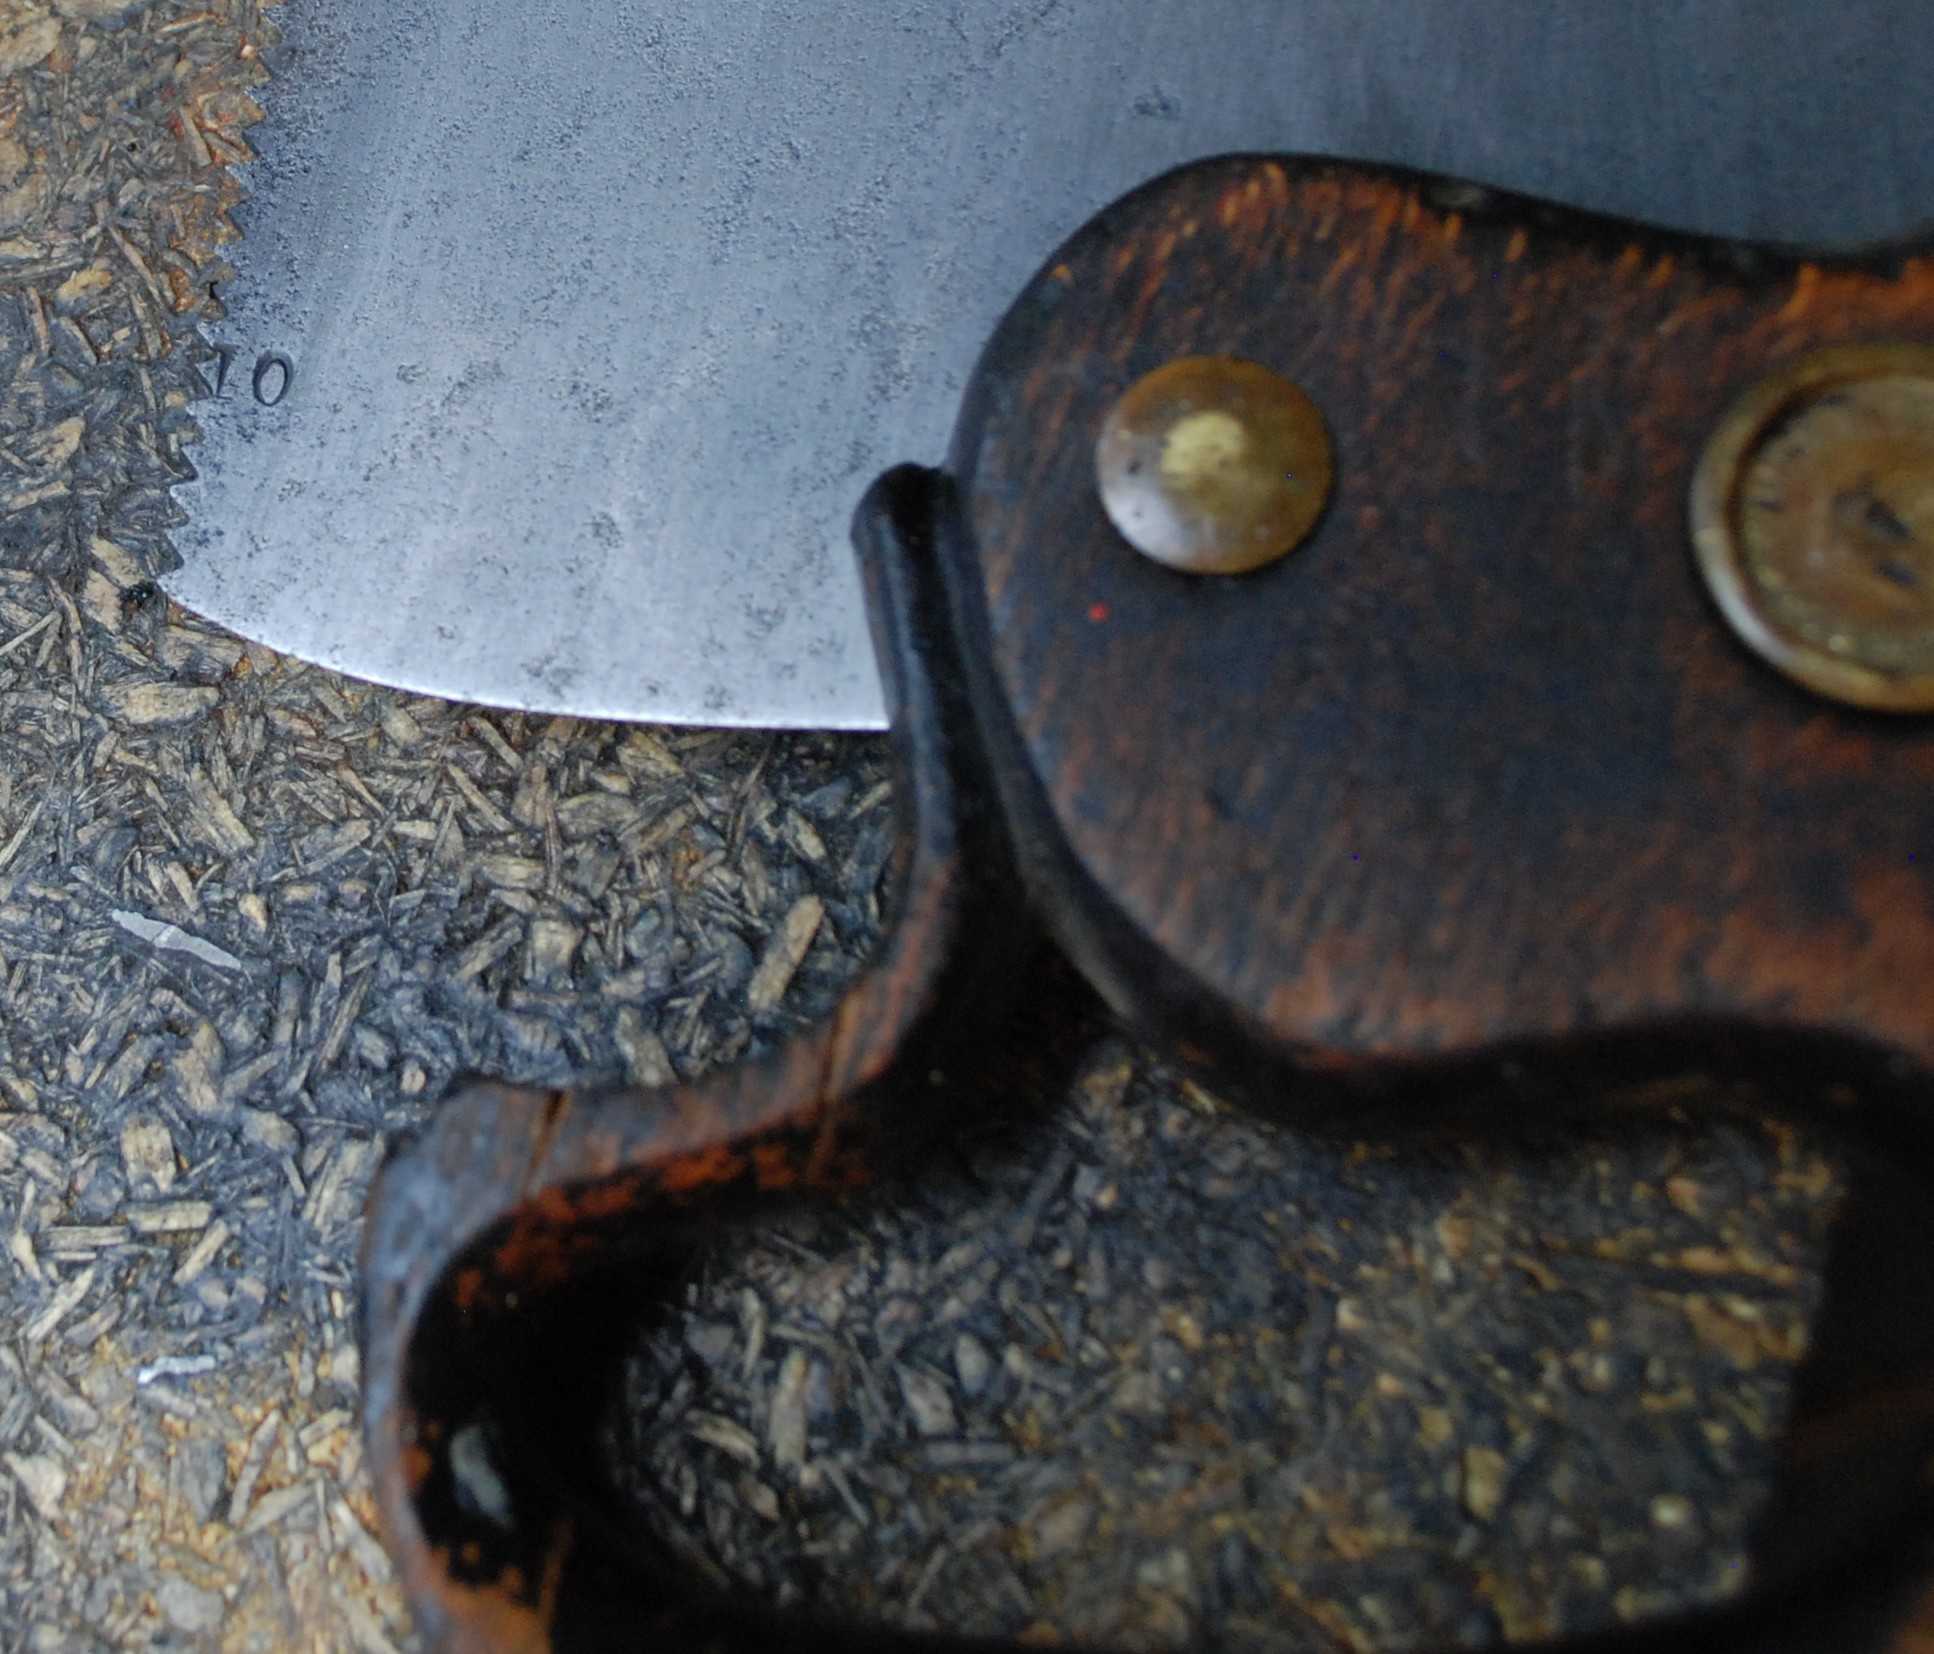
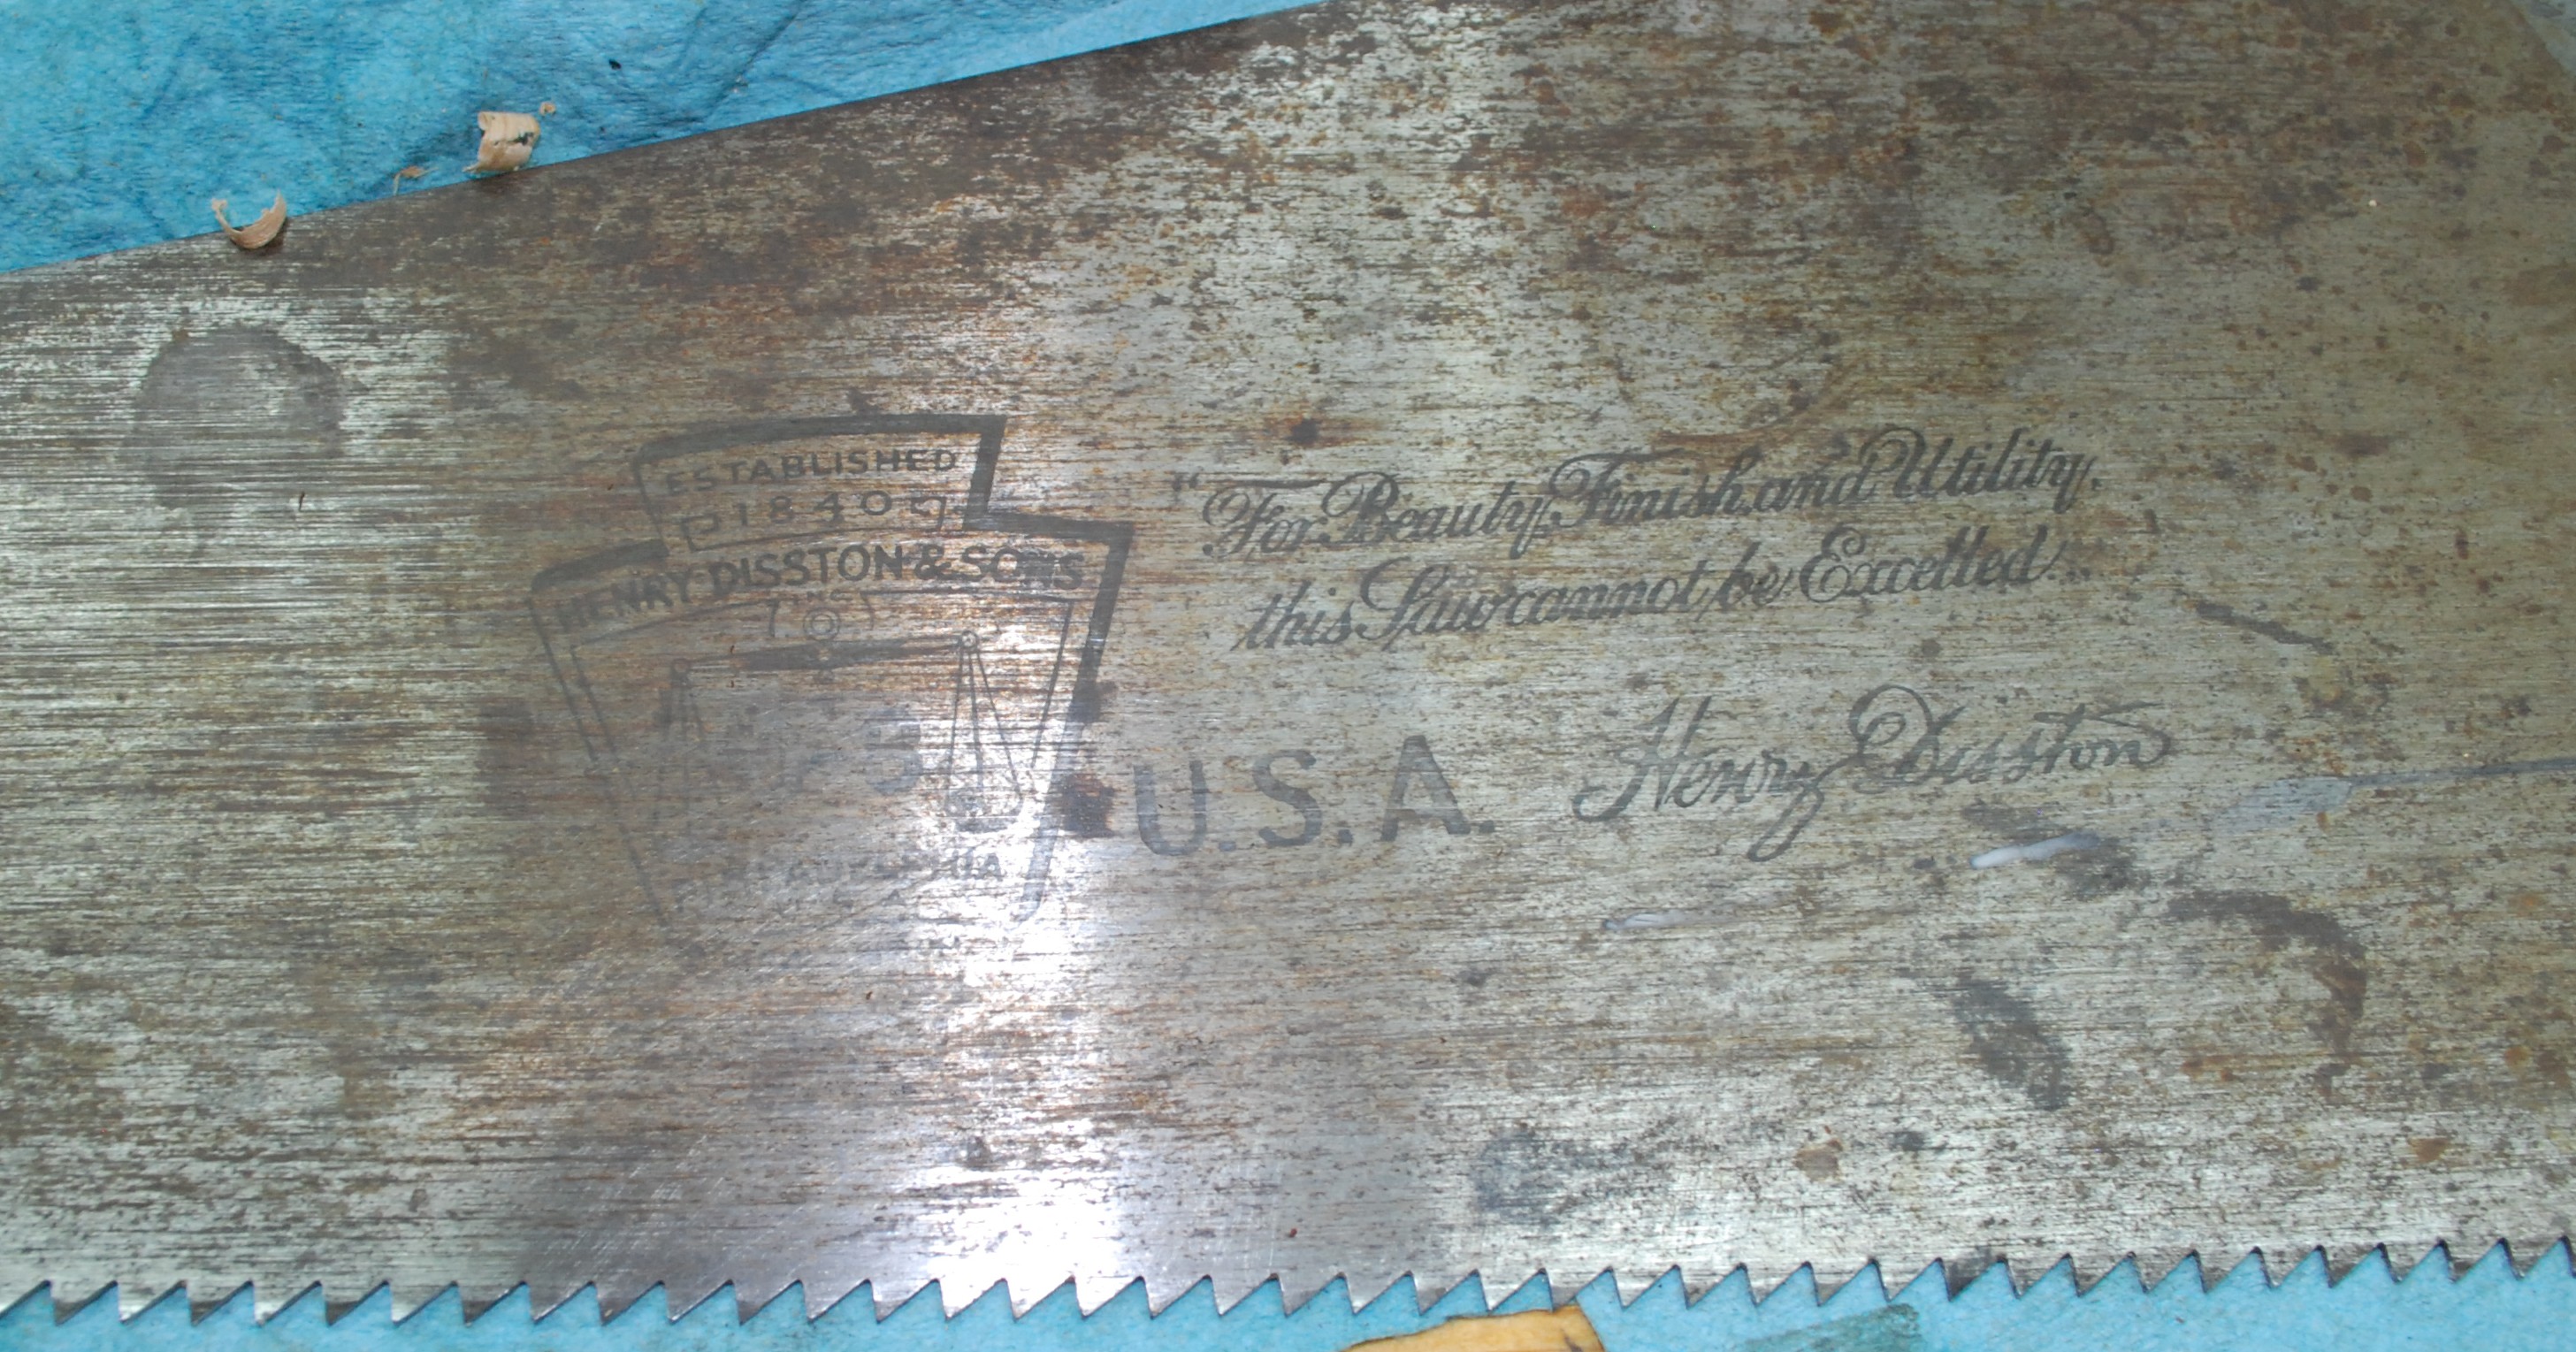
I started by pulling the handle off and scrubbing off as much of the rust and junk from the saw panel as I could.  Here is a close up of what I had to start with.  Unfortunately, I don’t think the logo is going to survive the cleaning in tact.

DSC_0170

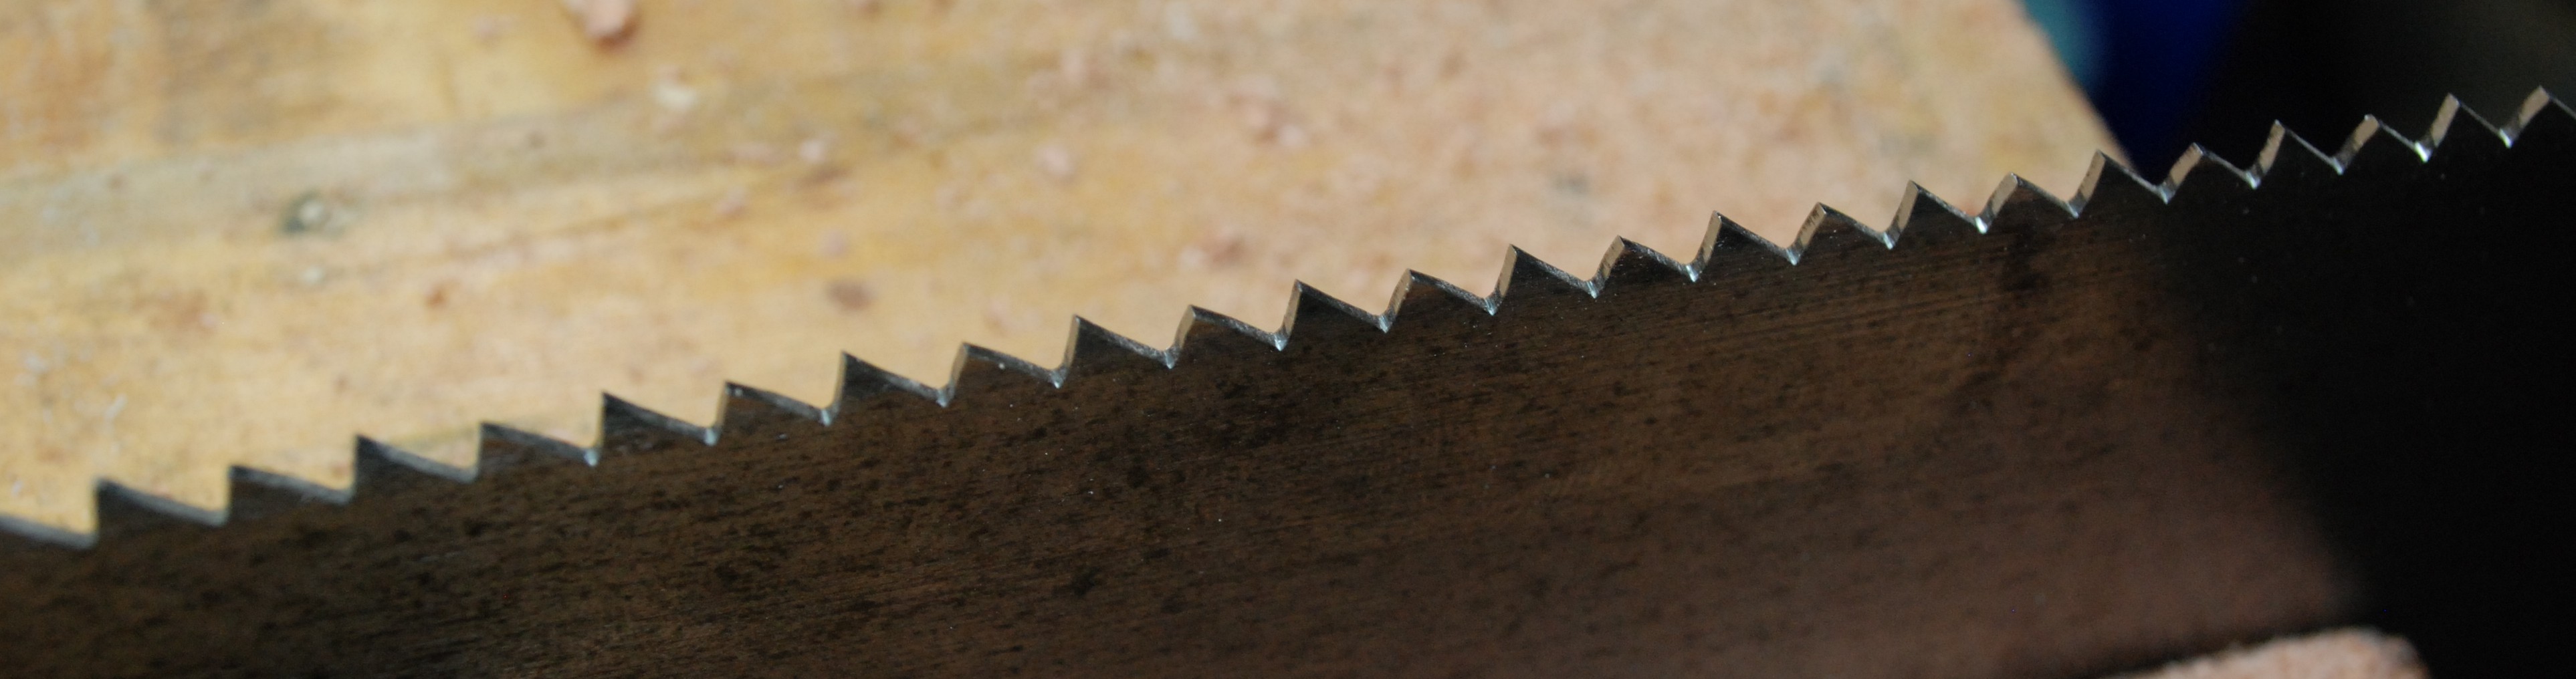
After cleaning (forgot a shot of that when I was finished) I moved on to sharpening.  I have never sharpened a saw before, so this was very new territory.  After watching some how-to vids and mustering up some courage I jumped in.  You can see a new metal shine starting on some of the right most teeth.  It is kind of hard to shoot.  If they look really oddly sized it is because of the set (teeth are bent left and right to cut a wider swath) in this camera angle.

DSC_0188I took a 2×4 and tried to rip it before sharpening and afterwards.  The before wandered a bit and was tough work.  The afterwards took about half the time and went straighter.  I had a lot of trouble sharpening in places because the saw was much taller than my vice.  It would rattle and vibrate as I sharpened.  I need to make a clamp fixture that goes up and supports just under the teeth.  I have seen plenty made in the past, I just need to get around to doing it.  Till then, this saw is in good working order.  The handle was in really good shape, so I didn’t touch it.
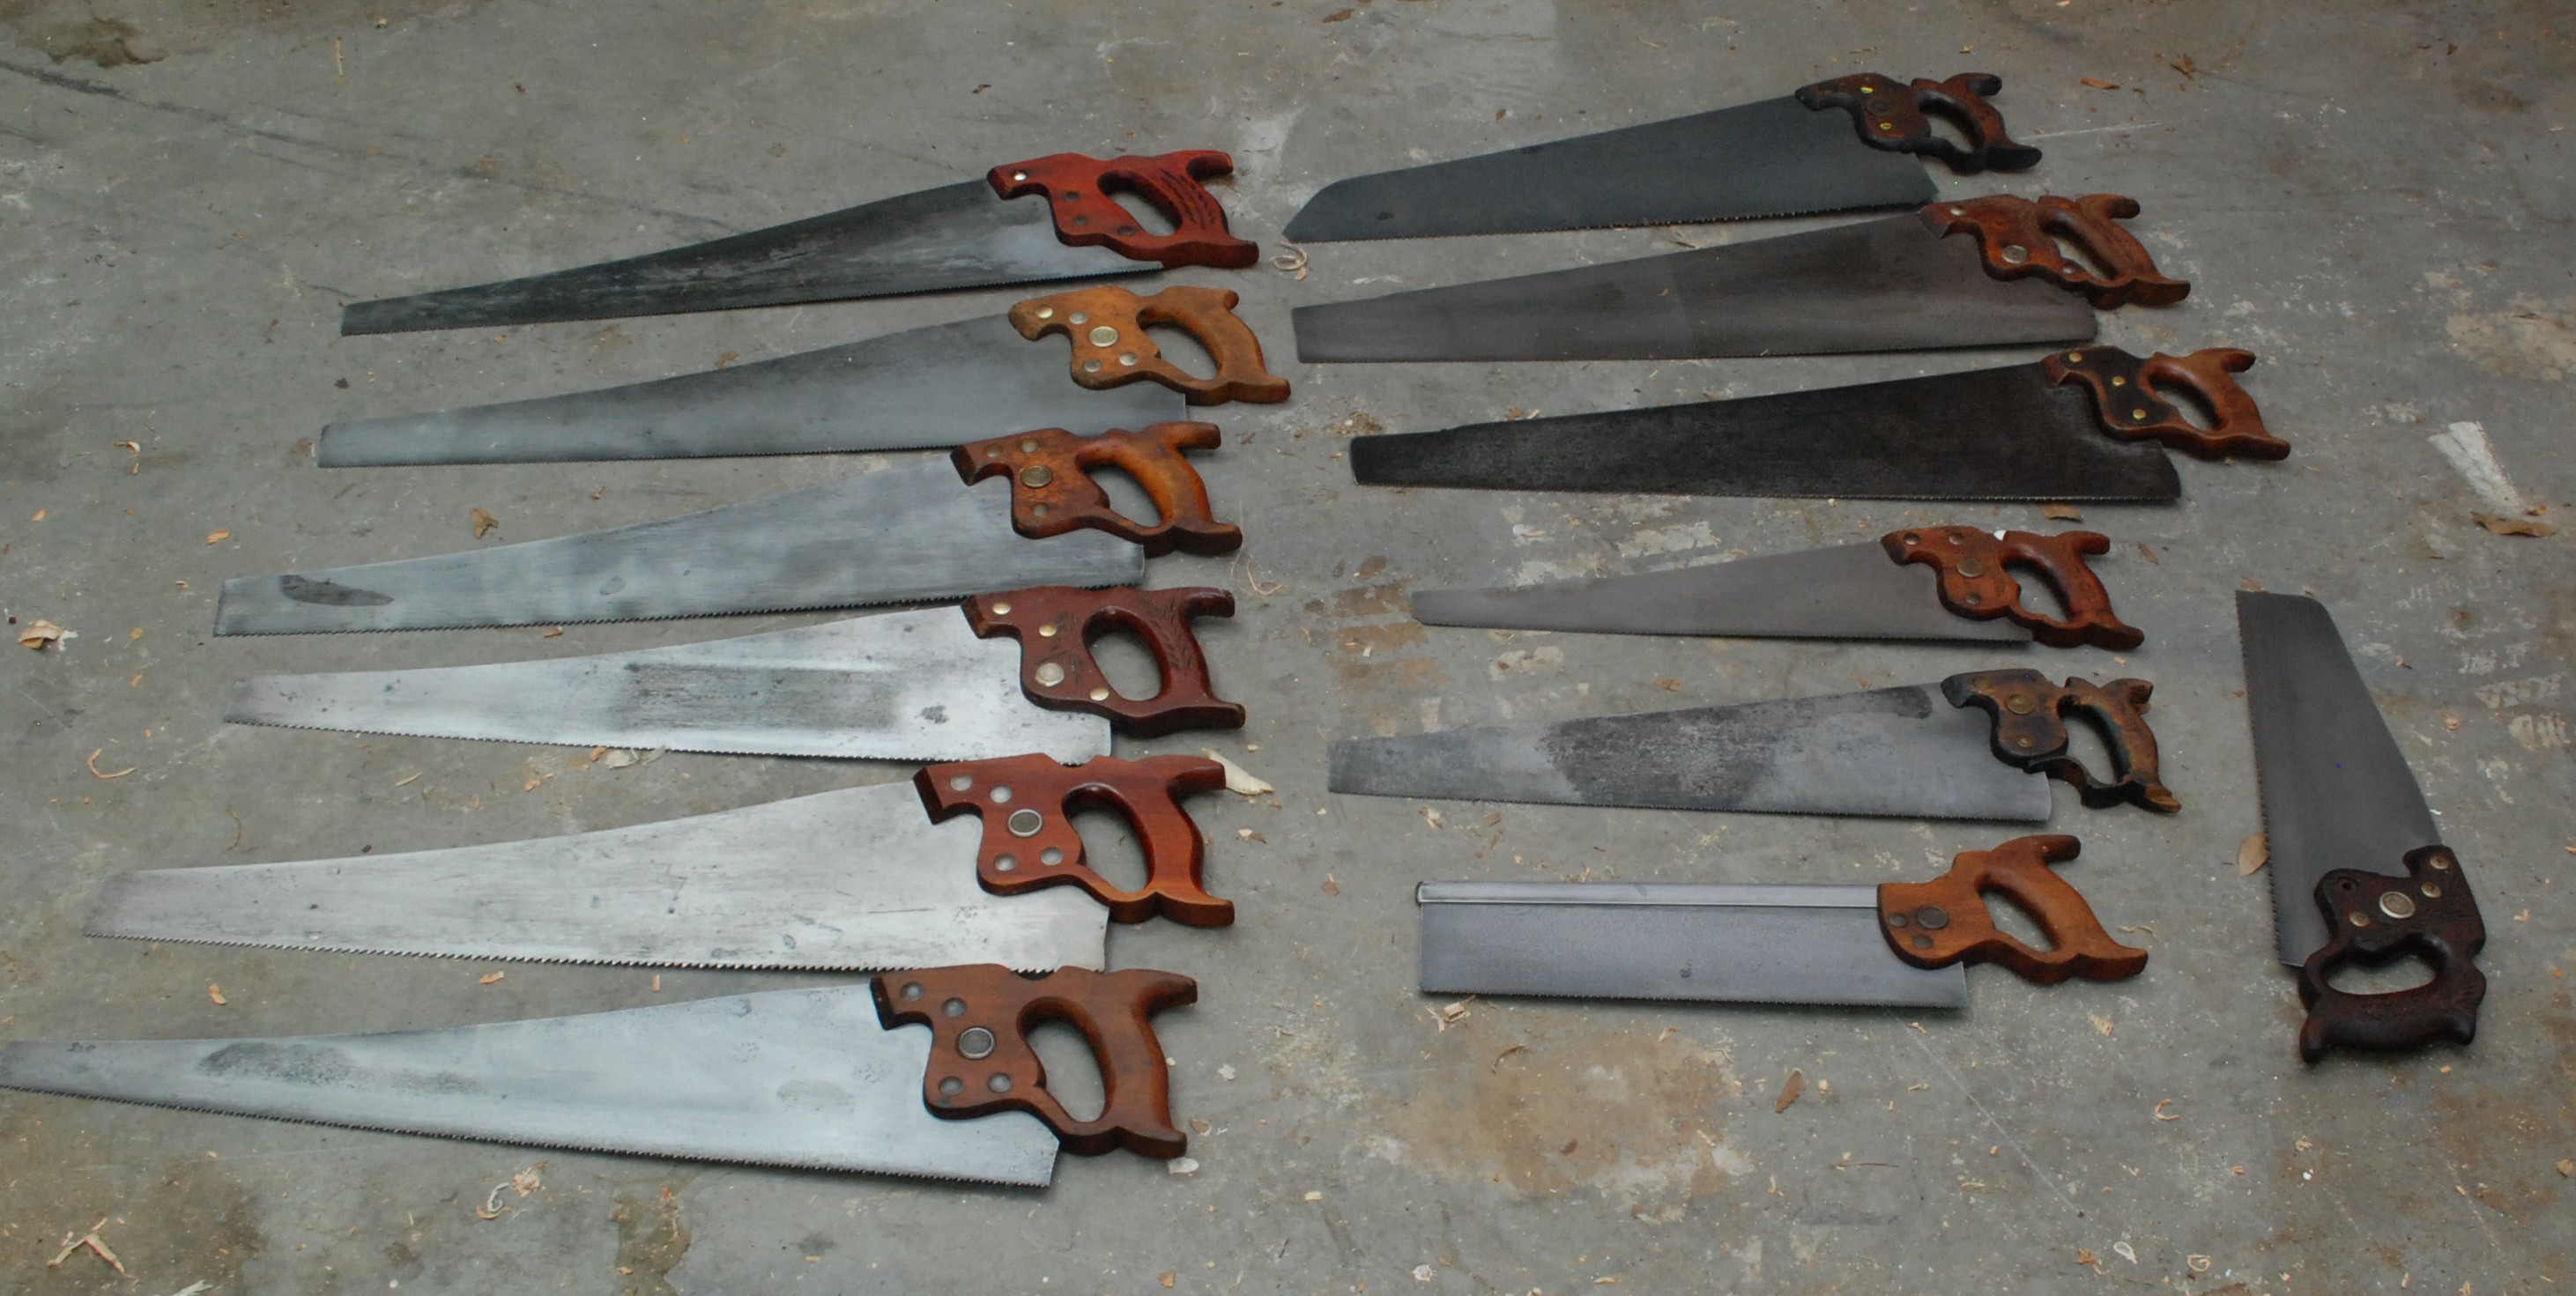
DSC_0189

Family Brace Refurb

I used Monica’s grandfather’s brace to drill the holes in her yarn swift.  It worked well, and I felt it needed a cleanup.  I have been picking up a few things from ebay recently, and am falling into an old tool refurbishment tear.  There are probably more to come.  First, the before shot.

DSC_0131

Very dirty looking, but still in working order.  I started by taking the chuck out and the head (mushroom shaped thing you push against) apart.  The ratchet portion is riveted together and the center spinner handle is not removable.  A few trips through the Krud Kutter (or as I call it now The Green Machine) got all the rust converted on the ratchet portion and the head area.  I didn’t want to dunk the center handle, so some naval jelly was brushed onto the rest of the tool.

DSC_0134

With all the rust converted I tried doing a bit of scrubbing with a scotch brite pad.  It helped clean up the darker areas, but wasn’t getting as far as I wanted.  On a whim I decided to try the brass brush on my bench grinder.  WOW!  What a result.  It takes the grime and converted rust off and leaves a really clean looking surface.

DSC_0135

Before I started cleaning I spent some time trying to identify the brace.  I couldnt see any markings on it, and went as far as posting it on reddit to beg for help.  Low and behold once I got the rust removed and cleaned off, the maker’s marks appeared.

DSC_0139

The first part was worn off before I started in with the brass brush.  The text reads

MILLERS FALLS CO. NO 1710
GREENFIELD MASS MADE IN USA

I did some research and based on the model number and jaw type, it has to be newer than 1949.  We know that her grandfather built a house in the early 50s, so my guess is that it was purchased around then.  Another interesting history fact is that the handles appeared to have been painted red at some point, probably originally.  The underside of the head was left red, and some tinges of red were left on the center handle.  They either wore away or were removed and varnished sometime in the past.  I sanded off a majority of it and recoated them with boiled linseed oil.

DSC_0137

With the wood preserved I re-greased the bearings at the head, oiled everything up and hit it with a protectant spray.  The final results are gorgeous.  It has some of the original scratches and a hint of the red is left over in the handle.  You wouldn’t ever mistake it for new, but it surely does look gorgeous.  Now that I am keeping it oiled and protected the tool should last another 60 years at least.