I happened across a Bosch flexiclick around the black friday season. It is a 12V driver with interchangeable heads; offset, hex driver, and regular 3/8″ chuck. Any of the 3 can go on a right angle attachment. It is pretty genius. I have owned their pocket driver for a few years and love it to death. I liked it so much I built it a portable caddy a while back. This new driver needs a home too.
I started by imaging a few things I wanted to make prints for on top of my cutting mat. It provides a good grid reference when making things in CAD. That usually gets you a 90% solution. The drill body will need a holder and the charger has no wall mount ability. Usually they have some key holes in the bottom to let you hang them from a screw.
I have a wall section with a french cleat so I arranged all the holders until I got a compact layout. Here are all the printed parts screwed down on a scrap board.
Starting off at the top is a plate that holds the charger. It is shaped like the charger with a channel underneath to allow a zip tie to pass through and hold it down. A cleat on the bottom keeps it from slipping down. The one zip tie wrap has been sufficient in holding it down with battery connects/disconnects.
The drill body has a nub sticking out where the various heads are removed. I used that to provide a good lock in mechanism. It is sturdy enough to have not fallen off yet, but is easy to plug in and out. The bottom bent section has some flex to it which is part of the magic.
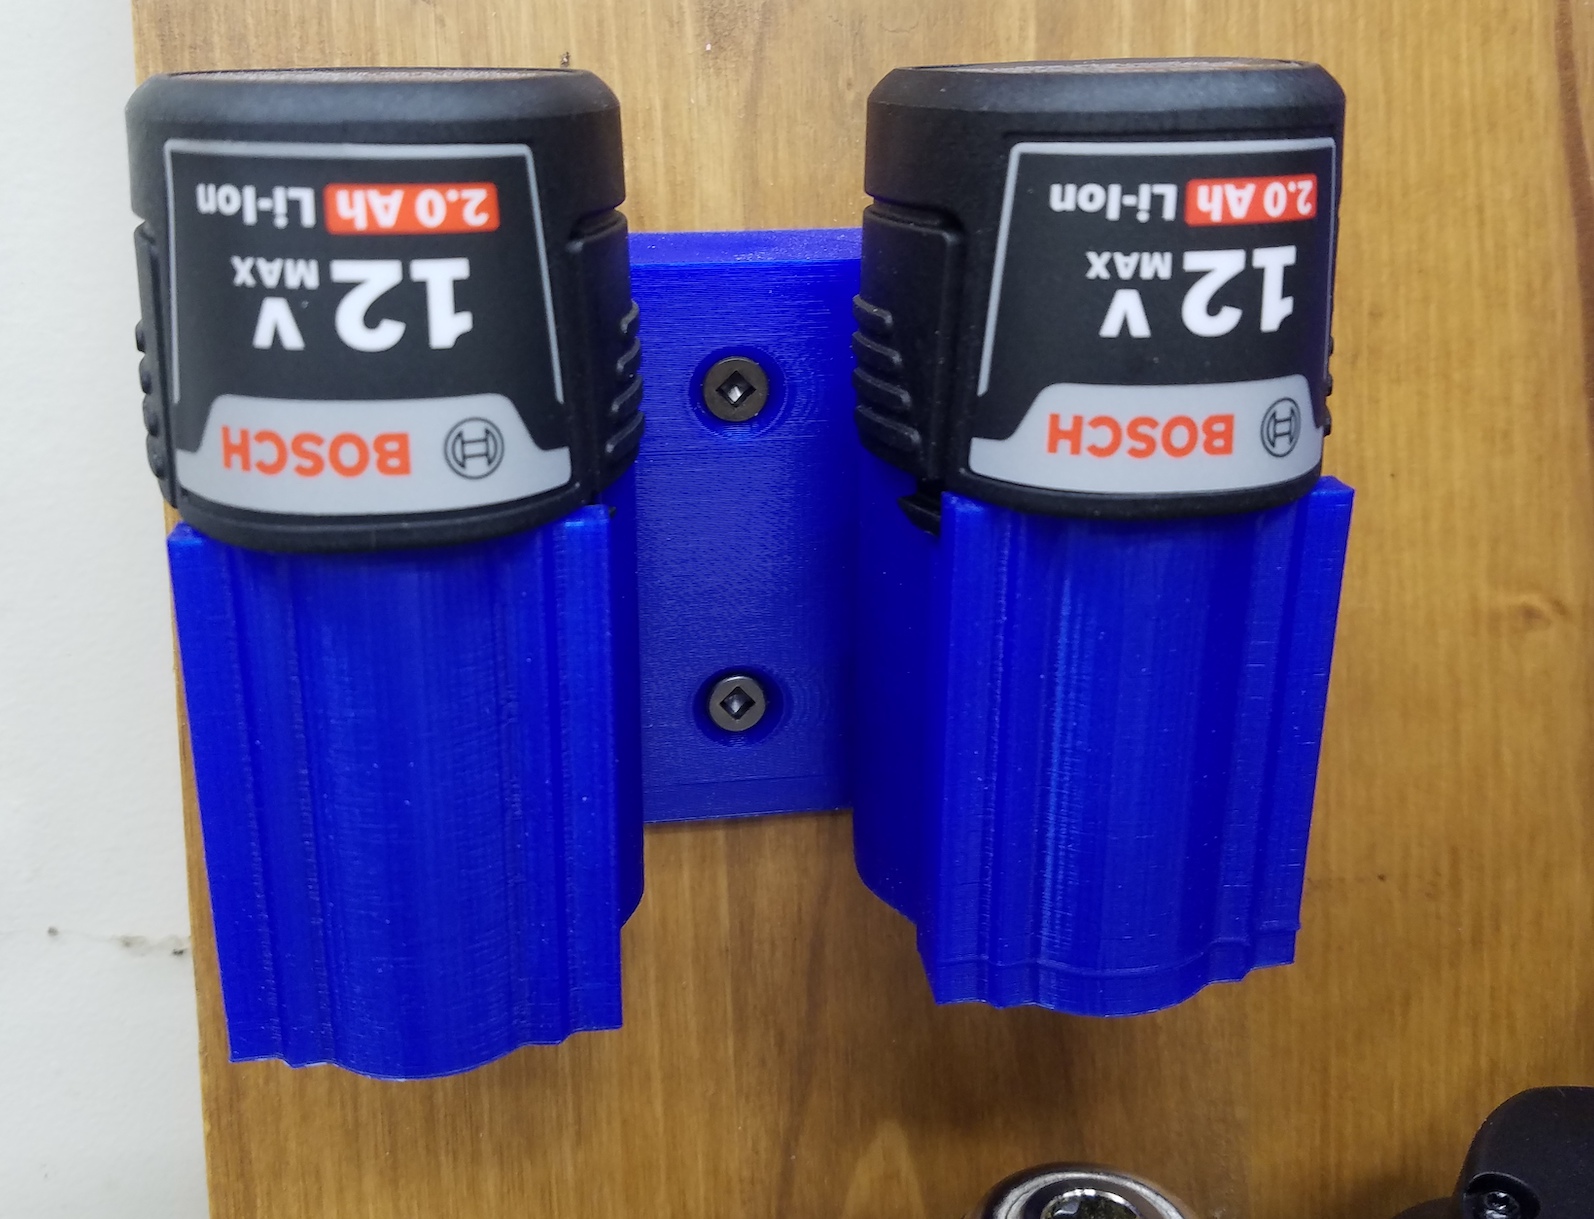
The battery holder is not my design, Thingiverse link to the original designer.
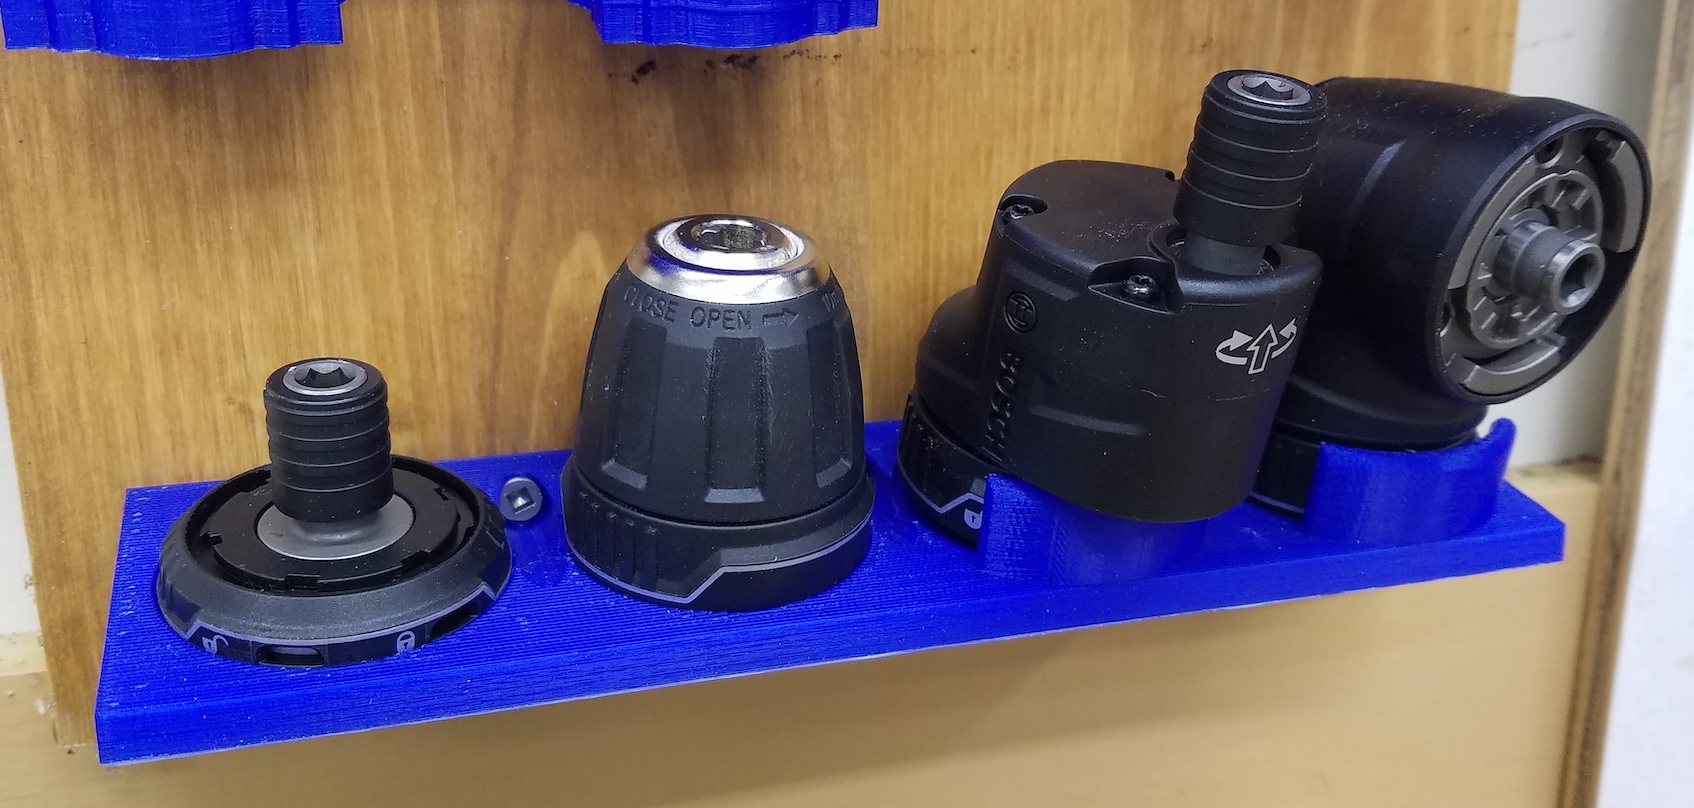
Last but not least is the tray that holds the flexiclick heads. The right angle and offset attachments have a high enough center of mass that they need a little helper support to keep them from toppling over.
I bundled my three original designs and uploaded them as a group to Thingiverse. All together fully populated and with the wires bundled up, it looks like a nice drill station. I had room left over so I stuck a Ryobi charger on there for good measure.
If I were to do a review of this tool I would say it is good but would have been a lot better if it were brushless. Trying to mix this many functions together always results in some compromises. Still, I use it for small light drilling quite often, and the offset driver has gotten me out of a bind.
A few months back I noticed my table saw was sounding a little ill. It was louder than usual. It had trouble getting through boards that normally didn’t give it pause, and the blade would come to a stop a short few seconds after turning off the power. I had a bearing problem somewhere.
I pulled the belt off between the motor and the shaft that runs the blade (called the arbor shaft). Turning the motor on, it spins freely and takes a while to slow down. Trying to turn the arbor shaft by hand is quite difficult. Well that was a fairly easy diagnosis. Now how to fix it. Matthew Cremona made a short video demonstrating his journey of replacing the bearings in this saw. (Ridgid R5411 Table Saw purchased in September 2009) He does a good job of showing what everything looks like, but some of the technique could be improved.
Step one is to remove the table top. Remove the blade and lower the arbor all the way down (sad story about that later). There are 4 bolts around the perimeter that hold the granite beast down. Remove them and walk the table top off onto a surface of similar height. This will expose the arbor shaft. There are two big bearings (6004zz) located here (under each red arrow), one of them is likely the culprit.
Now that everything is open I would suggest some lubrication. PB blaster is pretty well rated and available at a lot of auto parts stores. Spray everything that will need to slide and come back in a day or two. That stuff can creep into places for days. Raise the arbor back to the top, remove the pulley and use a block to push out the shaft like Matthew shows. I used a really big dowel to hammer out the bearing that gets left over (left side in above picture). What I ended up with was this below.
That right most bearing is tricky. It has to slide off of its resting surface, and the one for the left most bearing. Lube helps a lot, and so does the right tool. I picked up a cheap bearing splitter kit and am glad I did. There isn’t much room between the bearing and that flange that goes against the blade. The splitter wedged itself between the two and started the bearing moving towards freedom.
The big red vise from a few weeks ago is going to come in handy now! Next I installed the rest of the hardware to start pulling up on the bearing. The extensions were not long enough. Thankfully they were 1/4″-20 threads. I cut up some threaded rod I had around and got to work.
Original kit with extensions
Original kit compared to my threaded rod
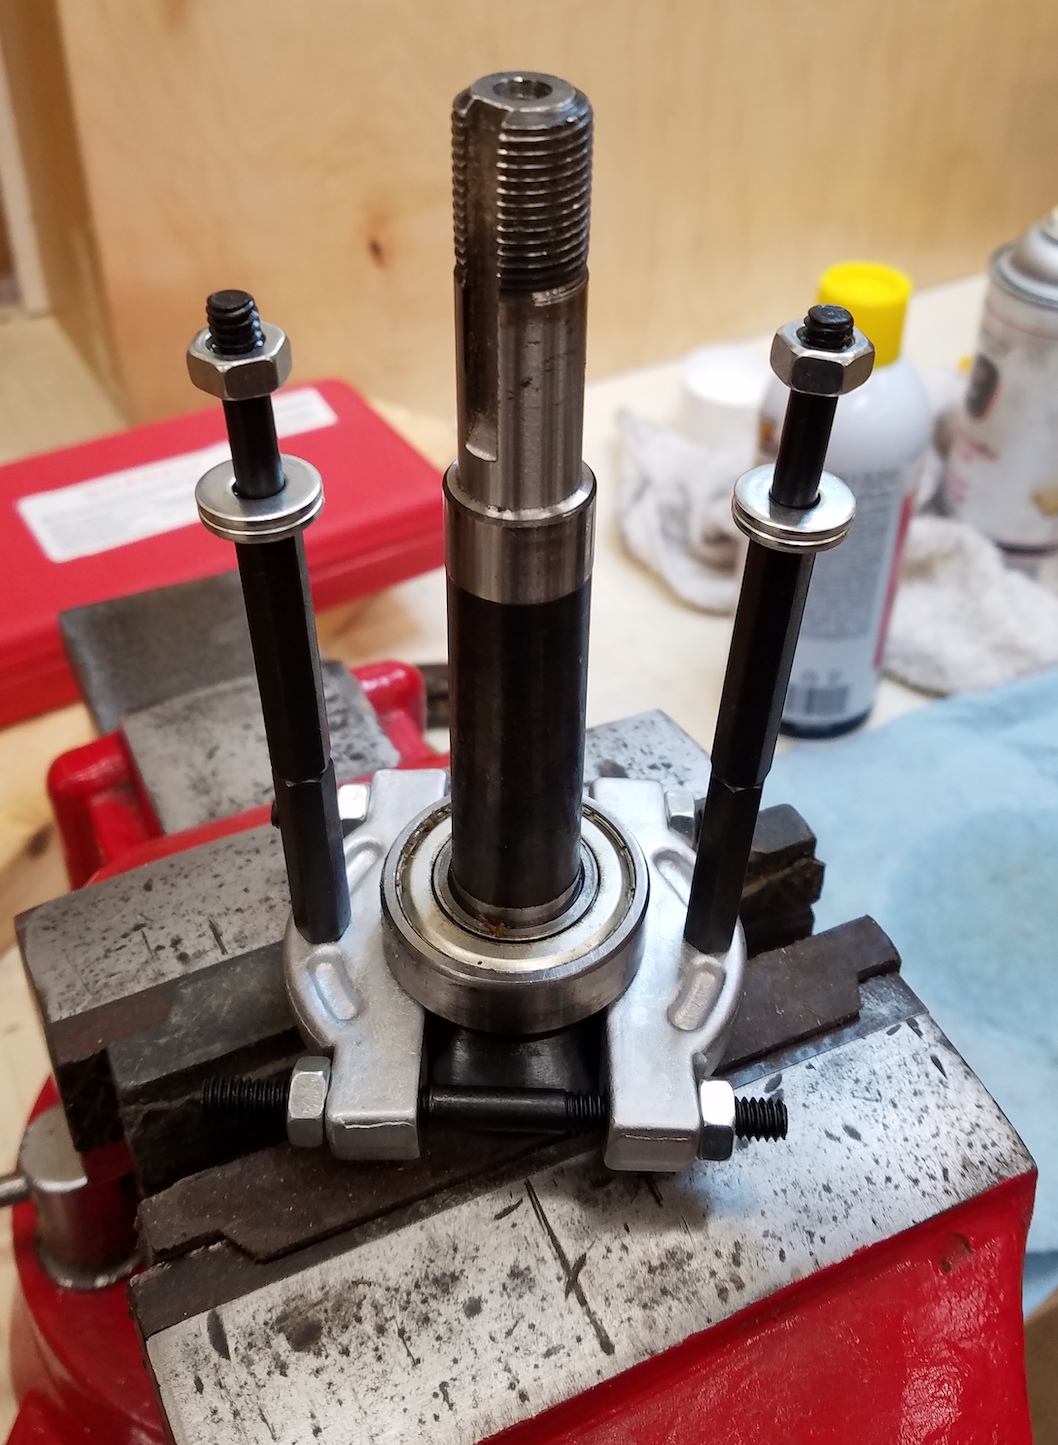
With two adequate threaded rods installed a double fork thing hooks in and has its own threaded center to push on the shaft. A socket wrench helps provide some umph.
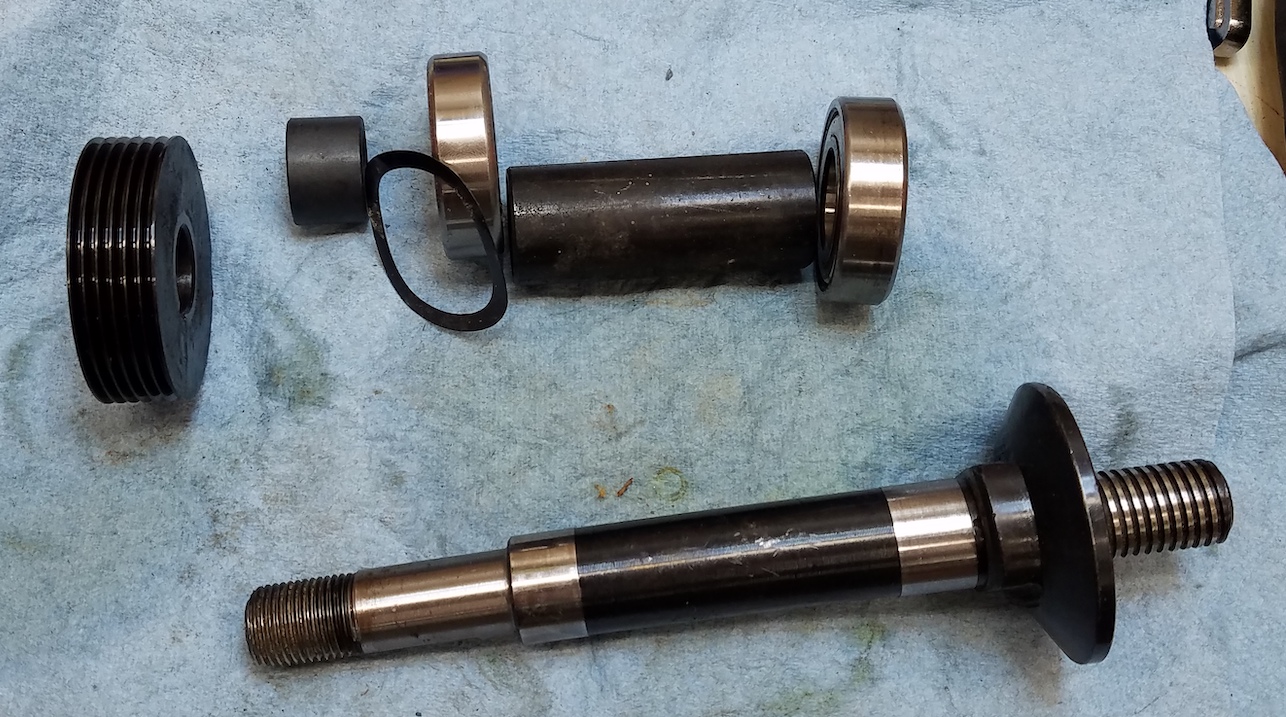
Careful application of force was all it took to take everything completely apart. Here is what it looks like with all the bits fully disassembled. The right most bearing was very much seized.
I broke out my new bearings (6004zz) and was a little disgusted. They had surface rust on the outside races. Both sets were individually sealed, but still had rust.
They were all I had and a little fine scotch bright pad took it right off. I used light sanding to make a lead in chamfer on all the bearing surfaces to help with initial seating. I hammered the right bearing back into place using a piece of 3/4″ PVC pipe. Most 3/4″ pipes should do, always apply load to the race you are seating. Inner in this case. The left bearing went back in with a parallel clamp just like in Matt’s video.
Everything was going well until I paid closer attention to the pulley. I had a section that was really dinged up. I had the blade off, but the arbor was near the top when I walked the granite top off. The top sat and slid around on this pulley with its delicate grooves. OOPS! I still can’t quite figure out what this is exactly called, or where to get a replacement. Careful use of needle files and a dremel got the rolled edges out of the way. I have used it a while and so far, no shredded belts.
Before
After some dremel and file work
With the drive system back together I dropped the arbor, waked the top back on and proceeded to re-align the saw. The miter slots should be square with the side of the blade. The only method of “fine” tuning available is to loosen the screws, bang it with a mallet and check again. Tedious, but I got there eventually.
I attached my dial indicator to a sled to make it all go faster. Once aligned I was back in business. Good thing too, I have done a lot of plywood cutting since this repair and have more to do.
In summary, the video linked at the beginning is a good general guide. Additionally, get a basic bearing splitter set to help ease things along. Use good penetrating oil to help in removal. Clean up everything and apply oil for re-assembly.
I have gotten some good use out of my router radius templates. I saw an interchangeable jig system that did a similar job and included chamfers in addition to the radii. First a reminder of how they work. You sit the template on top of the wood and use a special router bit that is a cutter with a matched diameter bearing on top. The bearing follows the template and removes any wood that protrudes beyond it. Ideally you cut off as much waste as you can on the bandsaw or elsewhere. Routers don’t remove a lot of material well.
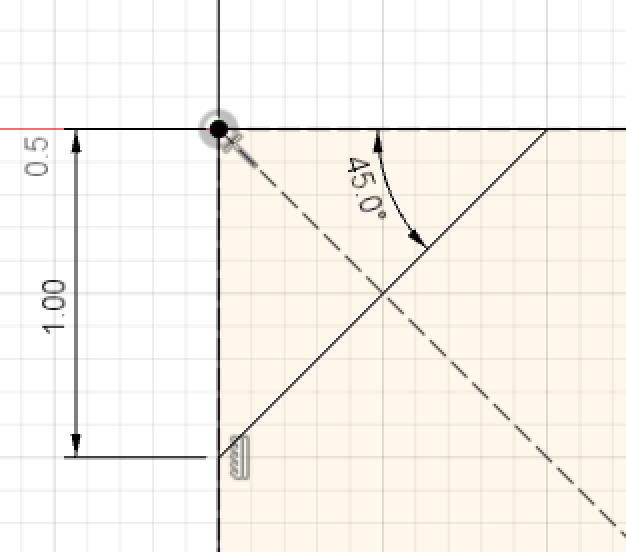
I modeled a variety of them from 0.5″ to 1.25″. The length given is a leg of the isosceles triangle that will get removed, not the hypotenuse. See the diagram below.
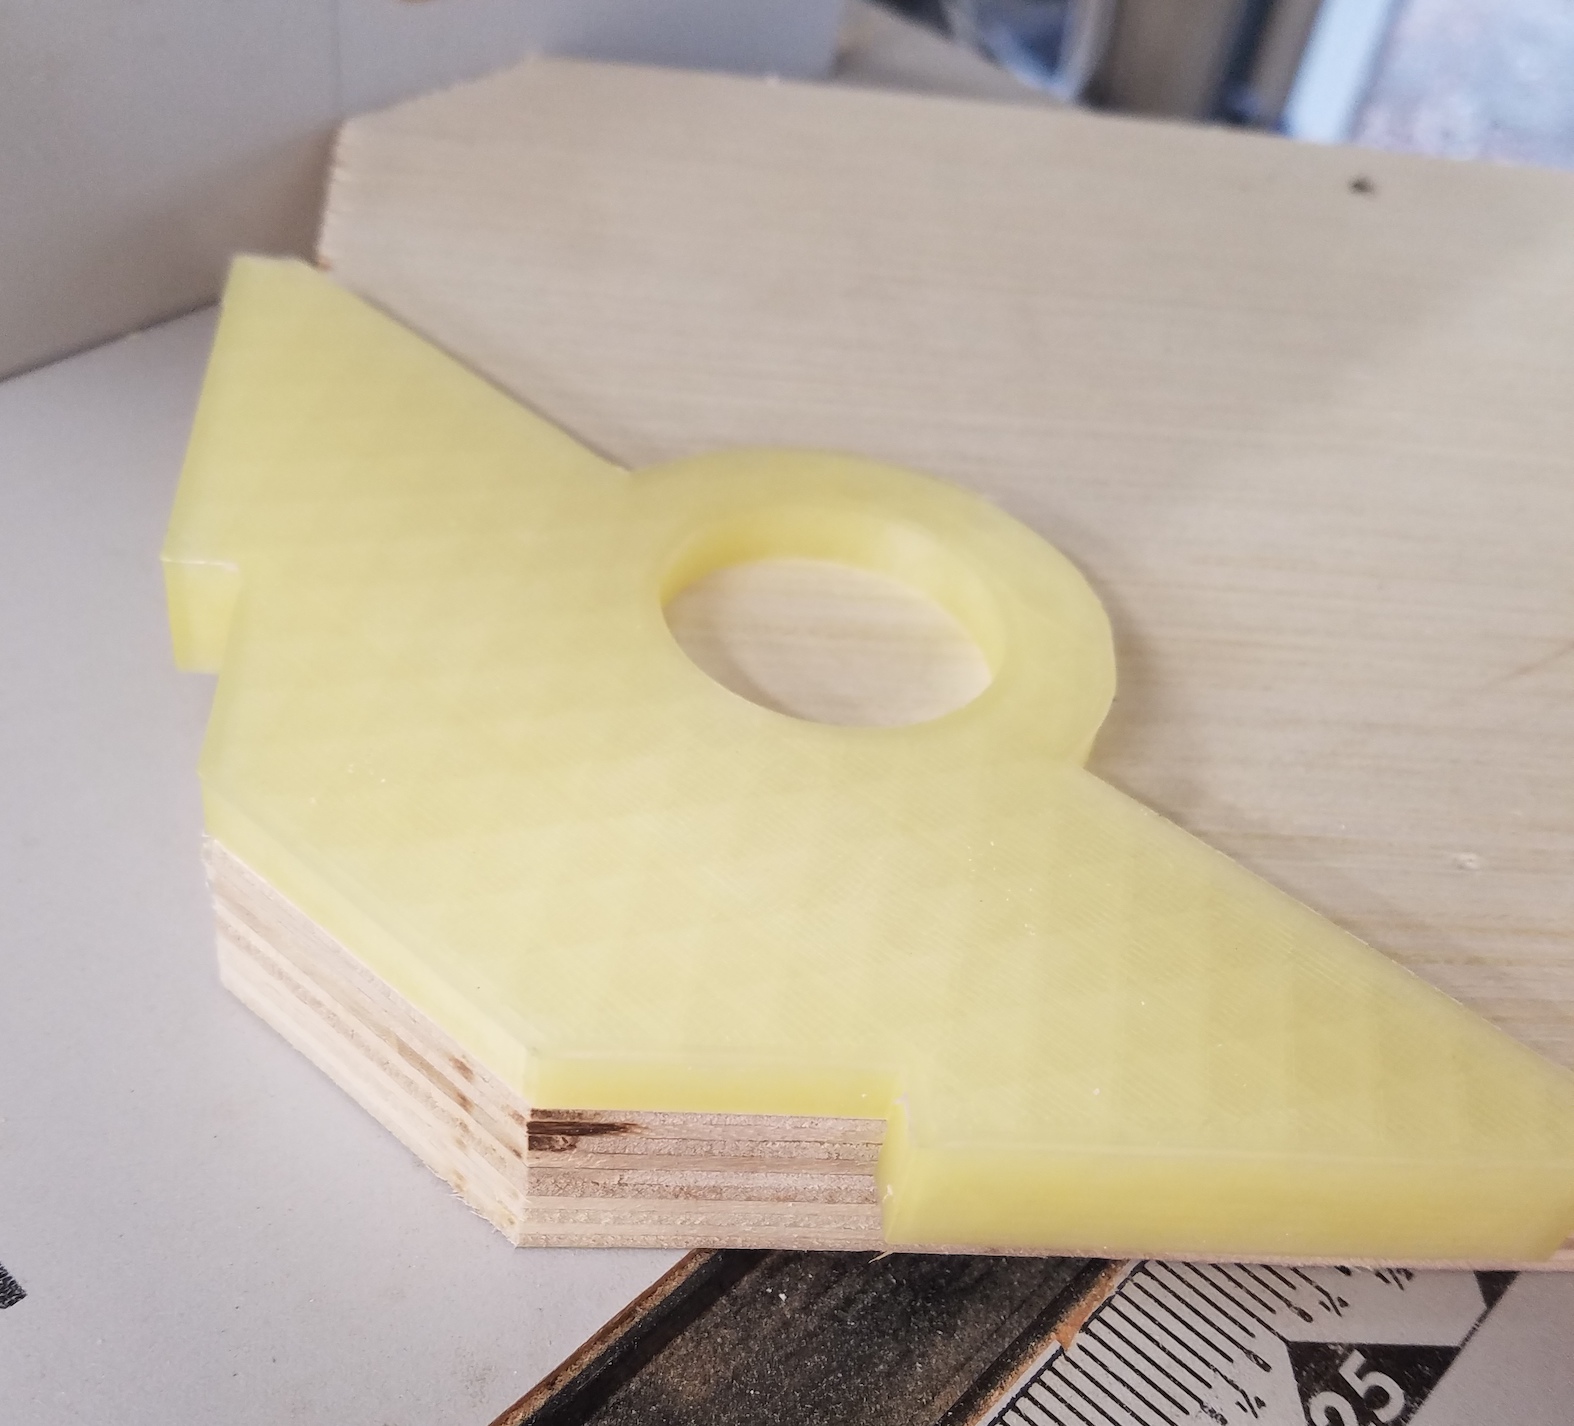
I printed a stack of them in case the need arises, and uploaded the design to thingiverse. If they look odd compared to my normal prints, it is because I used some cheap translucent filament I had lying around. I figure they will get torn up eventually, so no need to use the good stuff.
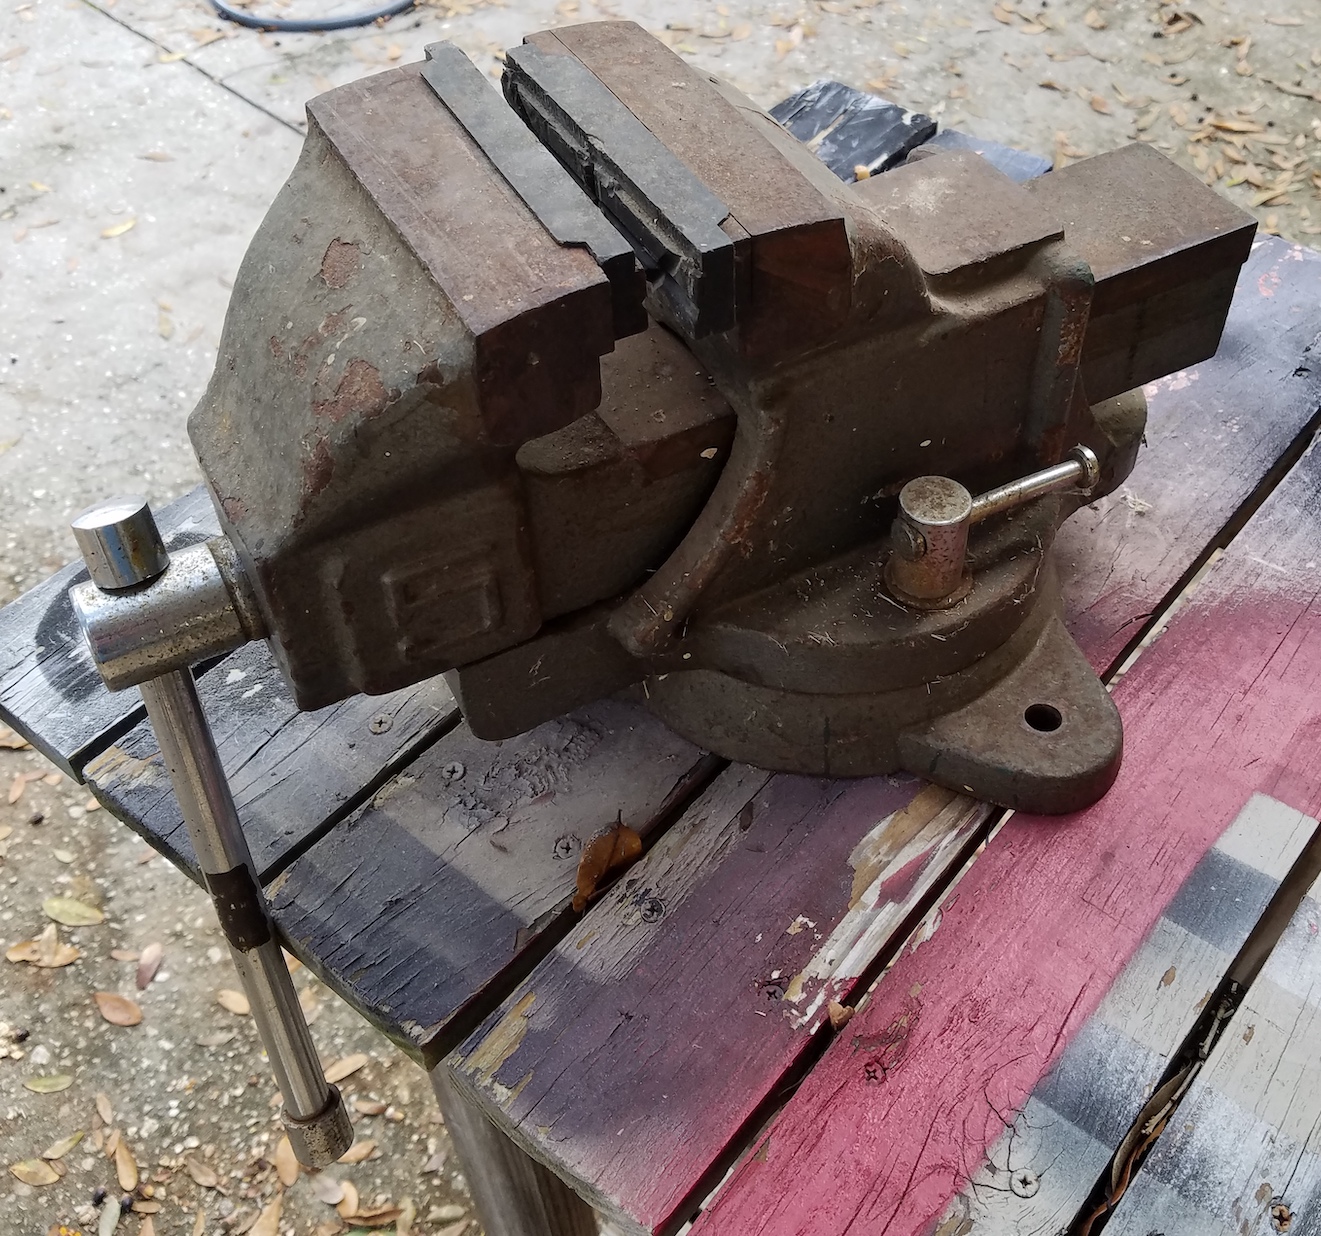
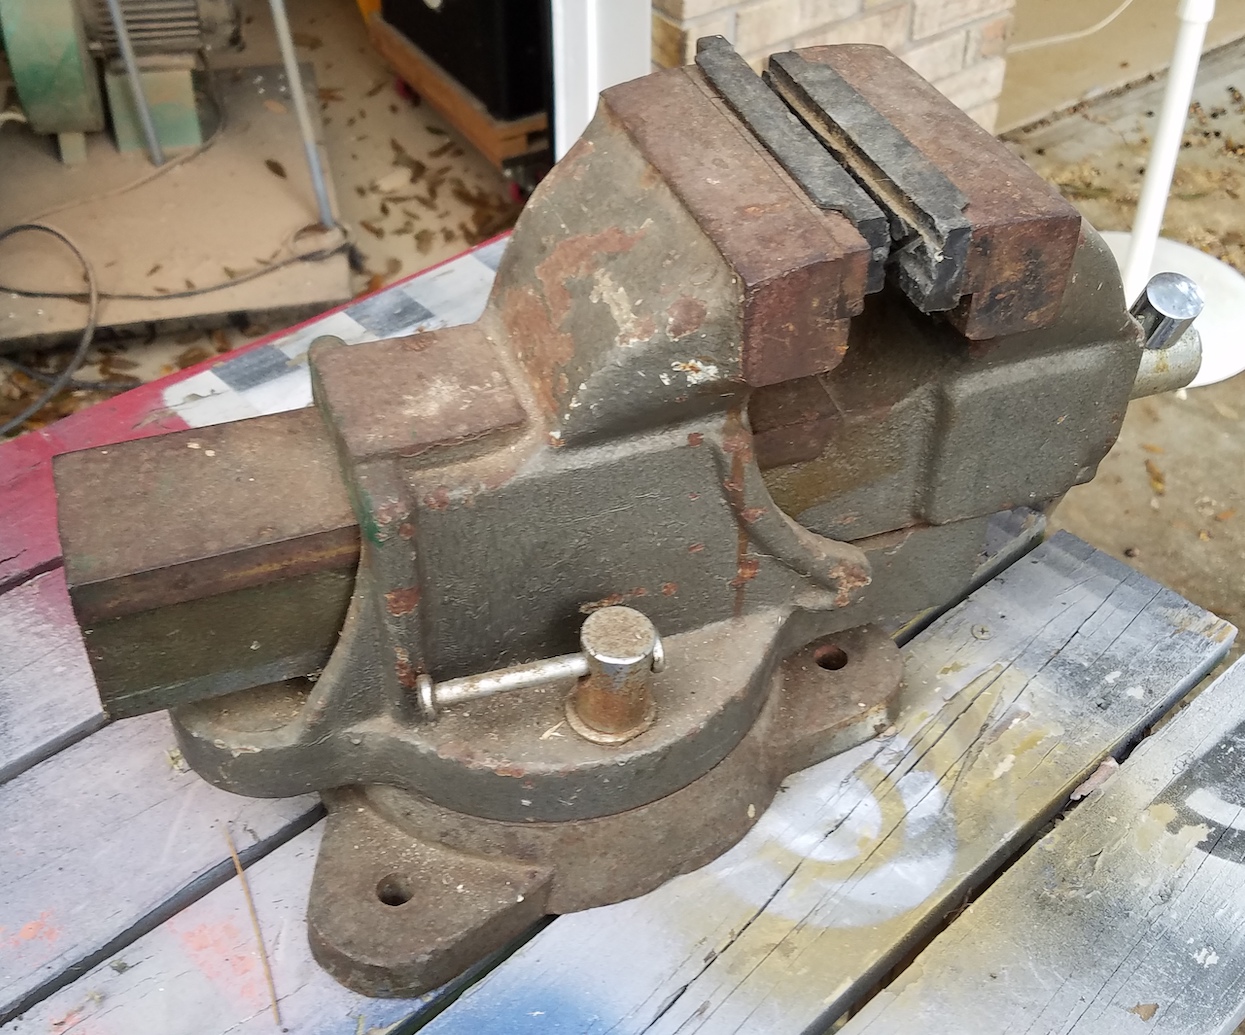
I recently inherited my great grandfather’s vise. It isn’t some magnificent old pre-WW2 piece of hardware that shows they really knew how to build them. It was purchased in the 70s and has an old green paint that looks like a faded version of what harbor freight uses today.
Still, no reason to get snoody about it. It is a really beefy looking vise compared to my little red one, it appears quite serviceable, is kind of an heirloom, and why toss something when you can fix it! It isn’t in horrible shape, but I wanted to do something before the rust moved in any further.
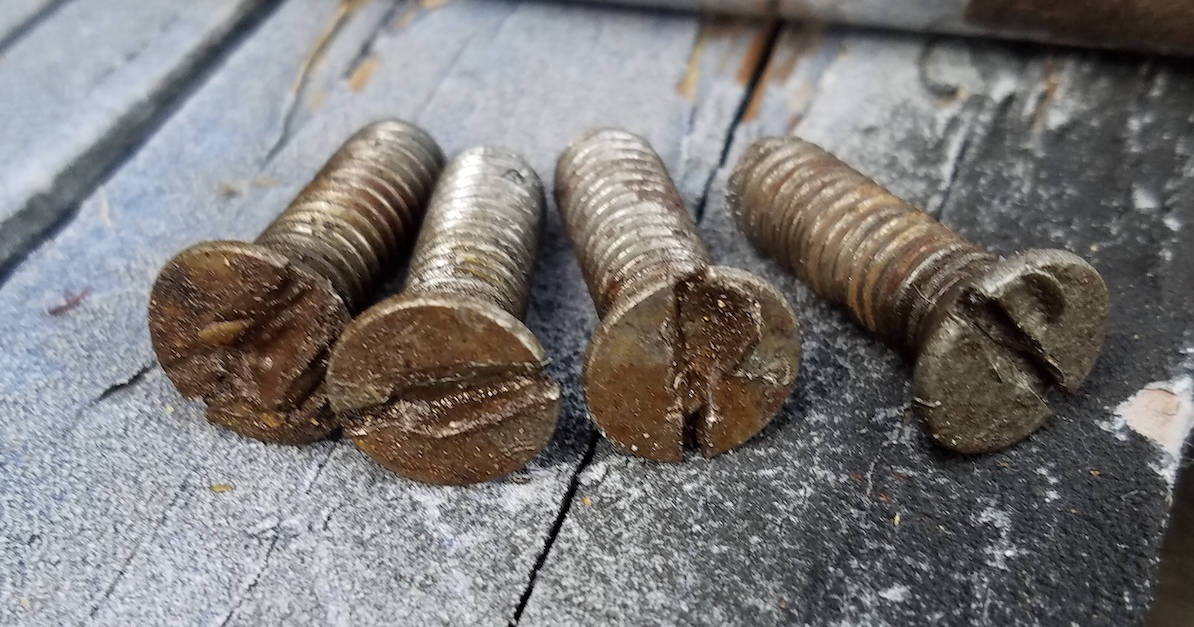
Everything came apart easily with the exception of the jaw pads. Their screws were in very poor shape and took some coaxing to get out. Looks like someone tried and failed earlier. I will replace these with something that accepts a hex key.
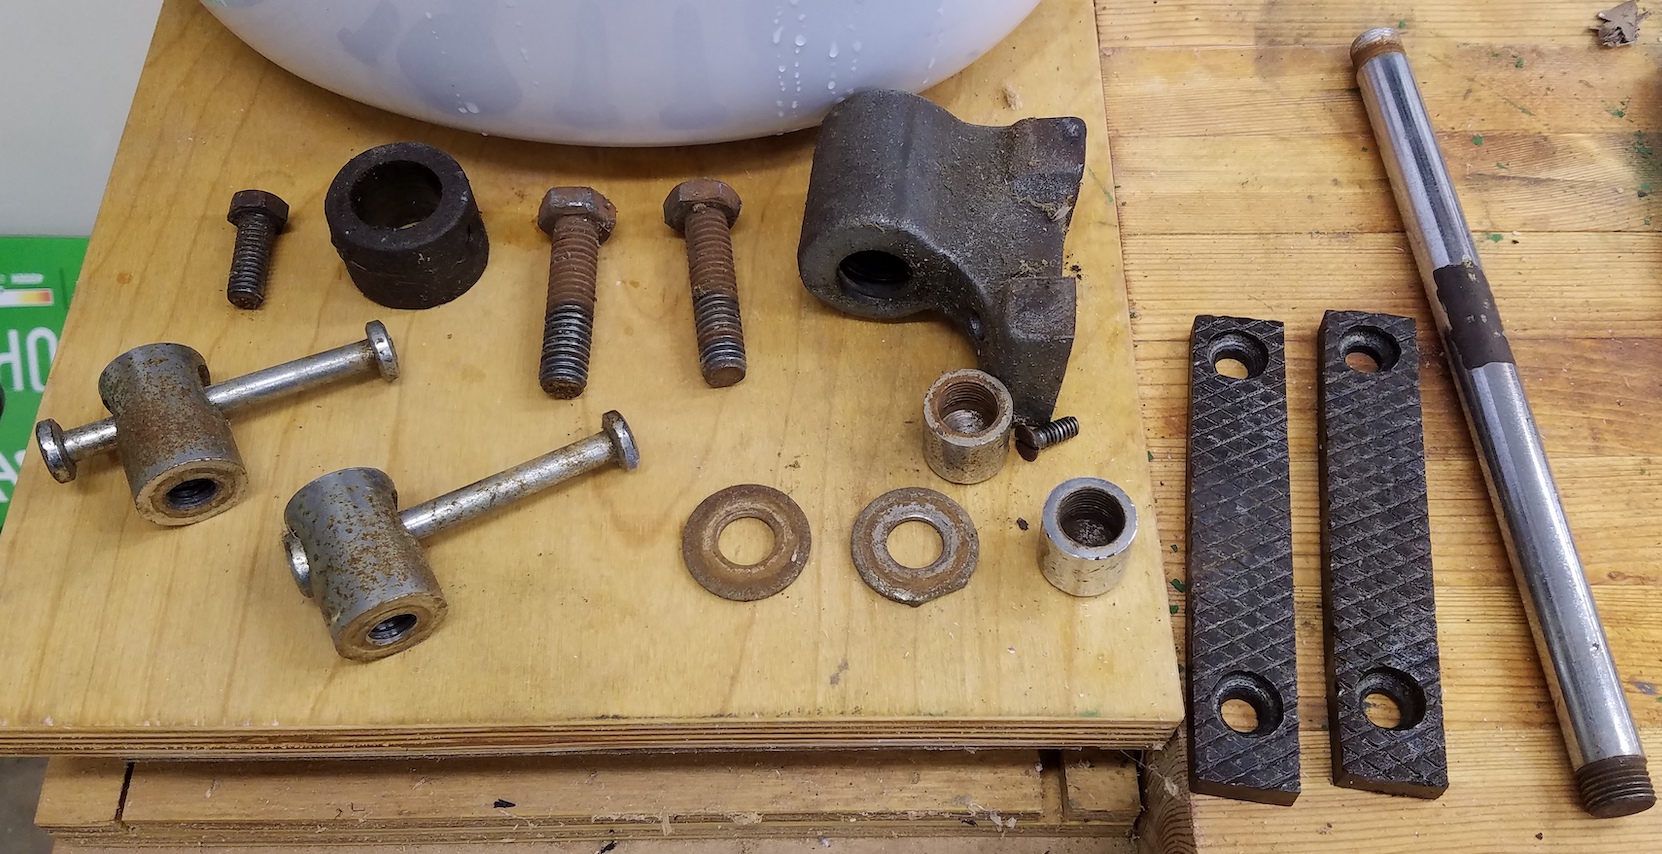
All the other minor screws and smaller hardware looked to be in good enough shape to keep. I put it all through a hot ultrasonic bath with a rust remover/inhibitor.
With the small parts taken care of I took an angle grinder powered wire brush to the main body parts of the vise. A flap wheel was used on the non-painted parts. They shined up a bit, but with all those deep gouges it will never look like new. Not sure if that means it is a soft casting or saw very heavy use. Everything remaining got a heavy coat of rust preventing primer.
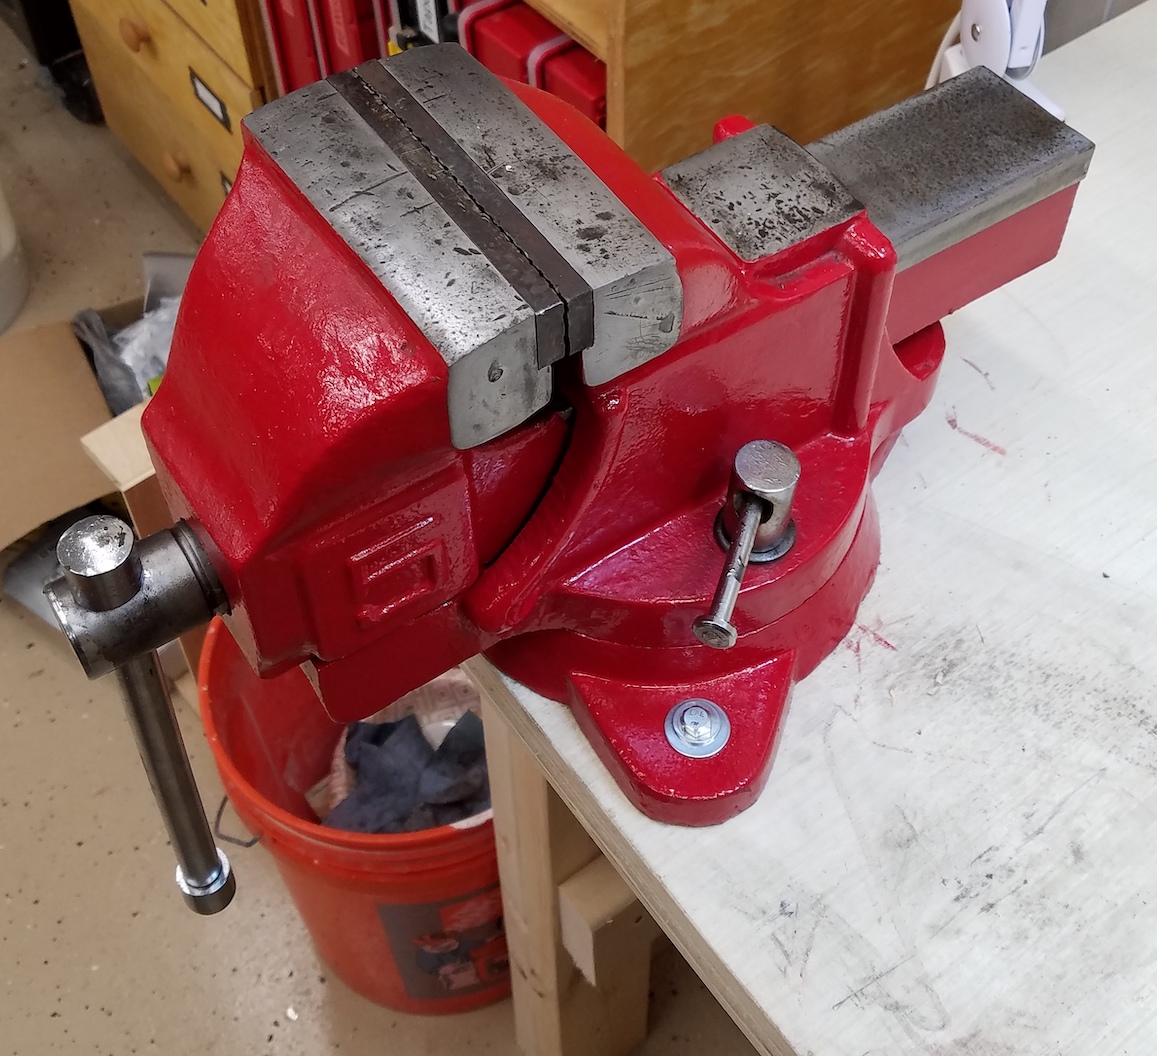
I wanted to gussy up the dreary green, so I broke out the vibrant red paint. It kind of looks like my smaller vise now. Big red and little red. Everything that moves got oil and I bolted it down to the new heavy duty workbench. Everything else below the bench is mobile, but this is going to see some heavy use, so permanent fixing is justified. Its first job is coming just around the corner.
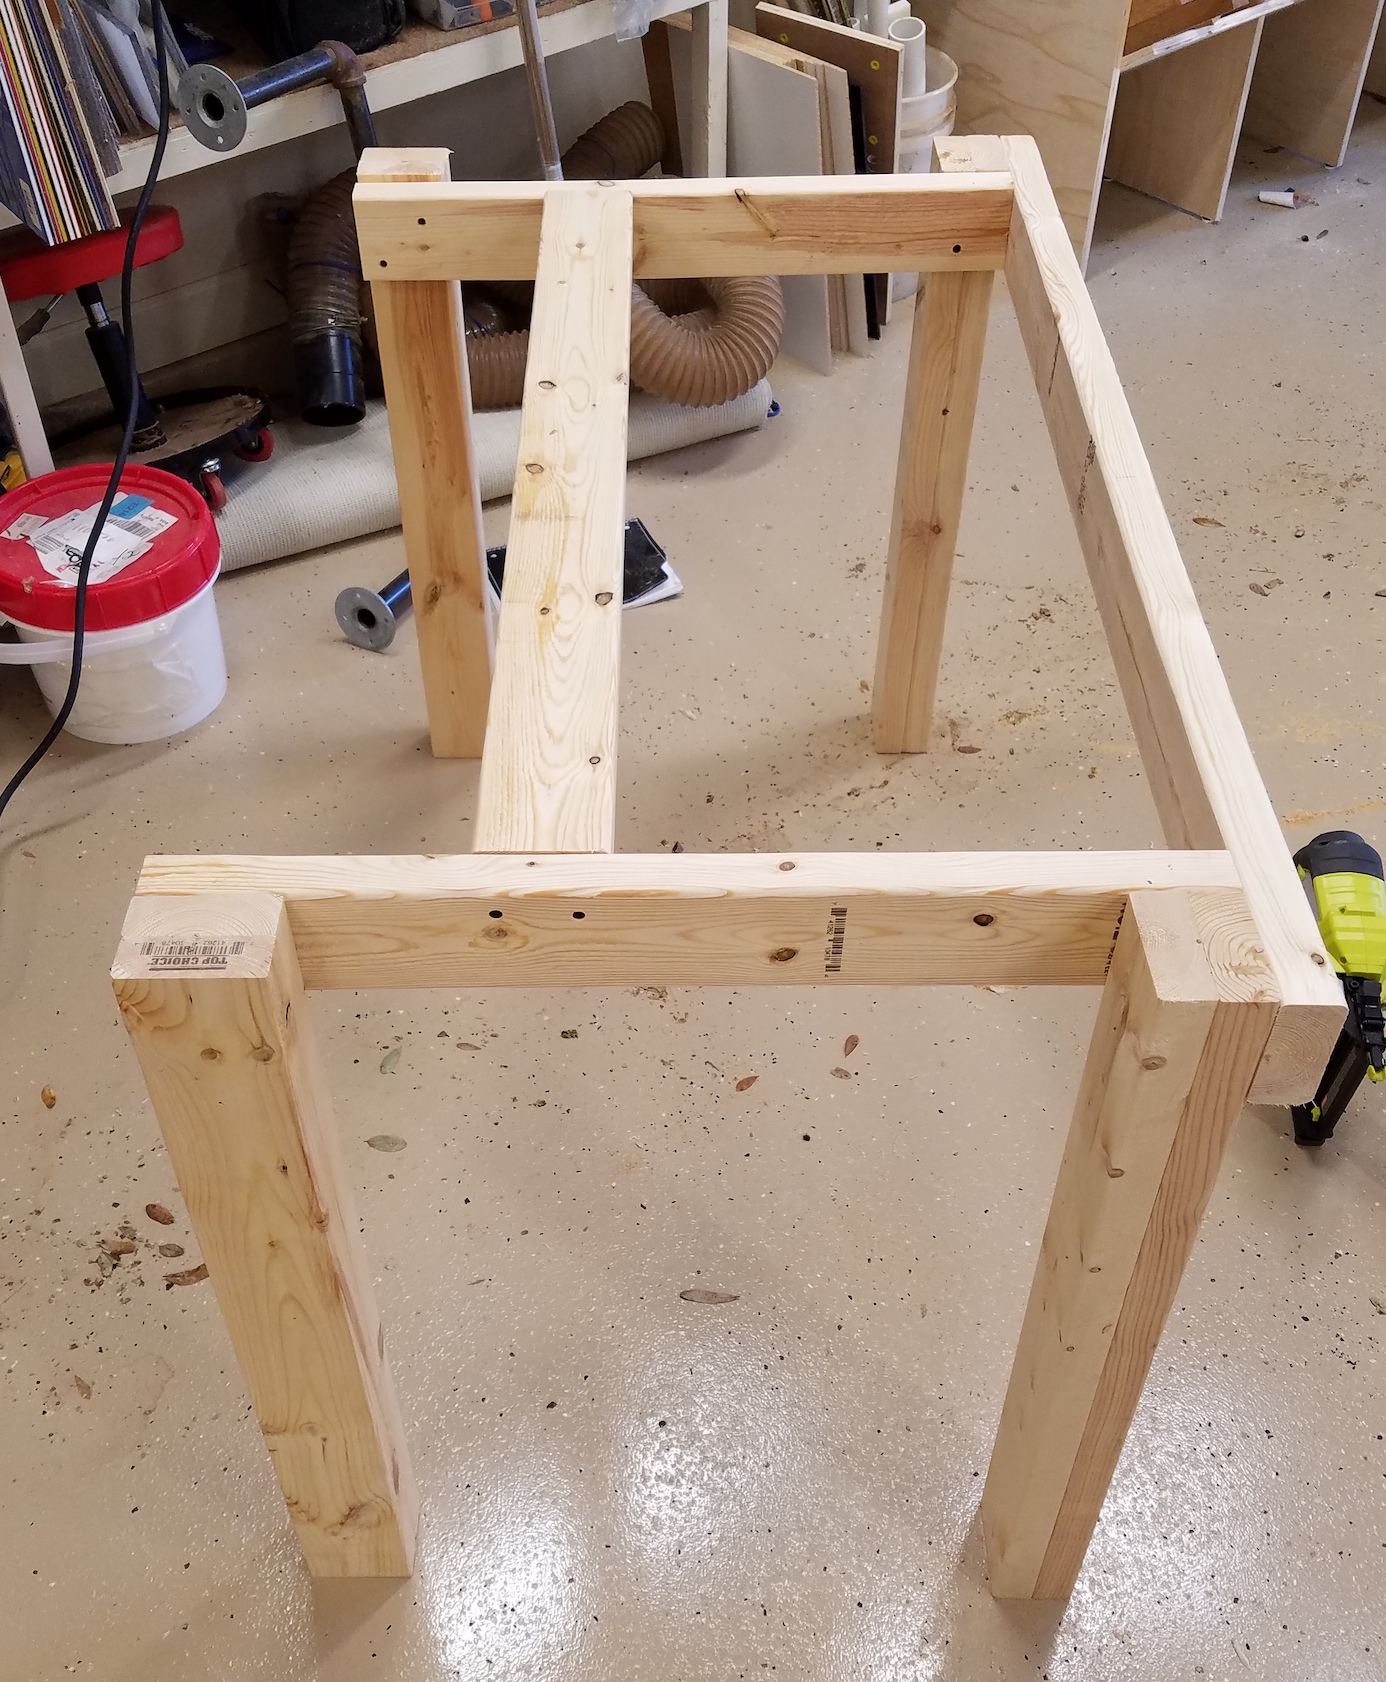
Shop work is still mostly getting usurped by home improvement projects. In moving stuff around the shop it occurred to me that there was some space for a work bench. I want something very sturdy to attach bench tools to (vise, bench grinder, anvil, etc), but also a place I could sit and do repairs. I worked out a design that requires most of a sheet of 3/4″ plywood and a hand full of 2x4s. I started by planing 2x4s square and gluing them together for extra thick legs.
The frame is 4ft wide which goes well with a 4×8 sheet of plywood, and 8ft 2x4s. The recessed bottom shelf gives some space for storing bench equipment when not in use. It would store more and be more accessible if it was full depth, but I wanted leg room so I could sit comfortably at the bench.
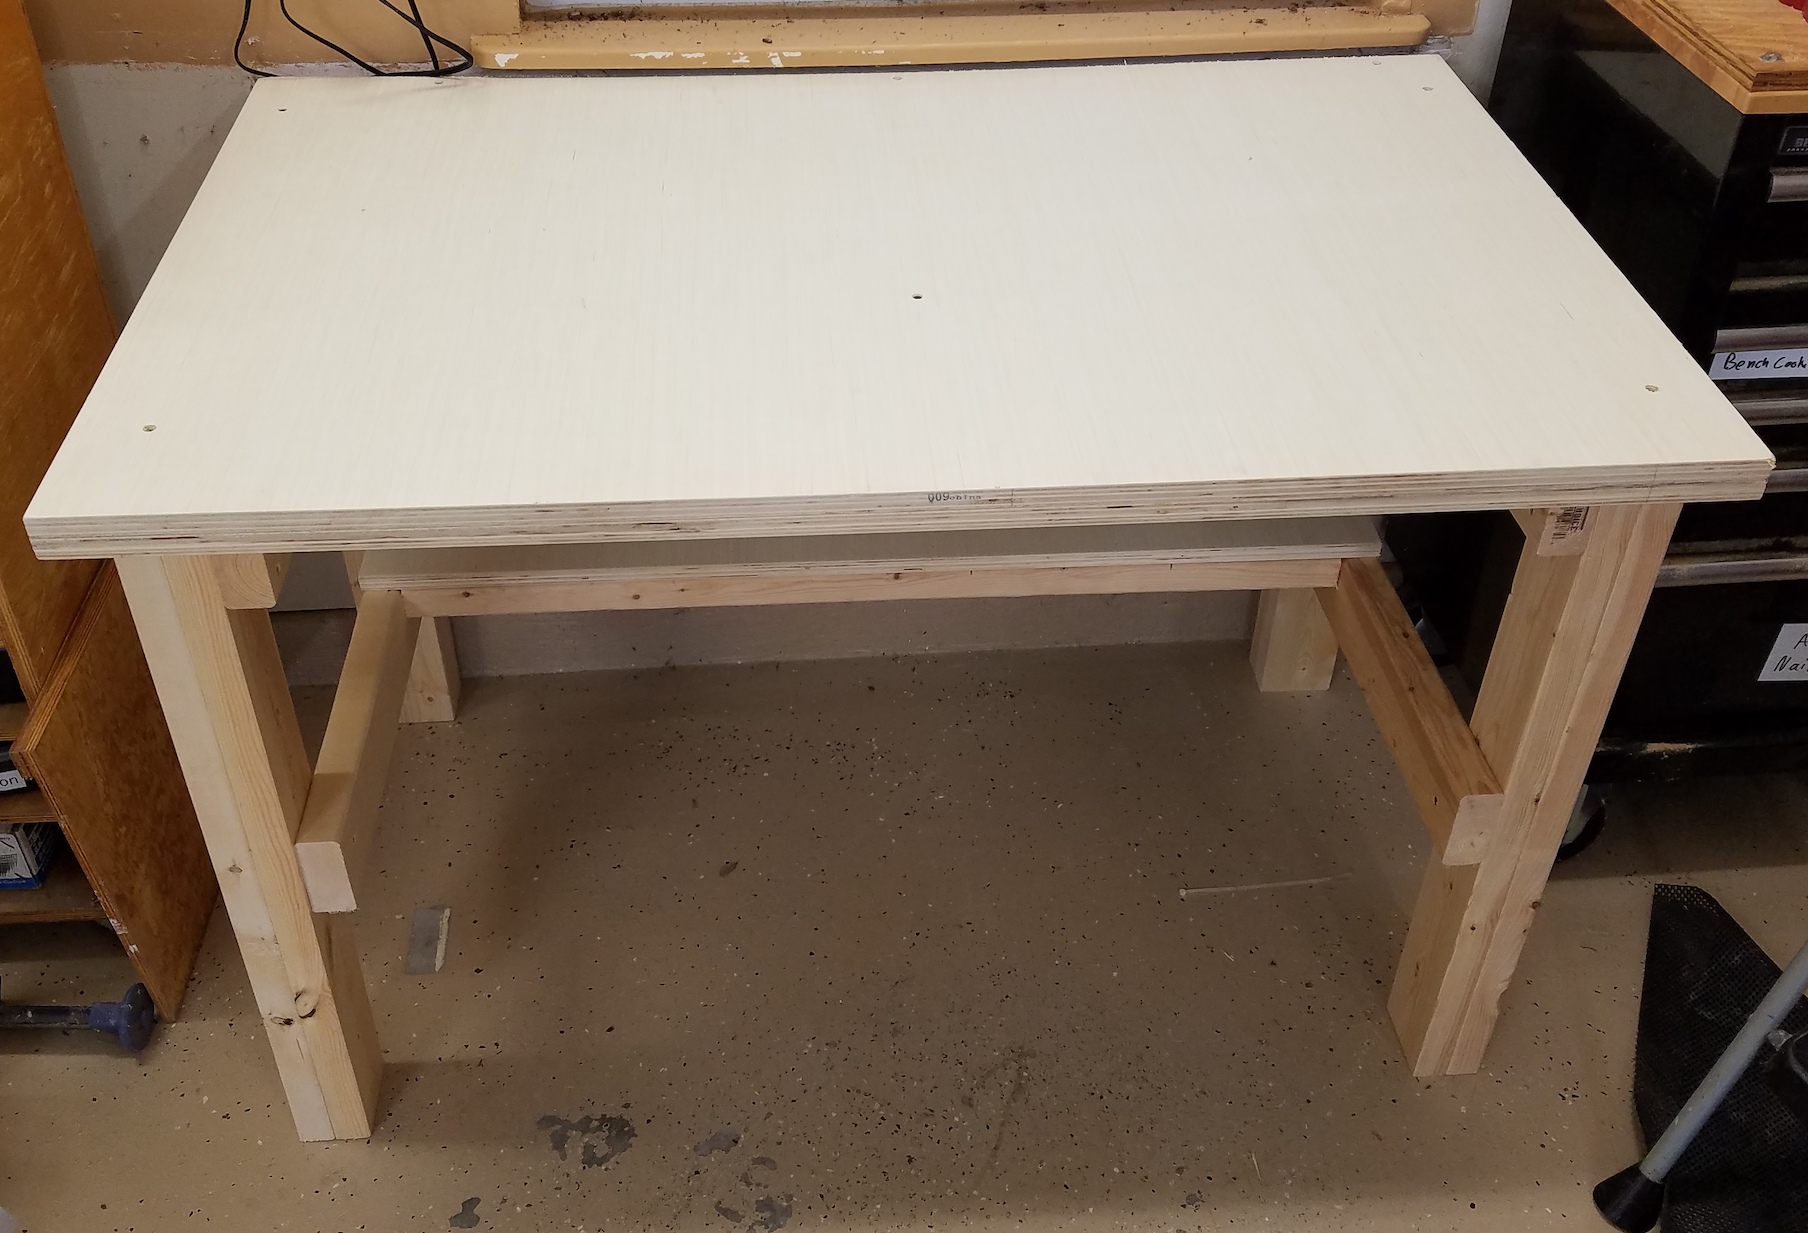
I screwed together two sheets to make the top. I was going to glue them, but screwing was good enough and I can replace the top piece if it becomes damaged. This is a very stout table.
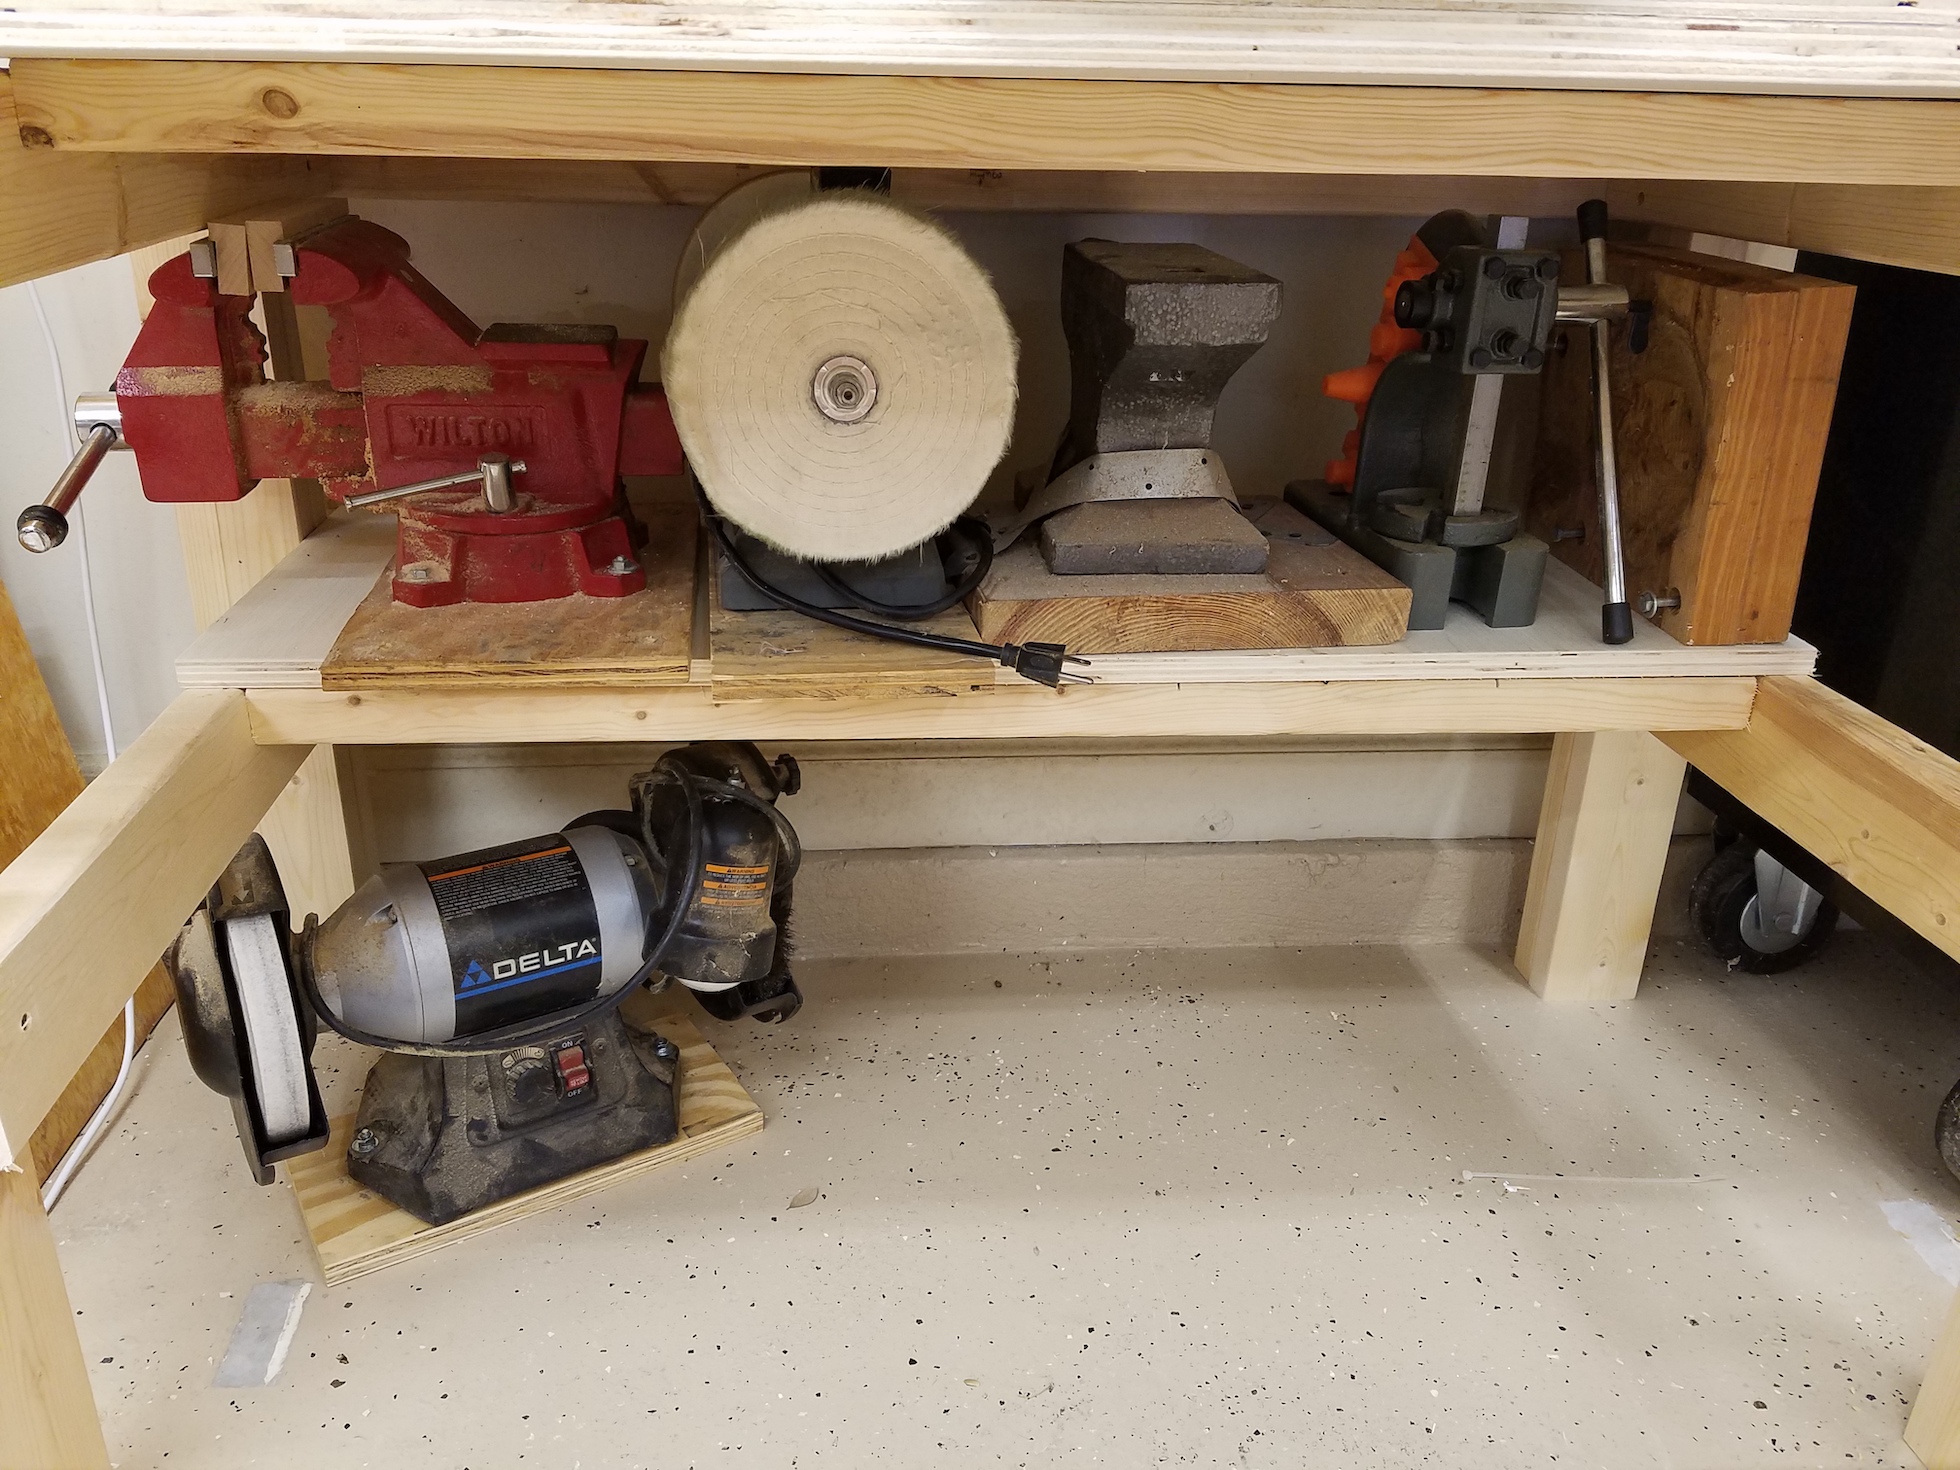
Bare, and in its final resting place it looks pretty good. Time to load it up with junk! From left to right, my big red vise from my dad, old bench grinder turned buffer, anvil, arbor press, carved depression used to hammer bowl shapes in wood, and bench grinder on the bottom.
Most everything is attached to thick pieces of wood. This lets me put the tool wherever I need it and clamp them down. I made sure the table top protruded from the legs far enough so I could clamp anything across the entire width. I kept thinking of fancy dovetail sliders, or bolt patterns, or bench dogs that would let me install a wide variety of tools. In the end a thick top and some C-clamps is simple and effective.
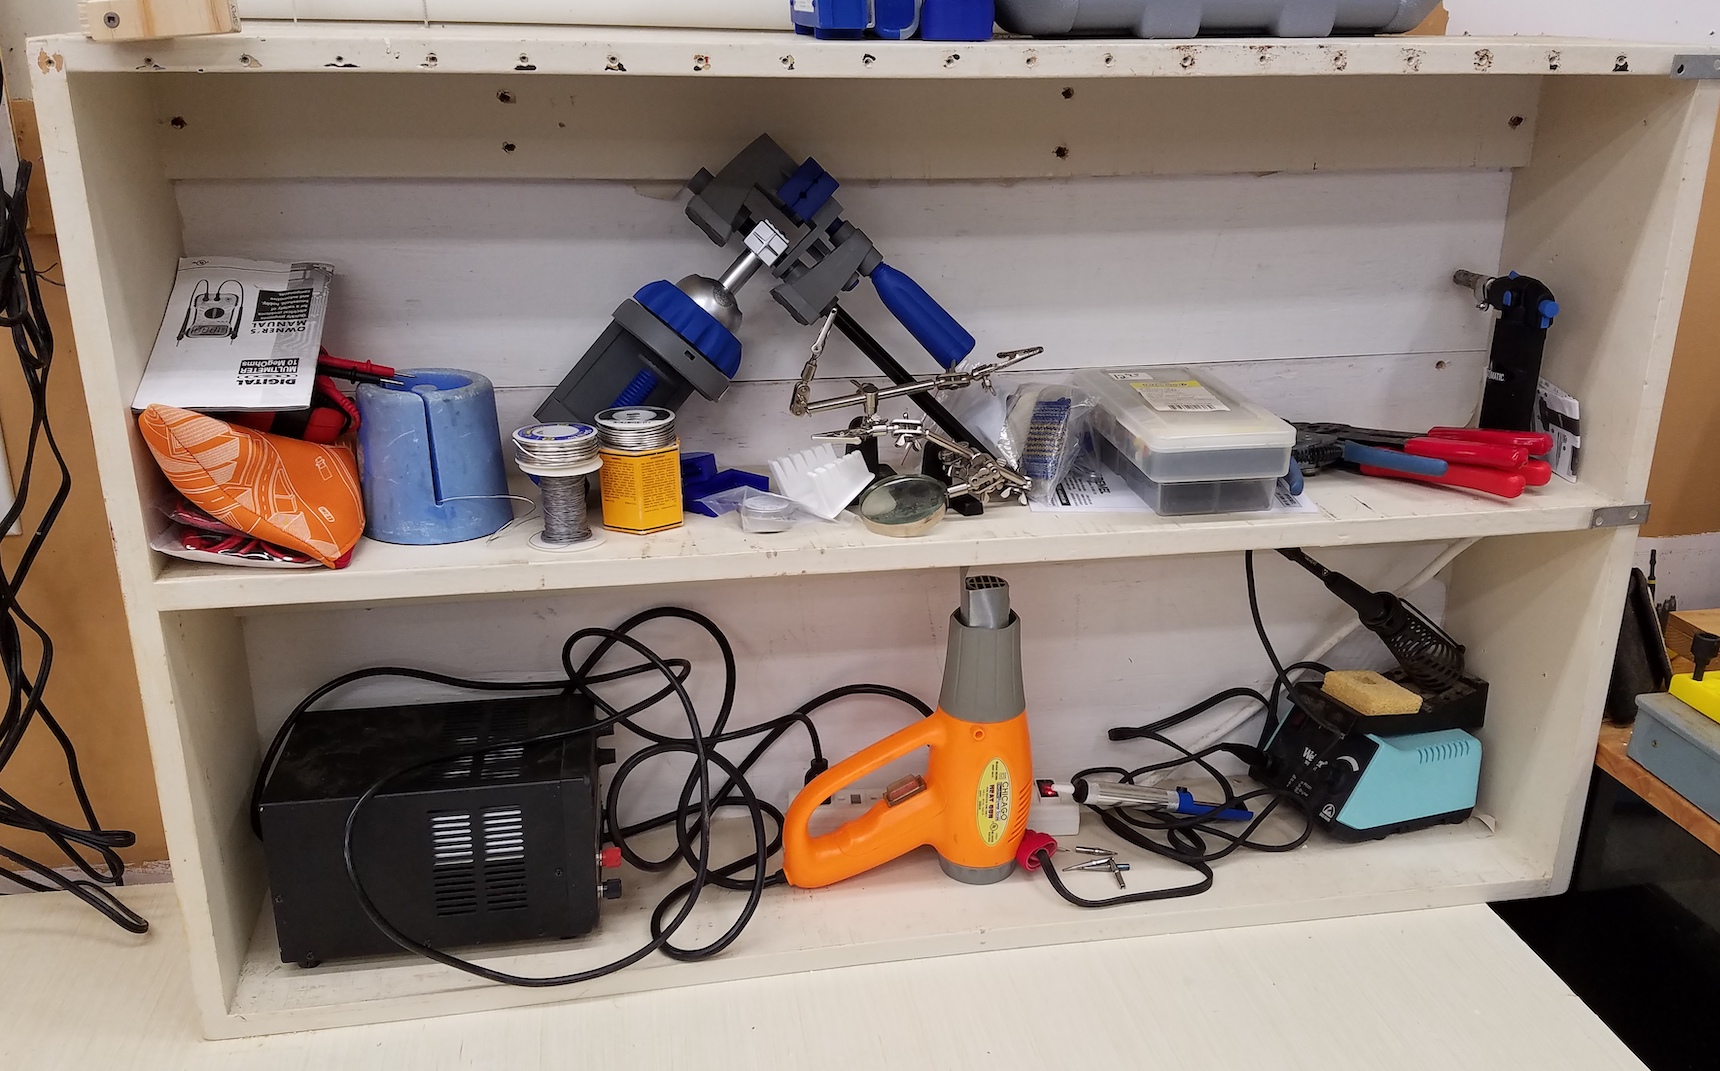
While I was dismantling parts of the garage to make space for this bench I pulled off these shallow shelves. It was kind of perfect for what I wanted to add to the bench. These shelves can be used to store my electrical/electronics stuff. That jives with my idea of this serving as a part time repair bench. The shelves were up against the wall and didn’t have a back. I added one to keep stuff from falling out the back.
The lower shelf has a power strip and commonly used equipment. It probably needs more organization in the top shelf. For now I am going to live with it and see what gets used often, and what can live elsewhere.
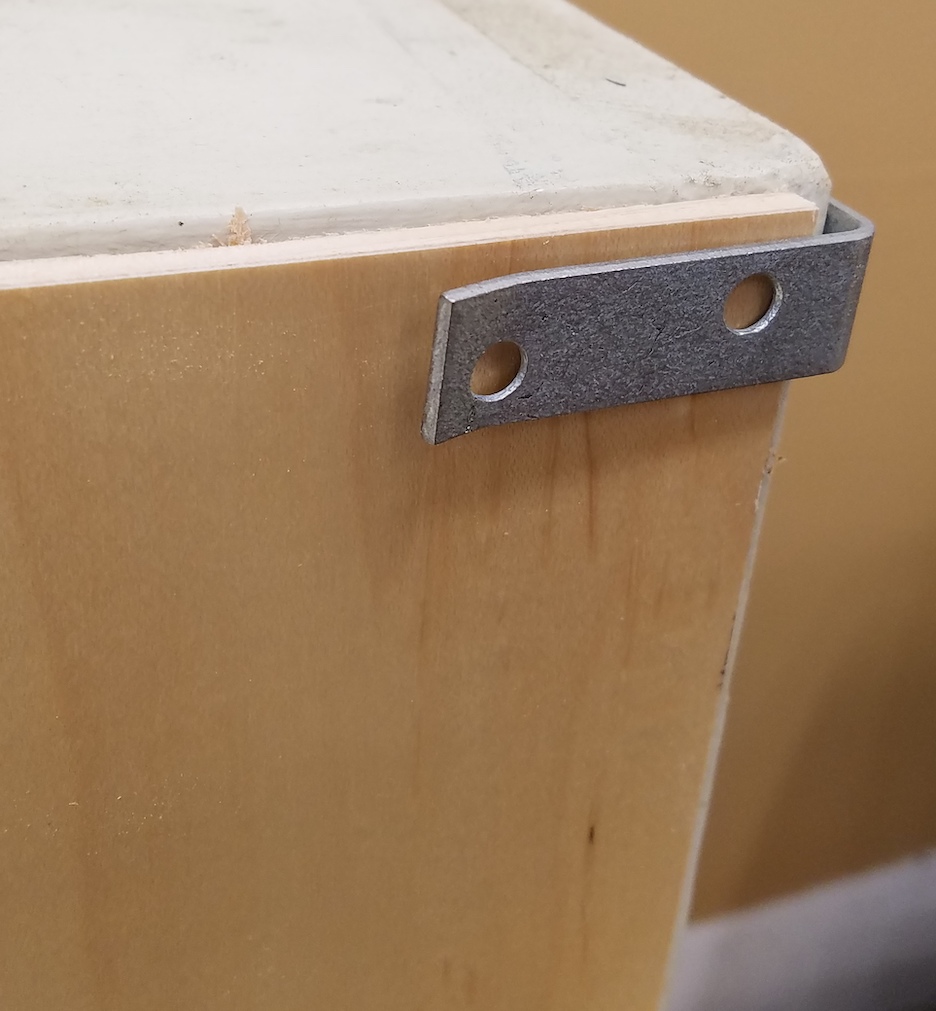
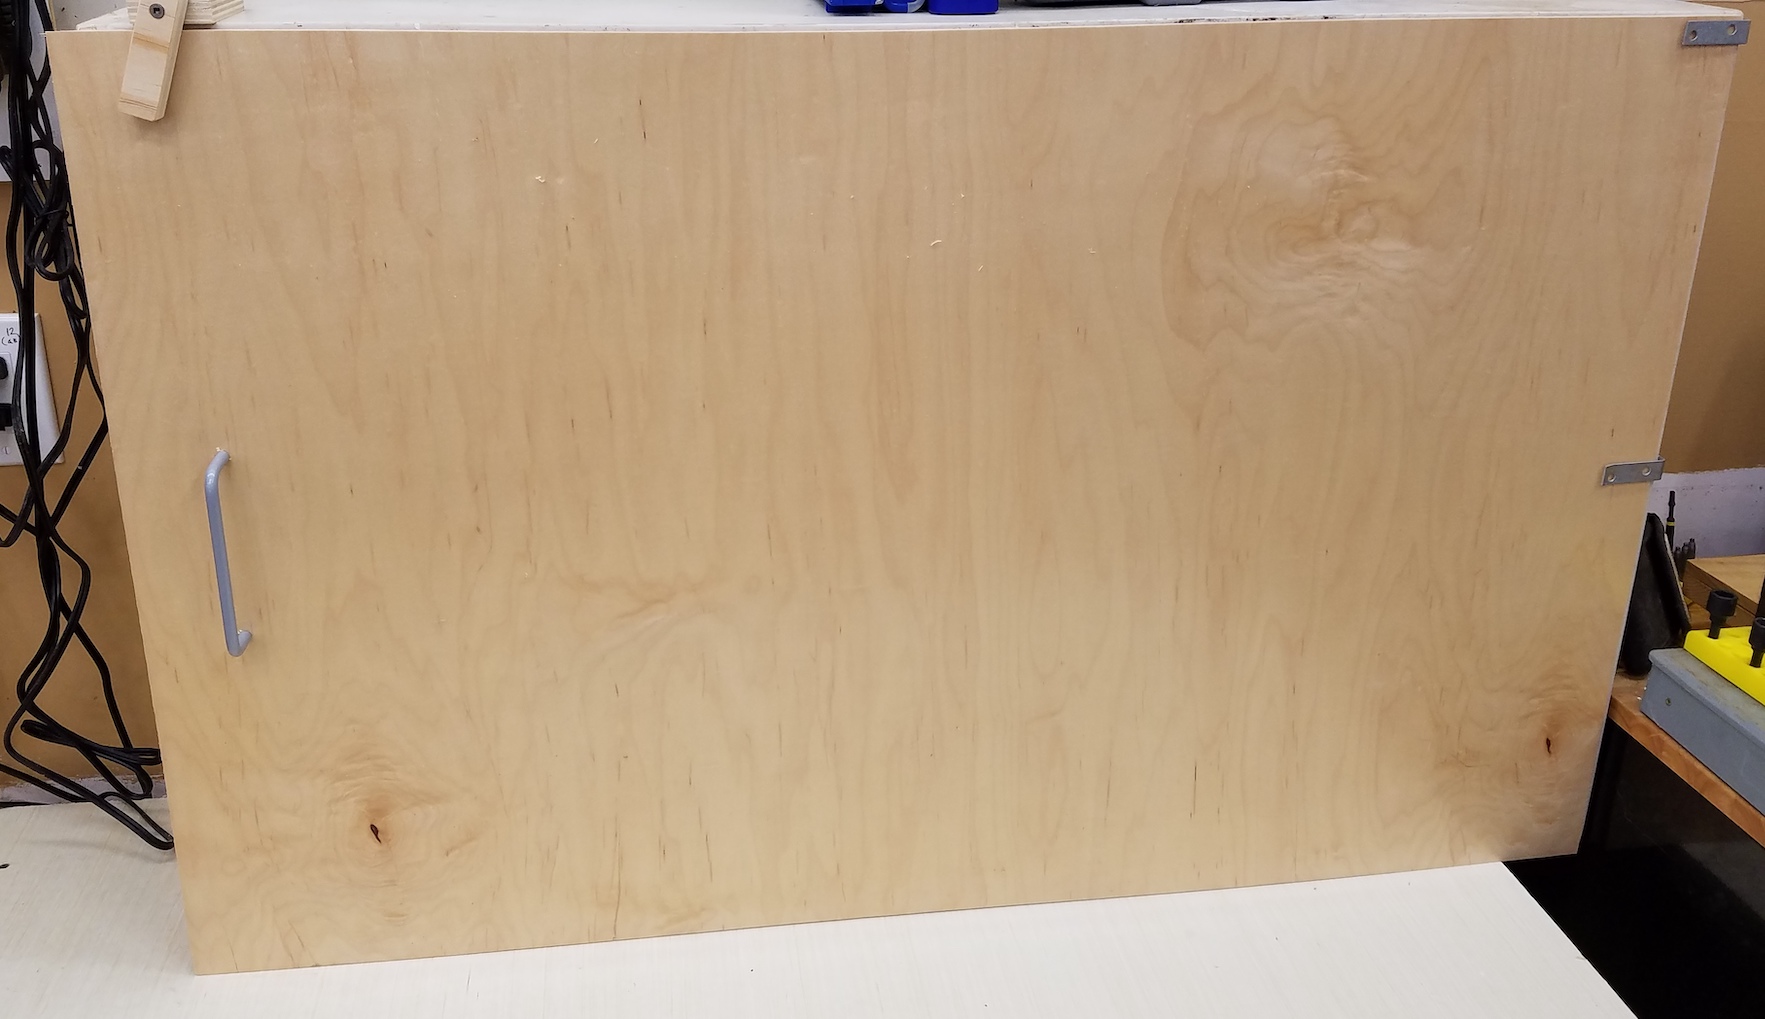
A front cover helps keep the dust out and things from falling off the shelf when banging on the table. Two bent brackets catch the front door on the right hand side, and a swiveled part holds it at the top. To remove you just swivel the one catch and slide the door left a few inches. That way it can be removed or installed even when the table is covered in junk.
I have had it this way for a week or two now and already I christened the table top with grinding detritus and grime from the next project. We all knew that pristine surface wasn’t going to last long.
Home buying is a nerve racking experience. Thrills and surprises await you around every corner. One big one is the home inspection. On something as big as a house there are always items that crop up. You have to decide if they are deal breakers, or if you can take the risk of them being worse than the inspection indicated.
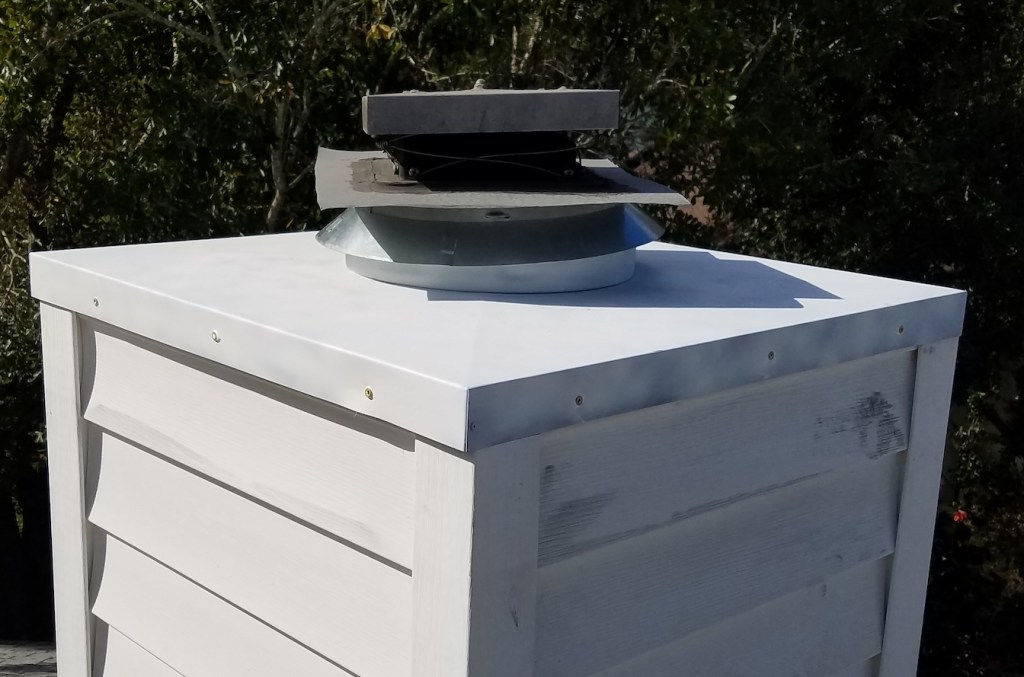
One thing that came up on ours was that the chase cover on the chimney was rusted. It was a surface rust, no emergency, but something to not ignore. A winter break gave me the time, and cooler weather, to get up there and do something about it while not dying of heat stroke. Close inspection revealed that it wasn’t bad and some cleanup plus paint would add many more years of life.
The big square chimney cover bridges the gap between the chimney pipe (might not be the right term) and the wooden structure sicking out of the house. My plan was to take it off, bring it to ground level and do all the paint work. The trick was I couldn’t figure out how to get that top little set of square covers off. I tried rotating the assembly but was worried something in the wall would come apart. 10 minutes of googling while on the roof didn’t give me a good answer.
Chimneys are completely new to me, so I am just feeling my way through all this. The section of roof is pretty tame so I took a grinder up there and did everything on the roof.
Sure enough, the rust wasn’t that deep. I knocked it, and as much other crud off as a I could with a wire wheel and came back with a coarse sander pad. There is still a lot of zinc left, but I had read a self etching primer would bond well with it. A few coats of that, and It was way too hot to keep working.
I came back the next day, sanded the primer and used a full can of high temperature white enamel. Even early in the morning the metal was getting hot and the paint dried too quickly. It isn’t a great paint job, but looks fine from down below. The original plan was to do this all on the ground in the shade. If I had known from the get go I was going to be working on the roof I might have opted to brush on something instead.
I replaced the rusted screw hardware with epoxy coated torx head screws. There is a thin band of metal that covers the gap between the pipe and the newly painted cover. The old one was pretty rusted, but a local fireplace store had new ones, so I replaced it. Not my finest repair overall, but it won’t be rusting through any time soon. When this needs work again I might be calling a fireplace expert of some sort.