Weapon Wall Hangers

I have a number of sharp and dangerous objects lying around my office. My intention was to eventually get them mounted up on the wall in nice displays. The prospect of tiny hands getting a hold of them moves that up in the priority list.

First up is my kukri. I rehabbed it many moons ago with a friend and have been sitting on it ever since. I found a thick piece of mahogany I bought years ago for a project idea, but never ended up executing on. This is my first time working with it, and a low risk project like this is a good place to start. It is really hard stuff, but look great when you get a good hand plane across it. I re-sawed the piece to save material because this stuff is quite expensive.

The back of the plaque was cut to size, had some shapes cut out at the corners, then got a round over to smooth everything out.

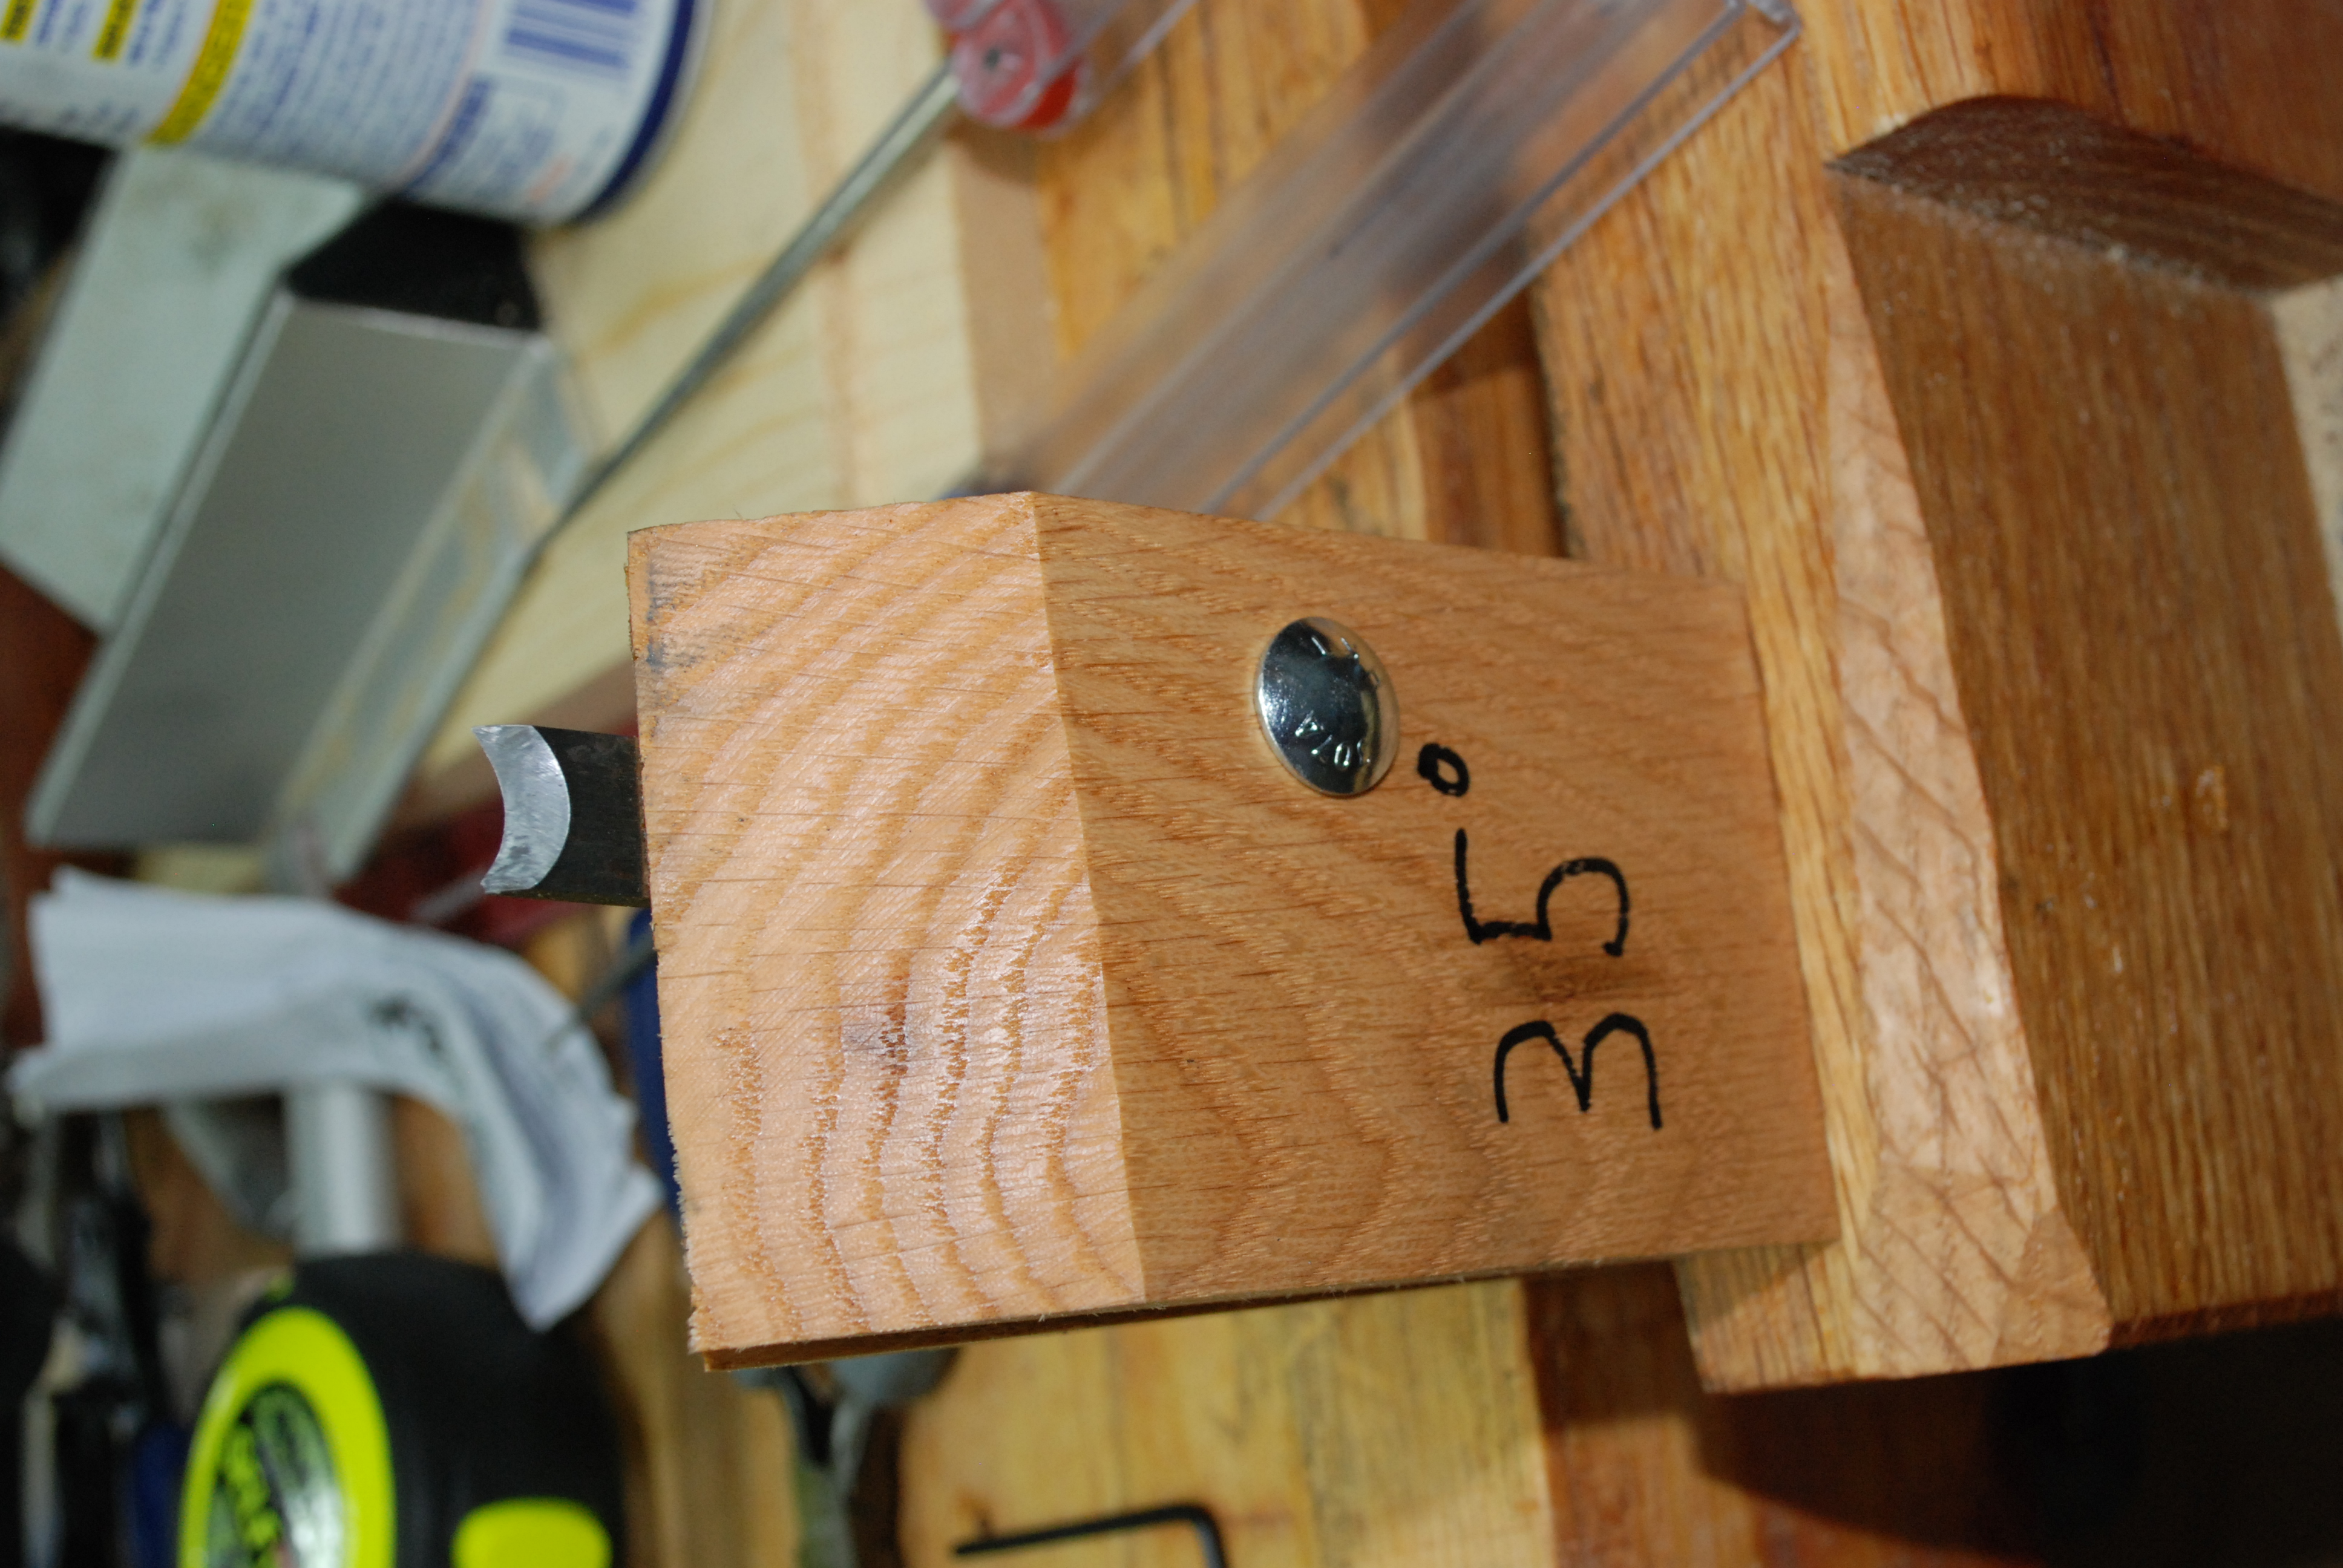
To hold the knife in place, I used some blocks of the mahogany and shaped notches with a hand saw, then rasp. When I was sure they would fit in place, I did a lot of sanding to round over the outside to make them look nice.

I experimented with dye to darken up the mahogany a little. Not too much, but I wanted it to be closer to the aged handle than any oil based finish would give. When I got the color I wanted I hit it with some shellac and called the project finished.


Next on the list was my bow and arrows. They had been sitting in a floor stand I made for quick access. I honestly hadn’t really done any shooting since we moved, so this could probably be put up on the wall without any inconvenience. Here is what the final piece looks like so you can see where we are going. I don’t use many stains anymore, but I think red oak stains wonderfully!

I had an image of this one in my head for a while and really wanted to do half lap joints to hold everything together, and have a lot of shape in the center. I laid out the curves and cut everything on the bandsaw.

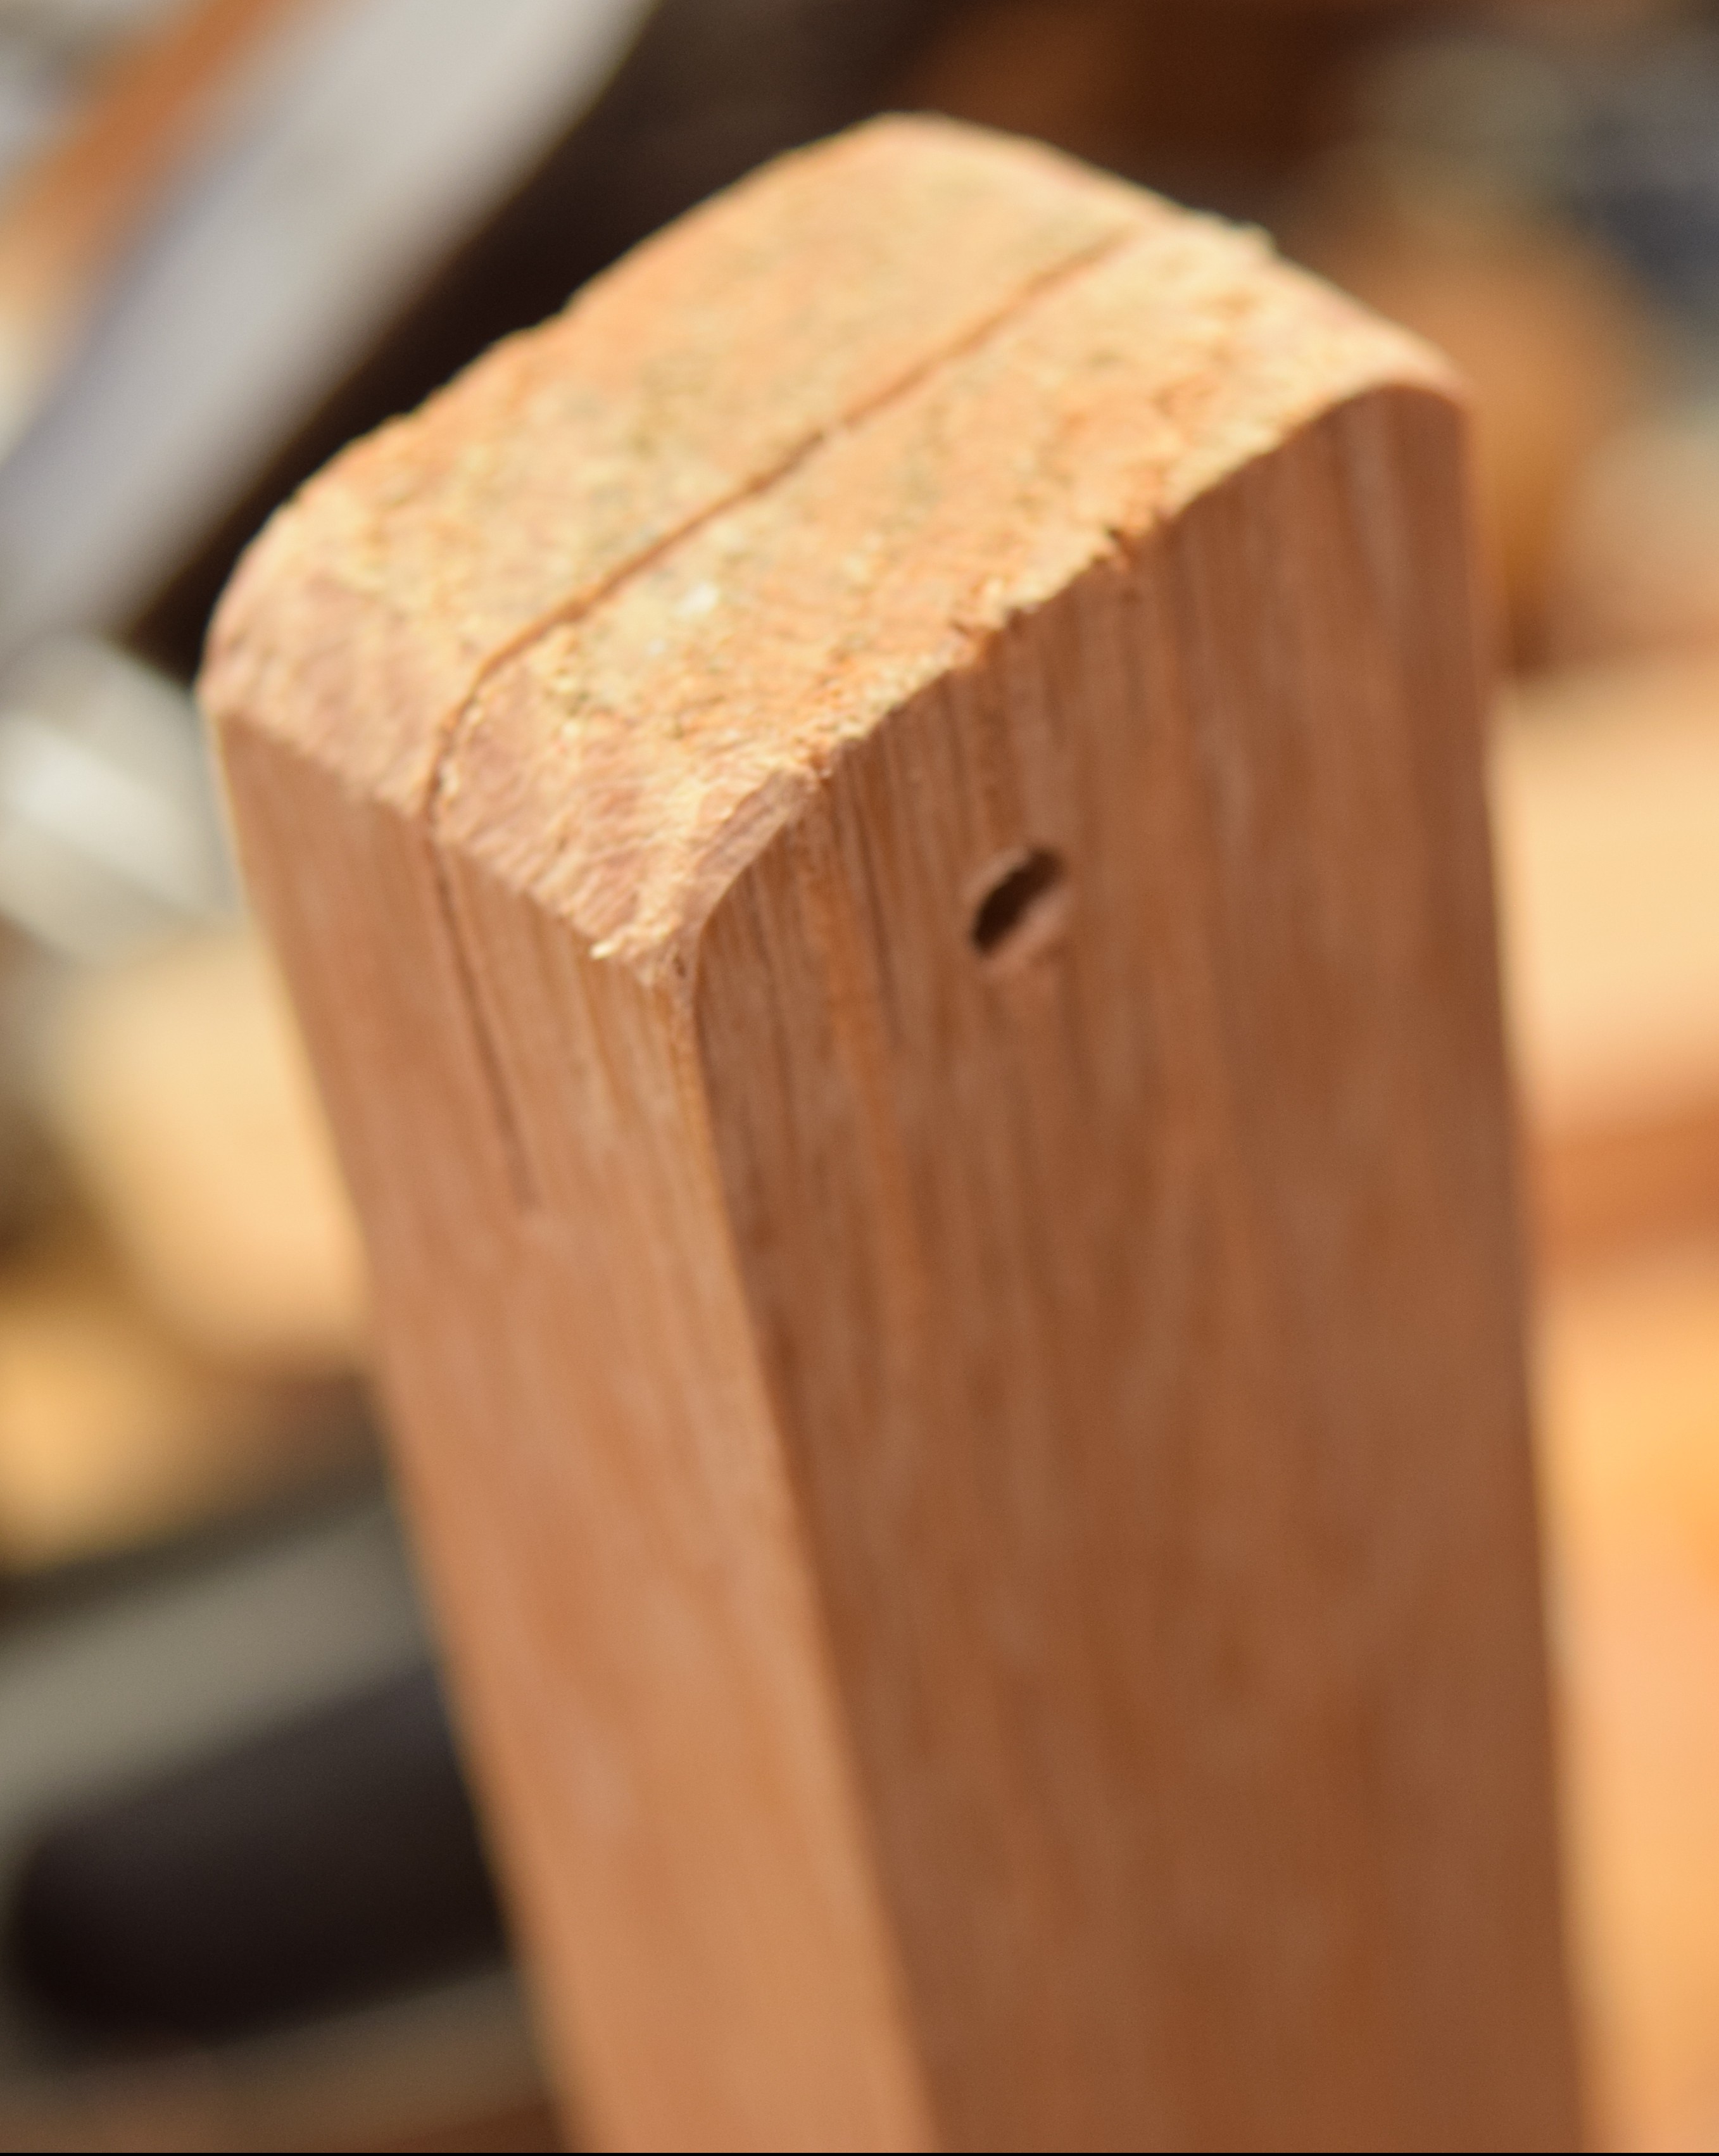
The spear point tip was another thing I had a pretty strong vision of. It came off the saw a little lopsided, but I was able to sand it into a respectable shape.

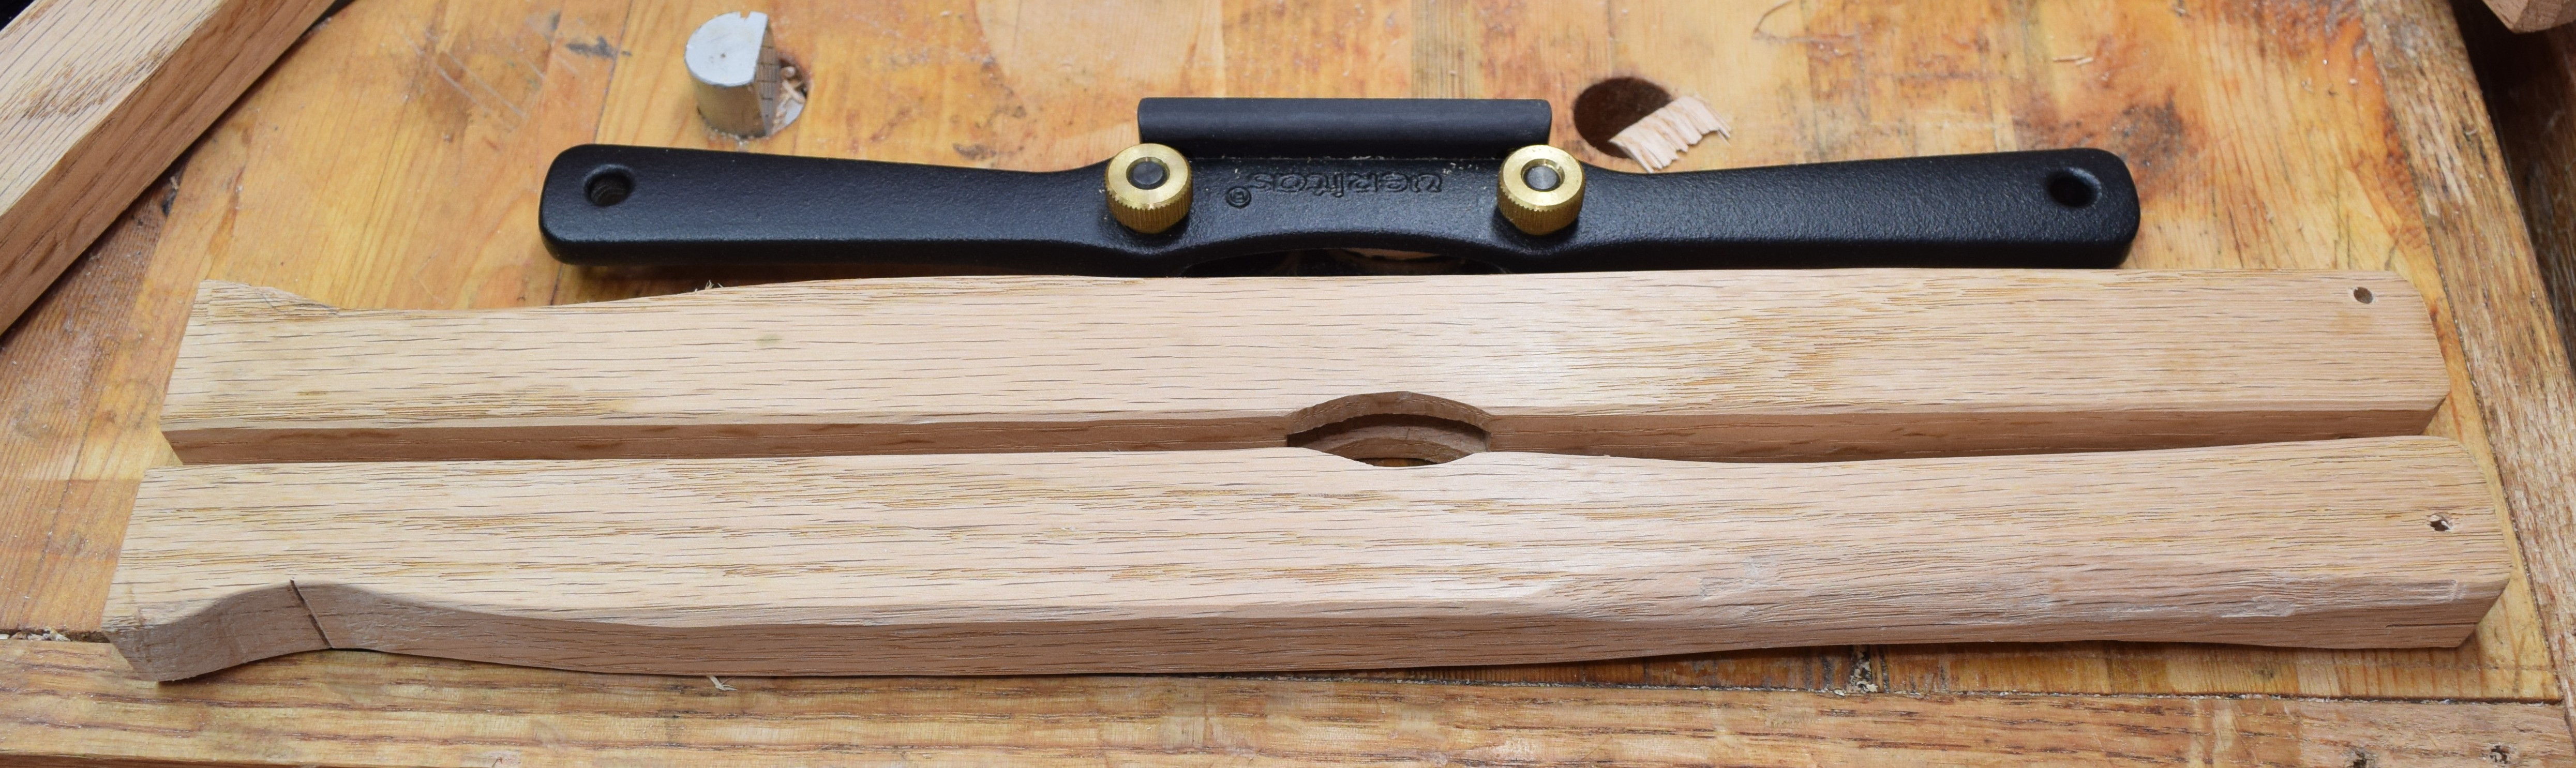
For the half laps I tried something new. In the past I would just cut them by hand 100%. I decided to try and be a hybrid woodworker. I hogged away most of the waist with my little trim router, then use a chisel to take it up to the line. It does make for a very smooth straight cheek.

My experience doing this trick with the other half of the joint was less stellar. The bit would keep grabbing and bouncing around and I went through a lot of batteries. The top left slot in the left hand picture shows where I started with the router, then just ran out of batteries. I had already defined the edges with a saw. I took a chisel, and in about 20 seconds cleared out 80% of the waste. I then went back with a new battery and cleaned up the bottom (right hand picture). That was way easier. Trim routers can’t hog out a ton of material, but they do great at cleaning up the last little bit. lesson learned.

Here is the un-assembled shot of everything. I did a little trimming with a block and shoulder plane to make everything snug. The final joints look pretty tight on the outside, I am proud of them. I cut the tennon parts a little long and planed them flush when the glue was dried.

To hold the bow in place I did a little more carving and shaping on some oak blocks.

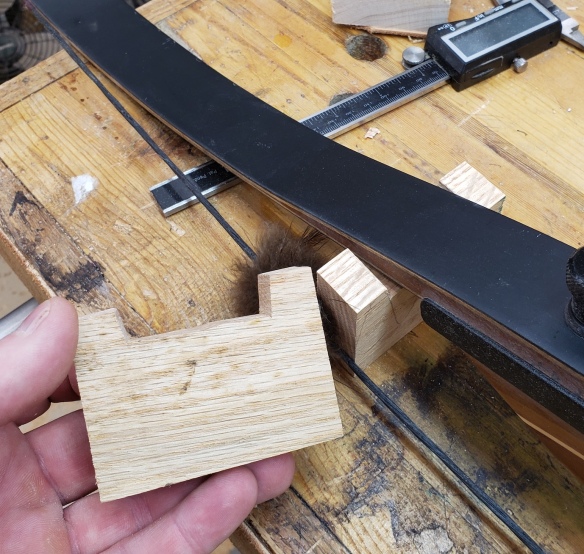
I didn’t do any edge rounding on this one. I wanted it to look reasonably refined, but still a little rustic. Like it might be something an old armory would use to hold a bow that was always needed at the ready.


Last but not least I made a big double bladed ax for my armor costume. This was probably back in 2010 or so. It has been moved around and mostly lived in closets. Now, it gets to live next to my shield on the wall. Putting this one together was so fast I got it up on the wall before I remembered to take the first picture. Oops!

Frame Saw – Giant Hack Saw

Paul Sellers has a really great video on making your own frame saw from a band saw blade or blades available specifically for frame saws.  It is a wonderful project that can be done with a minimal amount of tools and material.

DSC_0154

I started with a metal bandsaw blade and a few pieces of scrap oak I had around.  Typical hack saw blades are only 12″ long.  This one is going to be 18″.  The extra length should translate to a much faster more comfortable cut.  I will also have a lot more fine control on blade tension vs a normal hack saw.

DSC_0143

DSC_0144

The shorter pieces will make an upright and the long piece will act as a pivot bar in the center.  The uprights got a small set of mortises with a rounded relief to let the pivot bar do its pivoting!  The bar got a matching tenon on each end with a rounded section.  I did the round with a few saw cuts to get it close, then finished with a rasp.

When I got those fitting reasonably well I moved on to the bottom.  A saw cut will let the band saw blade in, and a hole set 3/4 of the way over will accept a nail to hold the blade in place.

DSC_0149

To hold the string I cut a small notch down, then used a chisel to sculpt both sides into that saw cut.  Once roughed in I pulled out the ole spokeshave and went to town.  What a fun tool to use.  It can be hard to see in the picture, but I did a lot of subtle shaping on the handle side.  Being able to hold it, then shape, then hold again is a fast way to make a part like this fit you really well in a short amount of time.

DSC_0151

DSC_0152

When everything was rounded I assembled, tensioned the bow by twisting the strings with another small scrap of oak, and tried it out on a bar of steel I had around.  Very nice!  The saw is light and well balanced, and the 18 inches of length meant I could really get into the cut without having to hold back.

DSC_0153

Next time I will work harder on making the rounds at the mortise/tenon joint more consistent, but otherwise I am very happy with this.  With testing done, I disassembled it, coated everything with BLO, and reassembled when dry.  The first picture of this post shows the saw with finished and in a low tension storage state.

GoPro Zip-Tie and Base Mount

When I was out in California I played around with the GoPro enough to know that I needed a few more accessories.  The first would be a decent base.  That plastic square that comes with the camera is nice, but it slides around and is bigger than it needs to be.  A sturdy non-skid base would be nice.

I picked up a rotating time lapse thing from amazon.  It winds up like an egg timer, and slowly rotates while you take time lapse photos.  It is a pretty sweet toy, but the base is slick, and the item itself is light.  That makes the whole thing top-heavy and likely to slide if what it is sitting on isn’t perfectly stable.

Two birds? One stone!  Enter my new default base!

DSC_0446 Resized

It may not look like much, but the 1/4-20 stud sticking out of the top will screw into my drift lapse base, and with a tripod mount, I can stick my GoPro directly to it.

The body is oak with black paint.  I used the mill to cut out the shape and do the counterbore for a hammer in threaded insert.  A short cut section of all thread epoxied in provides a short stud.  Hot glue holds the drawer liner gripper material.


Zip Tie mount

Zip ties can attach just about anything to just about anything else.  Why not use them to attach a GoPro to just about anything else?  Well, first you need a good zip tie mount!  I milled oak to accept an adhesive mount.  Two grooves allow zip ties to run cross to the camera orientation.  I rounded the edges of the zip tie channels by sawing and chiseling the corners.

I suspect most things I tie this to will be roundish.  A little sanding on the bottom creates a curved relief.  Peel and stick sand paper on the bottom should help it stay still.  Lastly, I wasn’t sure how well the 3M stuff would stick to wood, so I gave it a little 2 part epoxy at the edges.

I am really excited how this one turned out.  I need something to test it out with… how about this?  Spray paint GoPro anyone?  Oh well, it illustrates the point.

DSC_0441 Resized

Small Blade Sharpening Jig

I recently picked up a Stanley no 45 plane.  It has a lot of different blades associated with it.  They can make beads, coves, fancy edges, and all sorts of shapes.  The trick is that you have to sharpen each one by hand.  There really isn’t much in the way of jigs to do the sharpening for you.  That having been said, I did have an idea of how to help.  A clamp that holds the small blades firmly, and indicates the angle used for sharpening.  Finished product first!

DSC_0163There is a long half the drops down into my vice, and a mobile half the opens up and lets me position the blade to be sharpened.  I cut the top edges to 35 and 40 degrees.  They help provide a loose guide while sharpening.  It still comes down to your skill on sharpening, but it should keep me from getting too out of whack.


The build

I started with two pieces of oak and cut their ends to the proper angle.  In reality, I cut the wrong angles because I used the numbers on the miter saw.  Oops, I needed 90 degrees minus that number.  The correct angles show up in later photos.

DSC_0140

Next I drilled an offset hole for a 1/4″-20 bolt and threaded handle.  My hope was that It would be enough to hold a single blade with out rotating too badly once clamped.

DSC_0141

If at first you don’t succeed destroy all evidence you ever tried.  I guess by posting this I am not following that rule.  I grabbed a piece of scrap oak, glued it to the inside of the clamp opposite where the blade will be, and shaved it down to the blade thickness.  Low and behold the extra little part helps keep the clamp aligned and gripped firmly across the face of the blade.  I played with it a bit and am happy with the results.  Marking the angles will help me set the primary bevel and micro-bevel without confusion.  Boiled linseed oil should keep the wood protected.