DIY Screw Wax

Screw wax is a miracle of woodworking.  The original woodscrews were probably medieval or earlier.  There is debate on when they were first used.  I don’t know the correct time, but I bet they were universally hated until someone discovered screw lube.

With or without a pilot hole, by power tool or hand, waxing a screw makes it go in so much smoother and easier.  No stripped phillips slots, no broken off heads, and less arm ache if doing it by hand.  I picked up a little tin of screw wax a few years back, and it has become my best friend for doing anything finer than 2×4 construction.  I love the stuff so much, I wanted to create my own.  After all, what is having a backyard full of bees good for if not making your own beeswax products?!

DSC_0473

My mustache wax experiments told me I wanted a few parts wax to a single part of something with a lower melting point.  Beeswax alone is just too hard to be really useful, so I chose petroleum jelly.  I had 32g of wax in this little puck.  I wanted to start with a 5:1 ratio, but my scale had issues measuring the jelly weight.  Not sure why, but I guessed at somewhere between 5 and 10 grams.

A soda can made an excellent disposable double boiler.  Once melted and consistent I let the contents set.  I wanted to test the wax before pouring it into a bunch of small containers.  I broke out some commercially bought wax, my attempt at screw wax, and straight beeswax.  A finger nail impression, while not exactly a rockwell hardness test, showed my version to be similar to the store bought stuff.  Beeswax barely leaves an impression with your nail.  Screws seem to pick it up just like the commercial stuff too.

DSC_0476

DSC_0477

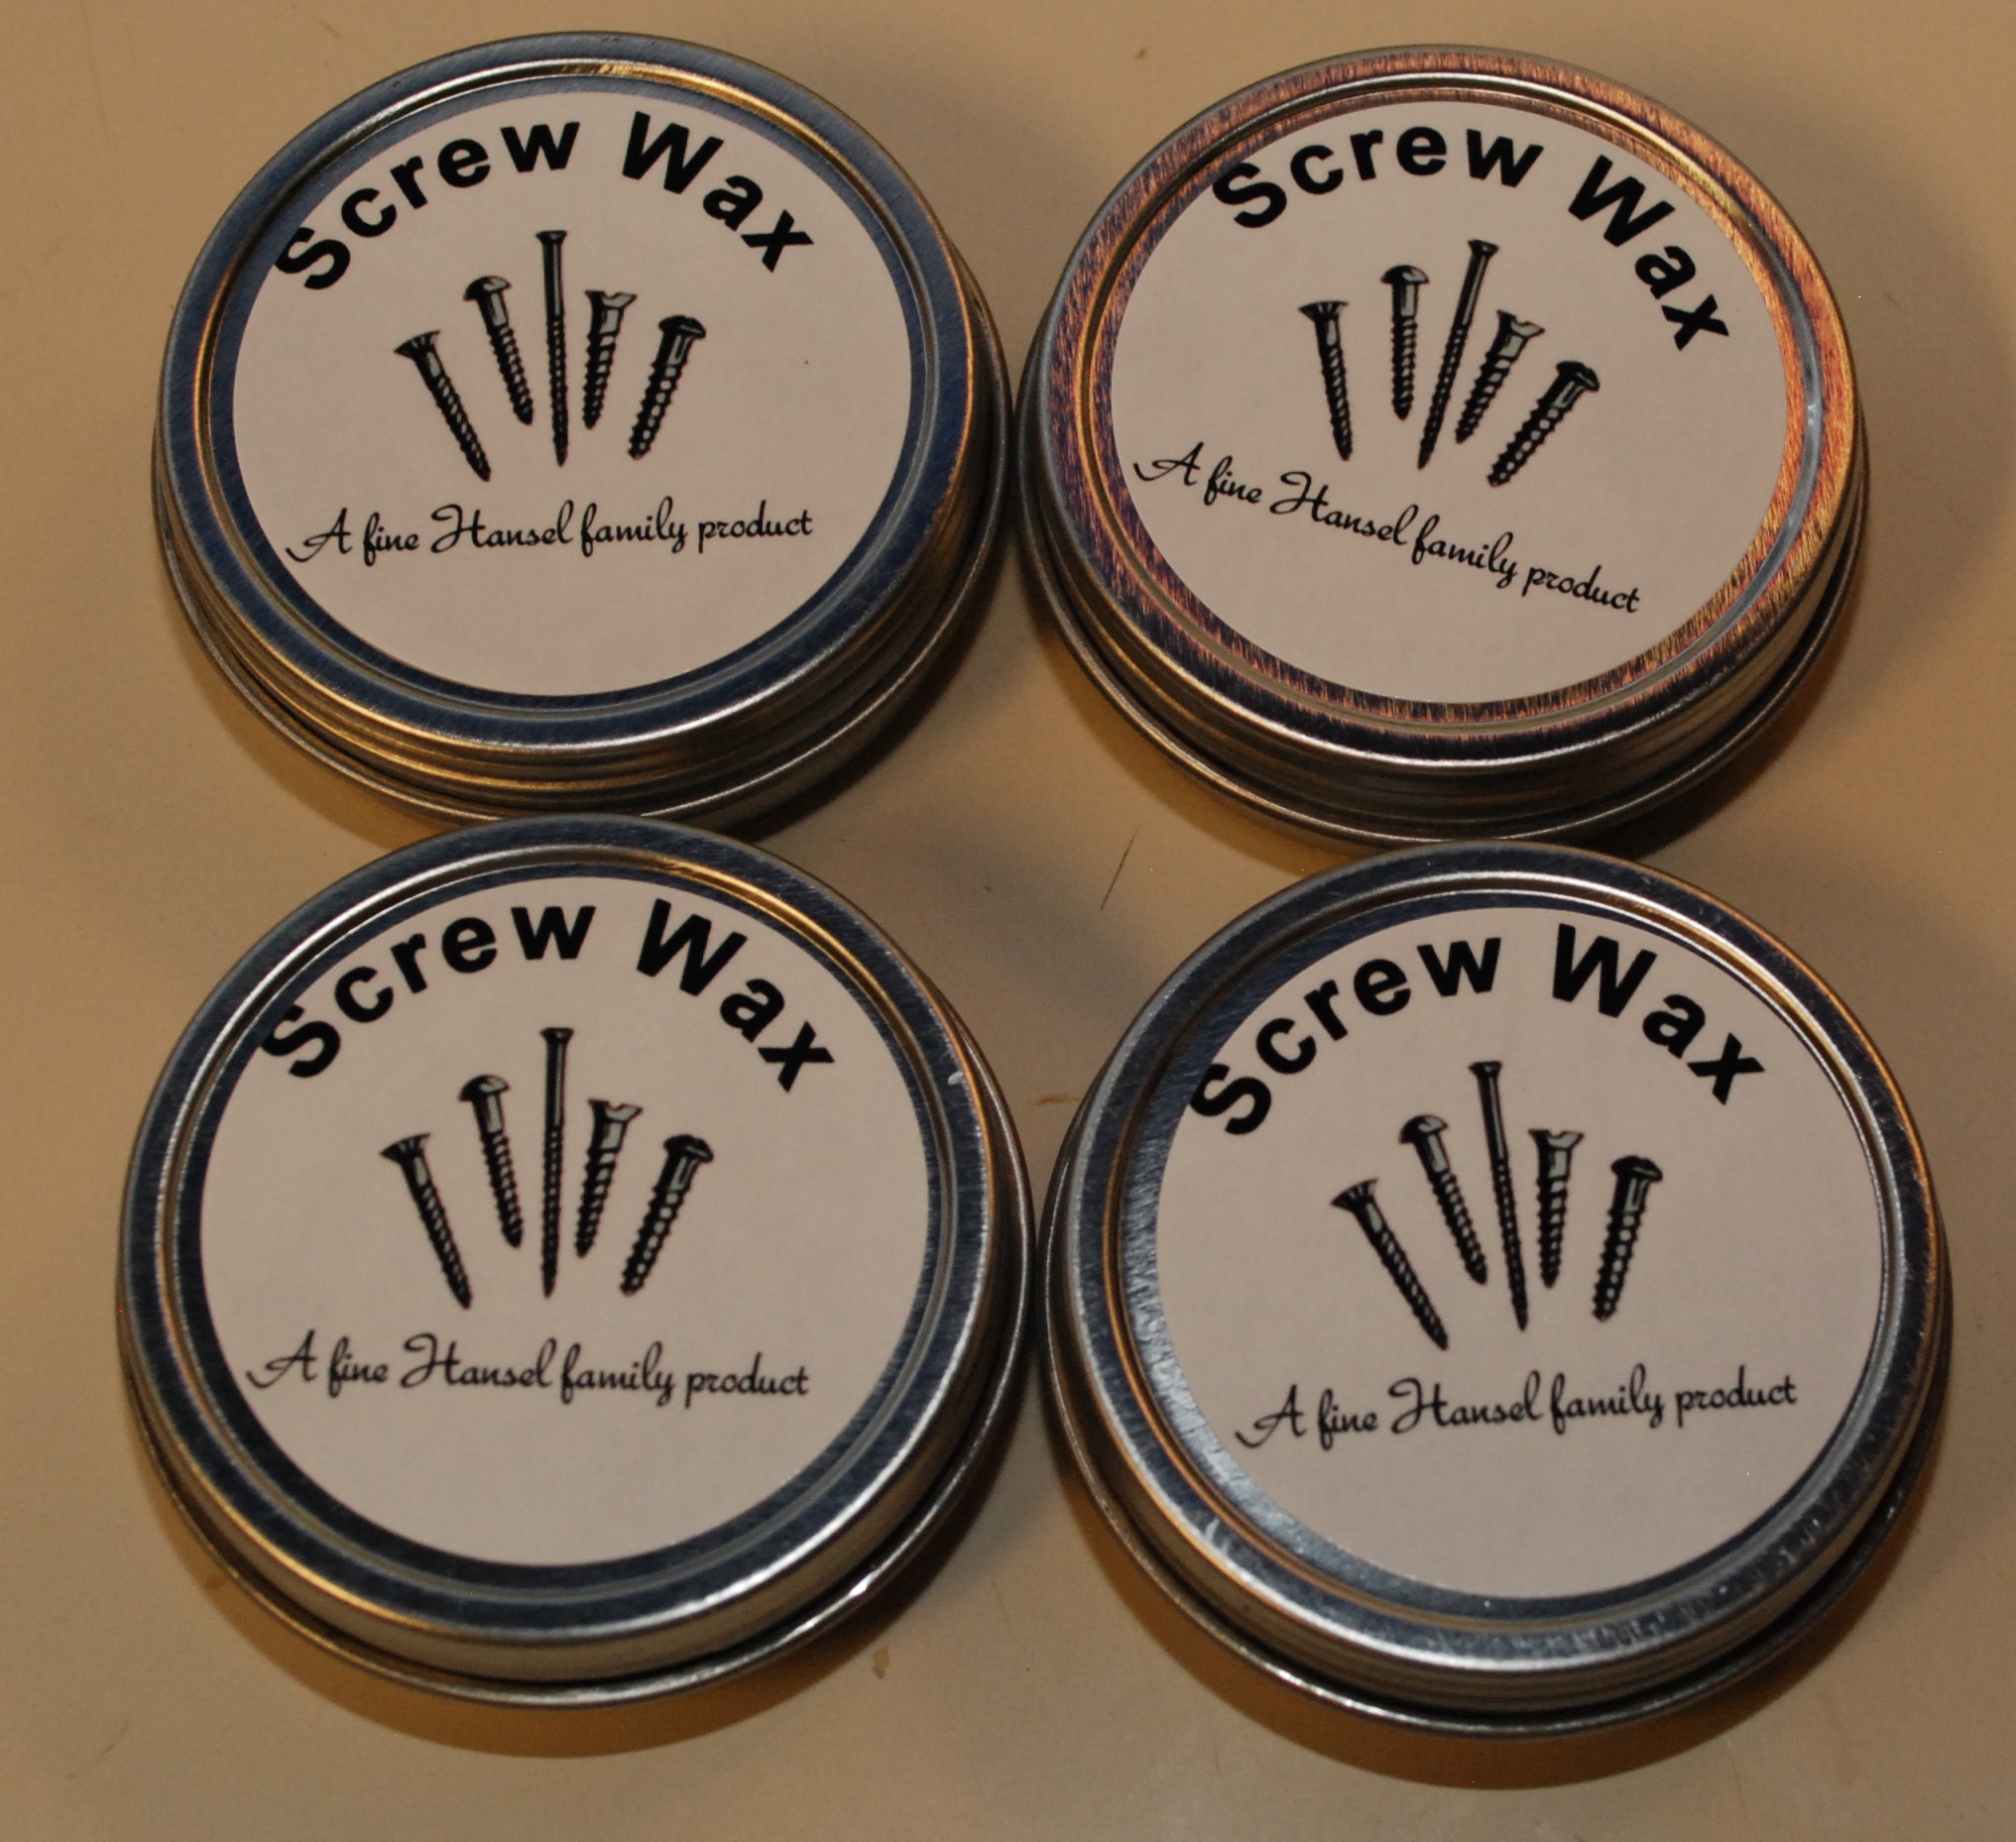
Satisfied with the results I remelted the puck and poured it into small 2oz metal tins with nice screw tops.  I ended up having to do a second batch to get 4 tins full.  Between my dad, my father-in-law, and myself, I needed at least 3.  Two tins for me probably represents a 10 year supply.  Who knows though, with labels that snazzy, I might find myself reaching for it even more.

DSC_0478

DSC_0479


Honey Harvest 2015

We had our first full harvest of hive Ester.  20 frames went by really quickly and easily with our home built honey spinner.  It was a bitter sweet harvest though.  I am pretty sure our queen is dead.  The hive population is very low, there is no capped brood, no signs of new brood, and we found a wax moth larva.  We had 6 weeks straight of rainy days, and near the end a serious brood problem showed up.  I couldn’t find any straight answer as to what it was.  It must have been some serious problem with the hive/queen.  Luckily some new friends from the beekeeping group might have a nuc for us.  Hopefully they come through before I have to freeze all the frames and give up for the year.

Back to the harvest, look at all these gorgeous frames!

All our equipment performed really well, and we ended up with about 37 pounds of honey. That looks pretty serious when it is all in one 5 gallon bucket.

DSC_0396

We bottled everything into 12 ounce bears to have enough small quantities to give away to friends and family.  That worked out to 50 bears, each with their own smart little label.

Now time to enjoy some honey.  Thanks bees!

DSC_0400


Wax Refining

I used a plastic tub to catch all the decapping debris.  There is a lot of honey mixed in, so a session sitting in the strainer is warranted.  Once drained of honey, it went back to the tub, and through multiple soak and drain cycles before the water ran clear and free of honey.

I was able to pack the wax into a single jelly strainer.  The strainer sat in an old pot and slowly melted away.  Once completely melted the nasty jelly bag gets tossed, and the wax can go into old containers.

The finished product was 9.5 ounces of wax.  It looks decent, but might need another strain.  Next time I might break it up into multiple runs to see if that helps the cleanliness of the finished product.  Still, it is perfectly good wax for use in all sorts of projects.

Mini Test Extraction

There is a lot involved in extracting honey.  You have to get the frames into your house without them being covered in bees, there is the removal of capping, the extraction, filtering and bottling.  Lots of steps with lots of potential for disaster and hang ups if you are new.  We are very new, so I thought a 2 frame mini test extraction would be worth a shot.  The girls are busy filling up the empty frames we added a few weeks ago, so we picked two (mostly) ripe frames to test my home built extraction rig.

This is the spinner portion of the centrifuge extractor.  I built it to go inside 5 gallon buckets so they would be easier to store.  There was an issue though, I didn’t give myself enough room on the bottom set of guides, and it didn’t fit.  So I started cutting and modifying and came up with an even better version that requires fewer parts.

DSC_0262

While modifying I broke the blade off my PVC cutters =(

DSC_0279

Now that I have learned how to properly build the bottom section I will make another and post it with full plans (parts list, lengths to cut, etc.).  Until then, just see what the results are from an extractor that cost less than 50 dollars in parts.


The Extraction

We took a set of full frames, de-capped both sides with an electric hot knife, and gave them both a spin.  The result was a pretty thorough extraction.

Once the honey settled and went through a filter we got some really amazing biscuits and honey.

DSC_0283

One frame was completely packed on both sides.  It lost 2lb 10oz going through the spinner.  The other was a bit lighter to start with and still had some open cells.  That one lost 2lb 1oz in the process.  We were able to bottle about 3.5lb of honey and 1oz of wax.  There is about a pound missing that probably got lost in the filters and side walls.  That will probably happen for extracting 2 frames or 20.

Assuming you do a pile of frames you can expect around 2.5lb of honey per full frame, or 25lb per super.  I have 2 supers full, and a 3rd on the way.  Oh boy, that is a lot of honey.


Wax Refinement

After letting the cappings drain through the filters for a bit I put them in a tub and did a series of rinses and soaks.  After a day of rinse and soak they appeared to be free of honey.

DSC_0284

A jelly strainer bag turned out to be perfect for refining.  It has a fine mesh on it, and you can toss it when done.  Basically dump everything inside, put it in an old pot and set the stove for low.  After a while the wax will all melt out and the junk will be left inside.

There will likely be some water in there from all the rinse cycles.  No bother, it will separate from the wax naturally.  Once you get everything melted, dispose of the bag and pour the pot contents into a form.  I used an old yogurt cup.

The hot wax will separate and float to the top.  Once cooled, break the wax out.  I ended up with a fairly clean chunk of wax weighing just over an ounce.  Bees are the best pets ever, thanks girls!!!

Moustache Wax (Part 2)

After my first round of moustache wax creation I had a lot of testing ahead of me.  Some batches were way too thin, and some had odd smells.  The table below is my conclusion from round 1.

Slide2

For starters I am going to nix the shea butter, but keep the cocoa butter.  The shea smells kind of funny to me and makes the wax very soft.  The cocoa smells good, though it is hard to tell if has any other beneficial effects.  The vanilla did not mix well or add anything.  Even the best batch had too little hold in my opinion, so the next round is going to need more bees wax for stiffness.  Take number 4 and increase wax!

In addition to playing with the amount of bees wax I decided to try petroleum jelly as an alternative to the cocoanut oil.  Many of the recipes I read about used it. Here is the list of things I will try in round 2.

Slide1

I used the same procedure as last time, measure out ingredients with a scale, then combine in a small double boiler using a glass measuring cup as the inner pot.  It makes pouring easier!  Everything went well, and my new pile of candidates look great!

DSC_0102 DSC_0103

I have lived with these for about two weeks now.  My main conclusion is that the petroleum jelly isn’t as good as cocoanut oil.  It doesn’t spread or hold as well.  Right now I am leaning heavily towards number 7.  8 might have slightly better hold, but is much harder to work in.  9 is way too hard.  I may try mixing 7 and 8 to see what an in-between looks like.  Til then I have ordered containers and more wax to make a big batch for the long haul.

DIY Moustache Wax (Part 1)

I entered into a beard off with a co-worker earlier this year.  We both stopped shaving at the beginning of August, and will not do so again until sometime in December.  We had an agreement that small trimming could be done for cleanliness.  I don’t like my moustache getting into my mouth, or tickling my upper lip.  One option would be to trim, but figured why not train it!  So I picked up a tiny comb and some moustache wax.  This is where my problems set in.

I have tried a hand full of different waxes available online, because I can’t find any in town.  All with the exception of one smelled so bad I couldn’t bring myself to apply them.  These things sit right under your nose for goodness sake!  Many of them are quite pricey too.  10-15 bucks for on ounce or two.  That is rich considering it is mostly bees wax.  How about I make my own?

I did some reading and found a whole host of recipes out there with a lot of different ingredients.  EXPERIMENT TIME!!!  Bees wax on its own is too hard to use, so oils are added to soften.  I used the following ingredients:  Bees Wax, Shea Butter, Cocoa Butter, Cocoanut Oil, and Vanilla Extract.  The ratios for the first 6 batches are:

Slide1Everything was measured out with a scale and combined in a double boiler.  I went through the week using one each day and recorded my thoughts.

  1. Way too thin and easy to spread.  Not enough hold for my course stache.
  2. Decent consistency and hold.  No bad smells.  This one has potential.
  3. Too little hold and the Shea doesn’t smell good in my opinion.
  4. Not enough hold for my liking, but the smell was light and pleasant.  With more wax, this could be a good one.
  5. Practically melted off my fingers.  No go!
  6. The vanilla extract didn’t mix well.  Oil and alcohol.  Anything I add should be oil based if I want to influence the smell.

In all it was a good round.  If nothing else, number 2 is probably an acceptable substitute for my previously preferred wax, and at a tiny fraction of the cost!  I kind of liked the cocoa butter additive.  My next round will be variation on that version with more wax.  I might try a round with petroleum jelly instead of cocoanut oil.  That seems to be a popular alternative to the cocoanut oil.  Until next time, let it grow!