Sharpening Station

Sharpening is one of those things that you know you should do often, but always gets put off.  It is often said 90% of your problems with hand tools can be fixed by proper sharpening.  I am getting better at free hand sharpening, and getting less lazy over time.  It is hard to always have some dedicated space to sharpening though.  I read an article in Fine Woodworking Magazine where someone suggested using a basic tool box plus custom top as a sharpening station.  It is portable to follow you around the shop, and has all the right stuff where you need it.  Instead of buying something I decided to stash bust and build one.

I have a ton of 3/4″ plywood around from my temporary kitchen counter tops, and some left over spares from the cabinet installation.  I turned them into a 16×16 open fronted box, along with a few drawers.

Given that the case and drawers would be short I didn’t want to use my normal method of attachment.  This typically involves building the drawer to just below the inside width of the box, and using pine as runners.  It is quick and easy, but the drawers fall out if you pull too far.  Instead I went with metal slides, and got to use my new drawer install tools.

I picked up a slide install tool and drawer guides from rockler.  They help a lot, but are a little awkward to use.  I wish I had do more research before buying.  I think kreg might have a better system.

Instead of using some kind of gripy surface to hold all the various plates and stones in place I went with a small vise.

On the left is a small work surface with bench dog clamps to help hold sharpening plates.  It is offset to the left to prevent drawer interference.  On the right is a small granite surface plate I had.  I added a protective cover to it eventually (seen in later photos).  Now I can use whatever method of hand sharpening best fits the situation of the tool.

DSC_0795

I built 3 sets of drawers to start with because it was all I thought I would need.  Then I found enough stuff to add a 4th drawer.  Once that was built and installed I found enough for a 5th.  I probably have too much sharpening junk.

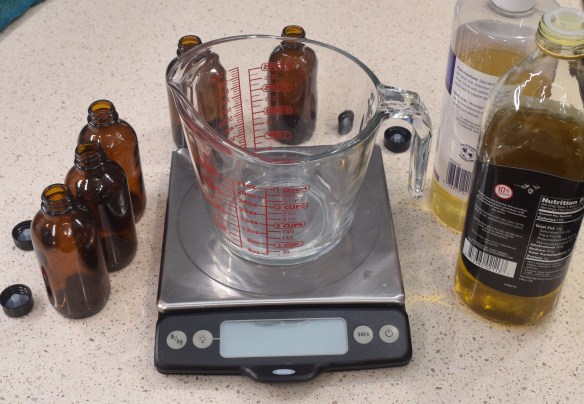
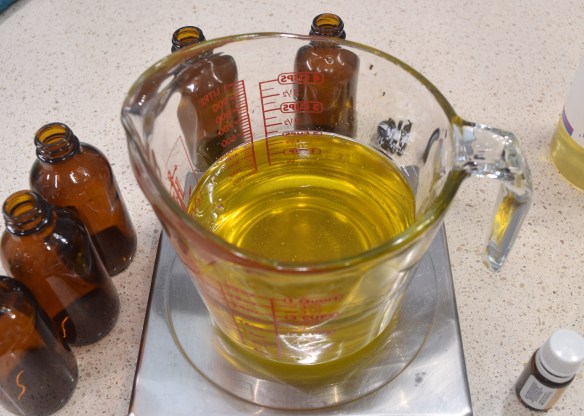
The project ended up stretching out over a month as I worked on other things and came back with more ideas.  In that time I used a few different pieces of plywood for the front face of the drawers, so they don’t match well.  I did cook up a cool side caddy for honing fluids though.

DSC_0801

In all I think I am going to like it.  It rolls nicely, tucks away under one of my other benches that didn’t have a use for that space, holds a lot of stuff in the drawers, and even has space on the bottom shelf for my work sharp tool box and saw sharpening clamp.  The only thing it might need is weight in the bottom to help with stability.  Now I have no excuse not to sharpen early and often.

DSC_0794

Easter Brisket Saga

How can one lowly Brisket turn into a whole saga?  Well gather round, because I have a tale of how much misery and woe a single slab of beef can cause.  Ok, it wasn’t that bad, but there was a lot of water all over the kitchen floor.

This story starts off innocently enough.  A boy and his brisket.  15 pounds of beefy goodness.  I had read about cooking a brisket via sous vide, then smoking it.  You get the tenderness of sous vide, with natural smoke flavor added.  Smoking briskets is hard, they are easy to dry out in the thinner flat area.  This should be easy!

I gave it a nice trim, set the fat cap to roughly the right thickness and then sprinkled generously with salt and pepper.  It is like putting on a fancy tuxedo, only for food.

DSC_0777

DSC_0779

Plan A

Next I cut it up, stuffed it in big ziplocks and tried to fit everything in my usual food grade polycarbonate container.  Oooohhh  might not be big enough.  The point is sticking up inches out of the tub.

DSC_0780

Plan B

No big deal, I have one of those fancy modern soft coolers.  People do sous vide in coolers right?

DSC_0781

It looks all snug and warm in its soft jacket.  Zip everything up and come back 24 hours later!

Wait, what is that dripping sound?  Why is the cooler leaking?

It turns out the cooler is only rated for 120F, not 155.  So the liner glue let go and started leaking everywhere.  I pulled out my hard plastic cooler and dumped everything in.

Plan C

Plastic coolers are definitely ok to work with.

Why is there water everywhere?  Oh great, the drain plug was out.  At this point I was running around like a mad man trying to sop up the gallons of hot water.  No pictures exist.

This container will work, but it is huge.  It needs at least 5 gallons to get everything covered right, and there is no good way for the sous vide cooker to live in there.  Normally they cut a hole in the lid so the electronics can be outside.  This will hold for now, but I need a…

Plan D

Run off to the supermarket and come back with a styrofoam container.  Big enough for a brisket, but not a monster like my big cooler.  It can definitely handle the high temp (you put boiling hot coffee in the stuff after all!).  I modified the lid on the band saw and we were back in business.

DSC_0786

A few hours later I walked by and water was all over the floor.  Apparently the foam is porous enough to let a little bit of water weep through.

DSC_0787

Plan D-2

Re-enter the plastic tub I tried using from the beginning.  It is only weeping a cup every hour or two.  I can keep it full for the time needed, and this tub should keep the floor dry.

DSC_0788

The Next Day

I made it through the night without spilling any more water on the floor.  The brisket actually turned out looking pretty.  Dark, soft, and ready for the smoker.  After another application of the tuxedo treatment that is.

Because the beef is already completely cooked there is no need to smoke all day.  Only a few hours to impart some nice flavor.  I went for about 3.5 hours on a low smoke.

DSC_0791

They are nowhere near as dark as they would be had they been smoked all the way through.  Still, they have been nice dinners for the week.  Reasonably moist, and pretty tender.  The fat is rendered perfectly.  That kind of melt in your mouth velvet feeling when you eat some of it.  I need a new container scheme if I want to do this again.

Sharpening Plates

There is a sharpening system known as scary sharp.  It typically involves adhering sand paper down to glass plates.  Start at a high grit, and sharpen your tool down through the grits.  It is perfectly valid, and can give you a great edge.  The only issue is the cost of sandpaper adds up.

If you only have a few tools to sharpen, it works great.  Sometimes you want to clean up a really rough ebay tool, and don’t want to use a nice diamond stone on a rusty hulk.  Flattening water stones is rough work, and best done with disposable sand paper.  They can help flatten issues on cast iron tables.  Basically lots of good uses.

I have some decent diamond stones, but still wanted some glass plates to do occasional sharpening and clean up with sand paper.  I went to a local glass company and told them I wanted 1/4″ 4×10″ float glass for this purpose.  I ended up paying 50 bucks for 9 plates.  The edges are a little rough, but not sharp.  Just not pretty.  They even put nice little square foam pads as feet.

20170416_093116.jpg

I am tickled pink at how nice and affordable these were.  I don’t plan on using them a lot, but at the price I got how could I not go for a pile?  This is probably a stash beyond life expectancy!  I would urge woodworkers and tool users that need to sharpen flat objects to go to their local glass shop and see what they can do.  A little super 77 spray adhesive to stick the paper down, and a sharpie, and you are in business.

Pre-Shave Oil

A while back I made a few batches of pre-shave oil.  It went over well and has served my skin nicely since.  It is time to make more!  After having used both numerous times I think the menthol was not a great choice.  It has too much of a cooling effect which is not what you want in a warm shave.  This time will be sandalwood only.

Step 1: Gather up some brown bottles, measuring and mixing supplies, and the oils.

DSC_0774

Step 2: Mix 2 parts castor oil, 1 part olive oil, and a generous dash of your favorite essential oils for aroma.  The two oils have quite a different shade of yellow at first.  They get almost cloudy when mixed until they mix completely, then it is all clear again.

DSC_0775

Step 3: Bottle with a tiny funnel and put a zazzy logo on them.  I wanted to use the phrase “For a shine that is hard to beat… and look directly into”, but it didn’t fit on the label.

DSC_0776

Feb-Mar 2017 3D Prints

Between travel, other projects, and a wounded printer, I haven’t made a ton of prints recently.  Here are the ones that bubbled to the top.

Bluetooth Antenna

I use bluetooth ear buds in my shop at nearly all times.  They are comfortable and go nicely under a set of ear muffs.  The bluetooth in my shop laptop has a really limited range.  Sometimes the EMI from power tools causes enough problems to interrupt the music.  I bought an external bluetooth dongle.  It worked better, but I found that raising it up away from the laptop and monitor made it work the best.

I used a pin contour gauge to try to copy the shape of my monitor.  It is a pretty complex shape and I didn’t quite get it perfect.  Still, a little hot glue holds the bracket on well and zip ties keep the USB extension held high and proud.  I was hoping it would look like a star wars droid antenna, but fell short.  Other than the visuals, it works like a charm.  Long range tunes without interruption.

Magnetic Door Holder

The weather is getting warm, but it is still nice enough to keep the doors and windows open.  The wind often catches the door into my shop and slams it shut.  I printed this bracket assembly and glued in magnets to hold the door open.  A large machine screw holds the two pieces together and allows some pivoting between the door and bracket.  I screwed it down to a mobile work bench, so the angle between it and the door can vary a few degrees.

String Trimmer Winder

I use a black n decker string trimmer for yard edging.  They come with spools (AF-100) that auto-feed the right amount of string and can be exchanged quickly when one runs out.  The trick is they sell for 6 bucks a piece.  Not a horrible price, but considering you can reload them for pennies, I had to find an easy way to do so.

There is a base that the spool plugs into, and a winder that chucks into a drill (1/4 nut and bolt required).  The base keeps the spool stable and guides the string while the winder lets you power through a whole spool in no time.

DSC_0771

DSC_0772

This one was complex enough to use that I made a short video explaining its use.  Thingiverse Link