Tumbler Sanding

Long story short: I tried to use a tumbler to conformally sand 3D prints and clean up old metal parts.  It didn’t work that well.

Long story long: I wanted a way to sand complex parts such as 3D prints and old tools.  I can convert rust easily enough, but it leaves surfaces dark, and doesn’t handle other grunge.  Sanding 3D parts works, but never gets the nooks and crannies right.

Enter the tumbler!  It is a funny shaped open top globe that vibrates.  Shooters use them to tumble brass bullet casings to clean them up.  I started with sand because it is abrasive and cheap.

No luck, sand didn’t do much even after hours of work.  How do the rock tumbler guys do it?  Silicon carbide grit.  Lovely!  I will buy some and mix it with my sand.

20170823_184435

Watching it combine with the sand is a really fun trippy experience.

20170823_184505

I tried lower concentrations of carbide grit to sand, but eventually added the whole 5lb bag of grit.  The metal and printed parts both spent 2-3 hours in full concentration grit.  I feel like the metal parts may have benefited.  It is a little hard to tell in the photos, but the metal is a bit cleaner.

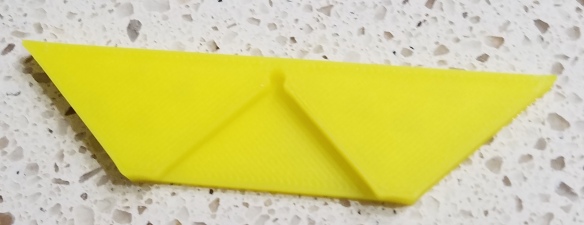
The 3D prints didn’t show much improvement.  The sanded one was a touch smoother in places, but picked up a lot of staining from the grit.  None of the ridged areas were knocked down well.  On the plus side, delicate features didn’t break off.

Poor pickle rick is just going to have to remain rough around the edges.  Don’t buy a tumbler and grit to sand your 3D prints, it doesn’t work well.

20170830_201430


Woodsaw 3D Printed Parts

Miter Saw Zero Clearance Insert

Sawing with a tight fitting insert is almost always the right way to go.  It supports the wood being cut and prevents the fibers from getting torn as the saw teeth punches through.  The plate that comes with the saw works, but has a wide gap.  I made a thin plywood insert, but they don’t last that long.  This is my attempt at a 3D printed one.  The original is on the right.  Notice how wide the saw blade gap is.  I took a picture of the original saw plate on one of those self healing cutting mats.  They have good ruled lines in both directions to make sure the image didn’t get distorted.

The first print out of the gate fit really well.

20170805_130315

I made the first cut with no wood in the way.  It chopped right through the plastic and cut a self fitting slot that is just exactly the size of the blade.  I might have been a little too cautious.  Slow cutting built heat and there was a bit of plastic fuzz at the top edges of the cut.  A little light work with a utility knife had those cleaned up.  Some subsequent cuts have shown the insert to properly back the cuts.

I still need to find a spool of Dewalt yellow filament.

UPDATE: Decided to upload it to thingiverse.

Table Saw Organizers

I am in a near constant state of looking for pencils and rulers/tape measures.  I should attach one of each to my body with a short retractable cable.  Until then I try to stage as many as possible at each work station.  At my table saw I made two different organizers to hold commonly used  items.  They both attach to the far side of my rip fence.

The white organizer holds my wooden ruler and a small stack of pencils.  The pencil well could have been a touch deeper, but otherwise it works well.  The yellow holder area keeps my grrripper push block.  It is at a really convenient hand position for quick use when sawing.

DSC_0927

DSC_0928

Cutting Corners

This was a fun collaboration with my dear madre!  She does bookmaking along with letterpress and about 100 other hobbies.  See where I get it from?  When making a hardcover book you have a solid material that is covered with something like fabric or heavy paper.  I forget all the terms, but in order for it to get covered nicely you need to cut the corner off the cover material so it folds in well.  It is kind of like wrapping a present.

I was directed to check out the cool 3D printed corner tool here: https://www.ibookbinding.com/tools/3d-printed-corner-cutting-tool/

It was a good looking tool, but the tall wall used to protect fingers made it a lot harder to use.  In woodworking we use guides like this all the time to cut knife lines in wood.  You want it to be low so you can get a flat single beveled knife up against the guide.  I made a few changes and came up with this.

20170804_095831

It sits on the corner of binding material up to 1/8″ thick, and provides a 45 degree standoff of 1/8″ from the very tip of the corner.  I added that funny circle cutout to make sure the printer didn’t round the corner to the inside any.  This sits snugly.

DSC_0923

Here is an example of a binder board and the cover material.  The tool sits on the corner of the hard binder material.

DSC_0922

With fingers sufficiently out of the way, you can run a knife along the outside edge and trim the corner off.

DSC_0920

With all corners trimmed you can do a little fold and crease and get a smart looking book cover.

DSC_0921

Mom was happy and requested a dozen.  Easy enough!  Thingiverse link for those that want their own copy