CNC Joinery Jig

Updates have been few and far between recently. Being a toddler parent doesn’t afford me a lot of time in the shop, and the learning curve has been steep on the mill. That said, I have gotten a lot craftier with it and have fusion 360’s complicated CAM system pretty well whipped. I built a set of drawers for my mill and in the process created multiple versions of a joinery jig, and even dove into python code to post process my g-code. It will take a few posts to unravel it all. First up, a few shots of random fun coasters I made the past few months.

The Drawers

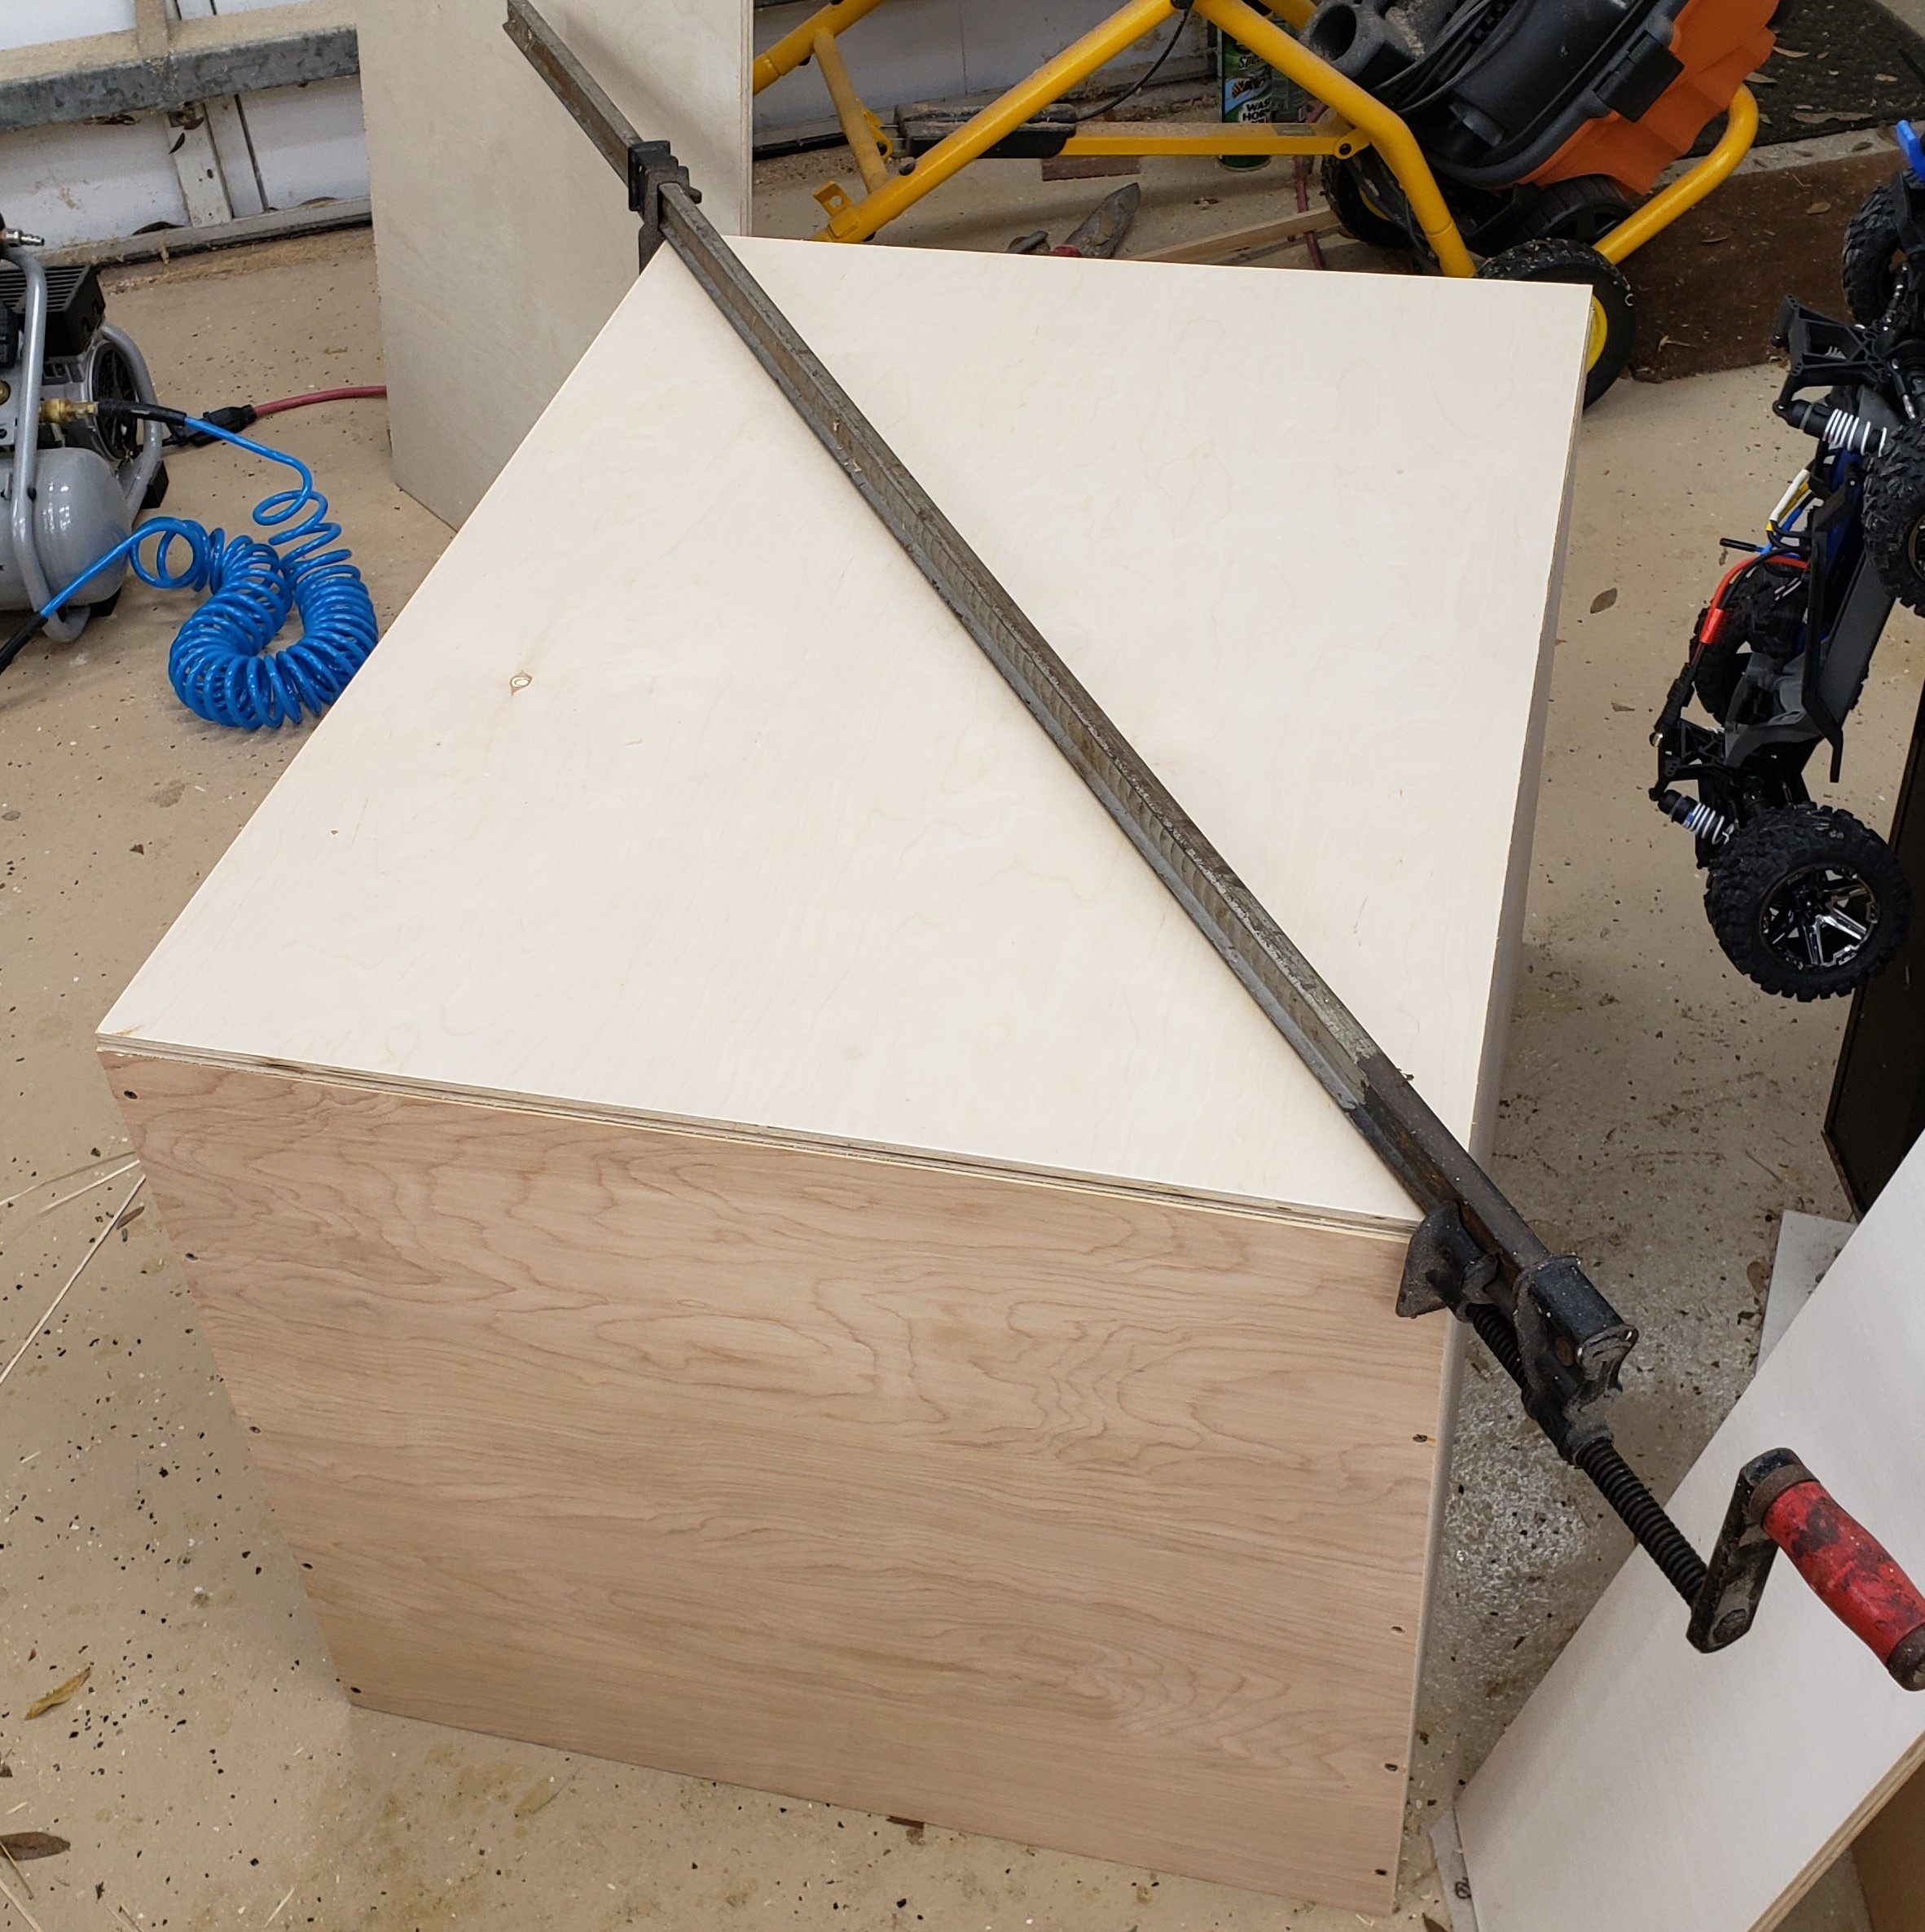
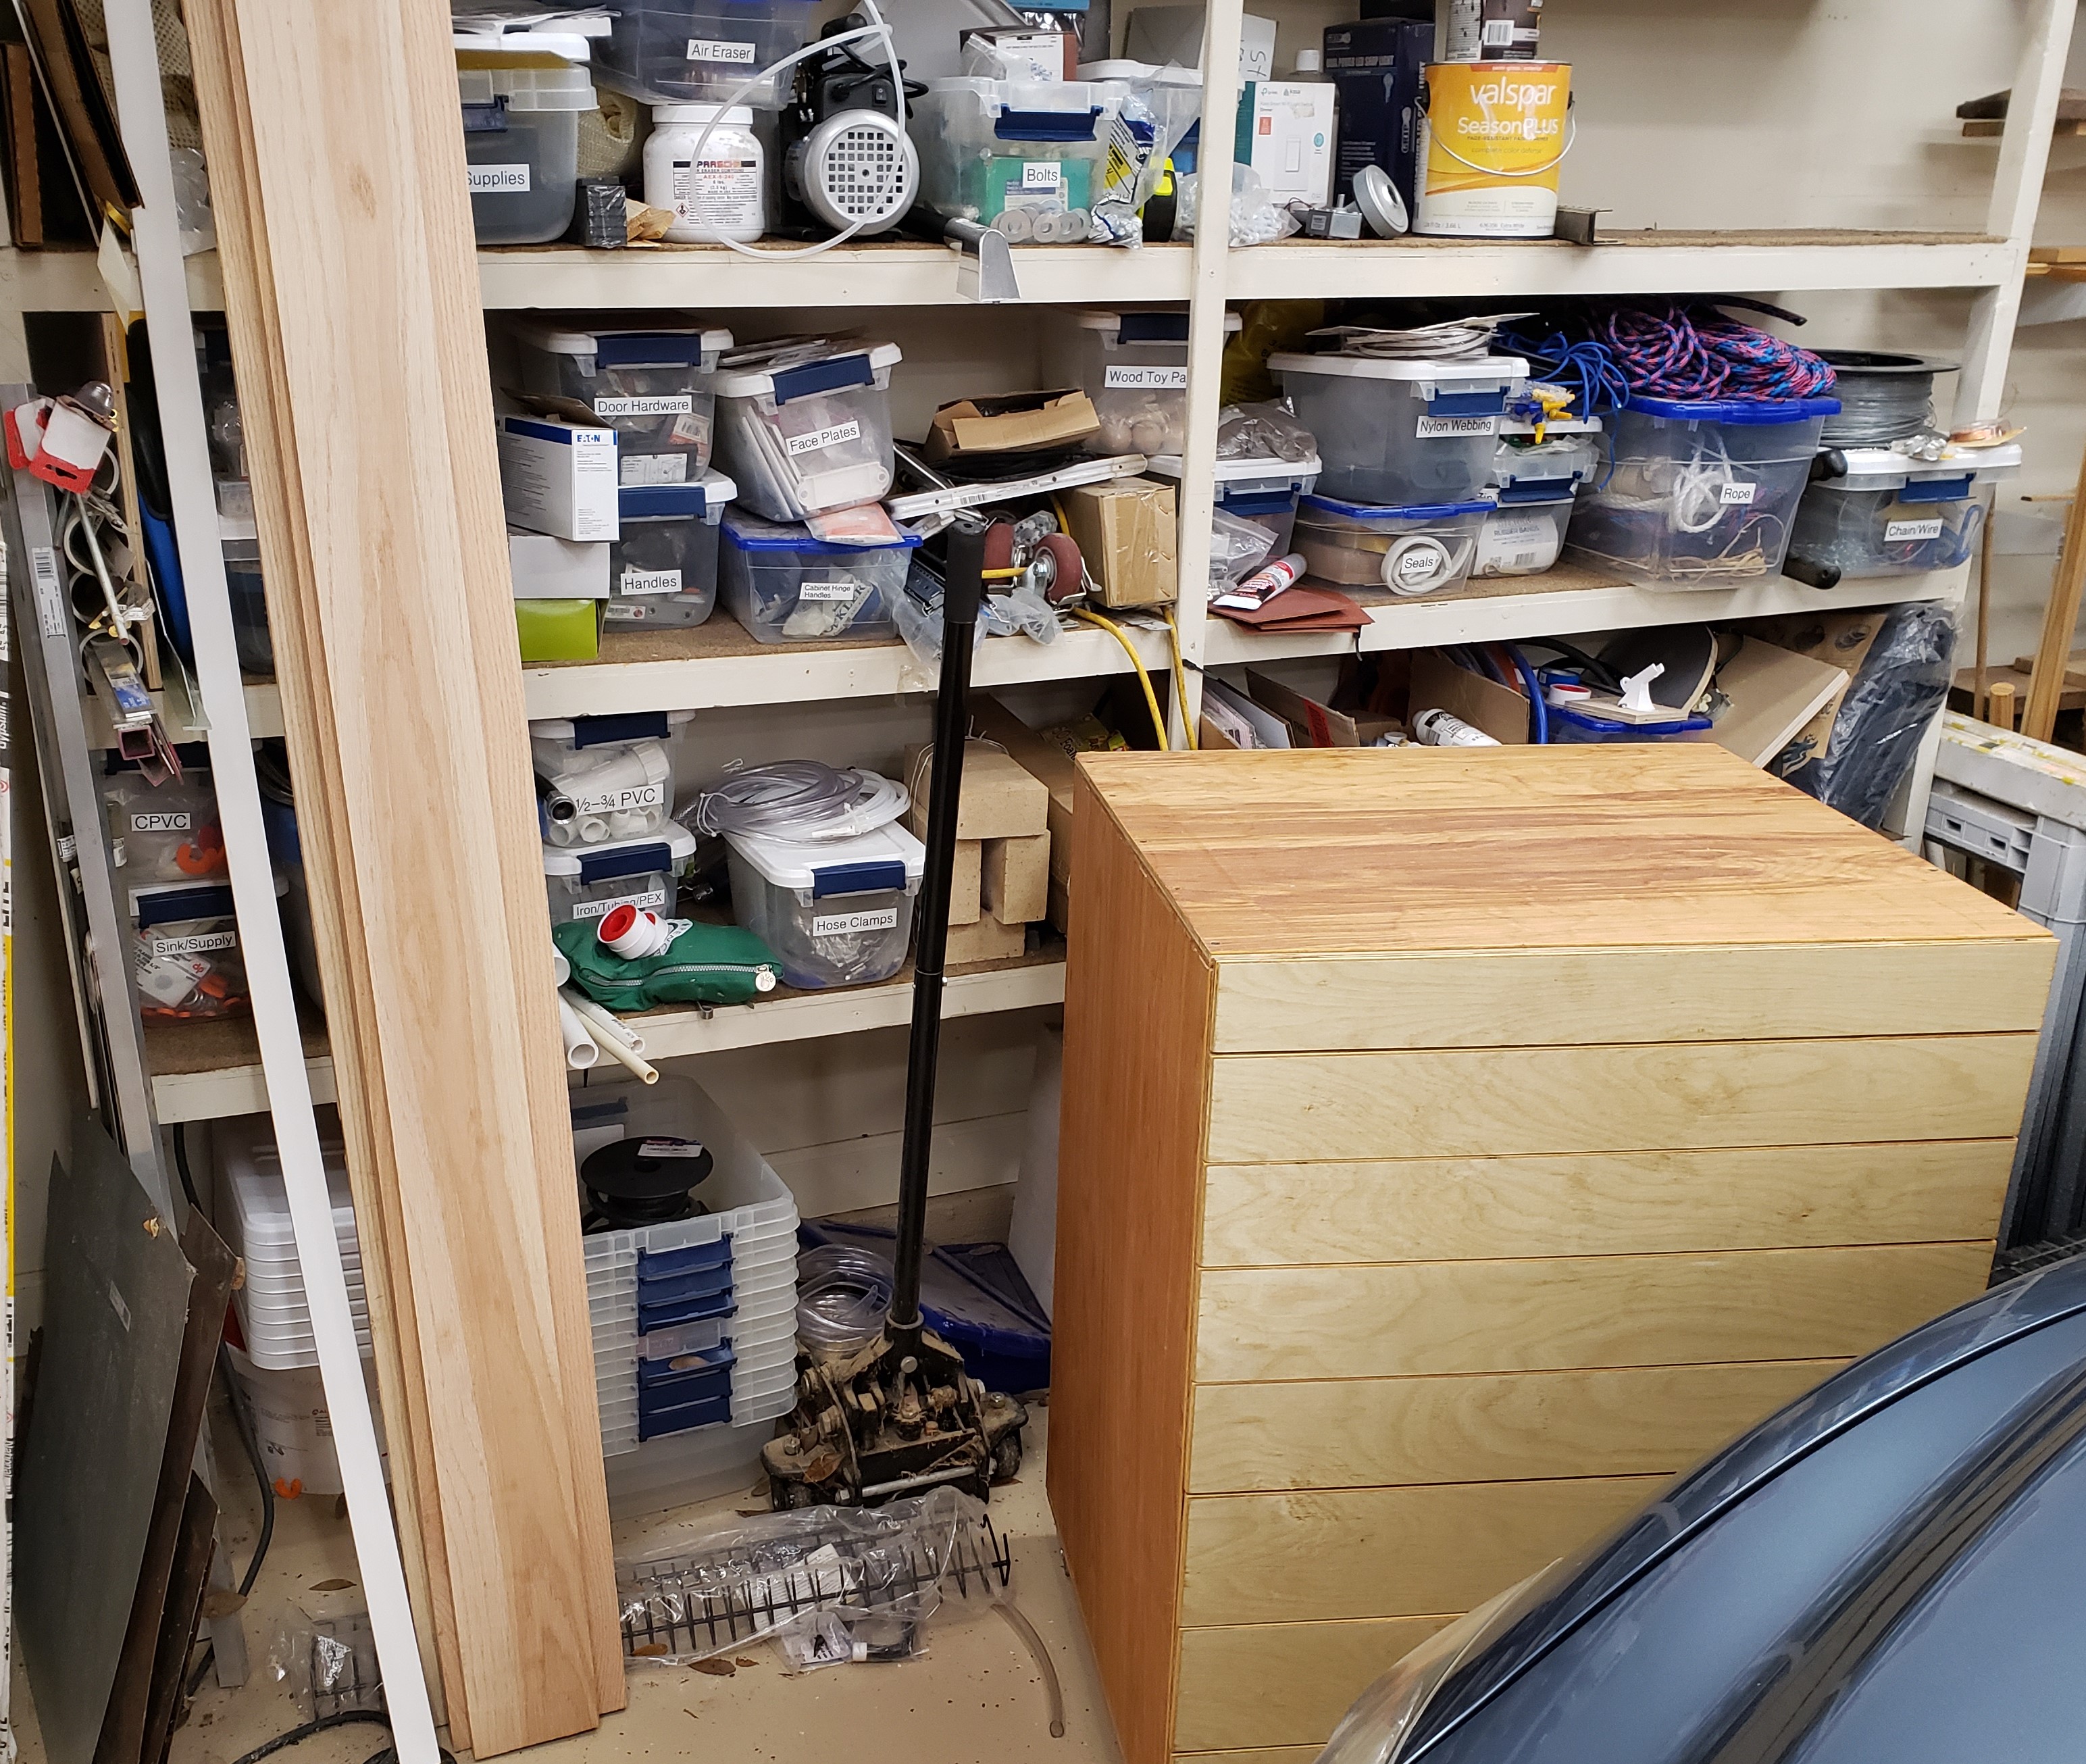
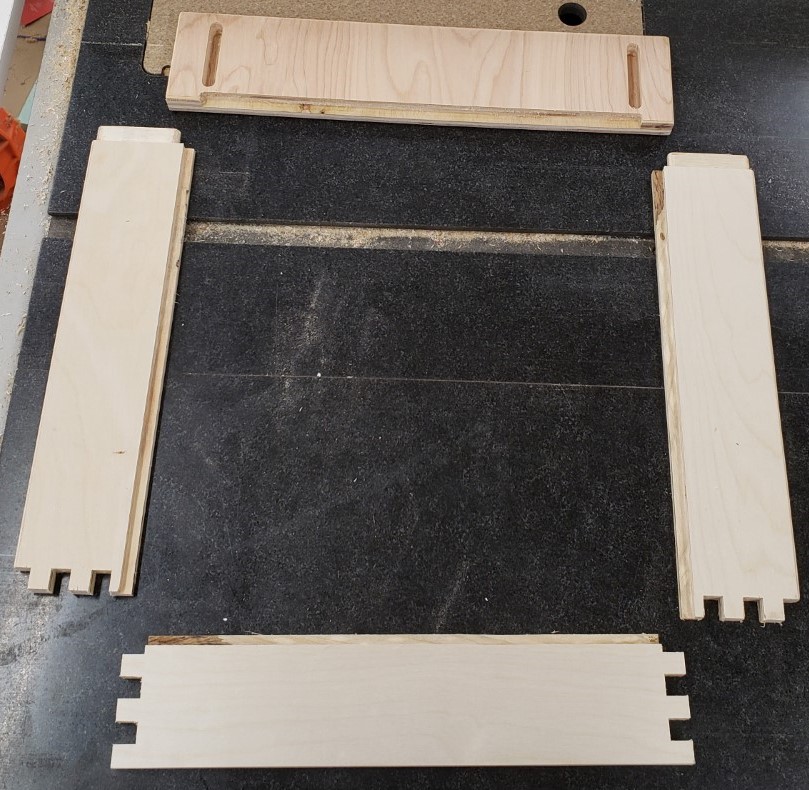
What kind of drawers are we talking here? Nothing too fancy, but I wanted the ability to make finger joints without too much fuss and setup. I’ll leave the details of the joinery and lessons learned for another post. For now, this one has finger joints on the back, and a tenon into the drawer front for the sides. Hidden and very strong.

Jig V1

The first jig was a pretty simple setup. I attached a piece of plywood to the front of the mill table to align boards vertically to the table. It was square to the top and had cam lock clamps to hold the board in place. Sticky backed sandpaper provided secure grip on the table side and on a clamp board. I had a double layer of plywood screwed down to the table behind the board to back the cut and a plank of 1/4″ MDF on the font. This gave both sides of the cut support to prevent blowing out any drawer side pieces.

Clamped side in place

With this setup you could repeatably clamp a board in place and usually get a pretty good cut without too much fuss. Replacing the backer was a huge pain, and the top stop was only good for one shape. It worked for my first 3 drawers, but after that I stopped to think of something better.

Joinery Jig V2

The next version has a two half system. The back half bolts down to the table top while the front half slides and clamps the board to be processed. There are sacrificial inserts that back all of the cuts to prevent blow out. Those are held in place by two clamp bolts on either side.

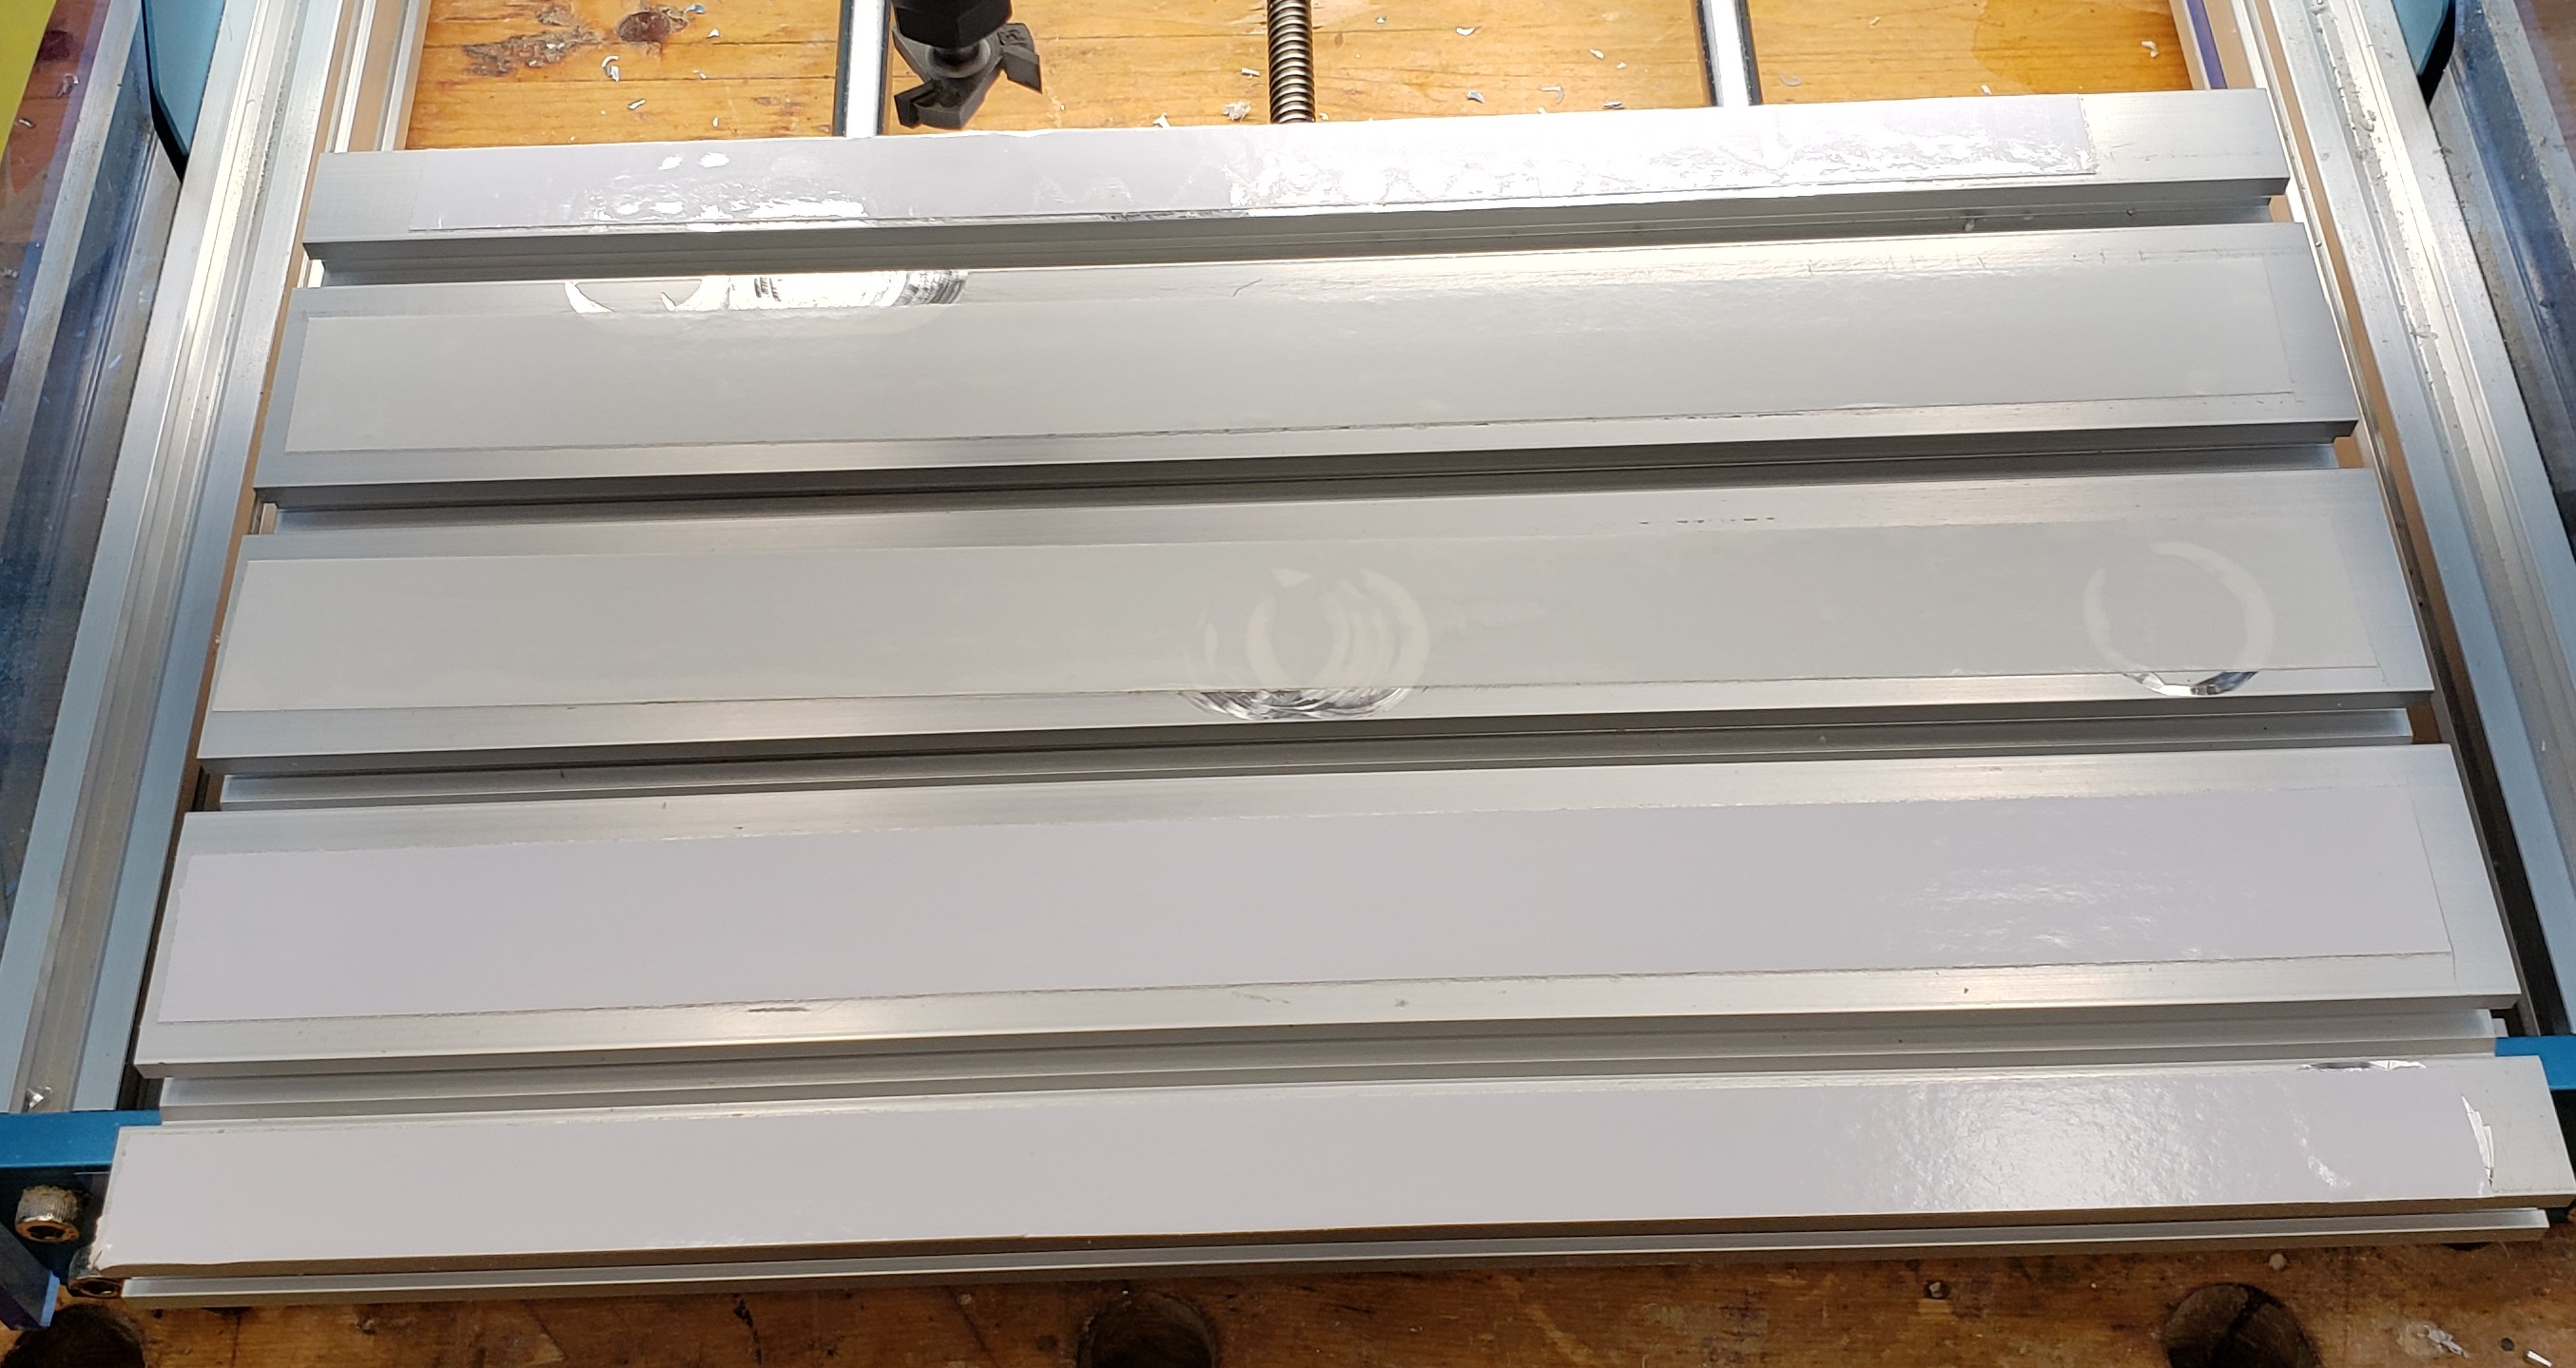
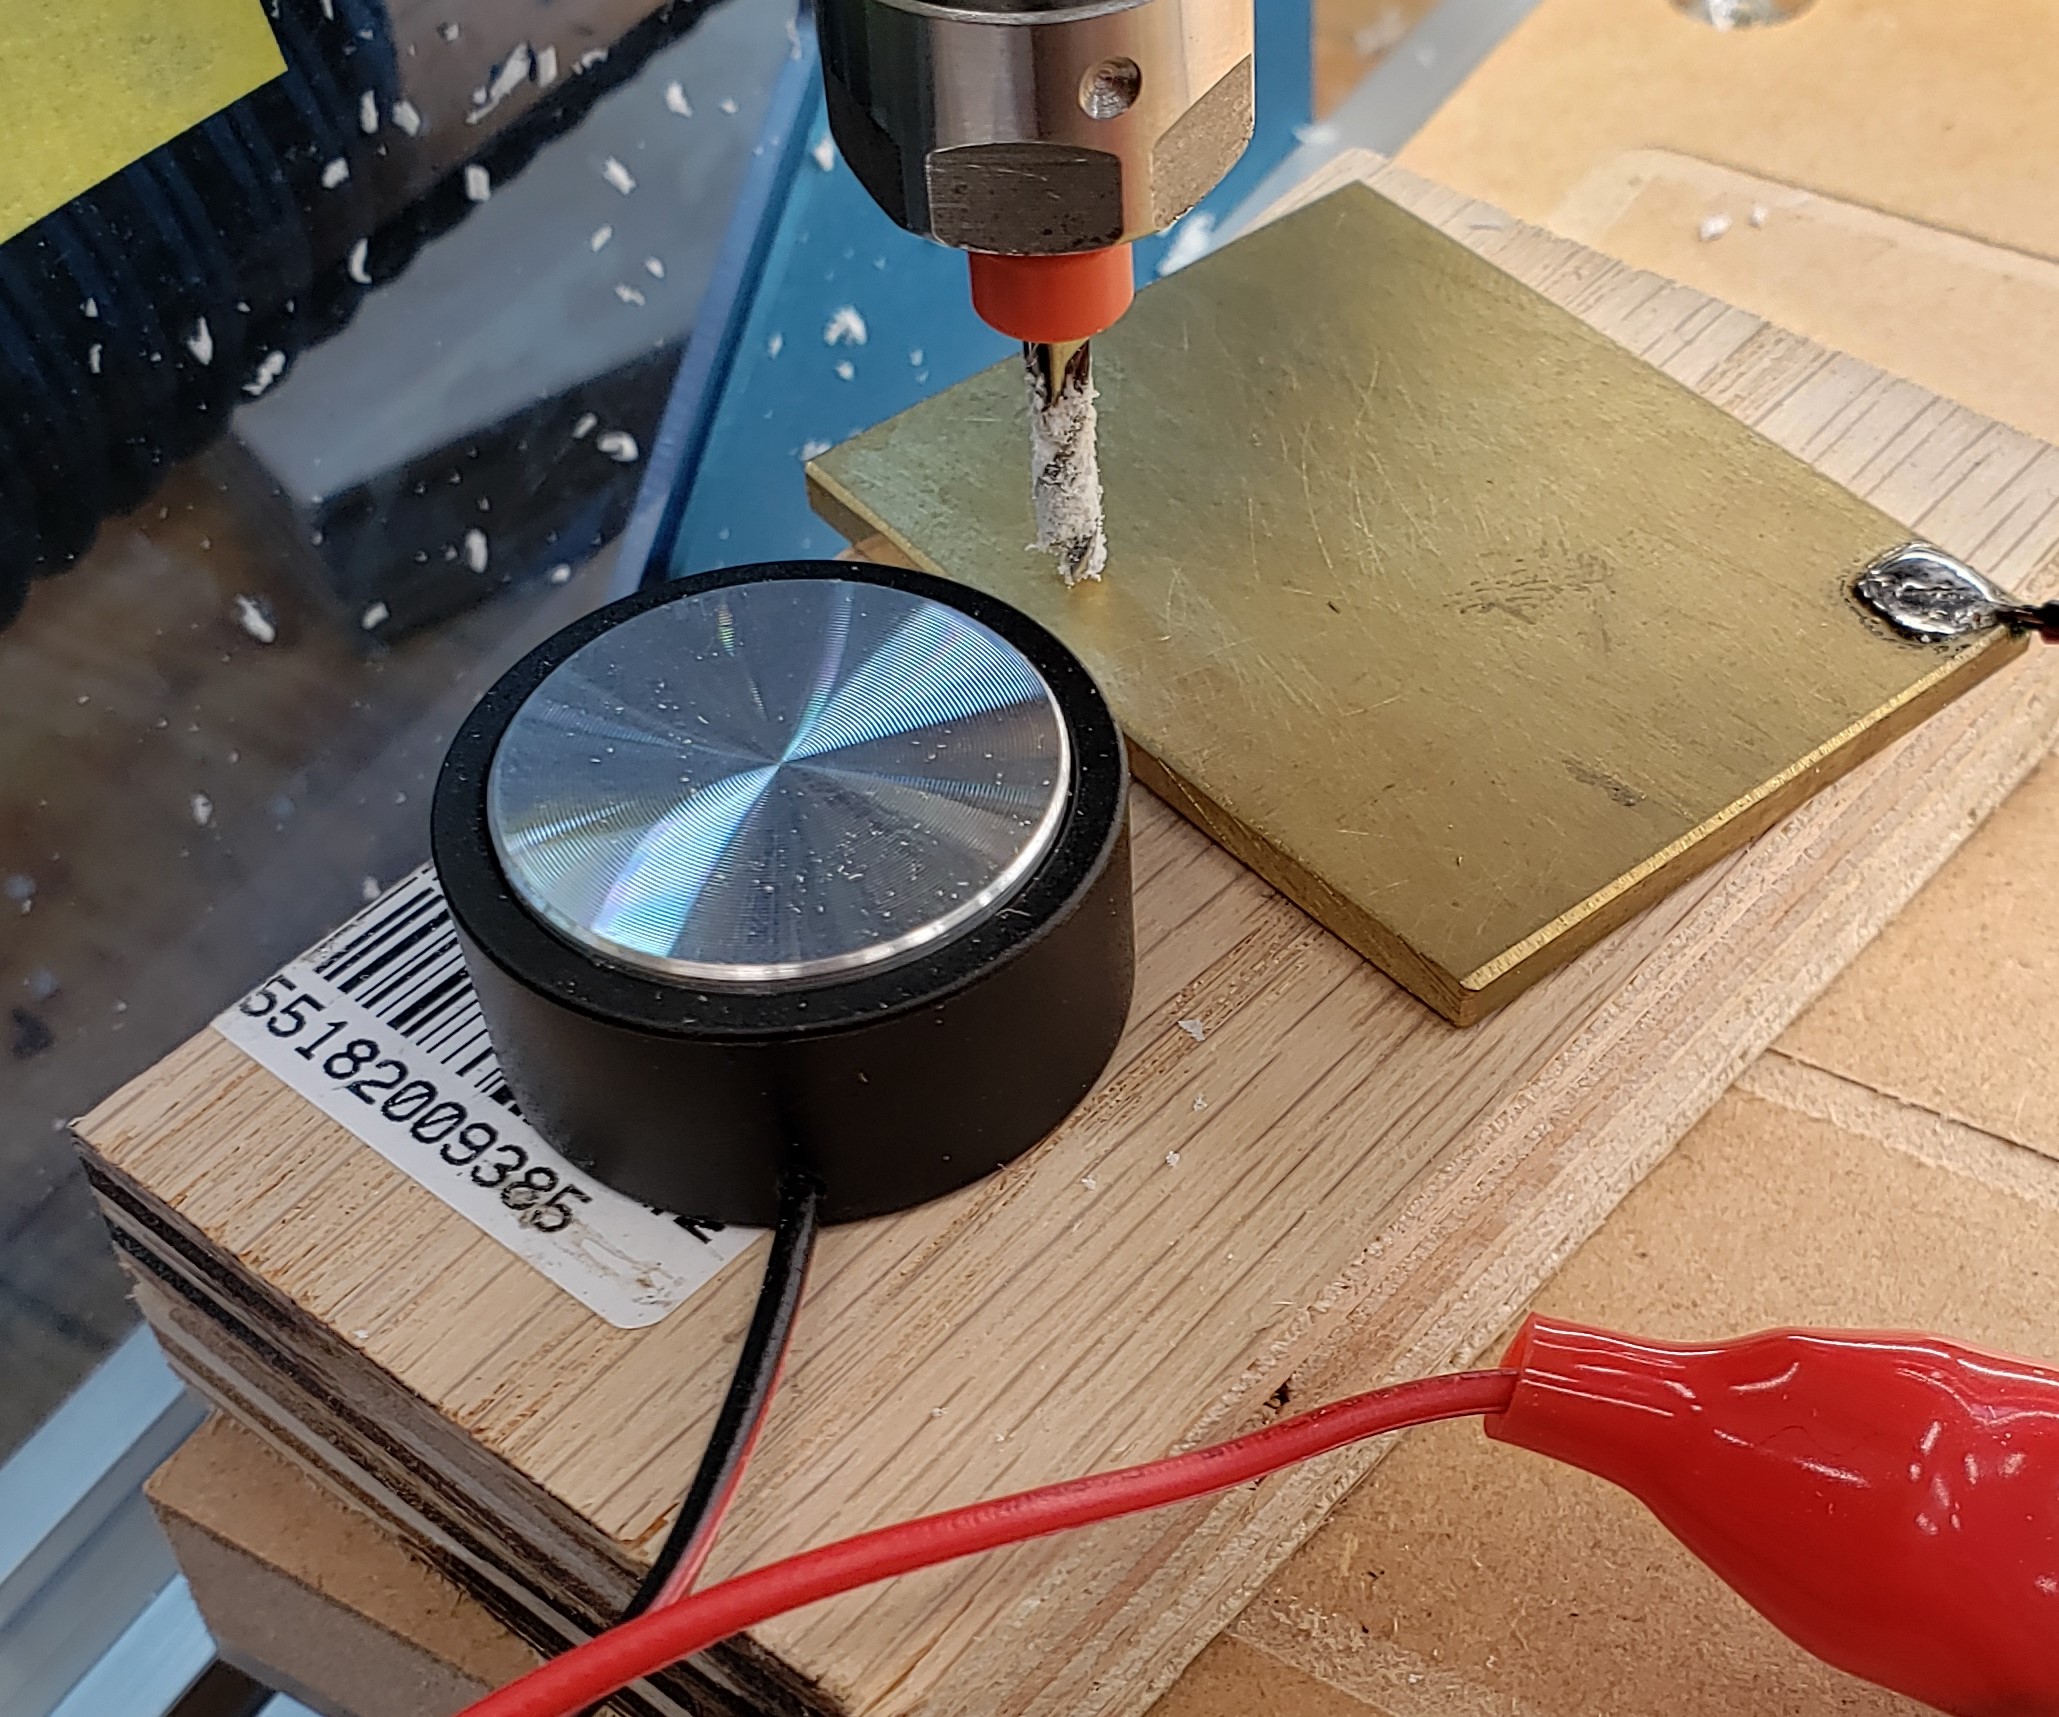
To create the jig I attached two pieces of 34″ plywood to the outside edges of a larger piece of plywood with glue and nails. This would be the base area for the rails/bolts that clamp the two halves together. I will mill it all as one piece and cut it in half at the table saw.

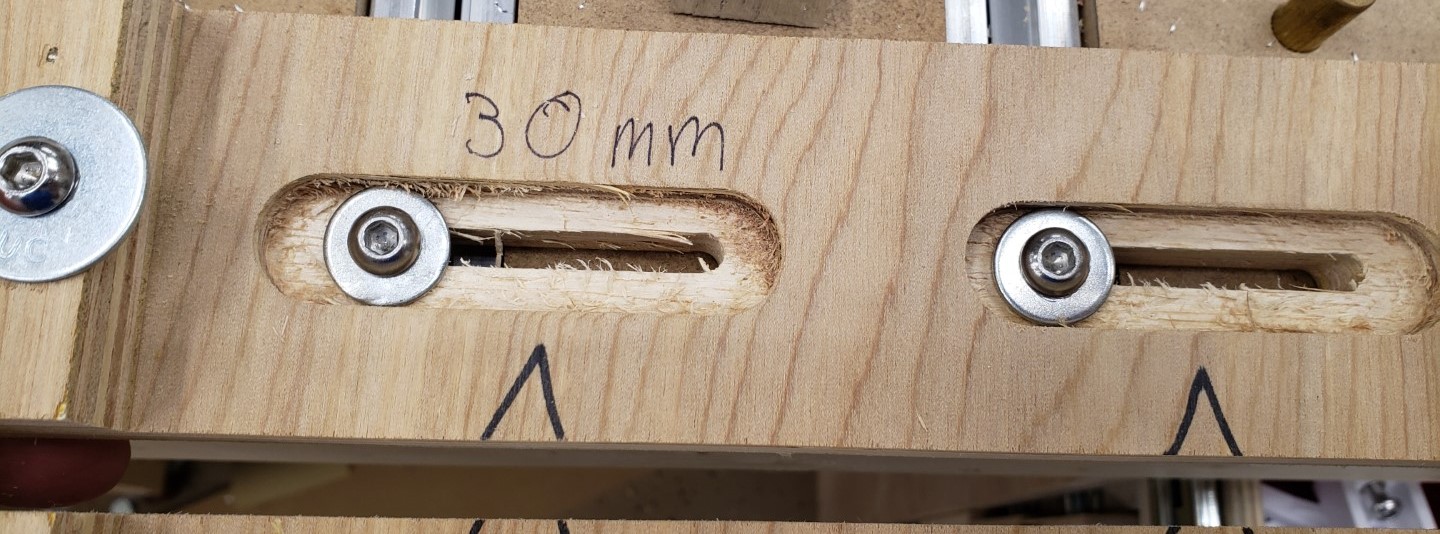
The slots are 50mm long and spaced 100mm apart. That should let me position it anywhere on my table top by always spanning two rails. I started with them just wide enough to hold the bolt head, but eventually widened them to allow washers. Bare screw heads on plywood would eventually compress and allow the jig to rotate.

Widened to allow washers

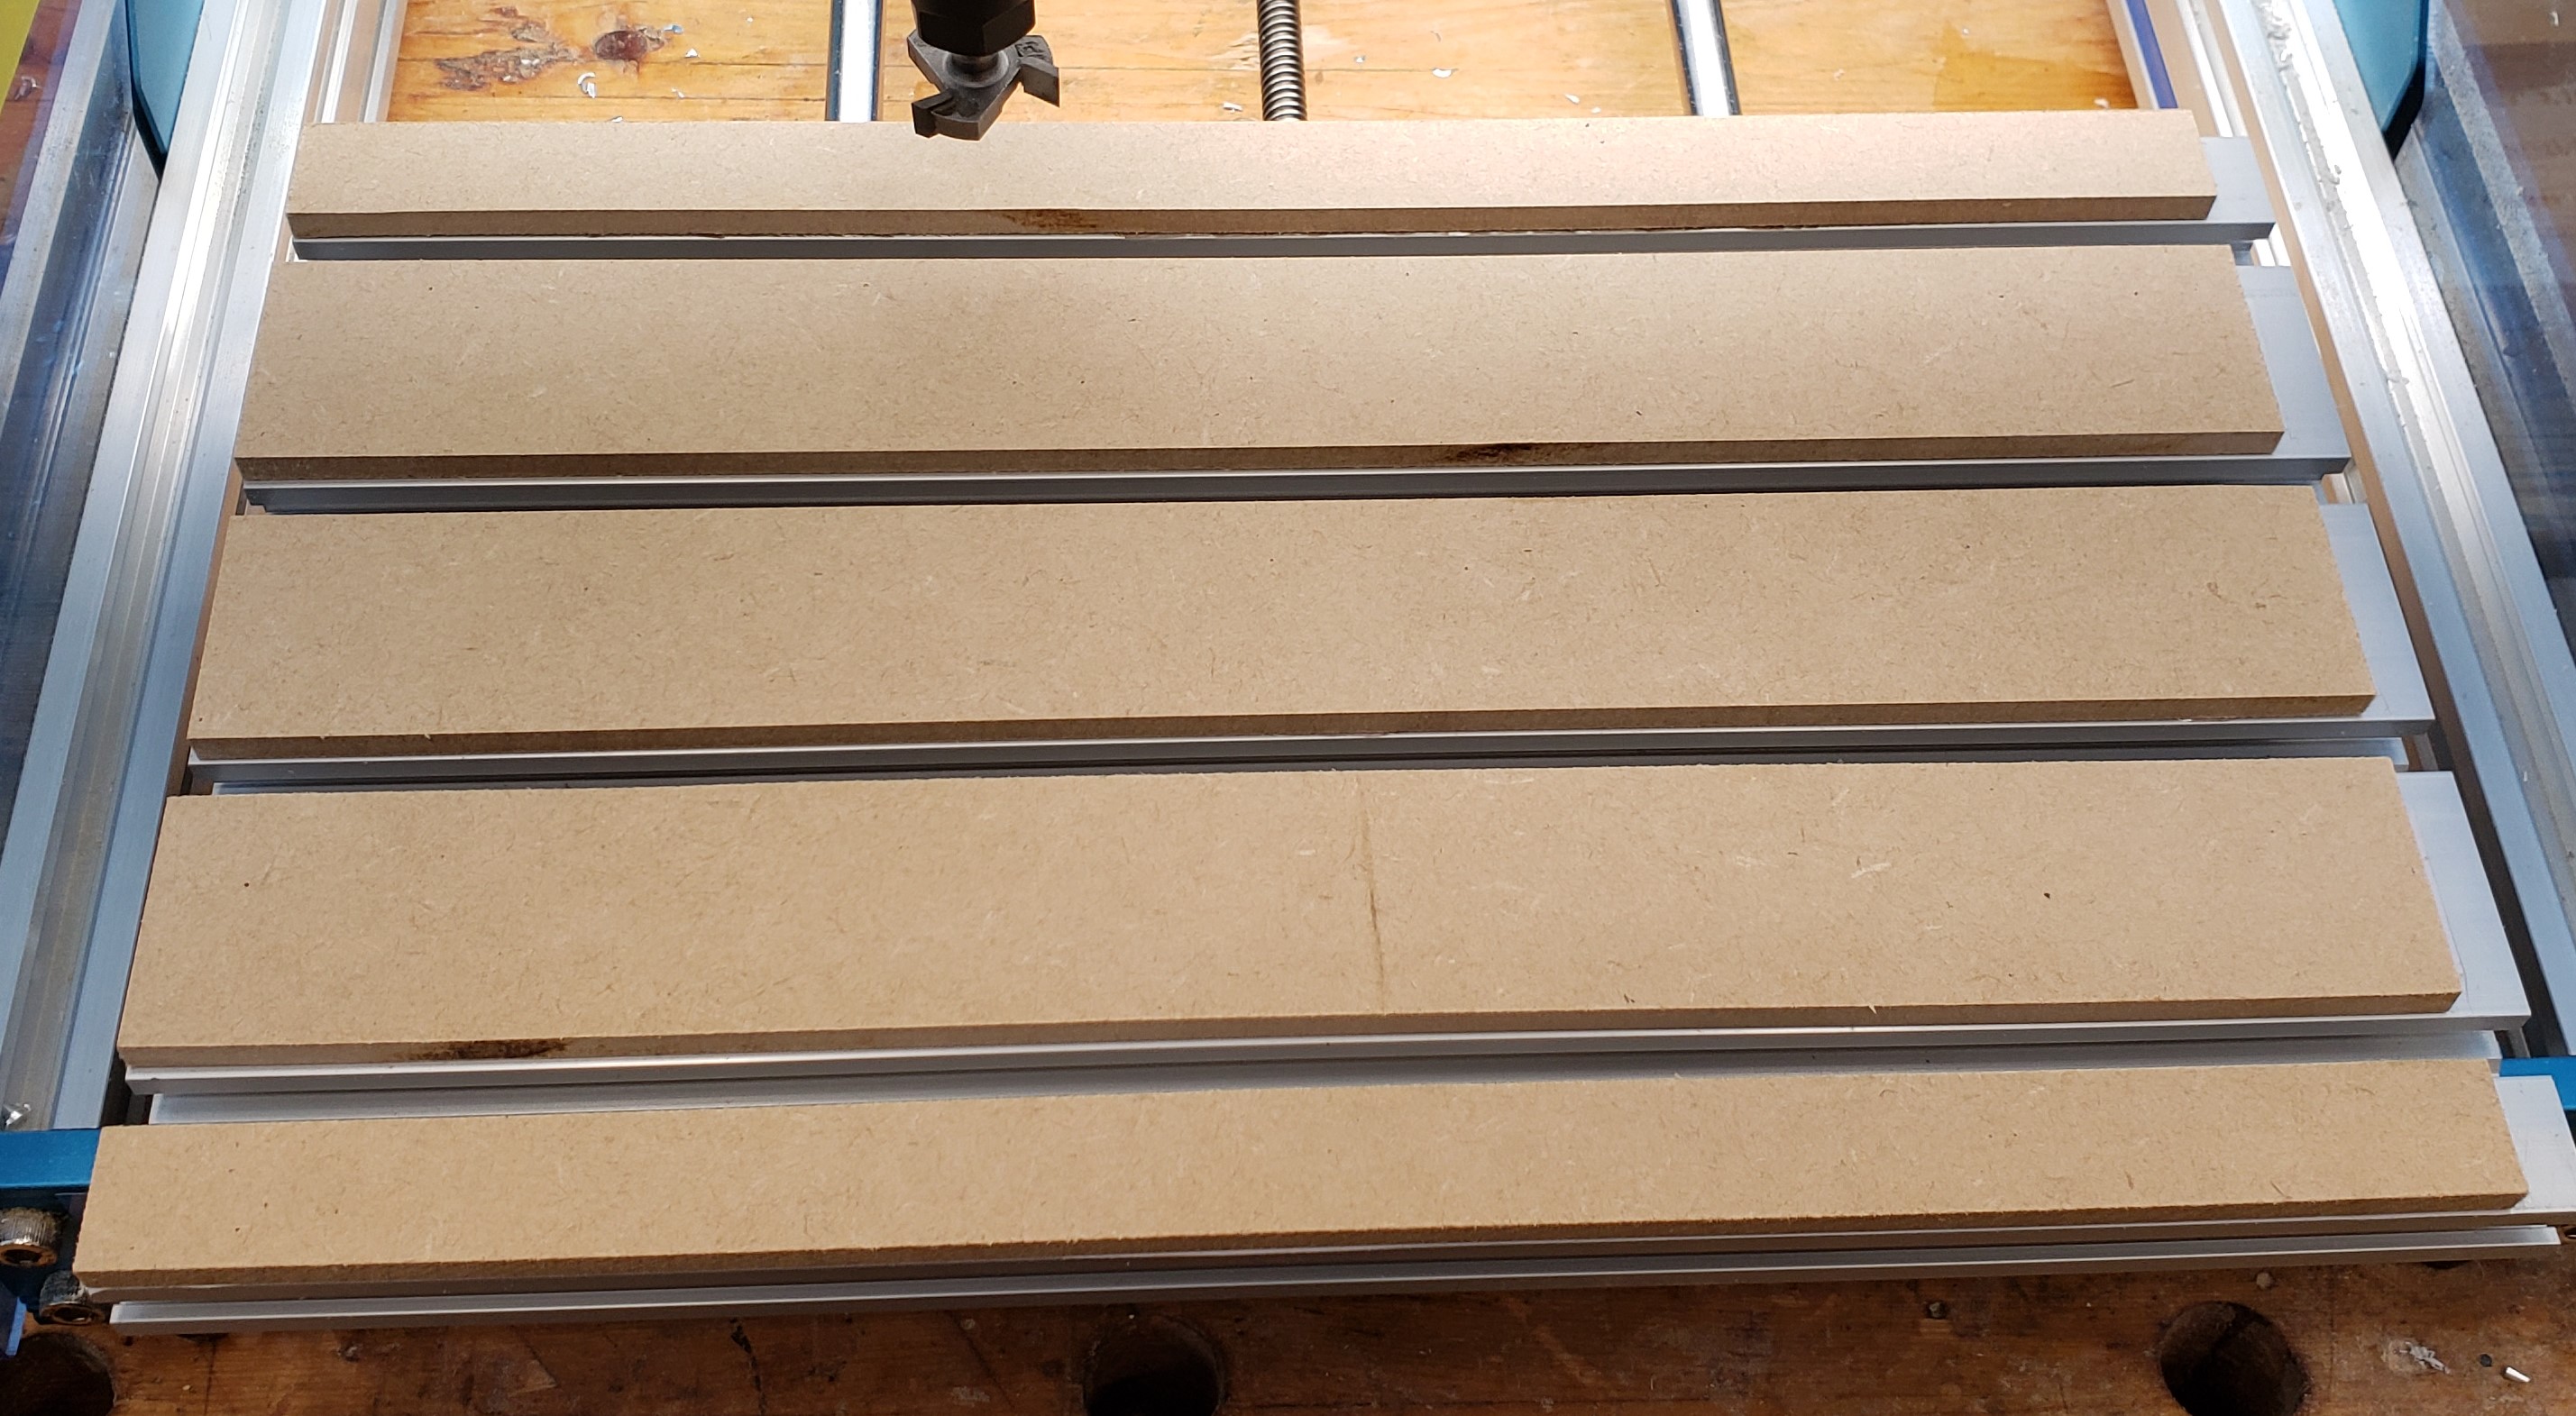
With the milling done, I cut it in half at the table saw, then added some alignment notes. Any 8″ wide piece of 3/4″ plywood or MDF should clamp in there.

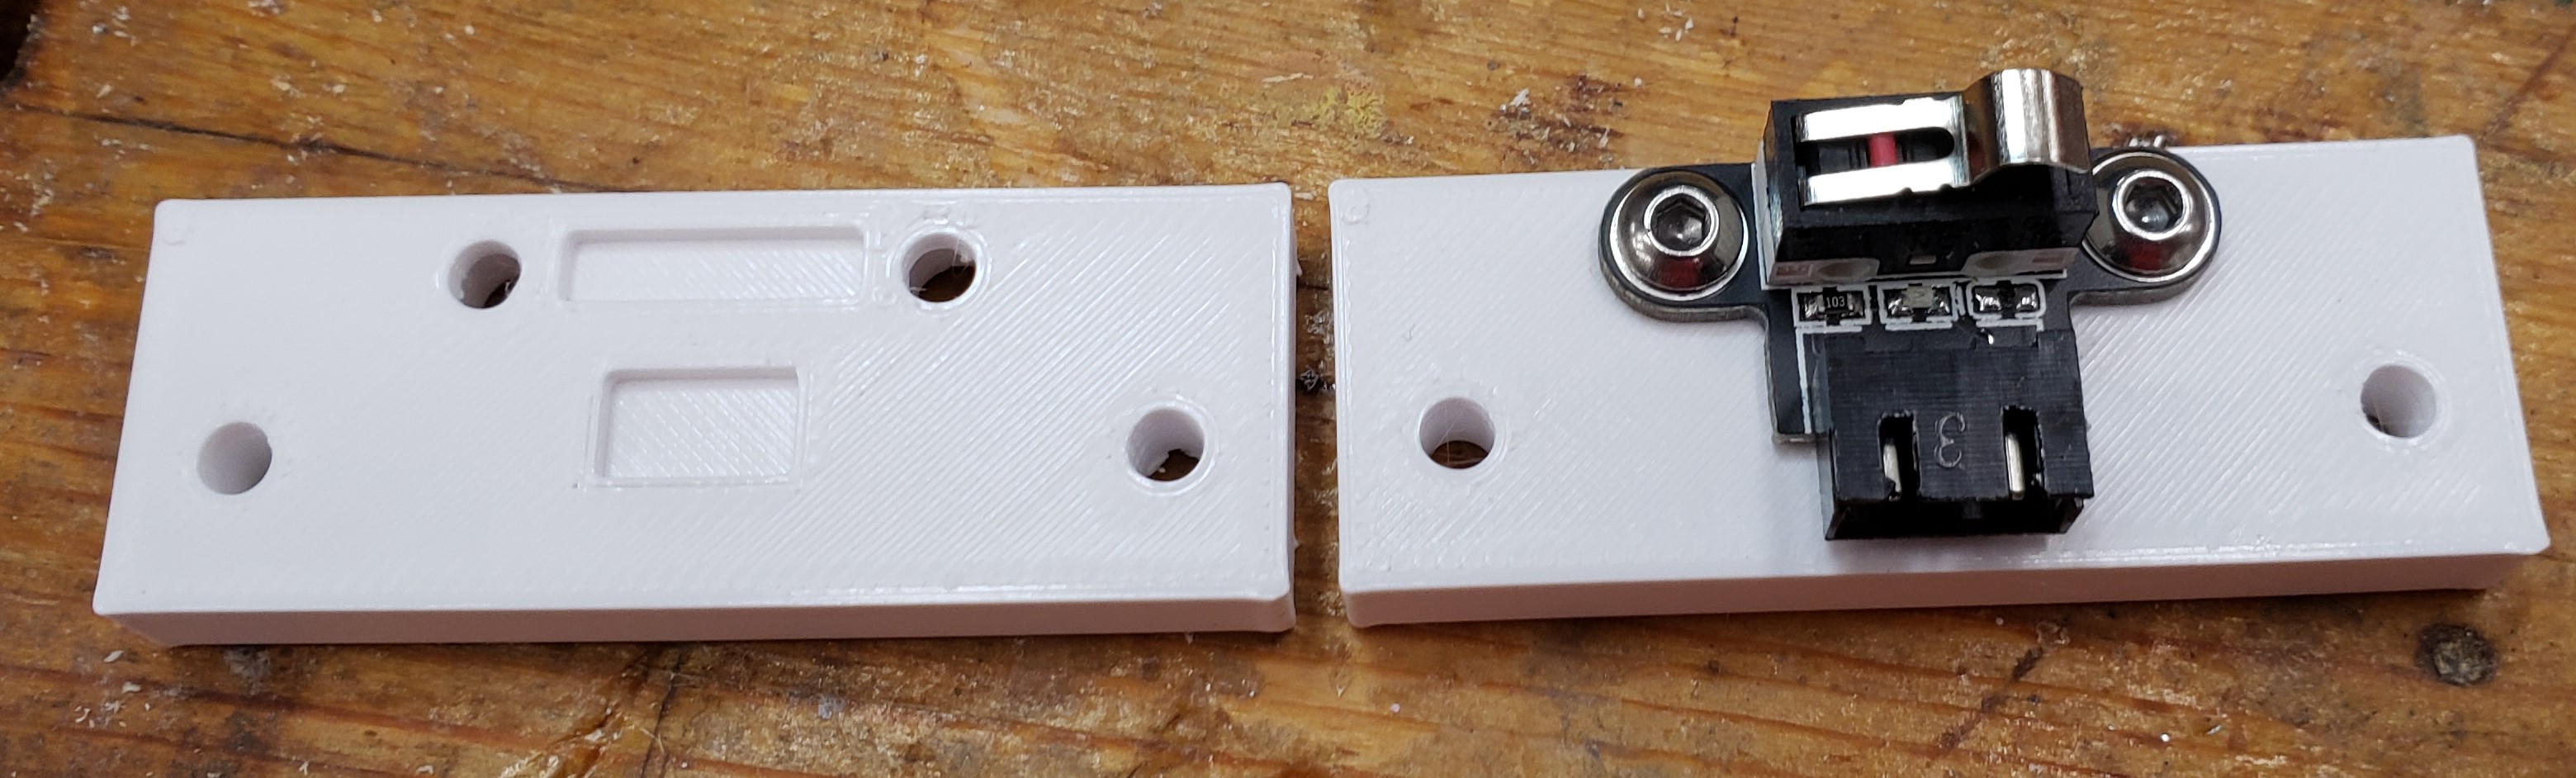
To hold the sacrificial waste blocks I screwed in an M6 threaded insert to the bottom of the jig. Button head screws and fender washers sit in the counterbore and clamp down the waste boards.

I clamped the boards together and drilled all the way through with a 3/8″ bit. It gave clearance for a 5/16″ t-bolt hammered into the back, and brass tubing in the remaining spaces. This acts as a bushing for the 5/16″ bolt. I used thread locker to keep it secure in the back, then large knobs in the front to clamp everything down.

T-nut secures 5/16″ threaded rod

Here it is fully installed without the waste boards inserted yet. You should be able to get at least 2 uses out of a 3″ wide waste board by flipping it around after the first cut pattern. I found mine were in good shape even after making 16 cuts of the finger joint pattern.

This version doesn’t need the cam clamps, the vise like action of the two threaded screws has plenty of clamping power. Similarly, I didn’t need a height stop. I could very accurately feel when the board was flush with the top of the jig. The second round of drawers went very smoothly with this jig!

New Router Mill and Table

After months of messing with my 3018, I am upgrading to a shapeoko pro. Having owned a shapeoko 2 many years ago, and gained a new appreciation for the power of modern CAM software available to the hobbiest, I was ready to jump in deep. A recent engineering award at work sealed the deal by adding a monetary boost. The 3018 was fun, but kind of a toy. I struggled to get my projects to fit on it, and it was barely able to slog through the oak handles on my material cabinet.

The new tool is a big beefy bad boy! So big in fact, I had to use a toddler for scale. He is 32″ tall, and this thing can cut a 33″ square. Everything about it is designed very stiff compared to any of my previous mills, and I think to get something better would require a custom build or doubling the price tag.

A big CNC router requires a big table. I moved a lot of shop things around in my head until I decided I could actually fit this beast. My woodworking bench had to scooch over a smidge, but there was room, and it keeps the mill in close proximity to my computer stand.

I was thinking torsion box originally, but only put a top on it. I started by running some 2x4s through the planer to get them flatter and squarer and all at an even set of dimensions. The top is 3/4″ plywood with the legs two 2x4s at right angles. I put it on casters because everything in the shop is required to be on casters. I threw a level across the top of the table and it was quite flat until you got to the edges of the plywood. That should hopefully be a good enough base for the mill. The bottom has storage area for all my plastics and metals with room to spare. I’ll probably put together some drawers once I live with the table for a bit and see where I naturally sit/stand.

The build was delightful. Good instructions, simple assembly, high quality parts, and only took a few hours. This thing is over 150 pounds of metal! My only hitch was that they sent me the wrong spindle and some headers on the controller board were installed upside down. They eventually made that all right via tech support.

I added a set of double LED strips under the X rail to help light up my projects. I expect a home made Z-touch probe and different dust collection solutions is in my near future. Regardless I got it all setup and blessed by the tech priests of the adeptus mechanicus. A coworker got me reading warhammer 40k, so I had to do some crafting for myself and him as a gift.

I got the new control board installed today and couldn’t help but start by measuring the stage accuracy, table flatness, and XY squareness. All of the numbers have been fantastic. I just have to check the spindle tram, then we are off to the races. I did try some test cuts in MDF. It was flying like a hot knife through butter.

Materials Cabinet

In industry there is a line of drawer cabinets from a company called Vidmar. They can be short or tall, but are usually pretty wide and deep and super well built. Each drawer can hold hundreds of pounds, they have different divider systems, and full extension drawers. Also they tend to have fancy features that don’t let you pull out too many drawers. You could easily tip one over on yourself and cause serious injury.

In looking at my materials storage area, I have a lot of plastic bins that are organized, but maybe only half full. I have made hardware drawers in the past and love their organization and dense storage capacity. This new cabinet will be much larger and deeper and use full extension metal slides. I started with a lot of planning. I wanted to maximize the materials I used, my limited shop time, and the space available.

I had it all worked out on paper, and started with the drawers. I cut 24″ wide sheets of 3/4″ plywood and put a rabbet down two sides to make half lap drawers. All four sides of the drawers would all be the same length. This made batching easier. Routing bulk material was faster and cleaner than cutting out individual sides, then doing the routing. This was a big improvement over previous drawer efforts.

Rabbet for the half lap

With all the sides cut, I put another rabbet along the bottom of each board for the drawer bottom. Each would get a 1/2″ piece of plywood in the recess. Probably overkill, but I want them to be able to handle a lot of weight. Eight 24×24″ drawer bottoms worked out nicely to 1 full sheet of 1/2″ ply. It was subtle, but I put a little radius on the top edges of all the drawer sides to make it easier on your hands when reaching in. They took a bit of sanding to smooth out.

Routing for drawer bottoms
Slight radius on drawer side top edges
All drawers ready to assemble

I had everything figured out really precisely, and cut all the drawers at the same time to reduce error. If they went together with any kind of bows or warp, it would throw my plans off. I attached a board to my table saw to act as a square, and used the top as a large flat assembly surface. Each side got glue and nails in two directions. Nailing and gluing a half lap like this is really fast, easy, and strong. The drawer bottoms got glue and nails in from the bottom, and into the side of the bottom plywood. They were fast to assemble, and should be bomb proof!

For the drawer fronts I cut a single strip of 1/2″ plywood and aligned each front with numbers so the grain flows naturally from bottom to top.

Next came the carcass of the cabinet. Nothing special here, just a box with an open front. I had to be very precise though, if the sides crept in, I couldn’t fit my drawers, and if it got too tall, It wouldn’t fit in the right spot in my garage. I had a little squareness issue, and had to break out my biggest clamp to fix it while installing the back.

For finish I turned to my usual boiled linseed oil shop tool finish. There was so much to do I broke out a roller and tray to put it all on. I think I went through half a gallon to do the cabinet and drawers. My shop helper was sprinkling the painter pyramids all over the driveway for me to step on.

A few days later when it had all stopped smelling I started assembly. The bottom drawer was numbered, and went down with a small spacer between it and the floor. I installed the hinges, then slowly pulled out the drawer and attached the runners. With the first drawer done, I put a 1/2″ sheet of plywood down to provide proper spacing for the next drawer to sit on top of the first. The runners go on the cabinet at a set height, then the next drawer goes in for installation. That gets washed rinsed and repeated until all the drawers are in.

Next comes the home for this big fella. I put heavy casters on the bottom so I could roll it around to clean underneath or rearrange easily. It cost a little storage space, but who wants to bend down that far anyways? Here is the cabinet next to its final resting spot.

Yes it is a mess, that is why I need this cabinet. I cut out the bottom shelf and slid everything home. I had planned it perfectly. The drawers all fit, the drawer fronts align well, and the cabinet fits up to the next shelf with only a tiny bit to spare.

Gap between the top of the cabinet and the next shelf. Less than 1/8″

Drawers of this size need a good beefy handle. I employed my mill to cut a nice looking handle shape. It was a bit more of an ordeal than I thought it would be. The machine really bogged down in oak, and a number of them broke off the double sticky tape before finishing. After numerous failures I got the feeds set slow enough and incorporated a screw in the work holding.

To keep from drilling tons of holes in my waste board I made the first operation to drill a hole for my screw, then pause the program. That drill operation is quick, and doesn’t stress the double sticky tape. With the screw installed in the same space every time, I reused the hole in the waste board, and knew it would be out of the way of my cutting. The results were rough, but they worked.

Next the handle blanks got sanded, a round over, and more sanding. I figured I would make their look a little more industrial, and set to counter bore the front for a screw. Lots of stop blocking and clamping was needed for that. This would be stronger than screwing through the back, and easier to install. I like the aesthetics of it too.

Things were coming together. I needed some labeling, so I printed slots that would accept 1″ label tape without the back removed. It meant I could rearrange tags quickly without peeling anything. A little calking on the back held the holders down. I used a few pin nails to tack them in place while the calking dried. No heads on the pins means they don’t interfere with the labels sliding in from the sides.

I painted on a little linseed oil on the handles and installed each one down the center. They are comfortable, easy to use, look gorgeous, and finish off a wonderful cabinet. I should make my own handles more often. I feel like my experience and planning payed off. Other than some issues with the handles this job went off without a hitch. I have done a lot of other stuff like it before though, so I shouldn’t be making as many mistakes at this point.

I spent days pulling things out of bins and drawers, organizing, cleaning up and throwing away junk. This isn’t the final configuration, but it is close. The shelves are a lot cleaner and I still have a lot of room left in this guy. It isn’t hoarding if you use labels!

The Quest For Bed Flatness

I take things too far sometimes. This is one of those cases. At work I frequently align things to microns and worry about nanometers. That followed me home a little. My new CNC mill is running, but has some odd issues. The bed isn’t very flat, and that means fine things like engraving can end up with issues.

This is an early project I did. Storage for the mill. I engraved all the letters in one go, milled the pockets, did some chamfering and cut it all out. The “Up Cut” letters are barely there, while the “Ball End” is very bold. That isn’t by design. The bed is higher on the right and makes that part cut deeper.

I bought a dial indicator just for this, and went to work measuring the issue. Holy cats was it bad. I didn’t have enough range to know for certain what I am dealing with. At least 0.04″ across the middle, but likely much more than that. Enough to sink or float an engraving tip right off the part.

I thought my spoil board was part of the issue, so I pulled it off and went about measuring the aluminum underneath. Actually there was a whole step in here where I printed shims and shimmed up the bearing blocks trying to flatten it out. I’ll leave that stuff out, the aluminum bed is nowhere near flat.

Ok, no problem. The aluminum bed is wavy, I’ll just fix that. I got a bed flattening bit and set it up to go really slowly over the bed and nibble away until I pulled out the high spots.

Not great. This little router isn’t stiff and can’t handle aluminum. It grabbed, hopped around like a mad hornet, and the spindle slipped up. After a few fouled attempts I gave up and tried a new tact. I have seen other hobby cnc routers use an aluminum bed with MDF inserts. I put down double sticky tape on all the extrusion parts, then stuck down 1/4″ MDF.

Double sticky tape
1/4″ MDF

I rubbed down some thick sharpie to help me visualize where the bit touched, and where I still had a low spot. I did a 0.02″ first pass and it showed a low spot still in the lower right. Another round cleaned it all up. I had another issue though, there were ridges every time the router bit went past.

I put down the waste board again and installed my indicator to make some measurements. Much flatter now, but those ridges kept bothering me. Every pass left a ridge in the previous pass’ overlap. I spun the indicator around. It was touching in the front, but way up in the air when spun around to the back. That means my Z axis isn’t perpendicular to the bed. It is tilted forward.

To fix this issue I need to loosen all the bolts that hold the X and Z stage down, tilt it towards square, then re-tighten. It took a few tries, but I got it.

I redid the bed flattening and this time no more ridges. I got it squareish! A little bit of the mdf lifted on the left where my finger is, but otherwise my dial indicator read pretty flat across the board. I installed the wasteboard again and got a hump in the center. I think bolting it only on the corners is causing a hump in the middle.

To remedy this I need 6 hold down screws. That is tough though. Getting that center t-nut in and aligned can be tricky. To capture them, I 3D printed small plastic t-nuts to accept M6 set screws. Those will act as holders to capture the main bed t-nuts. I measured the locations, and can mill all the needed countersinks from the home position.

3D printed t-nut
Bed with captured t-nuts

Finally, I wrote a program to cut the counter bores for my new bed, pulled out a fresh piece of 1/2″ plywood, and milled away. Once installed I broke out the indicator again and measured around 0.005″ of flatness error. Not bad considering there is plywood involved. Finally, I can rest. Actually, it is on to the next milling project!

It’s hip to be flat

Meet My New CNC Router Mill, Limit Switch and Lighting Upgrade

Many moons ago I had a shapeoko 2 cnc router/mill, and loved it. The tool chain was horrible, but it was my first CNC device. I created all sorts of things with it until I got my 3D printer. My attention was diverted due to printing’s ease of use and versatility. Eventually I forgot all the feeds and speeds and tricks for using my shapeoko. The learning curve was steep and I never got around to it. It got sold when I found out we were having a kid. Fast forward 2 years later and I stumbled into where CAM and mill control was in the modern era. Things have improved a lot in the 8 years since I first picked up a mill.

This is a 3018. Stock the way I got it. There are many versions out there, and this one is the prover from sainsmart. It was a good deal around christmas, so I broke down and got one. Out of the box it does a decent job, but there are a few issues. There are limit switches you can install, but they reduce the travel by an inch in either direction. Pretty bad when the thing moves less than 7×11″ in the first place. It could use lighting, and their touch probe is way too thick. I’ll fix it.


Y Limit Switch

I’ll start with the Y limit switch. Y is front to back if you are looking at the device. Underneath, there were tapped spots for you to put the limit switch. It hits up against the bearing blocks to trigger the machine to stop. With those installed you get a lot less travel.

Instead I found some tapped holes that are off to the side but unused. I printed a bracket to hold the switches out of the way of the bearing blocks.

With that installed I printed a stop block that would activate the switch. The base plate is 30×30 aluminum extrusion, so an appropriate T-nut let me fix the block in place. I have it set to stop the stage right before the bearing blocks hit. I could have milled the switch mount and stop block, but am much faster with 3D printing right now.

Switch installed
Switch activated by stop block

X Limit Switch

The Y limit was pretty easy, the X limit is going to be more invasive. Again, the position they want reduces left and right travel. I printed a tight spacer to keep the contacts off the aluminum side wall. I want the switch at the same height, but moved towards the back of the machine. I’ll drill and tap the side walls to mount my switches. I have to do it from the outside because I can’t get tools in around the extrusion and lead screws. Here is a switch temporarily installed with one screw on the outside.

I drilled and tapped the first hole, installed the switch, used a center transfer punch to mark the second hole’s location, then drilled and tapped that.

To make a stop block I drilled and tapped the back of the X carriage and installed another 3D printed block. The Z stops came pre-installed, and I didn’t see any way to modify them that would get me more travel. They let the stage use almost all of its small travel. My last mill never had limit switches. Now I can automatically home the machine each time and drive around without fear of impacting an end.


Lighting

All good devices need a bit of disco lighting. Or at least something to tell you when the power is on. Power and USB are different, so you can be chatting with the USB, but having nothing move because the power is off. To remedy this, I soldered some leads onto the 24V input power switch. A buck converter dropped that to 12V to run my LED strips. The wiring is getting mess, but I just bonded the buck down to the outside of the electronics cover. It got its own little 3D printed cover (not shown).

I used 20×20 twist in t-nuts to mount the c-clips that came with my LED strip housings.

Here is the tool with the lights off and on. It kind of blows out the camera, but the extra lighting is really helpful to work with in person.


New Touch Plate

Last but not least, I made a new touch plate. The one it came with is pretty darn tall and you have to clip the positive lead to the router bit. Mine is 1/8″ brass, and I soldered the other side of the lead onto the motor housing. I don’t have the Z-travel to use their touch plate in most situations, while mine always slides in.

Original (left) touch plate vs my new one (right)

To keep it close and handy I milled a little holder out of some PVC material I had. I could have printed this, but it was a good mill exercise to get used to fusion 360. I have a long ways to go, and spend a lot more time on the CAM to cut this shape than I would on the slicer settings to print it. Now I can accurately find the Z distance between my bit and work piece. This is a big helper that my last mill never had.

Sander Cabinet

DSC_0350

This is my new beast.  I posted about it a few weeks back and have been really happy with it since.  Happy with the machine, but not the stand.  It is too low, and my little shop vac doesn’t really fit under it.  Time for a new cabinet.

I designed this to work with a single sheet of 3/4″ plywood.  The doors, drawer, and back could have easily been made with 1/2″ plywood, but I didn’t have any, and buying one sheet of each didn’t make sense to me considering I can’t really store half sheets.  Besides, the price difference is minimal.

Started with an open box that would house the dust collection, and raise the tool up high enough when castors are installed.

With a shelf added I had room for a drawer in the bottom, and was able to cut holes for the intake and exhaust hose.

DSC_0356

The drawer is a simple box like I have been making for other cabinets and drawer organizers recently.  No handle on the front, just a finger cutout.  This is big and deep enough to hold all the sander’s spare belts and disks as well as some random miter saw parts that needed a good home.

At this point it was assembled enough to apply the boiled linseed oil finish and castors.


Accessory Holders

The sander has two different allen keys to make adjustments and remove guide plates.  Additionally it has a small miter guide for use on the disk sander.  I milled two pine blocks to make custom holders for the keys and guide.  Both sets of tool holders screwed to the inside of the doors.


The BestDSC_0364

Speaking of my CNC mill, I employed it a bit more for this job.  I think calling this thing a beast is really fitting.  I took some two color HPDE and milled out a BEAST Rikon logo.


Dust Switch

It won’t do to fumble around inside the box every time I need the vacuum on.  I found safety tool switches online that come with a split up power cord.  You can plug it into the wall, and plug your tool into the cord.  It took some trimming of the flange to make it sit flush on the cabinet side.  Once trimmed and screwed in place though, it looks and works wonderfully.

DSC_0406


Storage, integral dust collection with an easy switch, and a perfect working height.  What more could you ask for in a beast?

20160820_183040.jpg

PE Desk Name Plaque

My most wonderful wife has really knocked one out of the park by passing her Professional Engineering exam.  It takes years of experience, many referrals, and an all day examination.  Her year of studying really paid off.  Once you are a “Professional Engineer” you can legally put PE after your name, kind of like being a doctor.

I thought she could use a new name plaque for work that showed off her accomplishment.  The day she left for the test I found a nice looking piece of padauk, her favorite wood, and got started.

DSC_0453

My first attempt was to mill in the letters and infill with black color.  My black infill resin has gone bad.  It came out kind of chunky and left a ton of voids in the infill.

DSC_0454

After that failure I planed off the messed up inlay, and started over.  Instead I tried painting the top surface black, then did a relief cut around the letters.  It was going ok, but the edges were left with a lot of fuzz and fraying.  Sanding the edges was ruining the black surface, so I planed all the paint off.  It looks good as all one color, so lets go with it!  Tons of sanding the mill marks off later, and I had this.

DSC_0003

It took a few weeks of working on this while she was out of the house, but luckily for me it takes the PE board months to get back about the results.  Finally this past week she got the got the good news and I was able to deliver her new desk trophy.  Congrats dear!

Countersink Bit Set

Countersink bits are supremely useful.  Screws that are run flush look nicer, they are easier to install with the pilot hole, and are much less likely to split wood.  The set is from woodcraft and came in a plastic package.  It wasn’t useful for long term storage, and the simpler older set I had kind of rattles around in a drawer somewhere.  I wanted a better fate for this set, so I got to making a nice box for myself.

DSC_0455

I started with a piece of pine in my mill.  I milled everything in the bit area to the same depth that would accommodate the thick ring with the set screw.  In retrospect I would mill multiple depths so the chuck posts don’t rattle around as much.  Nothing is going to fall out with the lid on, but it would have been nicer and rattled less.

I was thinking about milling some numbering in but It would have required a lot of cam work and careful milling to individually make each number.  Instead I used my punch set to put in corresponding numbers.  A fine black sharpie really makes them pop.  I did the sharpie before I spray lacquered the wood.  The marker bled a bit on the soft pine, doing it the other way around next time would be better.

Next I milled a label into the lid and used some acrylic infill to make it really pop.

Everything got a coating of spray lacquer as a protectant.  A simple set of brass hinges made it an official lid, and some magnets keep it closed.  In retrospect, having magnets below each bit would have made this a really snappy cool set.  I guess its not too late!


Bonus Coaster

A co-worker I know is getting a tesla soon, so I figured he needed a nice coaster to go with it.  I was milling the day away, so why not?!  Also I am hoping this will get me a ride or two to lunch.

DSC_0457


Tree Revenge Kit

I love trees!  The whole oxygen-necessary-to-life thing is neat and all, but their dead dried carcasses are where it is really at!  Aged cherry, bright maple, dark smooth walnut.  Every once and a while these trees get their revenge.  Splinters don’t happen often, but when they do… OUCH!  Thus, my Tree Revenge Kit was born.

The kit sits right next to the entry to my shop and contains a single set of tweezers.  I like the ridiculous idea of a monster kit that has all kinds of fancy locks, and when you open it up there is only a small simple thing inside.  This isn’t that extreme, but the box certainly could be a lot smaller.  Or I could just put the tweezers in a drawer.


The Build

This is another mix of woodworking and CNC milling.  The lid is walnut and the base is poplar.  I started by making the top, and milling out the text and tree all in one go.  Each color got masked off and hit with spray paint.  I think this might be my new preferred method of inlaying color into wood.  It is quick and easy, and goes down well over a quick coat of spray lacquer.  Having done a number of color inlay projects at this point, nothing is faster or cleaner than hand planing off the excess paint on top.

Once the lid was cut out and finished I could cut the poplar base to match.  Nothing special was done to it aside from milling out a slot for the tweezers to go in, and some relief cuts for a set of big fingers to pull the tweezers out.

A really funny project would have been to cut the slit, but not the finger relief.  Then, make a tool (with magnets?) to extract the tweezers.  Maybe that tool would get its own box.  It should have a lock to keep people from stealing it.  I digress.

DSC_0214

A set of simple hinges hold the two halves together, and that about wraps it up.

Custom USB Stick With Bonus Disaster

I have a media computer hooked up to a TV that had been running windows 8.  After no end of having system updates failing and reformats I finally replaced it with Ubuntu.  I like the operating system.  It was easy to install, does everything I need on that computer, is fast, and appears stable.  Best of all it is free and can be installed with a USB stick.  I am going to be keeping a copy around from now on.  Might as well have a proper storage stick.

DSC_0200

That is the Ubuntu symbol in case you aren’t familiar.  So my spray painting job isn’t exactly perfect, but I am happy with how this one turned out.  I took a standard USB stick, painted it orange (Ubuntu’s color), then carved the logo into the paint to reveal the white plastic beneath.  It may seem like tons of work just to identify a jump drive, but when you have a mill, things like this MUST be done!

It wasn’t without issue though.  I bought two incase I messed up one.  Good thing too, because I forgot to reset the zero (starting position) in my mill software and plunged an engraving bit straight through the poor thing.

DSC_0197

Yes, that hole goes clean through.  Might as well try again.  The symbol milled into this drive was my second attempt.  It needed minor cleanup, but looks pretty good.  My attempt on the backup USB drive and was the finished product I showed first.

I think this speared usb stick can serve as a good example of what not to do.  Why not keep the engraving going and make myself a reminder sign?  I engraved some outline text into a bit of plywood, and sprayed it with black paint to highlight the lettering.

I went a little overboard with the paint, but after sufficient sanding I got through and had a decent looking set of letters.  I attached the USB stick and placed the new sign on the wall behind my mill.  Hopefully this will help keep me from making future mistakes… Yeah, probably not.

DSC_0199