Meet Ira

The big day finally came! It was nothing like how we planned and involved a long hard labor with a trip to the nicu. All of that is behind us now though and everyone is home safe and recovering. Right before he was born I took a piece of the family wood and engraved a name plate for above his room entrance.

He had a rough start, but is already gearing up to be a space commander some day! He is our biggest project yet. As such, there probably won’t be any posts for the next few months.

Little Bushey Sign Upgrade

Our Little Bushey South sign has been sitting proudly on the mantle since we moved in. I got something to add to it recently. My wife’s family had a small cutting of a fence post from the Little Bushey farm. It isn’t in great shape, but it is a family wood from her side.

I wanted to use this in a way that was special. My idea was to drill out some plugs from the post wood and inlay it into the sign. I cut a chunk off to make it easier to clamp, drilled the plugs, then diced them out on the bandsaw.

I thought 3 plugs to represent the 3 of us living in the house would be a good way to go. I kept an extra plug in case any more little Hansels come along. The walnut sign was really hard, and the post wood is really soft and porous. It made planing everything flush very hard. There is a little bit of crushing in the end grain of the plugs, but that was the best I could do.

Everything got a few coats of spray lacquer to blend the finish back together. The post wood is a lot darker than I expected once the finish went down. It is a subtle accent when viewed from afar, but I can always see it and know what it means. I saved the rest of the post wood in case another idea comes to mind.

Little Bushy South

This project was completed in July at the old house, but I had to keep it under wraps so it could be a surprise to someone.  My wife’s grandmother was a British war bride.  She met her American husband at Bushey Park outside of London where he taught air sea survival for the 8th Army Air Force.  When the war was over they moved to Michigan (his home) and eventually had a farm called “Little Bushey”, after the place they met.  We had talked about calling our new place “Little Bushey South” as a tribute to that.  I thought a sign was in order, and no wood could be better than the family wood.

These walnut beams were picked up by my mother’s parents when she was very young.  They spent a lot of time around boats and they were used as ballast by someone.  No clue how old they were then, but our family has had them for 50+ years.

One of the beams had been cut down a few times, so I cross cut it to about 42″, and then re-sawed it to make a 1 inch thick slab.  I left some of the worm eaten edging because it is so good looking.  A little work with my jack plane had it smooth and revealed a gorgeous piece of walnut.


In order to make the text for this project I am using my plunge router and custom printed 3D letter templates.  I wrote up all the text, then broke each segment up into a size that could be printed.  They are keyed to fit together to keep alignment and kerning proper.  Letters like “e” and “B” have to be done in multiple segments.  The “B” below shows how I tackled this.

The plunge routing went reasonably well, but something shifted part of the way through.  My cuts were shallower when I went back and redid certain segments.  Not sure what happened, but next time I will make everything double tight.  I went back with a chisel and cleaned up the issue areas.  The bottoms are still not smooth, but aren’t as uneven as before.  That left me with a few accidental chipout segments.  See near the top of the “O”.  Also, the “h” was in part of a knot.  My colorant will want to bleed into those cavities, so I have to fill them.

I used some dark woodworking epoxy to fill these problem areas.  First I went carefully with painters tape and dammed up all the problem areas.  Next I mixed the epoxy and used a syringe to put just the right amount into the voids.  A little light buffing and the epoxy filled the voids but is really hard to see.

DSC_1396

dsc_1400.jpg

I was going to spray paint this, then just plane off the top layer to reveal colored letters.  The bottoms are still uneven, so I opted to try epoxy.  I bought a big batch of system three epoxy with white color resin.  It worked really well.  No progress pictures because you have very limited time once the mixing begins.

The places I blocked the chipouts didn’t bleed, and only a little snuck in under the knot around the lower case “h”.  A syringe helped me pipe it into each letter, and manipulate the results.  The epoxy clung up at the sides and dipped a little in the center.  The result is a really awesome shiny 3D lettering effect.  It looks quite good on our new mantle.  I don’t really understand fireplaces in Florida, but this one looks picturesque.

20180813_141454

To The Best of Buns

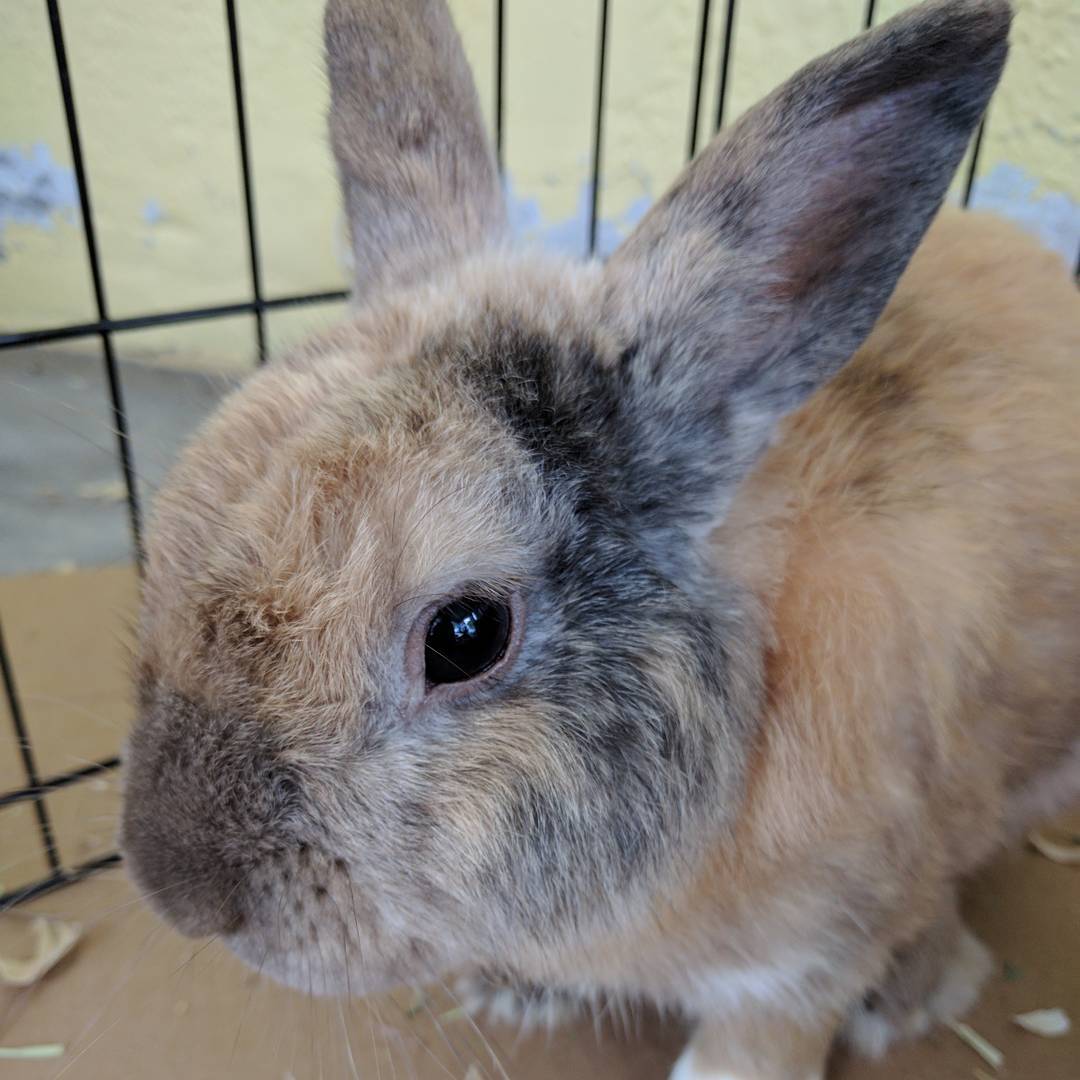
16465569_1653277584969017_6315287317531590656_n(1).jpgAs if allowing two long eared fuzzy ingrates in the house wasn’t enough, I eventually relented to us hosting a temporary visitor.  A particular bun from the mean streets of Melbourne got picked up by a cop and needed a home for a short while so he could get fixed and make his way to the greater Orlando rescue group.  I was expecting an ornery skittish bad bun.  What I got instead was an incredibly sweet creature.  Someone either lost him or kicked this guy out.  Either way, they are losing out big time.

I have never been much of a pet or animal person.  Herbie changed how I feel about keeping animals a bit.  Every time I would open up the back door he would be pawing at the edge of the cage for pets.  I could scratch his nose, rub his ears, pet his side, and he would just lean in for more.  I was sick while we had him and sat in his cage quite a bit.  He came over and gave me lots of love and attention that helped take my mind off the cold.

This story ends in tragedy though.  We were supposed to have him for a month.  A few weeks to recover from his street injuries (a few bad scrapes on his side and back), a quick neutering from the vet, and then a few more weeks of recovery before going off to the main Orlando group.  Though he appeared quite healthy and healed from previous injuries, he did not survive the neutering operation.  Rabbits are very delicate and sedation for surgery is touchy.  Maybe he had other issues we didn’t know about.  Maybe he was very old.  Maybe we just got unlucky.  We will never know.

In the two weeks we had him he completely nuzzled his way into my heart.  I was even starting to think of a way we could keep him along with the other two we are beholden to.  In the short time he earned himself a few nick names.  Herbie was the name he came with, but he also went by Herbacious, Herbie The Love Bun, Herb-a-licious, Herbert Hoover (when food was around), and Herbert J Whiskers (when he was feeling formal).  Honestly I probably forgot a few at this point.

Though we never got him to a forever home, we can still give him a final resting place.  We had him cremated and collected his ashes.  I thought it would be fitting to build a little box for the occasion.


20170212_144546

Something this serious calls for the family wood.  These walnut pieces have been in my family for decades.  I cut a chunk off and decided to go for a bandsaw box.  I have never made one before, but thought this was a good time to try something new.

I didn’t make any layout marks, just went went with my gut and cut out the first things that came to mind.  First the overall shape is cutout, then the back comes off.  With that set you can cut out any number of drawers you please.  In this case, just one.  A similar thing happens for the drawer, only you need to cut a front and back before carving out the central drawer cavity.

Cutting and glue-up went smoothly.  I did only minor sanding and didn’t bother with finish.  A wealth of off cut pieces gave me plenty to make a drawer pull in the shape of an H.

20170215_191515

After a few weeks of waiting we got his ashes back along with a few paw imprints in clay.  We laid him to rest in his little hand made home under the orange tree in the back yard.  Maybe we should call it the Herbert J Whiskers memorial orange tree.

16230127_751708518314283_6814505707241472000_n(1).jpg

Father’s Day Knives

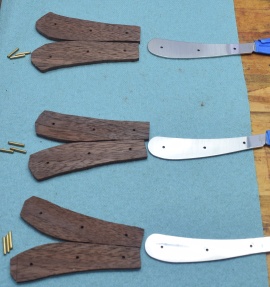
The family wood strikes again.  Mother’s day gifts one and two have already been delivered, and it is time for the dads.  I found these letter opener kits at woodcraft, and they include a blade, leather holster and brass pins.  All you have to do is make up the scales, bond them on, and sand away the excess.  It was actually that simple, and by going really slowly and carefully they turned out great.

I wanted three total.  One for my dad, one for my father in law, and one for me.  This is far enough out of my comfort zone that I bought a fourth kit to build first as a test article.  I have watched enough forged in fire to know that things can go wrong at the handle assembly.  Enter the family wood, and a thin slice via my bandsaw.

I cut down two small rectangles and held them together temporarily with carpet tape.  I clamped the blade on and match drilled the holes all the way through.  Once bonded on everything excess will have to get sanded, so I trimmed as close as I dared with my band saw.  The metal surfaces got a light sanding for bond strength and everything got a wipe down with alcohol.  I used T-88 which has a really long working time and high bond strength.

The next day the clamps came off, everything seemed solid, and it was time for the sanding.  I have a junky harbor freight 1×30″ belt sander.  It rattles and shakes, but really did the job.  First I went over with an 80 grit to remove everything sticking beyond the metal.  Once squared I went to 400, then 1000 grit belts to refine the shape and polish the metal interface.

It turned out really well.  The instructions wanted you to cut the scales to match exactly, then bond.  I figured this way guaranteed that everything fit smoothly, and if you used high enough grit, the metal could be put back to a polish.  I was right!


With one down and finished I had everything figured out to do the other three.  Doing them in a batch made things go quickly and efficiently.

My only point of confusion comes with the pin insertion.  Do you put them in the bottom scale, then install the tang, then the top scale?  It is hard to see if the pins are a little crooked, and everything is sticky with glue.  Pounding them in from the top with all pieces sandwiched means you are hitting the bottom scale’s holes blind.  I tried variations, and still haven’t refined that part of the build well yet.

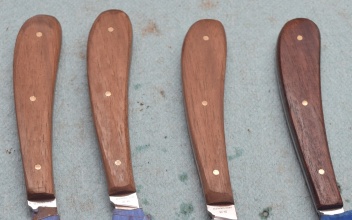
The last picture on the right shows the first one with a coat of tung oil on it.  It looks good and feels smooth in my hand.  All of them turned out great, and the 4th one was kind of unnecessary.  I’ll bet I can find a worth recipient.

DSC_0288

DSC_0289

DSC_0292

Mother’s Day Gift #2

I had another gift in mind using the family wood.  I couldn’t leave my mother-in-law out.  She is an avid reader, so I stuck with the book theme and made a set of bookmarks.  This is the thinnest resawing I have done, and I was planning to sand down even further.  We are getting into thin veneer territory here.  A fun project with a little skill building thrown in.  Cue up that gorgeous family walnut!

DSC_0210I planed the right side flat to have a good surface to start with, then used a marking gauge to mark off a plank of about 1/8″.  I might try my hand at doing thinner next time, but this was pretty thin for me.

DSC_0211

I cut two just in case, but as it turns out each one was wide enough to make two bookmarks.  I left one quite long, and kept a full thickness of the top inch or so.  The rest of that one got thinned dramatically.  The intention is that the thicker portion will add strength, and keep a portion of it proud of the book when shut.

The shorter one was thinned across its entire length till it was pretty flexible.  To keep it from splitting It found a small piece of purpleheart and glued it on with the grain running perpendicular to the walnut grain.  A lot of shaping at the sanders gave it a nice look and feel.  The purpleheart piece will also keep the bookmark from slipping down inside the book.

Once sanded smooth both pieces got a few layers of spray lacquer.  The shorter one should be good for novels and other small paperbacks while the big one should be great for larger hardcovers.

DSC_0238


Mother’s Day Gift

There are some pieces of walnut that have been in my family since my mom was a small child.  They were used to hold things down and as ballast in a sailboat.  Some sections are incredibly solid, while others are somewhat worm eaten.  I needed a good mother’s day gift and got inspiration from what I call, the family wood.

The pieces are 2-3 inches thick and 6-8 inches wide.  Quite a heft to deal with on the miter saw.

DSC_0196

I chopped off that nice rotted wormy section at the top for this project and a few others I have in mind.  I think with a bit of cleanup this could be a perfect book end for all of mom’s fancy book creations.

DSC_0198

It probably isn’t heavy enough on its own to hold the books up.  I considered drilling it out to add shot and a grippy bottom.  Instead I cut a small relief in the bottom to allow a metal tongue to protrude.  The weight of a few books on this tongue should resist movement.  The metal is a bit of 20ish gauge sheet steel.  A good hit with a center punch depressed the area enough so that a countersink screw wouldn’t protrude.  Two part epoxy was probably overkill, but it will keep it from rattling.

I pulled off the really loose chunks, brushed everything down, and planed the 3 vertical sides that weren’t wormy.

DSC_0203

No project is complete without a little message to remember it by.

DSC_0205

I may have gotten carried away with getting it finished and off to her early.  I did a number of coats of spray lacquer and never took a photo of the finished product.  Luckily for me, mom is a great photographer, and sent me some really pictures of it in use with her homemade books.  Happy Mother’s Day!

IMG_0230

IMG_0227