After working on a bit of fermentation magic to create my first round of hot sauces, I was feeling pretty spiffy. I figured I could handle something that takes more time, like sauerkraut. I picked up a head of green cabbage and got started.
The process is even simpler than hot sauce. It is just shredded cabbage and 2% salt by weight. No other ingredients, including water, are needed. Mix it together and knead/massage the salt into the cabbage until it is juicy. Simple enough, but I still screwed it all up somehow. I think it comes down to mashing, but I am getting ahead of myself. The shredding and salting went well. I kneaded it until it was well reduced. Everything with into a quart jar with a bit of juice on top to keep it covered.
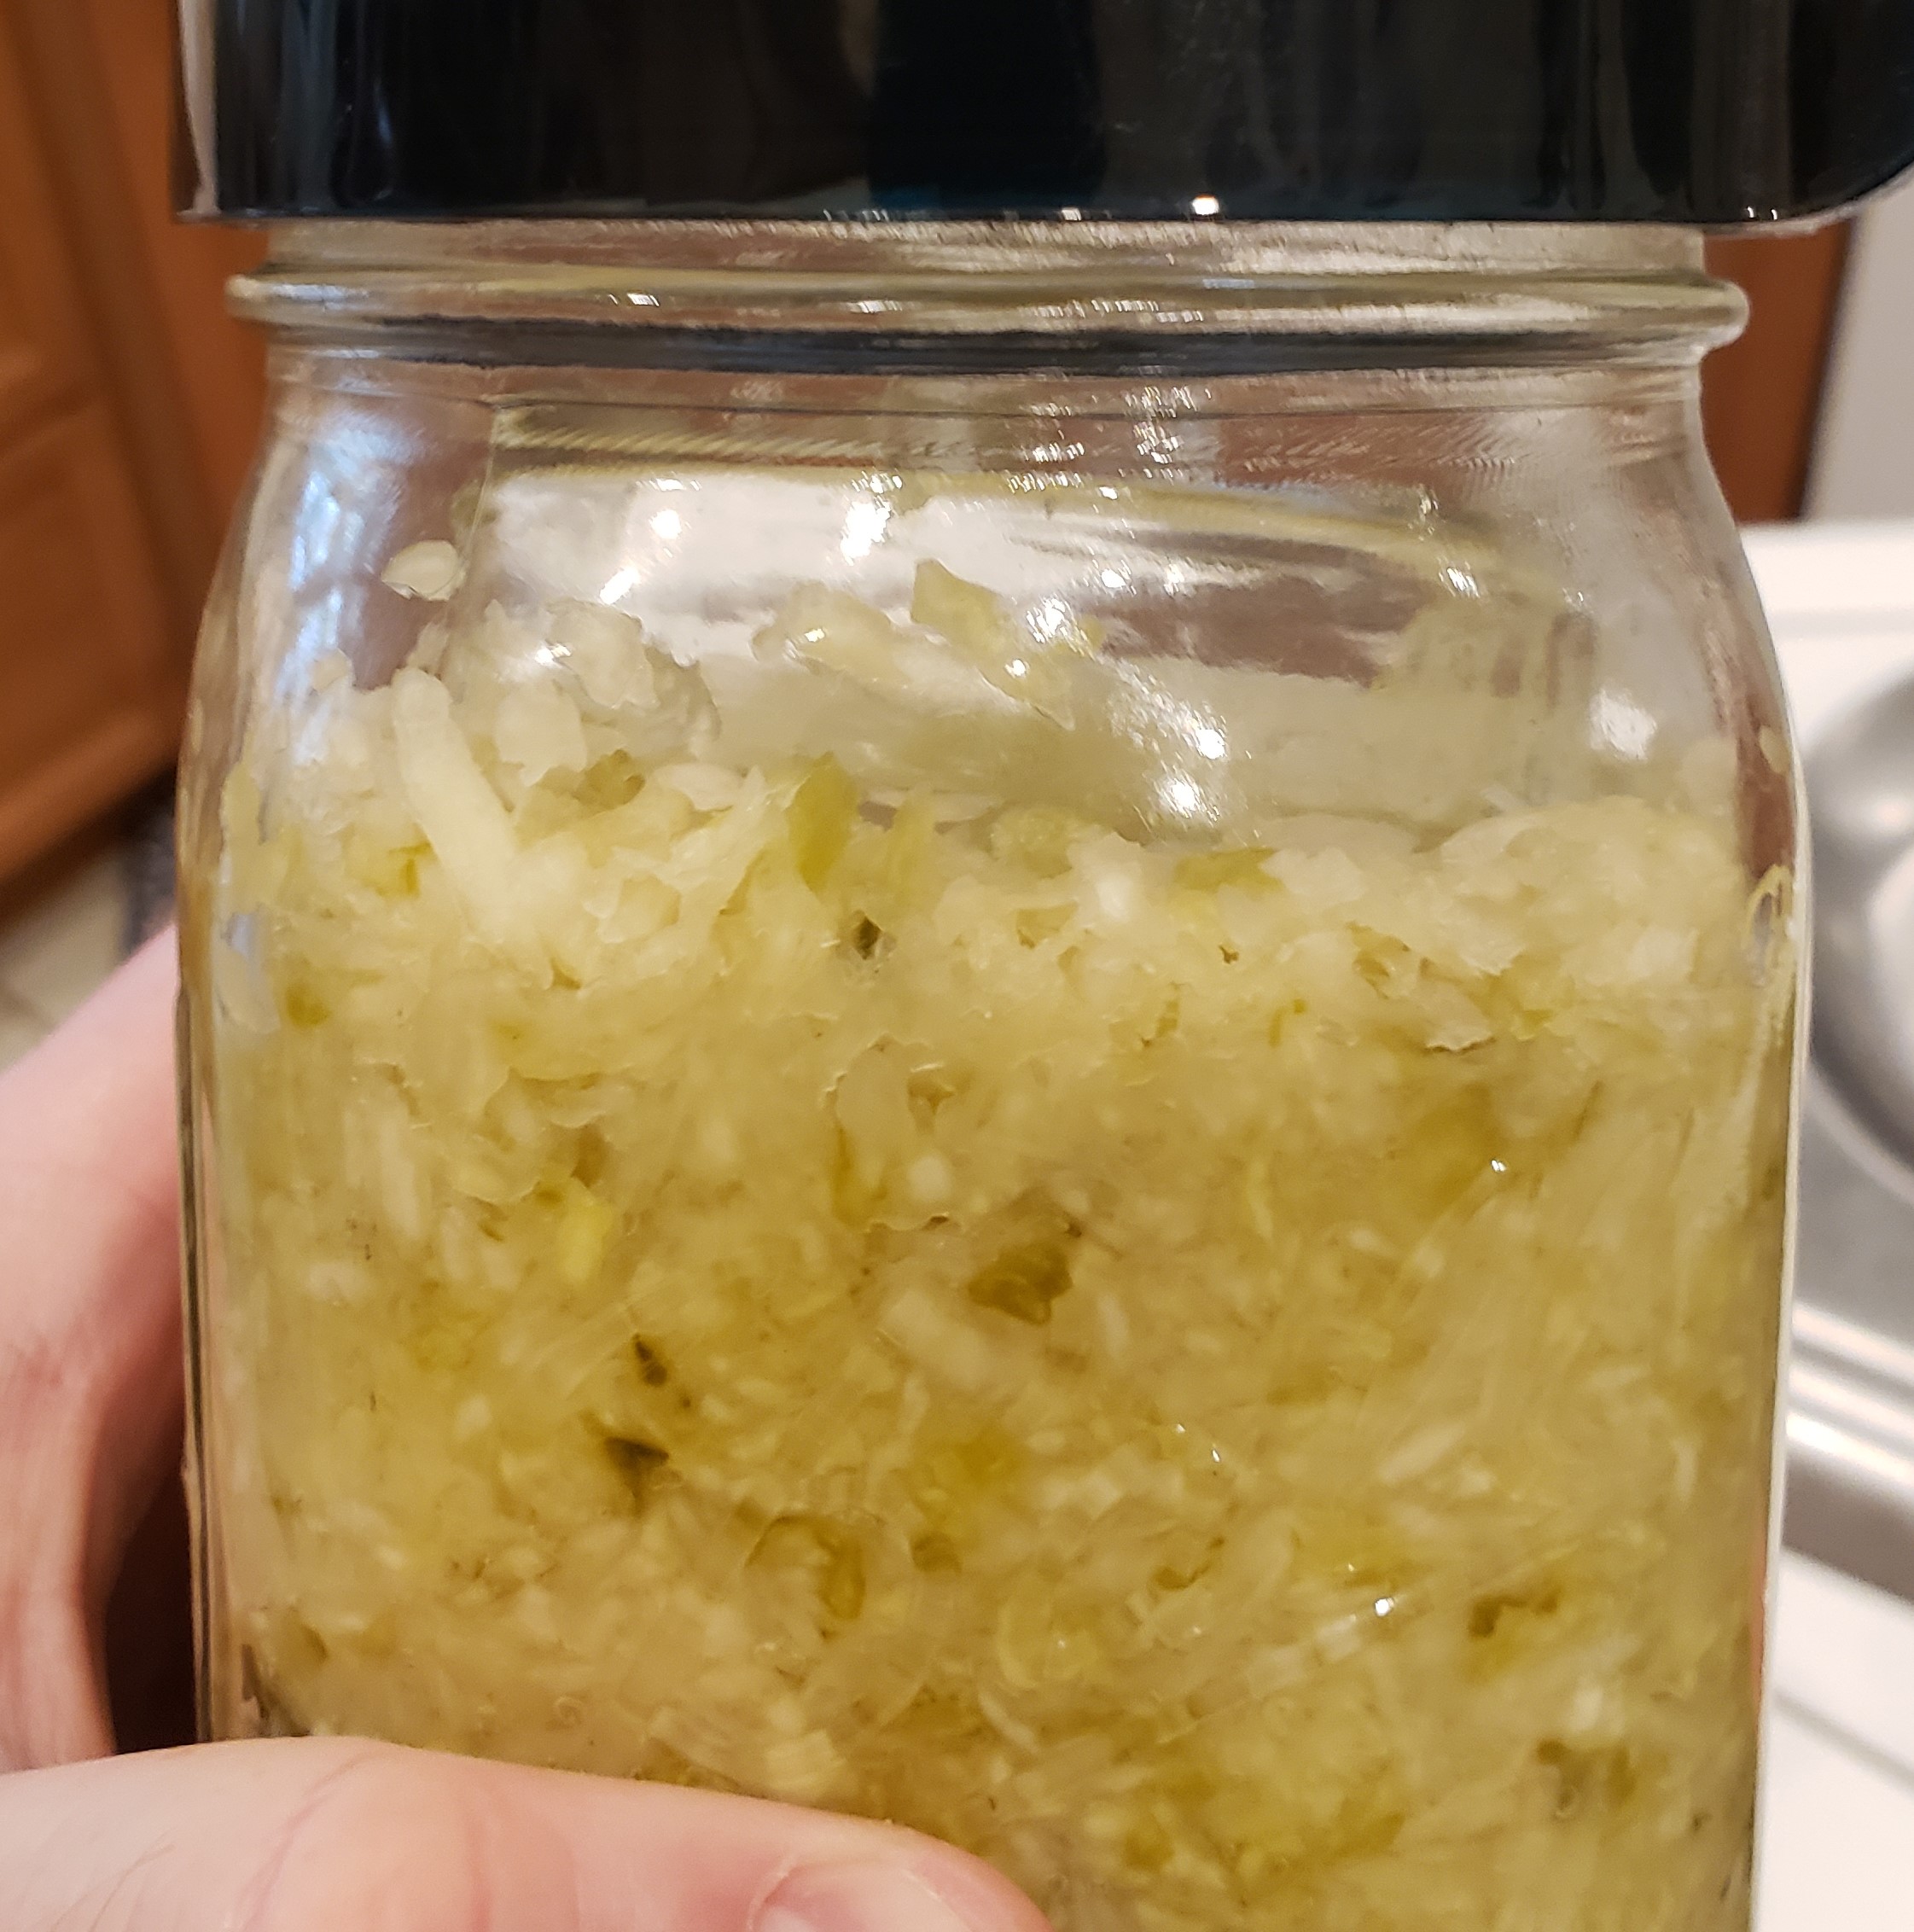
After 2 weeks I gave it a try. It had the right flavor, but was a little to hard and raw. I put the cap back on, and sucked it down to get the oxygen out. I figured it just needed more time, so I went ahead and made a bigger batch with red cabbage.
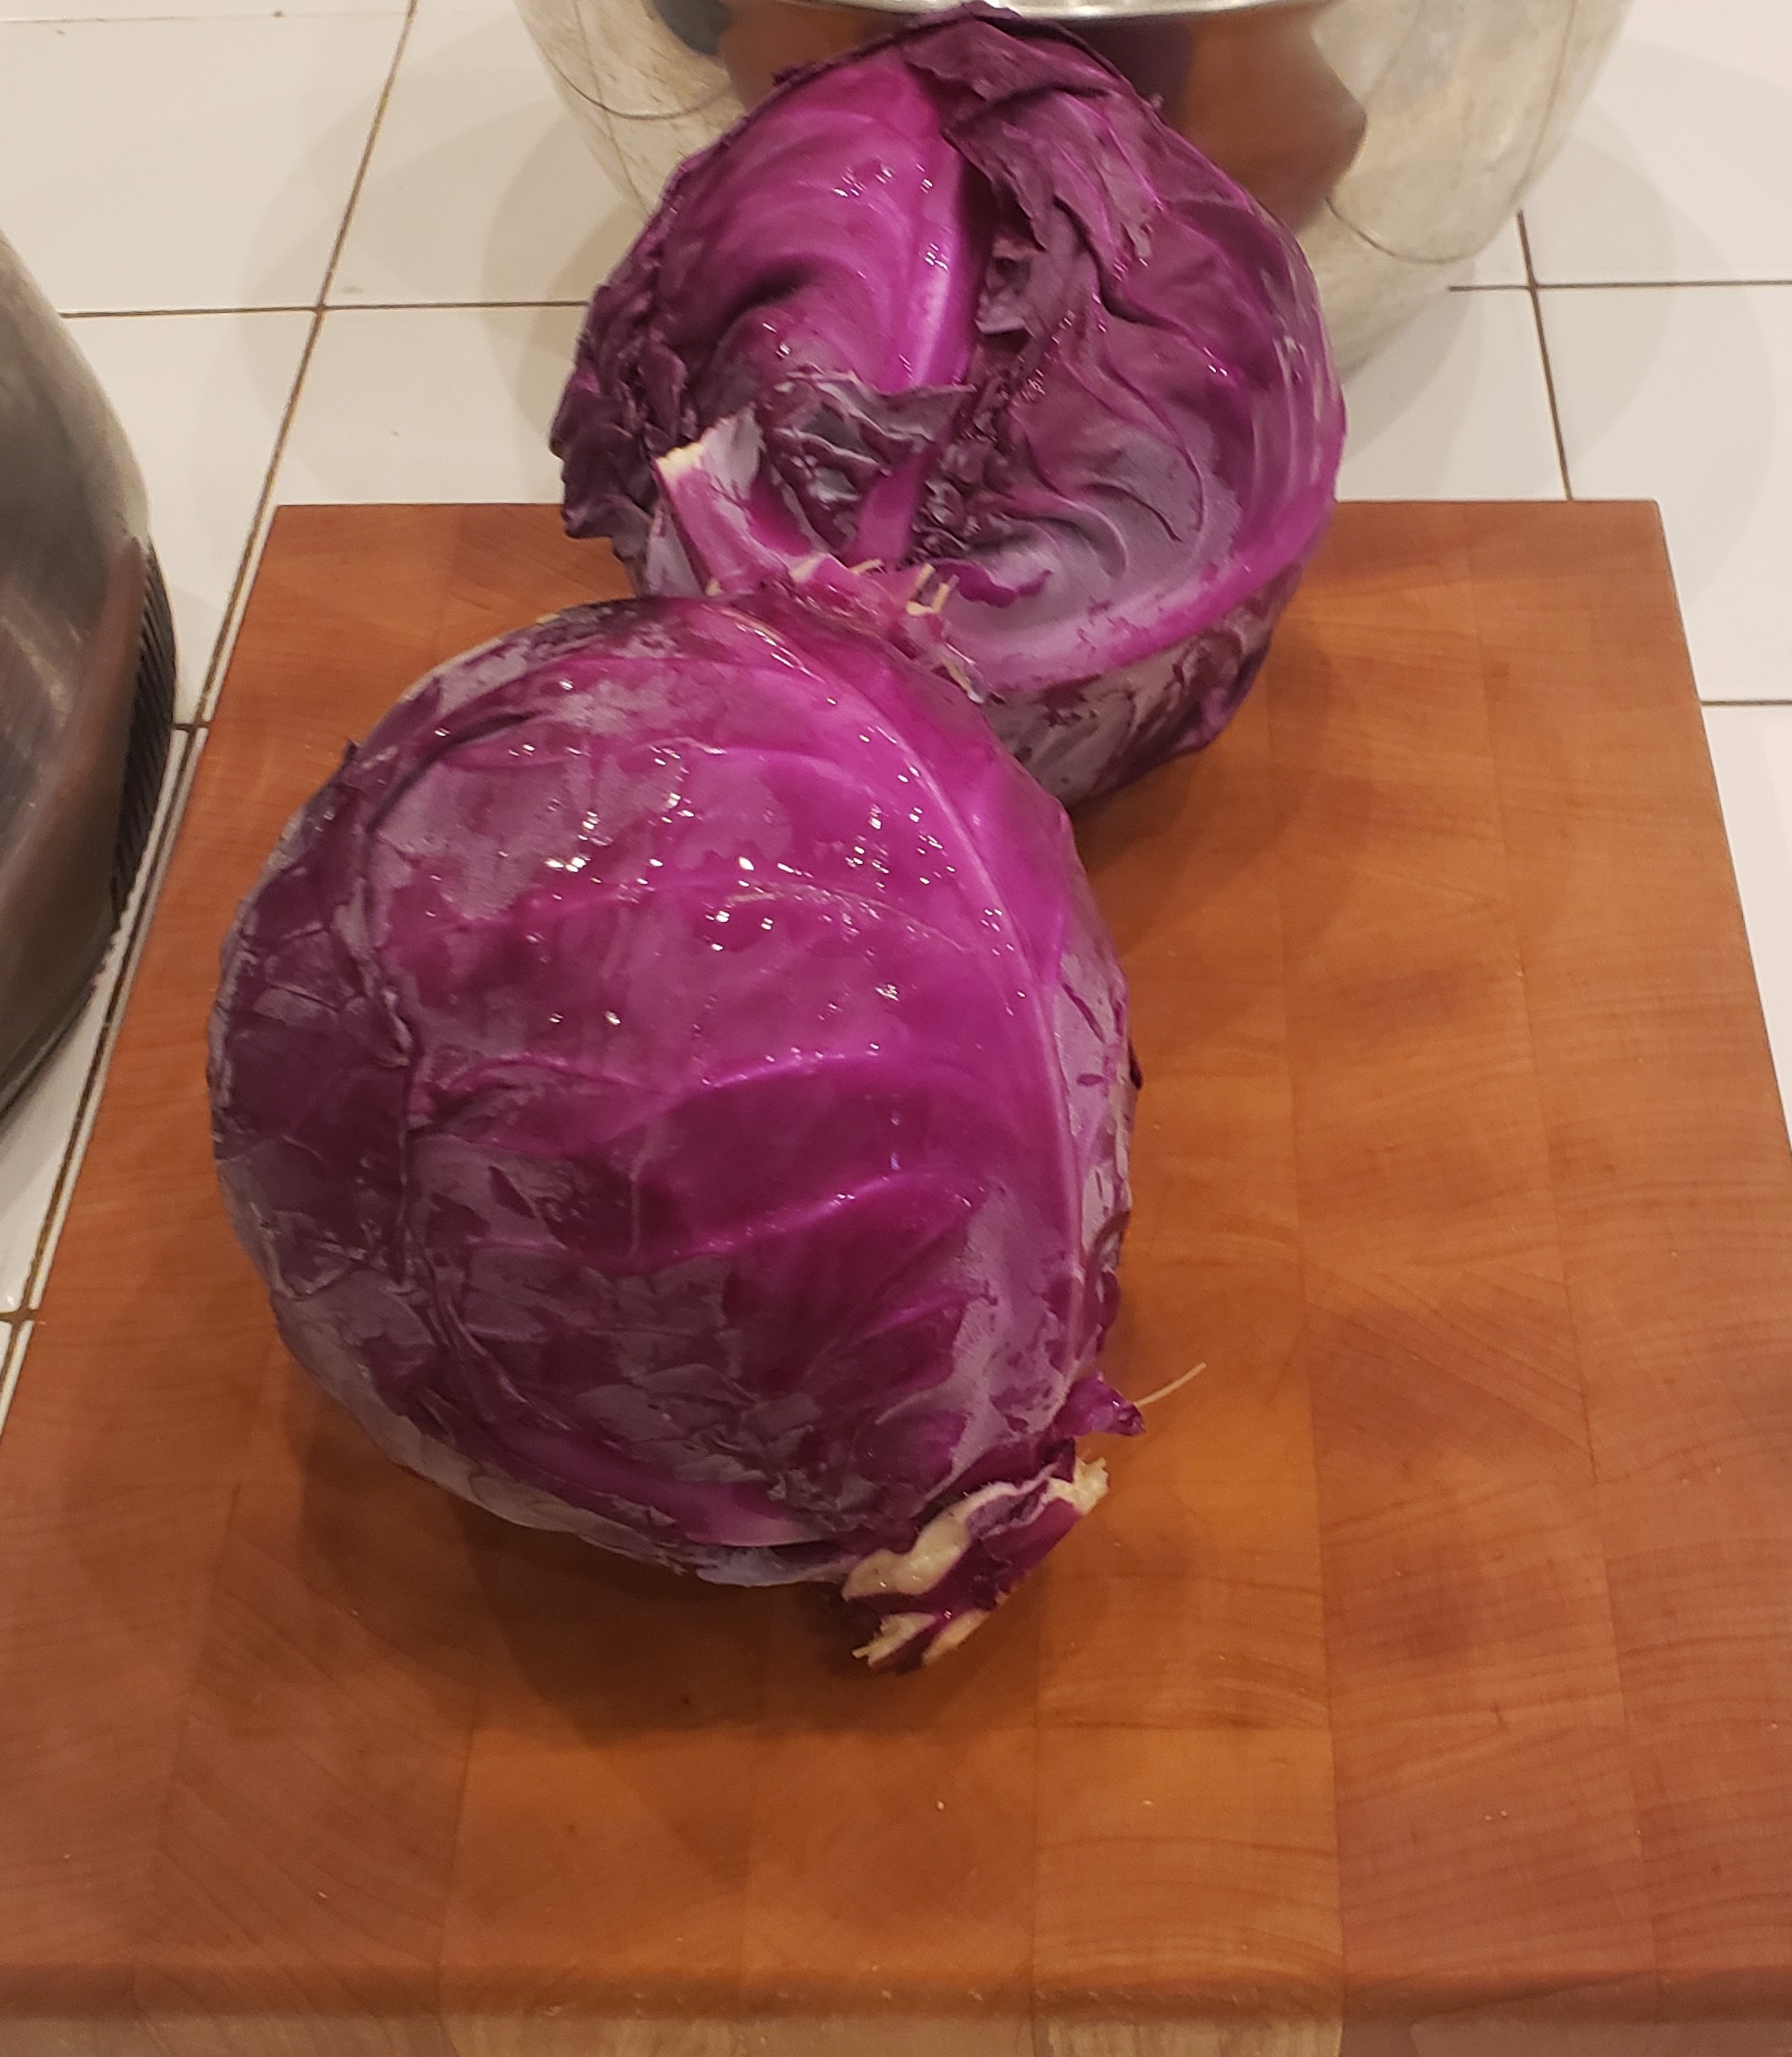
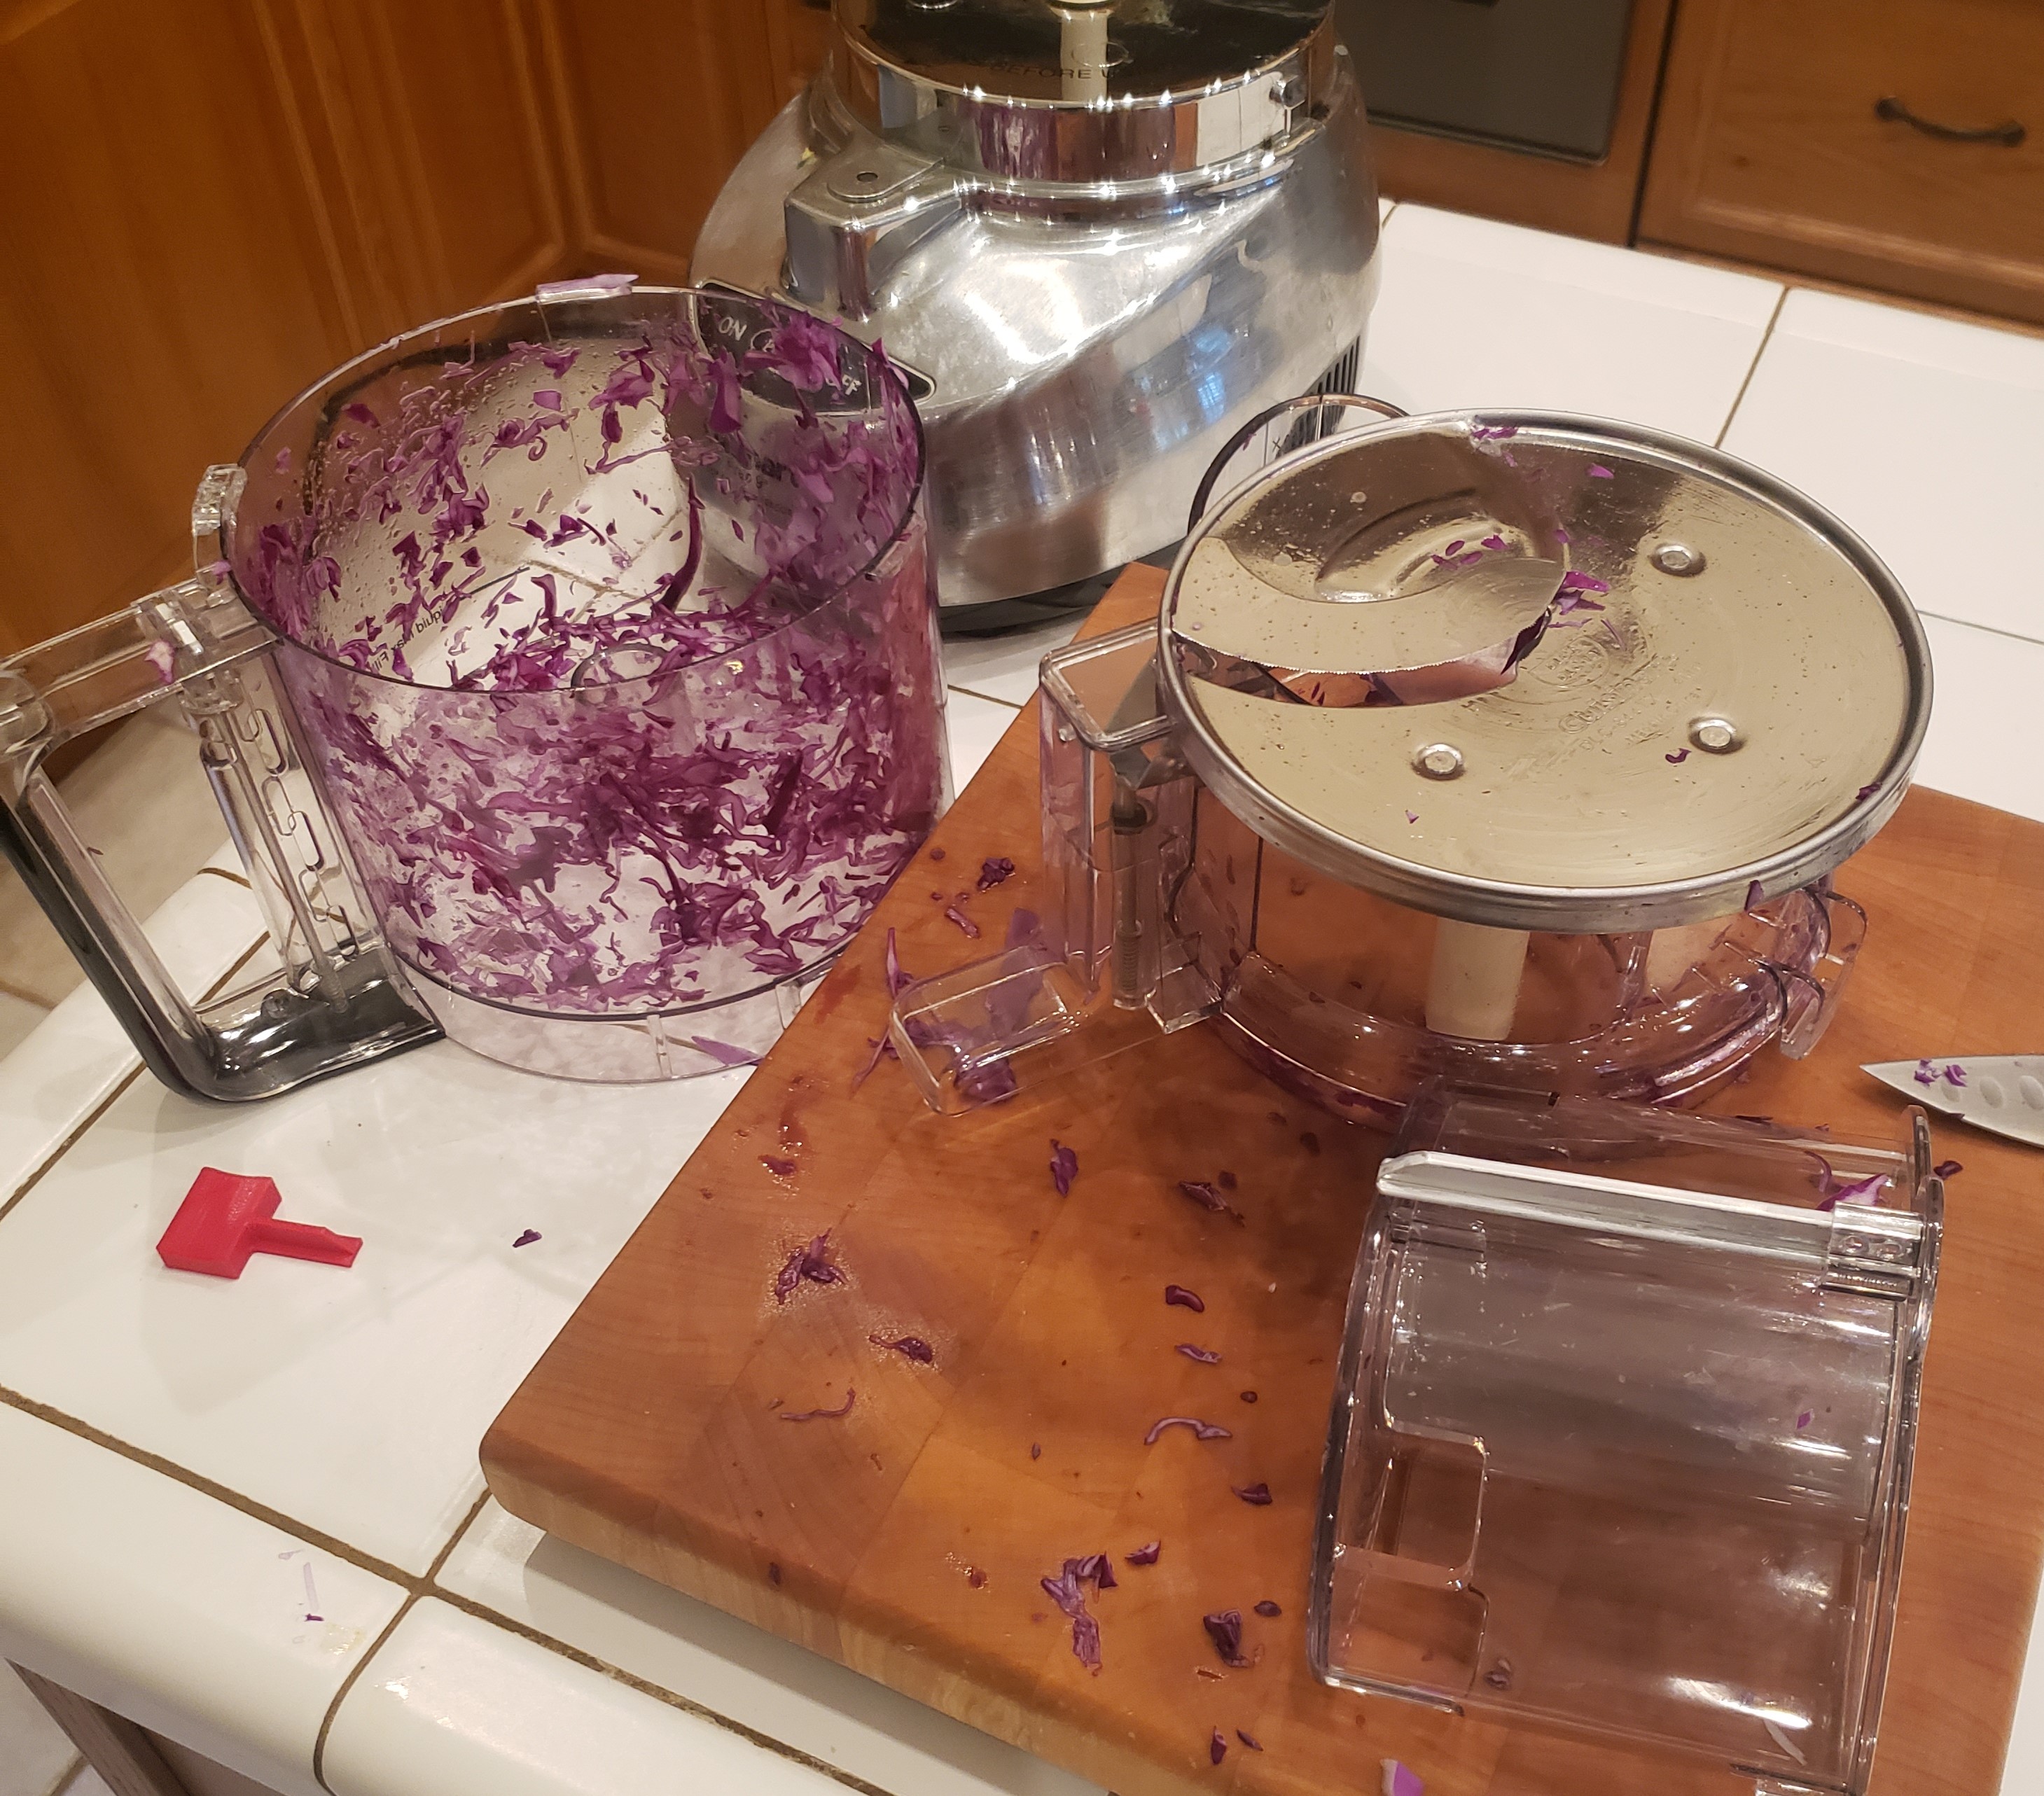
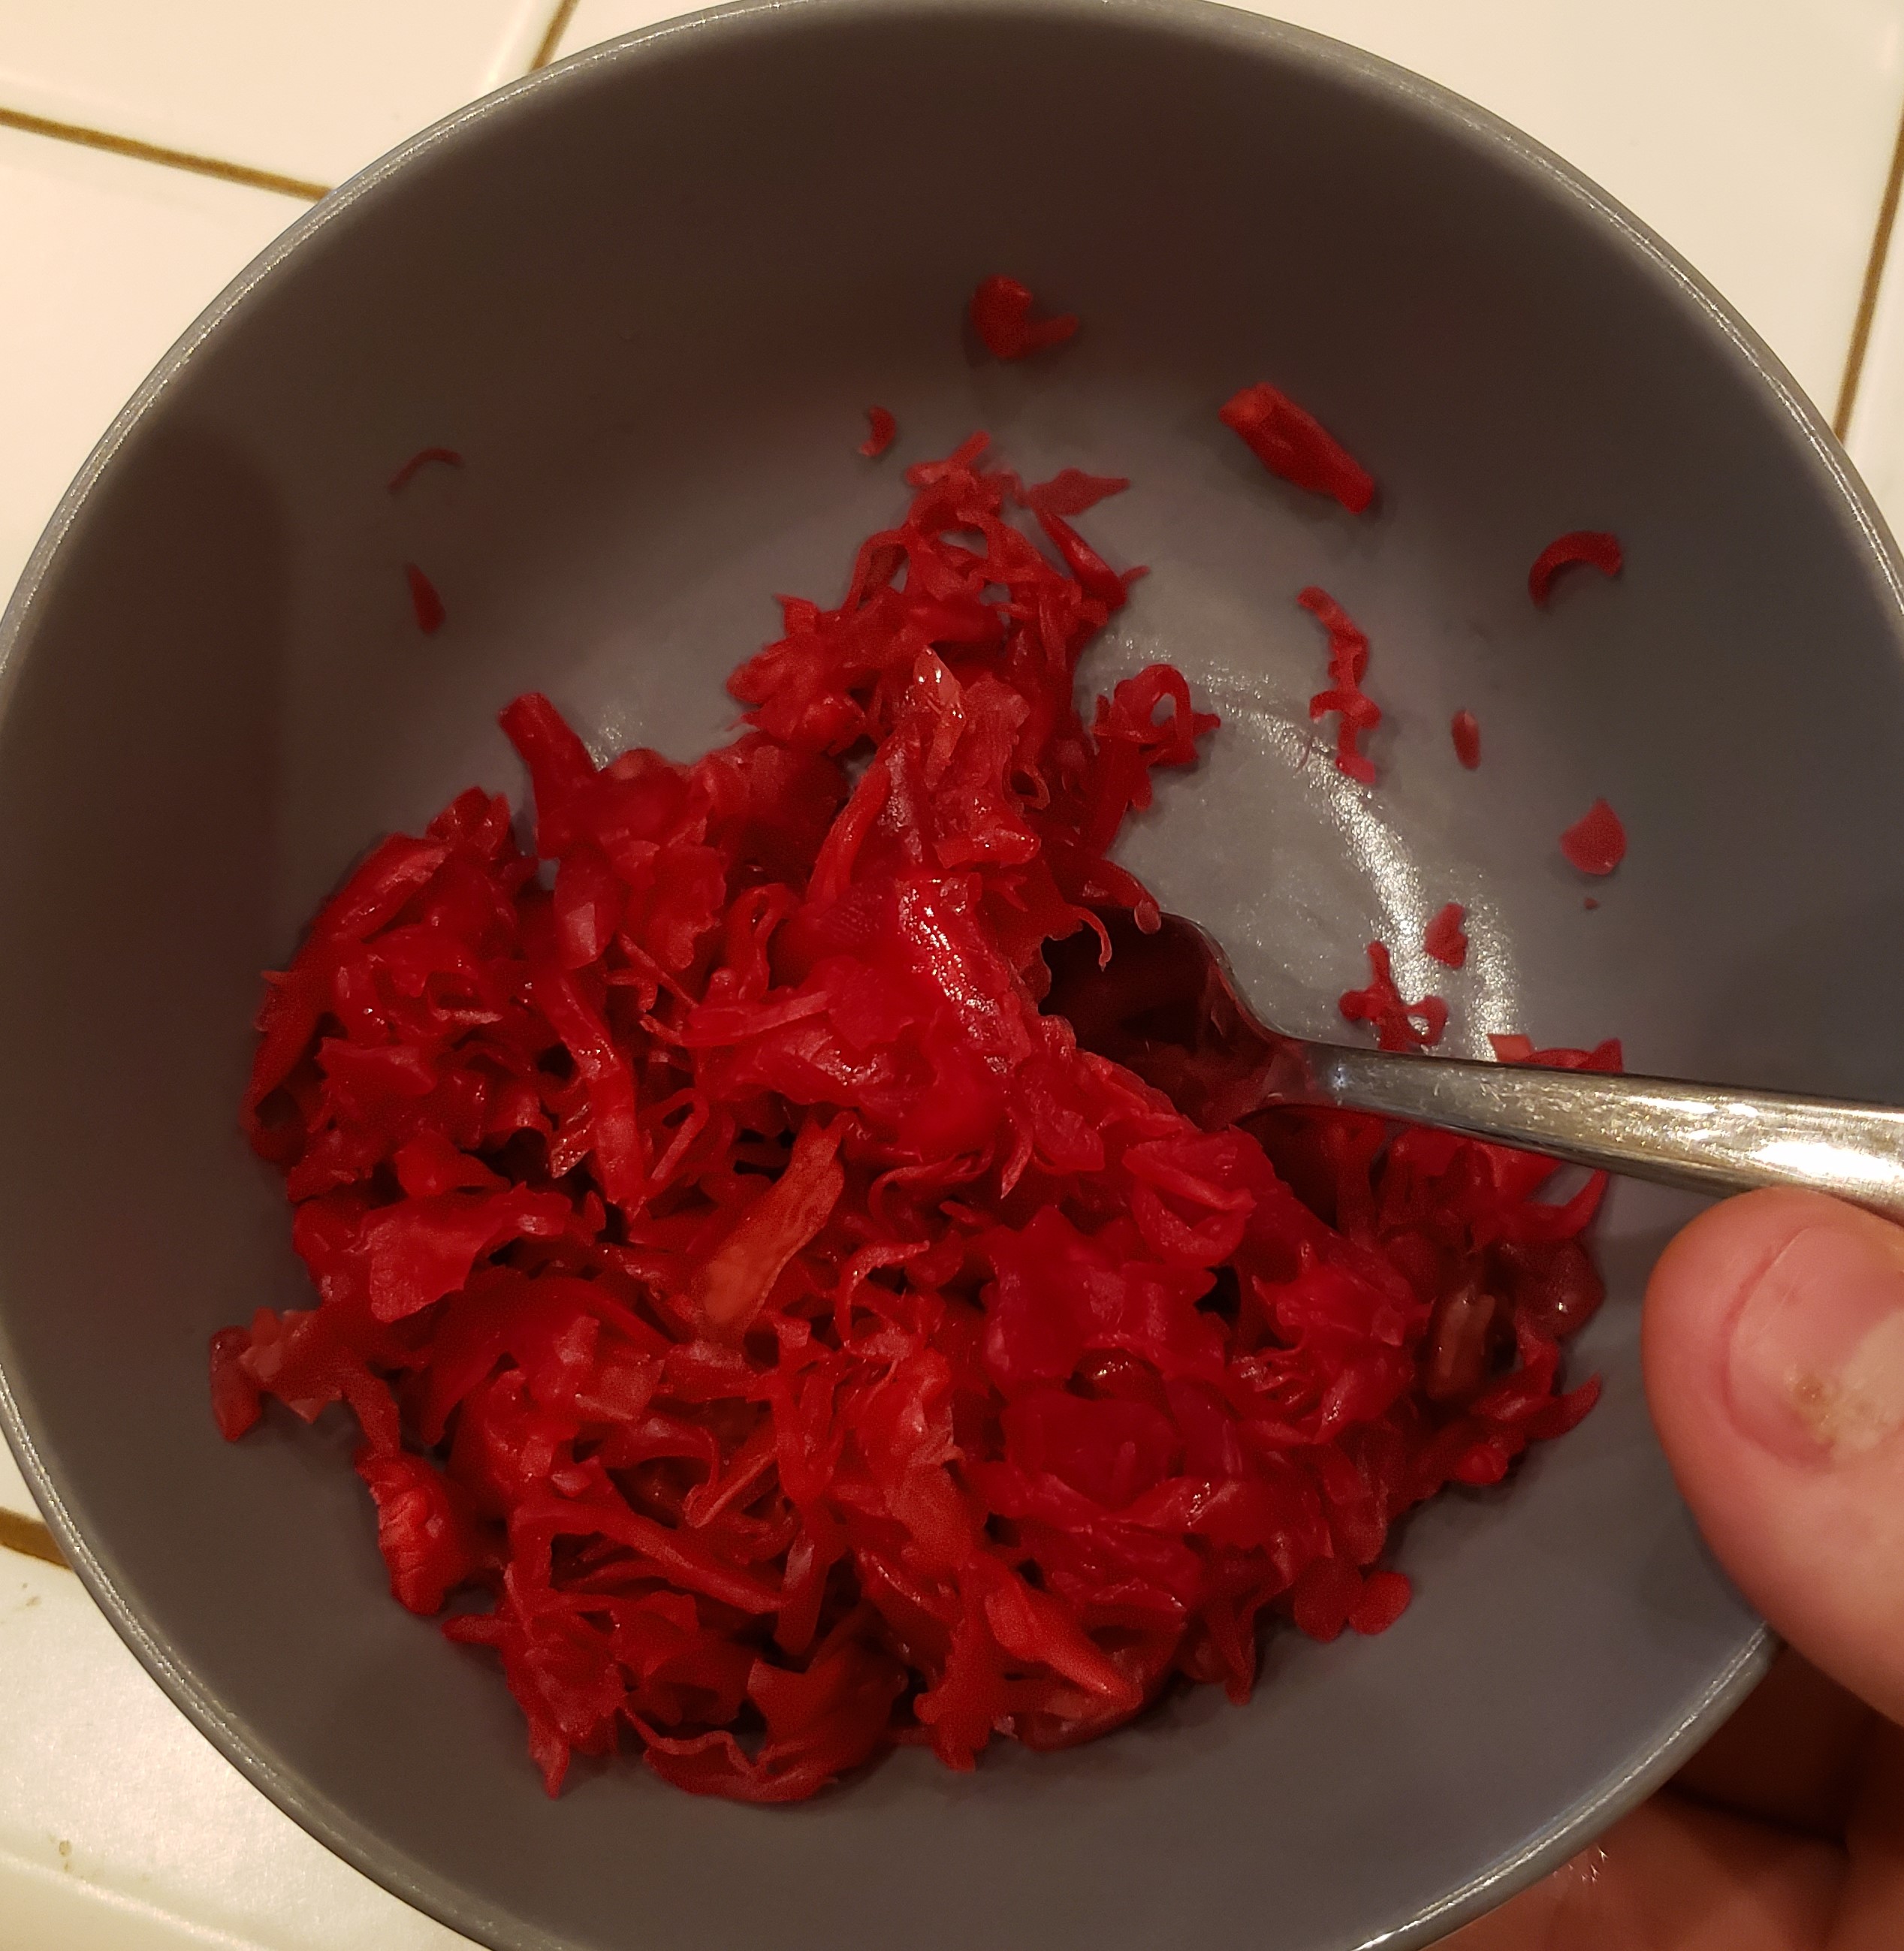
Same drill as last time, only a bigger staining mess. Still lots of fun. The two heads barely fit in my largest bowl at the start, but after massaging, they were much smaller. Almost all of it fit in my new 1/2 gallon mason jar.
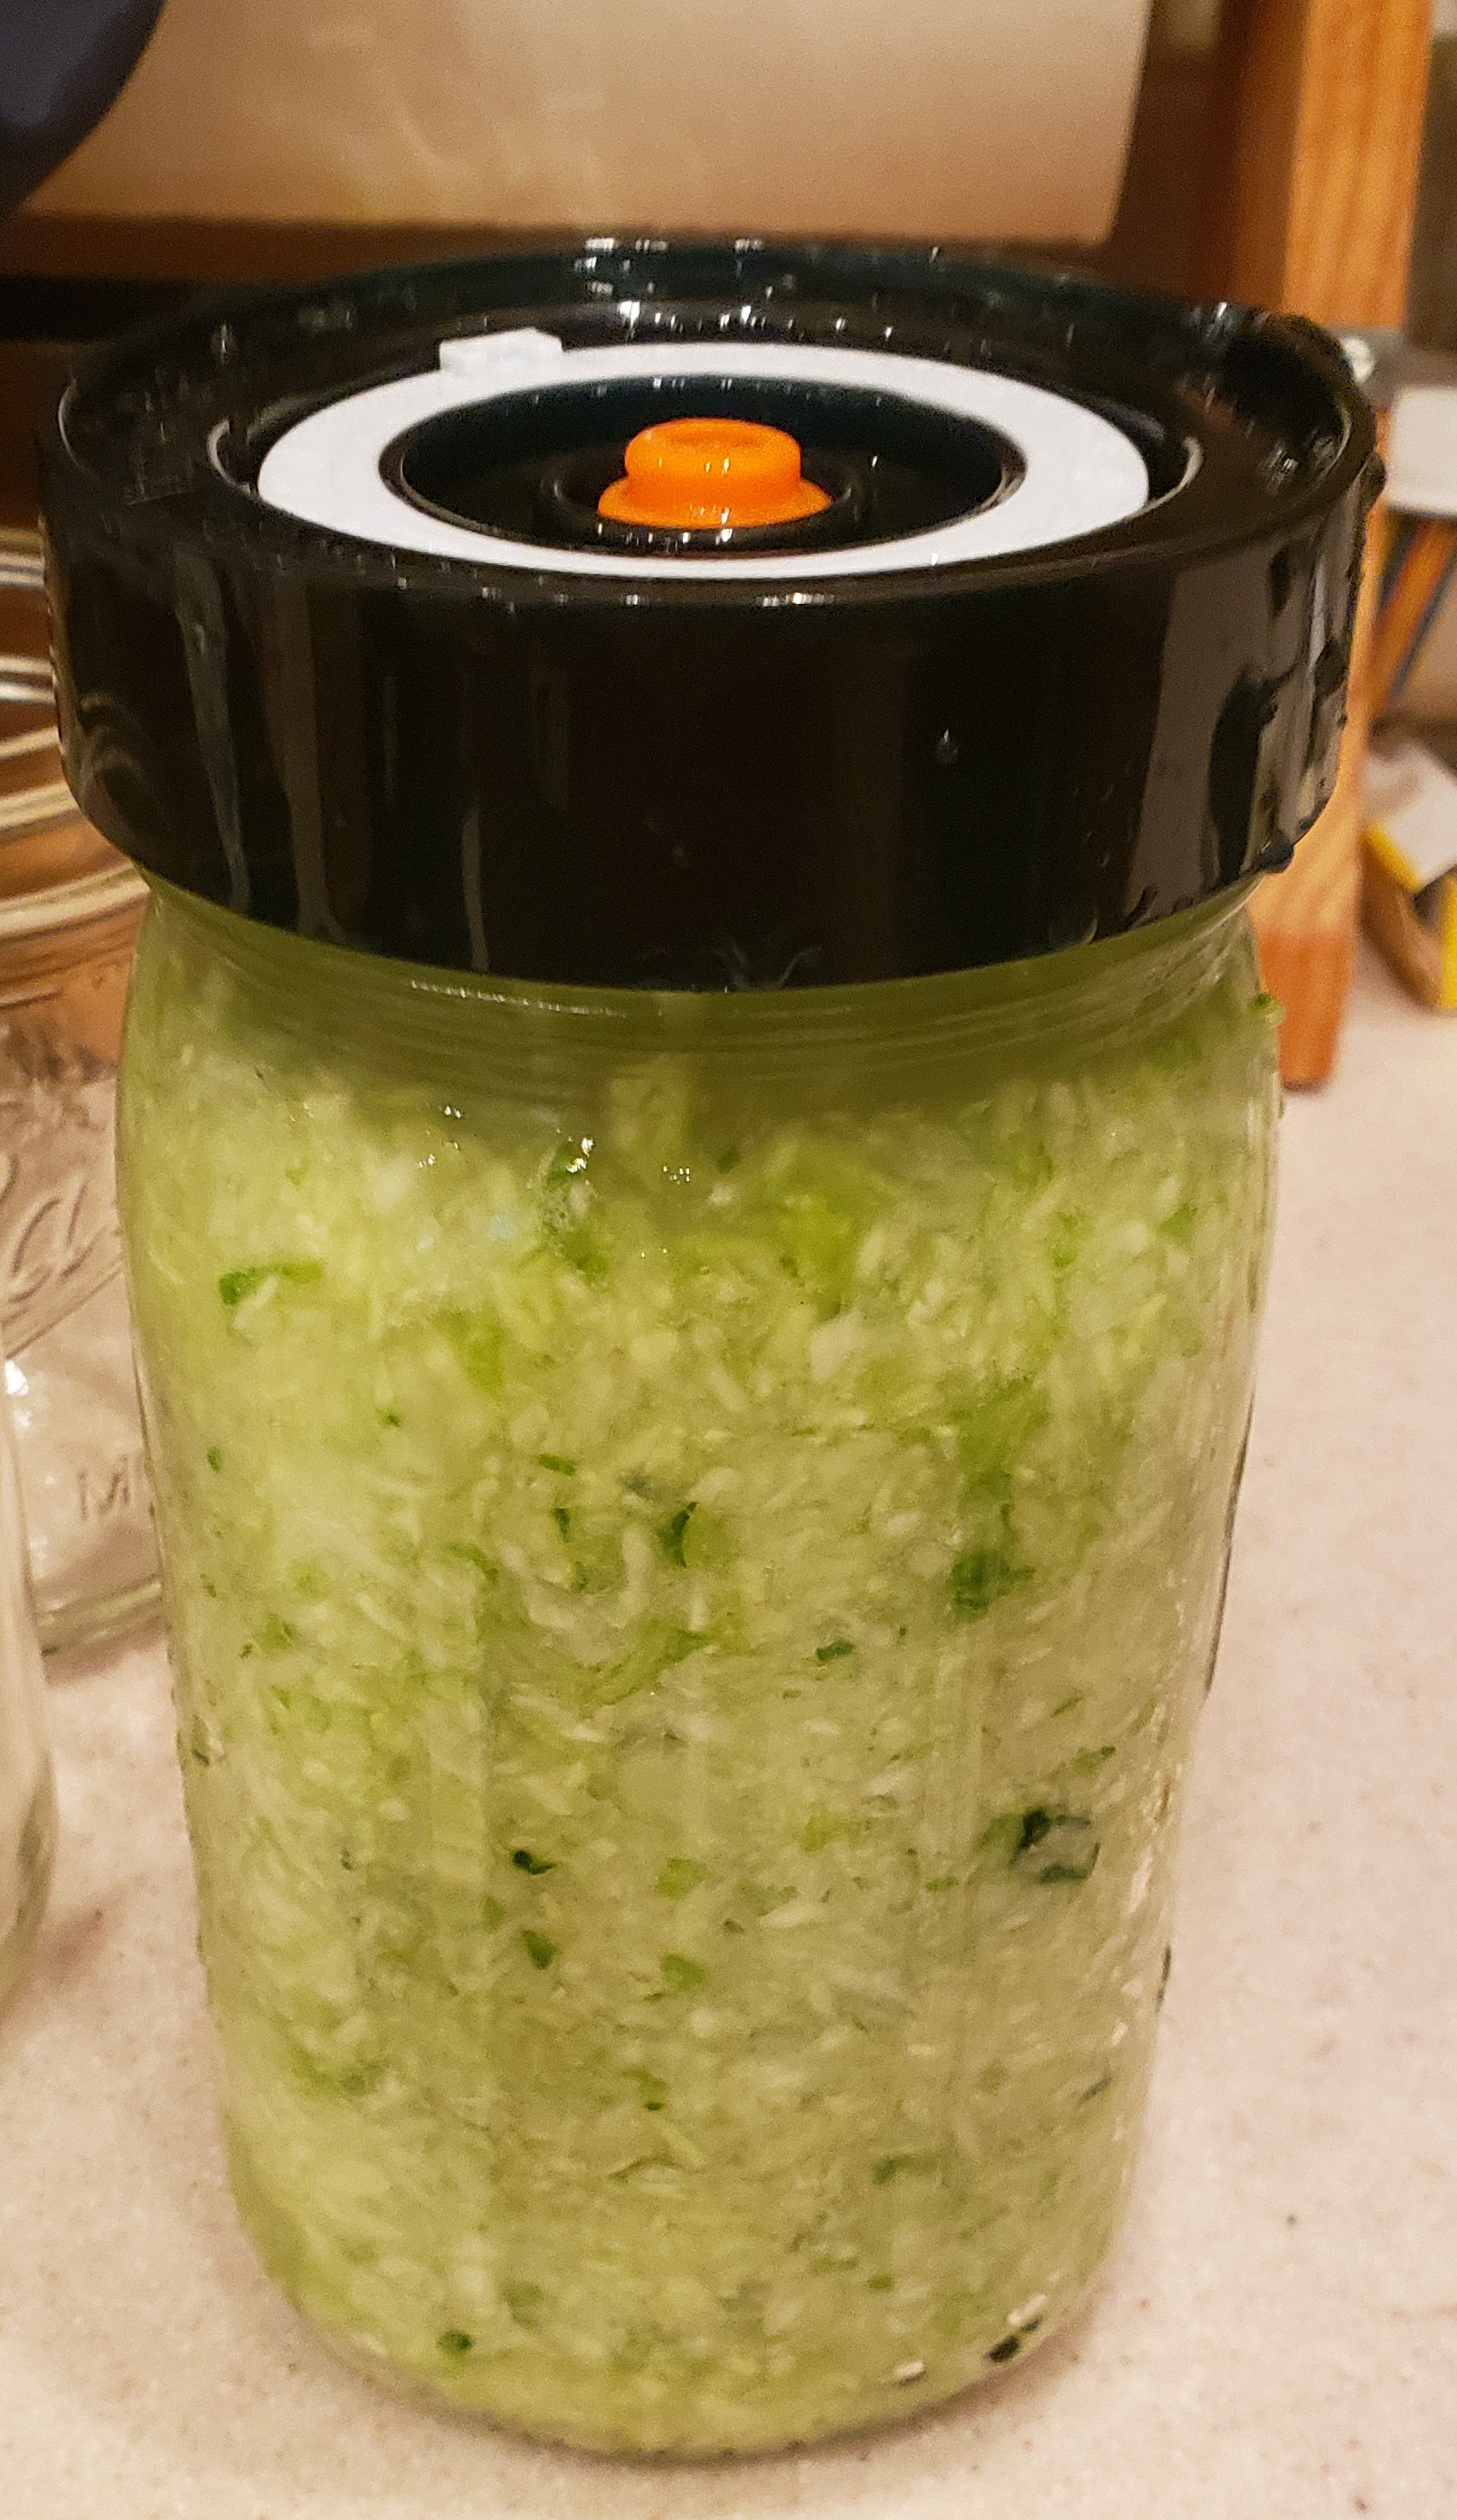
The red cabbage bubbled like mad and pushed a lot of the fluid out leaving the cabbage a bit more exposed. I had to keep the jar in the sink for days as it seeped and spurted cabbage juice out of the top. A month later both cabbages were rather dry looking. I know they were pushing liquid out early on, but I don’t know how it could have all gone out that far down.
The green one smelled like something had gone wrong. I tossed it immediately. The red one smelled correct and looked decent. It had been in there a month, but still felt way too hard and crunchy to be right. I don’t think I kneaded either of them well enough to break them down properly. Also, next time I will try a head or head and a half in a 1/2 gallon jar, so there is plenty of room for it to push liquid around, but still stay covered. The color of the image below doesn’t do it justice, it is a pretty red color. If at first you don’t succeed, try try again.
I learned about lacto-fermentation a month or two back and have been experimenting with it since. The principle is pretty simple. You cut up veggies of some sort, put them in a jar, cover with water, then add 2% salt by weight of the veggie and water. You can do sauerkraut and fermented hot sauces amongst other things.
My first attempt was with hot sauce. I owe most of my inspiration here from Ethan Chlebowski’s hot sauce adventures. He made 4 different hot sauces with the same ingredients, but different preparation methods. I am doing slightly different ingredients, and using fresh veggies to ferment.
I started with 3 poblanos(270g), 2 small jalapenos(40g) with some of the center removed and a number of garlic cloves(30g). Those all get rough chopped, thrown into a ball jar and covered with water. Weigh all that minus the glass jar weight and add 2% salt to the mix. I picked up lids that allow the mixture to burp the spare CO2, and prevent oxygen getting in. Also there are glass weights to keep the veggies submerged. It helps prevent mold. 9 Days later the jars were cloudy and smelled like pickly goodness.
Day 1
9 days later
I want this to be shelf stable if possible. The salt helps keep a lot of things from growing, and the fermentation part has created acid. If it is at or below 3 on the Ph scale, it should be shelf stable for a while. I picked up some test strips just for this, though I bet Ira and I can have a lot of fun with these in a few years. The strip looks to be 3 or less, so we are golden!
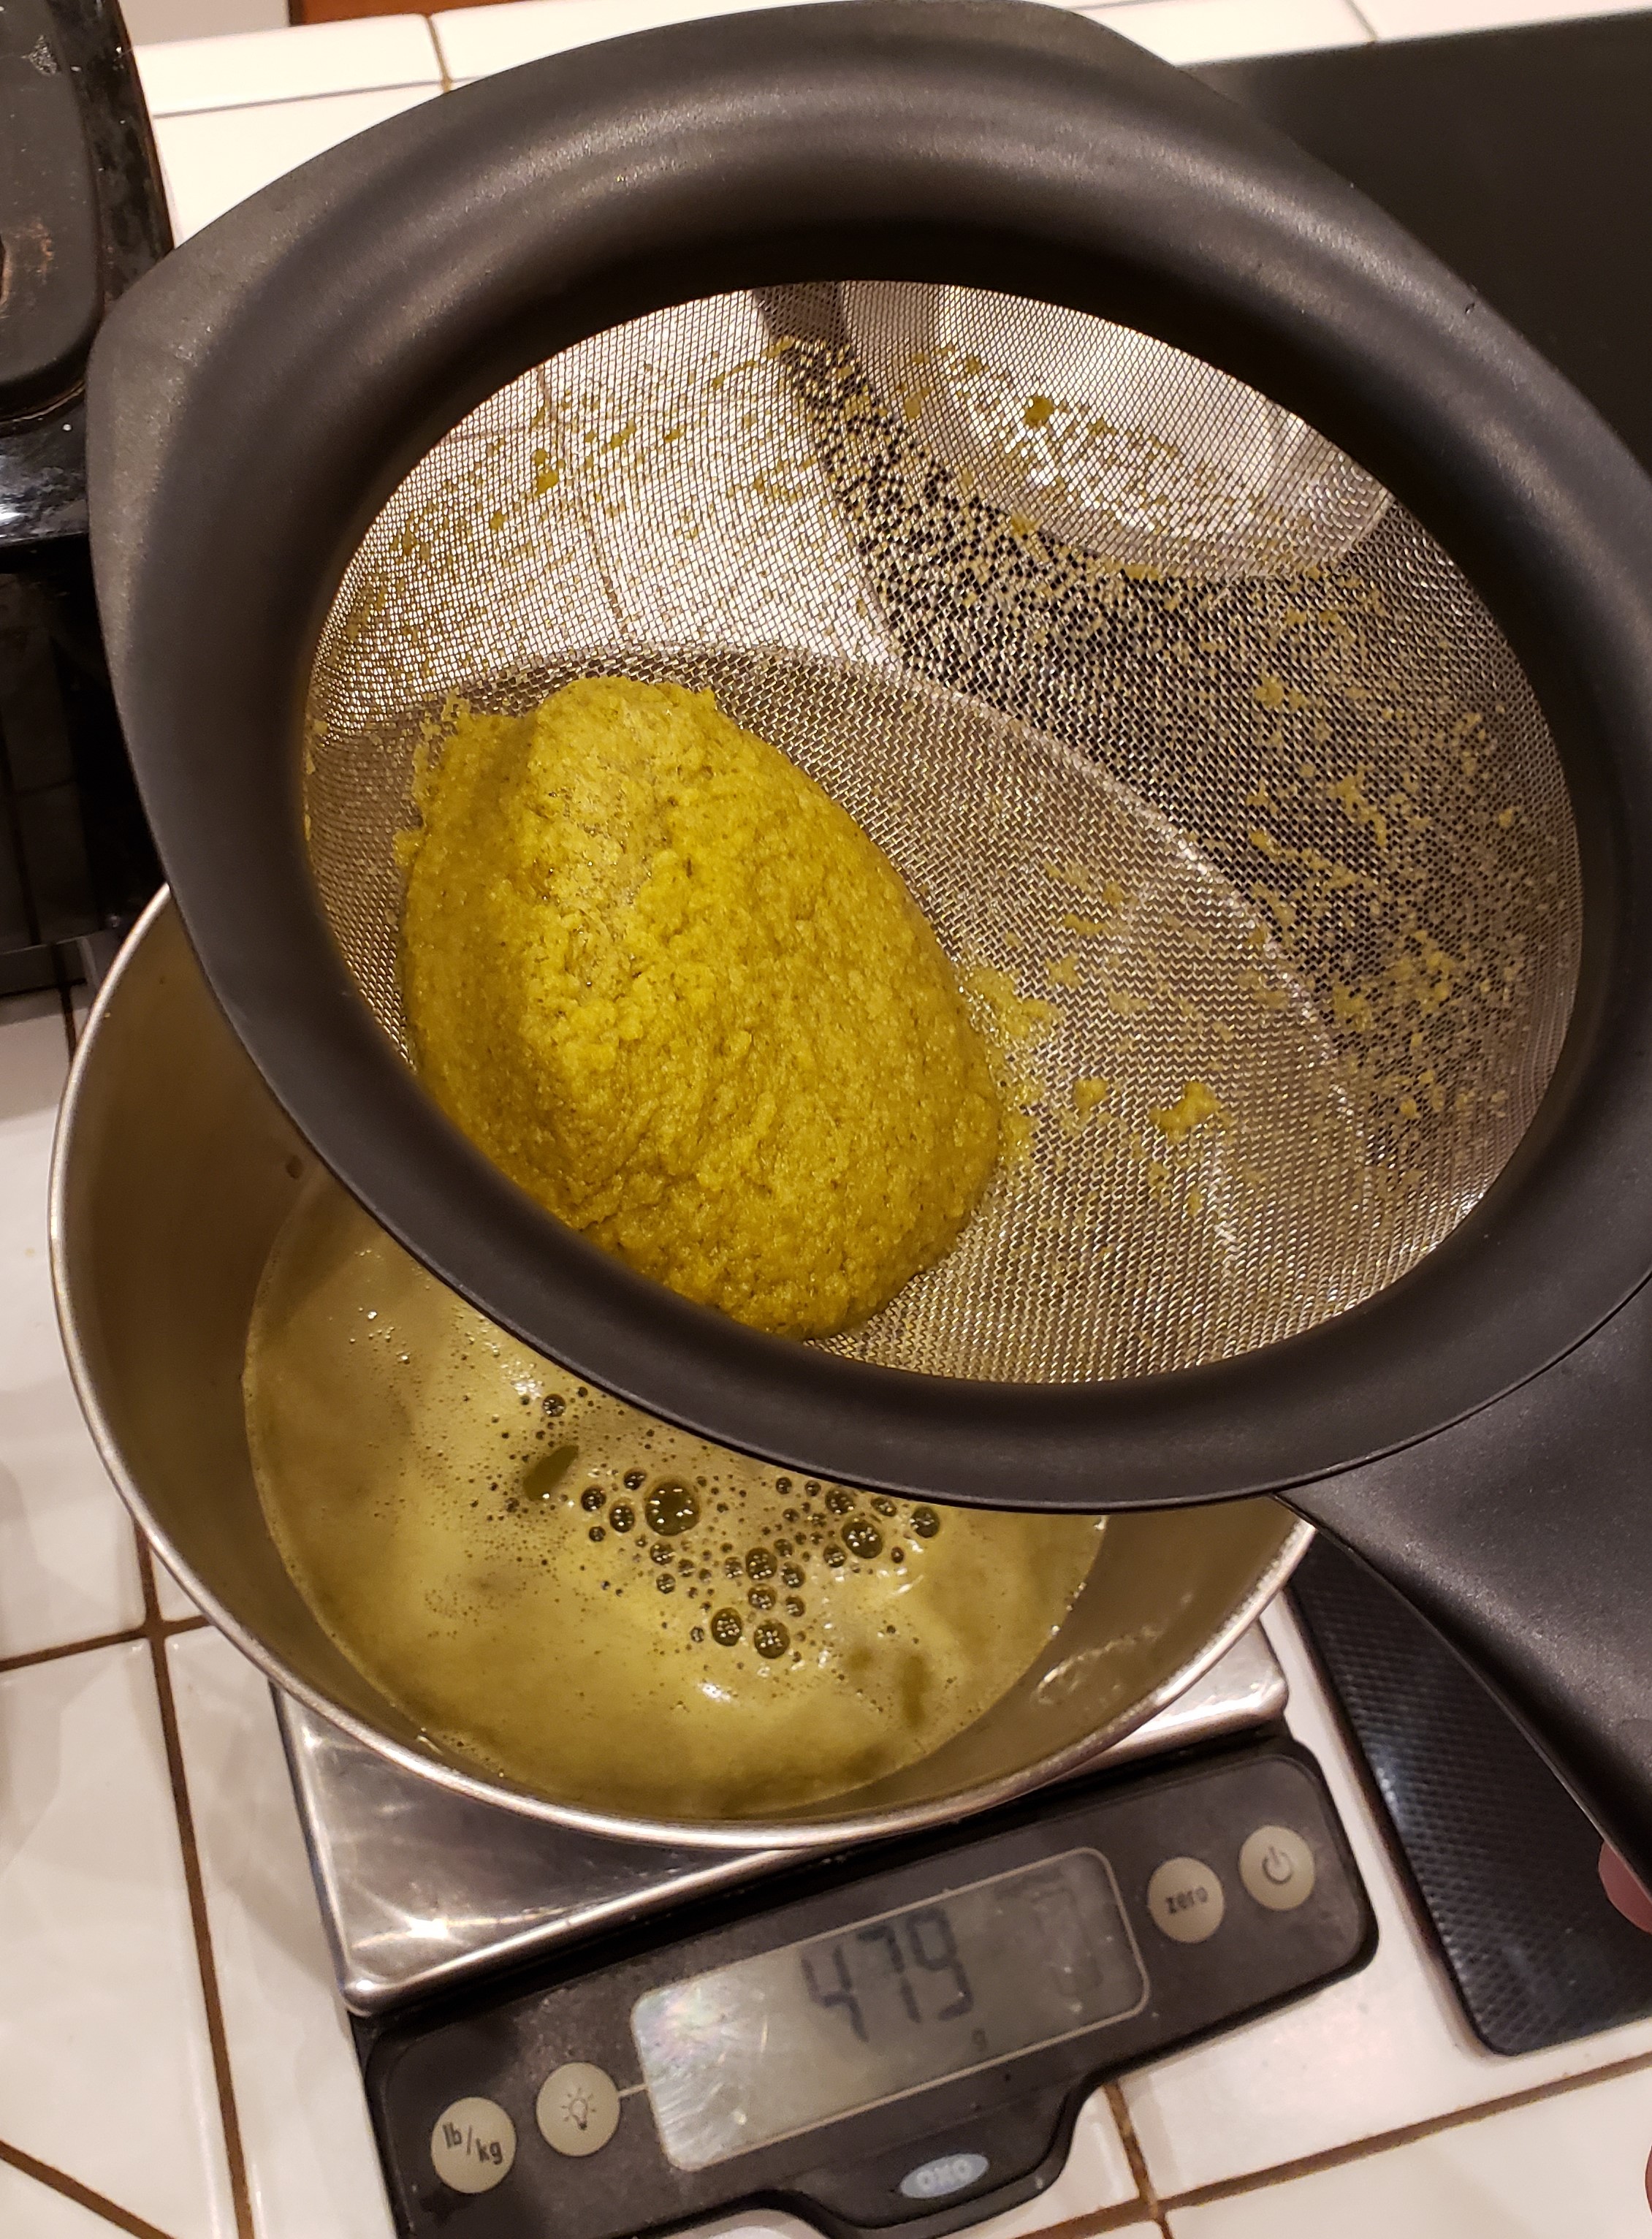
Next, you dump everything out into a blender and blitz like crazy. It whips some air in, but gets the mixture smooth. I strained it with a fine mesh strainer to get the chunkiest parts out.
This is where the most fatal flaw of my first batch came in. It is a really watery mixture at this point, and you want it to stick to your food. Xanthan gum is often used to add a little thickness. Check your favorite hot sauce, I bet it is in there. It can go wrong if you add too much though. I had about 500g of sauce, and it was suggested to use between 0.5 and 1g per 250g of hot sauce. Basically a 2-4% mixture. I did just under 2g, very hard to measure with a kitchen scale, and mixed it up in the blender. All set it went to the bottle.
The final grade is about a C-. It has a few major issues. I love garlic, but the raw garlic in this is really forward. The biggest problem is that it is too thick. Xanthan gum can make things kind of slimy if you use too much. I used way too much. The recommendation was not super helpful for some reason. It was ok at first, but after a day, it was a thick, but pour-able, slime. Time for a second version
Major lessons learned:
I used two pint jars, one quart would have been more efficient. Less room lost to the glass weight up top.
Use less garlic, it goes a long way in this sauce.
~2% Xanthan gum solution is way too much. I need a new way to measure.
Round 2
Undeterred, I set off with a new batch and tried again. This time I altered the pepper mix used. 145g poblanos, 115g jalapenos, 16g garlic. Less garlic and more jalapenos. It all fit well into a quart jar with a little tamping to coax it all down. Fast forward 9 days of hard bubbling and things are looking cloudy and smell right. Same deal as last time, blend, strain, and measure. I was right at 500g again.
This time I was more careful about the Xanthan gum. I would prefer to have it too thin, than too thick. To get a finer measurement, I would have to go for volume. My scale doesn’t do fractions of a gram. Instead, I took a teaspoon of the gum powder and weighed that. It came out to just about 4 grams. I had to add a tiny amount to get the scale to click over. A 1/4 teaspoon should be a gram. I have 1/8, and 1/16 teaspoon measuring spoons. I used the 1/8 one as a safe start. I slowly sprinkled it in while the blender was on low, and it looks like that did the trick.
My newly minted Green Goblin sauce is spicy without slapping you down. You can taste the peppers and a good serving of garlic. It is a little thin, and I might try more gum next time, but this is a good spot to start. The first one foamed more because of the gum, and less this time prevented foaming. I gave away 3 bottles for people to test, and kept one for my own cooking. The green sauce is good, but I prefer red sauces mostly. I will have to track down more peppers and make something different next time.
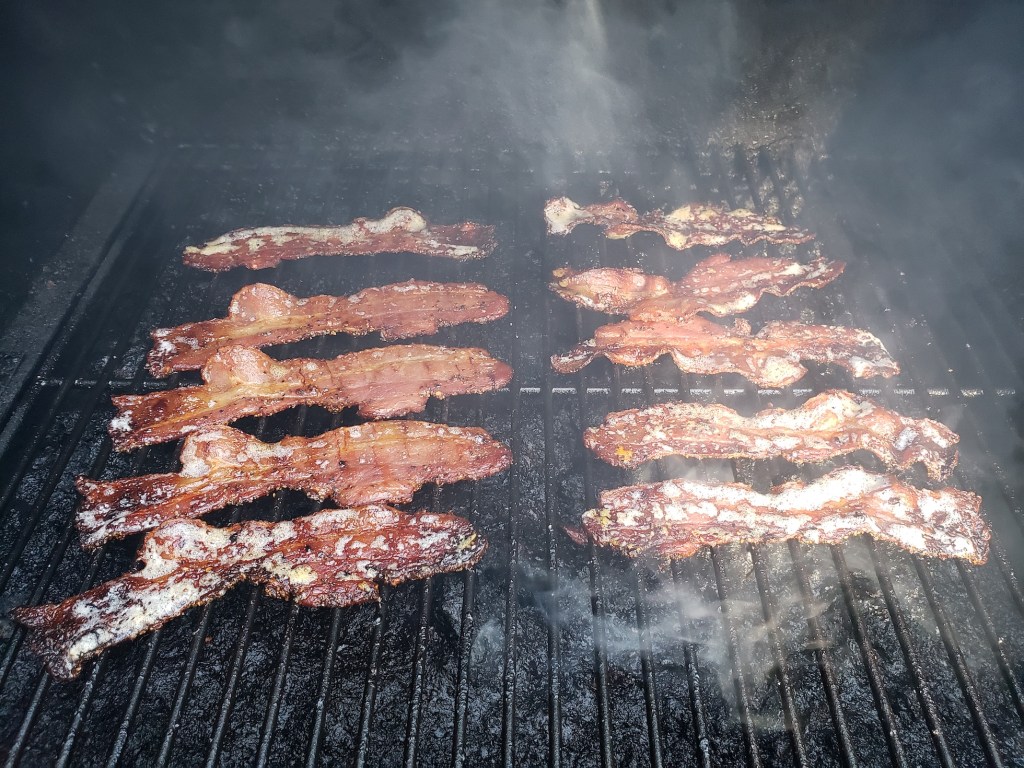
Like a towel on an intergalactic trip, nothing says “I’m prepared for a hurricane” like hurricane rations. No hurricane rations are better than smoked bacon. I am taking Lucky’s thick cut peppered bacon and hickory smoking it at 325F. 30 or so minutes ought to do it.
Hurricane Dorian is right around the corner and we still don’t know if it will be standoffish or come up close and give us a big hurricane hug. As usual I have learned some lessons from this go around and will be updating the guide when it is all over. Hard to believe this picturesque landscape will soon harbor harsh winds and torrential rains. I hope everyone stays safe and sane through the ordeal. Good night and good luck!
Two years ago I pulled my old smoker out and gave it a complete overhaul. It needs a little help again. Nothing dramatic, but the paint is chipping up with rust blisters in places. Best to get to that before they become dramatic.
A heavy grit flap sander pad on my angle grinder did a good job of cleaning off the paint and exposing fresh metal. I think I used a wire brush last time, but this works a lot better. So much better in fact that it revealed a lot more bad paint than I had originally thought. I had sites all over the smoker that needed grinding and repainting.
Out came the high temp primer and paint. I basically ended up repainting 75% of the smoker. That was a lot more dramatic that I set out to do, but I figure it is a lot cheaper than having a rusted out smoker.
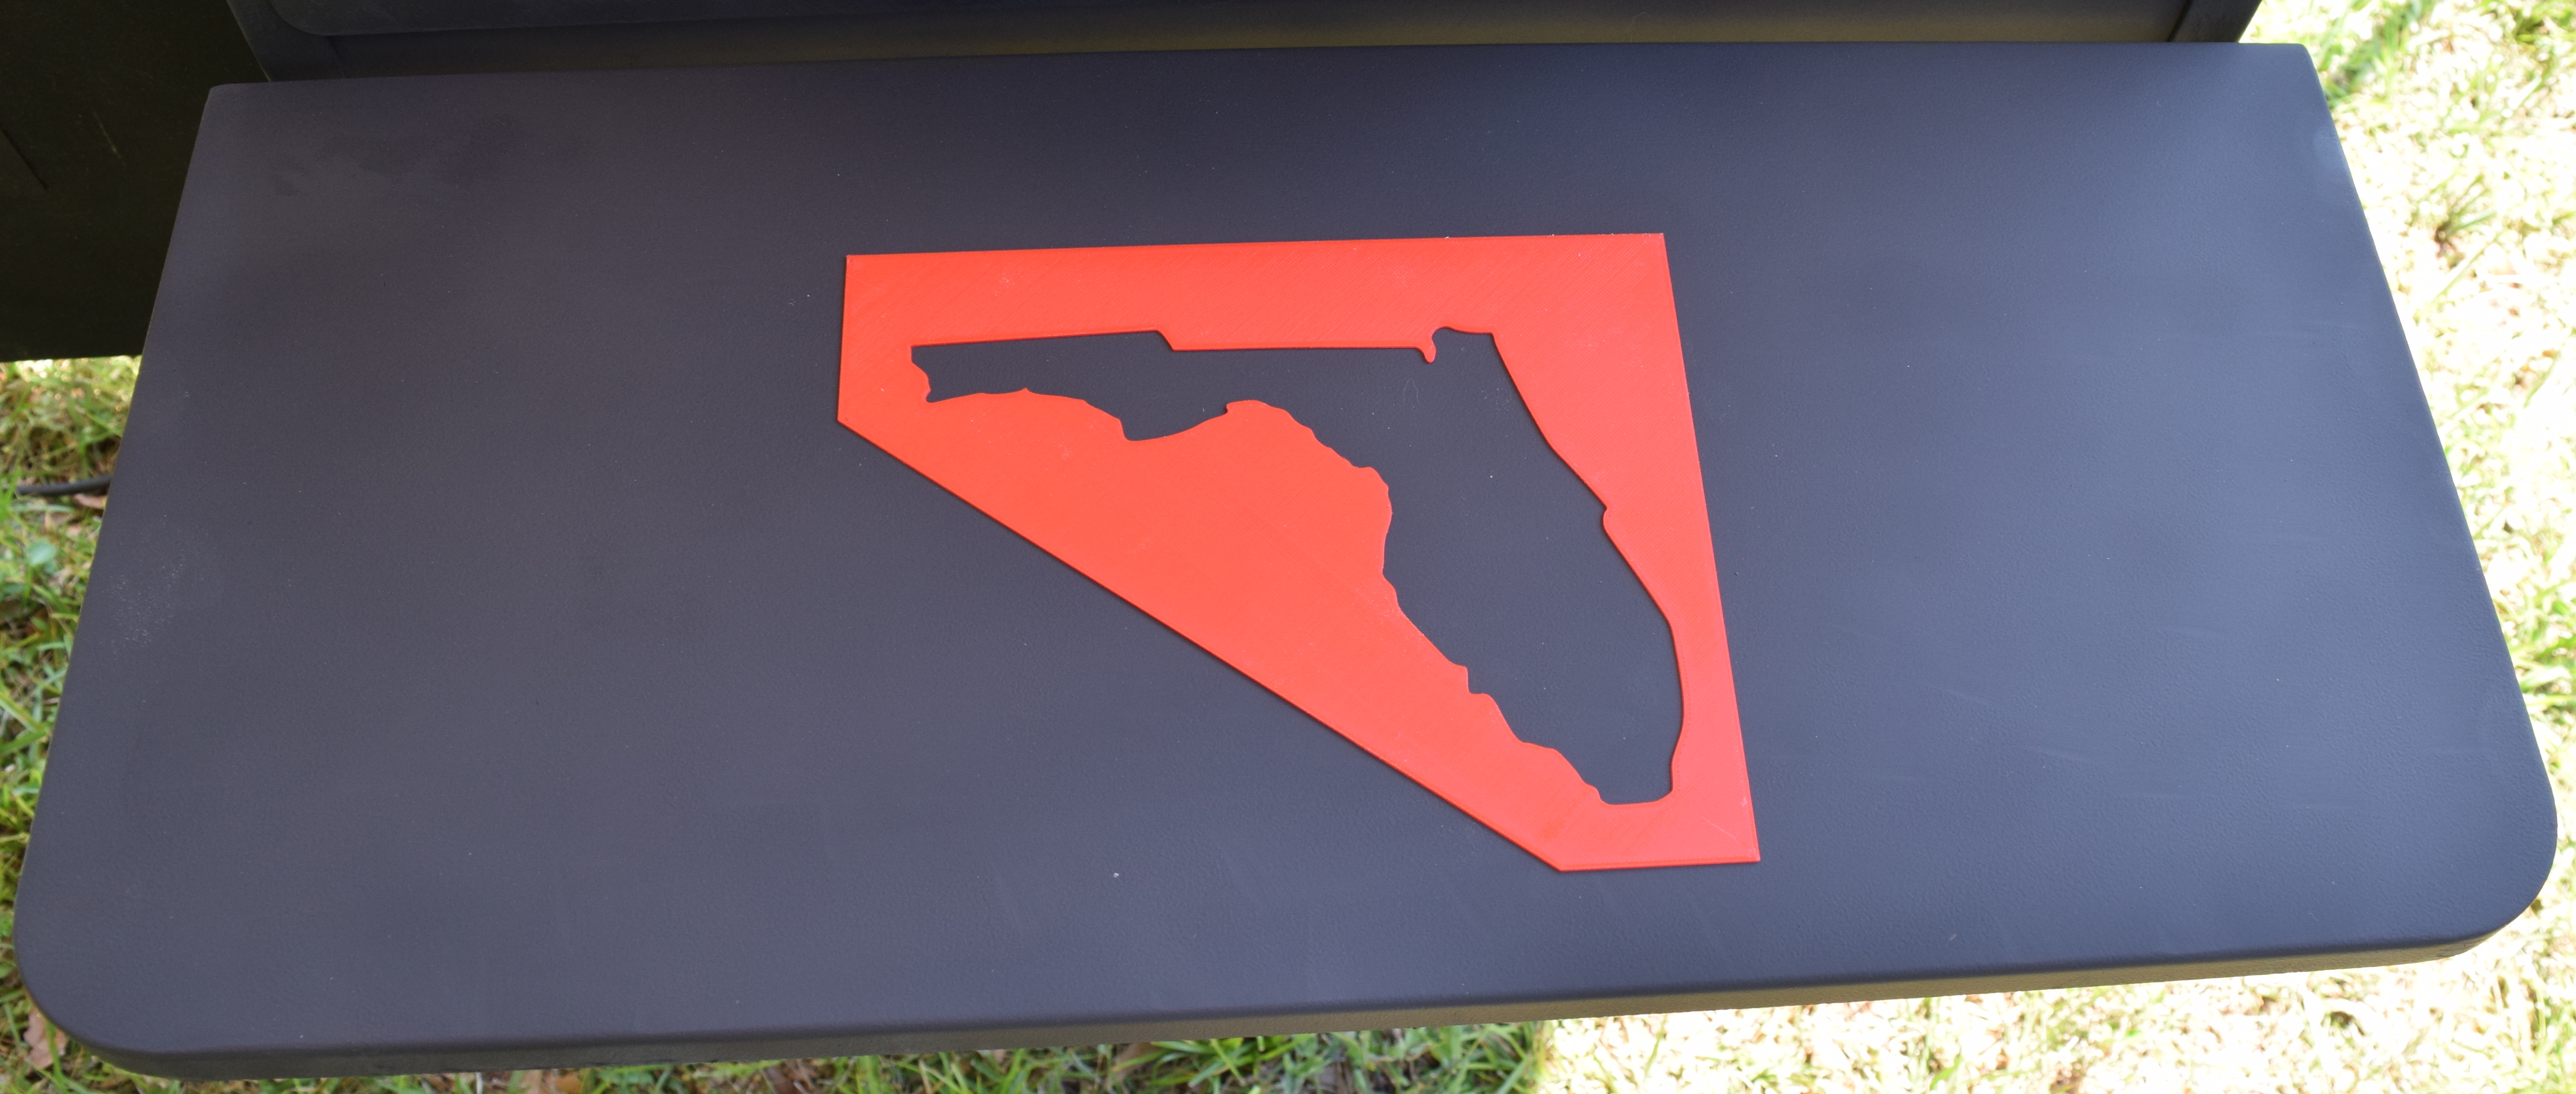
With it safe from the elements for a few more years I had one trick to install. I wanted to customize the front fold out table. I figured some kind of Florida BBQ sign was in order. I was going to make it look like a caution road sign, but then thought that would reflect poorly on my cooking. Watch out for this guy’s food!
I would historically use my mill to cut a stencil from thin plywood or hardboard. I haven’t used it in ages and need to spend a day on repairs and re-learning how to use it. Instead I tried to 3D print a stencil. It can make finer curves and lines anyways.
I sprayed the back with some light hold adhesive hoping that would keep spray paint from seeping under while letting me pick the stencil back up. I masked around it and sprayed away.
The edges weren’t as clear as I had hoped, so for the BBQ letters I sprayed more adhesive and make sure to rub it onto the grill table really hard. That probably would have gone ok, but I sprayed too much paint and it seeped under. Multiple lighter passes would have worked better. I used too much adhesive and it left residue on the table. I will wait a few days for the paint to really cure well before hitting it with a solvent. I also didn’t mask enough and got a little over spray on the grill.
Up close it has a lot of issues, but from afar it isn’t bad. All lessons learned for next time. Maybe in 2 more years when it needs another paint touch up I will have a better plan for branding it. The smoker will be 11 years old at that point!
You can sous vide just about anything, but should you? I typically smoke ribs a few times a year, and mostly get pretty good results. Exact texture can be tricky, but honestly as long as you don’t dry it out or have it be way under cooked, they are always good. A foodie friend of my highly encouraged me to try sous vide ribs, so I took the jump.
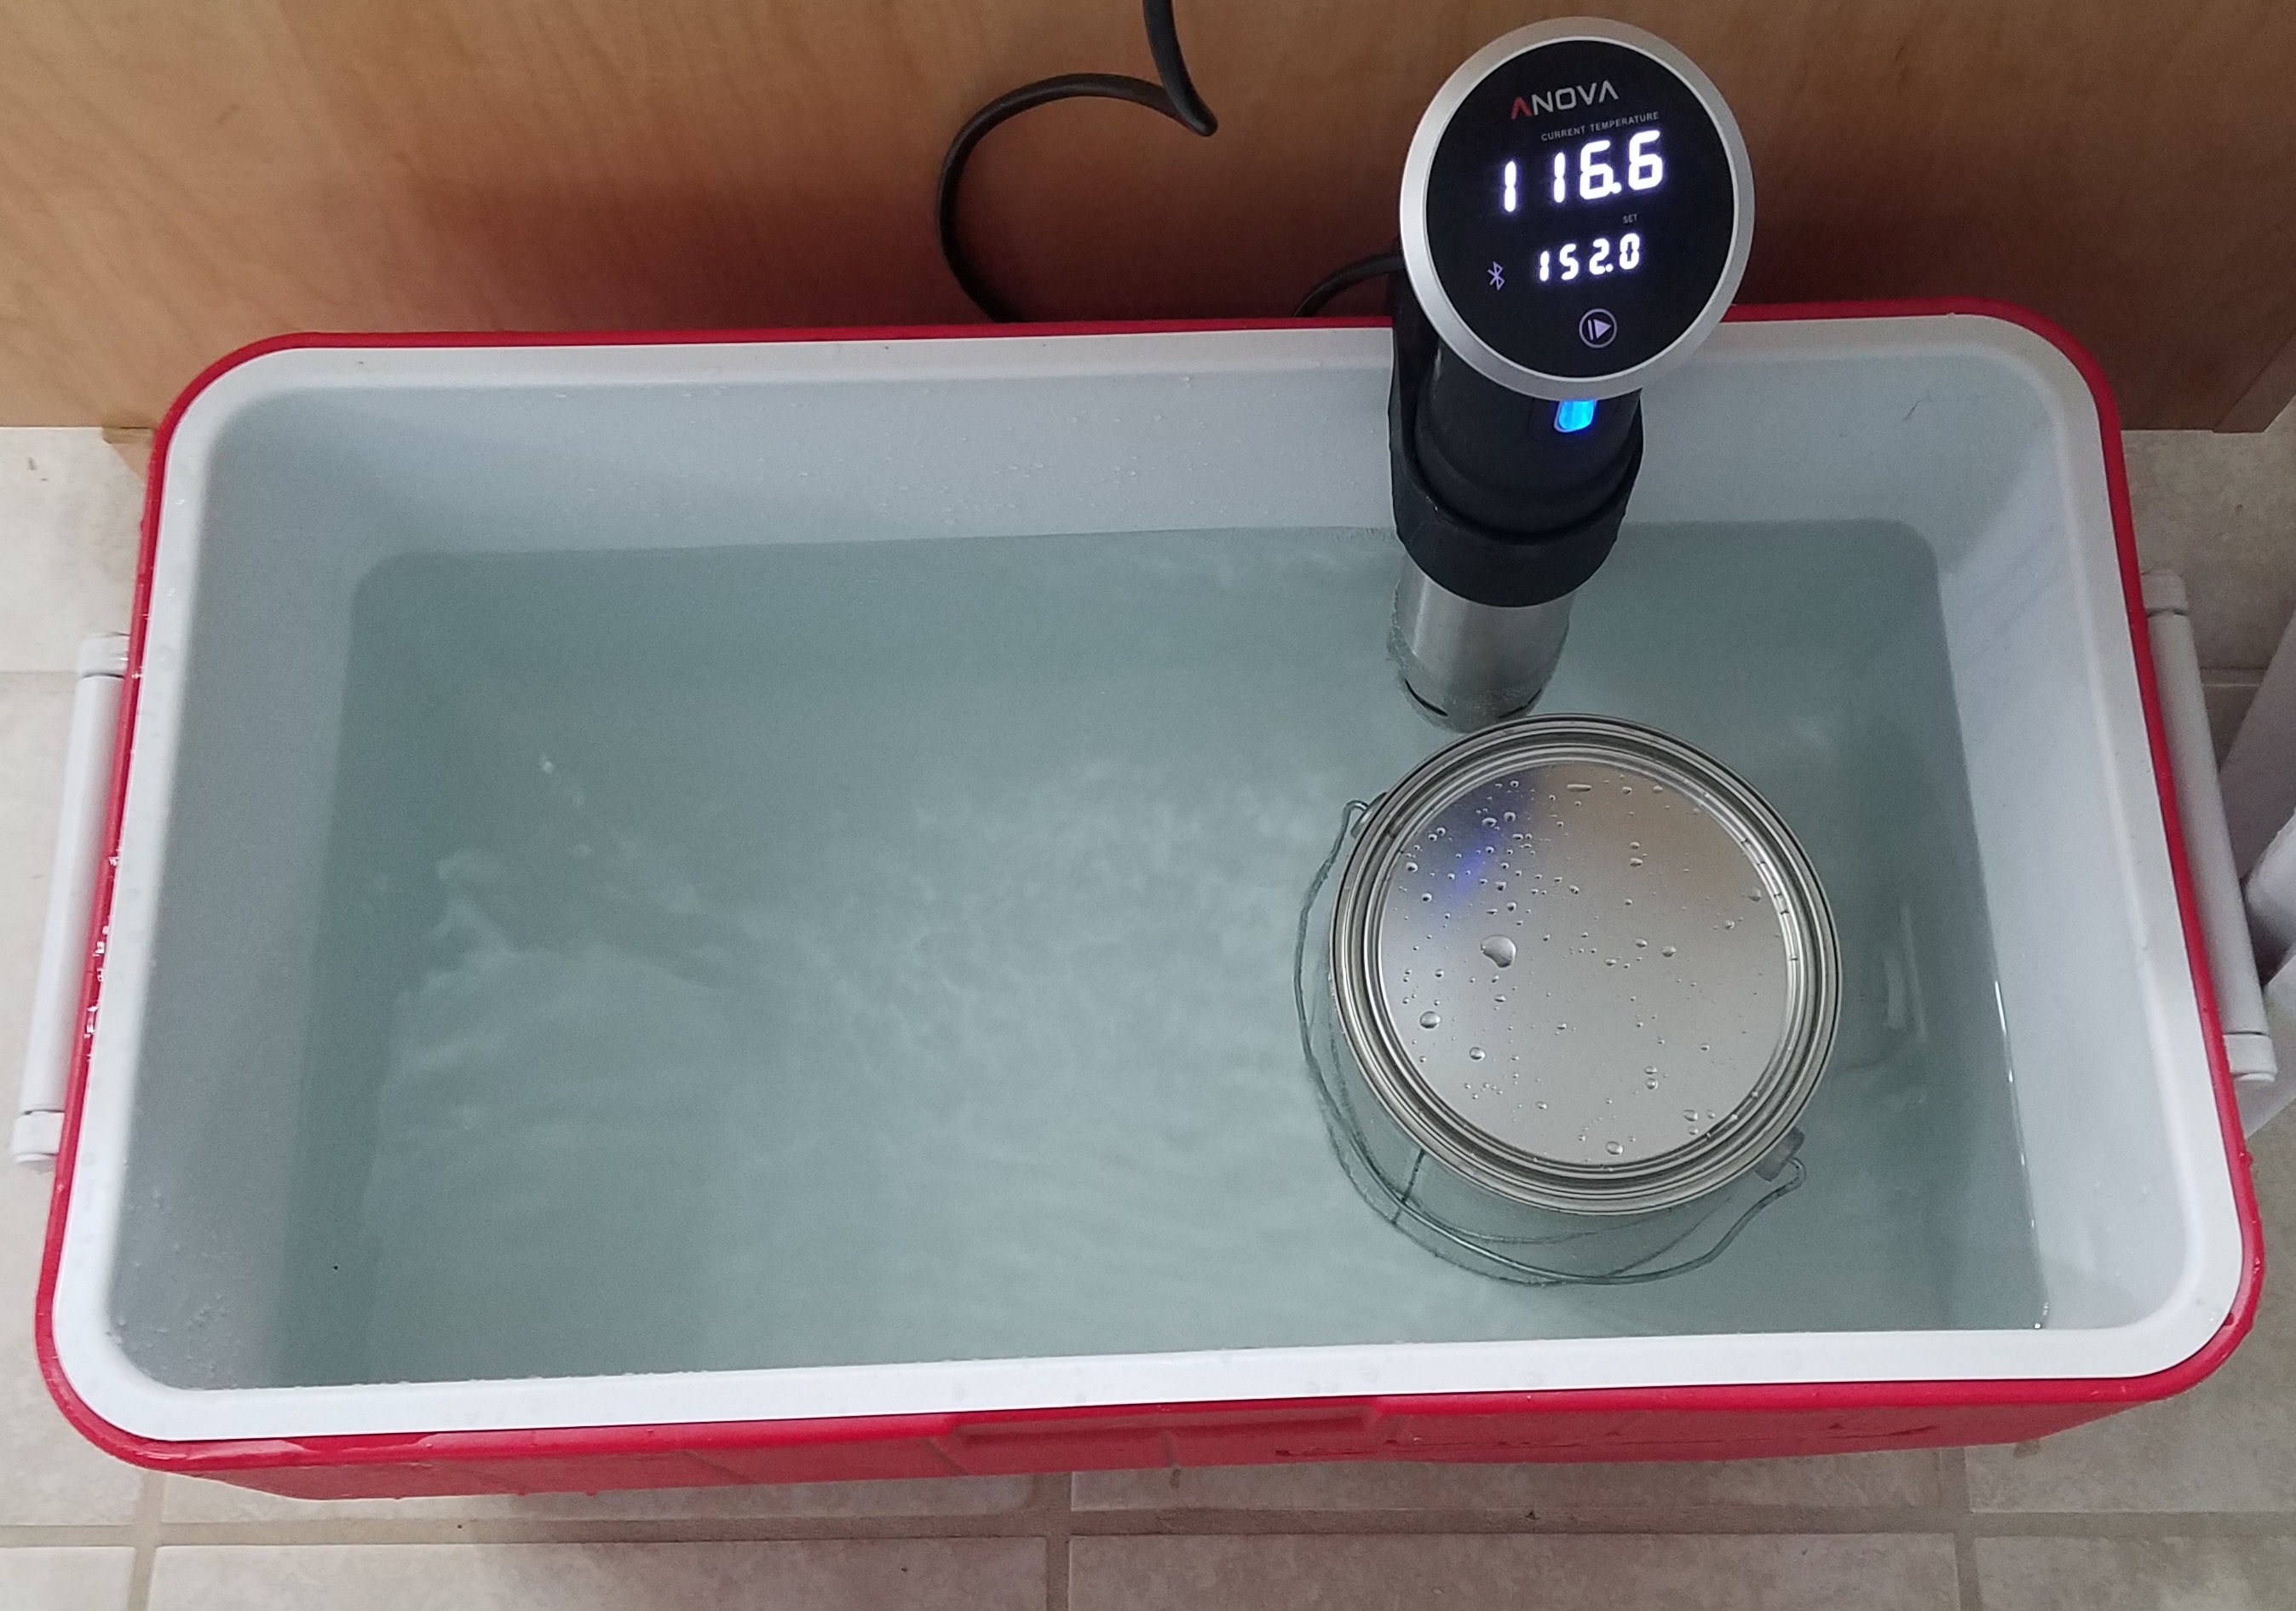
This will be a good chance to finally field test my franken-cooler. I have had it for over 6 months and haven’t actually used it for real until now. By my friends suggestion I read over this serious eats article on sous vide ribs. It is comprehensive and potentially more than you want to know about ribs. I wen’t with some st louis cut spare ribs because that was the sale of the week.
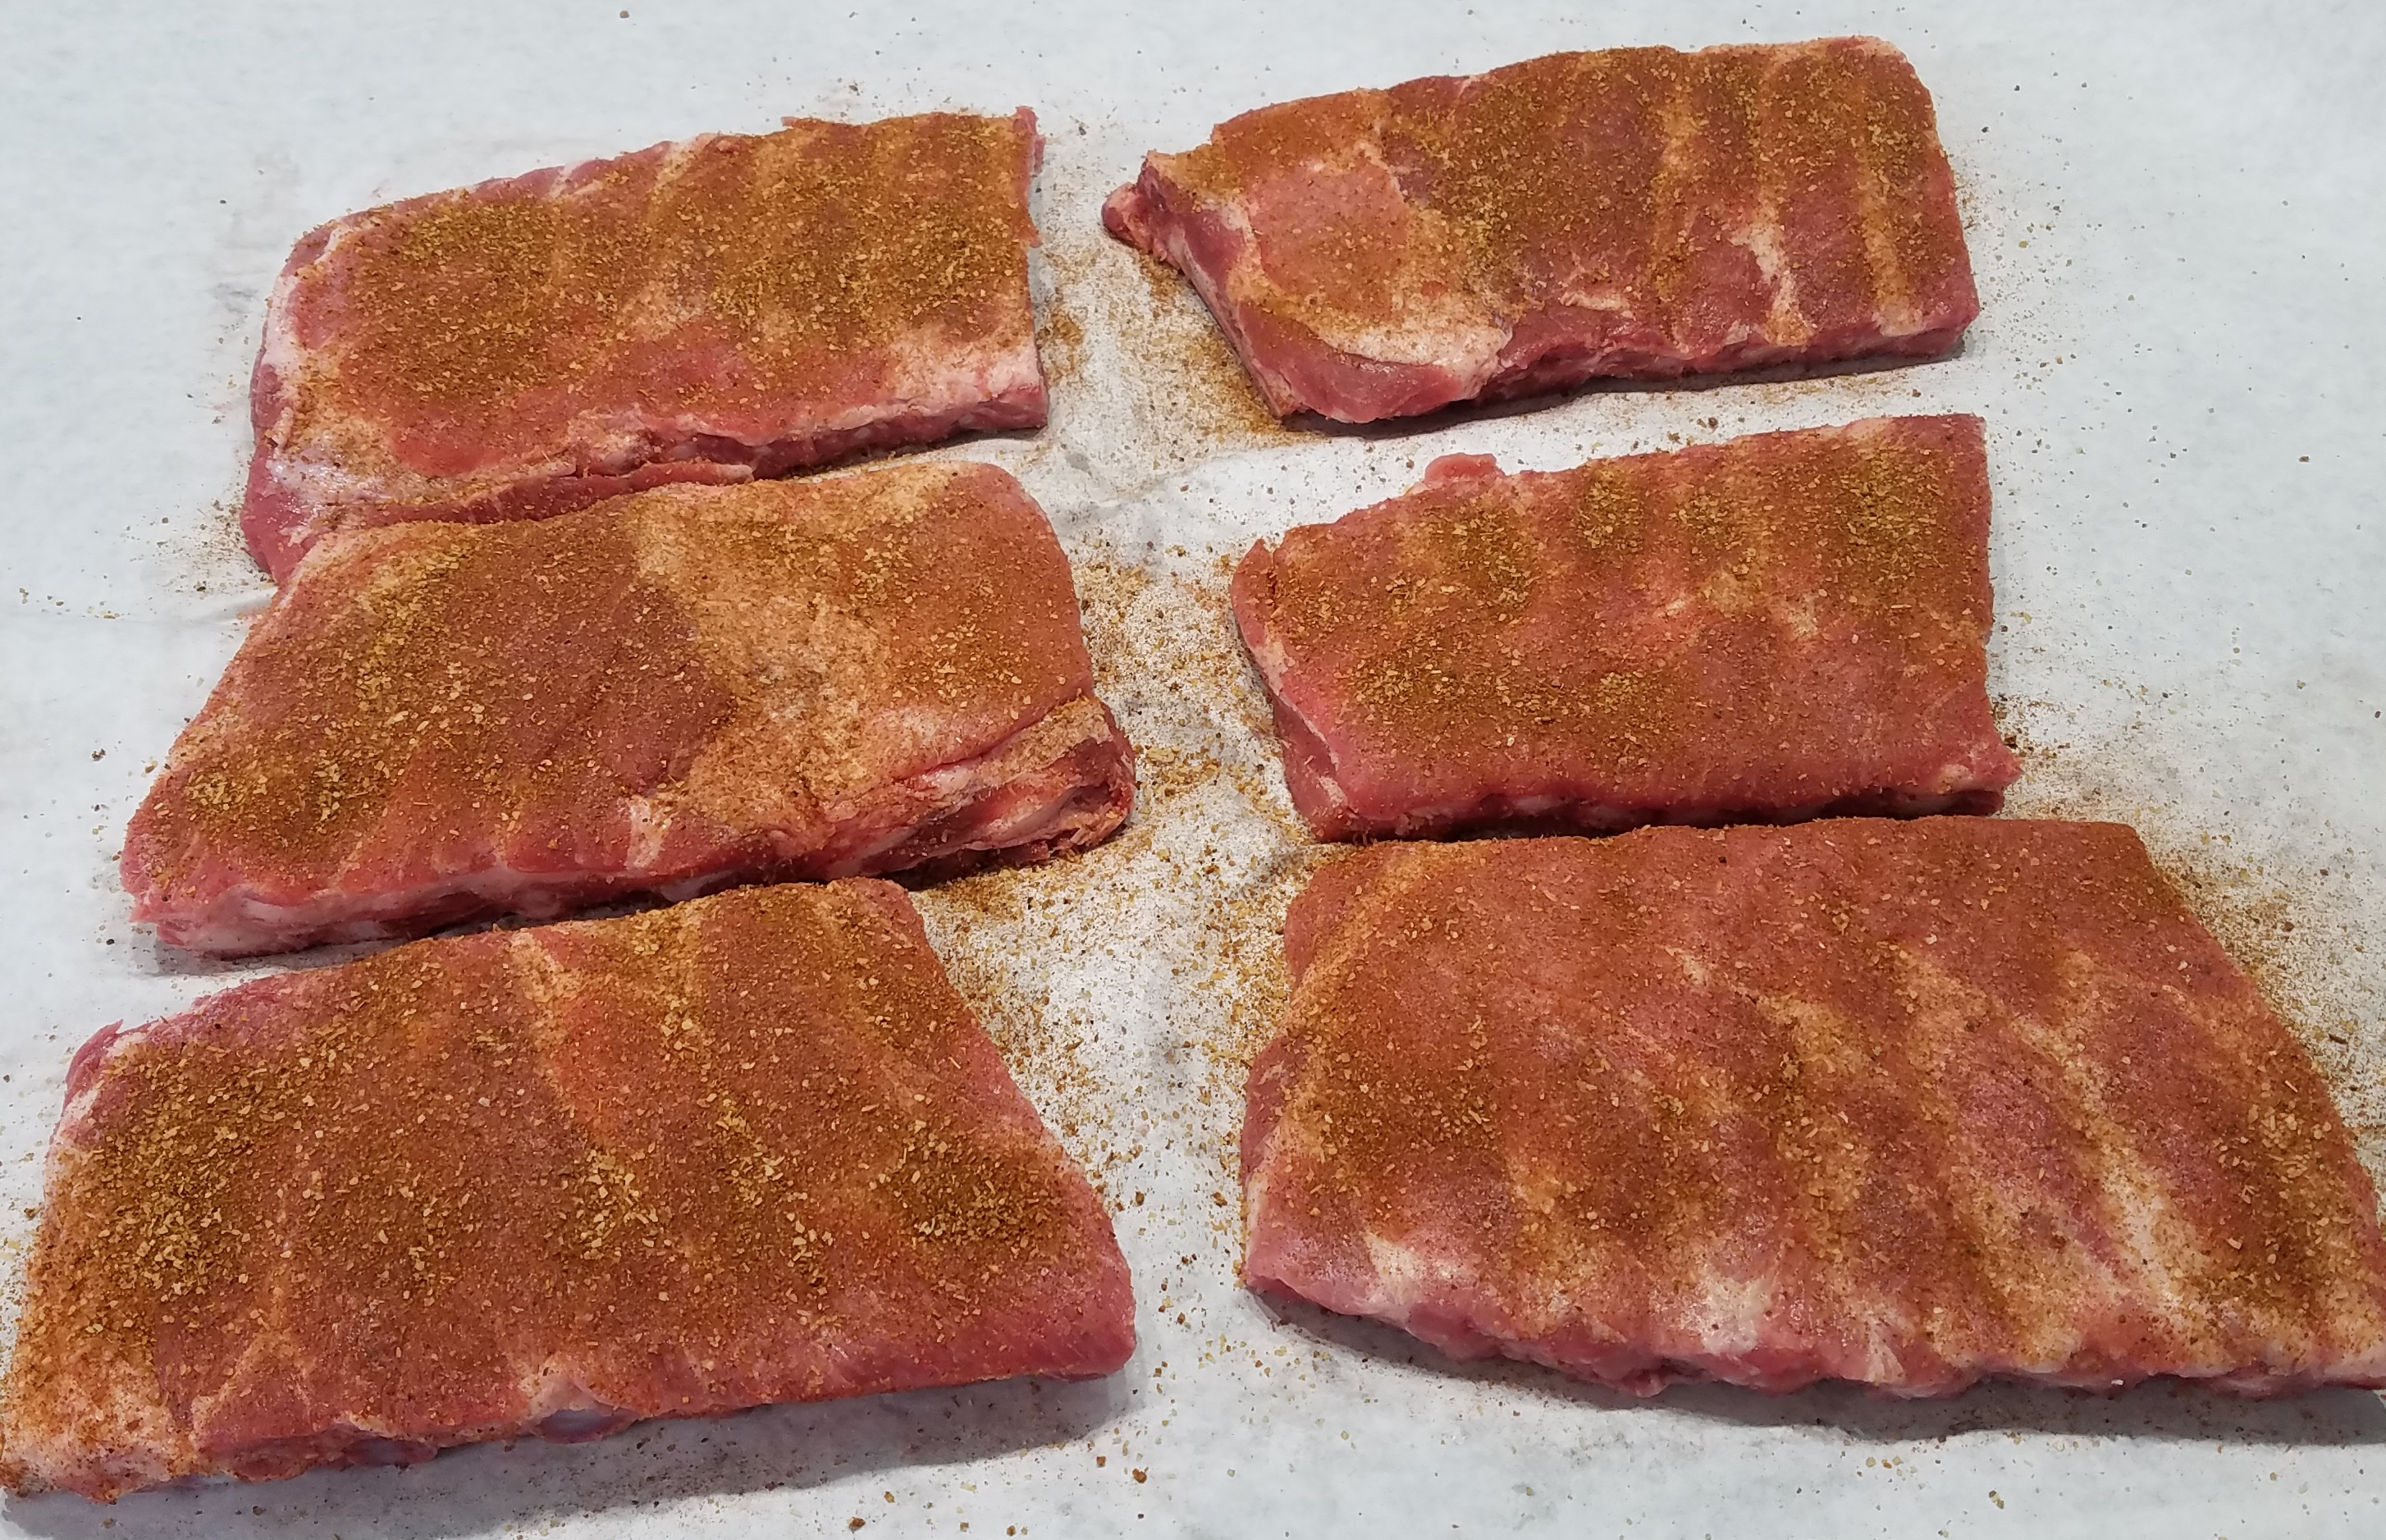
I went with a rub I had on hand, but did take the article’s note on salt to heart. I had an idea to help speed up the heatup time of the franken-cooler. That is a lot of water to bring up, and often the whole cavity isn’t full. I filled a new paint can with just enough sand so that it wouldn’t float. Pound for pound, water has 5 times the heat capacity of sand. It still took forever to come to temperature. Maybe some styrofoam weighed down with bricks would be even better. Maybe I will just not bother to worry about it next time, once up to temp the outside barely gets warm, so it has to be pretty efficient.
In they went at 152 for 24 hours. They looked and smelled good a day later, but there is one final step.
The instructions had an oven or grill finish. I opted to grill them for just a bit and throw a little bbq sauce on. This is kind of a lot of work for ribs, but smoking them isn’t exactly simple either with the wrapping and unwrapping.
The texture was amazing of course. There was a very consistent moisture level, rendering of fat, and soft pull apart amazingness. The flavor was good, because it is ribs. Still, I missed the smoke. I think in retrospect this might be a better method for baby backs. They are leaner and more susceptible to drying out.
Conclusion: yeah, these are really good. It took a lot of time, but if you are around isn’t too big of a deal. Maybe not my default method, but I am gonna have to try again with baby backs.
After a bit of a letdown trying to make my own jerky recipes I backed up to using commercially available seasoning packs. My favorite to date had been the Backwoods brand Original flavor. I picked up some hickory flavor, mixed up a batch, and loaded my cannon!
I have been using a Number 30 Disher for the last few jerky runs. The recipes haven’t always been the best, but loading and shooting the jerky has gone super smoothly. The hickory isn’t my favorite flavor, but the batch did turn out well. For now I am back in the jerky saddle, but not as gung-ho as I was before. I am going to focus on testing different seasoning packs and fine tuning my drying technique for better consistency.
Those food scientists and chemists jerky companies employ might actually be worth their salt. I learned that salt is important to jerky, but it isn’t the only factor. Something in the laundry list of unpronounceable ingredients really seals the deal flavor-wise, and makes ground beef jerky’s texture ideal. I tried another few experiments with greater amounts of seasoning. They turned out all right, but still nowhere near as good as some of the seasoning packs I have used before. On the bright side, I am getting pretty good with my extrusion spiral.
These last batches happened a week or so before Christmas. I was really hoping to make something good, and replicate it once or twice for everyone as gifts. It was a flop. Probably going to start up again in the new year with a basic batch from one of the jerky companies. Once I get my confidence back with a few rounds of decent jerky I can try adding to their seasonings, or maybe attempt to pick out which of their magic ingredients make such a big difference. Until then, as Yoda says, failure can be the best teacher.
I have been wanting to try making my own bone broth for a bit, and it seems winter was scheduled for this weekend here in Florida. Happy winter everyone! Winter calls for soup. Green Chicken Enchilada Soup from I Breathe I’m Hungry to be exact. Well not exact, I can never follow see a recipe and not do at least some modifications. Her recipe calls for shredded chicken and suggests you can use a rotisserie chicken. Enter one of publix’s finest products.
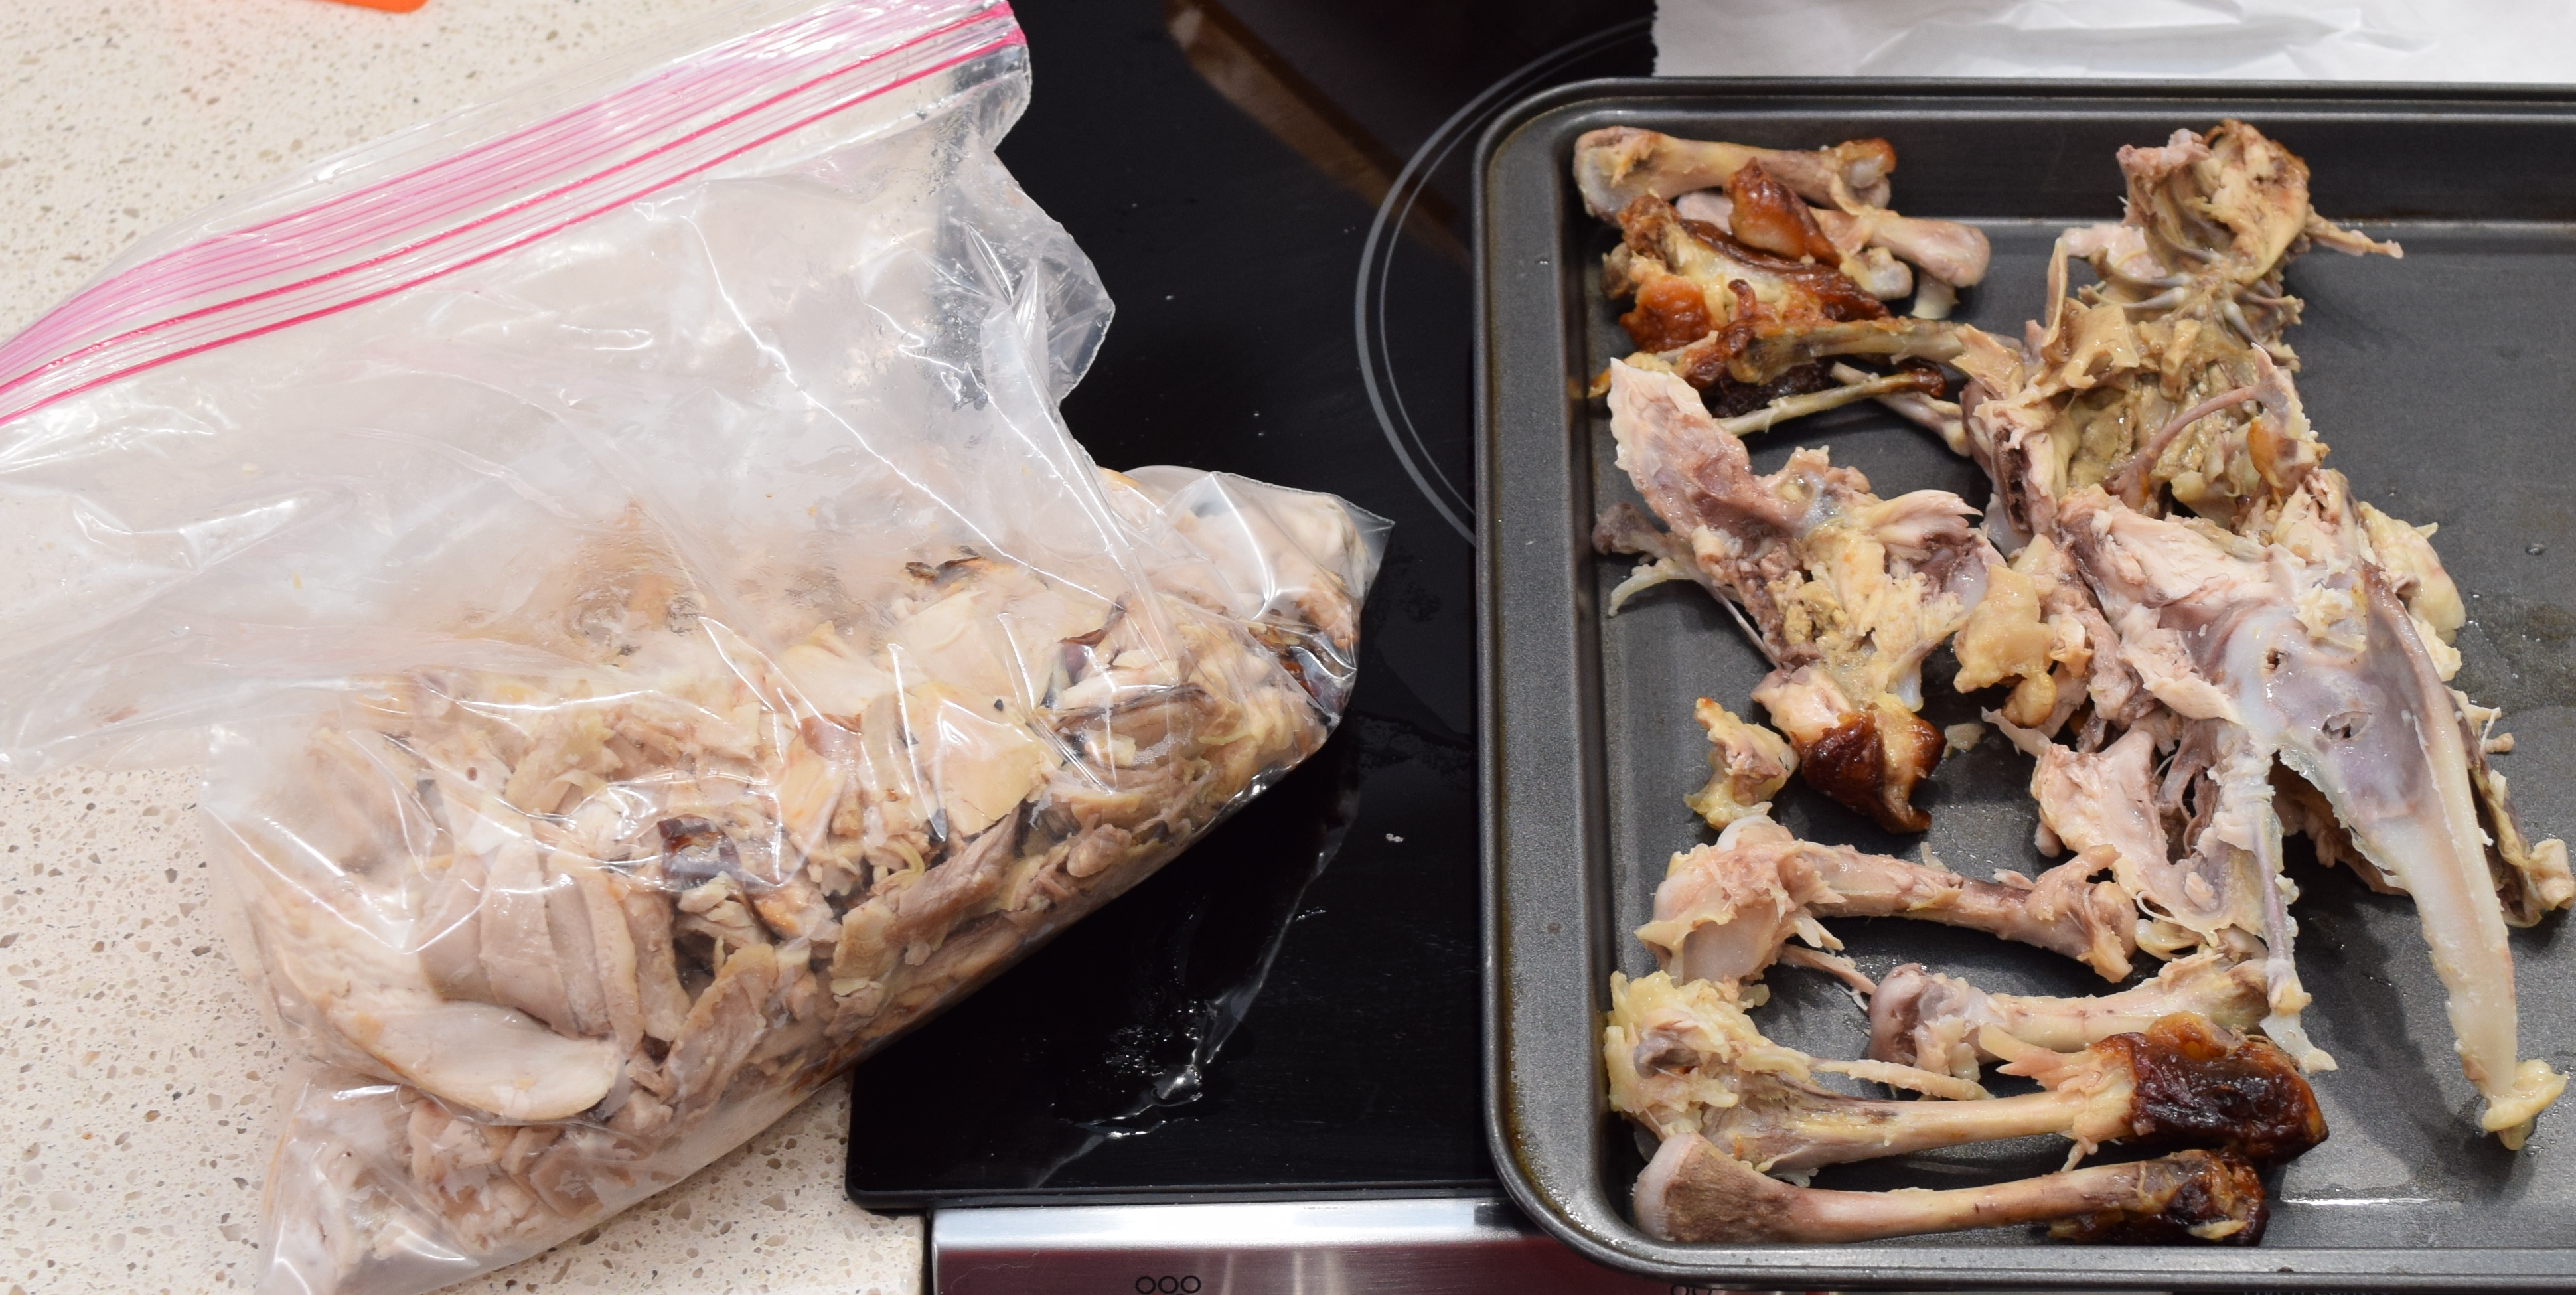
I cut up and divided the chicken into meat and bones. Most of the skin got snacked on with some set aside for the soup. Does mojo chicken skin belong in soup? It belongs in my soup! You are supposed to roast the beef bones for a bit in the oven, and I figured why not do the chicken bones as well?!
For the beef broth you will need to acquire some bones. As much as I love publix, here is where a local butcher can be really helpful. Mine got me two pounds of cut up pipe bones (industry term, think long bones like femurs and such), and two pounds of cut up knuckles for cheap. Sounds a little gross, but the connective tissue in those knuckles is part of the magic. Everything got roasted for about 40 minutes in the oven with salt and pepper.
On second thought, including the chicken may not have been my best plan. They look pretty burnt. I guess that size difference matters. I normally like the pan leftovers, but a lot of it was chicken fat, so instead of scraping it all into the crock pot I dumped it. Once again, trying to get fancy has bit me in the bum.
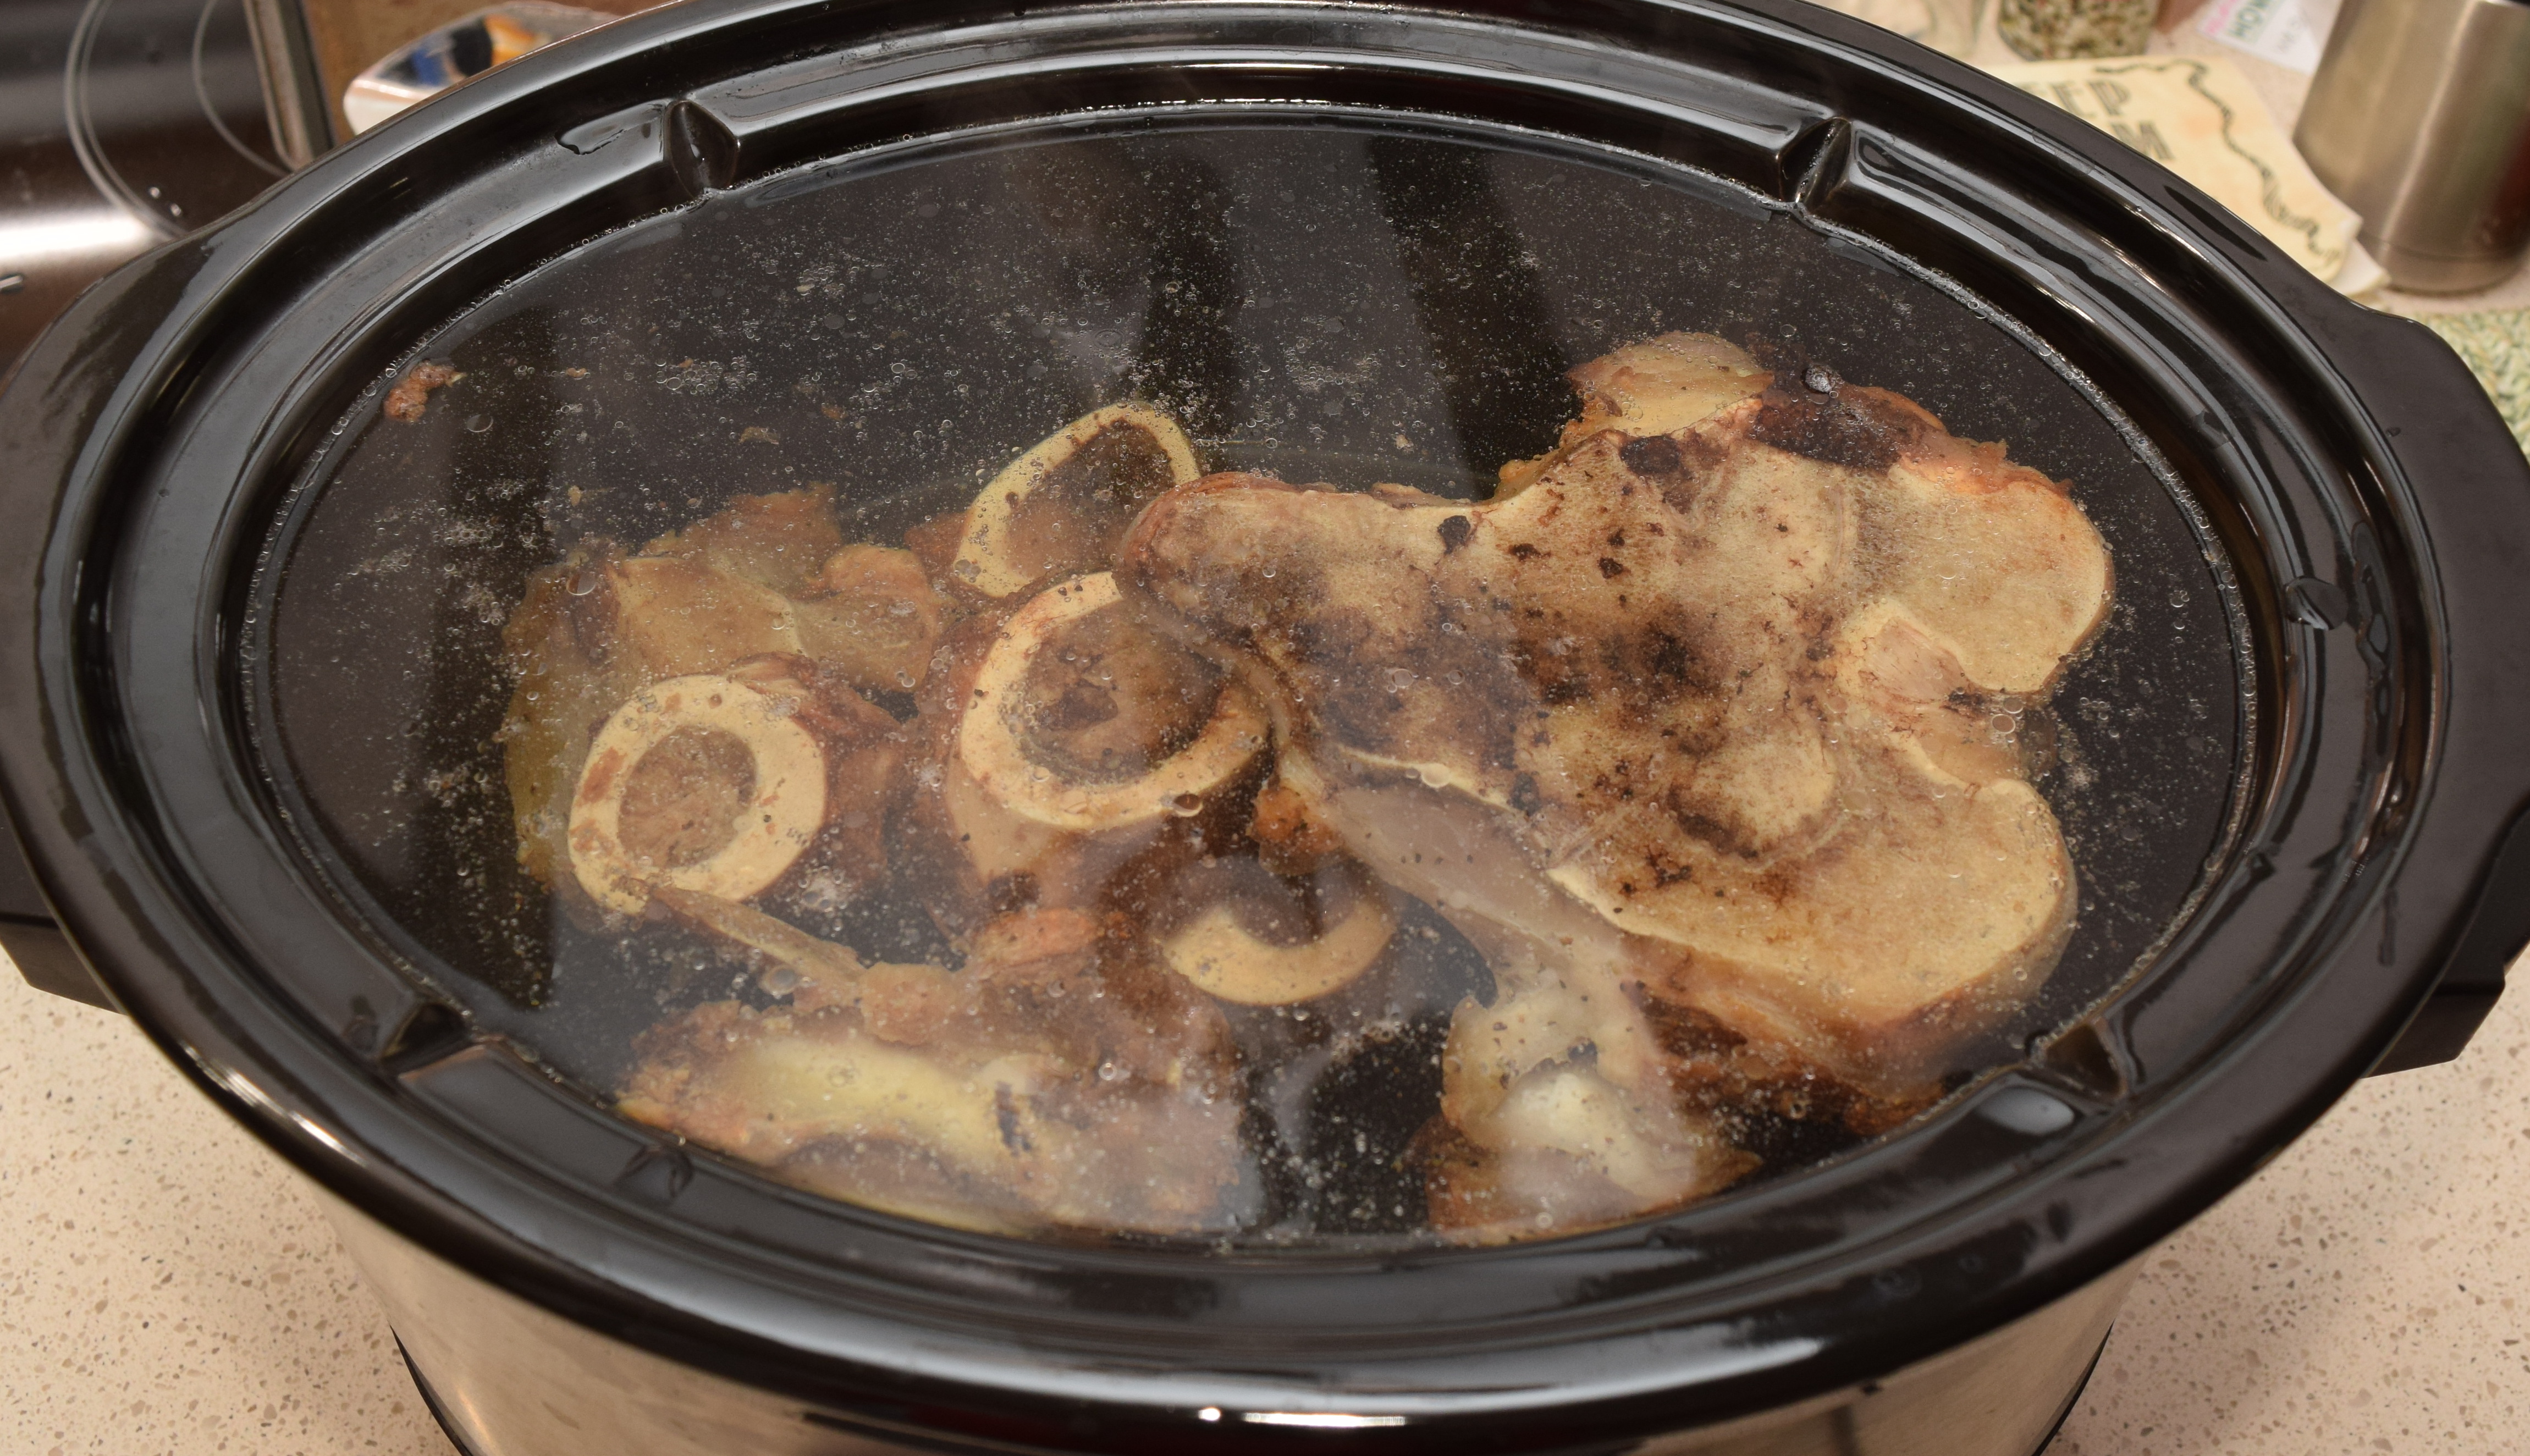
The beef bones got dumped into the crock pot with a few splashes of apple cider vinegar and salt and set on high for an hour or two to get it bubbling. Doesn’t look like much now, but hopefully in a day it will. Patience.
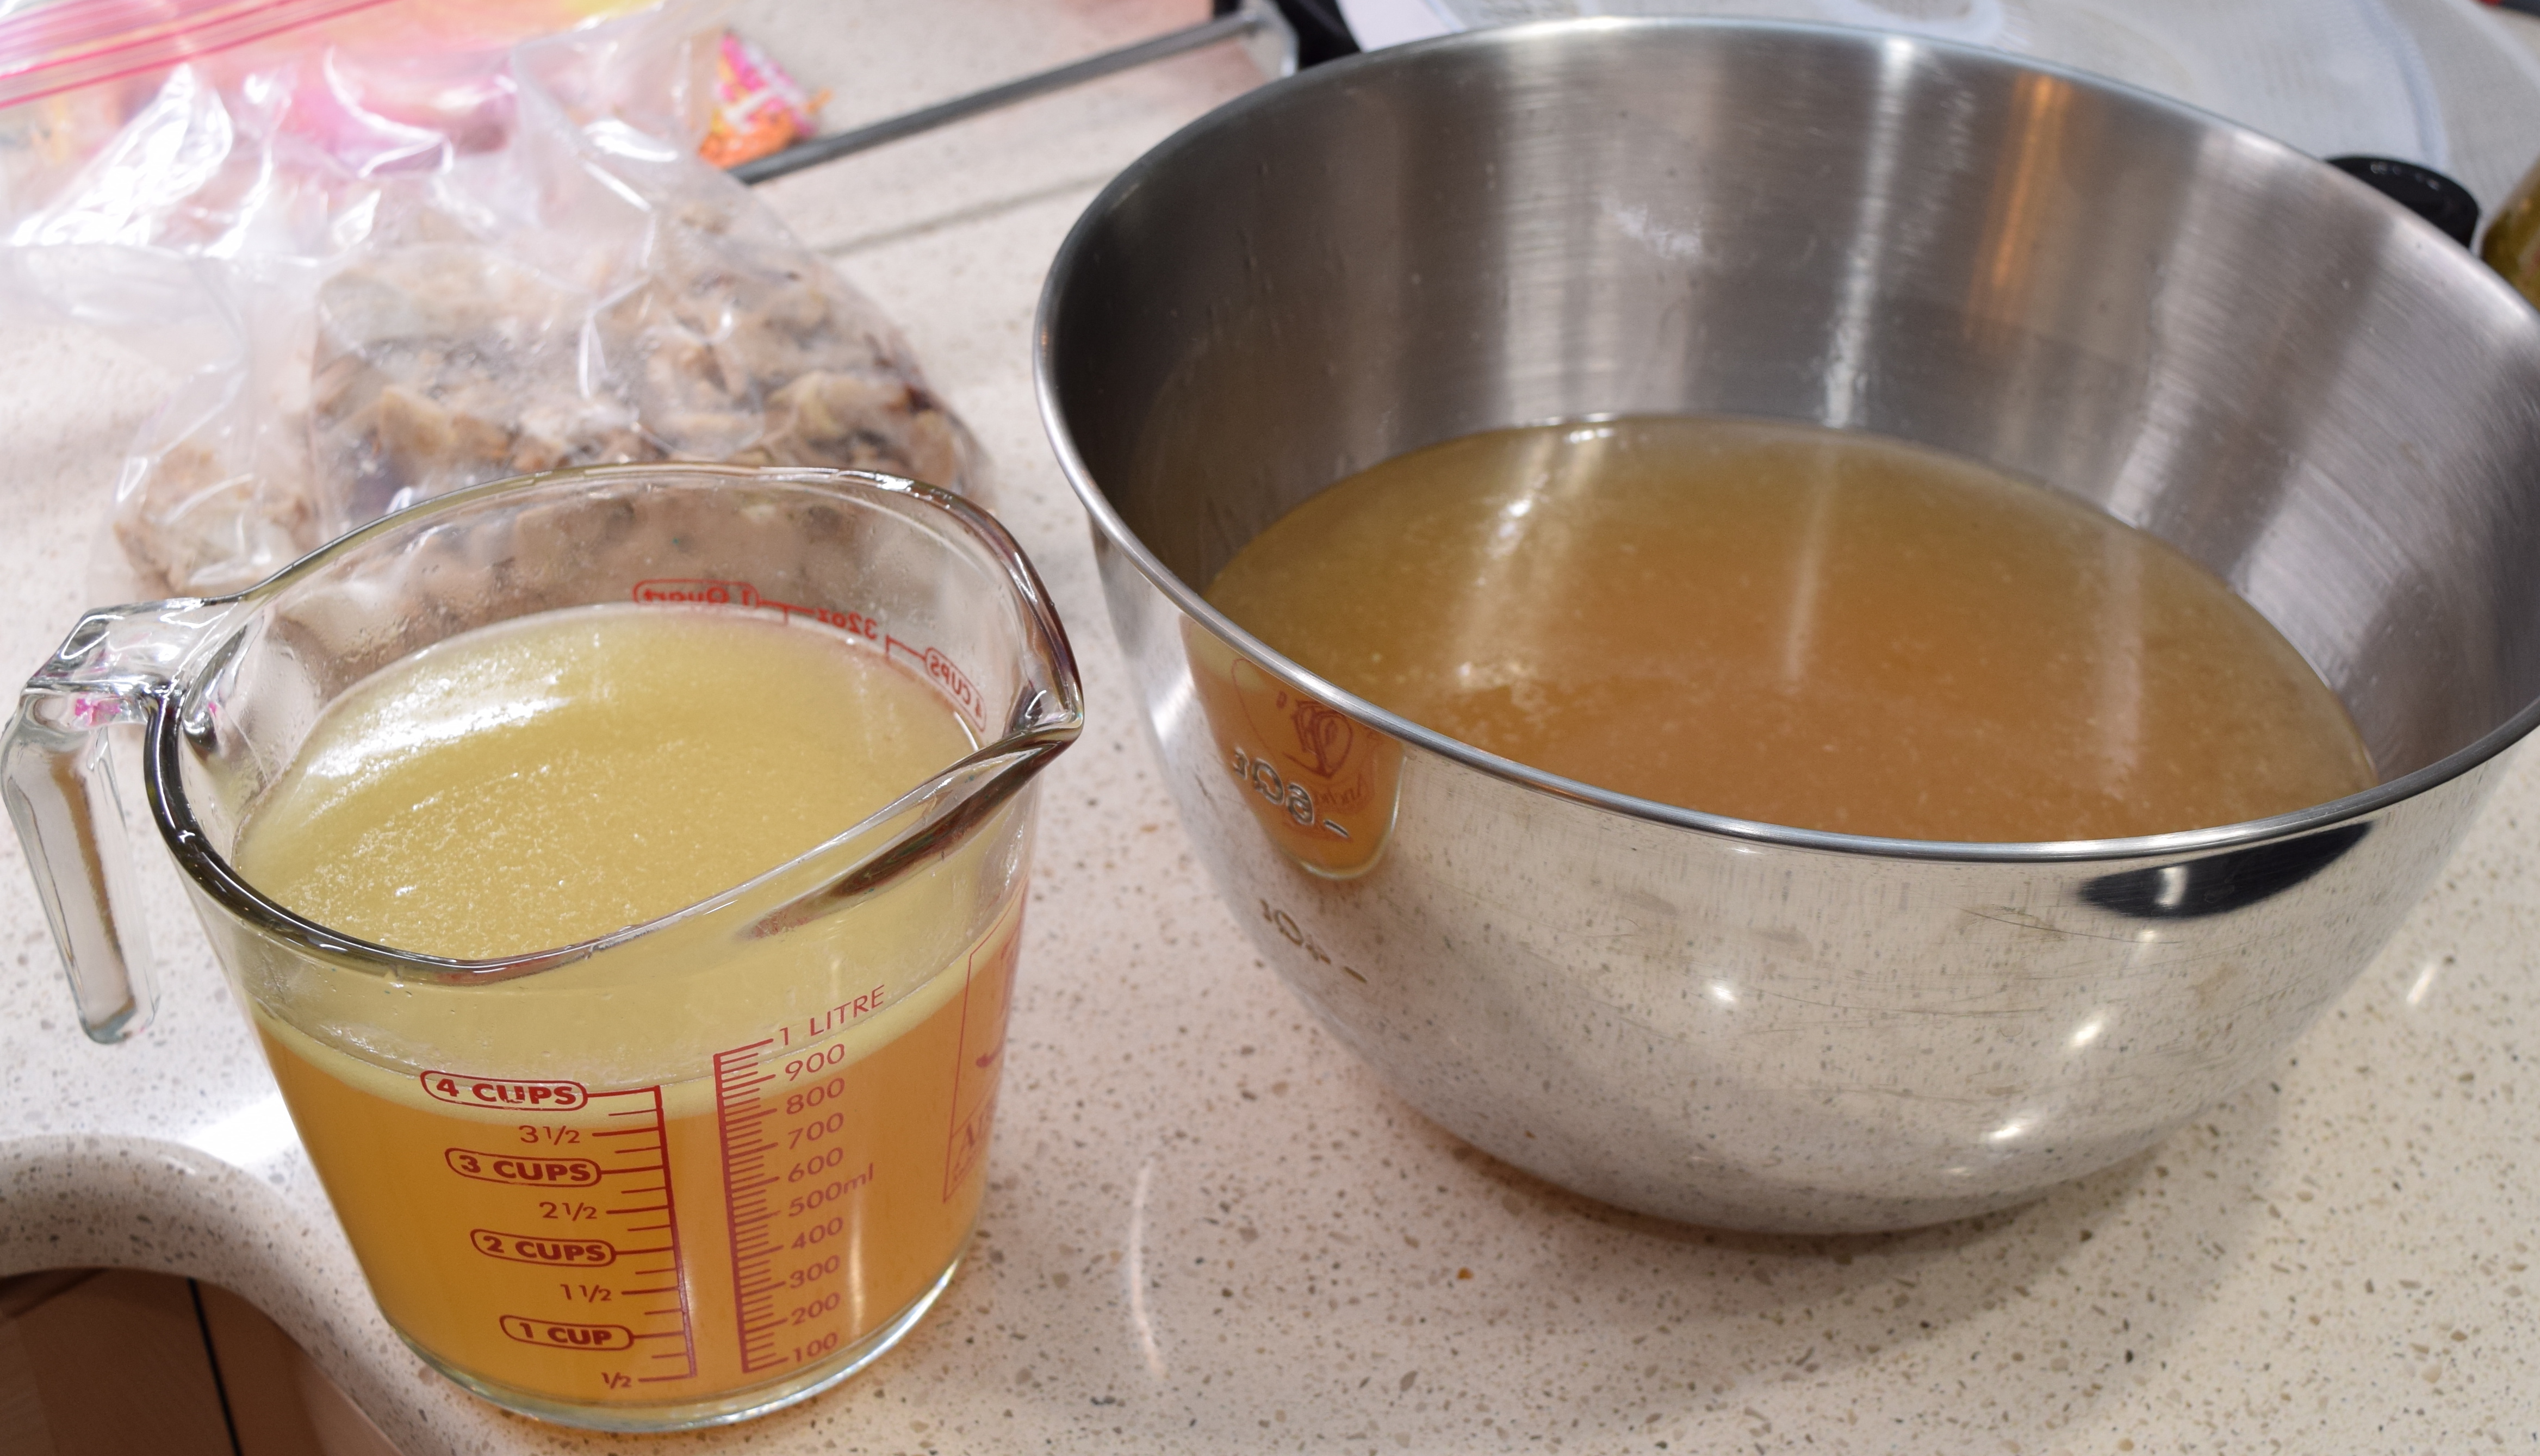
The next day it was looking cloudier and smelling a bit more like something good.
I pulled the bones and strained the rest through a very coarse mesh strainer. It has a silky kind of feel to it, but not tons of flavor. I wonder if that is right? Maybe I needed more knuckles and less pipe bone. Maybe more salt?
At any rate it made a really freaking good soup. I used 4 cups along with the shredded chicken to make a double batch. The only minor addition I did was to add some small portabella mushrooms while it simmered for a while. The recipe was good on its own, but the mushrooms really made it. Next time I will cut up and add more mushrooms.
I was pretty despondent after my miserable failure with my own recipe. I got cocky and flew too close to the sun. What does that get ya? Ruined jerky, that’s what! I mentioned in my previous post that research seemed to indicate that salt content was very important. While lean ground beef was still on sale I wanted to experiment with a very simple recipe and alter only the salt content. I measured out carefully four 1 pound batches of meat. Each got 1/4 tsp of cure, 1 tsp of garlic powder, 1oz water, a different amount of salt. No flying high here, we are staying well grounded with this recipe.
Of the previous two recipes, the simpler one had roughly 1/2tsp of salt per pound. It also had a ton of other ingredients which may have mucked up the results. I started with a 1tsp of salt version and moved up in increments of a whole teaspoon. The 4 tsp/lb version might be way too salty, but I would know the upper limit in that case. I noticed when mixing the 1tsp batch that my gloves came back very clean (left picture), but the 2tsp version (right) started getting rather sticky. Progress!
1tsp salt, not sticky
2tsp salt, much stickier
I continued mixing up batches going slowly and carefully so as not to miss anything. I don’t currently time how long I mix up the meat, but a voice activated smart phone timer might have to be in order. These 4 batches will go in the fridge for an overnight rest just like all my previous versions have.
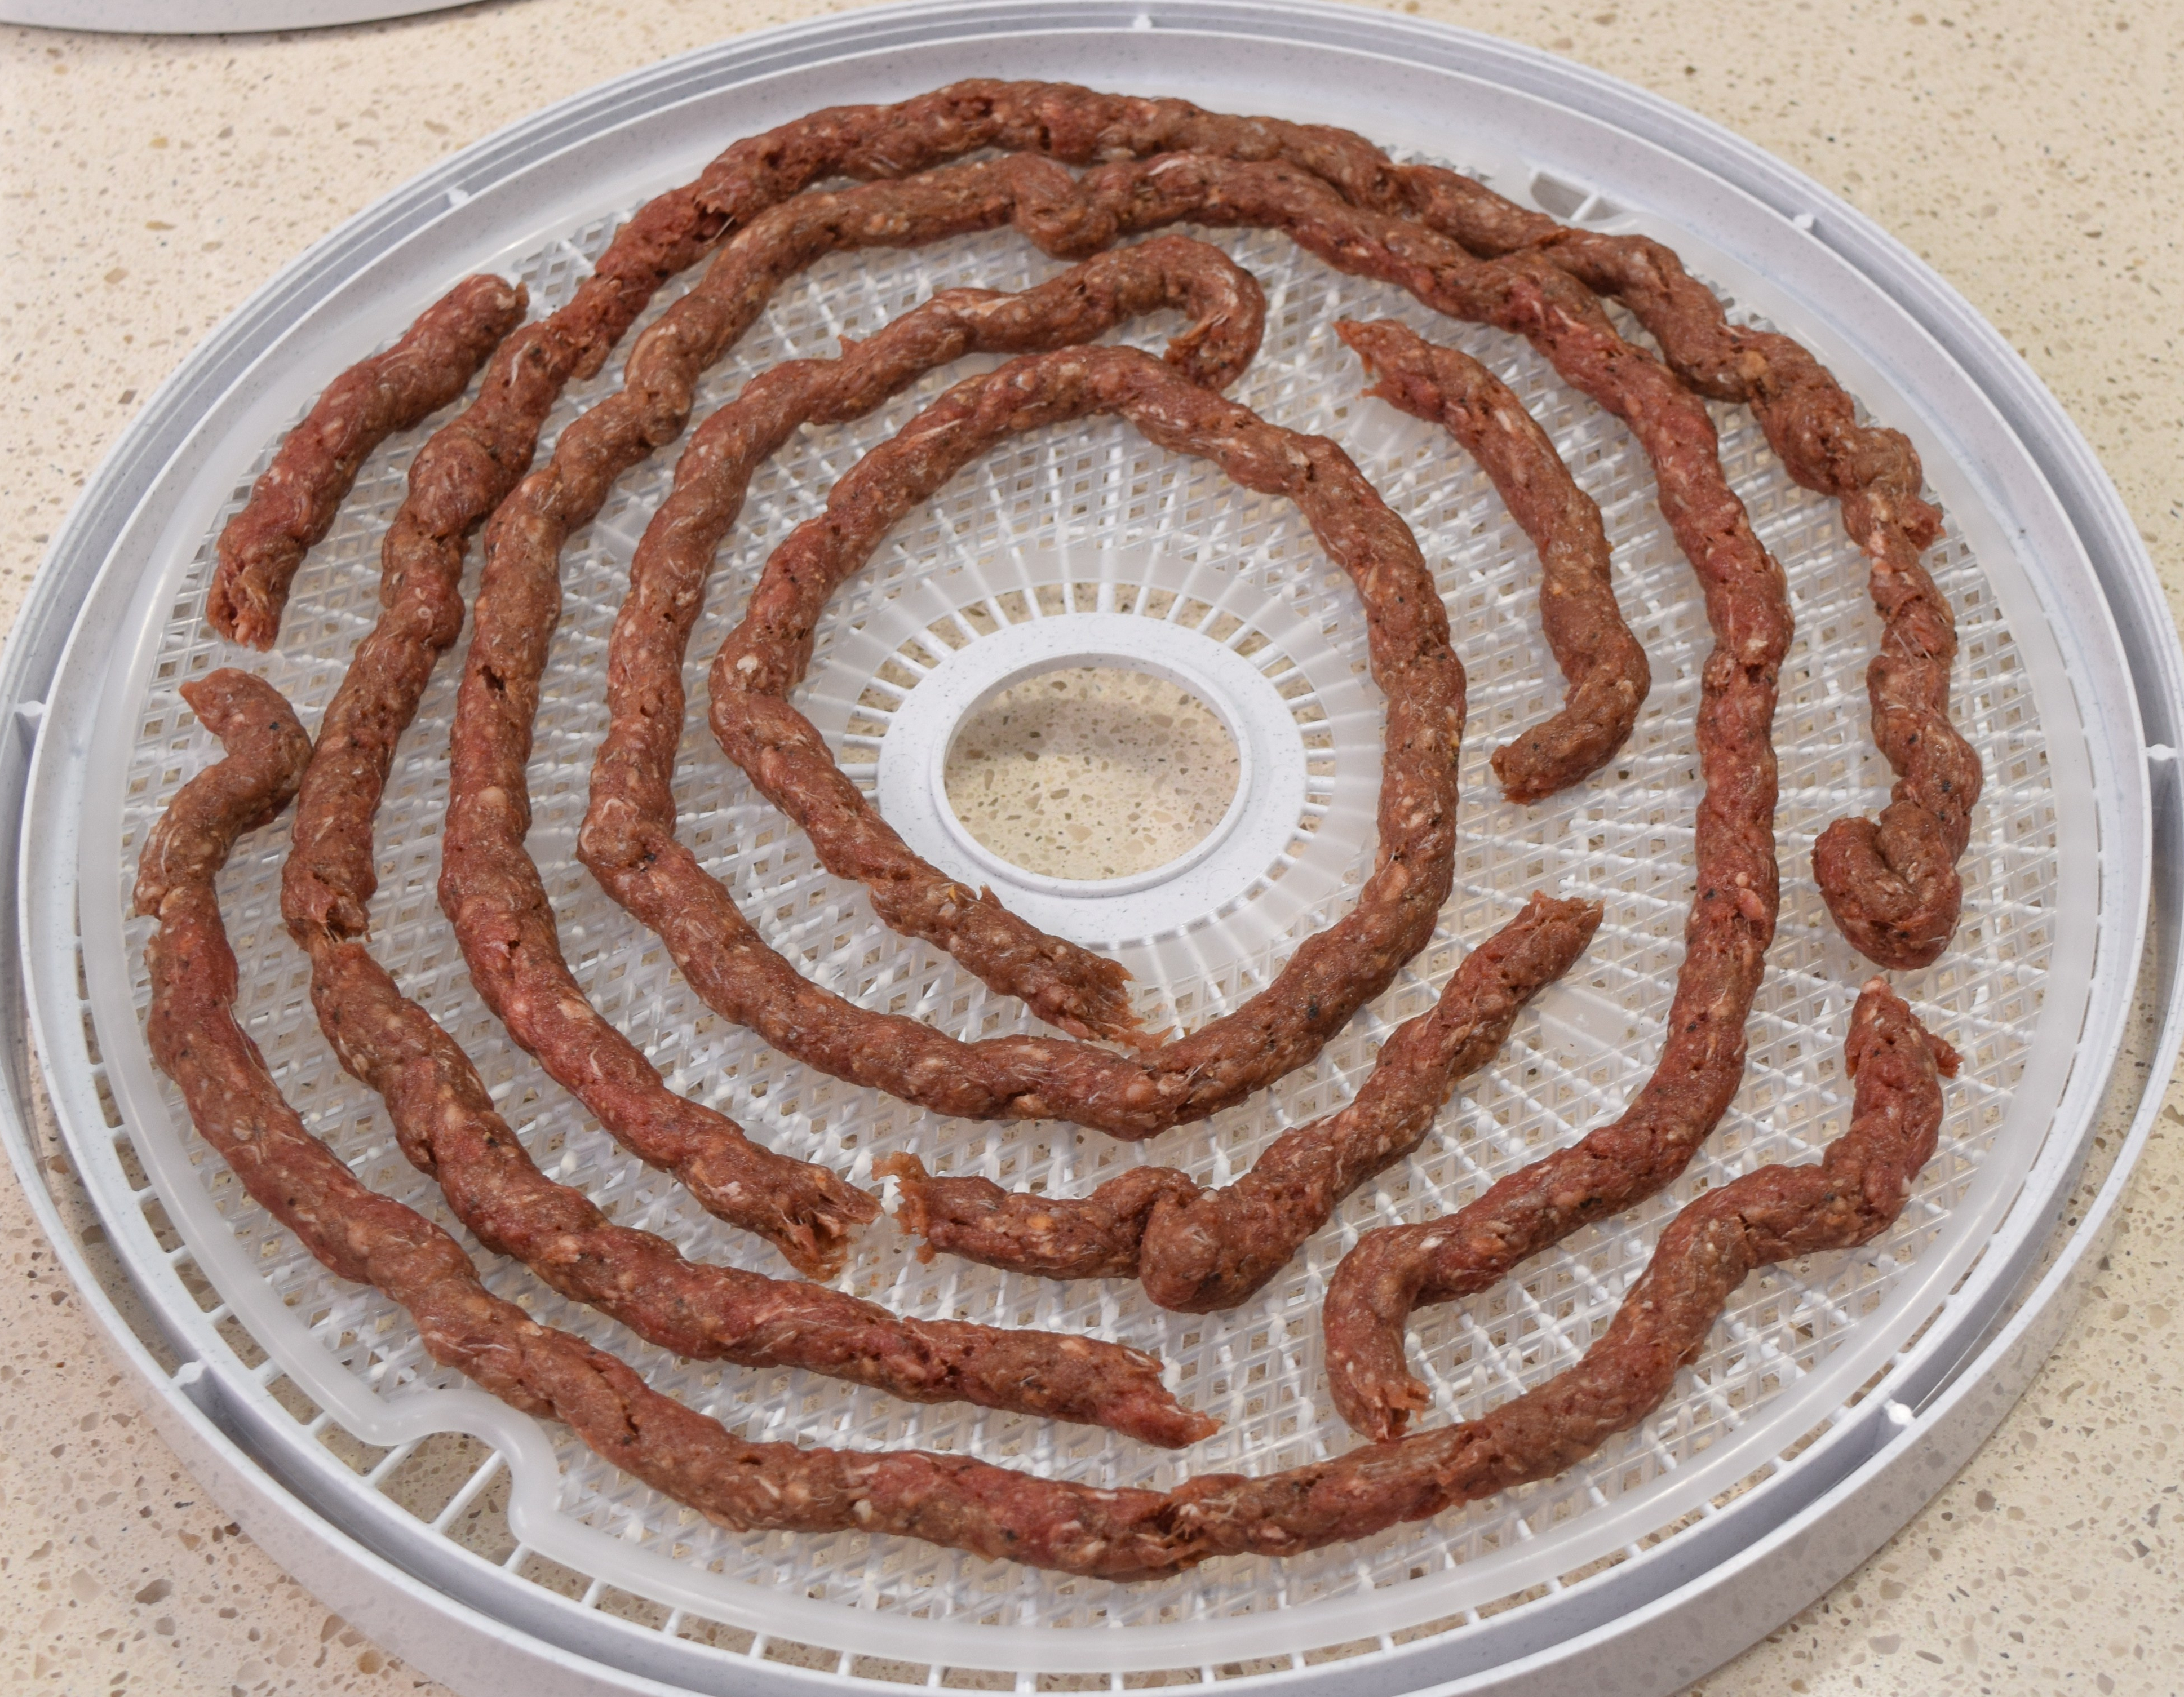
The dehydrator load showed the difference again. The lowest salt batch wouldn’t hold together (left), while the 2tsp (right) and above stayed continuous and made great spirals.
1tsp salt
2tsp salt
They all got the same trip through the dehydrator. The results were quite different. It is hard to see in the image below, but the 1tsp jerky is dry and crumbly like my previous batches. The 2-4 tsp versions all came out pretty chewy and with a proper texture. It seems 1-2 tsp per pound of meat is the required threshold.
I cut up each batch and bagged them with a number, leaving out batch 1. I gave all my coworkers an opportunity to try them without comment and gathered feedback. Most considered 4 too salty, though one guy really liked it. It was kind of a toss up between 2 and 3 as to which one was more favorable. 2 was maybe a touch blander. The 1tsp of garlic powder was very subtle, most didn’t detect it.
Final Conclusions:
You need more than 1tsp of salt per pound of ground beef, 2 is safer
4tsp per pound is excessive for most people
more than 1tsp of garlic powder per pound is needed to have it taste like garlic
Why buy a spice packet when you can just gin up your own flavors for a lot less? Failed jerky apparently! I thought I was going to be cute, and make my own seasoned jerky from now on. I may still, but I hit a huge setback. Everything started nice, I looked at a few recipes online and came up with two ideas to try on my own. A basic traditional style, and a taco seasoning style.
I mixed them both and ran into my first difference. Normally, the meat is really sticky. Even wearing nitrile gloves it sticks like crazy. These didn’t seem to leave much of anything on my gloves.
I left them overnight for the flavors to mingle, then fired up the jerky cannon. Another odd feature, they don’t hold together well at all. Normally I can get long continuous strands, but these fall apart immediately.
One thing I remembered after firing up the dehydrator was that I forgot the curing salt on the taco version. That was going to hurt the shelf life, but no reason to stop. The final results were garbage.
Instead of being chewy this stuff was dry and crumbly. I did some reading and found a few possible explanations that could apply to my batches.
Don’t use acids: I didn’t use any in the traditional recipe, but my taco version had a few tablespoons of hot sauce. Lots of vinegar in that sauce. That one was worse than the traditional.
Low salt: This is possible with both batches, I didn’t want it to be too salty. Checking around, salting ground beef can do important things. Serious Eats has an article on the subject.
My next experiment will be with a simple recipe of just ground beef, salt, and maybe a single seasoning like garlic powder. I will increase the salt content and see how that goes. An early indication of stickiness while mixing might help bound the lower end of salt. Too salty won’t be clear until I have cooked and eaten some.