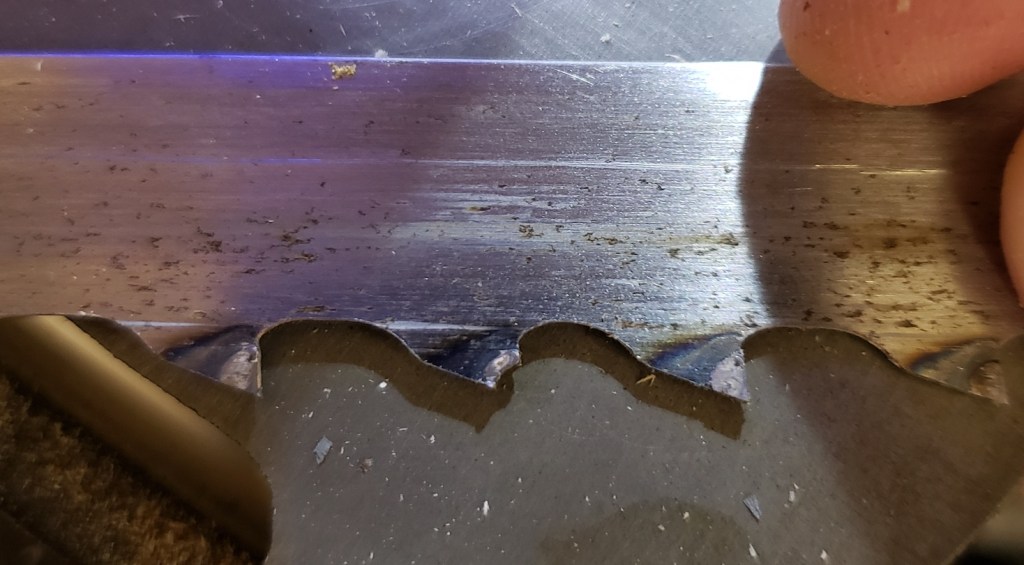
There are few events in life quite as thrilling as having your bandsaw throw a tire. And by thrilling, I mean terrifying! I flipped on my trusty porter cable 14″ saw and instead of a steady hum it had a terrible screech and roar. The top tire (rubber band that goes around the wheel and contacts the cutting band) split and set the blade loose. After 8 years of service, I guess it was time. The bottom tire was still in good shape, and that is where the motor is, so it still managed to drag the blade around inside the tool.
I feel like I switched it off pretty quickly, but I may have been in shock for a few seconds. The time that it did take me was enough for the wild blade to lurch forward and start cutting into the guard just above the top guide bearings. It cut through the metal guard and left a gash a few inches tall. Metal shavings were all over the tape top. The teeth are a heavy set tungsten carbide for ripping, so they are quite capable in soft metals. I did manage to chip a few teeth in the process.
Those blades are expensive enough that I was worried I would have to trash it. Luckily a few missing teeth out of 100 doesn’t appear to make that big of a deal. I opened everything up, pulled the blade out and ordered new parts. The top tire obviously needed replacing, and the new ones were a shiny blue! The bottom one looked worn and yellowed, so I replaced it too.
New top tire
Old worn bottom
Shiny new bottom
Last but not least I found the part number for the blade guard and ordered extras just in case. With the guards and throat plate replaced all was right with the world. The horrible screech was returned to its usual purr.
Kind of a big span of time with a smattering of prints. I am always printing one little thing or another, but only occasionally remember to document them. Let the disjointed presentation begin.
Reciprocating Saw Spray Can Shaker
One of my weirder ideas that was spawned by being locked away waiting for a hurricane to come. Wouldn’t it be cool if you could use a saw to shake new spray paint cans for you? Turns out some folks weld something like this together and sell them on ebay. Not sure I want the full metal version, but a plastic one screwed down to a de-toothed saw blade would be ok. A large hose clamp keeps the can in place.
So far it has worked well the 2 or 3 times I have tried it. Probably one launched can away from it being my worst idea ever, but until then, it feels pretty clever.
Pole Scraper (Paint Handle Threads)
Also while waiting out the storm I had time to experiment with threads. Specifically I wanted to make threads that would go onto any standard mop/cleaning brush/paint roller/etc pole. I did some research and it is an ACME 3/4″ x 5tpi. Turns out Fusion 360 only had that diameter in a 6tpi version. I found a guide on their help area that tells you how to set up custom threads. (Link)
My first project was simple, but useful. I made a little scraper that would go on the end of some extension poles we had. I used it to go all around the house and scrap off the mud dobber nests that had built up all over the house. The printed plastic will not hurt anything on the house, and the extension pole lets me get to everything without leaving the ground. Now I can attach any kind of hook, grabber, poker, or whatever to an extendable pole.
Calking Plug
While working on the rock project I went through a lot of tubes of landscape adhesive. I bought it in the large 28oz tubes (instead of your typical 10oz) because it is way cheaper per ounce that way. My big calking gun had issues sometimes though. The diaphragm in the back of the tube would fail, and I would end up with the plunger pushing through the glue. It almost ruined my gun.
The first time I thought it was a fluke. The second time I got kind of mad. Once the diaphragm fails, you basically can’t do anything with the tube and have to toss it. I cleaned the gun up again, and noticed that the plunger is quite a bit smaller than the inner diameter of the glue tubes. By only pushing in the center of the glue plug, it could be causing them to have a blowout more easily. I printed a larger disk that fits around the existing plunger, and just fits inside the tubes. After that, the glue tubes behaved themselves.
Inside Transfer Calipers
Sometimes you need to measure the inside diameter of something, but the shape makes it difficult to get that measurement. Inside calipers can help, but if going into a flared hole or other situation, it is not easy to pull the tool back out without disturbing the caliper distance. This simple design will produce the same dimension on either end. Stick it in a tapered hole, and just measure the part sticking out to know what that size is. A very special usage case, but I have needed one in the past, and with a little print time, I have one.
Wind Chime Clacker
The house came with a few really nice sounding wind chimes. They are blocked by the trees and screen, so they don’t chime often, but the long tubes make a deep soft song. The wooden clacker on one has fallen apart a few times. I keep gluing it back together, but the wood is really shot. I thought about making another wooden one, but wanted to try a printed one instead. It matches the diameter and thickness. The two halves are the same print just turned around to key into each other. This way I don’t have to untie anything, just glue it into place. The keyed insides align both pieces to center and add additional glue surface area. I am curious to see how long black PLA will last.
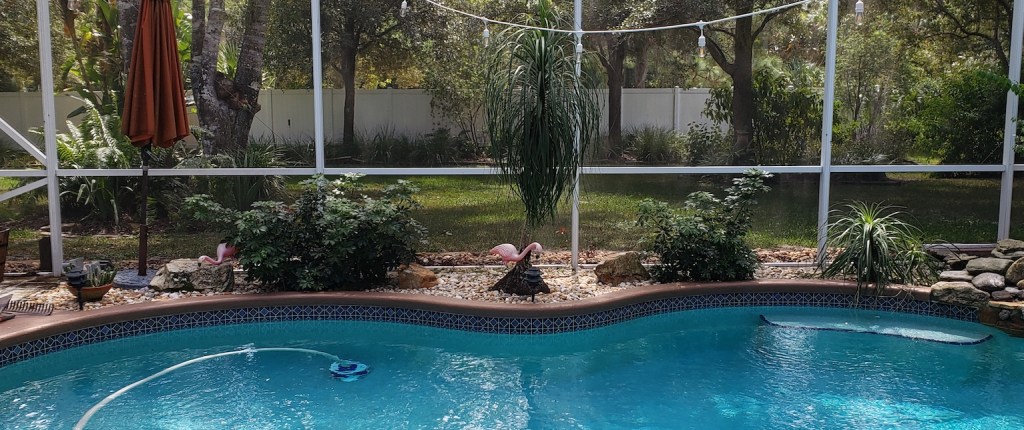
It seems that I am stuck in a bit of a leak rut right now. I fixed the suburban just in time to realize I have a pool leak. There is a great test where you put a bucket on your pool steps and fill it to the same level as the pool. After a few days if the level is lower in the pool than the bucket, then you know it is a leak, and not just evaporation.
I did that and attempted my own leak detection tests. 30 minutes in the pool with a mask and syringe of ink didn’t turn anything up, so I called the pros. They told us it was under a pony tail palm tree in the back planter bed.
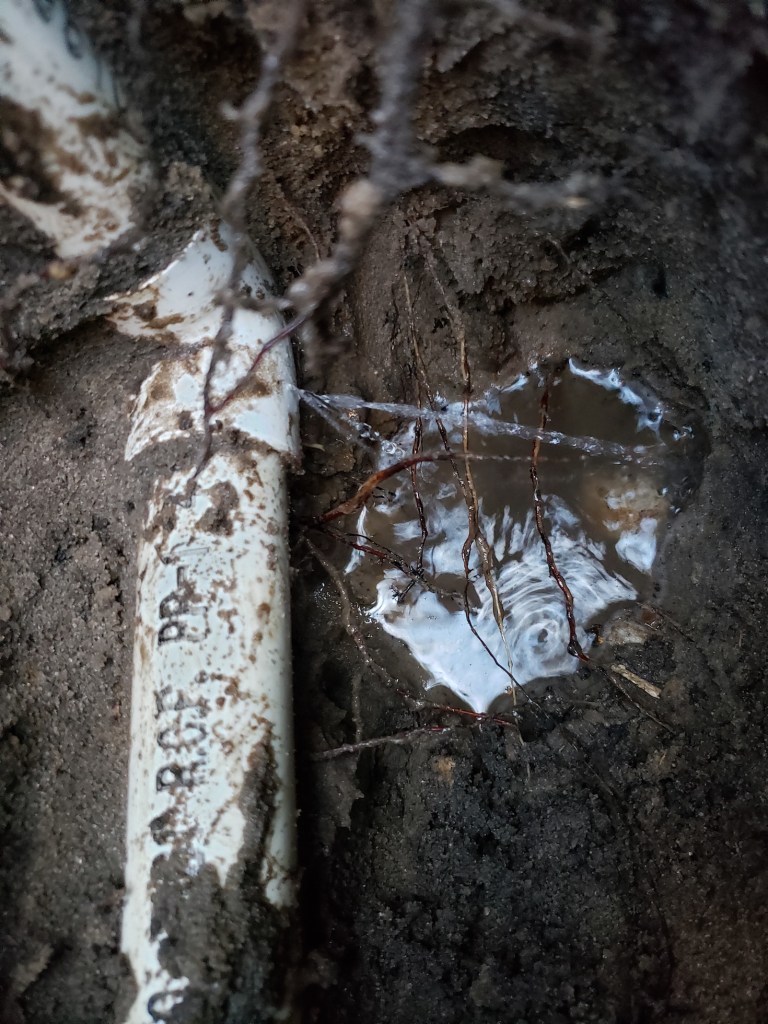
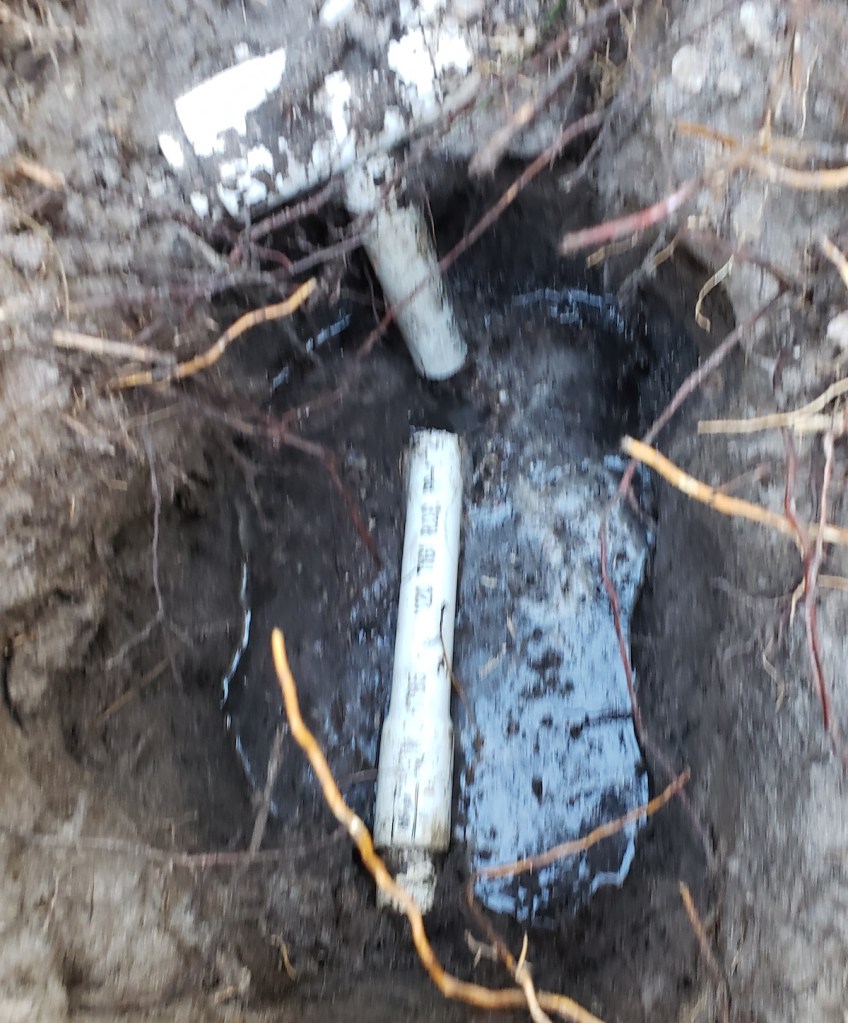
I don’t know if the plant was to blame, but it was right on top of the problem area and a lot of roots grew around the pipe. We pulled the two shrubs and saved the palms to another location. I started digging to find the water line, and sure enough. Those leak detection folks knew what they were doing. It was right there under the little palm. The elbow has some kind of issue.
I plugged all the return lines into the pool with plumber’s putty because the corks I could get were too small for the job. After that and letting the system drain down I was able to cut out the bad elbow. It is tough working at arm’s length in a muddy hole.
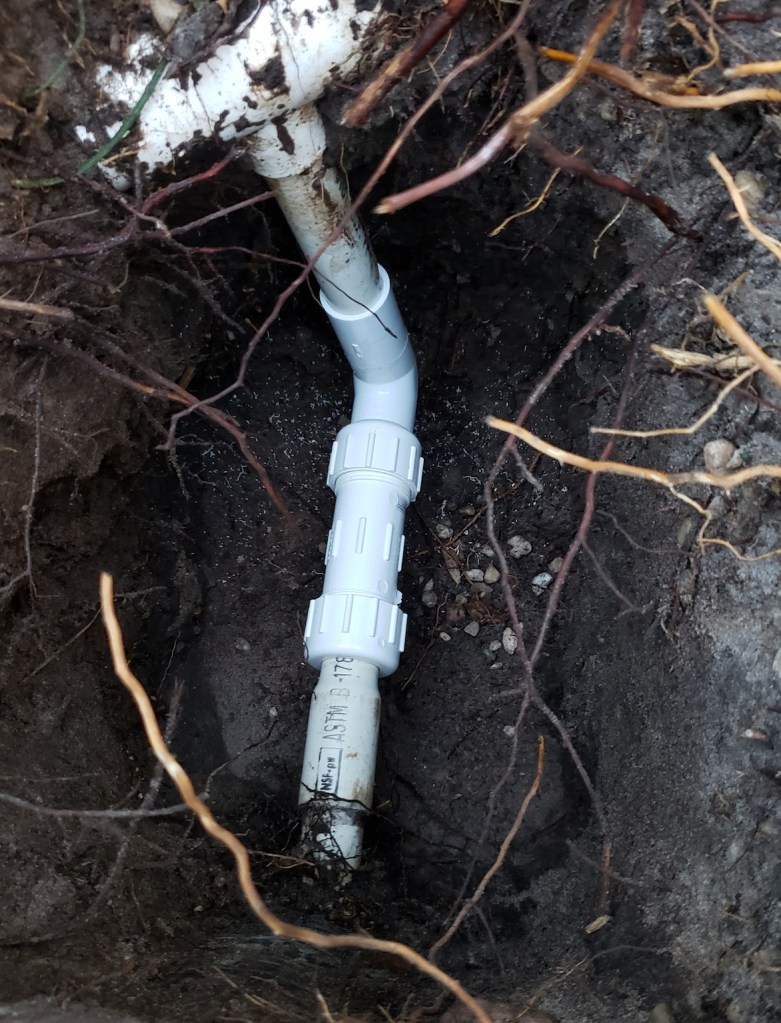
I drained the last of the water, cleaned the pipe and installed a new elbow. A compression fitting went between the horizontal pipe and the new elbow.
After letting the cement cure for a while I pulled the plugs to let water in, and eventually fired up the pump. No more leaks! The elbow was under some kind of stress and had a growing crack on the bottom side.
The back looks a little sad without the plants, but I bet we will get some potted plants going in no time.
I have an 18 year old suburban I use to make runs to the hardware store. Plywood, piles of rock, plumping parts, etc. It has been slowly degrading with an increasing number of cosmetic blemishes and features on the fritz. I normally don’t mind these too much, but I had a really odd one. I opened up the door after not having used it for a few weeks and there was mold EVERYWHERE! I needed to pick up stuff that day, so I cleaned it all and moved on with life. I thought it must have been raining or something the last time I used it.
I made a vow to drive it more often and didn’t think about it. I did notice though, that the windows were always fogged up every morning. Everything was super humid inside. I got in one night when it was raining to look for a leak and couldn’t find a thing. I crawled all around and finally got over to the driver side. The carpet made a sickly squish sound. It was soaking wet.
I saw water drops under the dash, but could never locate the issue. Took it to the mechanic and they said it was a deteriorated windshield seal. Got the windshield replaced, still more water showed up when it rained. Now I had all the dash bits apart and I could see it was coming in from high up on the A pillar. It actually looked like it was coming out of the folds of metal around the frame. I thought the roof rack was leaking water into the layers of metal that make up the roof.
The screws were all incredibly rusted, and the threaded segments in the body were in poor shape as well. I pulled everyone off, cleaned the area, replaced all the hardware with fresh stainless and caulked everything. Leak check? Yep, still leaks!
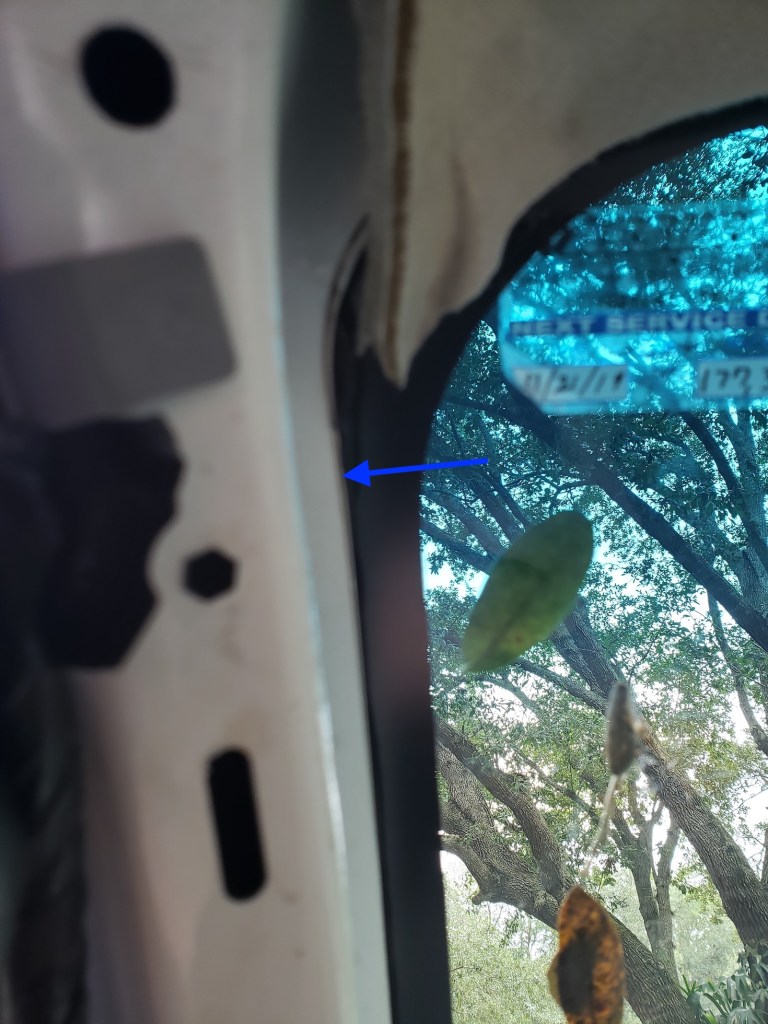
I had been trying to use fans to dry out the carpet, but this was the point when Dorian was bearing down on us. After we got setup for the hurricane I started going through and pouring water around to see if I could induce the problem. Pouring water on just the driver’s door seal would cause it to leak out of the windshield area. Pulling the door seal off I noticed it was in rough shape, and behind it was seams of metal.
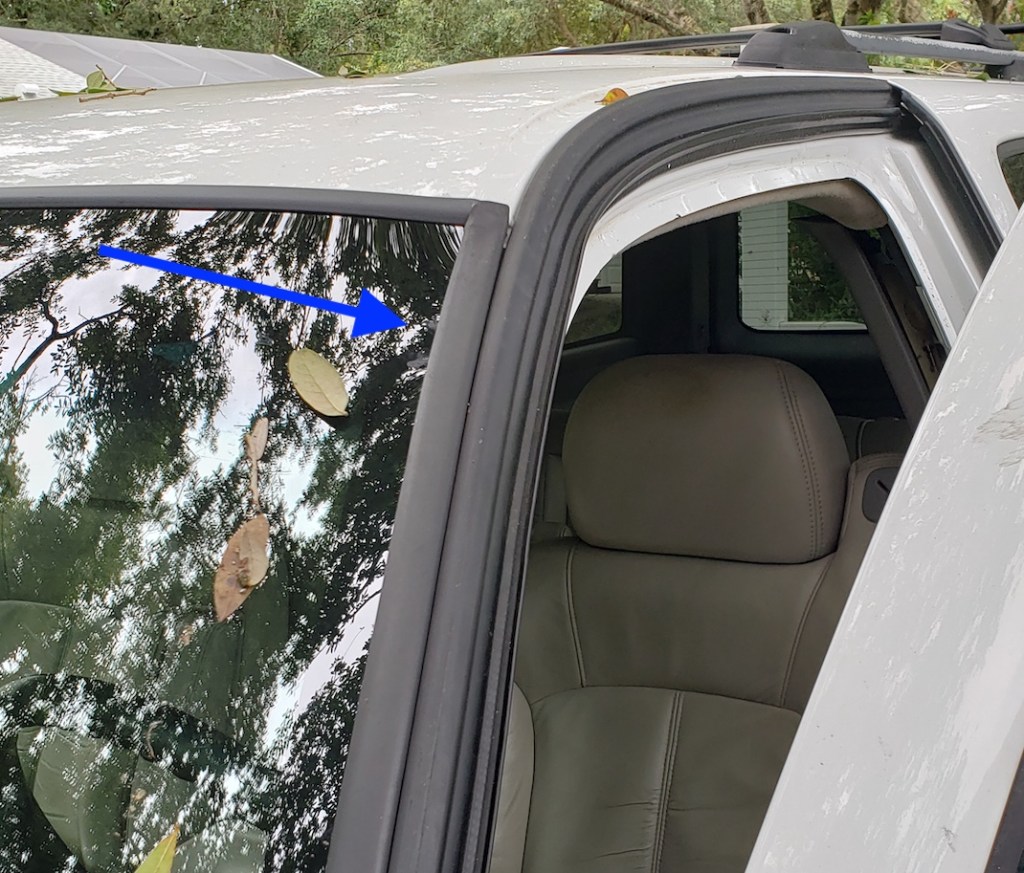
I think what is happening is that water gets past the seals and rides in the bottom of that U channel the door seal makes and gets soaked up into the seams of metal. The top of the door is higher than the A pillar.
Water starts up high on the door seal, soaks in, and comes out starting near the upper part of the windshield (blue arrow). The picture below shows it from the inside. It comes out along the whole A pillar, starting up at the top edge.
To remedy this issue I put some flowable silicone in a syringe with a thin plastic tip and shot it all along the drivers and passengers side door seams.
I ordered new door seals and when they came in I removed the old ones. It turns out there is a U shape of metal in there that helps keep everything clamped and sealed to that inner lip of the door opening. The metal had fatigued and wouldn’t hold the seal shut anymore. Dry rot on the rubber didn’t help.
The new seal fit nicely on the door opening lip, and was new and puffy enough to make the door slightly harder to close. It seals well now! Through a minor rain, carwash, and direct spraying with the water hose nothing has leaked in.
It took forever to get the carpet dry. The padding underneath was super soaked and I couldn’t figure out how to remove it. Eventually I just put my dehumidifier in the truck and sealed it up for a day. It got hot and dry and eventually moved all that water out of the carpets. Hopefully it will stop smelling like a bog and attracting frogs from now on out.
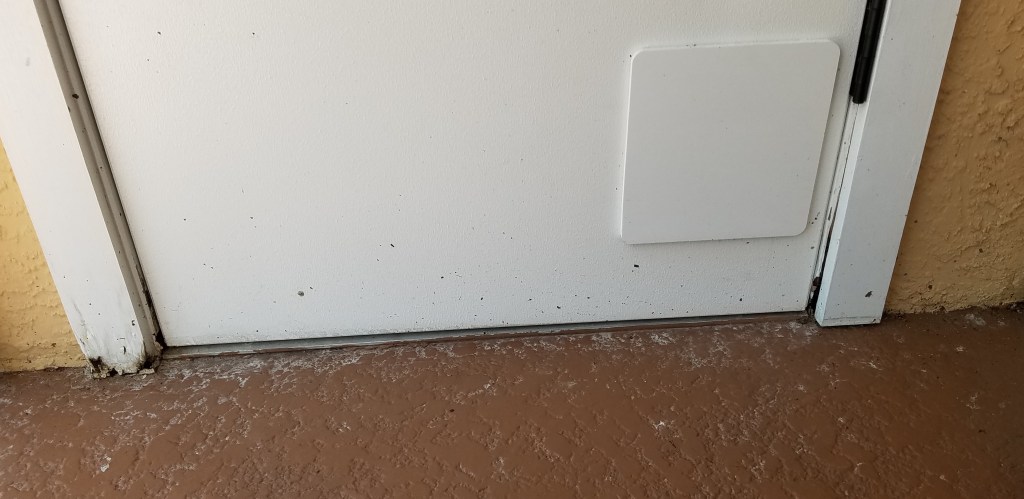
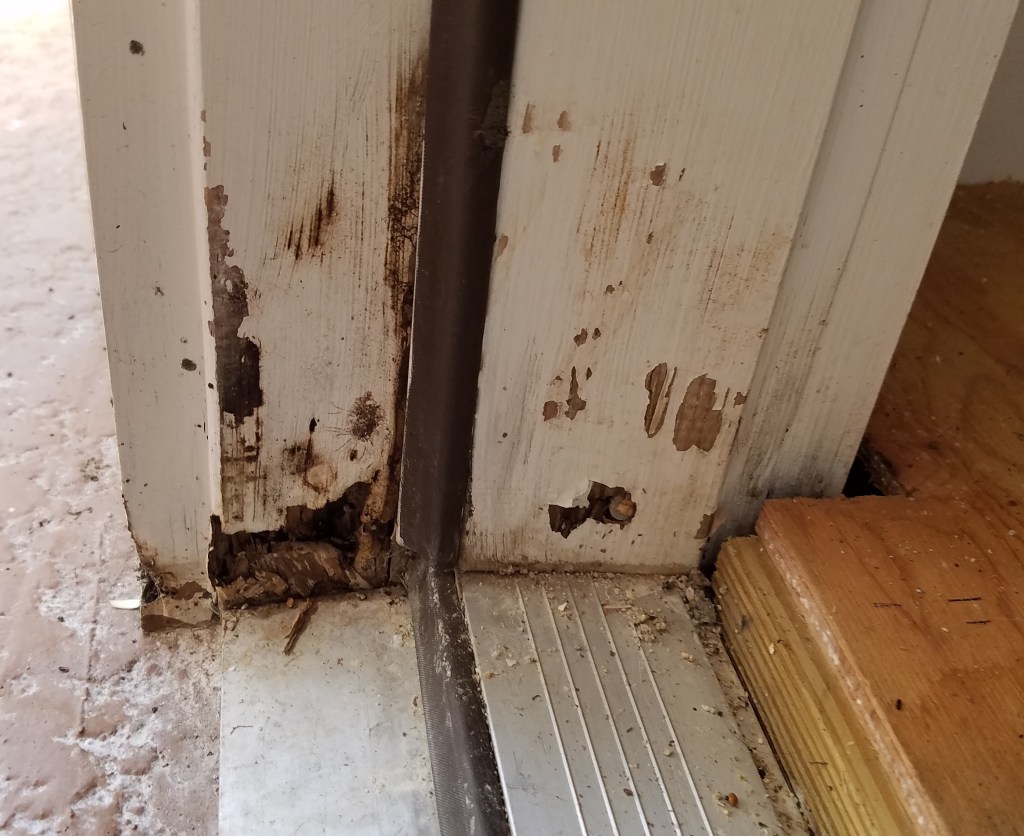
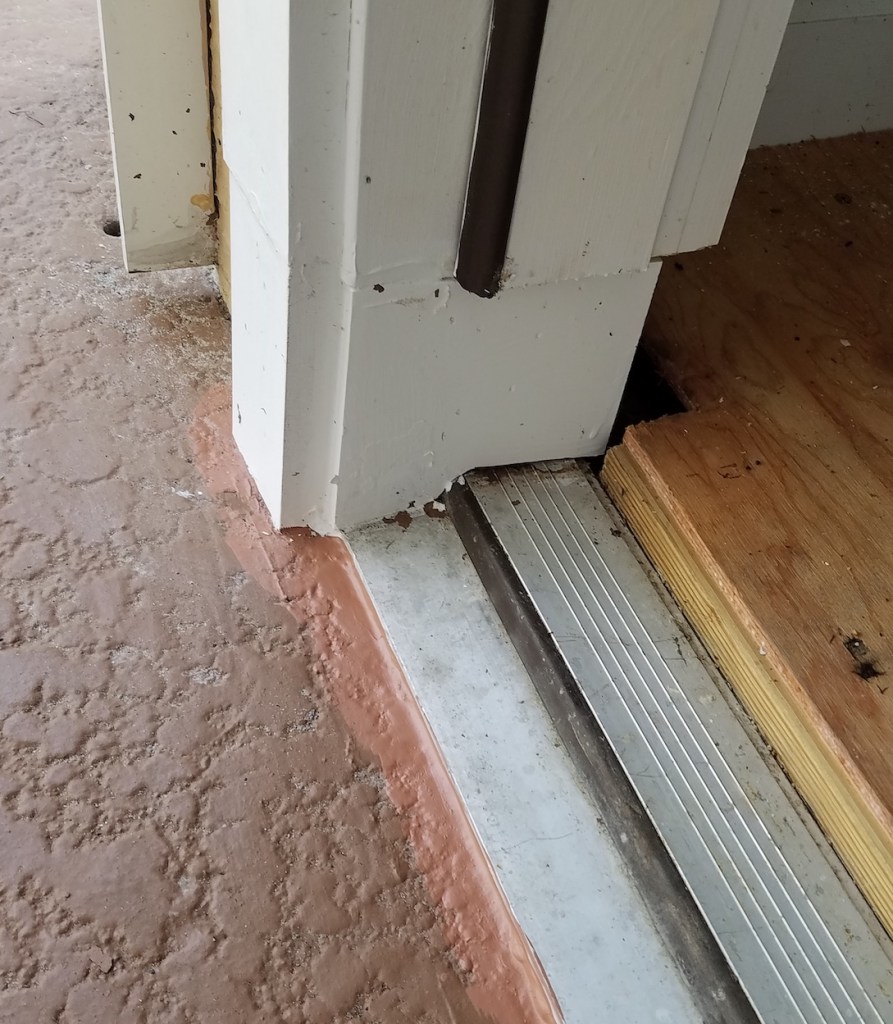
One of the lingering repair issues on our new house was a rotted back door jamb. It is on the porch well under the roof line. A thing I noticed though is that when it rains really hard the gutters over flow and water backs up to this door on the pool deck.
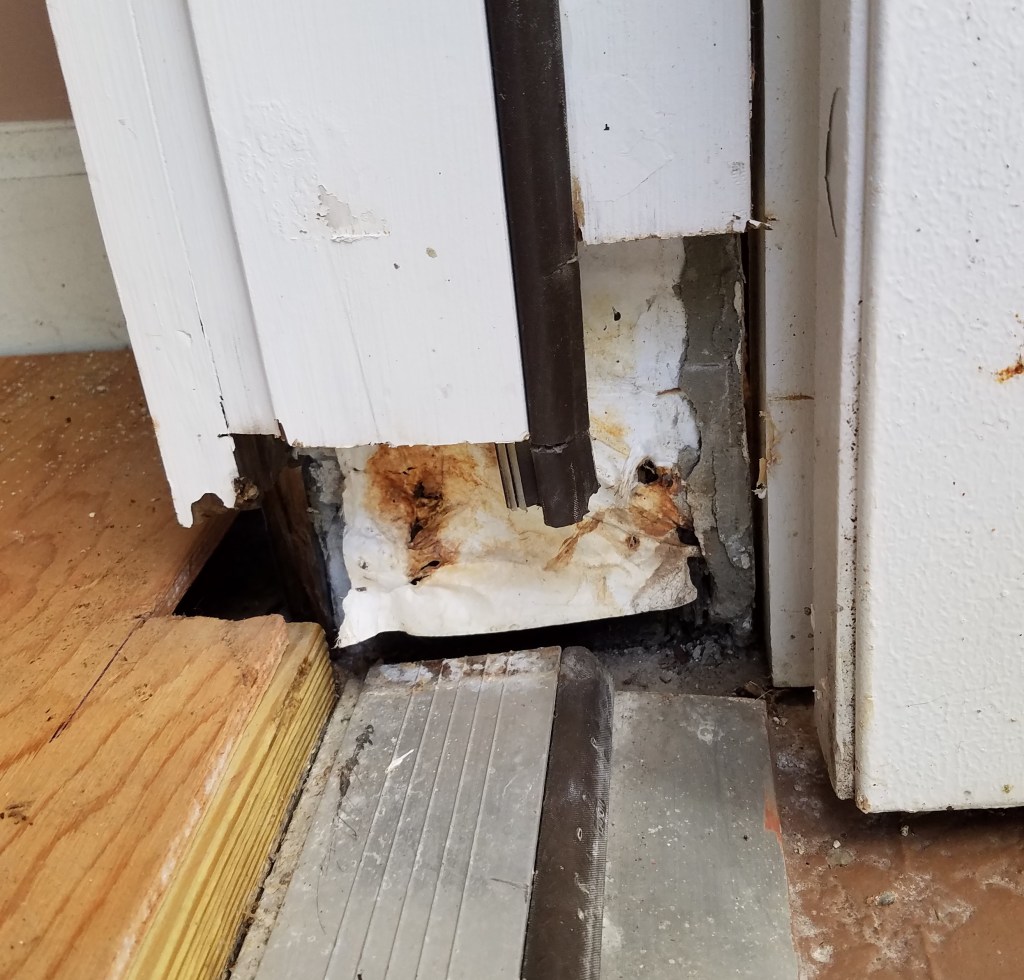
This showed up on the home inspection. I probably shouldn’t have let it go this long, but what can I say? I started chiseling away at the rot and found it was pretty heavy down low, but didn’t go too far up. The 2x4s in the walls ok. They must have some kind of treatment to help prevent rot.
Once I was done putting out the rotted stuff I squared everything up so I could start putting new material back in.
I went with a foundation of pressure treated wood with PVC wood on the outside. The thicknesses didn’t all match up in places. I don’t really care that much, this will definitely not rot.
I did some heavy calking to fill all gaps and painting to keep the wood that is left in good shape. A lot of the door seal is missing at the bottom, but I haven’t seen anything splash against this door, just the rising tide of rainwater backing up. The closet is not under AC, so the seal wouldn’t matter for that either.
I fixed the door rot, but really the root problem is water backing up on the porch. I fixed the door 2 months ago, and it took me working off and on all that time to fully address every aspect of the problem.
First off, the gutters often fill with leaf debris which causes them to backup and overflow on the porch. I have been keeping the gutters clear, but still get overflow sometimes. As it turns out, when it rains hard enough, the water has a lot of velocity coming off the roof, and it can skip out of the gutter.
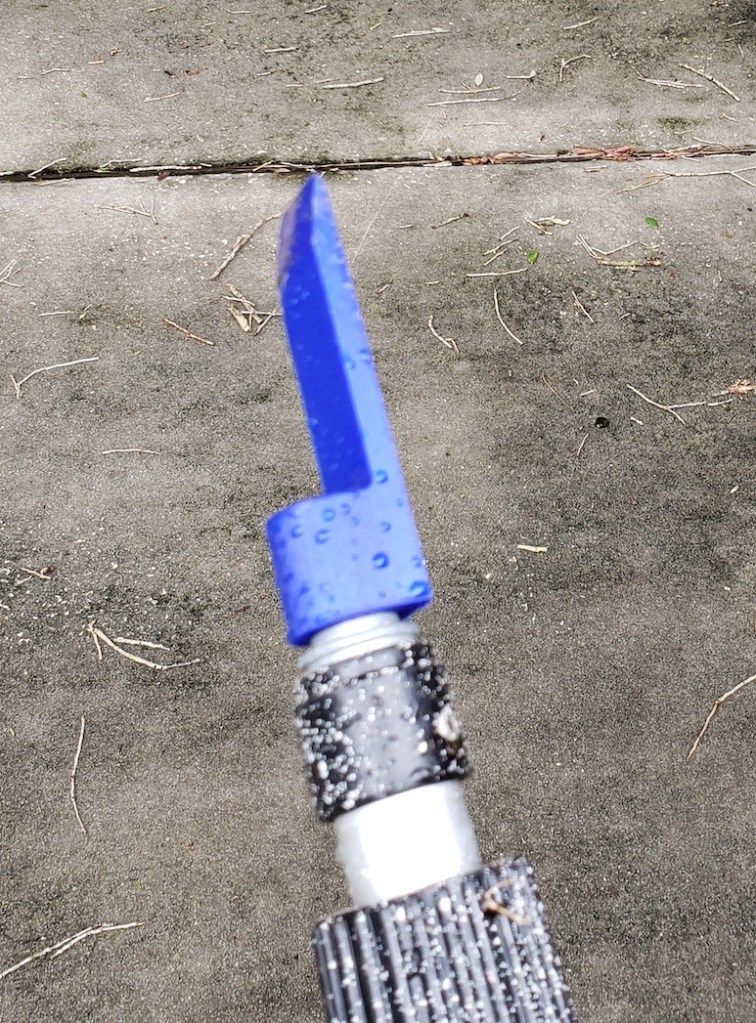
Next up is the channel drains in my deck. In doing some reading, paint isn’t good for them. I noticed in places the deck paint had completely covered the drainage slits. I used a pressure washer with the narrowest stream to strip the paint off the channel drain.
That was an improvement, but they still didn’t drain well. I picked up a pressure washer drain jetter hose. It is a pressure washer hose with a bullet shaped fitting on the end that shoots water forward and backwards at an angle to help you break up clogs and flush out drains and gutters. It was messy work, but I managed to flush the years of sand and sludge from my deck channel drains.
More improvement, but still not all in the clear. It turns out a root had grown up inside the side of the drain near the rotted door. The channel would move water, but was half full of roots, and didn’t drain as quickly as it should. A lot of work later, I got the roots cleared out.
With gutters clear, paint off the drainage slits, sludge out of the channels, and roots cleared out, it seems like they drain well now. Even if it doesn’t work perfectly every time, this should flood my porch a lot less than it has in the past. I will keep an eye on the water level and check the bottom of that door for cracks. The joys of home ownership.
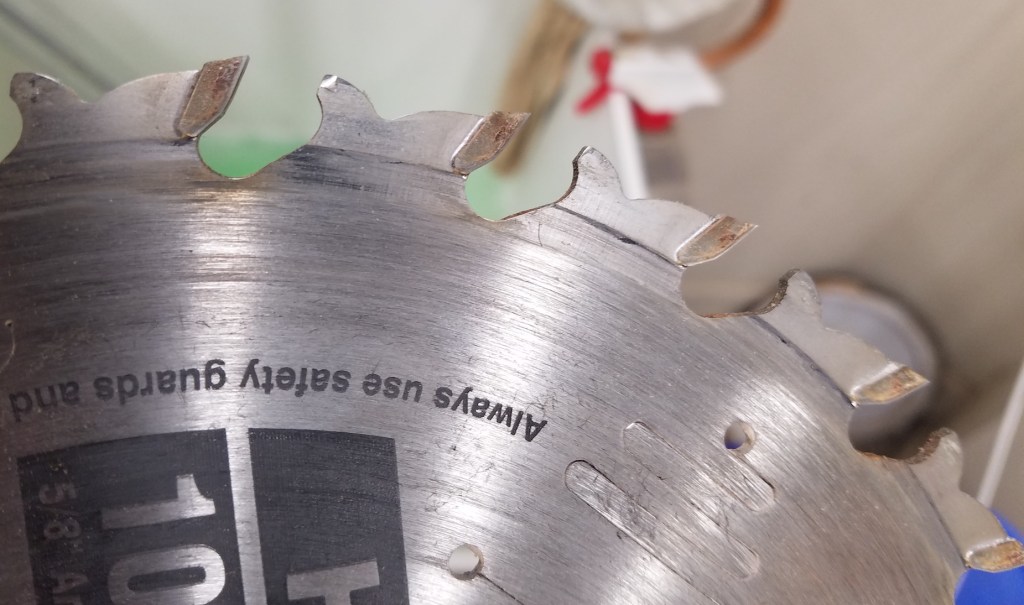
Saw blades tend to get gummed up with pitch and glue from all the various woods you saw. I have been doing a lot of hard wood and noticed some burning in my maple cuts. The blade was looking pretty gunky. I always blew off cleaning saw blades as not being that important, but decided to give it a shot. My table saw blade is pretty new and is starting to perform poorly.
There are various products out there for blade cleaning, but Internet searches suggested simple green or laundry detergent. I always keep simple green around so I started with that.
30 or so minutes of soaking later and a scrub with a stiff plastic brush and the blade looked practically brand new!
No more pitch or burned in junk. I was starting to think the carbide had some thermal damage, but no, it looks great. It worked out so well I went ahead and tried it on my big miter saw blade.
A simple green soak plus a little scrubbing puts you back on top. I was thinking I needed to replace this blade, but after the cleaning it cuts like new. Carbide wears out eventually, but not cleaning makes it seem worse than it actually is.
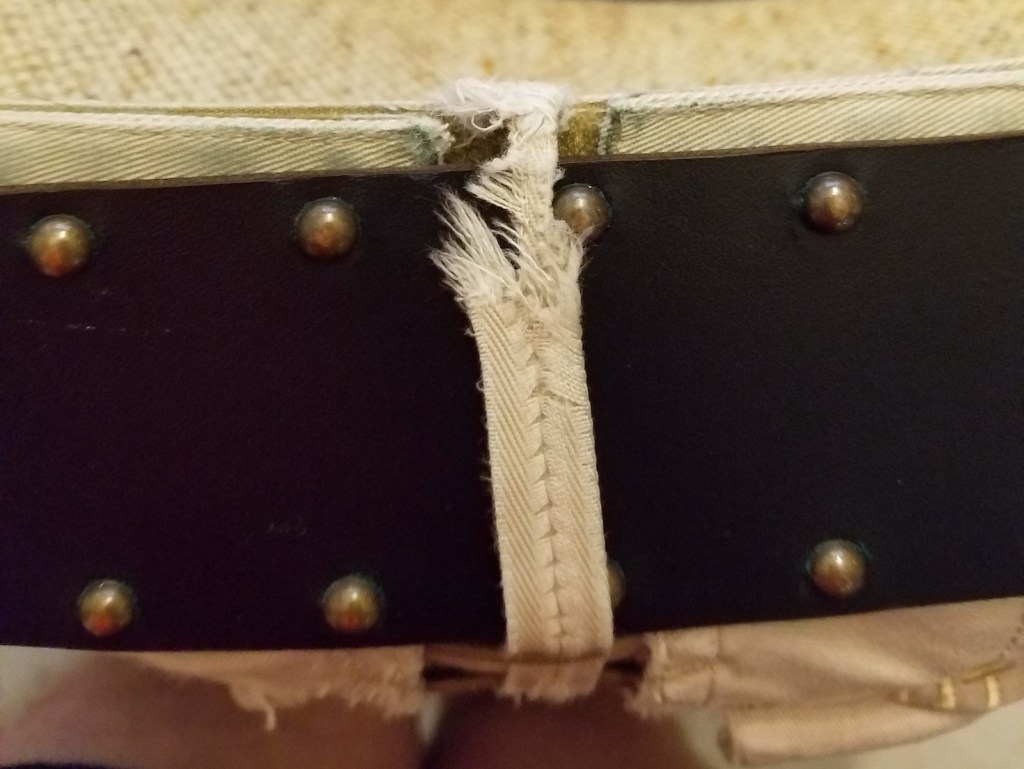
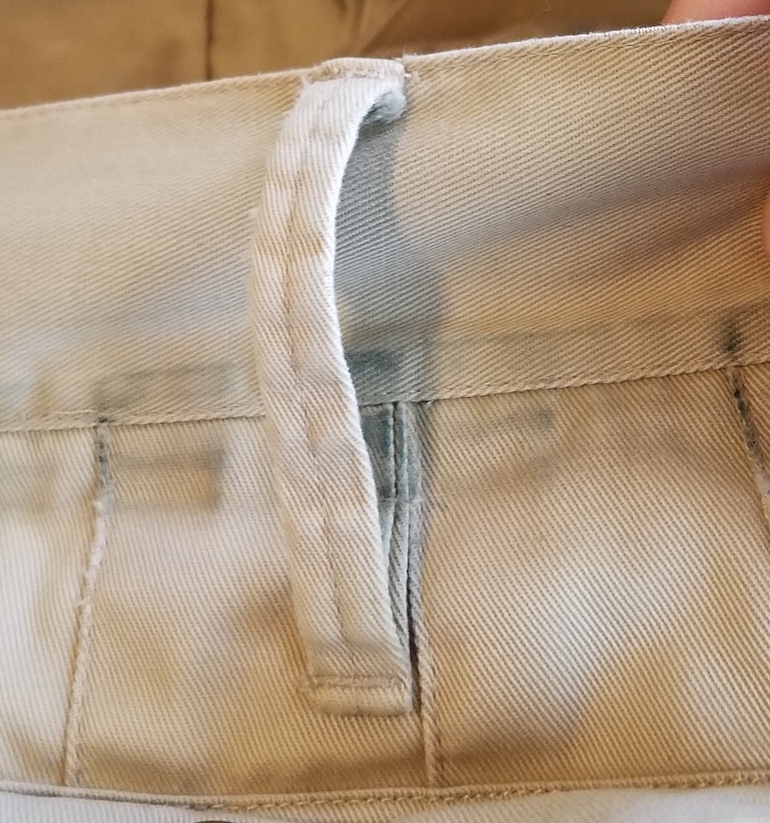
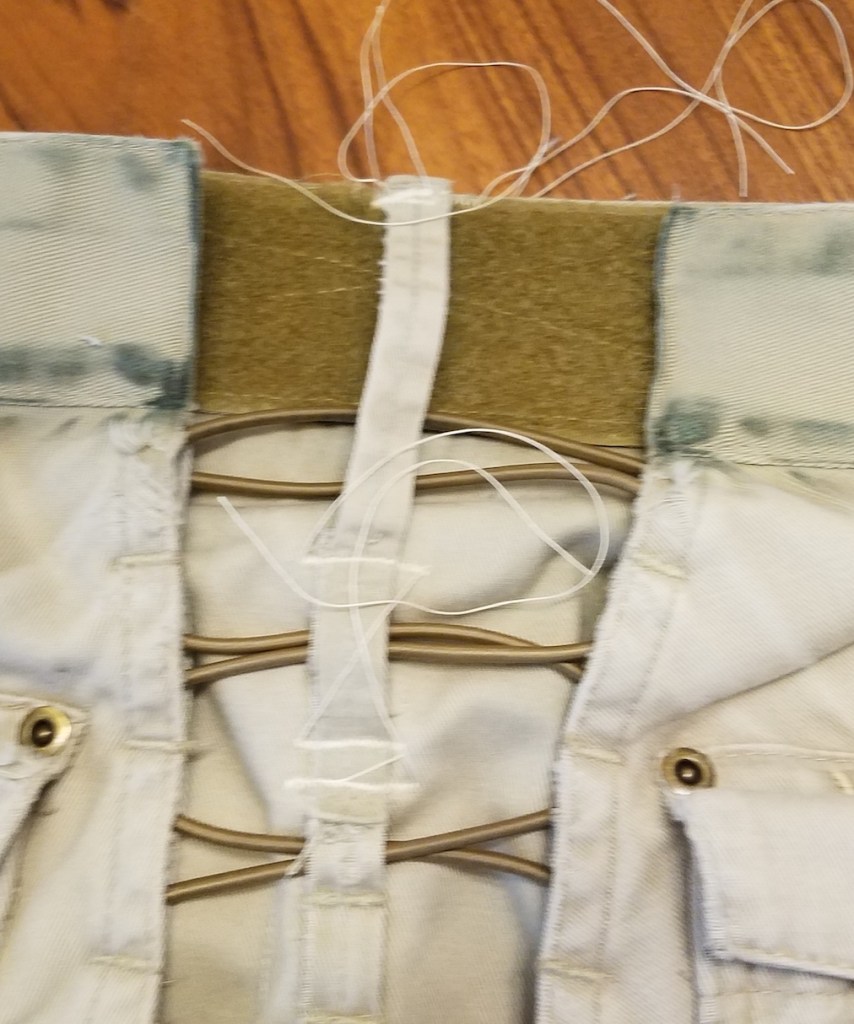
My latest kilt is going on 3 years old and has an issue with one of its belt loops. The center one in the very back is hanging on by a thread. This kilt is a few sizes smaller than my previous ones, and I have noticed that smaller pants/kilts tend to come with fewer belt loops. It may be the fewer loops, it may be the design changes utilikilt made, but for whatever reason, I need a new loop.
About 10 minutes after snapping the above picture I put the kilt on, sat down, and broke the last threads. Good thing I have an old kilt that I kept around. I figured I could cut some material out, sew it up into a belt loop, then sew that on. Turns out one of the loops on the old kilt was in really good shape.
Current Kilt’s Broken Loop
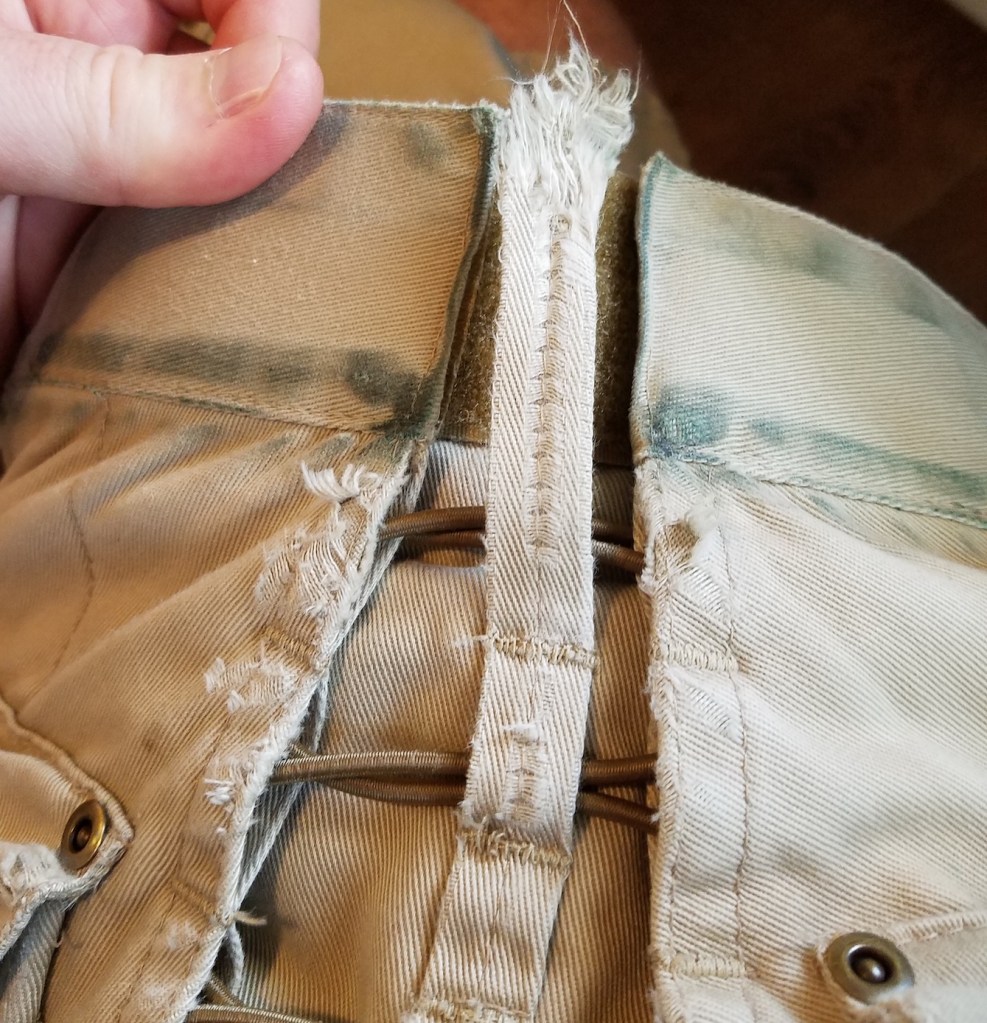
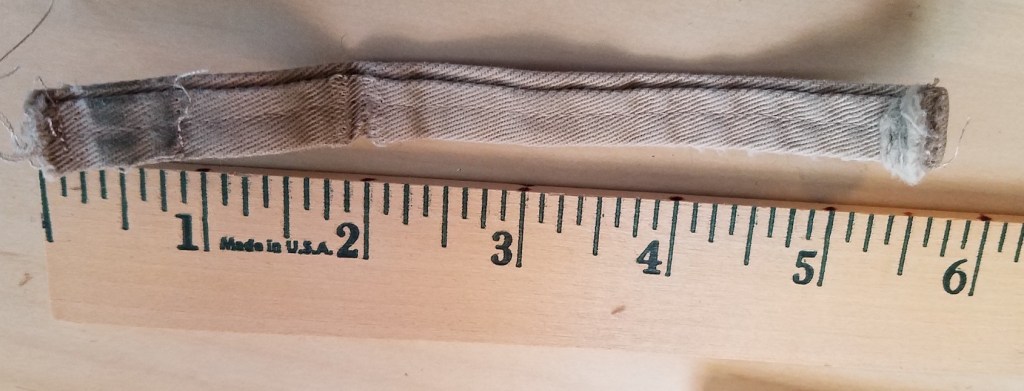
Old Kilt, Good Loop
I went after the old kilt with a thread ripper and managed to free the loop. The way they fold it over and under there ended up being a lot of material to work with. Good thing I am a hopeless hoarder!
I bought a basic sewing machine not long after college. I used it to make a few things early on, but never really picked it up as a hobby. Every year or so I break it out to fix something and completely forget how it all works. I need to make a photo guide. To make things worse I think it needs oiling.
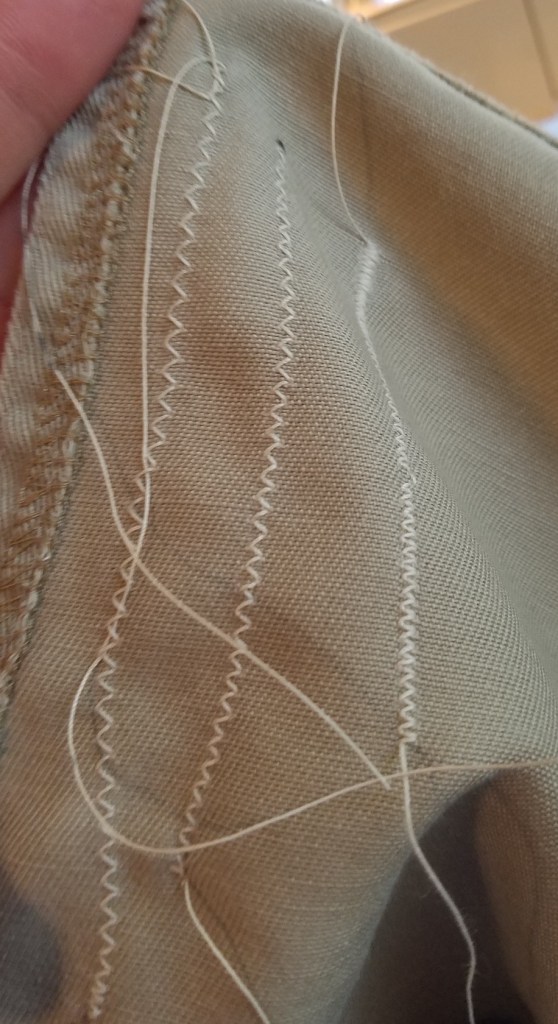
I picked up the old kilt and sewed a few straight lines to make sure I had the stitch settings the way I wanted. When I got done I realized my mad sewing was done in the kilt I was trying to repair, not the spare parts kilt. Oops. More time spent with the thread ripper. Thankfully it wasn’t in a highly visible spot and the final damage was minimal.
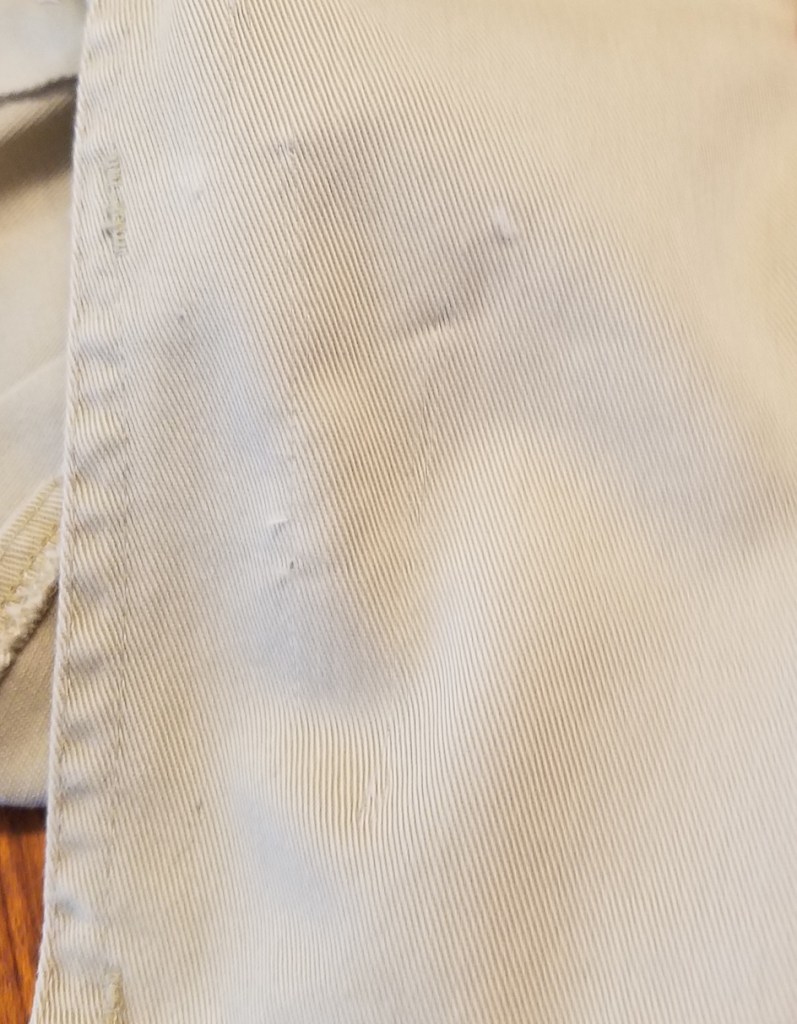
With the settings all worked out I went ahead and started tacking the repair loop down. The sewing machine had a lot of issues with the thickness and I ended up with a broken needle for my troubles. I switched out the needle and was able to finish. It looks a little ugly, but feels sturdy. I went wild with the sewing and managed to sew down the tag. Oh well, no real harm done.
Once I trimmed up all the spare strings it looks nice. I need a little darker thread next time, but this will definitely keep my belt in place for another 6 months or year. I like to get 4 years out of a utilikilt if I can.
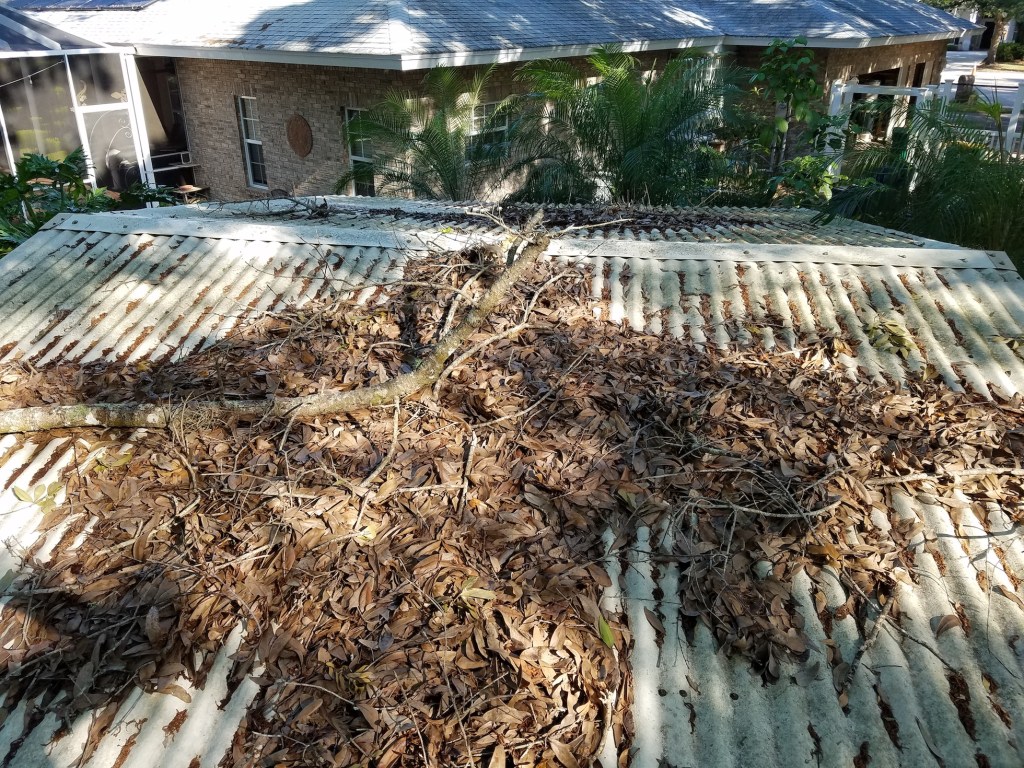
OK, so it is probably steel, but it still has a nice ring to it. The old shed at our new place could use a little love. It is 10 years old and the fasteners that hold the metal roof down appear to be in bad shape. The tops are all rusted and the rubber washer that keeps water out looks rotted. I pulled a few, and luckily none appeared to be rusted below the surface.
The shed seems to have a constant supply of leaves on top. In fact, I think that branch has been up there since before we moved in.
Some of the leaf piles had been there so long they had decomposed into a dirt/compost looking substance. The surface finish of the roof looks really rough in places.
I swept off all the leaves and debris, then gave the roof a pressure wash to clear the rest of the dirt and prep the surface for paint. Before painting I went through and replaced every screw on the roof with a new longer one.
Pressure washed on the right, not yet on the left
All clean
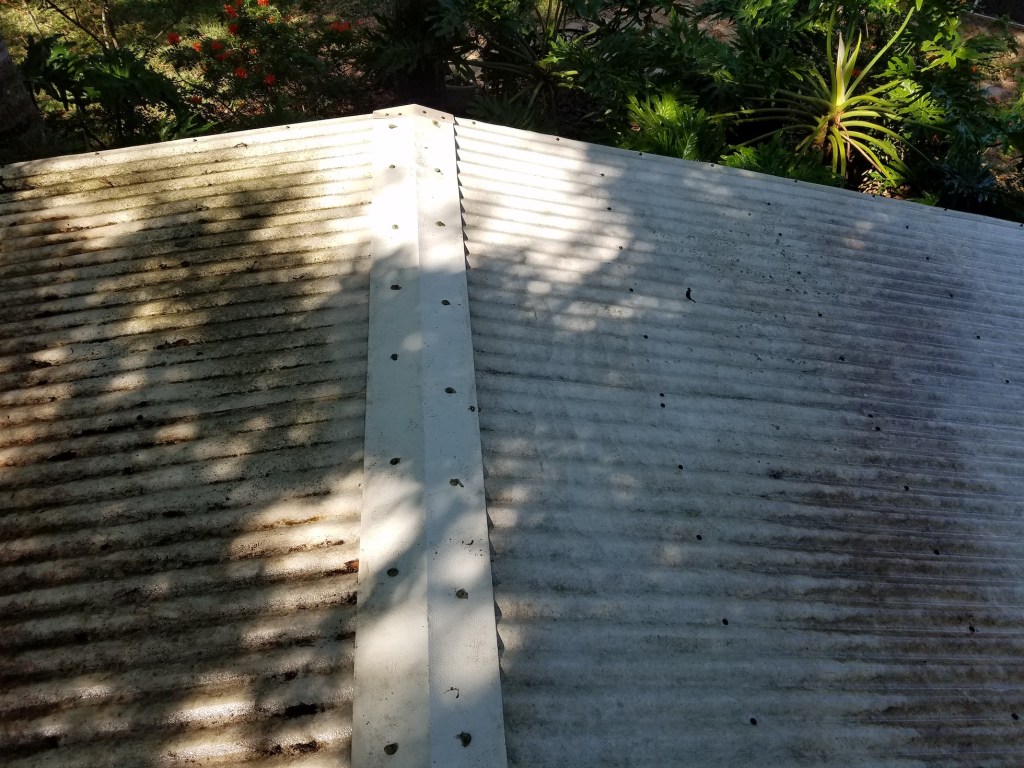
Once all the screws were replaced I sealed everything in with two coats of a siliconized roofing compound. It looked a lot like super thick paint. Putting it on really heavily, a 5 gallon bucket gave me two coats with a little left over.
I spilled over the sides in a few places, but otherwise it all turned out well and looks nice. I hope this buys the roof another 10 years before I have to do anything. I know walking around up there was bending the sheet metal up, so I won’t make a habit. I do need to sweep off the leaves a few times a year though. That should be an easy job with a long broom and a ladder.
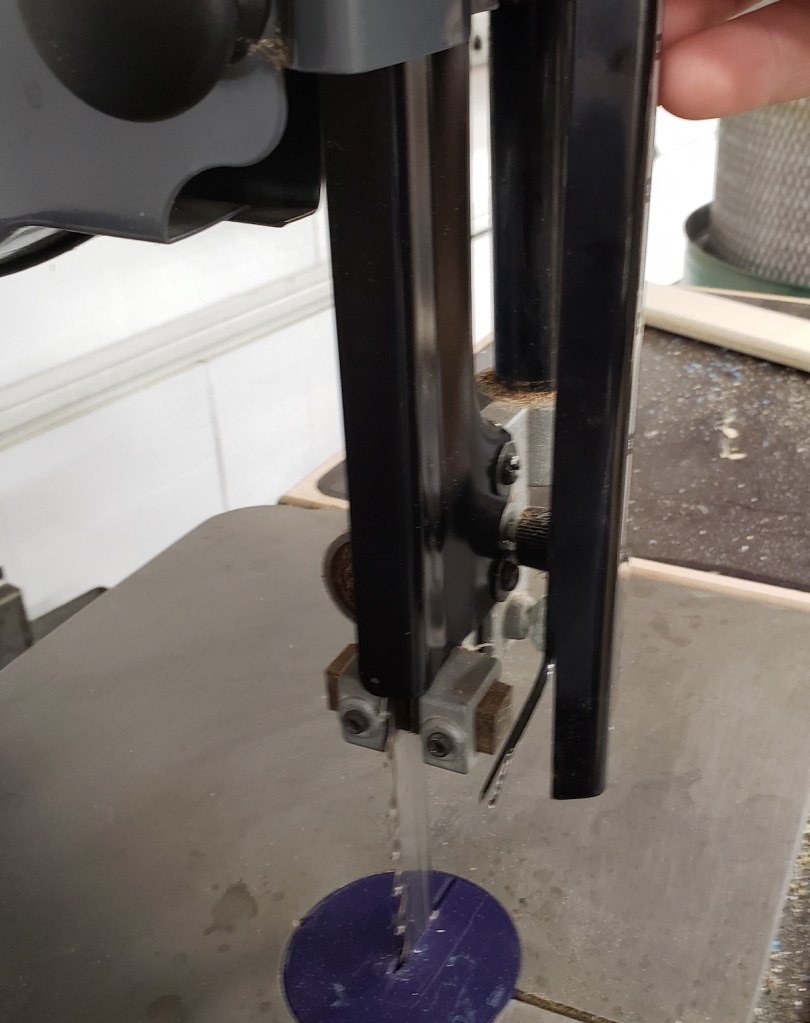
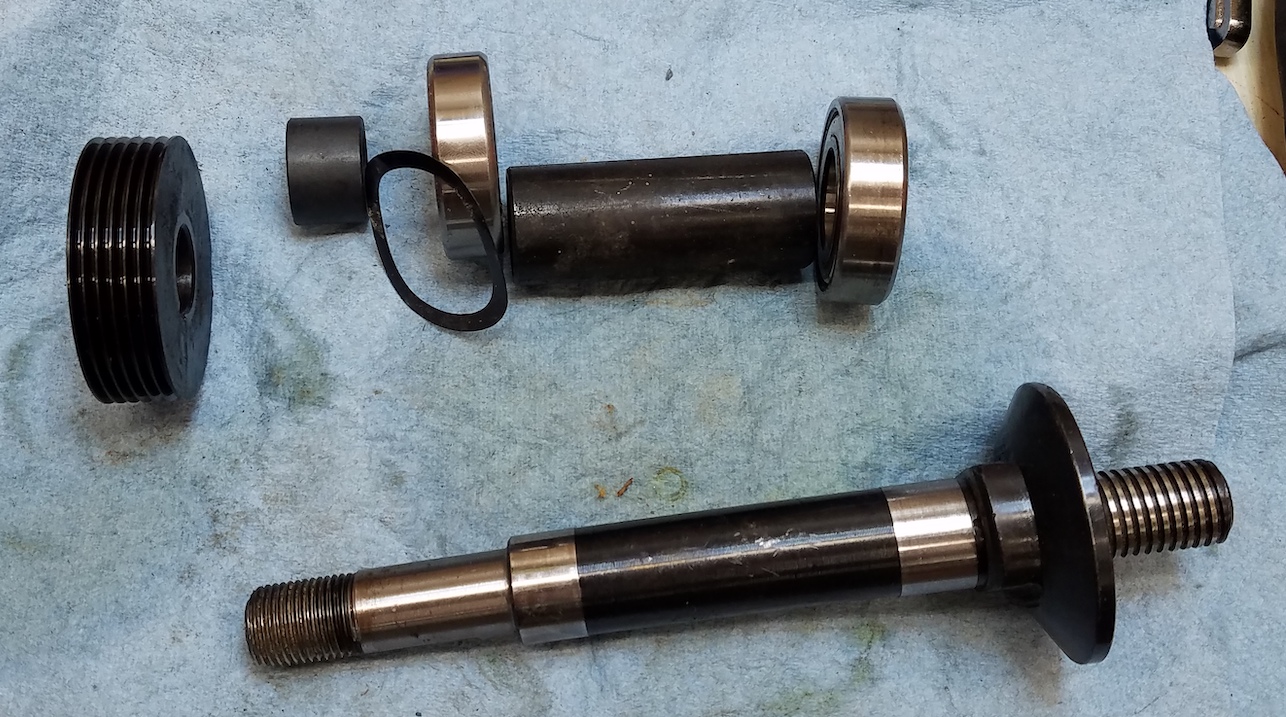
A few months back I noticed my table saw was sounding a little ill. It was louder than usual. It had trouble getting through boards that normally didn’t give it pause, and the blade would come to a stop a short few seconds after turning off the power. I had a bearing problem somewhere.
I pulled the belt off between the motor and the shaft that runs the blade (called the arbor shaft). Turning the motor on, it spins freely and takes a while to slow down. Trying to turn the arbor shaft by hand is quite difficult. Well that was a fairly easy diagnosis. Now how to fix it. Matthew Cremona made a short video demonstrating his journey of replacing the bearings in this saw. (Ridgid R5411 Table Saw purchased in September 2009) He does a good job of showing what everything looks like, but some of the technique could be improved.
Step one is to remove the table top. Remove the blade and lower the arbor all the way down (sad story about that later). There are 4 bolts around the perimeter that hold the granite beast down. Remove them and walk the table top off onto a surface of similar height. This will expose the arbor shaft. There are two big bearings (6004zz) located here (under each red arrow), one of them is likely the culprit.
Now that everything is open I would suggest some lubrication. PB blaster is pretty well rated and available at a lot of auto parts stores. Spray everything that will need to slide and come back in a day or two. That stuff can creep into places for days. Raise the arbor back to the top, remove the pulley and use a block to push out the shaft like Matthew shows. I used a really big dowel to hammer out the bearing that gets left over (left side in above picture). What I ended up with was this below.
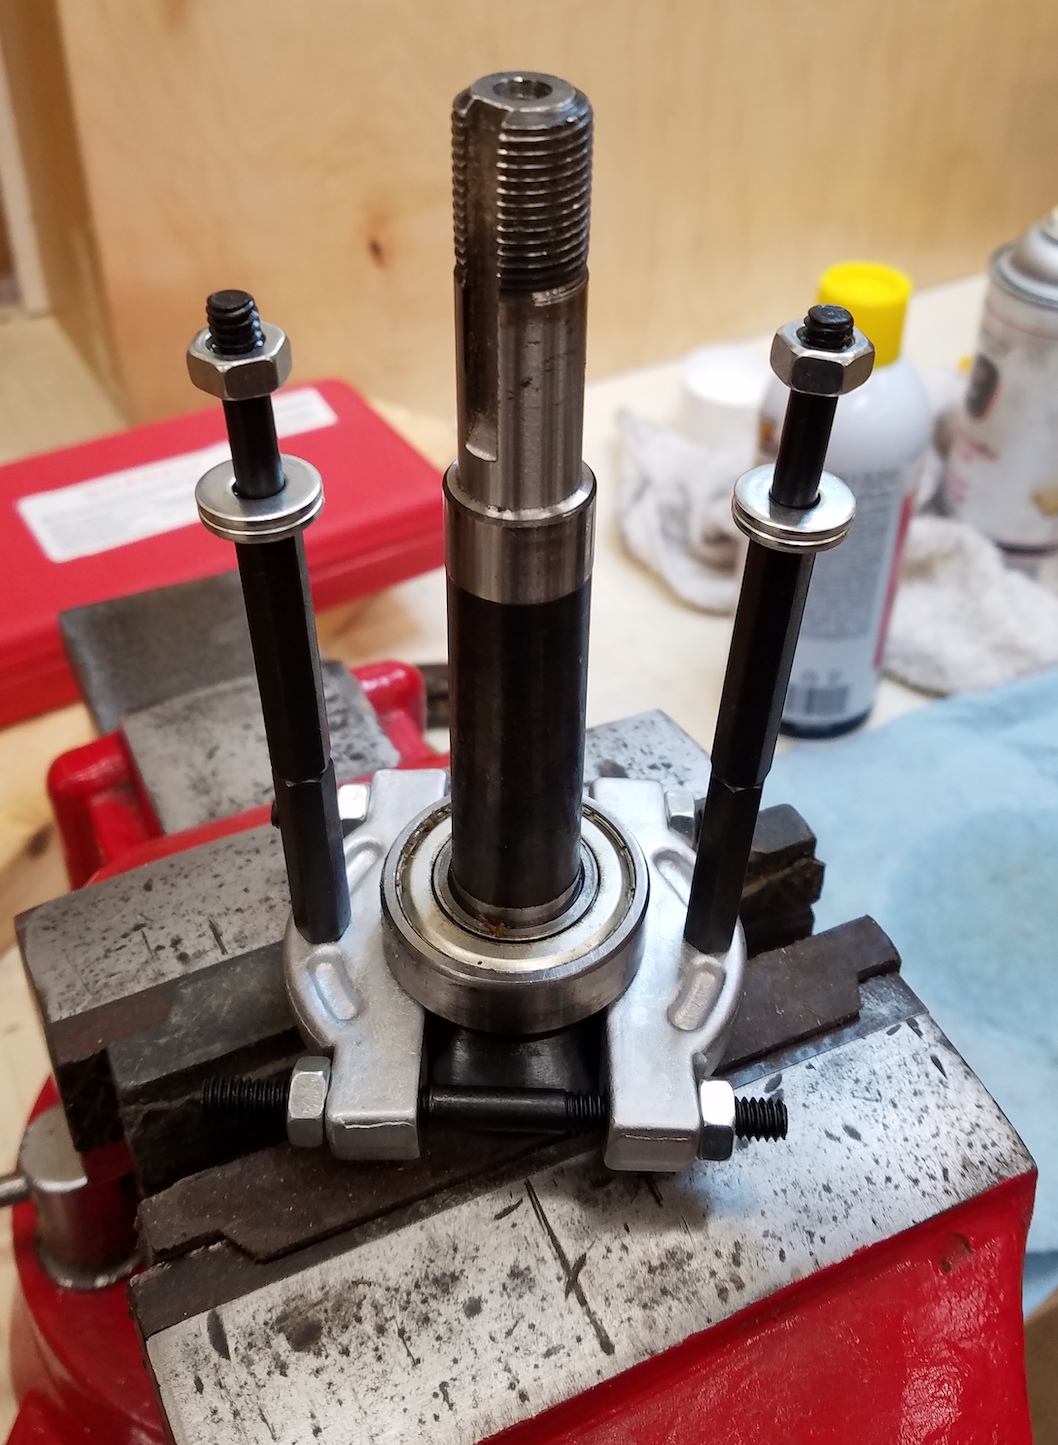
That right most bearing is tricky. It has to slide off of its resting surface, and the one for the left most bearing. Lube helps a lot, and so does the right tool. I picked up a cheap bearing splitter kit and am glad I did. There isn’t much room between the bearing and that flange that goes against the blade. The splitter wedged itself between the two and started the bearing moving towards freedom.
The big red vise from a few weeks ago is going to come in handy now! Next I installed the rest of the hardware to start pulling up on the bearing. The extensions were not long enough. Thankfully they were 1/4″-20 threads. I cut up some threaded rod I had around and got to work.
Original kit with extensions
Original kit compared to my threaded rod
With two adequate threaded rods installed a double fork thing hooks in and has its own threaded center to push on the shaft. A socket wrench helps provide some umph.
Careful application of force was all it took to take everything completely apart. Here is what it looks like with all the bits fully disassembled. The right most bearing was very much seized.
I broke out my new bearings (6004zz) and was a little disgusted. They had surface rust on the outside races. Both sets were individually sealed, but still had rust.
They were all I had and a little fine scotch bright pad took it right off. I used light sanding to make a lead in chamfer on all the bearing surfaces to help with initial seating. I hammered the right bearing back into place using a piece of 3/4″ PVC pipe. Most 3/4″ pipes should do, always apply load to the race you are seating. Inner in this case. The left bearing went back in with a parallel clamp just like in Matt’s video.
Everything was going well until I paid closer attention to the pulley. I had a section that was really dinged up. I had the blade off, but the arbor was near the top when I walked the granite top off. The top sat and slid around on this pulley with its delicate grooves. OOPS! I still can’t quite figure out what this is exactly called, or where to get a replacement. Careful use of needle files and a dremel got the rolled edges out of the way. I have used it a while and so far, no shredded belts.
Before
After some dremel and file work
With the drive system back together I dropped the arbor, waked the top back on and proceeded to re-align the saw. The miter slots should be square with the side of the blade. The only method of “fine” tuning available is to loosen the screws, bang it with a mallet and check again. Tedious, but I got there eventually.
I attached my dial indicator to a sled to make it all go faster. Once aligned I was back in business. Good thing too, I have done a lot of plywood cutting since this repair and have more to do.
In summary, the video linked at the beginning is a good general guide. Additionally, get a basic bearing splitter set to help ease things along. Use good penetrating oil to help in removal. Clean up everything and apply oil for re-assembly.
Home buying is a nerve racking experience. Thrills and surprises await you around every corner. One big one is the home inspection. On something as big as a house there are always items that crop up. You have to decide if they are deal breakers, or if you can take the risk of them being worse than the inspection indicated.
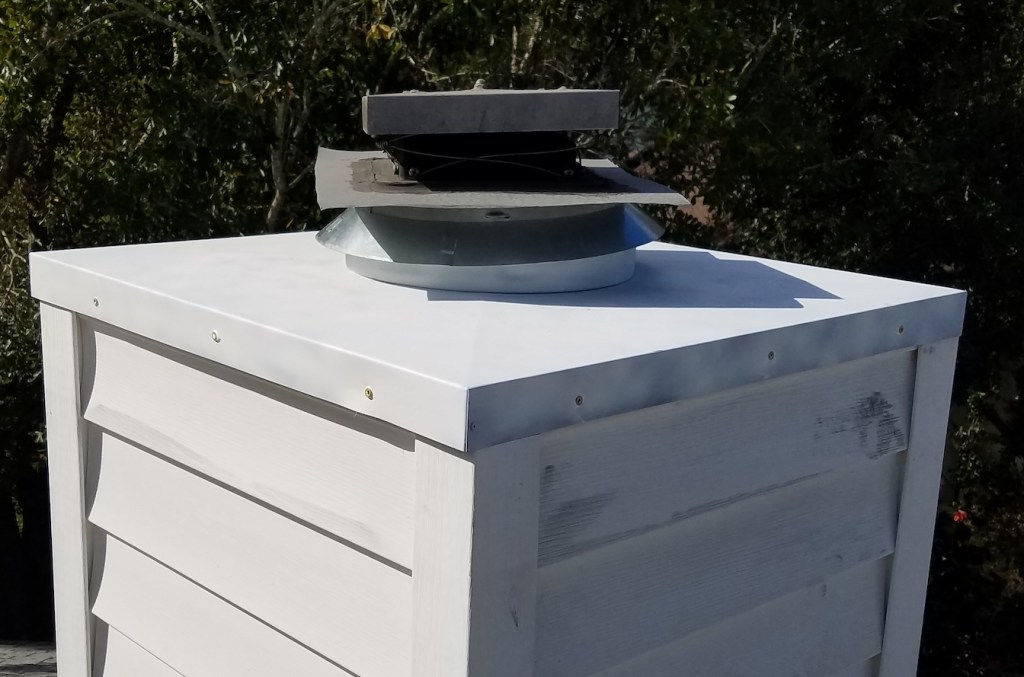
One thing that came up on ours was that the chase cover on the chimney was rusted. It was a surface rust, no emergency, but something to not ignore. A winter break gave me the time, and cooler weather, to get up there and do something about it while not dying of heat stroke. Close inspection revealed that it wasn’t bad and some cleanup plus paint would add many more years of life.
The big square chimney cover bridges the gap between the chimney pipe (might not be the right term) and the wooden structure sicking out of the house. My plan was to take it off, bring it to ground level and do all the paint work. The trick was I couldn’t figure out how to get that top little set of square covers off. I tried rotating the assembly but was worried something in the wall would come apart. 10 minutes of googling while on the roof didn’t give me a good answer.
Chimneys are completely new to me, so I am just feeling my way through all this. The section of roof is pretty tame so I took a grinder up there and did everything on the roof.
Sure enough, the rust wasn’t that deep. I knocked it, and as much other crud off as a I could with a wire wheel and came back with a coarse sander pad. There is still a lot of zinc left, but I had read a self etching primer would bond well with it. A few coats of that, and It was way too hot to keep working.
I came back the next day, sanded the primer and used a full can of high temperature white enamel. Even early in the morning the metal was getting hot and the paint dried too quickly. It isn’t a great paint job, but looks fine from down below. The original plan was to do this all on the ground in the shade. If I had known from the get go I was going to be working on the roof I might have opted to brush on something instead.
I replaced the rusted screw hardware with epoxy coated torx head screws. There is a thin band of metal that covers the gap between the pipe and the newly painted cover. The old one was pretty rusted, but a local fireplace store had new ones, so I replaced it. Not my finest repair overall, but it won’t be rusting through any time soon. When this needs work again I might be calling a fireplace expert of some sort.