Bee Rescue #2, Frame Capture

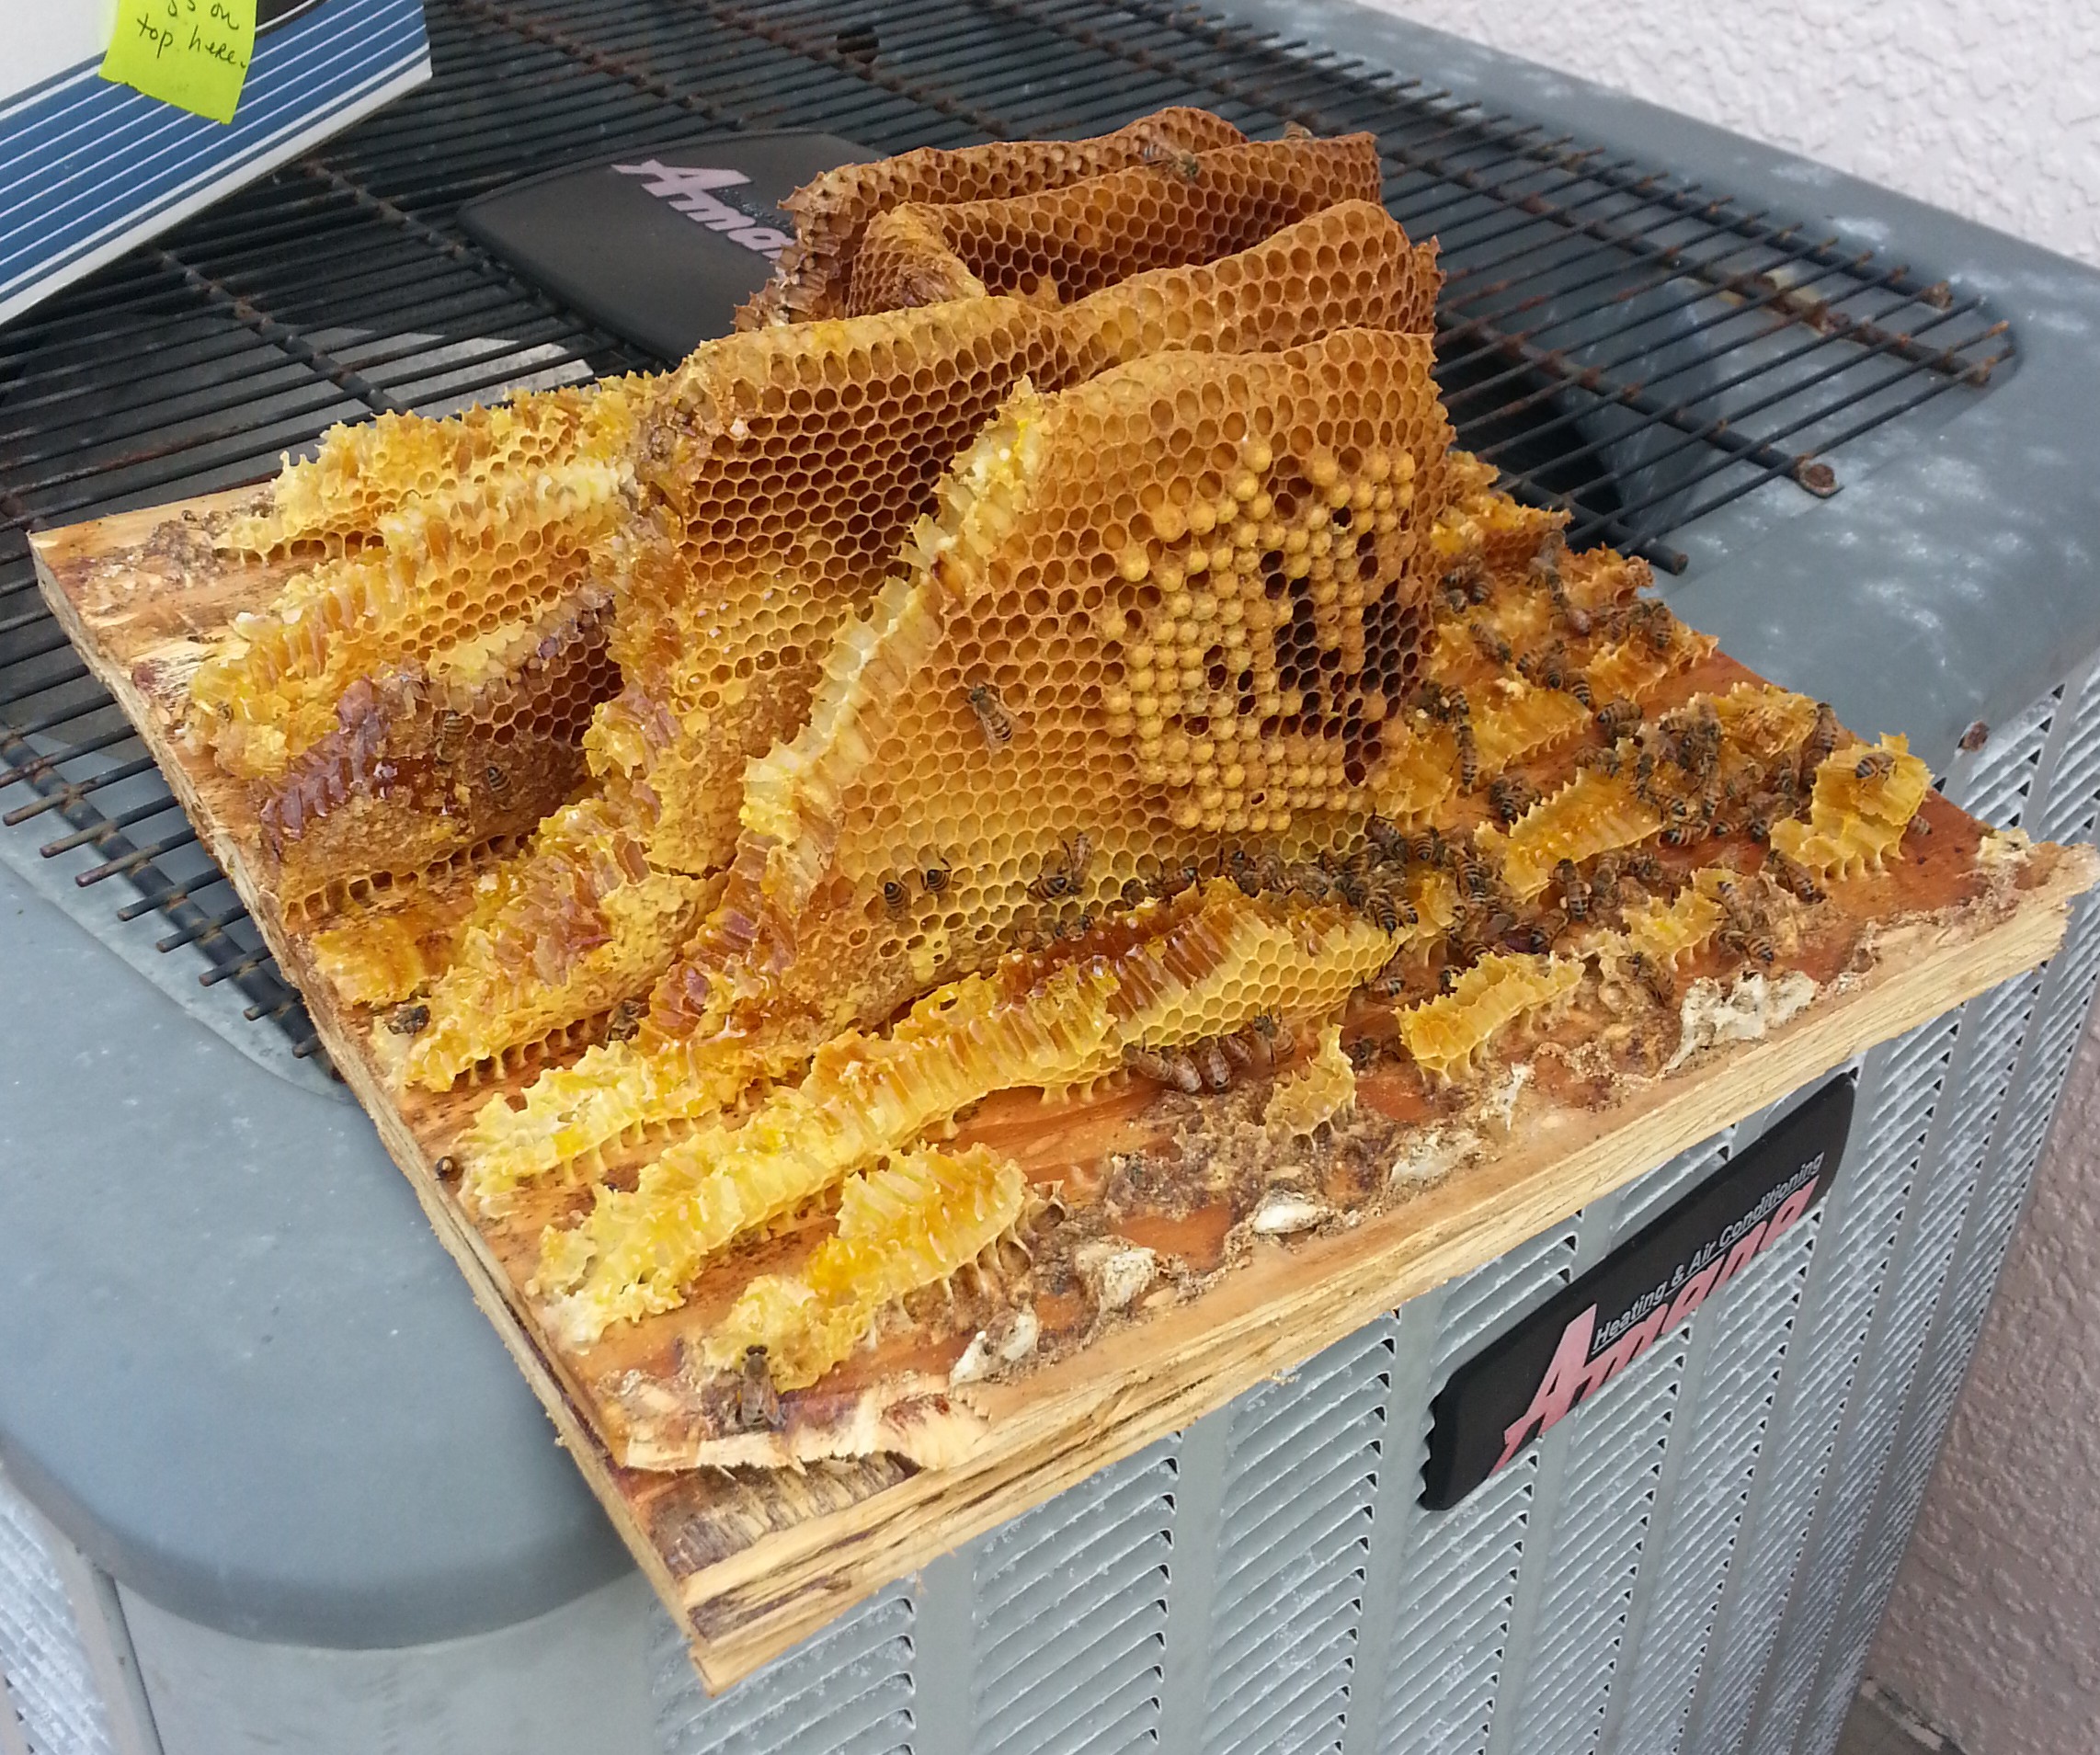
My friend found another hive setup in the floor of a piece of industrial equipment nearby. They were going to rebuild the equipment and wanted the bees gone.  Imagine an ISO shipping container with two layer thick plywood and a load of bees setup underneath.

2016-02-27 09.26.44

I can see a few of them, I wonder how far back they are?

2016-02-27 09.30.42

Oh boy, that is looking like a lot of bees!  There was a lot of equipment inside that couldn’t be moved, so I had to do some creative crawling and cutting to get into the floor.  Lots of cutting and prying later we had pay dirt!

2016-02-27 10.06.54

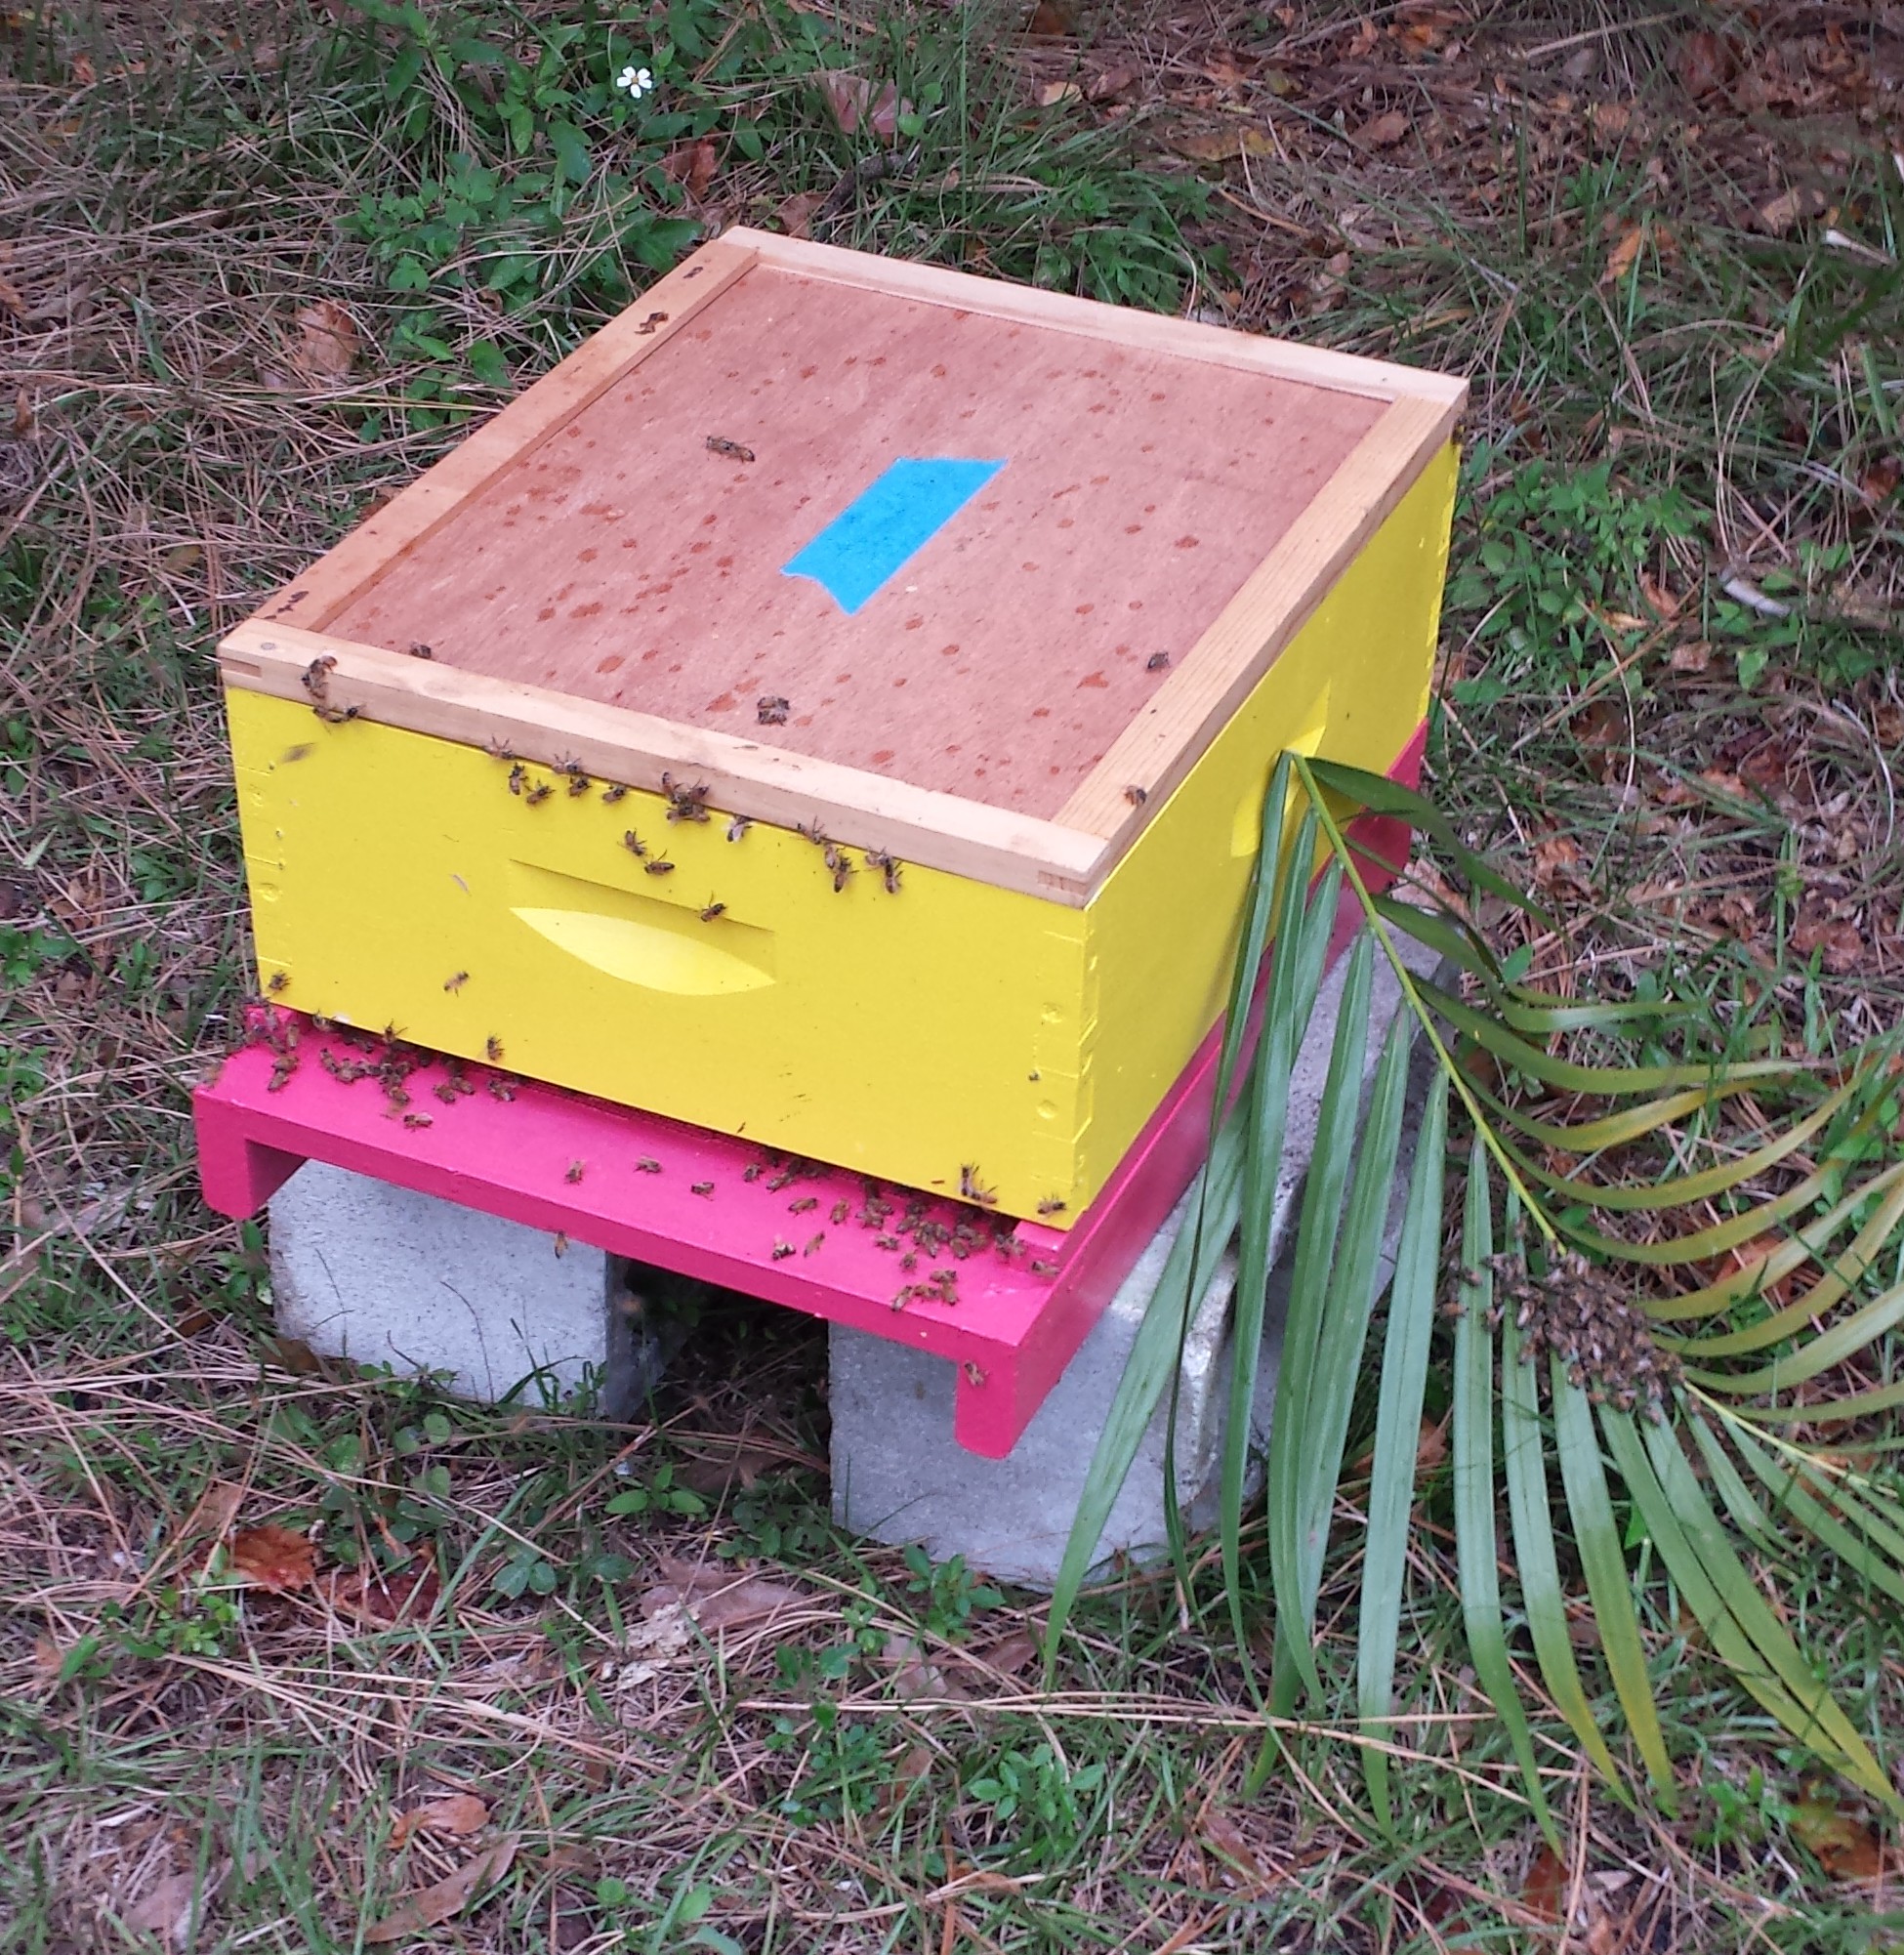
There was about a foot of space between the two floor bars, and they went back about 4 feet from the outside wall with comb and bees.  We came up with a new technique for getting the comb back home.  Put them in empty frames, and use string to bind it in place.

2016-02-27 11.06.07

2016-02-27 11.06.24

This worked really well.  One person would hold the frame upright and keep the comb in place while the other would wrap the string around.  At first we were trying to be really careful with clove hitches and half hitches to keep it all together.  After a while, everything got so sticky in honey that you could kind of just wrap a few times and it would all stay put.  Hopefully the bees will expand that comb out and cement it in place.  Later they will either chew through the string, or you can remove it yourself.

There were a lot of bees around.  I will try to update in a few months when they get well established to see if the string trick works.

2016-02-27 11.13.59

Bunny Fence Upgrade

Our ravenous rabbits know no bounds!  We have a baby gate we put up across the porch door to their area when the weather is nice.  The only trick is that they have taken to chewing on the fence from time to time.  It was cute at first, but they have been making headway on an escape.

DSC_0218

I cut out all the gate material below about 15 inches to clear out the chewed spot and make way for the new barrier.

DSC_0214

I could have upgraded to titanium coated steel mesh, but I figure they would chew through that in a few months as well.  Instead I went with thin acrylic sheeting.

DSC_0219

Covering just the bottom half kept the cost down and I doubt they will be able to reach high enough to do significant chewing above the clear plastic line.  I attached the left piece over the outside face of the frame because there was room.  The sliding action of the gate wouldn’t allow the right piece to be attached the same way.  Instead, I used some of the remaining white gate material as a backer, and drove screws in at an angle to wedge the plastic in frame.

DSC_0220


The Reaction

How was it received?  Pretty well I guess.  They have nosed it a few times, and tried to paw at it a bit.  Here was their first introduction.

DSC_0225

DSC_0227

DSC_0228

The window is clean for now, and provides an unobstructed view of extreme cuteness.  The way these buns are, I will come out one time to find them all raiding the fridge with a 4″ perfectly circular hole cut in the plastic window.  Clever buns!


Bee Rescue Rangers

We had a first in our beekeeper careers.  We helped rescue a wild hive that was setup in someone’s shed.  Lots of mistakes were made and a considerable amount of improvising occurred.  Here is the scene, a shed next to someone’s house has a very active hive coming and going from the corner.

20160206_112556

It was hard to get a picture of, but there were a few bees coming and going every second.  This was obviously a big active hive.  A bit of work on the outside panels led us to thinking that they were probably setup under the floor.  A stethoscope would be helpful next time.  We did some cutting between the joists and came up with this chunk of floor.

20160206_115045

Lots of slow careful work got all the comb out and into a medium box.  We should have brought a bigger boat!

20160206_121117

This was the only box I had spare, so it will have to do.  In addition we did a lot of really careful vacuuming with a shop vac.  We were able to grab thousands of bees this way, and they all seem to have survived the encounter.  This hive was found by our friend Willow, and it is going to live in her yard.  She has a thing for hot pink.  Good luck in your new home bees!

2016-02-06 15.19.02


Bonus Farm Tour

I got to start the bee rescue day off with a short lecture to the Melbourne Village  community garden about beekeeping.  They were very interested in beekeeping, but had a lot of questions.  After a bit of chatting they are on board and are looking into doing a few hives as a community.

After the rescue we were invited to one of the garden member’s backyard.  We got to see chickens and sheep and goats oh my!

The best part of it all was the dozen eggs I got as thanks from this backyard farm for giving my little bee talk.  Fellow beekeepers should seek out local community gardens.  They would probably be interested in hearing about beekeeping as a matter of interest if nothing else.  Some might be into it enough to start their own community bee hive!  Seriously though, check out these eggs!

2016-02-06 16.05.35


Smoker Renoation

My beloved smoker has fallen on hard times.  I bought a traeger pellet fed smoker in the summer of 2009, and have done mountains of delicious meat in it ever since.  All those years outside in florida have taken their toll.

DSC_0092

The paint has faded and is rusting through in places, the outside is quite dirty, and a back leg has completely rusted through. I had to prop it up to keep the thing from rocking.

The inside doesn’t look much better.  Surface rust is kind of unavoidable, but neglect had built up on the walls and in the bottom tub.  I should really clean this thing out more.

My bad behavior aside, this thing is built  like a tank.  Even with all the years of outdoor use, I was able to pull all the screws out.  There is a lot of surface rust, but nothing too deep except for the one back leg.  I started to take everything apart and became even more enamored with my smoker’s build and design.

With all the parts pulled out and the mess cleaned up it was time to get everything back into shape.


Rebuild

I used a wire brush on my angle grinder to strip all the bad paint and rust.  I started everything with flat black rustoleum grill paint.  It covered everything but looked kind of bad.  I was in the hardware store and noticed they have a semigloss.  It matches the original paint job.  I redid most of the parts with a primer, and gave everything another coat with the semi-gloss.

DSC_0130

DSC_0131

Once all the paint was down I started rebuilding.  Some of the hardware got replaced, but most of it was actually in really good shape.  The back leg was shortened and fitted with an aluminum extension.  No more rusting off foot!  I replaced the hot rod starter because it is hard to get to and didn’t cost much to replace.

Other upgrades happened along the way.  They have a nice shelf that bolts in with the legs.  It folds away when not in use, and sits nicely in line with the entrance so you can transfer to and from the smoker.

DSC_0143

I pulled out the old controller that only had 3 heat settings.  The new one reads the internal temperature and feeds in pellets accordingly.  It has an autostart-up feature and a shutdown cycle that helps prevent soot.  I also replaced the drip bucket because it was pretty nasty.

All in all it looks pretty good.  Because I couldn’t get all the old paint off there is some odd texture, but it looks way better than when I started.  Now that I have the primer and grill paint around I will make it a point to check every year or so for bad spots that need a touchup.

DSC_0144

Lastly, the accessory I should have bought when I first got the grill.  A cover!  I don’t know how much longer the paint would have lasted with one, but it is worth a shot.

DSC_0146

This smoker rocks.  With a little more preventative maintenance than I had been doing I can hopefully look forward to another 6+ years of service.  Delicious smoked meat posts to follow!