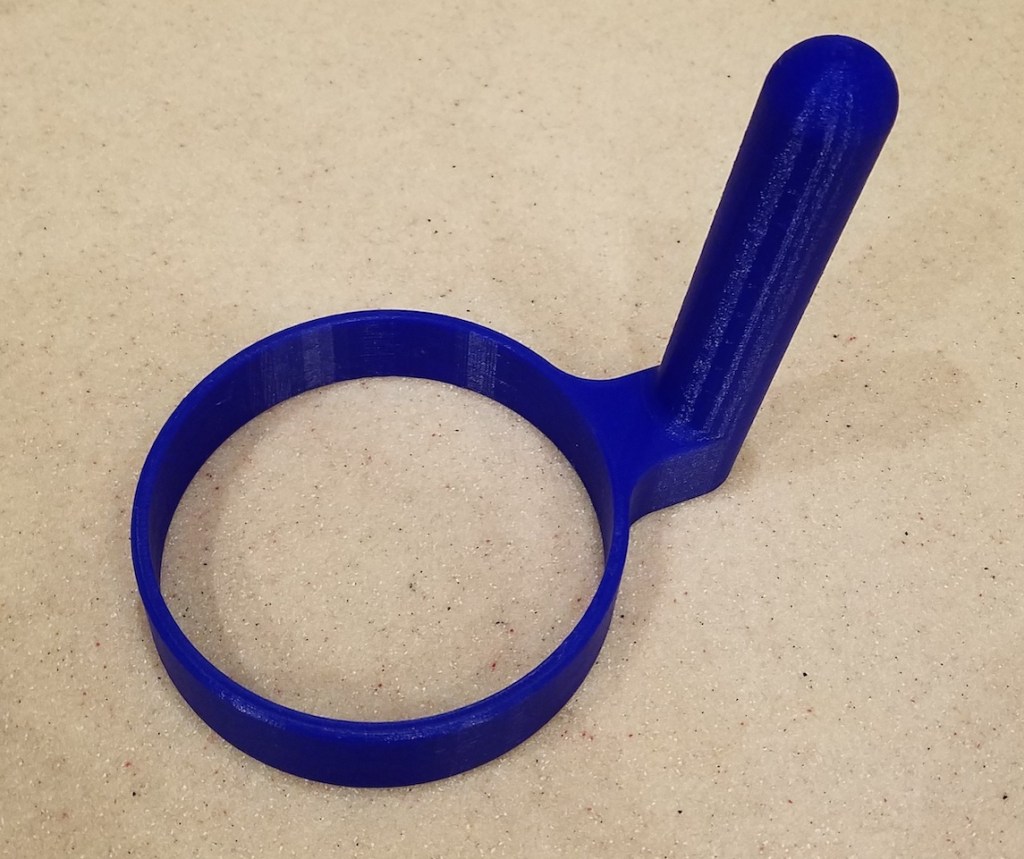
April 2019 Prints

RTIC Tumbler Handle

For some reason RTIC has changed the shape of their 30oz tumbler. Not sure if YETI did this, and they followed suit or what. I suspect it is a plot to sell more handles and accessories. As it stands, the old handle I designed doesn’t fit on the new style of cup any more. The taper angle and diameters are just a little different.

My old handle was printed in 2 parts because most low end printers (including the one I owned at the time) couldn’t print something that big. Now a days at least a 6×6 bed size is pretty bog standard. This new design will be all one piece. The cup is large enough in diameter that getting my calipers on it wasn’t going to work. I printed some rings of different diameters and used them to estimate the taper angle of the new cup.

With that figured out I just printed a new handle that looks a lot like the old one, only with slightly more finger room and a longer grip. Thingiverse link

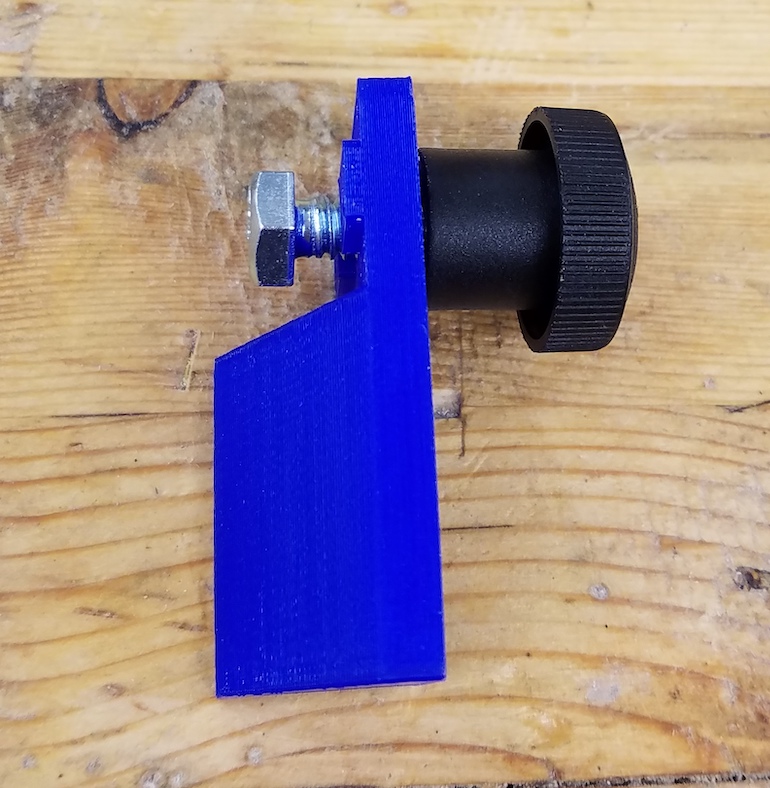
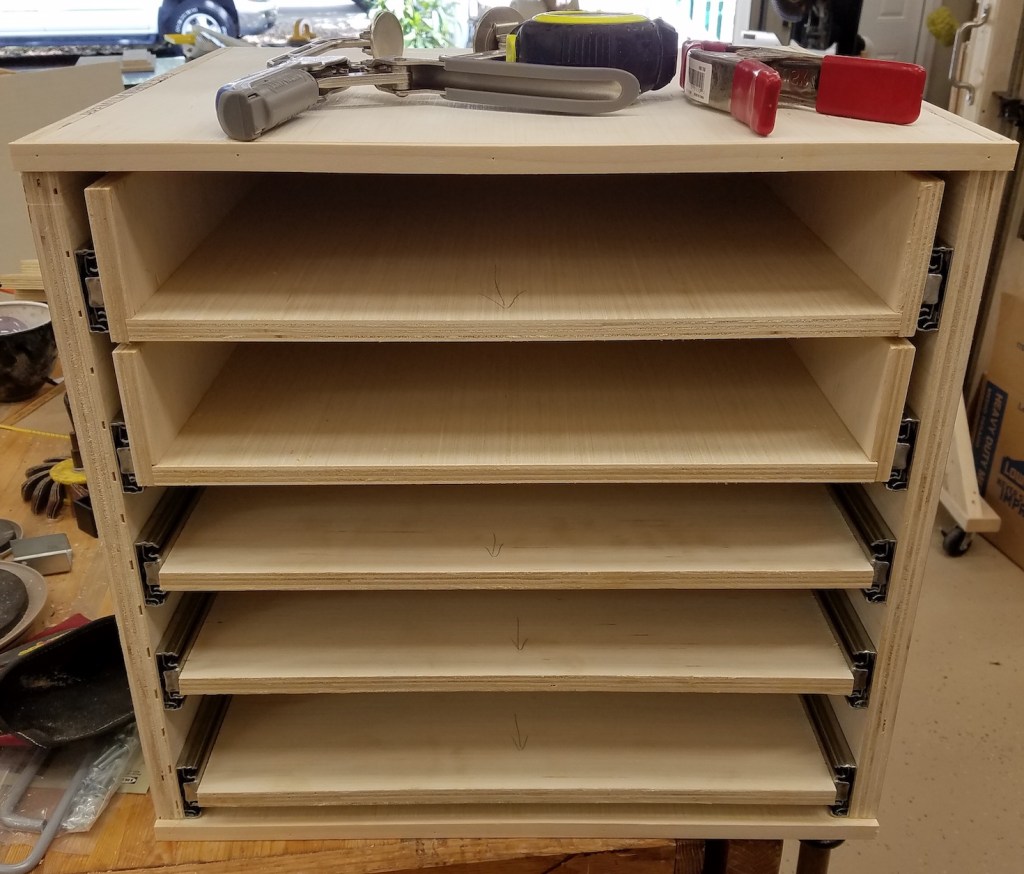
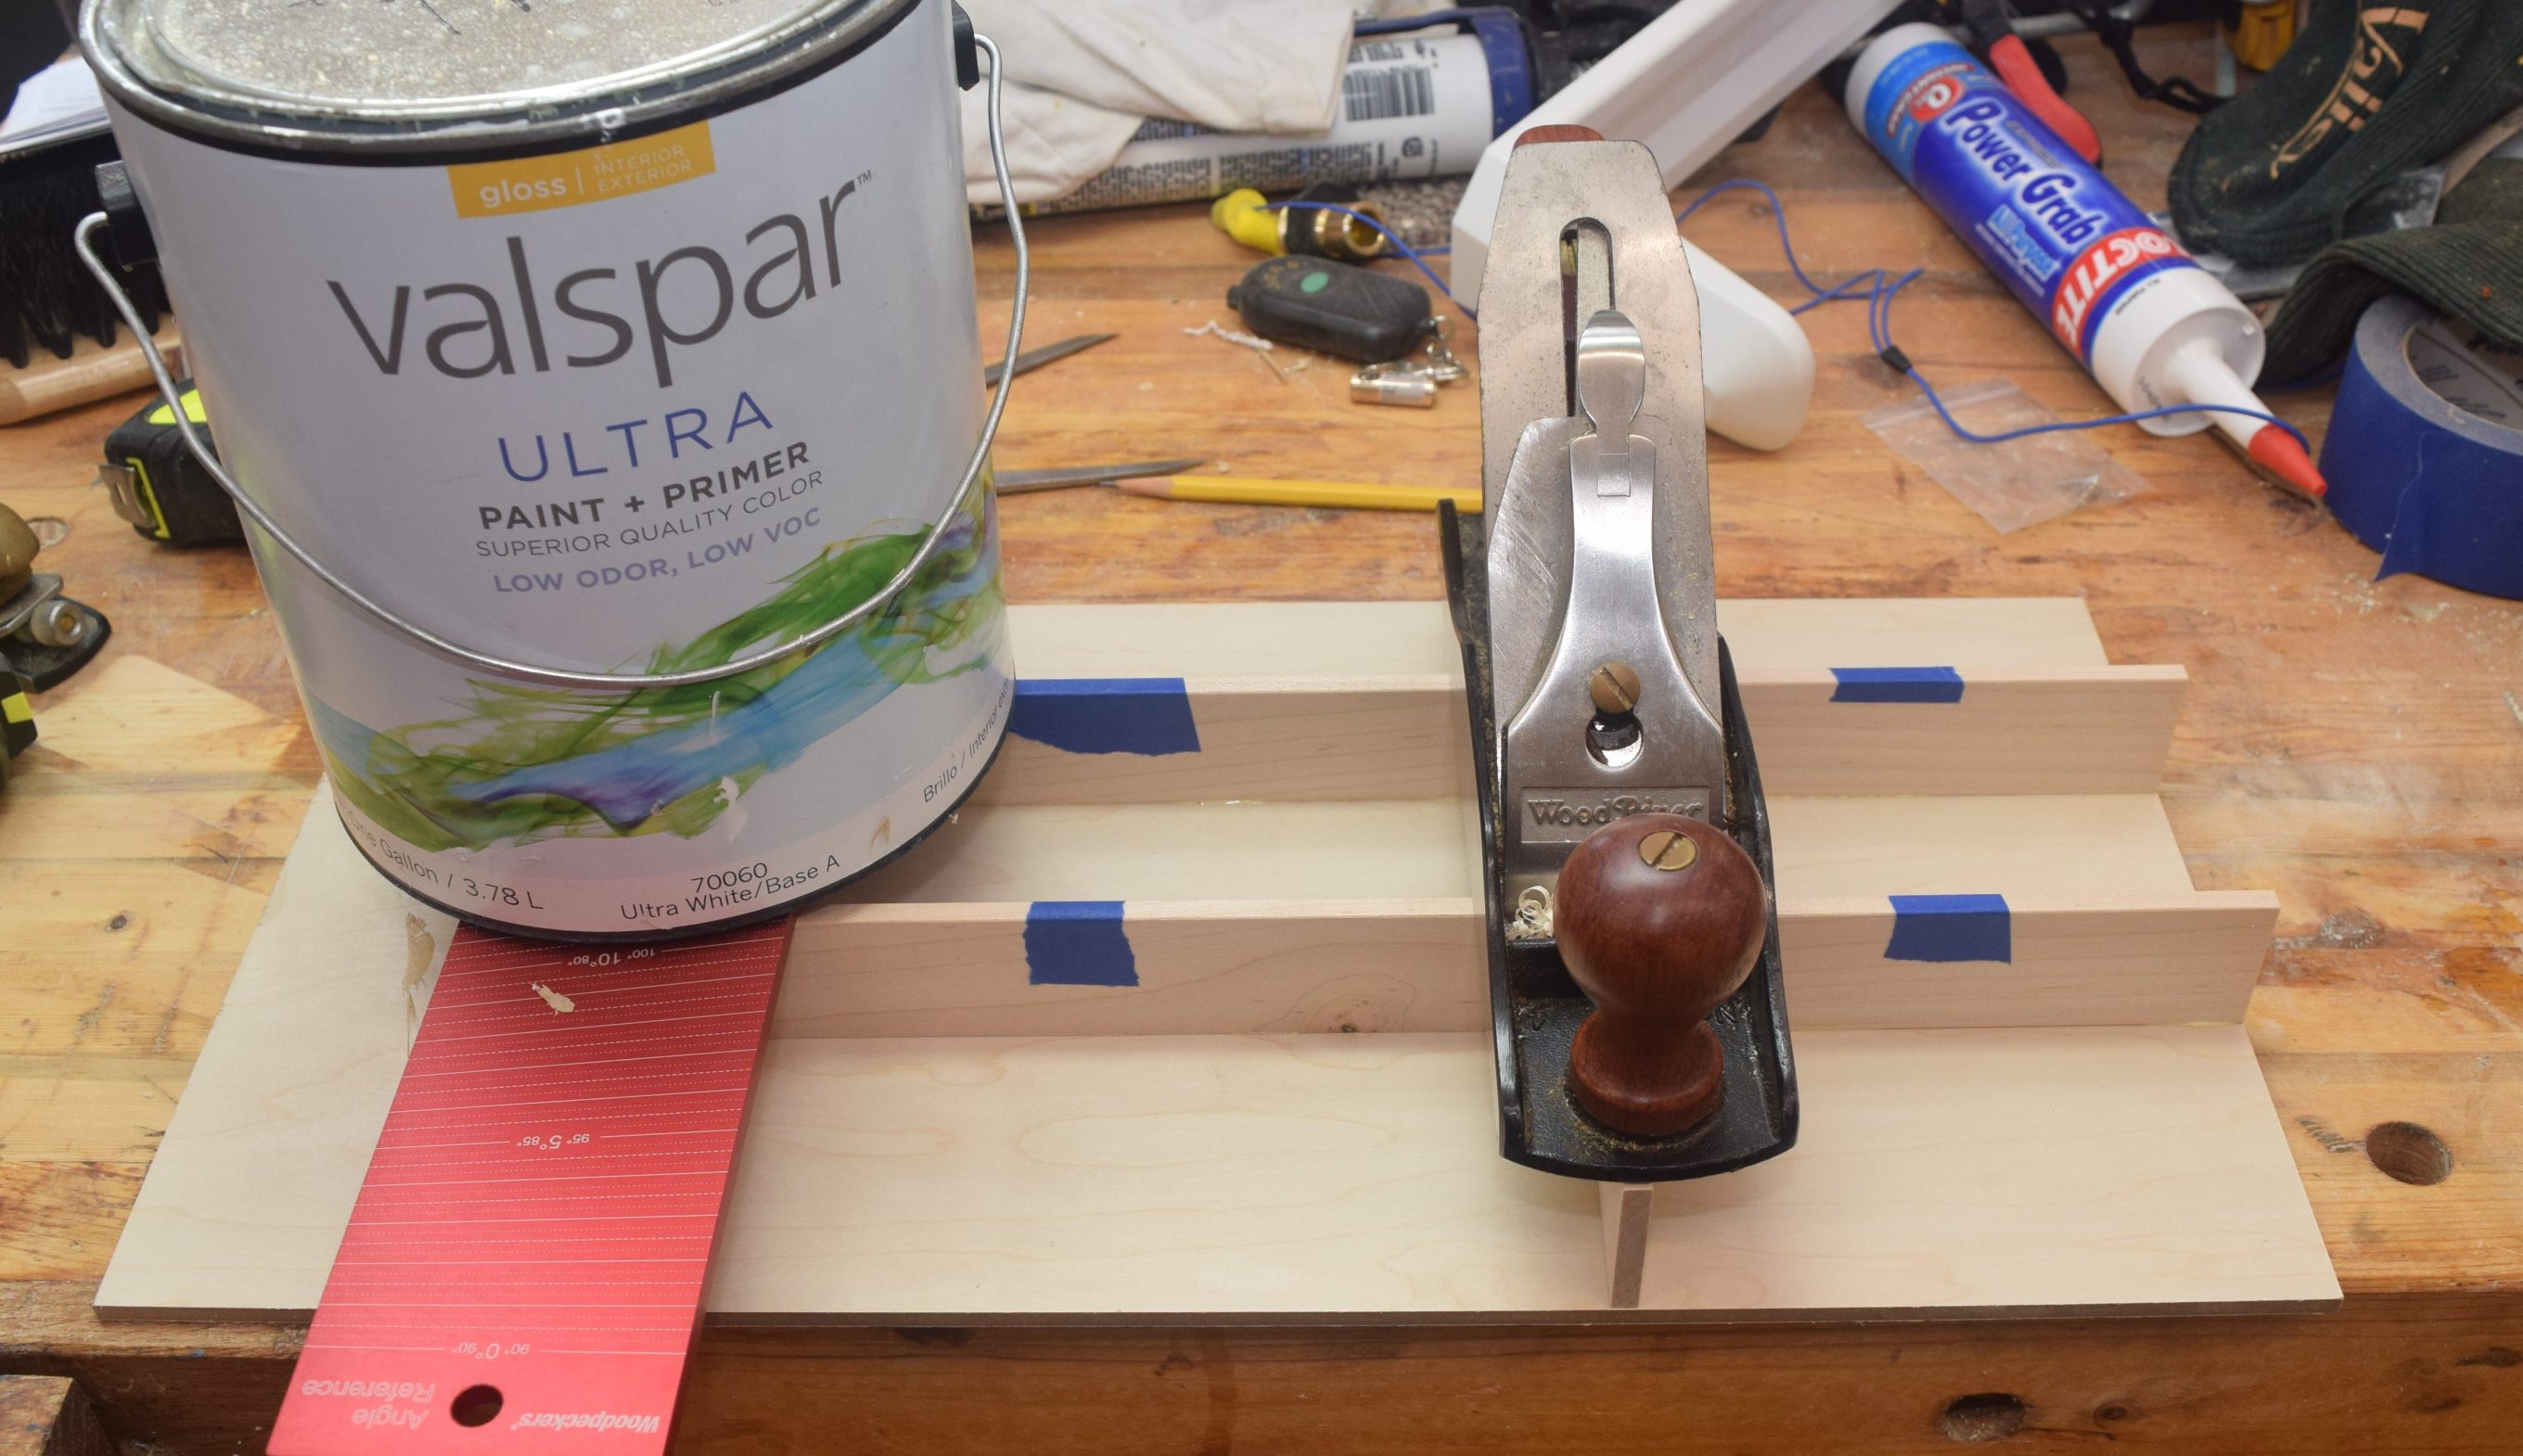
Drawer Pull Centering Jig

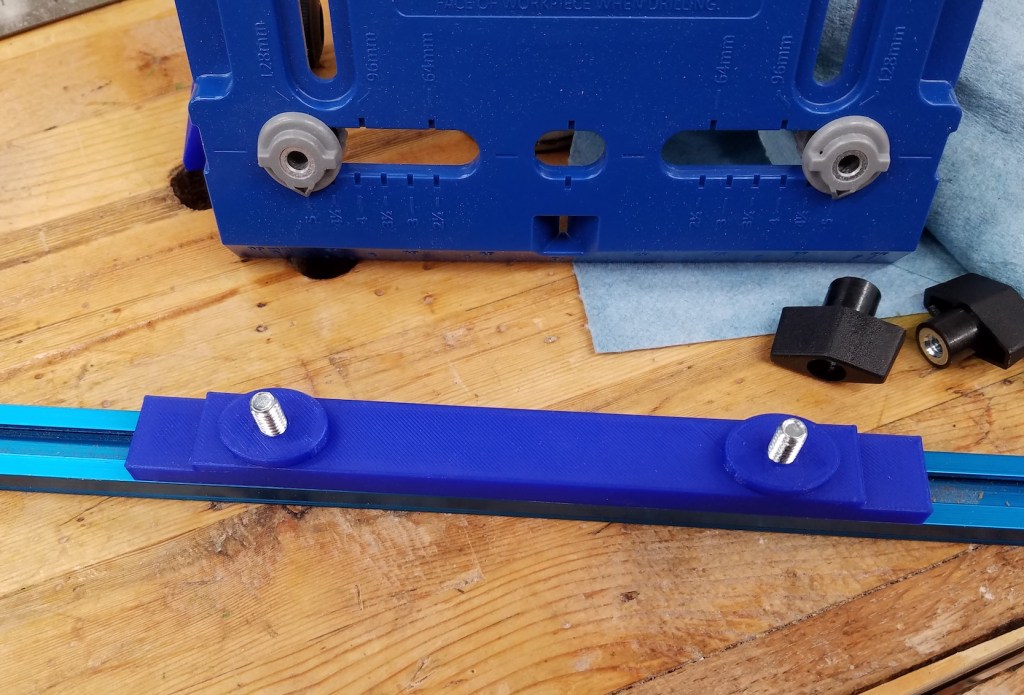
I picked up a Kreg cabinet handle jig for one of my recent projects, and because handles are something you install pretty frequently. It is certainly possible to do them well without a jig, but that always makes repetitive work easier. The jig does a good job of setting the height and width of the holes. It doesn’t center them on the drawer though. I made a few add ons to help with that.

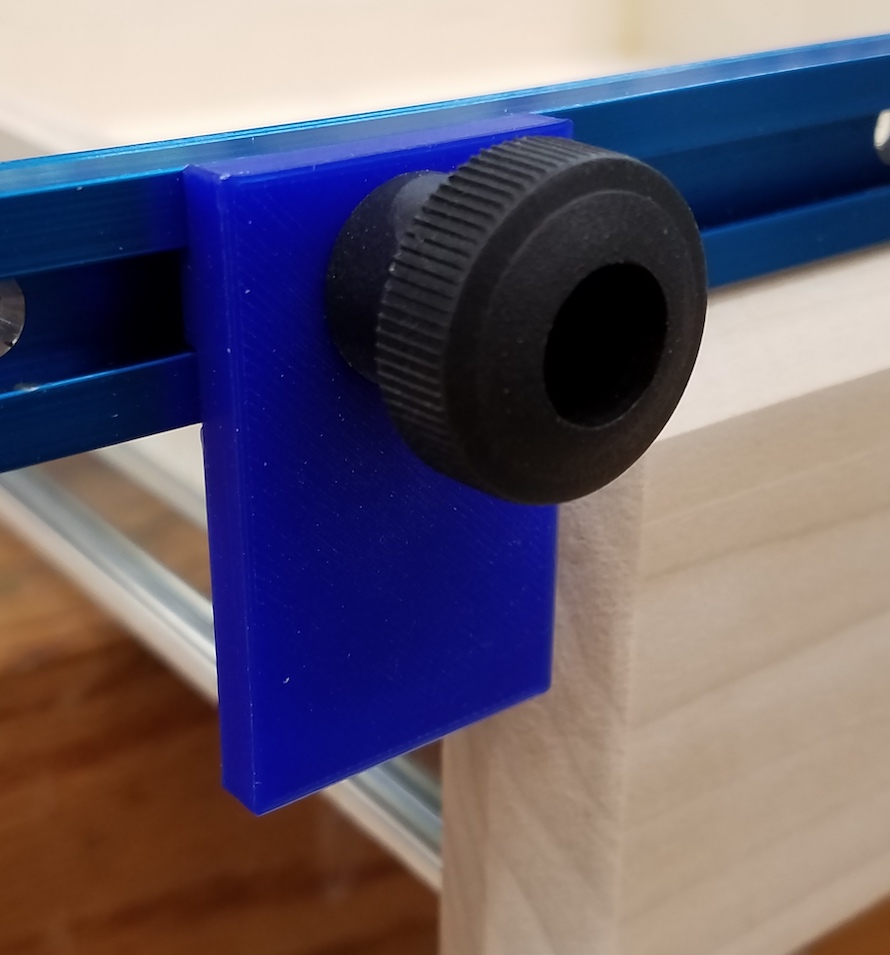
I took a length Kreg track that you would normally imbed into a table to make moveable hold downs. Instead, this becomes part of the top fence used to set depth. Now with a spacer it registers across the whole top edge of the drawer. That also lets you use an edge stop. Now it is all centered. Once set you can put handles in the same drawer position over and over again with no more measurements or adjustments. The only downside is that there was a scale on the back of the jig for setting depth. That no longer measures true because this vertical stop doesn’t register where the old one did.
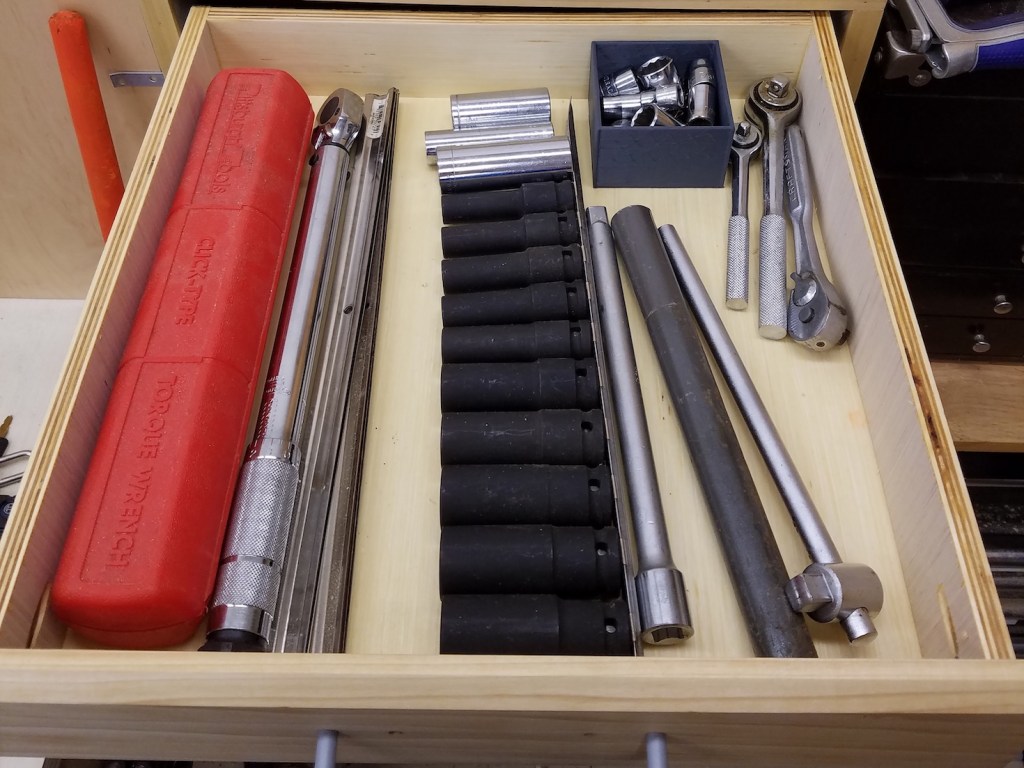
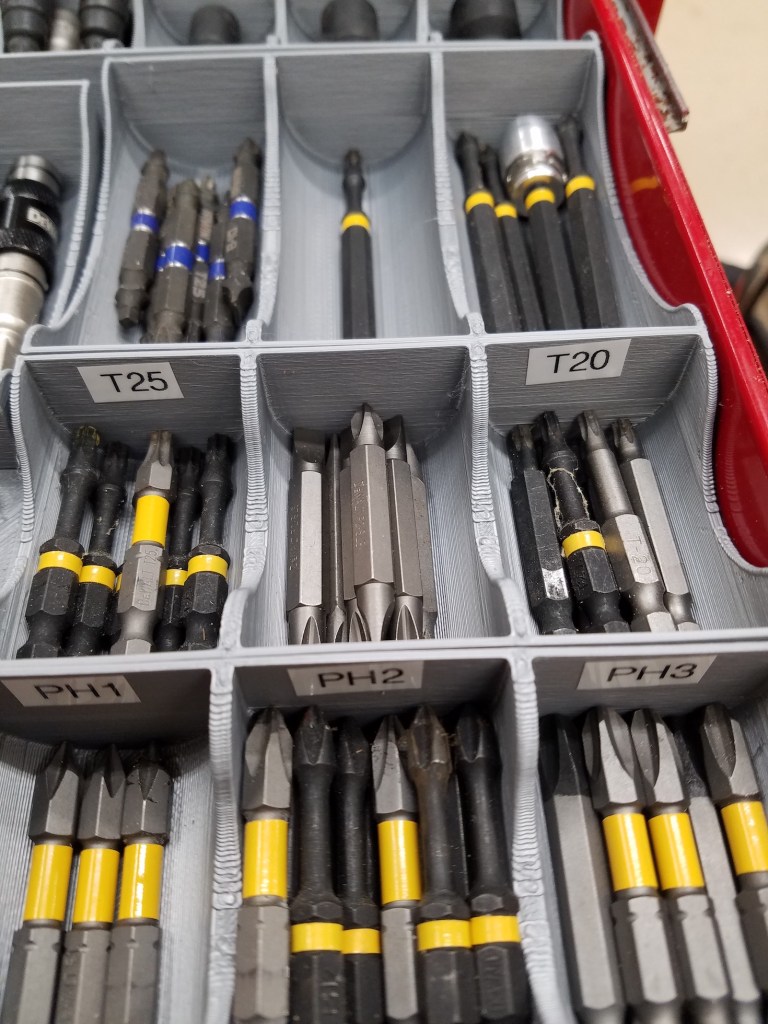
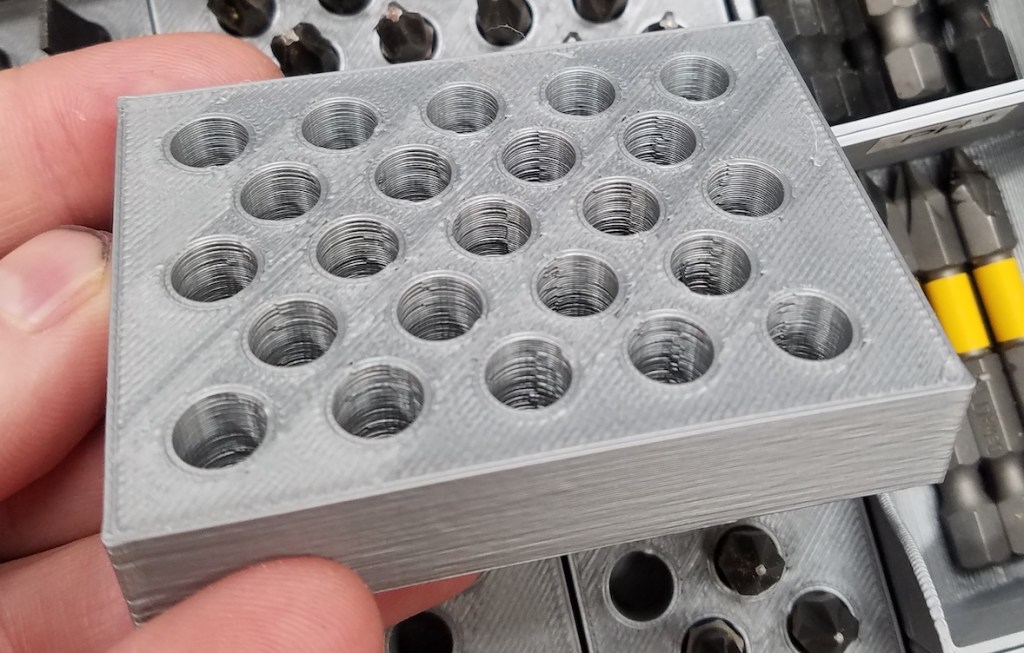
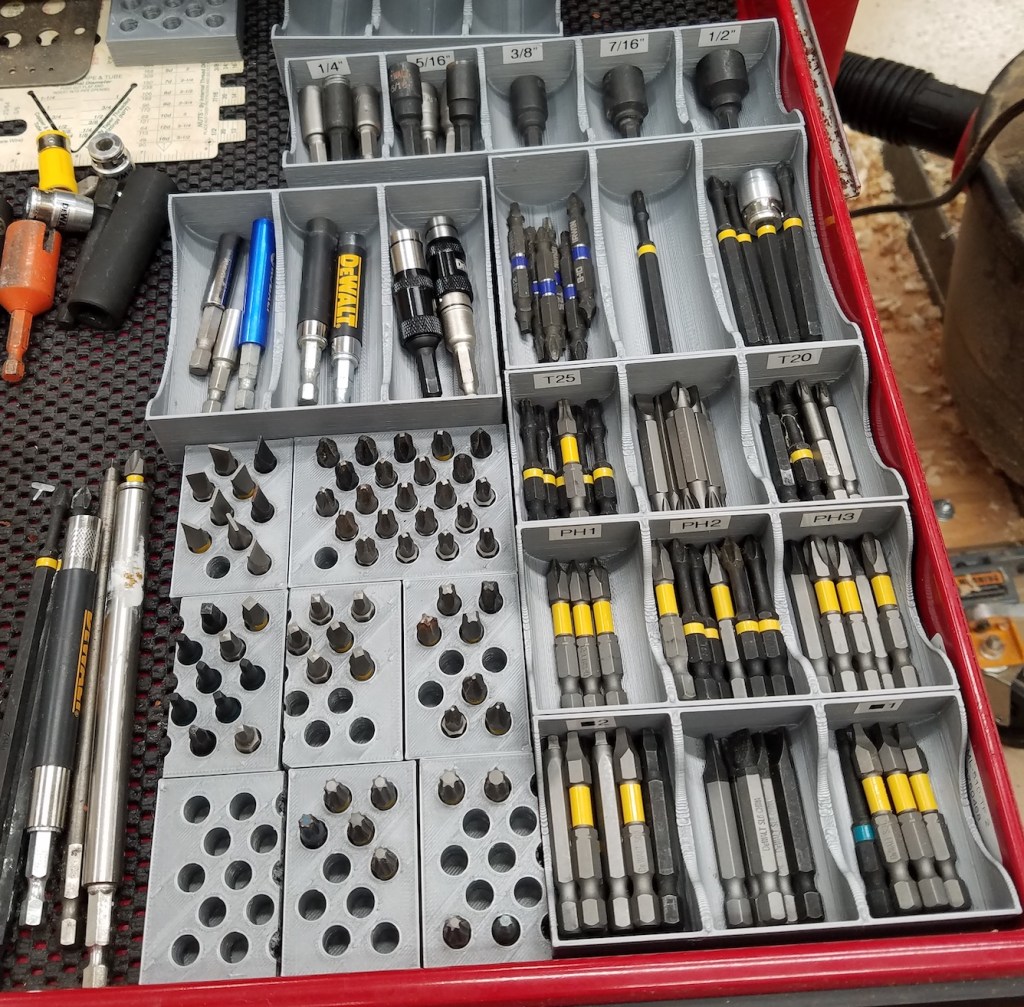
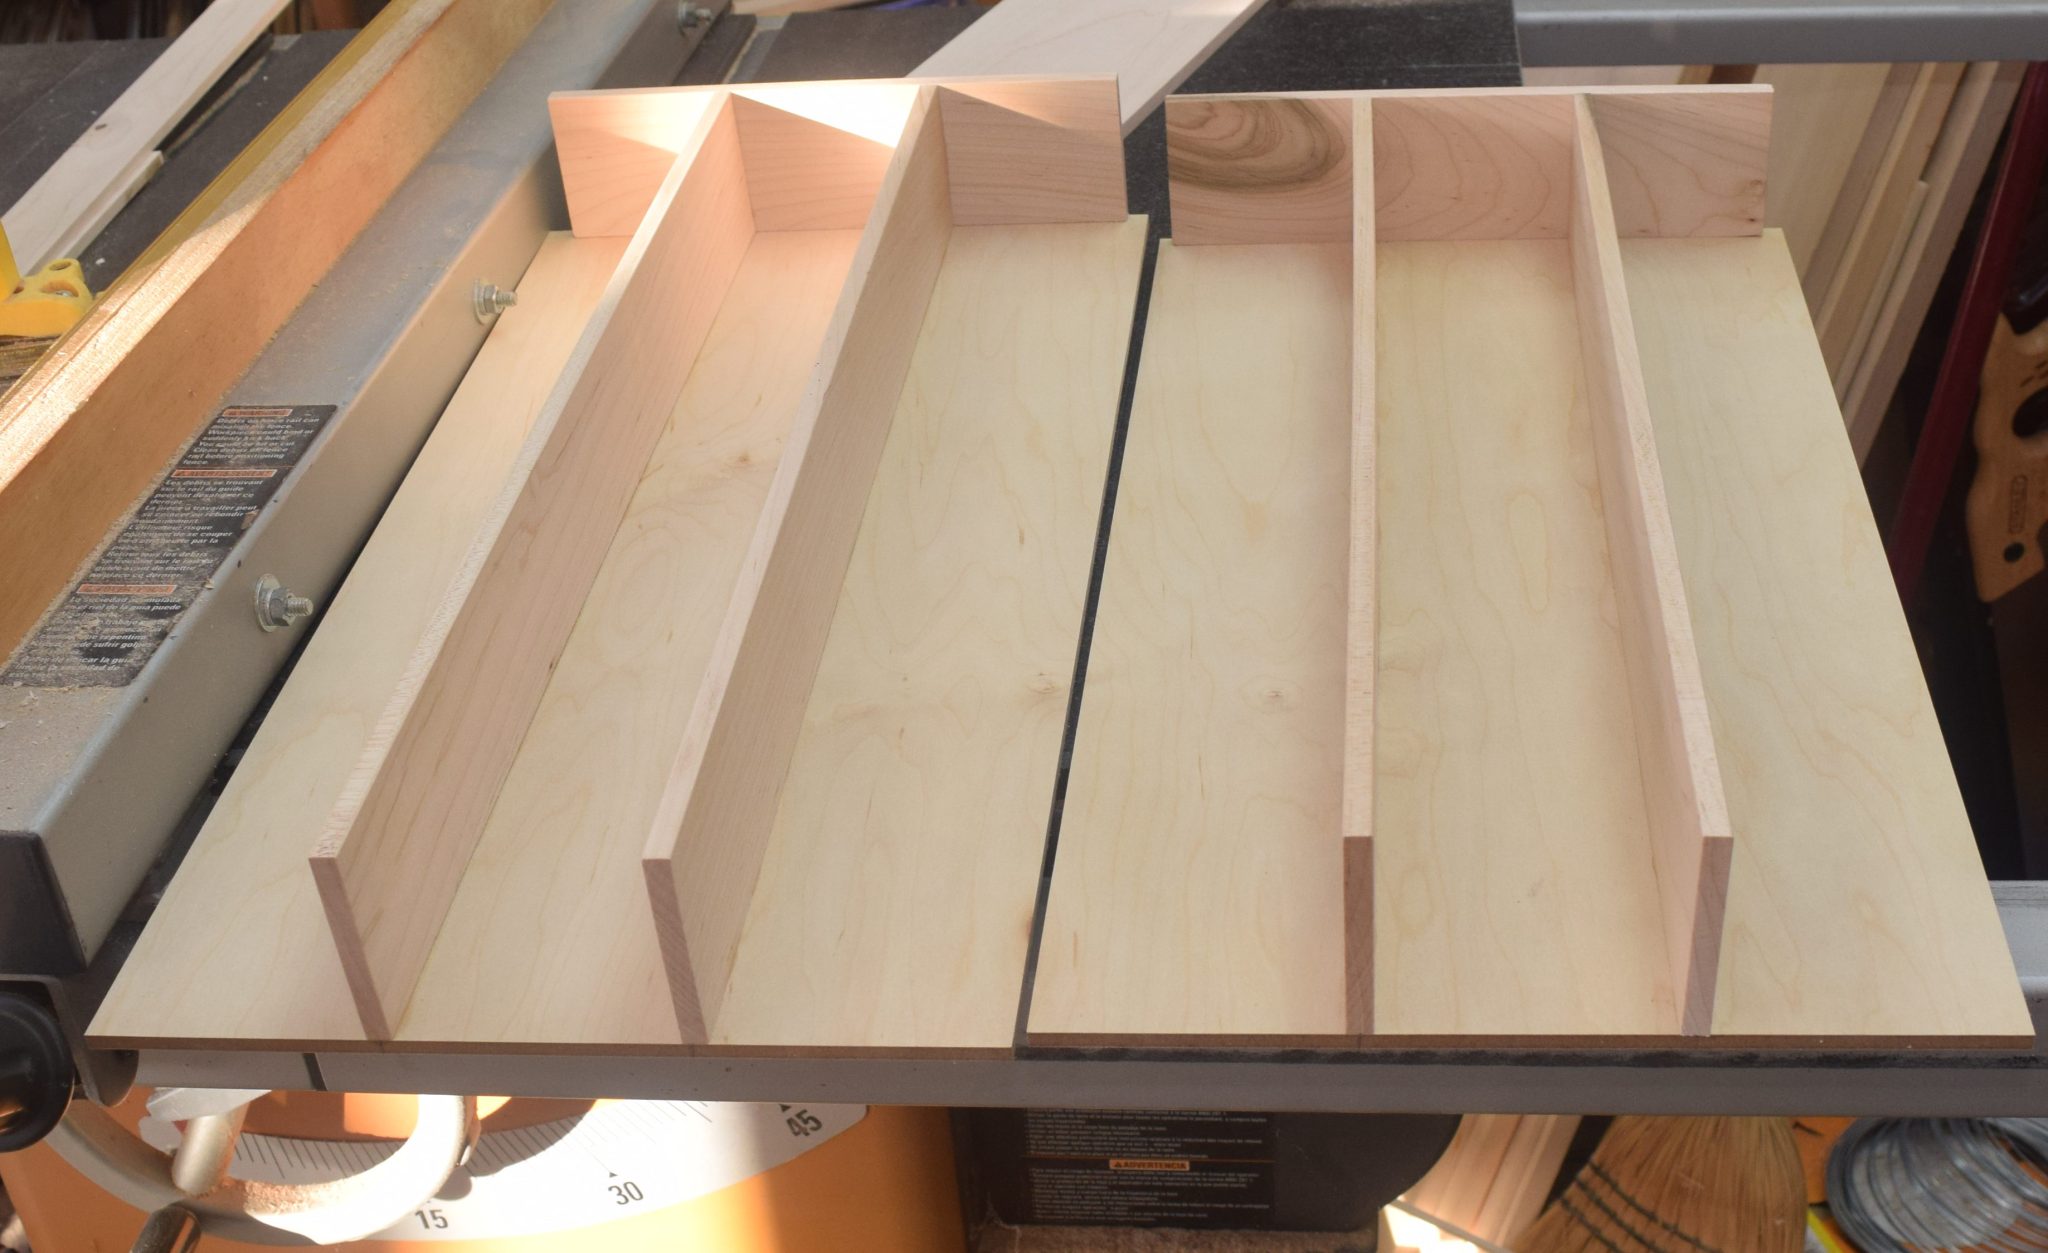
Router bits

Storage and organization is a place where the printer continues to be endlessly helpful. I have had this nice router bit set for years, but always had trouble getting the bits back in their slot. They end up clanking around the drawer and taking up more space than they should. A simple printed tray gives them each a home and takes up a lot less drawer space. For smaller prints like this, a label maker works better than trying to 3D print the text.

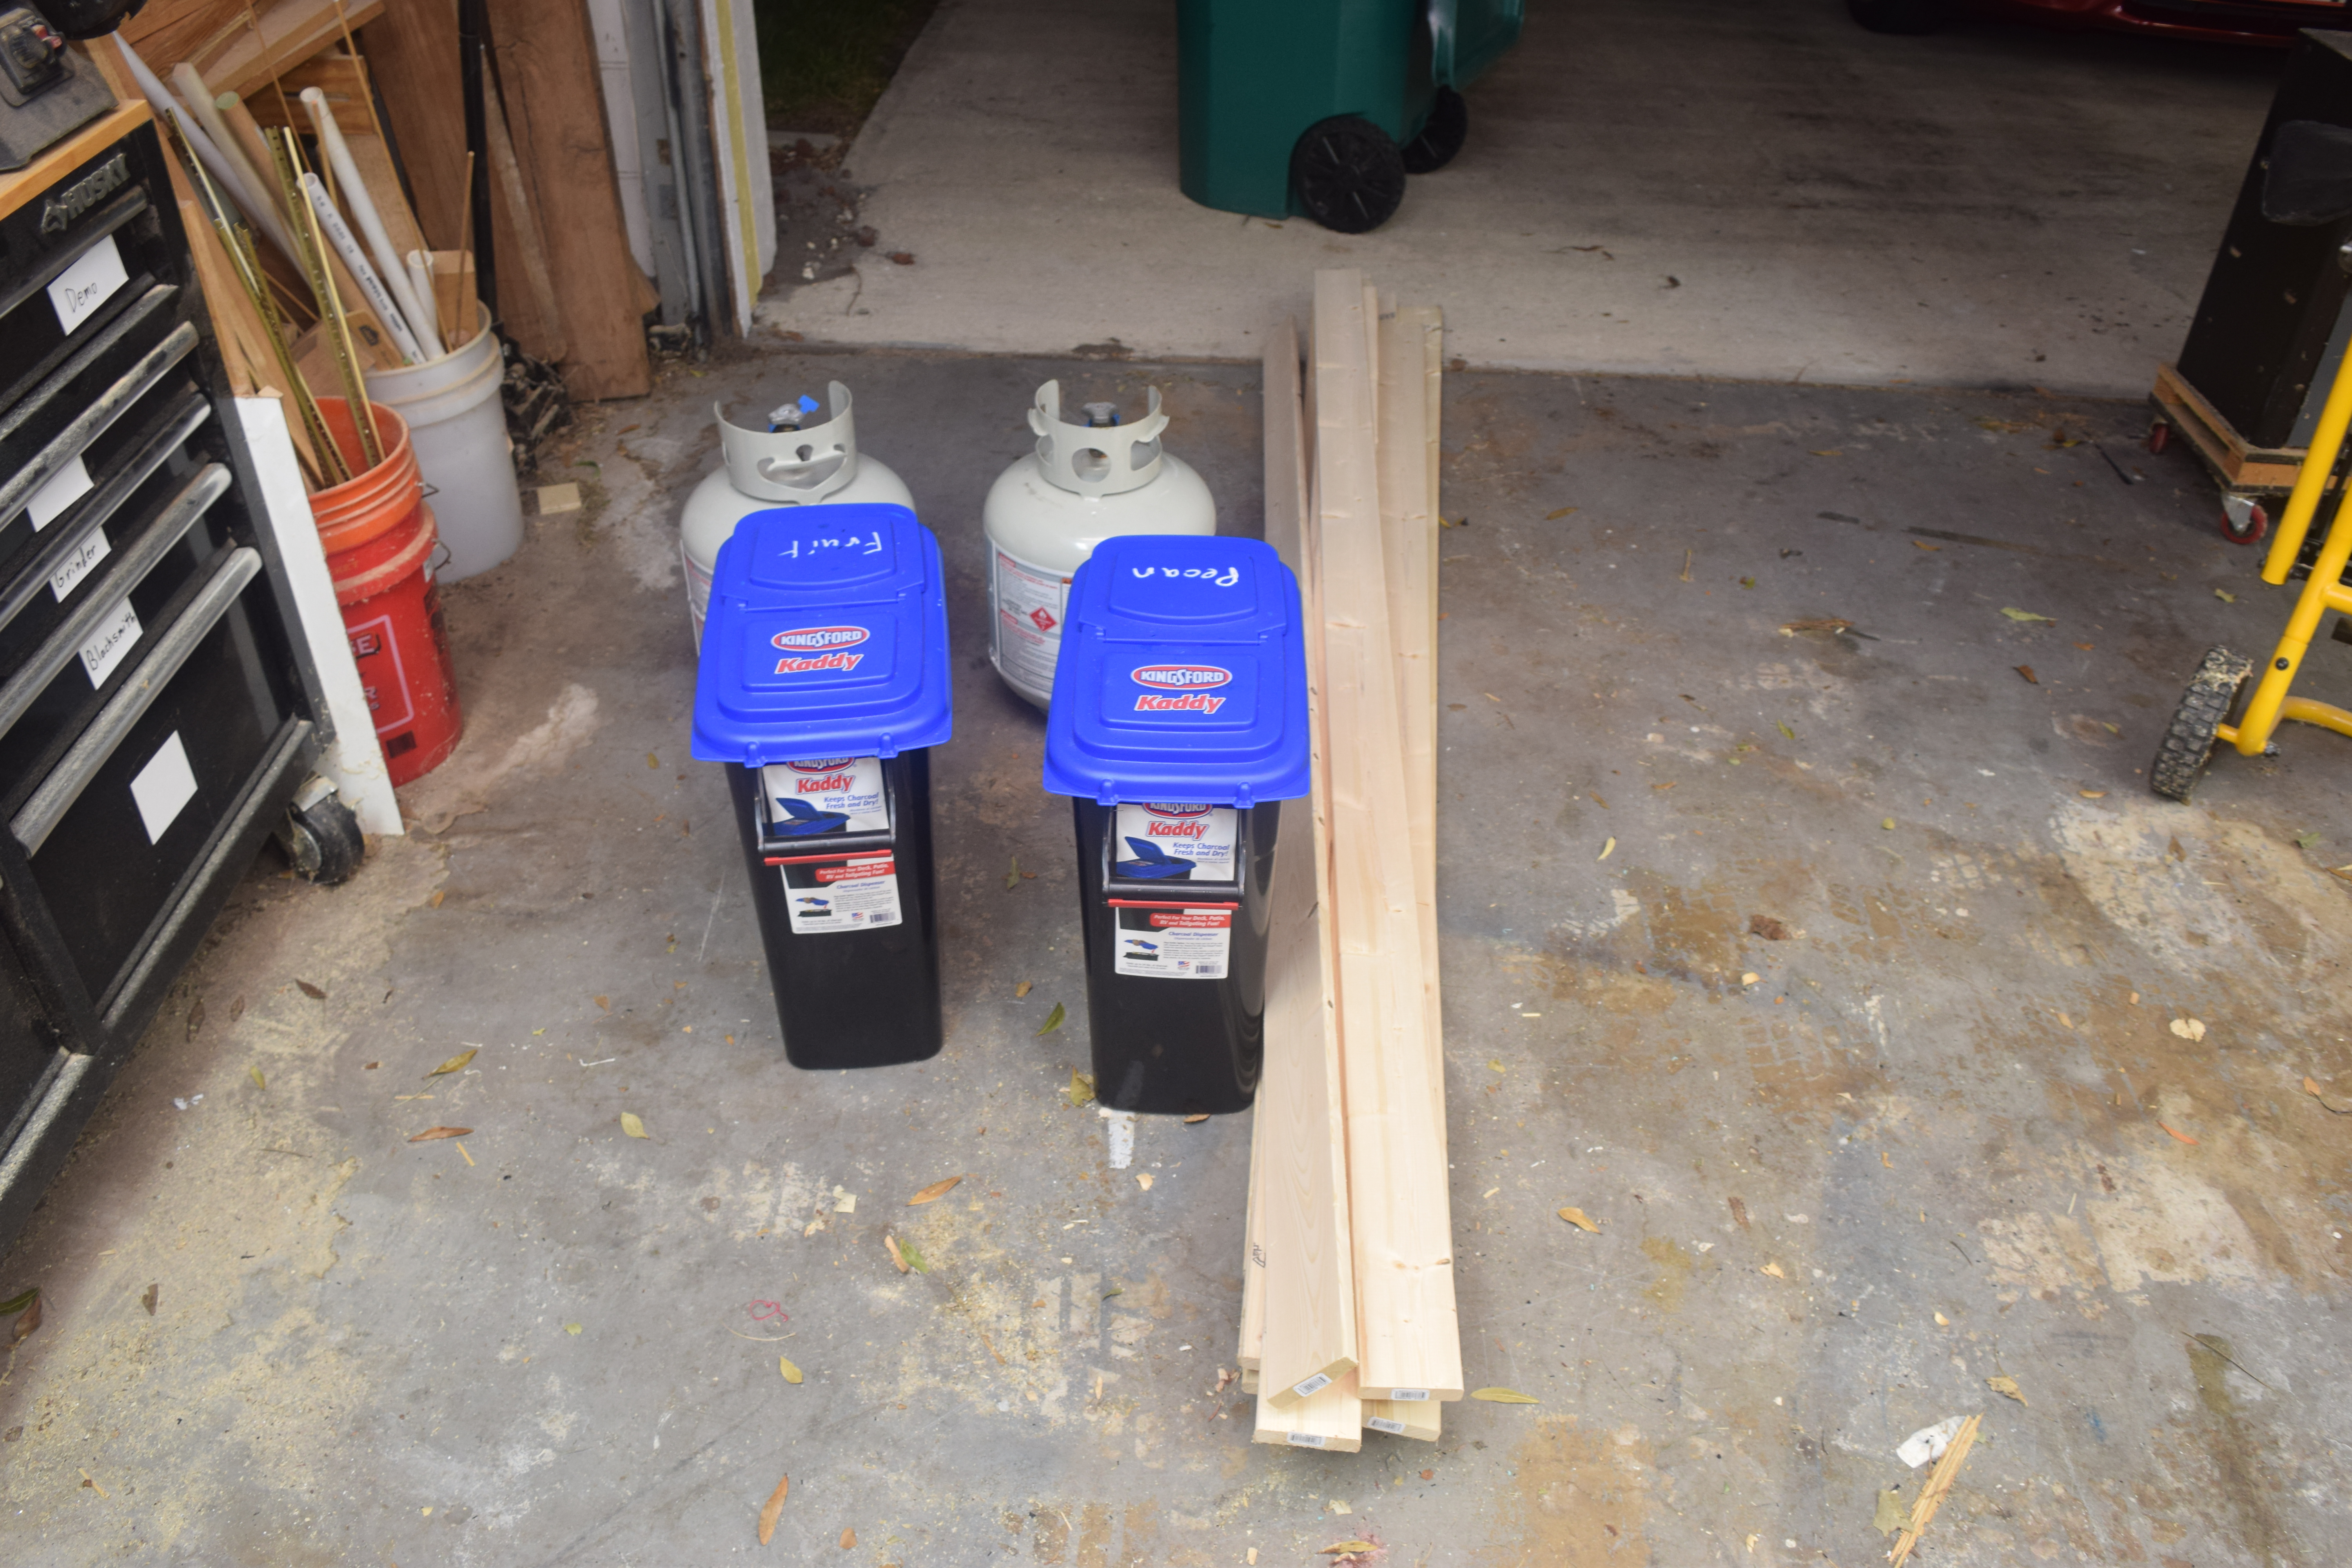
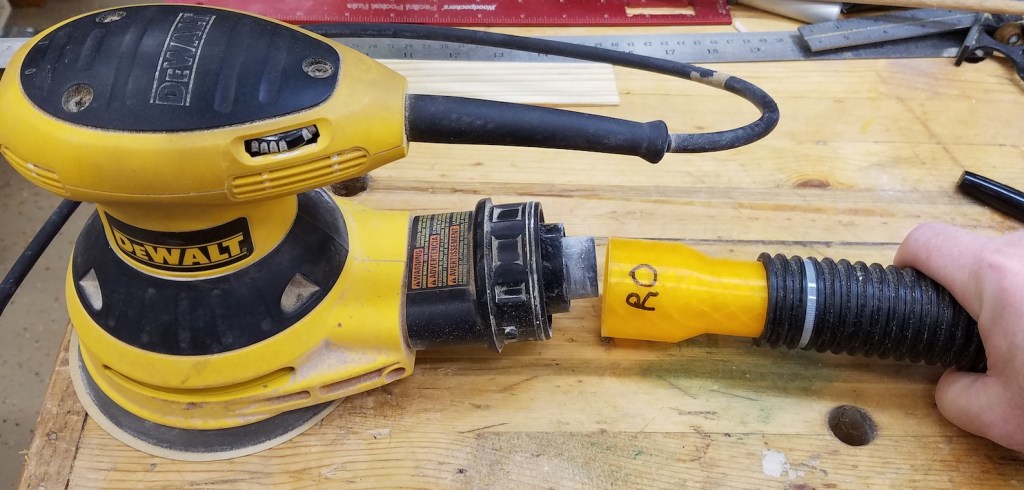
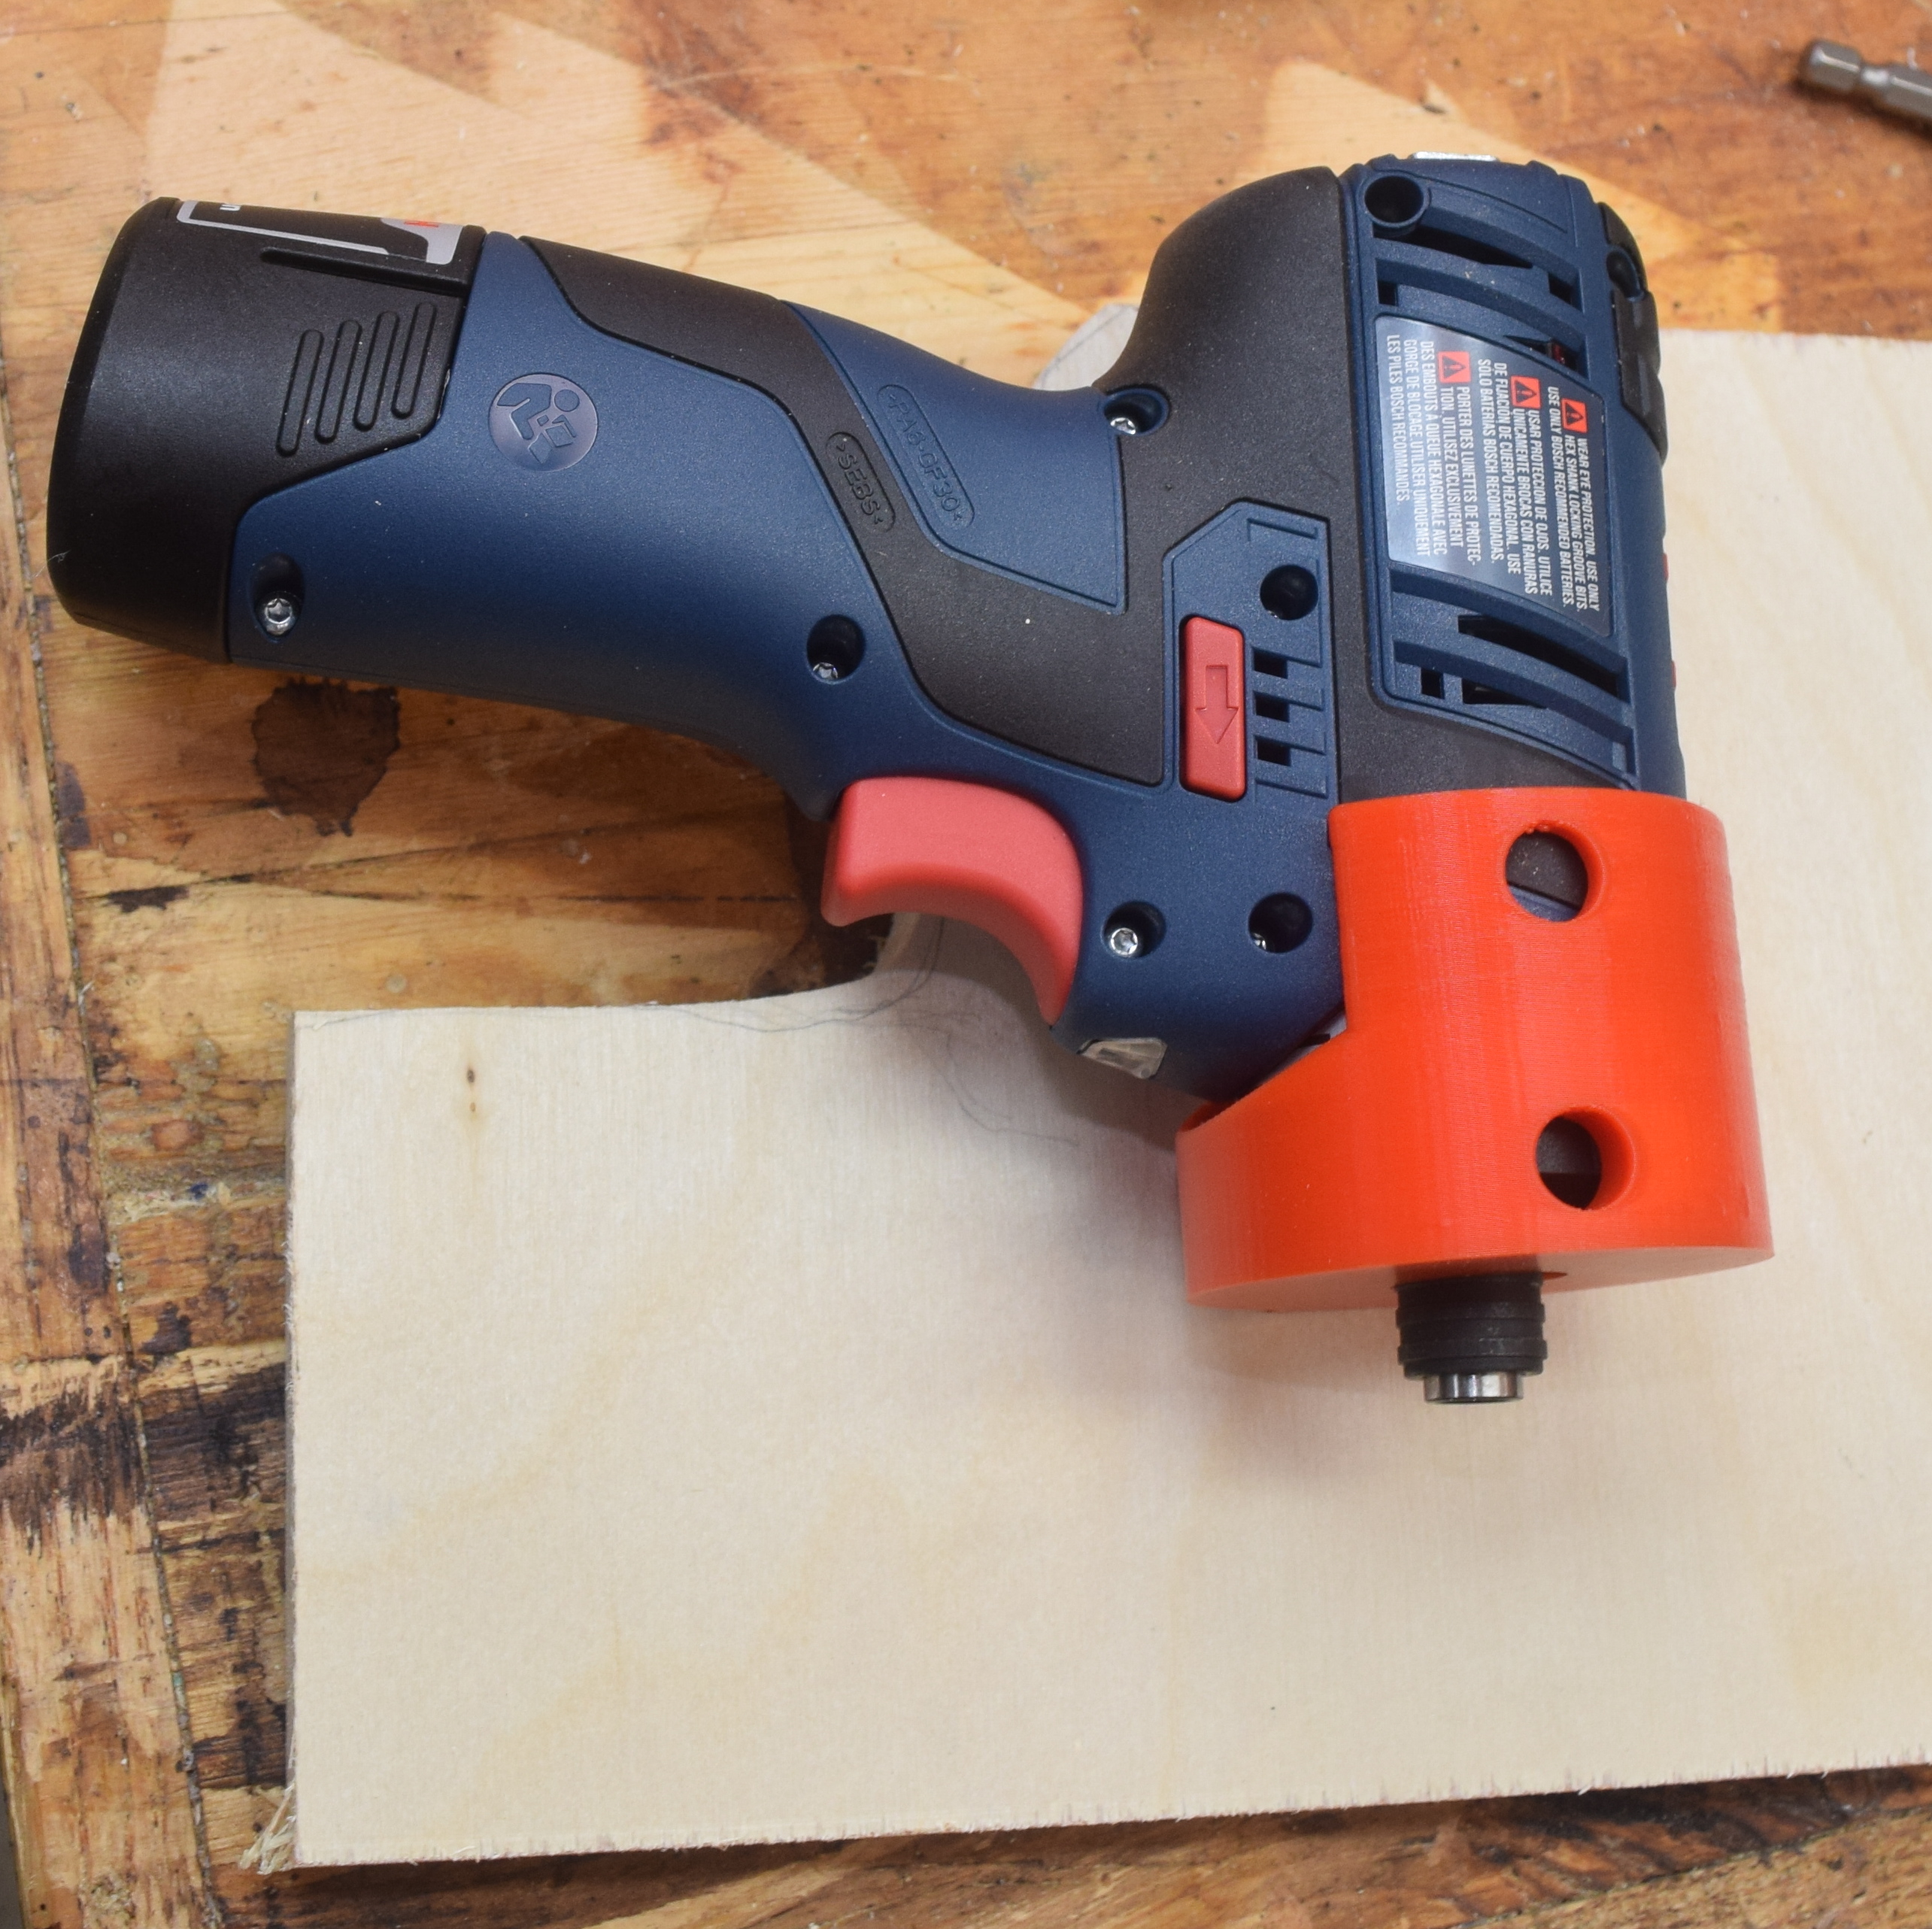
More Dust Collection Adapters

Woodworking Dust Collection Rule 1: No two dust collection ports are ever the same size… EVER

Once again I find myself trying to fit a dust collection hose on to some of my tools and wind up having to 3D print a custom solution. Why is it always like this? This time it is a port for my random orbit sander to 1.25″ hose (which isn’t really 1.25″), one for my belt sander, and an adapter to go from that hose to my dust deputy inlet (which has some funky taper on it). The good news is that the ridges left over from 3D printing these always helps the adapter stay in place, even if it isn’t perfect. This is exactly why industry standards and groups like ASME and SAE exist.

Socket Cabinet

Not long after buying my first house I picked up a big set of socket wrenches from craftsman. Previously I had an odd assortment of hand me downs that were missing various sockets. The plastic trays the sockets came in were labeled and worked well. The case was always kind of shoddy. It tended to drop the drawers out and spill sockets everywhere. If you pulled the bottom drawer out the top drawers collapsed. I am finally ditching it and making my own cabinet.

I started by making plywood drawers for each plastic tray (1/4″, 3/8″, and 1/2″ socket set), and two more full drawers for extras. This is the first project I have done where I made the drawers all first, then built a cabinet to hold them all. Kind of a neat way to work.

Once I got all the drawers assembled and installed into the cabinet I covered the face frame of the cabinet with 1/4″ poplar. I thinned more poplar down to 5/8″ and put a heavy chamfer on it to make drawer fronts. I thought pocket hole screws would be a great way to attach the fronts. They were, but I forgot to reset the depth of the drill bit to 1/2″ instead of my standard 3/4″, and drove the first screw through the drawer front. oops…

That won’t matter too much, and I am sure nobody will notice. Mostly because I accidentally drilled the first set of drawer pull holes at 3″ instead of 5″. Otherwise the cabinet looks great after a coat of boiled linseed oil.

Now to fill it all up. I used small strips of plywood to make stops so the plastic organizer trays sit still and don’t slide left to right when opening and closing the drawers.

Everything fits with room to accommodate future purchases. I don’t do a lot of mechanic work, so this set will probably cover me for the very far future. Lastly I did 3d print a few little organizers and helpers. I seem to have a lot of 3/8″ extensions, so I made a little slot holder for them. Also adapters to go from 1/4″ hex drive to various socket set sizes. The steady drum beat of garage organization marches on.

Early 2019 Prints

I used to track my random prints closely and publish a monthly update on them. More recently a lot of my printing has been integrating with dust collection upgrades and other organizing efforts in my shop, so there hasn’t been a dedicated post. This is all still very workshop focused as that is where I have been directing my time this new year. The shop is becoming a very magical place to work.

First up is a used blade storage box. A sharps container. I was brought up using traptezoidal utility blades. The two sided retractable blade is a standard and is widely available. I lose them a lot, so I have like 10 of them around. They are cheap, and all of them have cruddy blade because I am too lazy to grab a screwdriver to open them up and flip the blade. Enter a new contender, the snap blade.

I always thought of snap blade knives as cheap box cutters. I bought one to try out after some online recommendations, and have become increasingly impressed. I think they are sharper, can be extended longer, and if you need a new edge, you just snap a segment off and get back to cutting.

Both methods leave sharp rusty around, so I printed a small box that helps you break the blades off and keeps them trapped inside for safe storage. Inside, the entrance has a ramp so blades would have a really hard time rattling out. It is like a lobster or crab trap. The entrance slit is just big enough for the blades to slip in.

I designed it to accept the 18mm snap knife blades, standard utility knife blades, and single edge razor blades.

I made a few and tried colorizing the raised text. I started with a paint marker, but the text was small enough it was getting smeared. I moved on to an ink stamp, but the ink is too thin. It soaked into the print layers and ran everywhere. You need something thick like paint, but easy to apply to a whole surface like an ink stamp. They look ugly but work perfectly. Thingiverse Link


I really wanted to spring for a nice whiteboard for the shop. One that doesn’t have marker stains 6 months after you first get it. I did a little research and found an enamel coated board that looked good. Where to put it though? My new shop is big, but lacking in wall space. time to get creative.

The circuit breakers are in the right real estate. I need access to them, but only occasionally. I noticed the gear track above the panes and decided to take advantage of them. I did a few test prints and came up with a double hook that snaps in nicely. Those supported two strips of wood that the whiteboard mounts to. The whiteboard is very stable and can be removed quickly when I require circuit breaker access.


I picked up a dremel around Christmas and have been finding it really useful for small odd jobs. I ditched the organizers that came with it and have put everything into a clear organizer box. To keep the cut off blades separated, organized, and from getting broken I printed a simple wheel holder.


After working on the old and new house for months my driver bits were scattered to the winds. Over time I kind of piled them up in one place, but never managed to get them back into the right organizer box. Instead I decided to revamp the top drawer of the toolbox that holds all my drill press stuff to act as a driver bit organizer space. I printed blocks with well spaced round holes to hold the short bits, and longer trays to hold the various 2″ long bits.

I ended up making smaller versions of the holed blocks. I have a lot of #2 philips and #2 square drives, and only a small smattering of everything else. Now everything is really easy to access and find. I definitely don’t need to buy bits any time this century. Stash beyond life expectancy.

Drill Organizer

The organization bonanza continues. My workbench has been the collector of all things used, but without a proper place to call home. In my last shop I had a place to store my dewalt drills in a hanging organizer above the toolbox. Bits were stored in a little shelf setup nearby. Neither of those made it through the move.

My previous drill hanger was a piece of plywood with some rough cutouts that hung, via zip ties, from wire shelving. It worked pretty well, so I will make a nicer version of that. I measured the drills and tried to make a careful slot for each.

The hammer drill (far right) was a little wider in spots than I thought, so it took a little freehand work to get right. The rest fit beautifully the first time. Everything got a chamfer inlet and a router roundover top and bottom. The back edge is cut at a 5 degree angle to tilt the whole board upward. It makes them want to slide to the front of the slot a little. No vibration or jostling will cause them to fall.

Everything hangs from the french cleat system I already had going. The drill holder was supported with some blocks underneath cut to the similar 5 degree upward angle. Underneath it all I put a box with pilaster rails. They accept shelf clips and are really easy to work with. I have used them in other shop applications like my hardware rack. 1/2 plywood serves as shelves for batteries, and drill accessories.

Instead of routing a groove for the pilaster rails I left them proud. This was easier to manage in the 1/2 plywood sides, and it meant cutting a notch in the shelves would lock them into place, front to back, between the pilaster rails. Everything fits with room to spare and adjustability to accommodate.

Sharpening Station Stability

I built a sharpening station last year and like it a lot.  It has one issue though.  The whole thing wobbles badly during use.  The casters and small base don’t make a good combination.  I came up with a solution in this video:

It took a bit of messing around with feet material, but felt will work just fine for now.  I might find some kind of heavy duty rubber feet for longer term use.  Until then, stay sharp my friends!

Woodsaw 3D Printed Parts

Miter Saw Zero Clearance Insert

Sawing with a tight fitting insert is almost always the right way to go.  It supports the wood being cut and prevents the fibers from getting torn as the saw teeth punches through.  The plate that comes with the saw works, but has a wide gap.  I made a thin plywood insert, but they don’t last that long.  This is my attempt at a 3D printed one.  The original is on the right.  Notice how wide the saw blade gap is.  I took a picture of the original saw plate on one of those self healing cutting mats.  They have good ruled lines in both directions to make sure the image didn’t get distorted.

The first print out of the gate fit really well.

20170805_130315

I made the first cut with no wood in the way.  It chopped right through the plastic and cut a self fitting slot that is just exactly the size of the blade.  I might have been a little too cautious.  Slow cutting built heat and there was a bit of plastic fuzz at the top edges of the cut.  A little light work with a utility knife had those cleaned up.  Some subsequent cuts have shown the insert to properly back the cuts.

I still need to find a spool of Dewalt yellow filament.

UPDATE: Decided to upload it to thingiverse.

Table Saw Organizers

I am in a near constant state of looking for pencils and rulers/tape measures.  I should attach one of each to my body with a short retractable cable.  Until then I try to stage as many as possible at each work station.  At my table saw I made two different organizers to hold commonly used  items.  They both attach to the far side of my rip fence.

The white organizer holds my wooden ruler and a small stack of pencils.  The pencil well could have been a touch deeper, but otherwise it works well.  The yellow holder area keeps my grrripper push block.  It is at a really convenient hand position for quick use when sawing.

DSC_0927

DSC_0928

Drill Caddy

I am in a caddy mood for some reason.  Having organized grab and go tool sets make life easier when you have a problem to solve somewhere.  Most repairs don’t happen within arms reach of the tool box.

Up next is this zazzy little 12V drill driver.  It is small and highly controllable.  I like it for use as an electric screwdriver for assembly/disassembly and for installing small and delicate hardware in wood.  First you need a holster.  I did some careful measurements and in just 1 iteration came up with this design.  It is easy to insert and holds really well even through heavy shaking.  The key was how it catches on the pull out chuck.  A rounded leadin helps it find hold, but a square edge keeps it from erroneously falling.

DSC_0911

I attached this to a piece of wood and started carving off a handle area at the bandsaw to give more finger room.  This needs to be the most accessible thing on this caddy.

DSC_0912

With the gun set in place I could start planning out other accessories.  satisfied I had enough room everything got a coat of paint.  My blue was running out so it is a little spotty of a job.  Once everything gets installed I doubt it will be noticeable.  It would be great to buy Bosch blue and Dewalt yellow filaments and paints.  I bet a lot of effort goes into picking the colors for tool companies, and they don’t want to give those away.  Plus I have way too many paints and filaments, I need to use my current stash.

DSC_0913

I had a pretty good idea at this point where I wanted everything from the layout stage.  The only change was the addition of the bottom blue short bit holder.  I was running out of “wall” space and realized that would be perfect.  The nut drivers came with an odd loop on the holder.  It made building a little slide on clip easy.  The red case is full of a zillion standard and security bits.  No hardware is safe from me!

The handle is a copy of the previous design with a switch to red to keep with this color scheme.  The kobalt set has some decent quality standard bits, sockets, and a basic assortment of drill bits with hex shanks.  I don’t plan on doing much drilling with this, but occasionally they might come in handy.  Ok, what needs fixing?

The only thing this might need is a removable magnetic parts tray.  Maybe a clever, secure yet removable, design will hit me in the shower.

Drawer Dividers

While the cabinets were being installed I was hard at work making accessories for the drawers.  Most commercially available drawer dividers had a few strikes against them.  They were either plastic or bamboo (doesn’t match my maple cabinets), they weren’t very adjustable, and most don’t fit the narrow drawers next to my stove.  So I made my own.  The first trick is to take two thick boards and make four thin boards.

I resawed (cut standing on edge in the bandsaw) these two 3/4″ maple boards to make four slightly undersized 3/8″ boards.  After a few trips through the planer to clean up all the heavy bandsaw marks they were all about 1/4″.

I could have tried to glue various thin pieces together to make dividers, but wanted to include 1/4″ plywood as a bottom.  It would make the thin dividers a lot stronger to glue along those long edges.  I pulled out some silverware and got to settings sizes.

dsc_0654

Every edge got a few swipes from my lovely little lee neilson tiny block plane.  That thing is perfect for knocking down sharp corners.  Once I had all the dividers in place for a particular drawer I applied expert and professional clamps until the glue dried.

dsc_0656

Drawers full of spatulas and cooking spoons needed backup in the rear to keep them from leaning, so I used a short segment to shore them up.

dsc_0657

I had planned to divide out our junk drawer and a drawer full of odds and ends, but that doesn’t appear to be feasible.  Entropy will reign supreme in those drawers for the time being.  I did however get all the heavy use drawers near the stove well organized.


dsc_0683
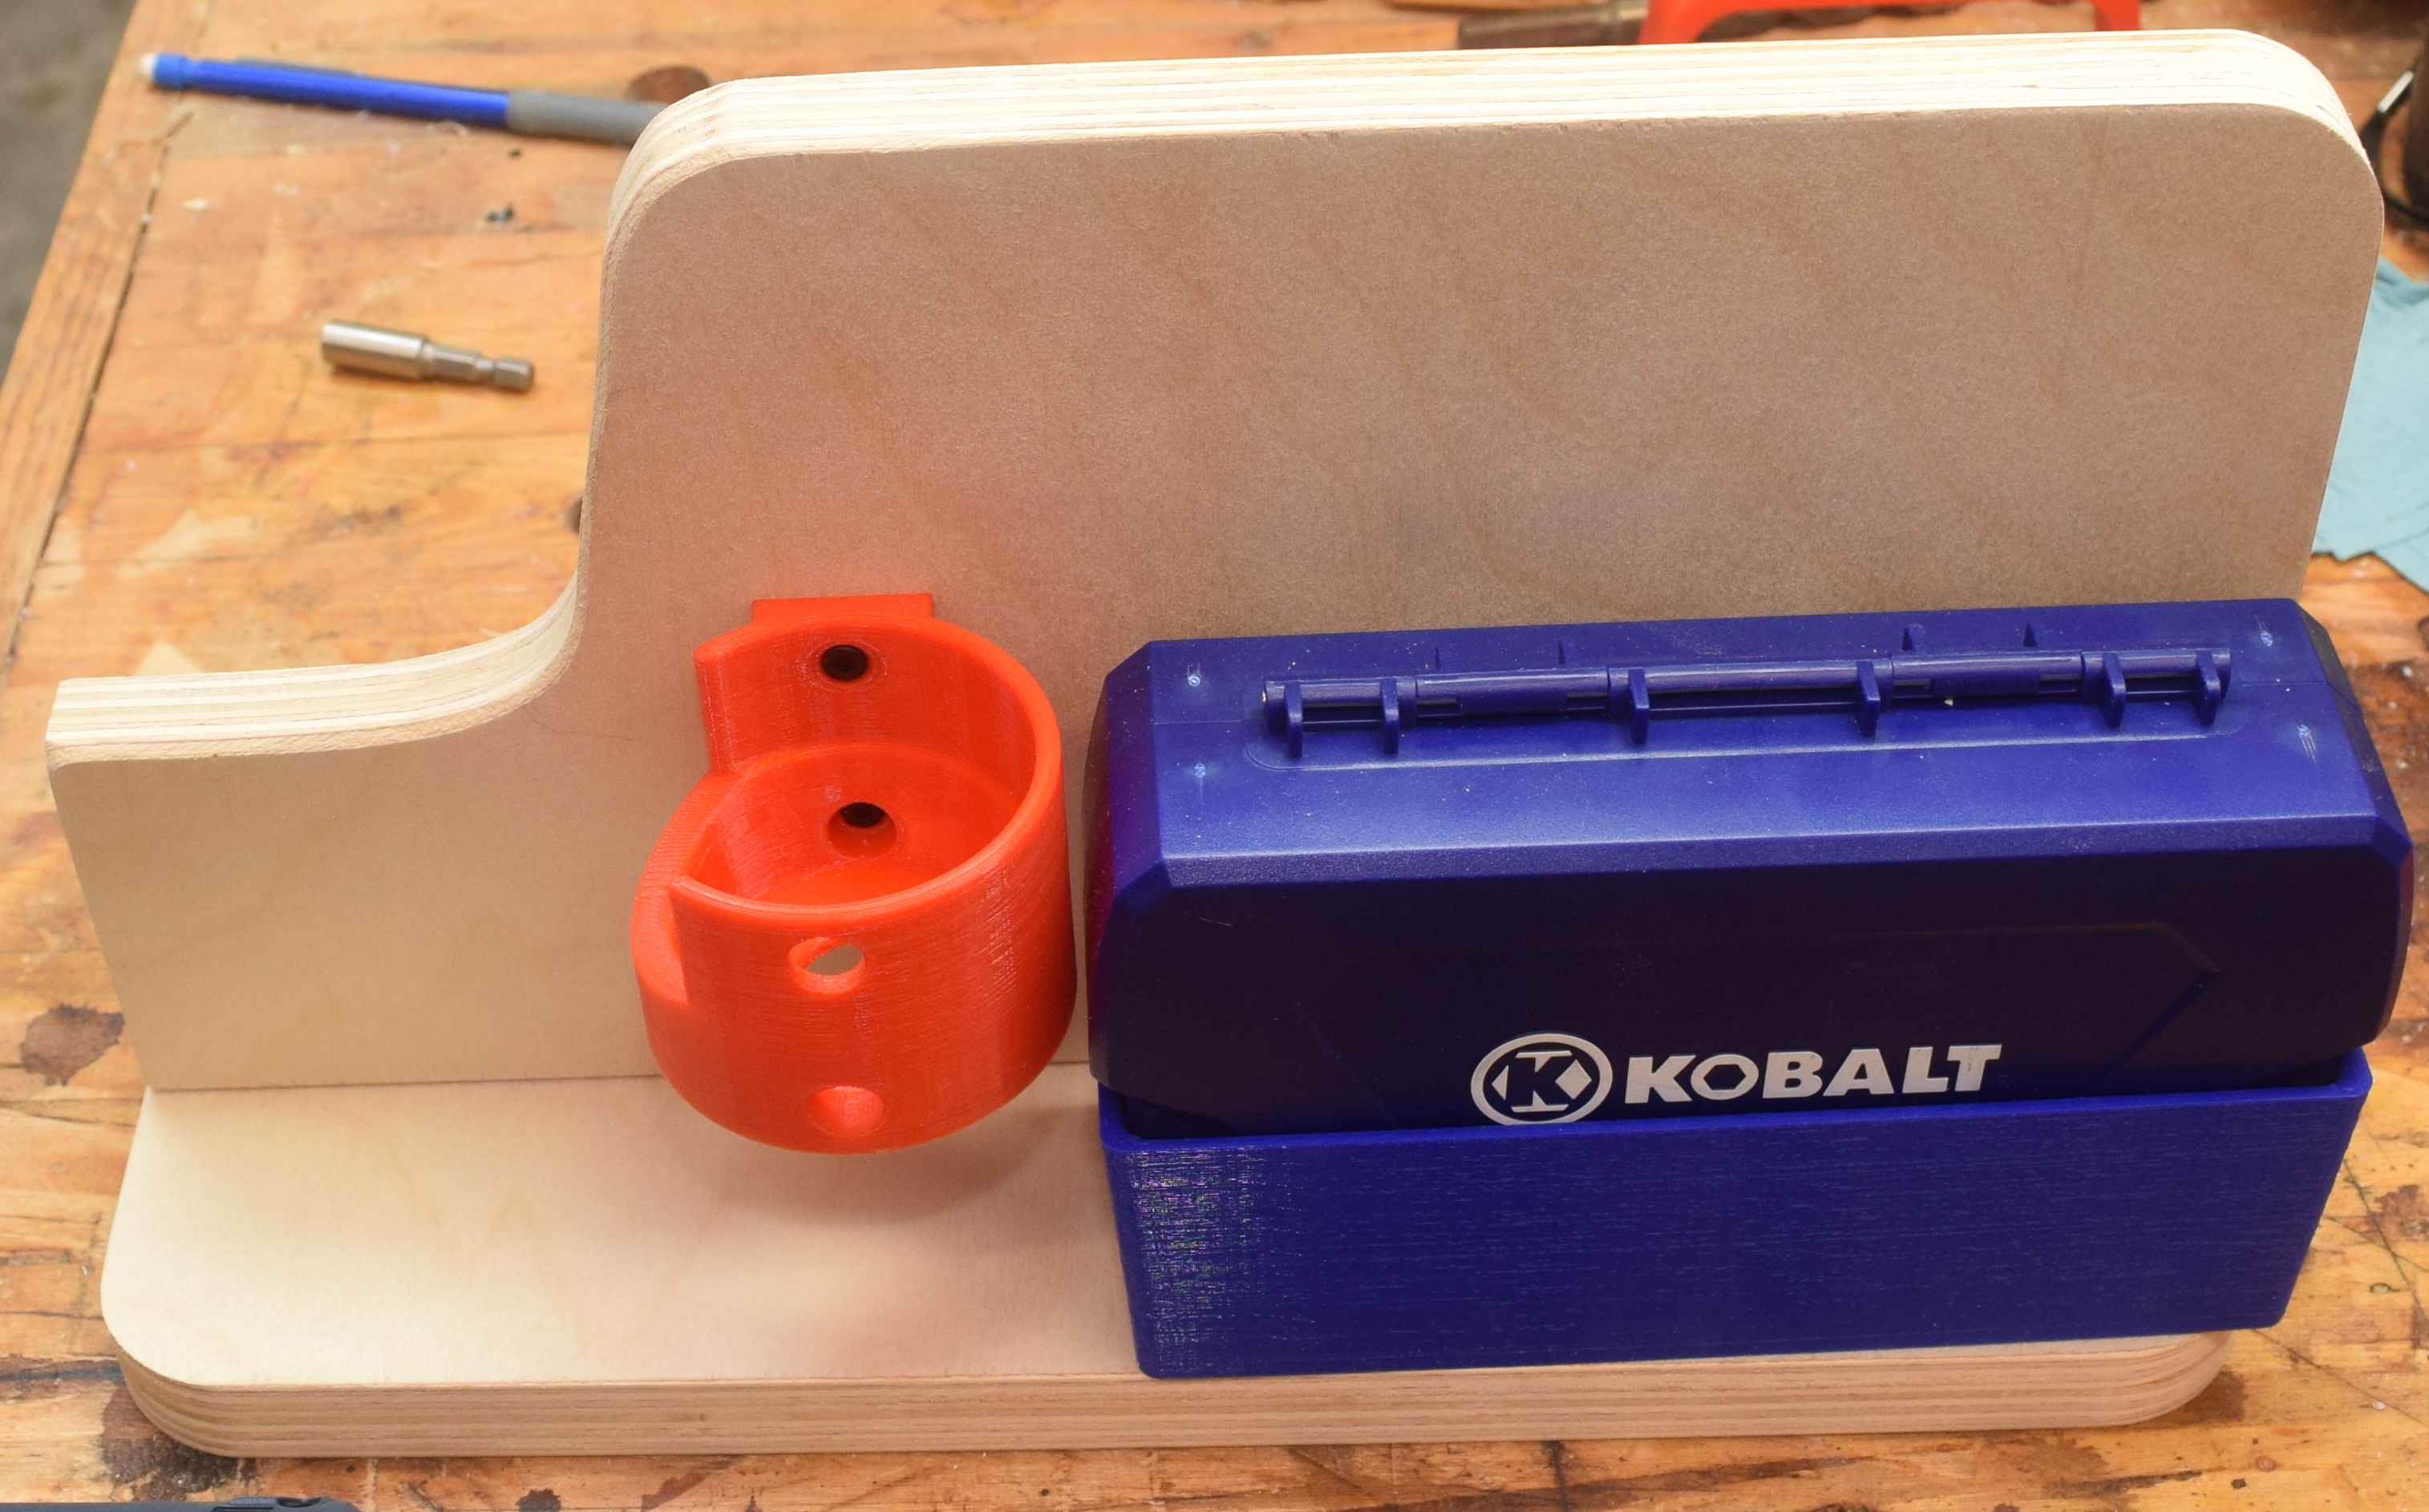
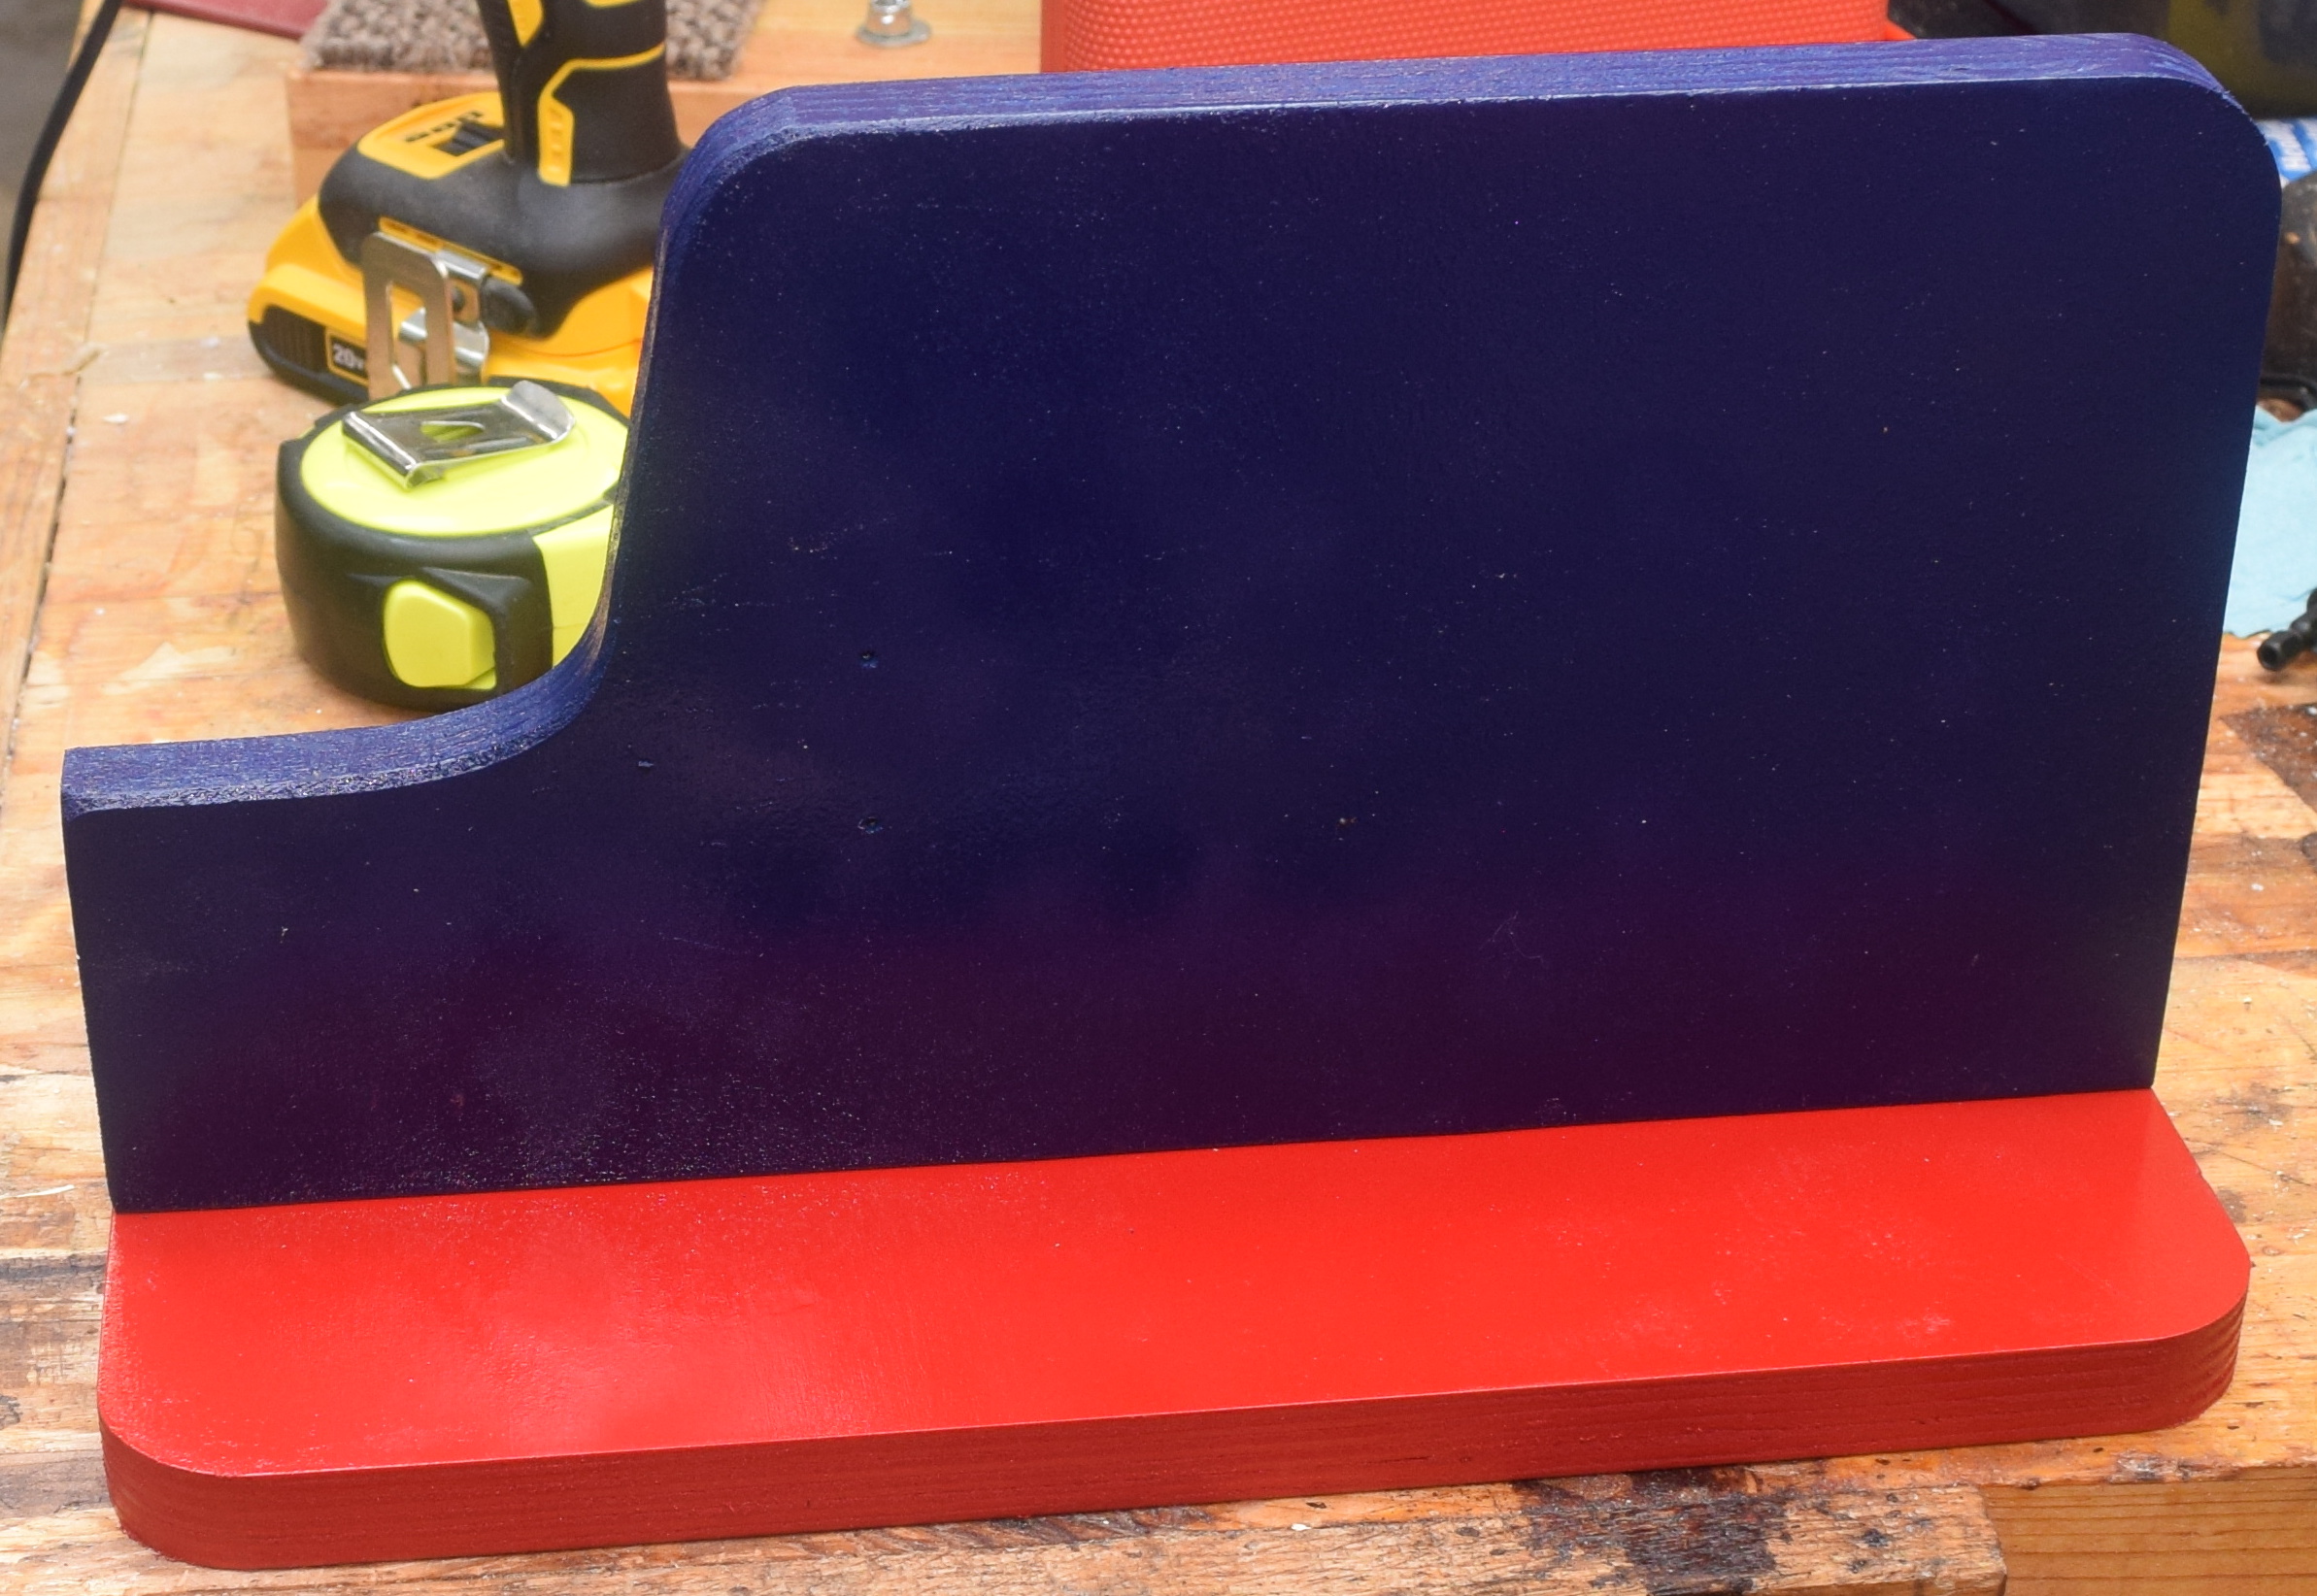
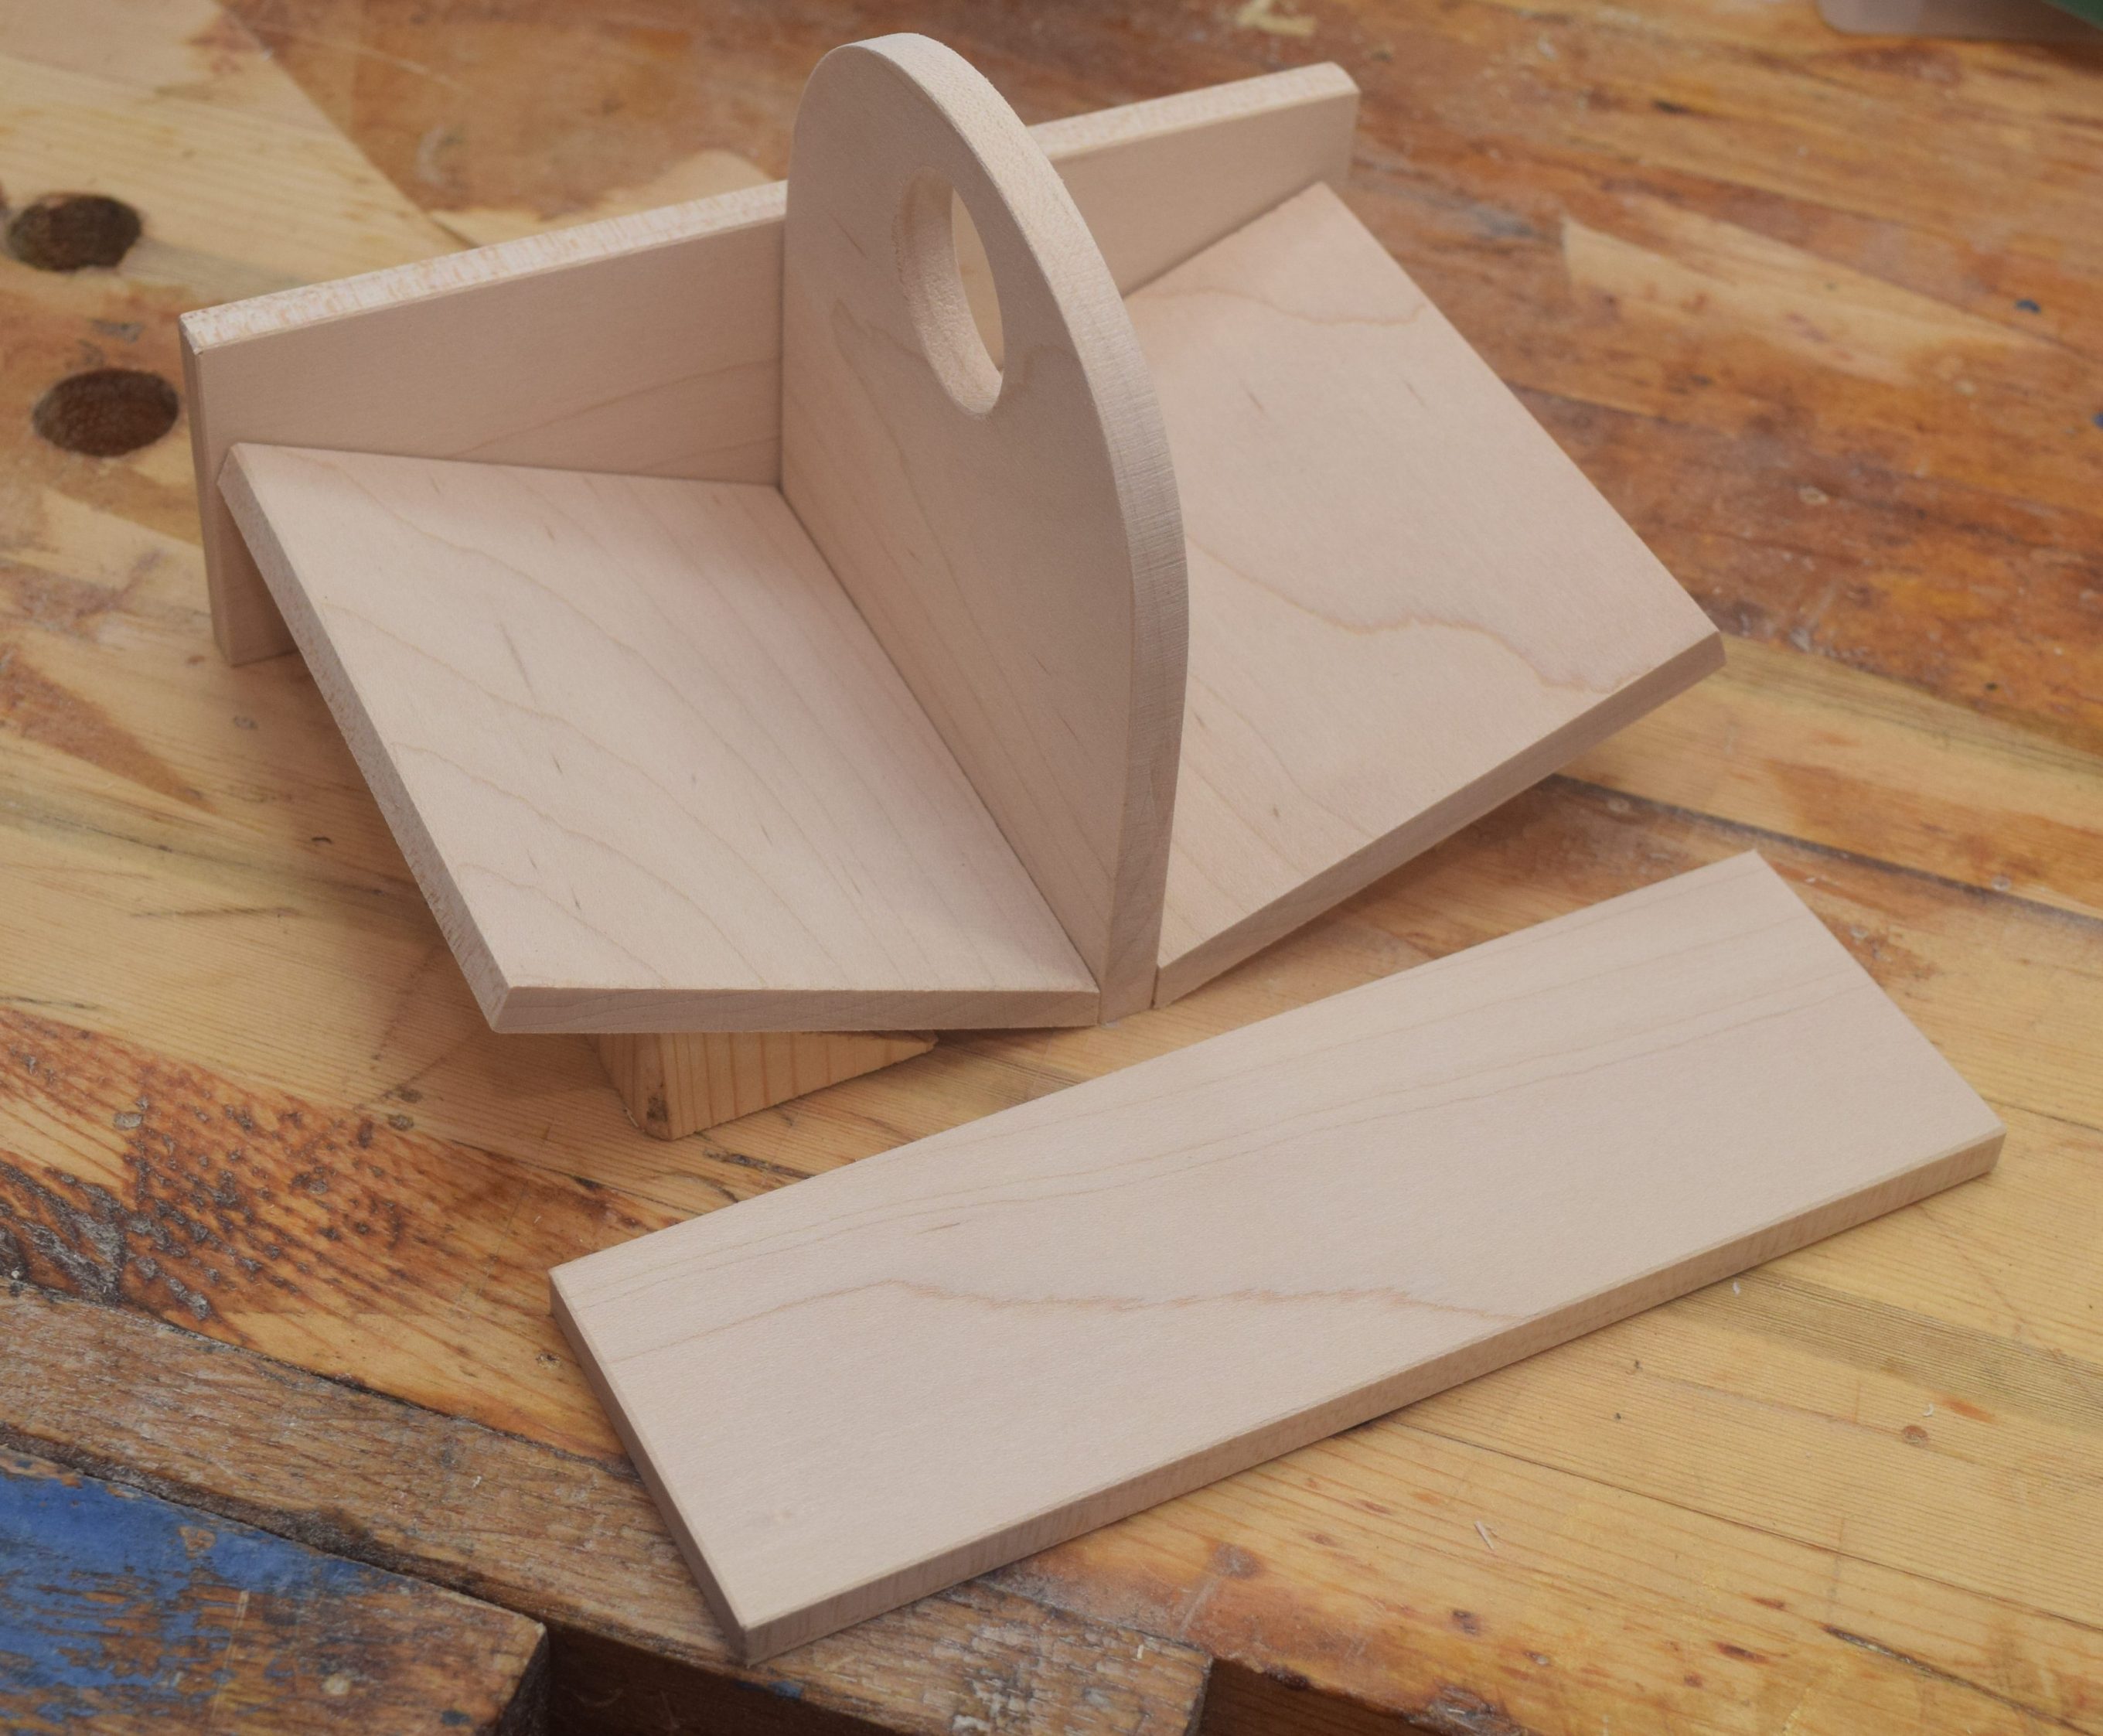
As a bonus I had extra thin cut maple left over.  I want to use this stuff up quickly.  At these sizes and with it being flat sawn, it will cup and bow quickly.  At work we stretch regularly using a deck of cards with different stretch moves.  The box the cards came in was complete junk.  I thought having a two sided card caddy would make transport and use easier.

The cards are in a tray at an angle to keep them from falling out when carried.  As you do a stretch the card moves from the face down side to the face up side.  Eventually you get through all the stretches, shuffle everything and start over.

dsc_0684

I took this as an opportunity to try two new things.  The first was liquid hide glue.  I have been hearing a lot about this (very old) product recently.  Long working time, reversible and low visibility under finishes made me very interested.  It was a fine glue, I will be using it more.  The next was my  new pin nailer.  It worked miracles on my quarter round baseboard molding and did a great job sneaking pins into this thin stock.  The pin heads are only somewhat visible on the flat sides.  It wasn’t the best usage case, but I like them a lot.  They kept it clamped and are much lower profile than brad nails.

Porch Fuel Organizer

The slow take-back of the porch continues.  With all the bunny stuff gone, I have to get things organized so we can maximize the available space.  I have grill stuff everywhere.  Three propane cylinders for the grill, outdoor cooker, and spares for hurricane season.  I put all my Traeger pellets into kingsford charcoal bins to keep them organized and from spilling all over the place.  This all needs a nice storage rack.

dsc_0561I was planning on using 1x4s to do a majority of the building, but found that the store was out of their basic grade boards.  Instead I noticed their furring strips.  1×4 with nicely rounded edges for about a 1.70 a piece.  The quality is terrible.  They are very light rough and soft pine.  Many were so bent and twisted you couldn’t even use them for boat building.  Still, with enough cherry picking I got some good boards and was able to keep my whole project cost to less than 15 bucks.

A few scraps of 2×4 made uprights for the two level contraption.  I set the width so that I could store the 3 propane tanks comfortably below with a few pellet bins on top.  Keeping the propane low seems like a good idea.  Less distance to fall.

dsc_0562

Short pickets run between the two frames to tie them together and give the propane tanks a stable surface to sit on.

dsc_0564

The top shelf could hold a lot of weight in pellets.  To help stiffen the two existing runs I wrapped a vertical boarder around the edge.  It added a lot of strength to the shelf, keeps the pellet bins from sliding off, and looks nice!

dsc_0565

dsc_0567

Everything fits as intended, and I am ready to give it all a heavy coating of boiled linseed oil.  Never used this on an outdoor project, but it will live under cover on the porch, so it should work out.

dsc_0568

24 hours later the coating was nicely cured, and the wood took on a lovely golden yellow look.  I may have to use furring strips more often!  It looks good on the back porch and helped clean up a lot of space.  I wish I had gone a few inches wider though, I could have gotten another bucket of pellets up there.  Oh well, next time!

dsc_0569