Height Growth Ruler

Our little guy is growing fast and I wanted a way to help document that. Kids are usually interested in seeing how big they are, so I decided to make a height ruler. I started back in July because I wanted to be done by the time his birthday hit. I got done in time, but hit a bunch of snags along the way, and still have trouble getting him to hold still for a measurement.

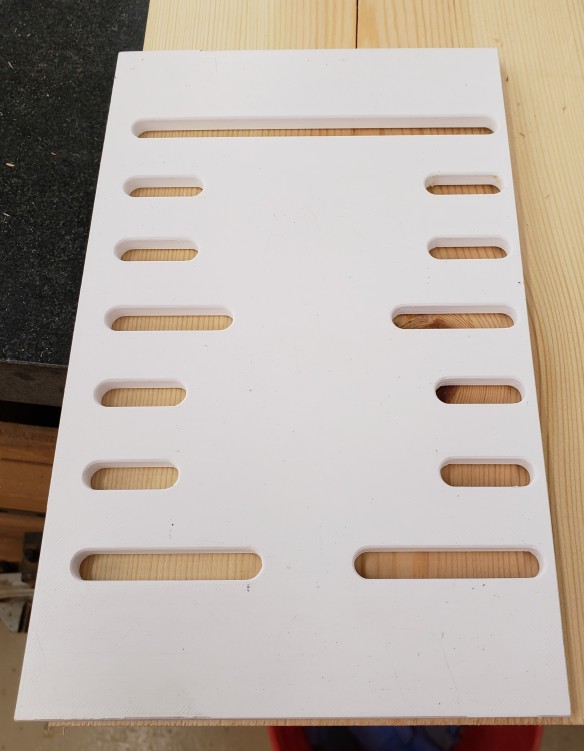
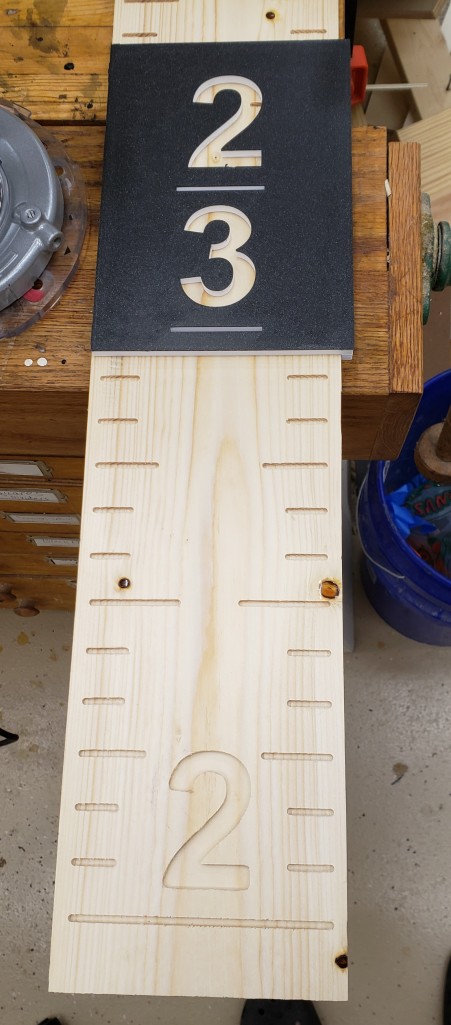
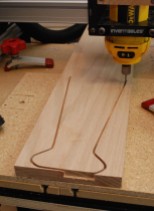
First up, I bought some pine boards to experiment on and 3D printed this guide to make the ruler marks. This took a few iterations, I was trying to use a pattern bit, but ultimately a bushing and plunge route was the best way to go. You can flip the template around to continue the pattern and route the whole ruler with one template. I based the marks off of an old folding wooden ruler I have.

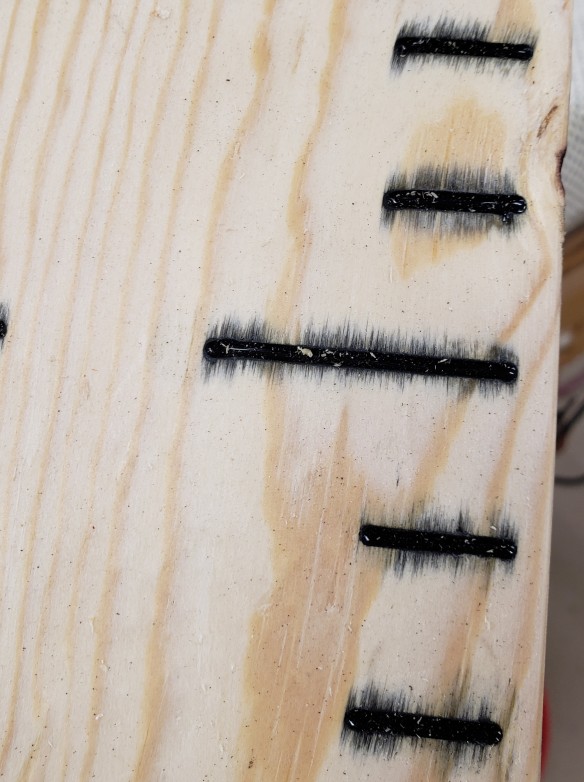
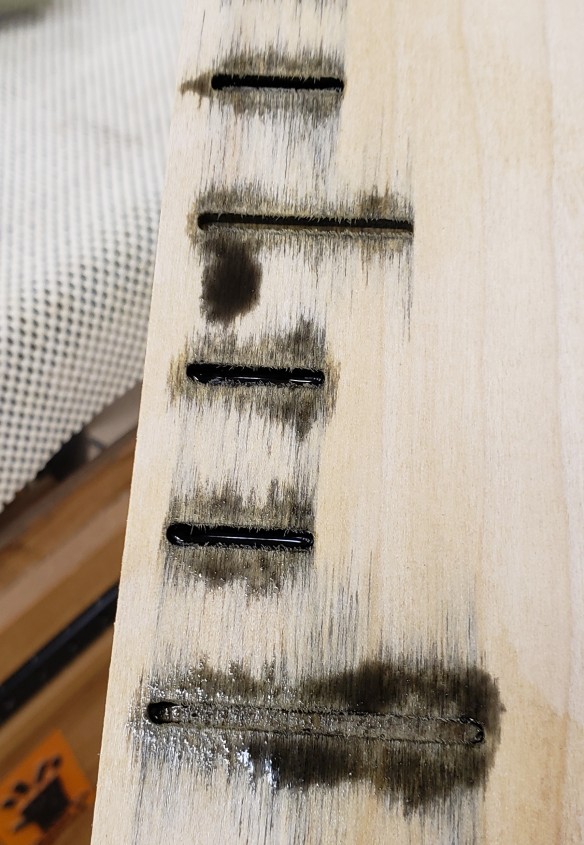
The first big issue I ran into was inlay. I wanted to route a pattern, then mix black epoxy to pour into the cut grooves. The epoxy kept wicking into the grain. I tried poplar, it wicked too.

I tried sealing the grain with multiple rounds of shellac and still ran into some issues on the poplar samples. I should have started with a hardwood of some sort.
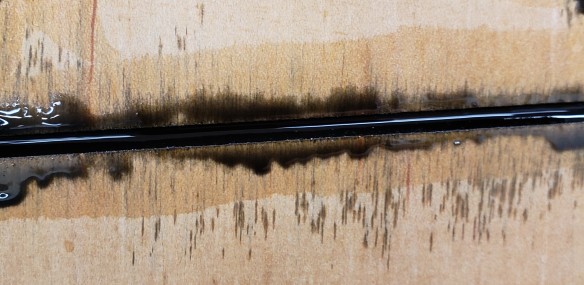
I eventually got enough sealing done on pine and filled another test piece. There was still some grain seepage and in trying to plane through the top surface and get to flat inlay, I kept hitting bubbles. I tried vacuuming the epoxy and still couldn’t get it to be void free. Here again, the rough pockets that are left by the routing might be allowing air pockets. Again in retrospect using maple or something would have been better.

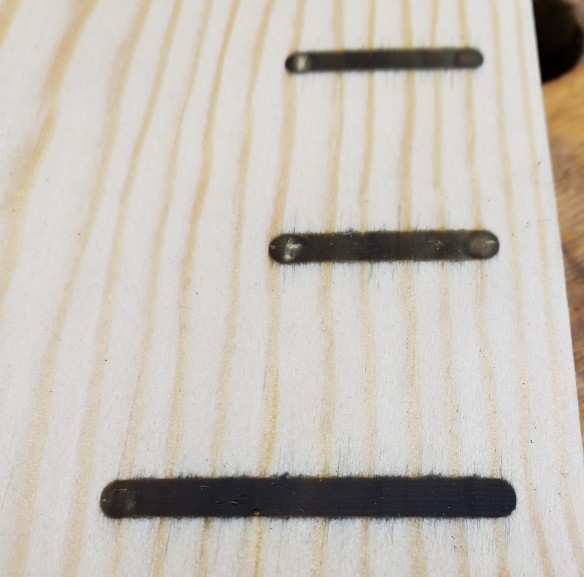
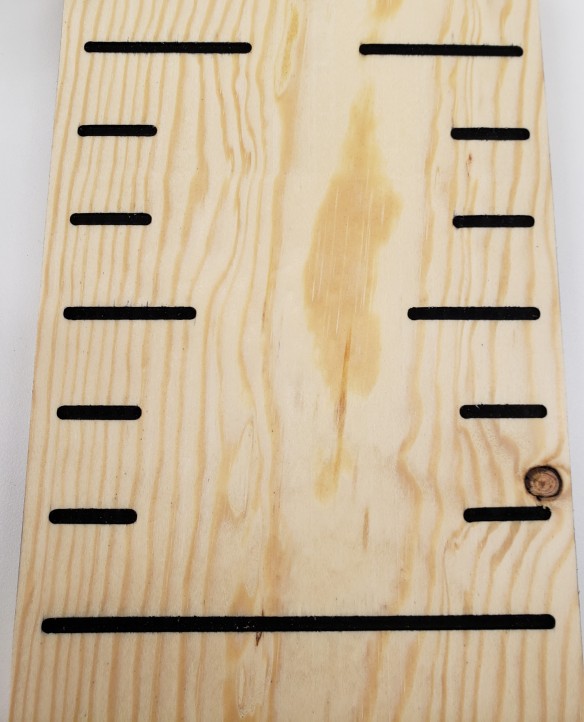
Finally I settled on a quick clear coat to seal, and spray paint. It makes the router cuts dark and visible, and is easy to apply. The sample board turned out well enough, so I moved on to the real thing. I will work on improving my epoxy inlay techniques later.

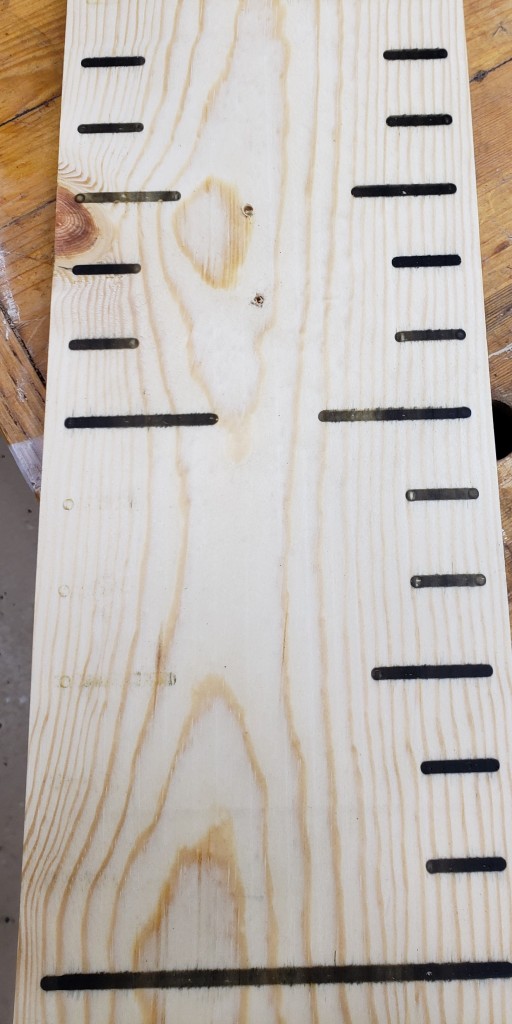
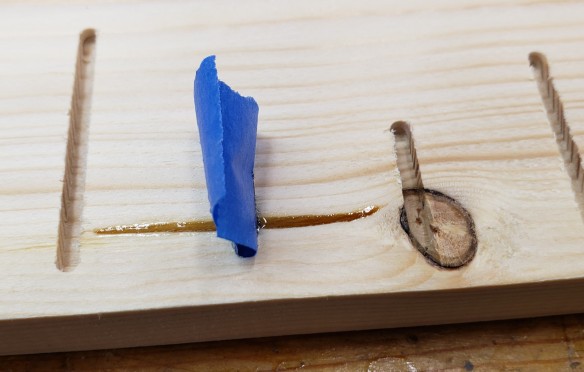
I printed letters to make the ruler clear to read. Each letter has an alignment line underneath so you can see the foot mark line when putting it down. I had a few knots and checks that were in the way so I used clear epoxy to fill the voids so that the spray paint wouldn’t get inside. I then routed everything and sprayed the entire surface.

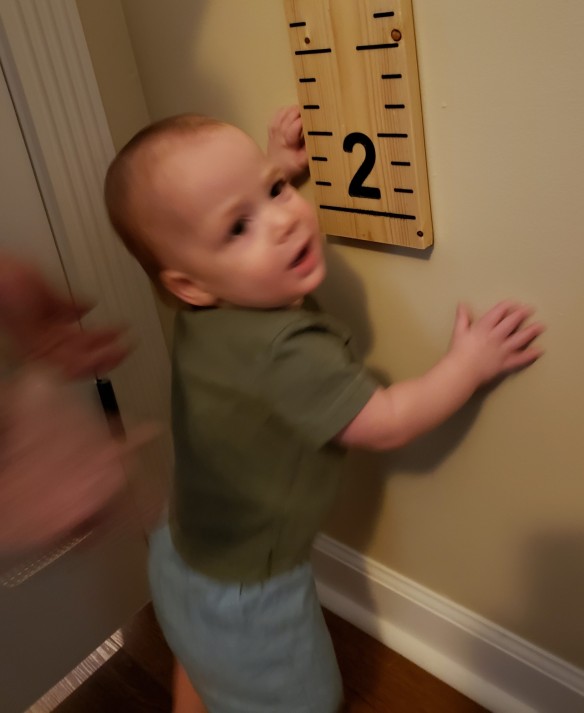
I planed off the top surface to reveal a decent inlay. Everything got a few coats of finish, then hung up on the wall. The hardest part now, is getting him to stand next to it. He pulls himself up to standing constantly, but always has his own agenda. This picture was the best I could get in nearly 2 months of trying. Never work with kids and animals they say.
Acrylic Paint 3D Printing Inlay

I have made multiple attempts at colored inlay with 3D printing and CnC milling in the past. My best results have been with epoxy resin and dye. It is hard to work with. Either you slop it on or pipe it in with a syringe. Slopping it on runs the risk of voids and has a lot of surface cleanup. Using a syringe has better control, but the stuff kicks off quickly when placed in a container like that. I had experimented with Acrylic paints in the past with only modest success. I tried again on my 3D prints and had a bit of a breakthrough.

I picked up some craft acrylic paint for general purpose use. It comes in a bottle and is the consistency of ranch dressing. The previous stuff I worked with was in a tube and was very thick I poured some black into a 3cc syringe and piped it into a cavity of my 3D print.

I started with a 25 gauge straight needle, but the paint flowed too freely and I ran over on one of the parts. I dropped down to a 30 gauge needle and had a lot more success. The paint flows in, sticks well to everything, and doesn’t appear to run. You can use the needle to guide it up to a wall if it didn’t quite reach everywhere.

These prints are my corner radius templates for the router table. The text is face up and have 3 perimeters. Not sure if it will bleed through 2 perimeters or not. I suspect if you had inset text on the side of a print it would seep out and run along the Z-layers. I haven’t tried it yet though. If you do happen to run over, the paint wicks down into the top layer and never comes fully out. Sealing it with a spray lacquer, before you paint, might fill the gaps and buy margin for error. I was just really careful and used a small needle after the first screw-up.

Once I got the hang of it I didn’t make any more mistakes and was able to fill them out in a minute or two each part. Maybe some day I will get a multi-color capable printer, but until then, this is a really easy effective method of adding color to inlaid text on 3D prints.

Little Bushy South

This project was completed in July at the old house, but I had to keep it under wraps so it could be a surprise to someone.  My wife’s grandmother was a British war bride.  She met her American husband at Bushey Park outside of London where he taught air sea survival for the 8th Army Air Force.  When the war was over they moved to Michigan (his home) and eventually had a farm called “Little Bushey”, after the place they met.  We had talked about calling our new place “Little Bushey South” as a tribute to that.  I thought a sign was in order, and no wood could be better than the family wood.

These walnut beams were picked up by my mother’s parents when she was very young.  They spent a lot of time around boats and they were used as ballast by someone.  No clue how old they were then, but our family has had them for 50+ years.

One of the beams had been cut down a few times, so I cross cut it to about 42″, and then re-sawed it to make a 1 inch thick slab.  I left some of the worm eaten edging because it is so good looking.  A little work with my jack plane had it smooth and revealed a gorgeous piece of walnut.


In order to make the text for this project I am using my plunge router and custom printed 3D letter templates.  I wrote up all the text, then broke each segment up into a size that could be printed.  They are keyed to fit together to keep alignment and kerning proper.  Letters like “e” and “B” have to be done in multiple segments.  The “B” below shows how I tackled this.

The plunge routing went reasonably well, but something shifted part of the way through.  My cuts were shallower when I went back and redid certain segments.  Not sure what happened, but next time I will make everything double tight.  I went back with a chisel and cleaned up the issue areas.  The bottoms are still not smooth, but aren’t as uneven as before.  That left me with a few accidental chipout segments.  See near the top of the “O”.  Also, the “h” was in part of a knot.  My colorant will want to bleed into those cavities, so I have to fill them.

I used some dark woodworking epoxy to fill these problem areas.  First I went carefully with painters tape and dammed up all the problem areas.  Next I mixed the epoxy and used a syringe to put just the right amount into the voids.  A little light buffing and the epoxy filled the voids but is really hard to see.

DSC_1396

dsc_1400.jpg

I was going to spray paint this, then just plane off the top layer to reveal colored letters.  The bottoms are still uneven, so I opted to try epoxy.  I bought a big batch of system three epoxy with white color resin.  It worked really well.  No progress pictures because you have very limited time once the mixing begins.

The places I blocked the chipouts didn’t bleed, and only a little snuck in under the knot around the lower case “h”.  A syringe helped me pipe it into each letter, and manipulate the results.  The epoxy clung up at the sides and dipped a little in the center.  The result is a really awesome shiny 3D lettering effect.  It looks quite good on our new mantle.  I don’t really understand fireplaces in Florida, but this one looks picturesque.

20180813_141454

Inlay Success (almost)

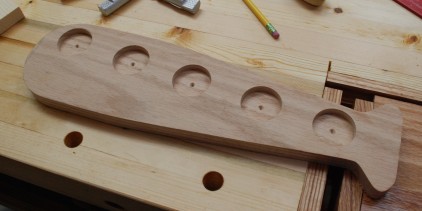
I think I finally finished my inlay journey.  See previous attempts here, here and here.   I made two different wooden projects with inlay, and aside from leaving out one important step, they turned out well.  The projects are my the “Cube Sweet Cube” signs that I have attempted to make over and over again, and a baseball bat trophy thing for my little cousin.  He is into tee ball, and has some game winning balls to display.

I milled out a deeper pocket (0.05″) and instead of filling it completely with paint, which didn’t go well, just tried to coat the inside surfaces with paint.  Thinning the acrylic with a little water helped it coat evenly.

The results were pretty good, the color was consistent, there wasn’t a voiding issue, and the surface planed clean really quickly and easily.  This was due to the very thin layer of paint on top.  The only thing that went wrong was a little bleeding into the grain.  It is worse on the red than the black.  The oak didn’t do this as bad as the pine did.  I was lazy and didn’t do any sealing, so I only have myself to blame.  No we know that is important!

5


Final Procedure

  1. Mill text pocket with either flat or round bottom mill to at least 0.05″ deep.
  2. Spray area with a sealer such as spray lacquer.  It is cheap and dries quickly.
  3. Mix desired acrylic paint color with a small bit of water to make it spread easily.
  4. Let dry overnight and either sand or plane off excess paint on top.

Trophy Bat

I used the shapeoko to mill out the somewhat complex area around the handle.  I could have cut this with drill bit and band saw, but this was quick and came out really well.  I don’t have enough travel to do the whole thing, so I finished the rest of it with my bandsaw.  A forstner bit made pockets for holding the balls, and a quick trip around the router made a nice round over.


Inlay Issues (Part 2)

Inlay is going to turn into a saga If this keeps up!  I had previously tried doing my own alternative to inlace’s resin infill material.  It was kind of a disaster.  The dye I added had a very adverse effect on the two part epoxy and resin.  A few weeks later I looked at the casting dye and noticed that it had completely separated.  There are no instructions on the bottle to mix before use, so it isn’t 100% my fault.  I remember last time that I had to add a lot of the stuff to color the resin, and It still wasn’t very opaque.  That could have been my issue all along.

I created another test structure and went to work.  I don’t need to revisit inlace, I know it is good.  For the acrylic paint, I tried to slop it on really thick so when it shrinks the pockets will still be filled.  The two part and polyester resin were done with a minimum amount of dye added.  This time they looked proper dark.  The results were unfortunately bad.  The polyester resin didn’t adhere well, and the two part epoxy had kind of a rubbery feel to it.

Well acrylic it is then!  I went a little deep with the sanding and buzzed off part of the R, but other than that It looks good.  Without further thought I ran off to make the “Cube Sweet Cube” sings I wanted to make weeks ago.  The results were not issue free.

The acrylic paint shrinks considerably when it dries.  The shrinkage is difficult to predict and often includes bubbles.  I was trying to go thin on the pocket milling so I didn’t have to use as much paint.  In trying to plane everything flat I shaved the paint right off in sections.  The neat byproduct of that is some really cool looking shavings.

DSC_0213I have one last test up my sleeve.  The acrylic paint coats well, but does not build up consistently.  I will try taking a rounded bit and make deep pockets.  These will get a good but thin coating of paint.  I can shave or sand plenty off the top with out worrying about going too deep.  Assuming the surface finish of the paint is ok, this should be a good solution.  More results to follow!

Inlay Experiment

After royally screwing up the inlay sign I made a few posts back I decided it was time to experiment with different inlay techniques.  I had mixed success, but will share my current round of results here.

I started by milling some test shapes into a block of maple and sealing them with a few quick coats of spray lacquer.  I thought I had a picture before applying any inlay, but apparently I do not.  There is a section for each inlay technique.

annotations

  • Polyester resin with added “castin` craft” pigment
  • Two part epoxy with added “castin` craft” pigment
  • Acrylic craft paint like you can find in any craft store
  • Inlace brand black inlay fill

Each section is made up of 3 letters.  The left most letter is 25mil deep, the center is 20, and the right one is 15mil deep.  I wanted to see how shallow I could go and still have the results turn out well.

My first observation is that the the castin` craft additive did poorly with both the epoxy and resin.  For starters, it took a decent bit to get a good looking black.  I was worried about adding too much, and you can see the polyester section is fairly translucent.  Both were very soft and gummy.  Attempted sanding mostly just pulled them out of their inlay pockets.

DSC_0132

This is really disappointing.  I bought a few different colors of the castin` craft stuff which I don’t know what to do with now.  On top of that, I bought a container of polyester resin and don’t know what to do with that either… I really thought that was going to work.

There are a few bright spots.  The inlace material looks great!  It is pricey, but at least it works.  The acrylic was promising.  The picture looks bad because I over sanded it.  Looking at the first picture, I barely put any acrylic paint down, just enough to cover the wood.  The surface texture looked bad, so I tried sand the paint smooth and got too aggressive.  Acrylic paint is a good option if I can get it to look smooth.  It is easy to get ahold of, comes in lots of colors, and is color mixable.  My next test will be to figure out how to apply paint thick enough so that it can be sanded to look smooth.

Liquid Inlay Failure

AKA Always read directions carefully

The plan was to make a small sign that said “CUBE sweet CUBE” for a friend/co-worker and myself.  I was going to mill some lettering into a nice piece of wood, and fill the pocket with colored inlay resin.  I will introduce the mill in a post soon.  Until then, I want to share a complete screw up I had.

I started by re-sawing (Cutting in half length wise.  It turns a thick piece of wood into two thinner pieces of wood) a scrap piece of maple.  Some quick sanding got the tops flat and ready to go into the mill.  A 0.063″ mill bit did a great job of removing material where the text will be.  I sprayed both pieces with a quick coat of lacquer to keep the dye from soaking in along the grain.  With the woodworking over, I moved on to filling the text area with a colored epoxy resin.

I taped off the area to be filled with black and mixed up the product.  The inlay filler I used is a resin with dye made by Inlace.  I metered out an ounce of the black resin and put in the proper amount of hardener.  After a good mix I poured it into the “CUBE” letters and let it sit.  There was a bit of shrinkage, but the results seemed ok. Next I switched to the “sweet” area and mix up the red resin with a proper amount of hardener… or so I thought.

It turns out that the black I got was both resin AND dye pre-mixed together.  The red, was just dye.  It is supposed to be added to clear resin.  12 hours later, It is still liquid, and I am sad.  I can’t come up with any good way to wash out the offending dye.  I think this is going to have to be a do-over project.  In retrospect, the lettering is a lot deeper than it needs to be.  A big waste of resin.  Unfortunately this stuff is hard to get.  I can’t find it in town, and no one online carries inlace’s full product line.  I might try to find their clear resin and do it over, or I might try someone else’s epoxy dye that is more attainable.