Acrylic Paint 3D Printing Inlay

I have made multiple attempts at colored inlay with 3D printing and CnC milling in the past. My best results have been with epoxy resin and dye. It is hard to work with. Either you slop it on or pipe it in with a syringe. Slopping it on runs the risk of voids and has a lot of surface cleanup. Using a syringe has better control, but the stuff kicks off quickly when placed in a container like that. I had experimented with Acrylic paints in the past with only modest success. I tried again on my 3D prints and had a bit of a breakthrough.

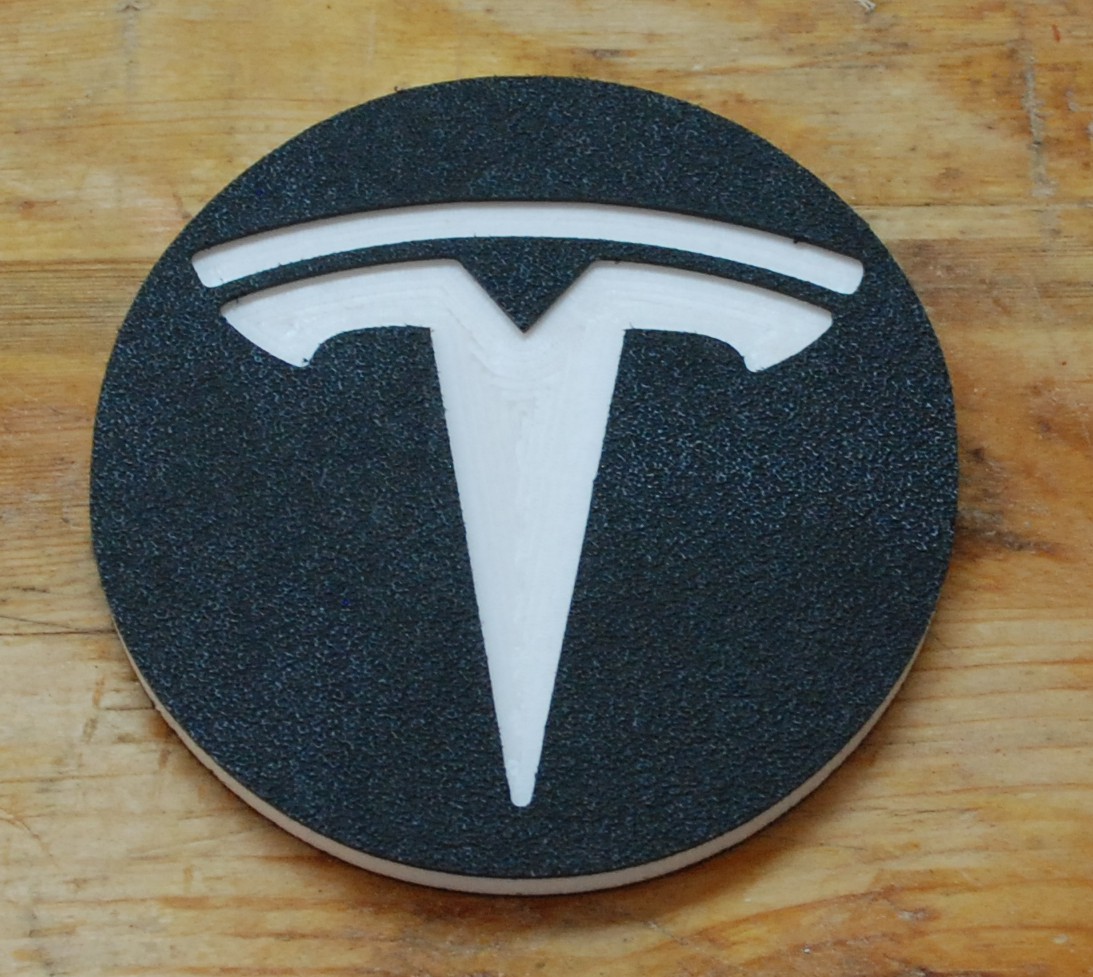
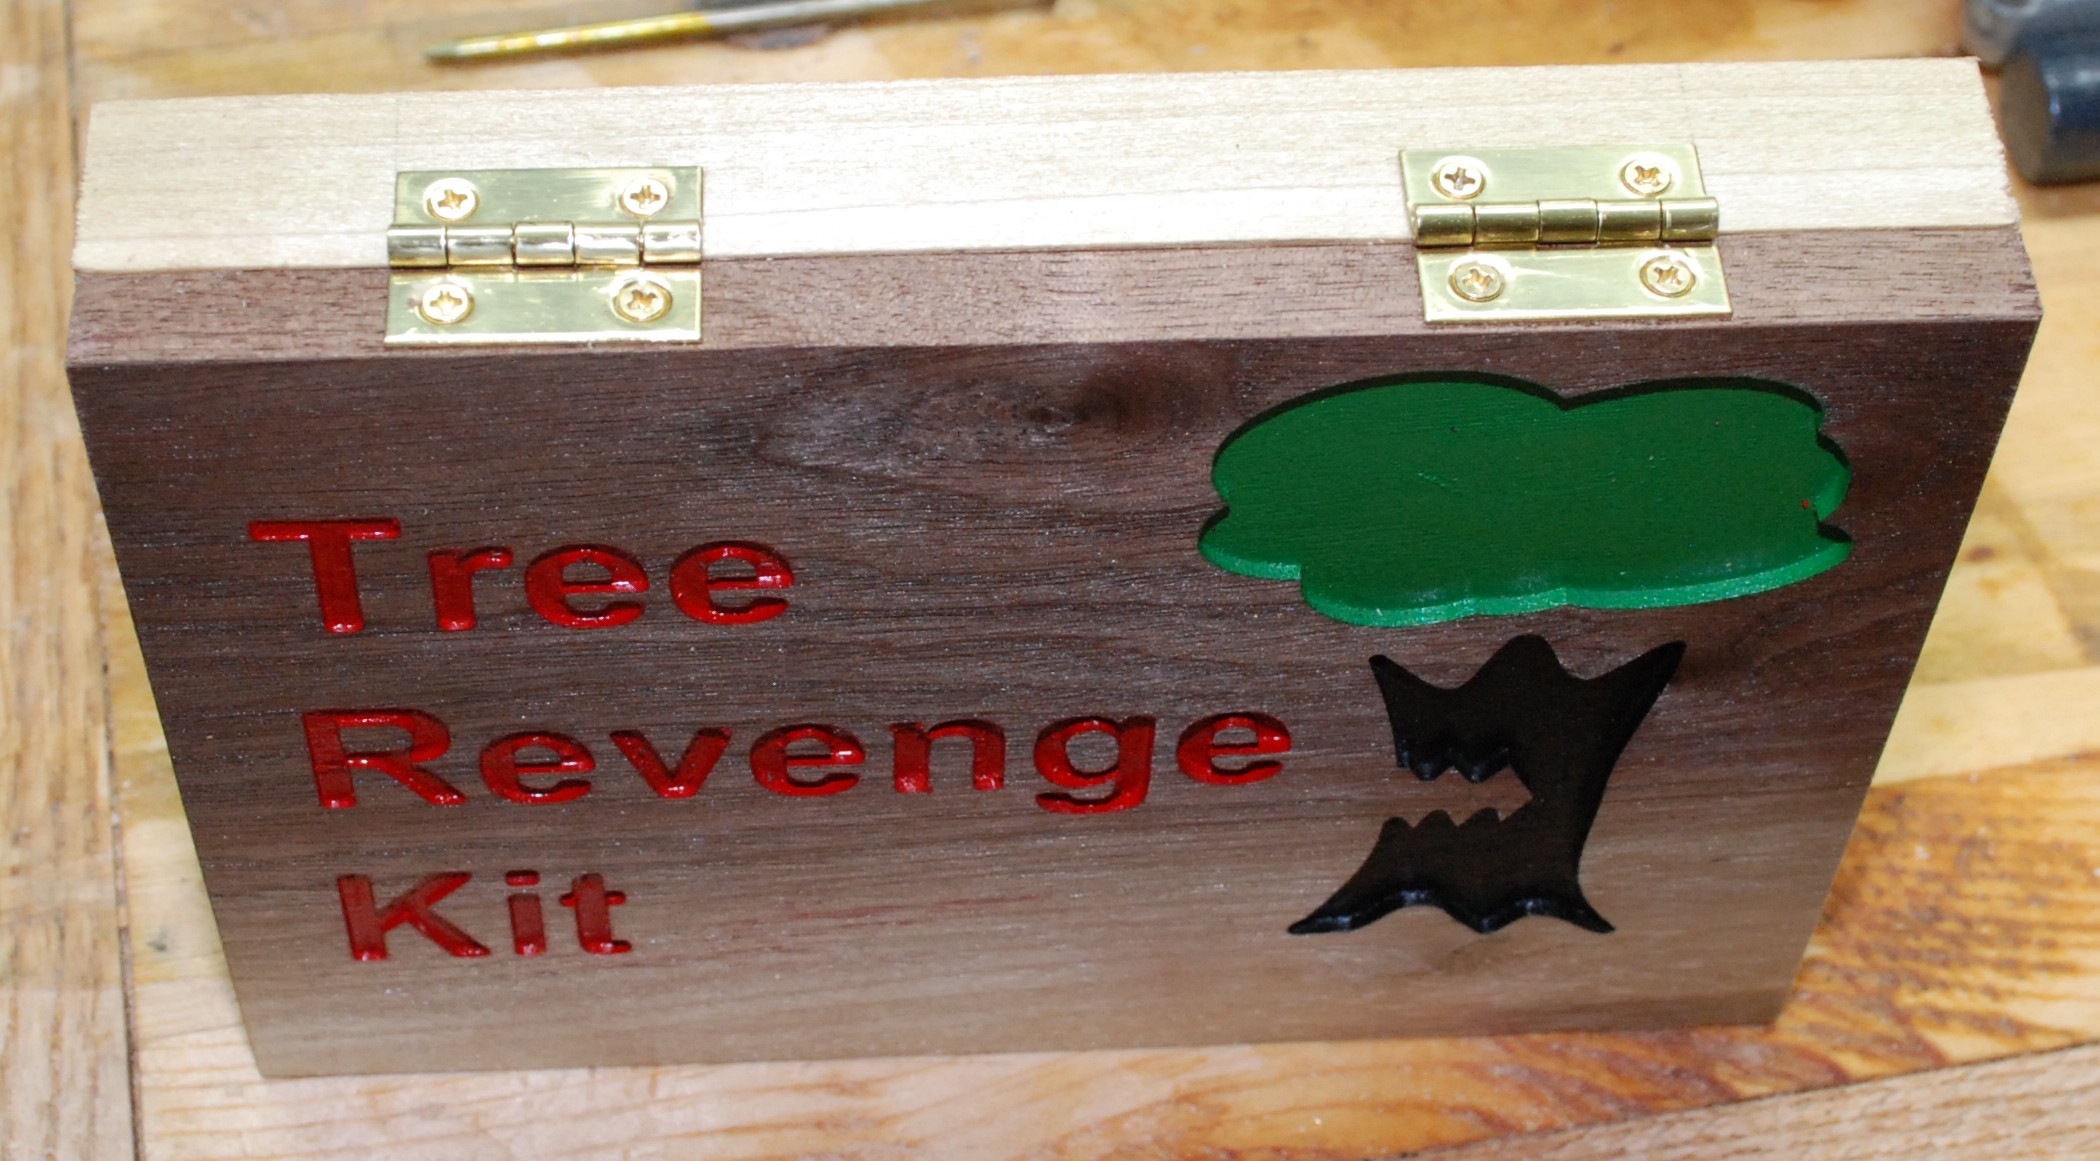
I picked up some craft acrylic paint for general purpose use. It comes in a bottle and is the consistency of ranch dressing. The previous stuff I worked with was in a tube and was very thick I poured some black into a 3cc syringe and piped it into a cavity of my 3D print.

I started with a 25 gauge straight needle, but the paint flowed too freely and I ran over on one of the parts. I dropped down to a 30 gauge needle and had a lot more success. The paint flows in, sticks well to everything, and doesn’t appear to run. You can use the needle to guide it up to a wall if it didn’t quite reach everywhere.

These prints are my corner radius templates for the router table. The text is face up and have 3 perimeters. Not sure if it will bleed through 2 perimeters or not. I suspect if you had inset text on the side of a print it would seep out and run along the Z-layers. I haven’t tried it yet though. If you do happen to run over, the paint wicks down into the top layer and never comes fully out. Sealing it with a spray lacquer, before you paint, might fill the gaps and buy margin for error. I was just really careful and used a small needle after the first screw-up.

Once I got the hang of it I didn’t make any more mistakes and was able to fill them out in a minute or two each part. Maybe some day I will get a multi-color capable printer, but until then, this is a really easy effective method of adding color to inlaid text on 3D prints.

Little Bushy South

This project was completed in July at the old house, but I had to keep it under wraps so it could be a surprise to someone.  My wife’s grandmother was a British war bride.  She met her American husband at Bushey Park outside of London where he taught air sea survival for the 8th Army Air Force.  When the war was over they moved to Michigan (his home) and eventually had a farm called “Little Bushey”, after the place they met.  We had talked about calling our new place “Little Bushey South” as a tribute to that.  I thought a sign was in order, and no wood could be better than the family wood.

These walnut beams were picked up by my mother’s parents when she was very young.  They spent a lot of time around boats and they were used as ballast by someone.  No clue how old they were then, but our family has had them for 50+ years.

One of the beams had been cut down a few times, so I cross cut it to about 42″, and then re-sawed it to make a 1 inch thick slab.  I left some of the worm eaten edging because it is so good looking.  A little work with my jack plane had it smooth and revealed a gorgeous piece of walnut.


In order to make the text for this project I am using my plunge router and custom printed 3D letter templates.  I wrote up all the text, then broke each segment up into a size that could be printed.  They are keyed to fit together to keep alignment and kerning proper.  Letters like “e” and “B” have to be done in multiple segments.  The “B” below shows how I tackled this.

The plunge routing went reasonably well, but something shifted part of the way through.  My cuts were shallower when I went back and redid certain segments.  Not sure what happened, but next time I will make everything double tight.  I went back with a chisel and cleaned up the issue areas.  The bottoms are still not smooth, but aren’t as uneven as before.  That left me with a few accidental chipout segments.  See near the top of the “O”.  Also, the “h” was in part of a knot.  My colorant will want to bleed into those cavities, so I have to fill them.

I used some dark woodworking epoxy to fill these problem areas.  First I went carefully with painters tape and dammed up all the problem areas.  Next I mixed the epoxy and used a syringe to put just the right amount into the voids.  A little light buffing and the epoxy filled the voids but is really hard to see.

DSC_1396

dsc_1400.jpg

I was going to spray paint this, then just plane off the top layer to reveal colored letters.  The bottoms are still uneven, so I opted to try epoxy.  I bought a big batch of system three epoxy with white color resin.  It worked really well.  No progress pictures because you have very limited time once the mixing begins.

The places I blocked the chipouts didn’t bleed, and only a little snuck in under the knot around the lower case “h”.  A syringe helped me pipe it into each letter, and manipulate the results.  The epoxy clung up at the sides and dipped a little in the center.  The result is a really awesome shiny 3D lettering effect.  It looks quite good on our new mantle.  I don’t really understand fireplaces in Florida, but this one looks picturesque.

20180813_141454

Countersink Bit Set

Countersink bits are supremely useful.  Screws that are run flush look nicer, they are easier to install with the pilot hole, and are much less likely to split wood.  The set is from woodcraft and came in a plastic package.  It wasn’t useful for long term storage, and the simpler older set I had kind of rattles around in a drawer somewhere.  I wanted a better fate for this set, so I got to making a nice box for myself.

DSC_0455

I started with a piece of pine in my mill.  I milled everything in the bit area to the same depth that would accommodate the thick ring with the set screw.  In retrospect I would mill multiple depths so the chuck posts don’t rattle around as much.  Nothing is going to fall out with the lid on, but it would have been nicer and rattled less.

I was thinking about milling some numbering in but It would have required a lot of cam work and careful milling to individually make each number.  Instead I used my punch set to put in corresponding numbers.  A fine black sharpie really makes them pop.  I did the sharpie before I spray lacquered the wood.  The marker bled a bit on the soft pine, doing it the other way around next time would be better.

Next I milled a label into the lid and used some acrylic infill to make it really pop.

Everything got a coating of spray lacquer as a protectant.  A simple set of brass hinges made it an official lid, and some magnets keep it closed.  In retrospect, having magnets below each bit would have made this a really snappy cool set.  I guess its not too late!


Bonus Coaster

A co-worker I know is getting a tesla soon, so I figured he needed a nice coaster to go with it.  I was milling the day away, so why not?!  Also I am hoping this will get me a ride or two to lunch.

DSC_0457


Tree Revenge Kit

I love trees!  The whole oxygen-necessary-to-life thing is neat and all, but their dead dried carcasses are where it is really at!  Aged cherry, bright maple, dark smooth walnut.  Every once and a while these trees get their revenge.  Splinters don’t happen often, but when they do… OUCH!  Thus, my Tree Revenge Kit was born.

The kit sits right next to the entry to my shop and contains a single set of tweezers.  I like the ridiculous idea of a monster kit that has all kinds of fancy locks, and when you open it up there is only a small simple thing inside.  This isn’t that extreme, but the box certainly could be a lot smaller.  Or I could just put the tweezers in a drawer.


The Build

This is another mix of woodworking and CNC milling.  The lid is walnut and the base is poplar.  I started by making the top, and milling out the text and tree all in one go.  Each color got masked off and hit with spray paint.  I think this might be my new preferred method of inlaying color into wood.  It is quick and easy, and goes down well over a quick coat of spray lacquer.  Having done a number of color inlay projects at this point, nothing is faster or cleaner than hand planing off the excess paint on top.

Once the lid was cut out and finished I could cut the poplar base to match.  Nothing special was done to it aside from milling out a slot for the tweezers to go in, and some relief cuts for a set of big fingers to pull the tweezers out.

A really funny project would have been to cut the slit, but not the finger relief.  Then, make a tool (with magnets?) to extract the tweezers.  Maybe that tool would get its own box.  It should have a lock to keep people from stealing it.  I digress.

DSC_0214

A set of simple hinges hold the two halves together, and that about wraps it up.