Saw Renovation Wrap-Up

I finished my last round of saw renovations, and have ended up with a serious collection of panel saws.  Some were dropped some where chopped, but most made it through in decent condition.

DSC_0107

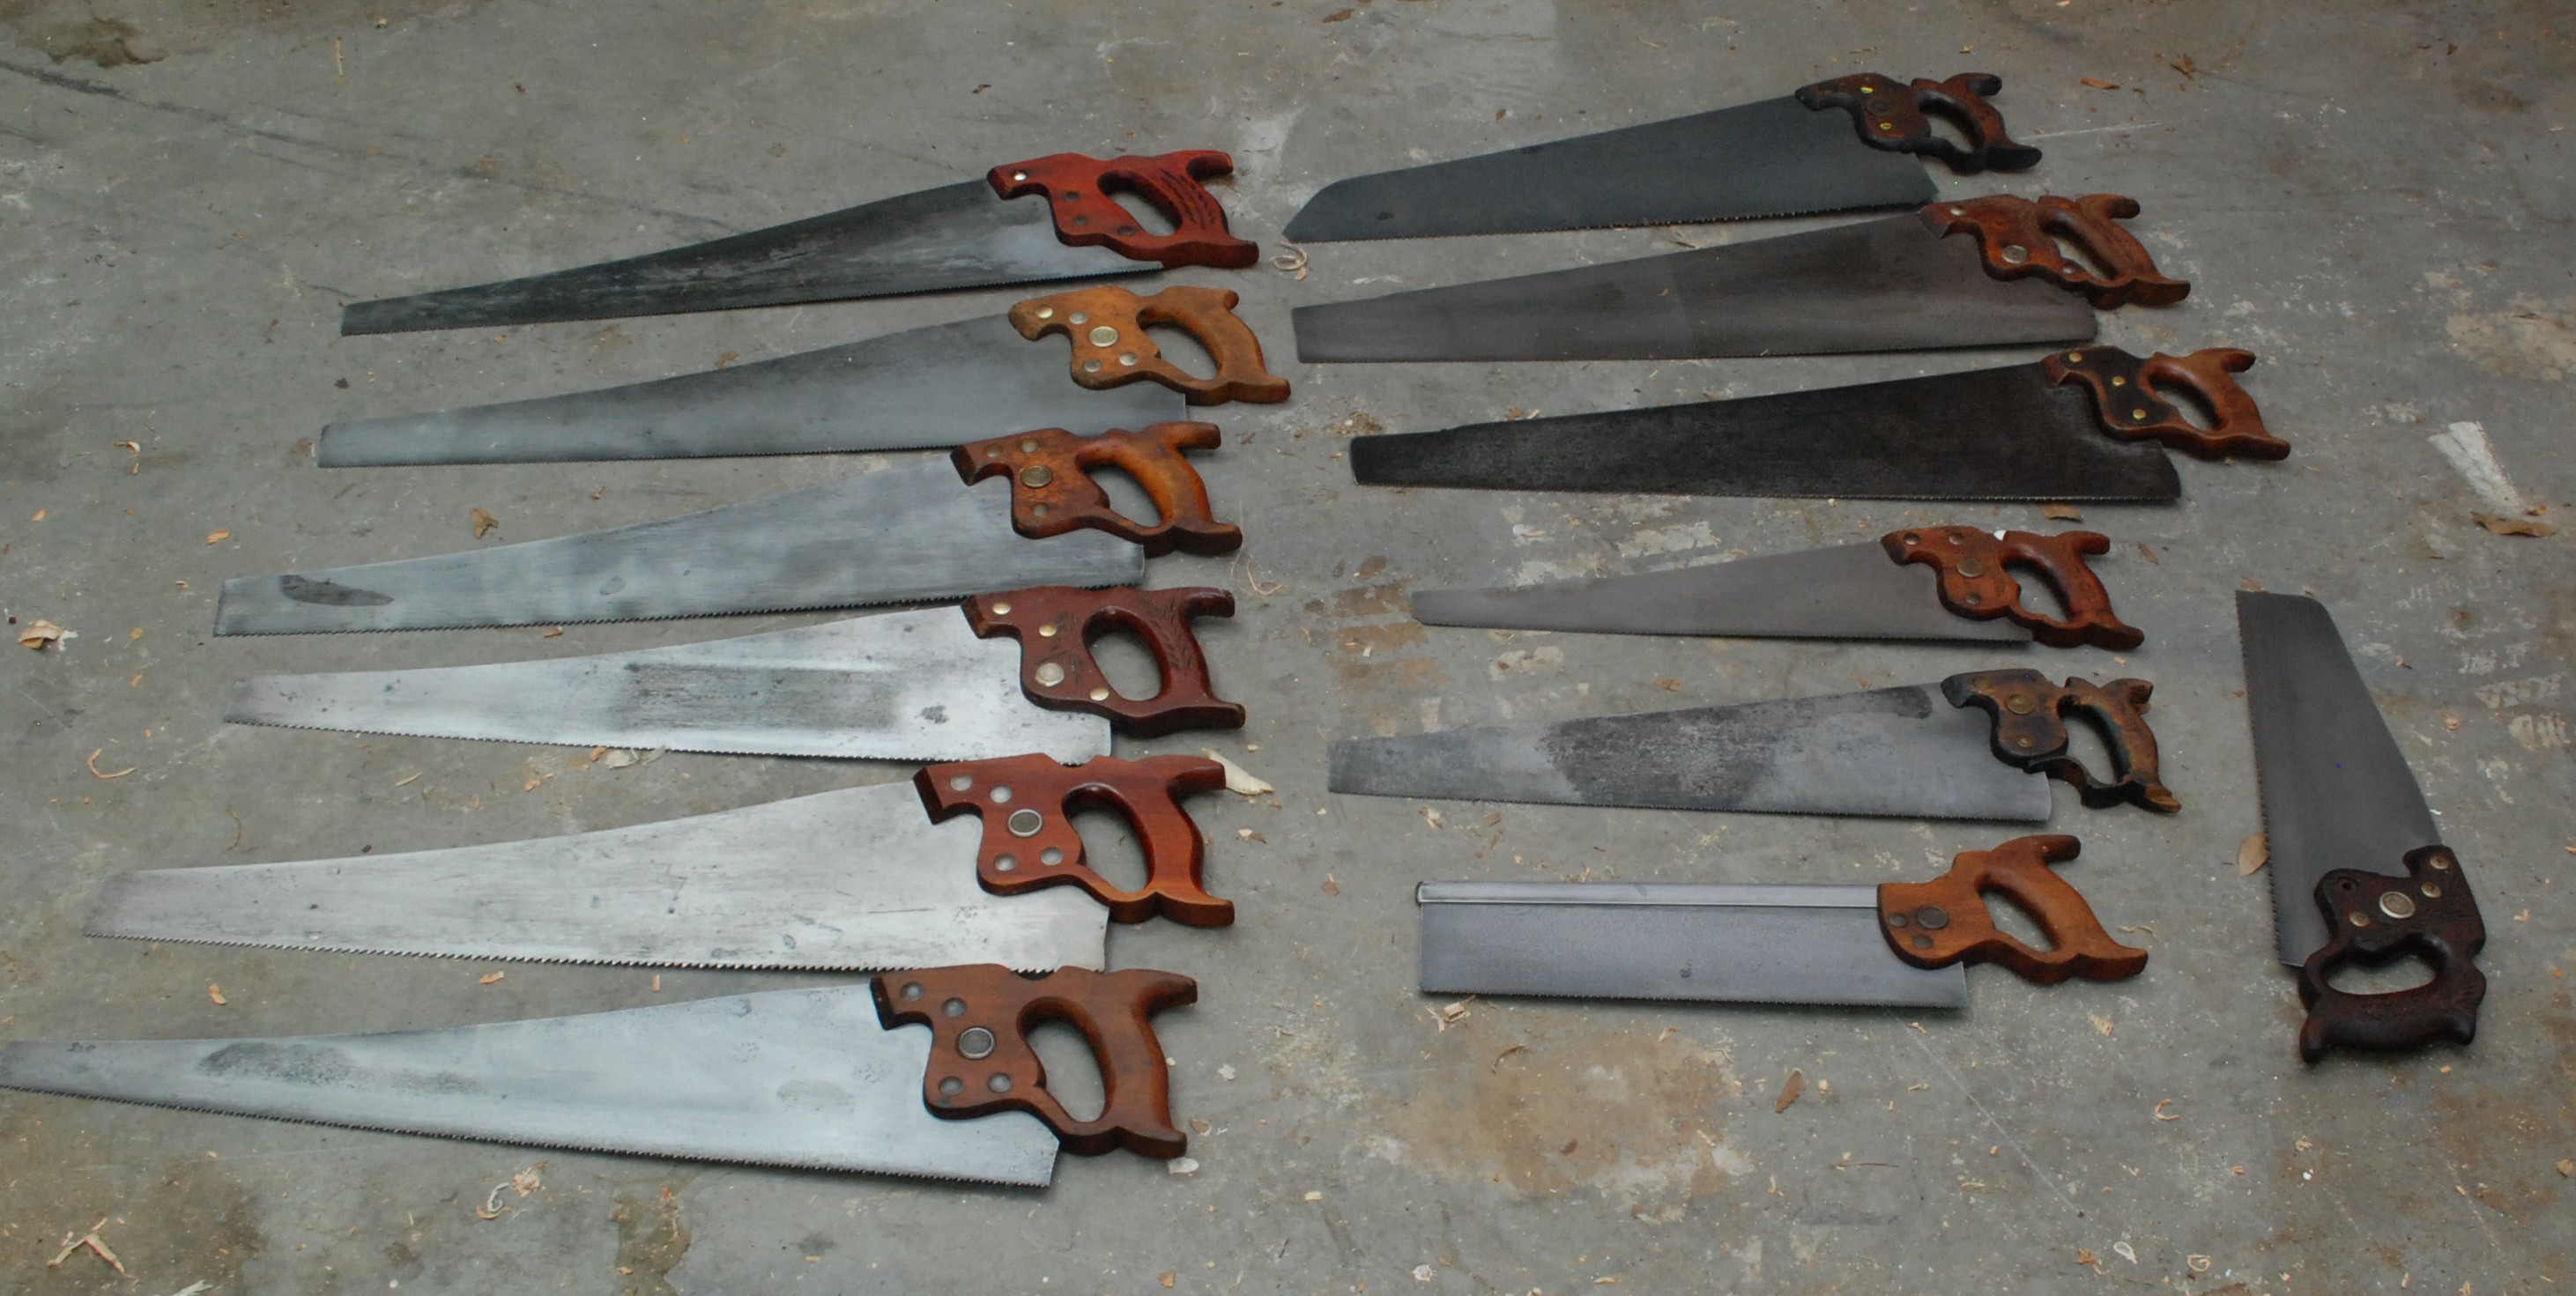
In all I did a major restoration on 3 sets of saws for a total of 9.  Some of the ones pictured above were purchased in pretty good shape, and didn’t need any serious restoration work.  Sanding all those saws was messy work and left my fingers stained black.  Luckily I put down a sheet of particle board to protect my bench.  I guess gloves are in order next time.  After 9 saws, the rust remover bath looks like used motor oil.

DSC_0105I like to think that after all the neglect these saws are happy to be back on the job and free of decades of rust.  Look, they have even taken up synchronized swimming!

DSC_0111


The last set of saws came from a really cheap lot purchase.  Any buy from ebay can be a crap shoot.  It is hard to tell quality from the pictures and sellers rarely take a picture down the length of the saw blade to show bends.  Still, for 15 bucks for the three, I am willing to take my chances.

Unfortunately the top most saw, in the left hand picture, was beyond saving.  I couldn’t get past the heavy pitting and bends in the blade.  I disassembled it and will keep the parts for potential future repairs of other saws.  If I could find another medium sized backsaw or two and a good miter box/saw my collection would be complete… yeah right!

Saw Renovations

I have been collecting old panel saws for a while.  Some are in decent shape and only need a sharpen, some have bad rust and hard bends in the saw plate.  In this endeavor, no saw will go untreated.  I tried to straighten when possible, but a shortening happens.  Check out these work horses of american history.

DSC_0079

They have seen better days, and the one in the middle has some serious bend to it.  Still, all indications are that the age of these saws is pre-WW2.  That was a golden era of saws where you probably can’t go wrong with anything you find.  I started by removing the handles and ran into my first serious snag.

DSC_0081

Someone had lost all the split nuts and decided to replace them with wood screws.  Based on the screws it was probably a number of decades ago.  They were screwed or pounded in, then had the tips bent over.  After a lot of messing around with pliers and cutters I eventually grabbed a hack saw and sawed the screw off between the plate and handle.

DSC_0084

Next the saw plates went into a shallow tub with Evapo-Rust.  I found that one of those under-bed storage containers was perfect.  Once again this stuff is amazing.  It works pretty well over night, but there appear to be no ill effects from leaving it longer.

After their bath they look almost black.  I tried a few different techniques and found spraying down the blade with WD-40, then scrubbing with a sanding sponge did the best.  A 220 grit 3M sandblaster sanding sponge did a fantastic job.  It holds together really well under wet conditions, even with the saw teeth raking it, it doesn’t get loaded, and it cut through the grime quickly.  Each side took less than a minute to clean.  I have never used sanding sponges, but I can see why they are popular.  This poor plate had to get cut down a bit, but I saved the cutoff for use as scratch stock and tools.

The handles were mostly in decent shape.  Lots of scratches, and small breaks from getting dropped.  The finish was stripped off with a corse sanding sponge.  Again these sanding sponges surprise me.  They do a really great job of adapting to all the handle contours.  Once smoothed and cleaned up I rubbed a coat of boiled linseed oil on each one and let it dry.  Everything went back together quickly.  The tall saw had to get a new set of hardware.  Luckily my local Ace had brass plated binding post hardware.  Not exactly authentic, but it is a huge improvement over the wood screws the last guy used.

DSC_0092

Sharpening is the next step.  I have everything I need, but my table is covered in saw rebuilding stuff.  I will keep the refurb train going until they are all done, then convert over to sharpening.  In the mean time I need to come up with a good measure for saw sharpness.  Maybe some time trials are in order.

Saw Bench Pair

In an effort to increase my use of hand tools I need a better way to saw big boards.  Right now I can only cut smaller things on my work bench.  If anything needs ripping, or a bigger board needs cross cutting it has to go to either the chop or table saw.  With that, I present my saw bench set!

DSC_0052

I can’t take credit for the design, it is a rough copy of Chris Schwarz’s.  The one on the right is called a saw bench, and the left is a saw horse.  Most saw horses are hip high, so I will call this guy a mini horse!  I made the mini horse a lot shorter in length because I didn’t think I needed to be as big.  Hopefully I am right!  I started by chopping everything to rough length and gluing together two 2x4s for the top of the bench.

DSC_0016

The top was then planed smooth, had a vee cut in the front for ripping clearance, and was notched vertically to allow for the legs to have room to inset.  My first set of notches were pretty rough, but by the end of this build I had some very clean looking ones.  I set all the joints for the legs and the spreaders that ran front to back then assembled.  I waited until after the first glue up to make the spreaders that went left to right.

The bench was made over a number of evenings as I made mistakes and tried out different techniques.  By the time I got to the mini horse I had a good plan on what to do, and was able to knock out all the joinery in just a few short hours.  It turned out a lot better than the bench.  I wish I had started with it, then moved onto the bench.  You may notice that the top is shorter in the last picture.  I realized the extra length isn’t helpful and cut it down.

Once everything was assembled I set about trying to level the legs.  I had left the bottom of each leg square and figured I would saw them parallel to the ground once assembled.  Each leg has a 10 degree flare with respect to the ground.  Trying to saw each leg at 10 degrees once the thing was assembled was a bear.  Next time I will not plan to do any sawing on something like this after it is built.  Once I did manage to level and set the feet, I applied a coat of boiled linseed oil and called it finished.

I have had trouble explaining how useful these are to people.  Words don’t really do it justice, and even pictures don’t tell the full story.  I shot a video of me using the bench because of a few conversations I had when people asked what I was building.

As summer sets in here in Central Florida it gets harder to spend time out in the shop.  Luckily for me I have a window shaker in my garage.  I can keep it at a reasonable temperature in there with the AC on, but can’t run any big tools.  Summers are a great time to work on lighter activities such as dovetails.  I will use this summer to renovate a pile of saws and drills I have waiting.  Some just need sharpening and some need serious rehab.  I will call it my Summer Saw Stravaganza!