Goodbye Garage

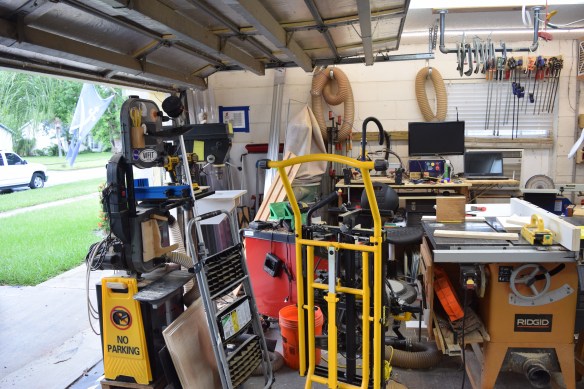
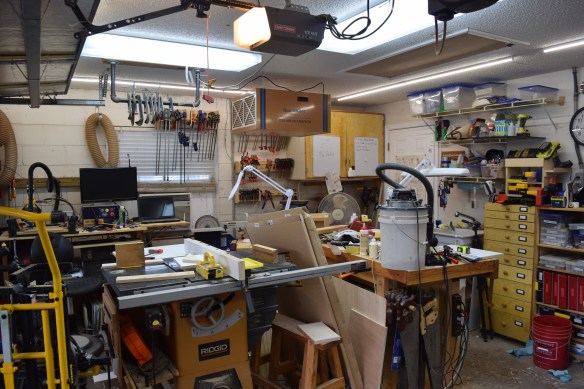
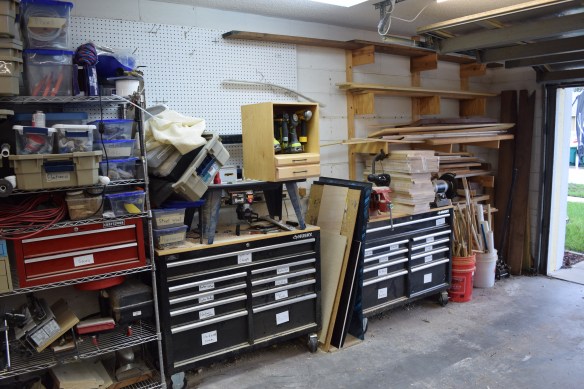
The wonderful wife and I are pulling up roots and moving.  Not far, just a few miles away, but our new dig will be bigger and better than ever.  I have lived in my fixer-upper for 9 years now and the time has come to move on.

When I moved in I had few tools and not much experience.  I ended up renovating the whole house and developing a strong passion for woodworking along with more tool junk than you can shake a stick at.  The garage has seen a lot of my screw ups and disasters, but with that, a lot of learning.  It has been a slow organic work of progress.  That and mostly a huge mess.

I started packing up right after taking these pictures and finishing off my drill press rebuild.  This is why I was so interested in it being mobile.  It was a little sad to start undoing all my hard work that got this shop to where it is.  To offset that, the new garage has over twice the square footage of my current one.  Lots of exciting posts to come in the future about new house renovations and shop setup.  Until then, goodbye old friend!

DSC_1403

DSC_1404

DSC_1405

DSC_1406

Death and Resurrection of a Drill Press

My beloved drill press is a Craftsman from the early 90s (I think) that I snagged on craigslist.  It has served me well, but is very difficult to move.  Top heavy and with a small base; even small shifts in position are precarious.  I am going to need to move it a lot soon, so when woot had a Bora Portamate mobile base on sale I snatched it up.  I was walking the drill press out of its corner to get the base installed when disaster struck.

20180720_135157

I tried to control it on the way down, but once it got going there was no stopping it.  I didn’t get hurt but the arm that holds the table broke off.  I still had a drill bit installed in the chuck, and that is what kept the table from sliding further.  It bent the drill bit, but the quill appears true.  I stood it up and started it spinning.  No wobble of any sort that I could see.  With that established I gathered up the broken parts.

Maybe a quick visit to the local welding shop would have me set right?  Apparently cast iron is very difficult to weld.  They were not wild about trying, and wouldn’t guarantee me any of their work.  Whelp…forget that.  After being really bummed for a day or two, I decided I could build up my own top table top out of the scraps I had around.  I gained enough confidence to install that mobile base.  It floats like a dream now!

DSC_1377

I started with a stout piece of oak drilled to match the table arm attachment point.  A drill press would have been really useful there, but I managed without.  From there I built out ribs that hold the top.  I made sure everything was square with respect to the drill bit before screwing them in completely.

The table top will be done with two layers.  The top will have a square cutout that holds a sacrificial drill insert, and the bottom has a hole so you can push up from the bottom to remove the insert.  I printed a square guide to let me cut out a 2.75×2.75 inch hole for the insert.  That new plunge router lets me do all sorts of cool things.

DSC_1402

I routed some slots for a set of aluminum t-slot guides that hold the fence in place.  The fence is just two pieces of the same plywood glued back to back.  I cut a dozen of the center inserts.  They all got an undercut chamfer to help keep dust from letting them sit level.  This table is smaller than my last, but I feel it is more functional by far.  It was a good recovery, and ultimately led me to making a better drill press table.

DSC_1407

DSC_1408


Table Saw Inserts

Professionally made zero clearance table saw inserts are an important add-on for any table saw.  They make the cuts come out cleaner and ensure small scraps don’t get lodged inside the throat.  They are quite expensive though.  They run over 30 bucks a piece for my saw.  No more, time to make my own.  I bought a smallish piece of phenolic coated plywood for 40 dollars.  It has enough material to make at least 8 inserts.

I started off trying to make a jig that would hold the plywood and make all the blade relief undercuts and slots for the riving knife behind the blade.  It was difficult to hold everything and produced mixed results.

DSC_1361

Eventually I just used carpet tape to tape down one of my old store bought inserts.  A guide bushing on my plunge router let me remove all the area where the riving knife should be.

From there I printed a 7/16″ radius template for the tracing router bit.  I could have used the already taped on insert as a template, but it had a few weird features I didn’t want copied.  With a finger hole drilled in, things were starting to look right.

I need a way to level out the insert.  The pocket they go in is always deeper than a 1/2″ sheet of plywood so you can raise it up to be flush with the top.  I used brass threaded inserts for #6 set screws to give each one leveling feet.  The set screws can be adjust from above with the insert in place.

DSC_1367

The surface coating on this plywood is hard and very slick.  A great material for fences or inserts like this.  The phenolic chips like mad though.  I will stick with these and have left over material, but probably not buy it again.  A few coats of polyurethane and wax would be easier to work with and also reasonably slick.

Because of how high the 10″ saw blade is in the housing I had to use a 8″ dado blade to start the cut before switching back to the full sized blade.  I made 4 total, and once I got the swing of things they came pretty quickly.  Two will be for dado cuts, so they don’t need the riving knife slot.  Hopefully this batch lasts me a few years.

Nailer Cabinet

Air nailers are a pretty wonderful invention.  They can provide low visibility fastening in a lot of different applications.  I have had a brad nailer for ages, and picked up a good pin nailer when I redid the kitchen.  The cordless electric nailers are a lot heavier than their air counterparts, but for just a few quick hits, they are awesome.  I recently built up a full inventory of air and electric brad and pin nailers.  Time to put those nailers to work building a little home for all these gadgets.

I planned out a cavity to hold all the nailers up top, and a set of drawers below to keep the nails and other accessories.  1/2″ maple made up all the components except the drawer bottoms.

Once assembled I cut more plywood with a 45 degree angle on it to act as a french cleat across the back.  The electric nailers sit nicely on their own, but the air ones will need hangers.  Plus, this lets me rearrange things, or add dividers if I feel the need later down the line.

I played with the arrangements, and there are lots of spacing options that work.  Big enough to be flexible, but not so big as to waste space.

DSC_1298

This is a decent looking cabinet on its own, and is about where I would stop in my previous builds.  I wanted to add a little something, so I made my own maple edge banding.

The pin nailer came in handy for securing it all, and hand planing really lets you sneak those parts into a good fit.  With the body of the cabinet in shape I turned to the drawers.  I thought drawer fronts with chamfers might be a neat flare, and I had a new router bit to try out.  I cut all the end grain chamfer while it was still a solid long block, then cut the two fronts out and routed the long grain.  It completely mitigated any tear-out issues.  I finally feel like all those minor screw ups of the past are congealing into wisdom.

Everything got multiple coats of danish oil.  Not a bad finish, I like the wipe on aspect and how it looks.  Honestly though, it is just some kind of thinned linseed oil.  At probably 4x the price of basic linseed oil, I might just figure out how to thin that stuff myself.

I 3D printed organizers to keep each set of nails contained and labeled.  The drawer I had these in was a mess with different nail lengths all mixed up.  Mishaps have occurred from pulling the wrong length nail ream.  If I ditched the manuals I could have probably combined everything in one drawer.  Oh well, this provides ample expansion for new nail lengths, or other jigs/accessories I might acquire.

The final design looks pretty nice.  I will see how much dust it collects and consider adding doors later, but for now it is perfect.

DSC_1311

June 2018 Prints

A bountiful harvest of prints this month.  I had a lot of work going on in the shop, and that typically ends up producing different jigs and prints to help out.

First up, I reorganized all of my machine screws into one central organizer.  To help with organization and to tell them apart I printed a screw ruler and hardware guide.

20180617_152833

The ruler measures screw lengths of either flat head or other style.  The guide has through holes that match my common hardware styles along with examples of washers and nuts.  It makes matching a random bit of hardware easier.


I do a pretty good job keeping my eye and ear protection on when in the shop.  Dust masks are another thing.  A lot of my tools have vacuum, but certainly not all.  Most masks I have tried don’t work well with the beard and mustache, and most are pretty hot.  This one works well for me.  I built it a little home to prevent damage, and so I always know where it is.  I feel a little like bane when I wear it.

I took a photo of it on the cutting mat, then used the lines to help design an appropriate housing shape.  The hinge required a single screw and nut, and a magnet in the lid and body keep it closed.  The backplane screws down so I tucked it under a cabinet with other PPE.


I had a lot of flat parts that needed holes drilled in them in the same location.  Instead of marking every one I made a drill template with bushings.  The bushings are sized so a particular drill bit just fits inside.  It keeps the bit on location and perpendicular to the surface.  They will wear out eventually, but are easy to replace.  These all fit in a 5/8″ hole and have two screws to keep them in place.  Once built this saved me a ton of time and increased repeatability.

20180612_203922


Dust collection fittings never fit.  There was an article about it in one of my woodworking magazines.  The guy basically threw up his hands and told the industry to get their act together.  I emailed him with my solution.  He said it was cool, but a workaround for an issue that shouldn’t exist.  Agreed, but here is my workaround for my miter saw.

DSC_1305


I switched to using these small bottles from woodcraft for my glue.  I like them a lot better than the bottles that most glues come in.  The only trick is that the little red caps blink out of existence once dropped.  I did a few test prints with a segment missing to get the taper size and groove right for this one, but I think I have a winner.  It is much easier to handle, harder to lose, and is more easily replaceable.


I had kind of a failed attempt at a vacuum system for degassing epoxy.  I might revisit it at some point, but for now it is a defunct project.  I needed to tap some polycarbonate for pipe fittings and bought a pipe thread tap.  It didn’t come with any case or even pouch, so I printed one.  I sprayed it good with oil to prevent rust.  Hopefully stored this way it will not get lost, broken, or rust.