Drill Press Table

I built a new drill press table when I dropped my press before the move. It was a good table for how quickly I turned it around with what I had on hand. There are a few issues though. I made it small because my last one was too big and would collect junk storage. It is a little too small and stuff overhangs a lot. The 2.5″ insert is a lot smaller than many of the bits I use, which means the top has a lot of damage from my 4″ hole saw. More importantly though, the fence is unusable. I put the t-tracks right in line with the rotating handle. Every time you bring the press down it bonks on the fence knob. A few inches to the left or right and things would have been fine.

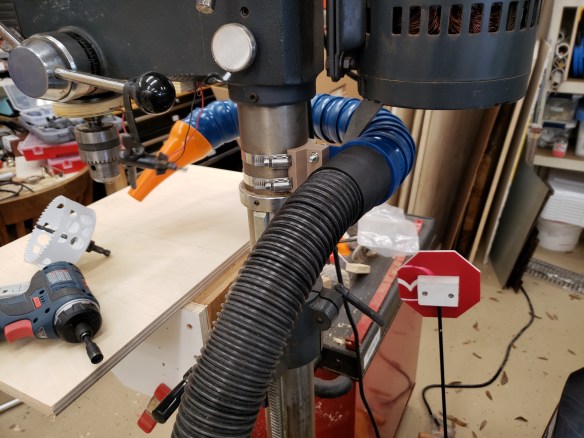
To start with, I had been fussing around with dust collection solutions on my drill press for ages. I finally broke down and bought some big locline hosing (blue and orange in the pictures below) and 3D printed an adapter to attach it to the back column. The adapter has passages for hose clamps to pass through it and clamp it securely. I had already wired in a switch at the front, so you just turn the vacuum on and start drilling.

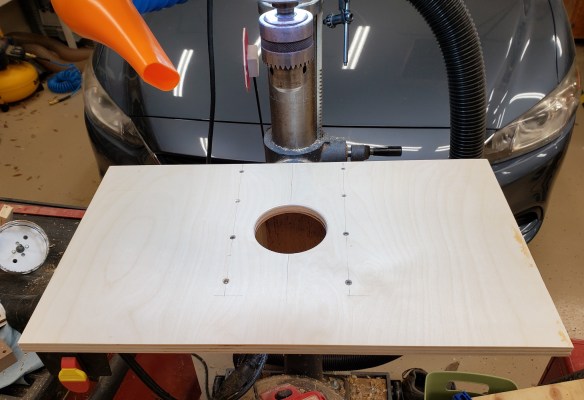
With dust collection solved, I attached the first layer of the table top. The large hole in the center will let me reach up from underneath and pop out the top table’s insert. Notice the dust collection switch already attached at the bottom left.

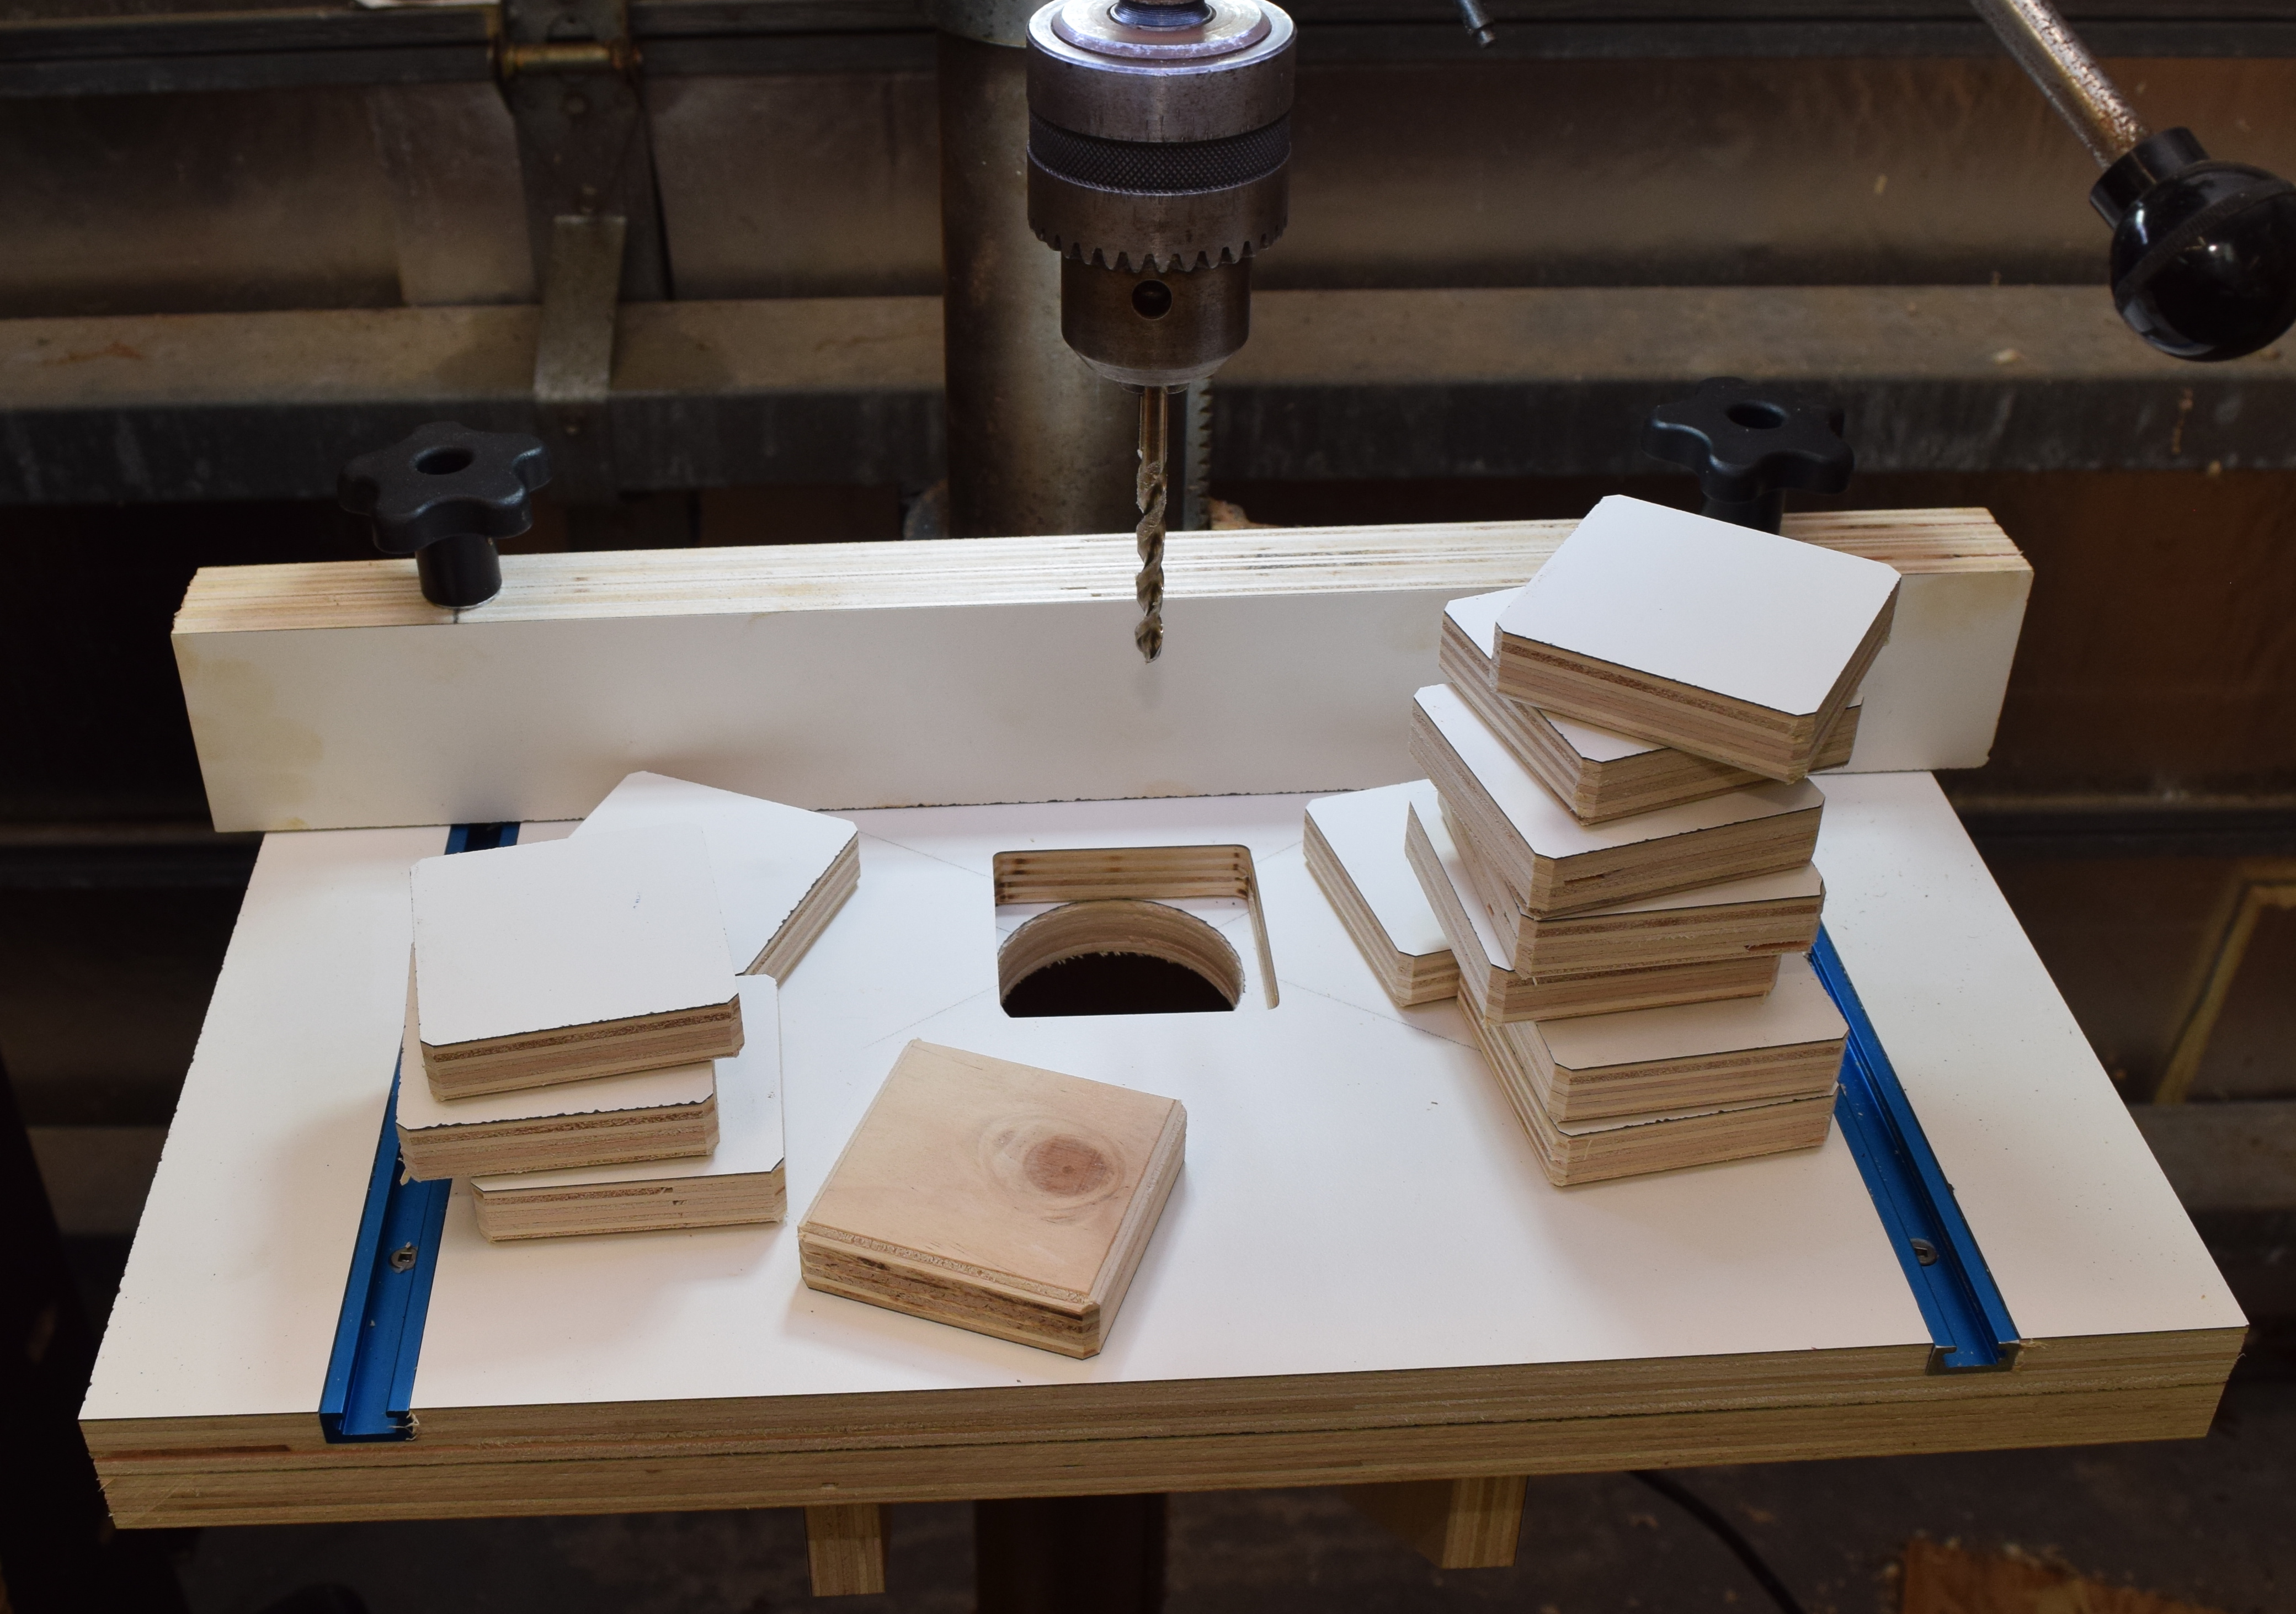
Next I printed a template and routed out a square section for the inserts to go into. Previously I had a smaller insert. I found myself using the 3 and 4″ hole saw at the drill press often, and it damaged the tabletop outside of the insert area. This new one is 4.5″ wide. I cut a pile of inserts to make sure I wasn’t going to run out anytime soon. They got their corners and bottom edges rounded to fit in the cutout better and prevent dust in the corners from letting them sit properly.

Last but not least I made up a set of fences. I find myself rarely clamping to the fence, and often wishing it was very short. I made both a tall fence, that could have stop blocks clamped to it, as well as a flat fence. The t-track is far enough out on the table and the clamp knobs are short enough that the drill press handle shouldn’t ever be an issue.

Flat Fence
Tall Fence

Death and Resurrection of a Drill Press

My beloved drill press is a Craftsman from the early 90s (I think) that I snagged on craigslist.  It has served me well, but is very difficult to move.  Top heavy and with a small base; even small shifts in position are precarious.  I am going to need to move it a lot soon, so when woot had a Bora Portamate mobile base on sale I snatched it up.  I was walking the drill press out of its corner to get the base installed when disaster struck.

20180720_135157

I tried to control it on the way down, but once it got going there was no stopping it.  I didn’t get hurt but the arm that holds the table broke off.  I still had a drill bit installed in the chuck, and that is what kept the table from sliding further.  It bent the drill bit, but the quill appears true.  I stood it up and started it spinning.  No wobble of any sort that I could see.  With that established I gathered up the broken parts.

Maybe a quick visit to the local welding shop would have me set right?  Apparently cast iron is very difficult to weld.  They were not wild about trying, and wouldn’t guarantee me any of their work.  Whelp…forget that.  After being really bummed for a day or two, I decided I could build up my own top table top out of the scraps I had around.  I gained enough confidence to install that mobile base.  It floats like a dream now!

DSC_1377

I started with a stout piece of oak drilled to match the table arm attachment point.  A drill press would have been really useful there, but I managed without.  From there I built out ribs that hold the top.  I made sure everything was square with respect to the drill bit before screwing them in completely.

The table top will be done with two layers.  The top will have a square cutout that holds a sacrificial drill insert, and the bottom has a hole so you can push up from the bottom to remove the insert.  I printed a square guide to let me cut out a 2.75×2.75 inch hole for the insert.  That new plunge router lets me do all sorts of cool things.

DSC_1402

I routed some slots for a set of aluminum t-slot guides that hold the fence in place.  The fence is just two pieces of the same plywood glued back to back.  I cut a dozen of the center inserts.  They all got an undercut chamfer to help keep dust from letting them sit level.  This table is smaller than my last, but I feel it is more functional by far.  It was a good recovery, and ultimately led me to making a better drill press table.

DSC_1407

DSC_1408


Drill Press Lighting

I love my drill press.  It is a 1980s era craftsman floor standing drill press.  The table I made for it is honestly not my best idea, but that isn’t the drill press’ fault.  The lighting scheme is a little lacking.  It has a single bulb tucked behind the spindle, and it does ok, but LEDs will make it better!

DSC_0417

I found these things called “angel eyes” for cars.  They are used to make cars look like they have fancy rings around their headlights.  You can get a two pack of different diameters for around 10 bucks.  They are perfectly suited for ring lights.

DSC_0416

I took the ring and bonded it down to a bit of plywood cut with an inner diameter that just presses onto the un-moving part of my drill press.  To add additional lighting I found these patches of packaged LEDs used to replace in-car dome lights.  They can be found in 4 packs for around 10 bucks.  All of these parts already have resistors built in because they are designed to be hooked up to a car’s 12V line.

The plywood square will go over the area that previously had the drill’s light bulb.  I used recessed magnets to hold them in place.  The wires got wrapped around to the back, and soldered together along with the ring light.  Hot glue helped with all the cable management.


I connectorized the lighting half and the power supply so I could separate the two if need be.  Speaking of power supply, the ring light and each light patch take a few hundred mili-amps each.  Get a 12V supply with at least an amp output.  I used an adapter that screws into a regular bulb socket and gives a plug outlet.

DSC_0424

The power supply is screwed into where the bulb used to be, wires are routed, and lights installed.  Lets see how it looks with no light, with the old bulb, and with my new lighting system.

DSC_0427

No Lights

DSC_0428

Old Bulb

DSC_0429

New LEDs

Very bright!  I guess for the 30-40 bucks I spent on parts I could have bought an off the shelf drill press ring light.  Maybe it would provide more light, but I kind of doubt it.  I know it wouldn’t be as compact or fit as snugly as this thing does.  The last thing to keep in mind when doing this is free slack on the ring light.  The section I attached the light to moves when the drill press comes down.  Provide enough slack to allow free movement.