Loc-Line Vacuum Upgrade

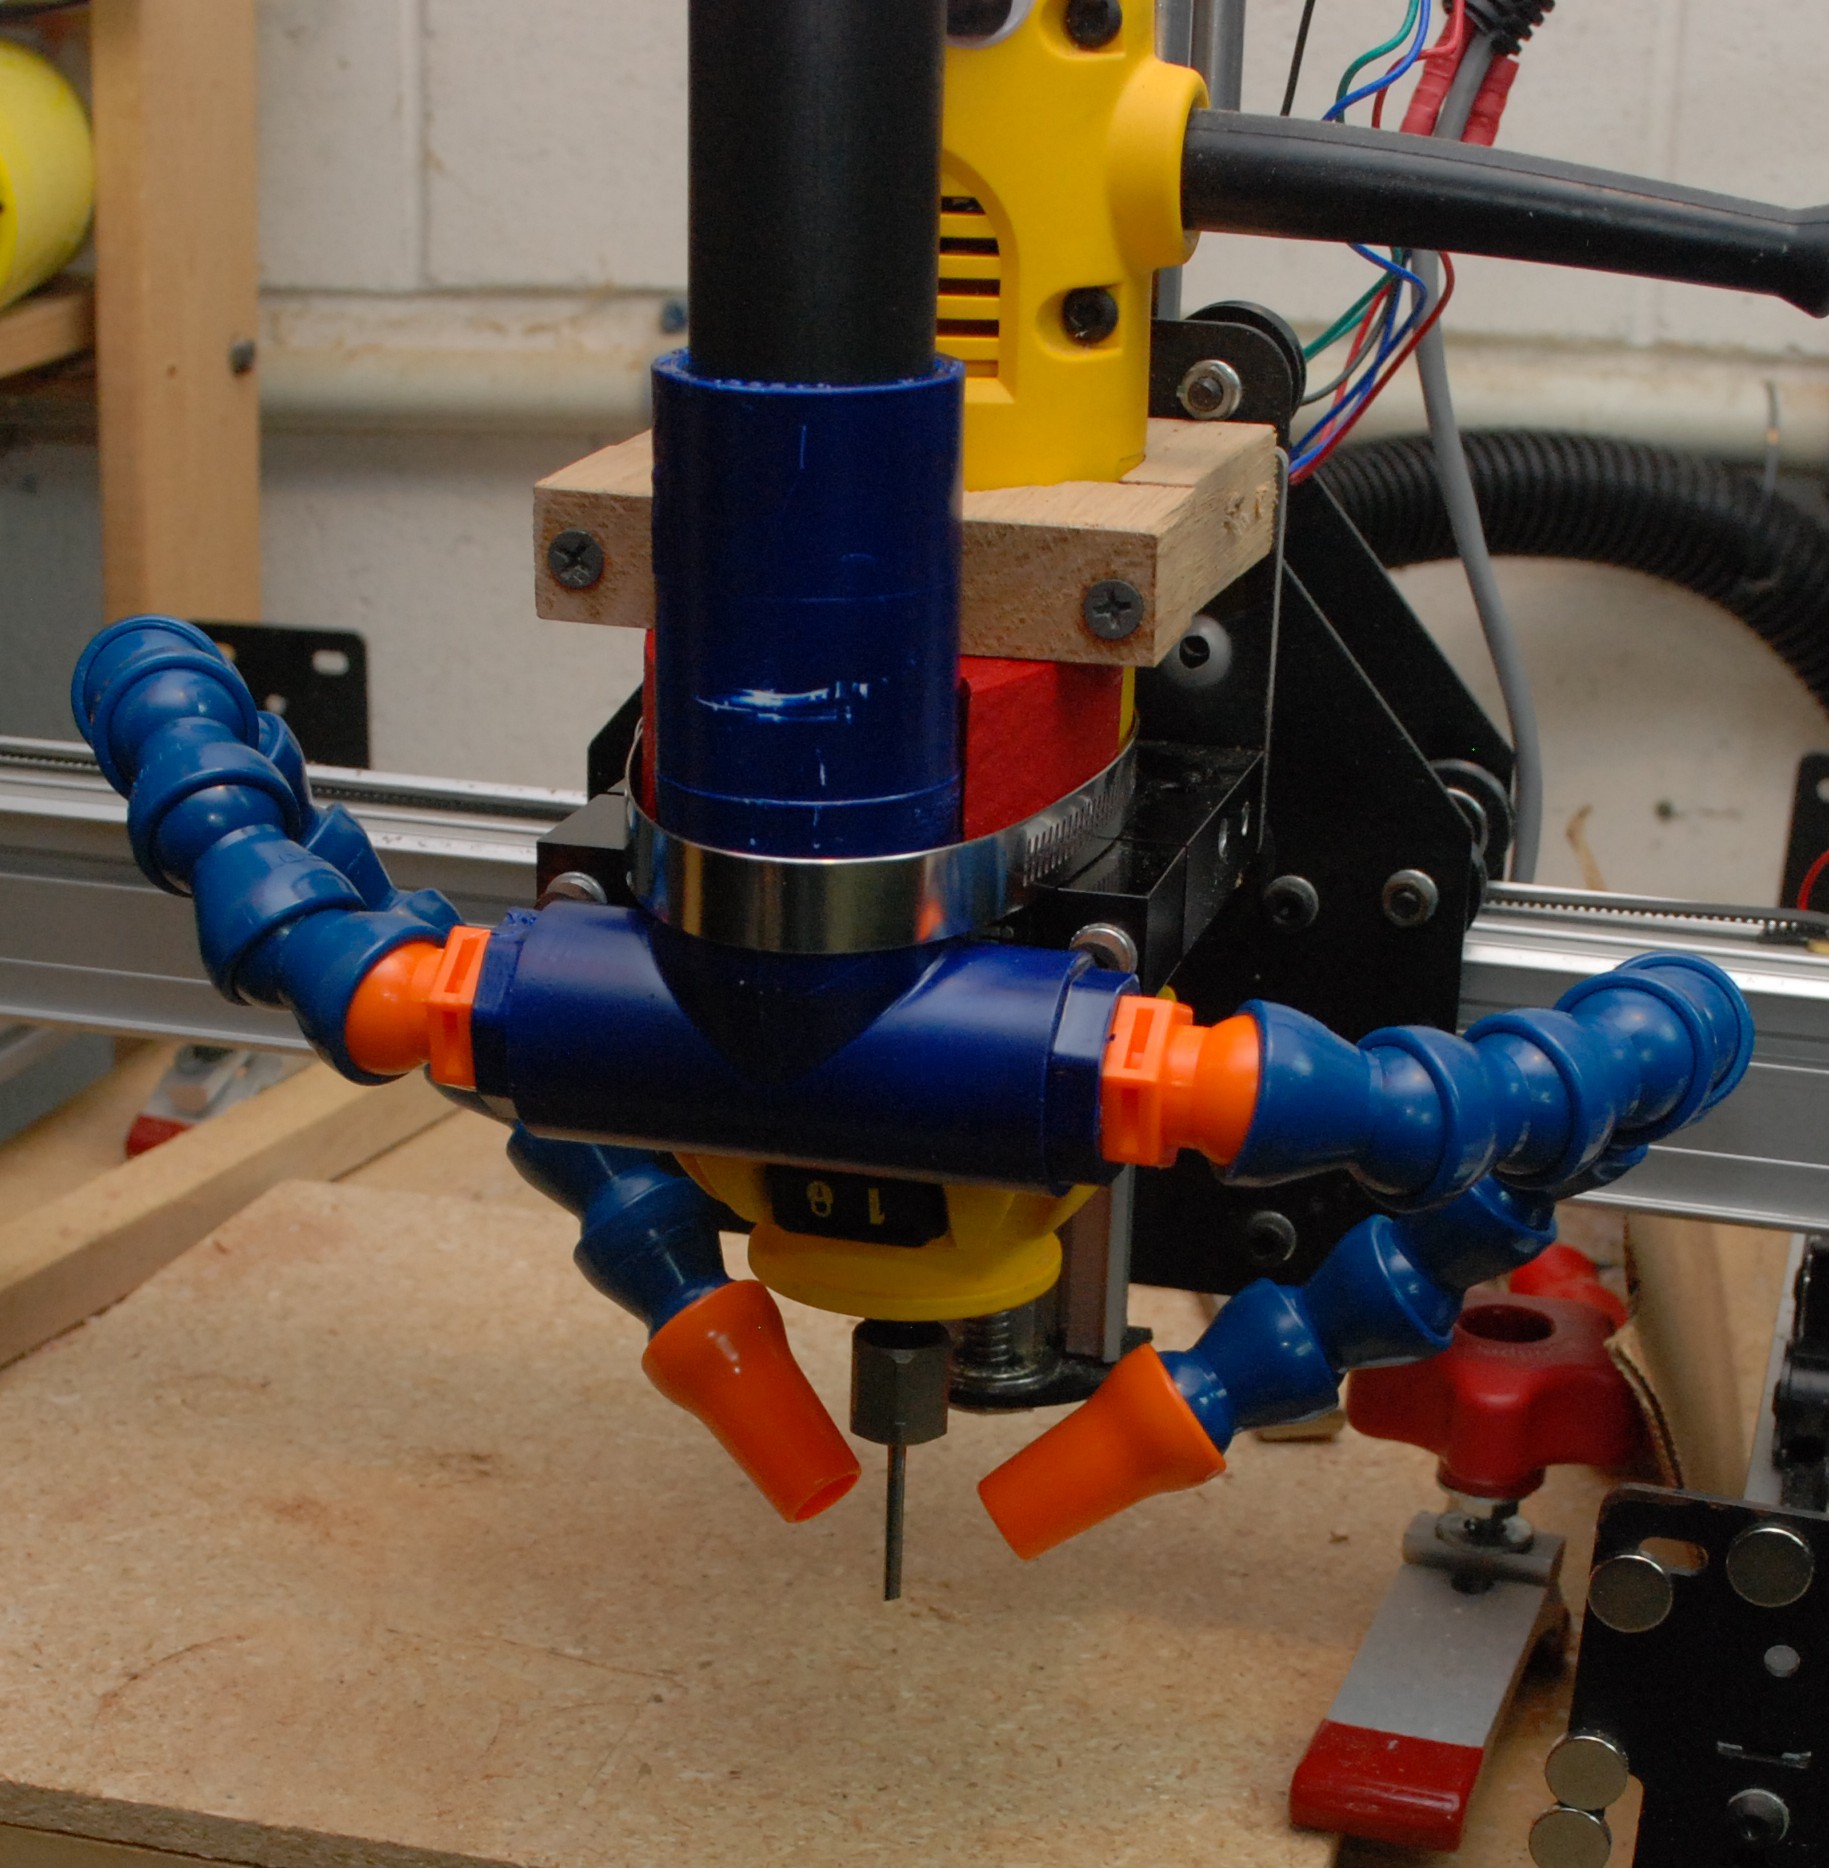
One of the early upgrades I added to my mill was a dust shoe.  It was a copy of a common design in the shapeoko community.  It works, but I have issues with it.  The design relies on a skirt, which is never the length you want and doesn’t work well with small parts and height changes.  The other issue I have is that you can never see what is going on.  Some have created designs with clear materials, but those will get dusty fast.  Lastly the design restricts access to the collet locker.  It makes bit changing a pain.  In comes my savior, Loc-Line.  First a picture of the finished product so we are all on the same page. DSC_0477 They sell 3/4″ Loc-Line for a reasonable price on amazon.  I don’t recommend it however.  The stuff has a large internal diameter, but the bend radius is not tight.  I made an early version of this with the 3/4″ stuff and just couldn’t ever get the nozzle positioned how I wanted.  Instead I recommend this 1/2″ kit from amazon.  It comes with 12 segments, 3 different nozzle diameters, and two threaded NPT adapters.  One is 1/2″ NPT and I think the other is 3/8″.  I used two kits to outfit my mill.

Now is one of the many times I really really want a 3D printer.  I could print a perfect adapter to go from my tapered shop vacuum hose line to these Loc-Line threaded adapters.  Also a 3D printer would let you print all manner of nozzles.  Having some be flat bottomed or concave to sit around the bit would be ideal.  Alas I have no 3D printer, but luckily PVC piping got me there.  My shop vac line fits reasonably well into a 1″ PVC coupler, so I started with that.  I found a great tee to go from 1″ to 3/4″ pipe, and a set of 3/4″ plugs with internal 1/2″ NPT pipe threads.  Loc-Line threaded adapters go into those.  Take a look:

Just for the fun of it I went ahead and painted the PVC tee blue.  Why not add some color to life.  A shaped piece of wood conforms to the spindle on one side and the PVC on the other, and a hose clamp holds it all together.  I forgot to take a picture, but the SVG profile is below and you can see it painted red in the finished shot. rect3476   DSC_0478   
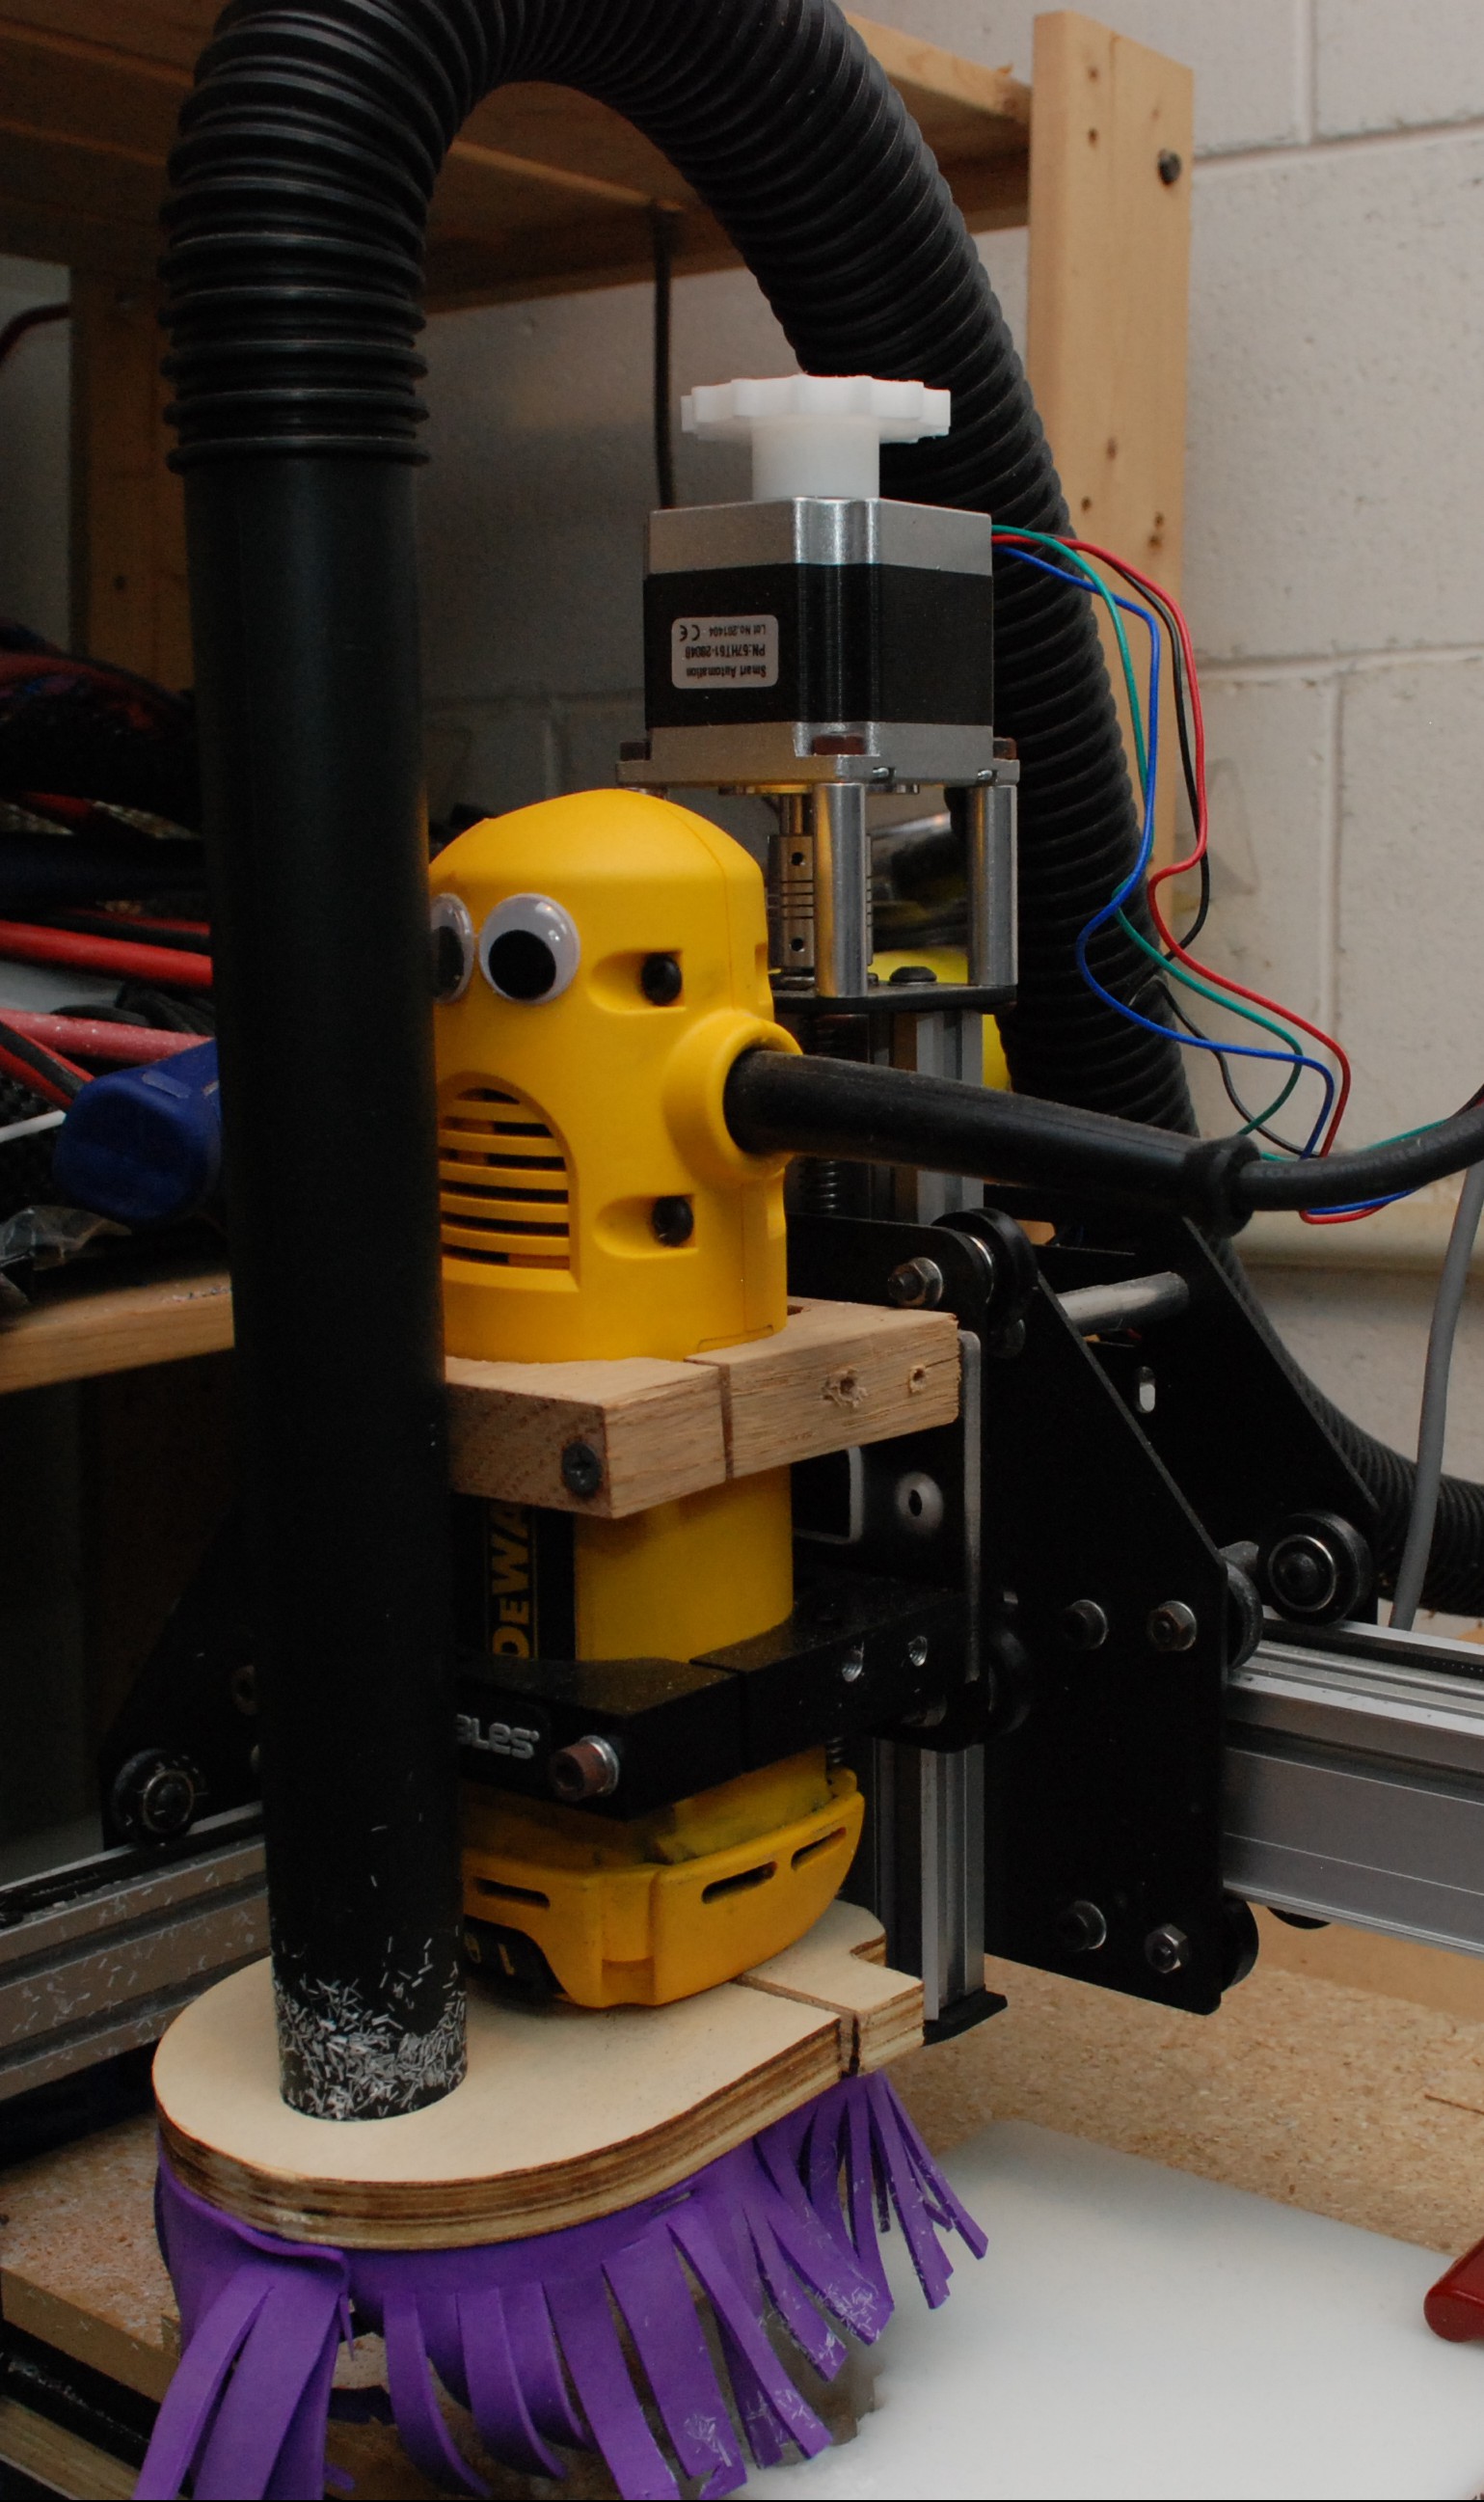
Looks stylish, has a lot of adjustability, easy to see what is happening, and easy bit access.  Does it suck though?  I shot some video while finding out.  First I started by pocketing 1.2″ diameter hole as an easy test.  Next I moved onto a deep profile cutout to see if it could suck debris from the bottom of a trench.  As a bonus the nozzles hit the work surface.  Being flexible they moved and didn’t interrupt the mill.  I will probably chew up nozzles over time, but they are cheap enough.  If I had a printer I could make my own on demand!  Someday.  Anywho, video time.

Moldable Plastic Solutions

I recently stumbled across an Australian company advertising a moldable plastic product.  The product came in pellet form.  You dumped the pellets in hot water, let them soften, then combined by hand.  You had a few minutes to work before the cooled too much and hardened.  Searching around, there are many companies selling essentially the same thing.  It is a polyester thermoplastic that melts at around 140F.  I picked some InstaMorph up a week ago thinking it would be good to keep around.  Here is the melting process.

I quickly found a use!  My house key had a rubber protector on it that made gripping easier and kept it from scratching things up.  It completely fell apart recently.  Lets morph a new one!

I ended up putting way too much into the cup.  That isn’t really a problem though because you just put it back in the jar and melt it again for the next project.  Zero waste!  Green and saves money.  Thermoplastics are amazing!

Speaking of thermoplastics; the pricing works out to about $1.50 an ounce.  3D printer PLA can be had for about $1.00 an ounce.  Printers usually make things sparse on the inside so they are typically very material efficient.  3D printing parts is cheaper, but $17 gets you a 12 ounce jar.  That is a low cost of entry considering you just need a hot cup of water.  That, and there is no such thing as waste, you just throw what isn’t used back in the jar and heat it next time.

Kind of a trivial first use, but it was easy and fun.  This is so quick I could find myself reaching for this stuff a lot.  I discovered after making the key that they sell color pellets on amazon as well.  DIYers, People more artistically inclined, and those with kids should definitely try it out.

DSC_0490

GoPro Handle

Shakey cam seems to be the plague of small handheld home video.  The units are light and often don’t have good ergonomics.  If I want to do any hand held shooting I will need a decent handle.  I looked around a bit and I think the DIY projects I found fall into three categories.  1.  A simple handle.  Basically something to hold onto.  2.  Balanced handle.  A little nicer, it is weighted so the unit isn’t so top heavy.  3.  Steady cam handles.  These are fairly elaborate, but should give really good stable video.  I am going to try number 2, it will probably give the most bang for the complexity buck.

I think I found a really simple solution.  The handle is PVC.  This isn’t novel, there are a lot of PVC handles on the internet.  Mine is a bit different though.  Instead of using the pipe and putting a bolt through end caps I used couplings and plugs.  It means the whole handle has a consistent diameter with flat tops.  Normal end caps are always domed; not ideal for mounting.  The other trick is to use threaded rod instead of a bolt.  A lot of designs use a short bolt.  It is never short enough.  You end up having to do funny things with extra nuts and washers.  A threaded rod held in with a nut is infinitely adjustable.

Enough talk lets pictures.

I glued everything together except the top plug.  I left it loose so I could add or remove metal BBs to the hollow handle.  A bit of trial and error got me to a good balance.  It is centered at about my middle finger when holding it normally.  I shot some video with and without weight.

Not exactly an instant hollywood quality shot, but a few grams of BBs did really help calm down some of the shakes.  With the BB weight added I mixed up another batch of epoxy and poured it in to hold them in place.  It wouldn’t do to have them bouncing around while shooting with audio.  The cap got some PVC glue and the handle is assembled.  I wanted some kind of paint or grip for the handle.  Plasti dip provided both.

DSC_0472

DSC_0474The final product still kind of looks like spray painted PVC, but I like it.  The total weight isn’t high and it feels solid in my hand.  While not professional, it was well worth the <10 dollars and little time I spent on it.


GoPro Zip-Tie and Base Mount

When I was out in California I played around with the GoPro enough to know that I needed a few more accessories.  The first would be a decent base.  That plastic square that comes with the camera is nice, but it slides around and is bigger than it needs to be.  A sturdy non-skid base would be nice.

I picked up a rotating time lapse thing from amazon.  It winds up like an egg timer, and slowly rotates while you take time lapse photos.  It is a pretty sweet toy, but the base is slick, and the item itself is light.  That makes the whole thing top-heavy and likely to slide if what it is sitting on isn’t perfectly stable.

Two birds? One stone!  Enter my new default base!

DSC_0446 Resized

It may not look like much, but the 1/4-20 stud sticking out of the top will screw into my drift lapse base, and with a tripod mount, I can stick my GoPro directly to it.

The body is oak with black paint.  I used the mill to cut out the shape and do the counterbore for a hammer in threaded insert.  A short cut section of all thread epoxied in provides a short stud.  Hot glue holds the drawer liner gripper material.


Zip Tie mount

Zip ties can attach just about anything to just about anything else.  Why not use them to attach a GoPro to just about anything else?  Well, first you need a good zip tie mount!  I milled oak to accept an adhesive mount.  Two grooves allow zip ties to run cross to the camera orientation.  I rounded the edges of the zip tie channels by sawing and chiseling the corners.

I suspect most things I tie this to will be roundish.  A little sanding on the bottom creates a curved relief.  Peel and stick sand paper on the bottom should help it stay still.  Lastly, I wasn’t sure how well the 3M stuff would stick to wood, so I gave it a little 2 part epoxy at the edges.

I am really excited how this one turned out.  I need something to test it out with… how about this?  Spray paint GoPro anyone?  Oh well, it illustrates the point.

DSC_0441 Resized

GoPro Clamps

Ok fine, the GoPro gets its own category now.  It doesn’t show any signs of stopping.

In keeping with my new motto of “If it moves, attach a GoPro” I am in the market for some kind of clamp mechanism.  They sell a neat looking clamp with a gooseneck thing on it, but it is 40 bucks, and doesn’t appear to open very wide.  I did some looking around, and a lot of people attach 1/4-20 screws to those plastic one handed clamps.  That seems ok, but I bet there is a better solution.

In a previous post I mentioned that I had stuck magnets to the adhesive side of a flat adhesive mount.  There was no picture before, so here is one now for reference.

wpid-20150215_111106.jpg


 Metal Spring Clamp

I took a large metal spring clamp and applied the magnet mount.  The metal spring has a ton of clamping force and with the rubberized tips doesn’t appear to be going anywhere.  The metal is thick enough that the magnets have a good hold.  Slide the base mount around to get different angles, and move the clamp as needed.  More adjustment than you can shake a stick at.

DSC_0431 ResizedThe price was very agreeable.  The clamp was about 6 bucks at lowes.  The magnetic base is useful in tons of places, but if you wanted to make one the adhesive mounts are a few bucks a piece and magnets can be had for a similar price.  Very affordable over all.


 Plastic Ratcheting Clamp

While picking up the metal spring clamp I looked around and saw other options.  The one I liked the most was this ratcheting clamp.  It feels beefy, and has wide surfaces for attaching mounts to.  I used a curved adhesive mount and after letting it sit for a while the thing was really solid.  Hats off to to 3m for that peel and stick stuff.  It is really good!

DSC_0432 ResizedUsing it isn’t great.  The clamp is really solid, but when you try to clamp with it nothing flexes.  A good clamp has a little flexing involved when you use it.  It makes sure there is still clamping force even if something shifts.  This thing is just pure rigid.  You don’t have any mechanical advantage, and the yellow pads don’t have any grip to them.  Hard rubber or leather pads might improve this, but as is, this clamp sucks.

Because the mount is solidly fixed, adjustment is tough.  The metal clamp setup allows easy adjustment, this does not.  Even if I figured out how to get a 1/4-20 bolt in there somehow, it still wouldn’t be more adjustable and convenient than the metal spring clamp.  Go with the metal spring clamp and DIY magnetic base.  It is superior to the other homemade clamp setups I have seen.

Shapeoko Z-Knob

I have been wanting a Z-knob for my shapeoko for a while.  Moving that axis up and down by hand is a huge pain.  I typically do it with my xbox controller run via software but the unit isn’t always on, and it is often faster to turn the motors off and rough things in by hand.  Why not make one?

I generated a gear pattern in inkscape and overlaid a circle that would cut out most of the depth of the teeth.  I only wanted some small knobs sticking out for grip.  There are probably better ways to do it, but I am still not an inkscape guru.  The results were pretty cool though!

The plan was to drill horizontally through that beefy shaft, and tap it for a number 10 set screw.  I tried to press the knob onto the shaft of my NEMA 23 Z-motor and it wouldn’t go.  I reamed it out a tiny bit with a 1/4″ bit and tried again.  Once I finally managed to press it into position I realized I could stop.  Instead of going through with a set screw, I should stop.  The press fit turned out to be really good.  I turn off all the motors and it did a bang up job moving the stage up and down.  Success came early!

DSC_0445

DSC_0451

San Francisco Fun With GoPro

I took my GoPro with me on a business trip to San Francisco.  The conferences don’t get started till 10am, and I was still on east coast time.  That gave me a chance to experiment with time lapse.  The first one I recorded was on the top floor of the Marriott I was staying at.  The video turned out well, but the blue WiFi LED got in the shot from time to time.  1 image every 5 seconds.

I really liked the video and wanted to try more.  The next morning I got up well before the sun, turned off the LEDs and had a sunrise shot.

Both shots suffered a bit from dirty window syndrome when the sun was full, but there wasn’t much I could do about that.  I still have a lot to learn about cleaning up color settings and all that.  Still, my little Hero 3 White did an admirable job taking photos in very dark conditions.  I am going to have to take this on all my business trips and get cool travel shots.  If this keeps up the GoPro might earn its own category here at Kilted Craft Works.

Bee Hive Base and Table

One step closer to getting the hive started.  In addition to the purchased parts I already have, I wanted to build a few things.  First is a base that will get the hive up off the ground to stay high and dry in our driving rains.  Step one, start with some assorted lumber.

DSC_0423
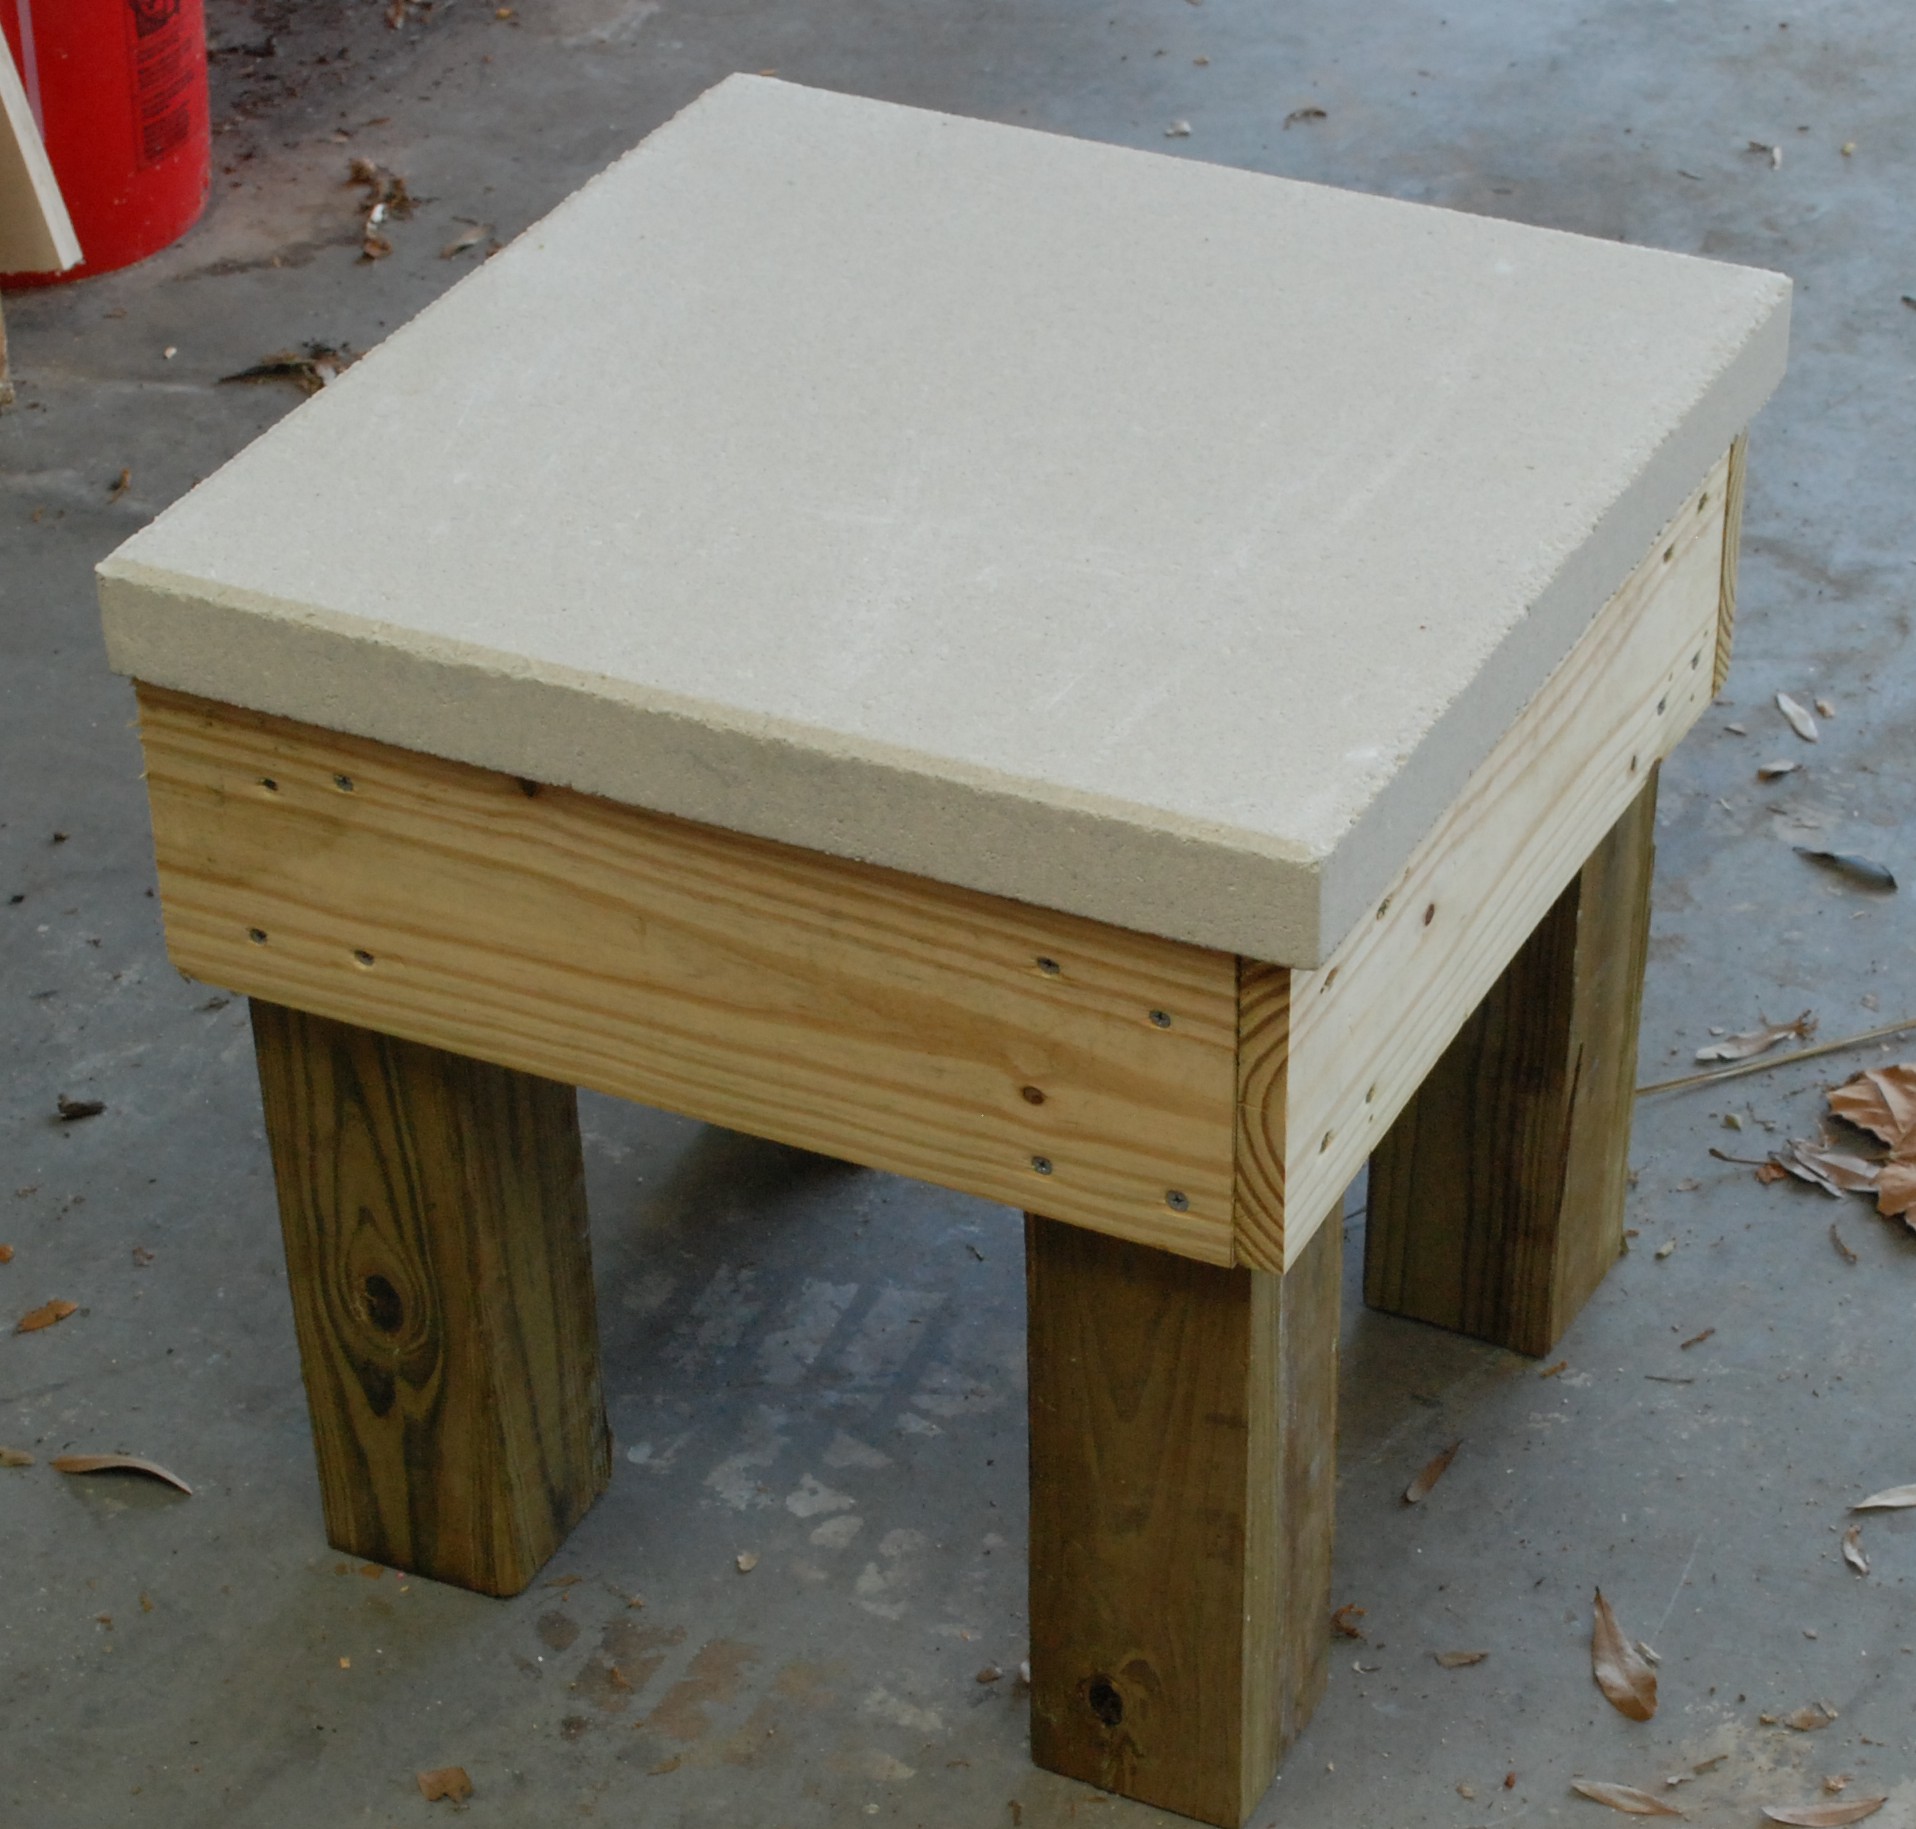
Screw together vigorously with epoxy coated exterior screws.  Impact drivers help make stuff like this go quickly.  I love my dewalt!

DSC_0425

The legs are probably overkill, but I wanted weight and stability.  A 20 inch paver forms the top.  That will not rot and should help keep the whole thing still.  The sides don’t look pressure treated next to the legs, but they are.  The total cost for this base with paver top is 15-20 dollars.  I threw some of the hive hardware on there to make sure it all sat right.  This is gonna be great!

DSC_0426

To go with the base I made a working table.  I want a place to put tools and hold frames as I shuffle them around the hive.  The table’s construction is similar to the base but 36″ tall, and with support arms.

DSC_0428One set of arms is the right width to hold a few frames, and another set is notched for a tool tote.  I haven’t made the tool tote yet, but there appears to be enough equipment involved to justify building one in the future.  Next comes prepping the ground area and then BEEEEEEESSS!!!  Probably still a few weeks though.

No bee puns were harmed in the making of this blog post.  I can’t make any promises next time.

Goodbye To My Beard

This qualifies as crafting… I made it myself!

I entered a beard off 6 months ago with a coworker.  He shaved before Christmas making me the winner.  After living with it for a while I decided to trim the sides.  My cheeks and chin do not match in color or growth rate.  It is kind of weird really, but I guess crazier things have happened.  I am keeping the stache for a while longer at least.  The chin has been with me for over a decade, and isn’t going anywhere.

Do you see that look of sadness in my eyes?  A loss of a dear friend will do that.  Also trying REALLY hard not to blink for the 30th time.  Selfies are hard with an SLR.  Rest in peace beard.


Scrub Plane + GoPro = ScrubPro?

I said I was going to spend some time getting to know the video software and not just jump into making things.  And I have a really big, for me, project that I need to get done by a certain friend’s wedding date…  Well, maybe just one little video while I work on said project wouldn’t hurt.

I needed to do some thicknessing on a few legs, so out comes the scrub.  Why not attach a gopro?  I used one of the flat adhesive mounts, suck some magnets to it, and put that on the top end of the iron.  Next time I need to angle down a little more.  Still, I am pretty happy with the results.  It is a plane’s eye view of how to rapidly remove wood.