New Ukulele Collection

I mentioned in the previous post about a small collection of ukes that came my way.  After a little cleanup and a restring, they were ready to be accepted into the collective.  First though they needed straps.  I have found a strap to be very beneficial to my playing.  Changing chords goes much faster and more reliably without having to worry about the head dropping.

DSC_0135

The button installation went quickly and smoothly when using the technique I laid out in my button install post.  I pulled together a hodge podge of straps.  They all work, but some are maybe not the best style for the instrument.  I will have to keep an eye out for fun and flashy straps to match each ukulele.

DSC_0136

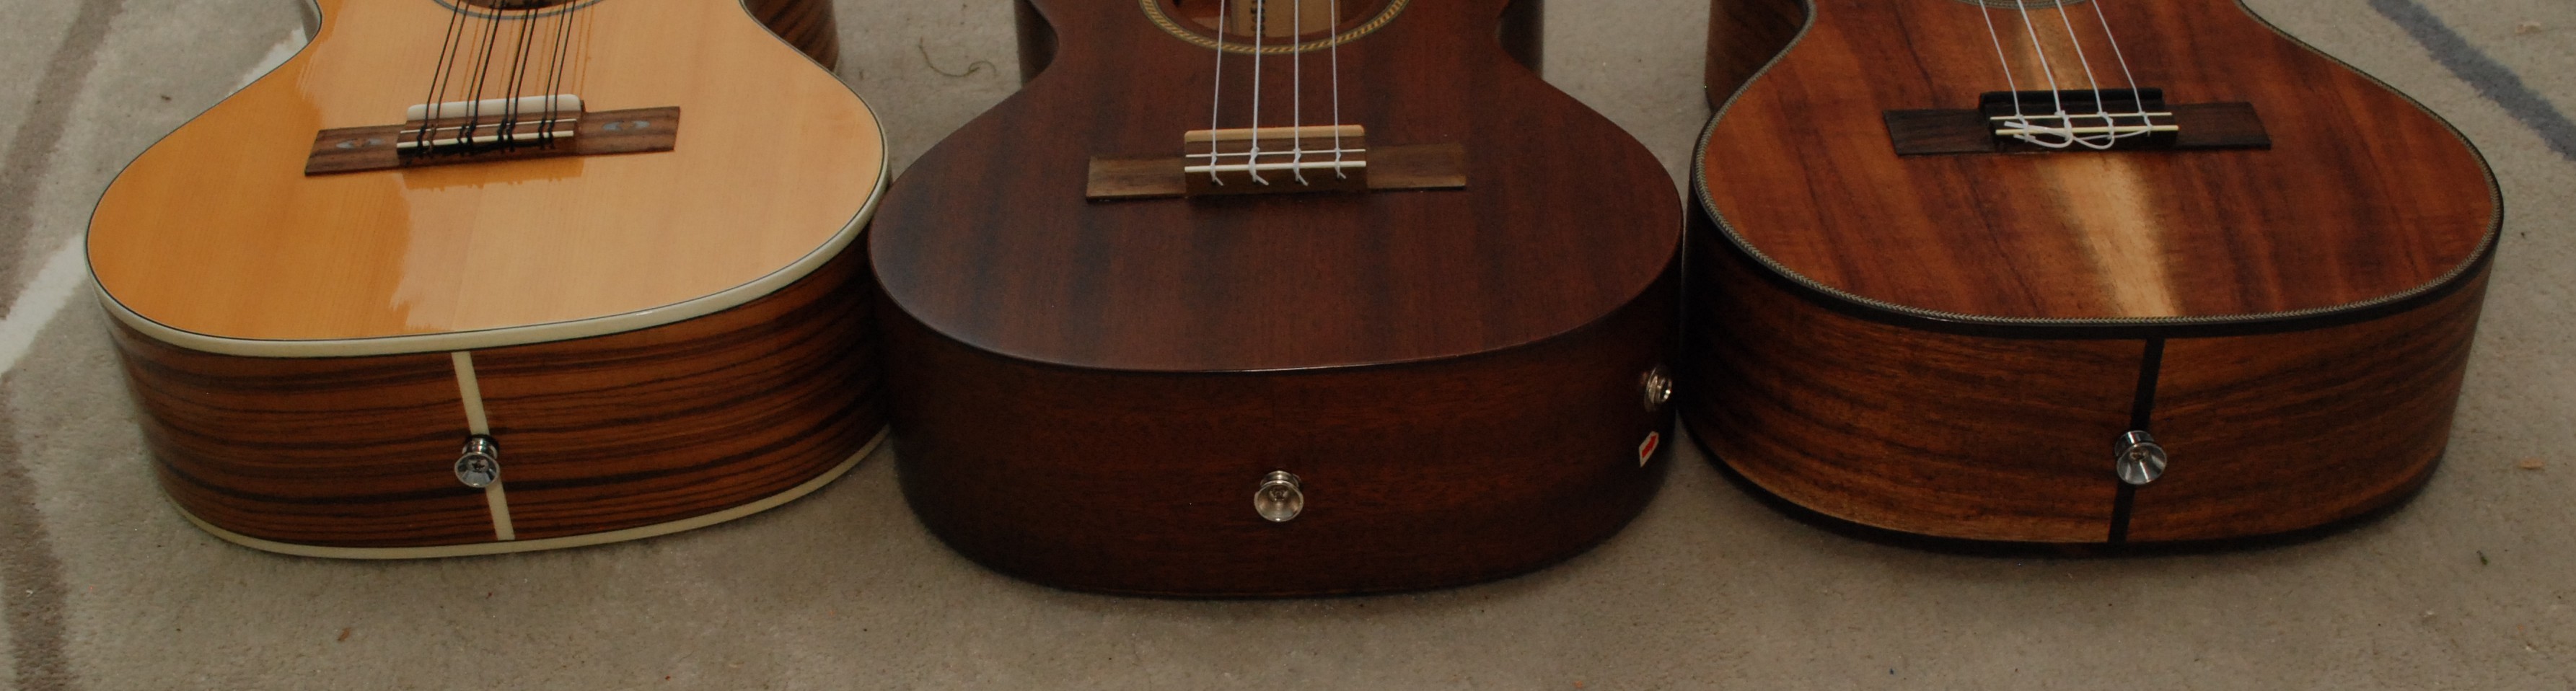
On the left is an acoustic-electric Cordoba, the middle is an eight string Lanikai, and on the right is the Kala I restored.  They are all tenors which is a bit bigger than the concerts I typically play.  The size upgrade is nice, and I think this might be my new standard size.

Ukulele Restoration

I came into a few well loved and used ukuleles by chance.  This kala is my favorite by far.  It is very similar to one I had looked at new in a sam ash.  This kala is a slightly different style and is even more gorgeous!  It has obviously seen a lot of play time.

DSC_0120

DSC_0122

The fretboard looks almost black near the top frets, while you can actually see the rosewood at the lower frets.  Years of finger oils has given it a great color gradient.  Likewise on the back of the neck, the finish has been polished from satin to a high gloss near the top frets.

DSC_0118

Unfortunately there was a pretty heavy level of grunge built up around the fret wire, and the nut fell off when I tried to change the strings.  A few dabs of titebond type 3 and a small spring clamp had the nut back on the road to happiness.

DSC_0123

The cleaning was all done with a microfiber cloth.  I didn’t really want to clean off too much of the oils, and I don’t know what, if any, finishes were used on the fret board.  A good microfiber cloth is perfect for this.  Good at buffing, and non-abrasive.  All that green was from the frets being mildly corroded by salty body oil.

DSC_0126

Once the glue had all dried and the body had been buffed clean, I was able to restring.  It looks and sounds gorgeous.  More images of the collection and recordings to follow!

DSC_0129

Paracord Wrapping Jig

I went a little nuts and bought a 1000 foot spool of paracord.  I went from having no rope around the house to having more than I knew what to do with!  What to do with it was actually a bit of an issue.  The spool stores nicely, but isn’t immediately useful.  You have to pull out what you need, cut some off, and then burn the ends to keep it from fraying.

Enter the fast pull rope wrap.  It is a simple way to bundle up paracord into neat organized bunches that don’t get tangled, and they let you pull out a little or a lot as you needed.  The best way to make one is with a jig.  My jig has some neat and novel features you are sure to want if you have to make more than a few bundles at a time.  With it I was able to break my spool down into more reasonable sizes that could be sprinkled around to various locations that might need rope.

Cheese Boards (Part 2)

Cheese board madness continues.  Continuing from Part 1, I chopped down the remaining over sized boards into a pile of nicely sized cheese boards.

DSC_0087

They got a good sanding, a round over on the router table, and yet more sanding.  Who doesn’t love sanding.

DSC_0088

DSC_0089

I love how everything changes as soon as you hit it with oil.  Some of the purple heart turns brown, but otherwise everything else deepens, darkens, and becomes more wonderful.

Care and Feeding of Wooden Cutting Boards

I made a comprehensive video for the care and feeding of wooden cutting boards.


Cutting Board Types

Long grain boards have grain running parallel to the table.  They are not good for chopping but look gorgeous as a cheese board or display platter.

End grain boards have the grain running up and down with respect to the table.  They are excellent for general kitchen cutting of meats and veggies.

Care

Long grain boards should be oiled occasionally with either mineral oil or an oil with wax.

End grain boards must be oiled regularly with mineral oil to keep the water and bacteria out.  Use a generous amount of oil flooded across the surface and let it soak in.

In both cases if water appears to be soaking into the board, it is time to oil.

Cleaning

Both board types can be cleaned in the same fashion.  Use hot water and soap to clean the surface as you would anything else.  Do not soak or immerse the board, and never use the dish washer.  Dry immediately after cleaning.


Surprise Bunnies

A few days before Christmas we noticed Honey the bunny was plucking some of her fur out.  Oh no, that is nesting behavior and indicates a pregnant bun.  A quick trip to the vet later, and we had this: Screen Shot 2016-01-09 at 2.03.15 PM

If you look carefully you can see 5 little spines and skulls in there.  Later that night, she popped and our collection of rabbits grew.

Screen Shot 2016-01-09 at 2.05.09 PM

Two of the poor things didn’t survive the first 24 hours.  I don’t know what was wrong with them, but I guess this is why they have big litters.  After a few days they started getting fuzzy and growing rapidly

20151228_151300.jpg

Unfortunately the little black one was lagging behind.  We don’t know why, but after a 12 days he was half the size of his siblings.  We started trying to feed him and keep him inside on a warming pad.  It was not to be.  He died before two weeks hit.

On the bright side the other two appear very happy and healthy.  At about 16 days they started opening their eyes and exploring a bit.  They are fuzzy, playful, curious and very jumpy!  We dubbed them Luke and Leia in honor of them being twins and the new star wars movie.  Check out this video of them being cute as can be.

Papa Tyrion got his snipping moved up and is not going to be making any more bunnies in this lifetime.

Cheese Board Mishaps

My latest round of cheese boards appeared very successful, but it wasn’t all perfect.  I bought a few cutting board templates from woodcraft and was some fun board.  For example this pepper below would have looked great red padauk.  DSC_0483

The idea is that you double sticky tape this MDF shape down to a piece of wood.  Use a saw to cut away most of the excess, then use a flush trim router bit to match the wood to the template.  That was the idea at least, it had issues.

DSC_0484

Everything was going ok until I got to this thicker area.  The bit dug in and shifted the pattern despite all the tape.  Ok, no big deal, I just need to go slow, and I can smooth that out on the sander.

DSC_0486

Nope.  It caught again on the other side and split off a big hunk of the board.  This one can’t be salvaged any more.


Things didn’t go well with the padauk, but it some odd grain in places and that shape had tight turns.  I decided to try a simpler fish design in walnut.  There were no tight spots or harsh curves, so I figured this would work better.  Plus I did a good job getting everything really close with the bandsaw.

DSC_0487

That looks good, let’s give it a go.

DSC_0488

Even with the edges tightly trimmed it still dug in hard and shifted the template.  I used a lot of carpet tape, and bought a decent template router bit.  No idea what the problem is, but I would issue some caution to anyone wanting to try this for themselves.

Ikea Picture Rescue

Our new living room deserves a really epic picture for above the couch.  We went to ikea to get a copy of their giant wave poster, but they were out.  Not deterred we checked the as-is section.  Ta-da, there was an assembled copy of exactly what we wanted.  The only problem was the fact that it is over 4 feet wide and 6 feet long assembled and had a tear out on the one side.  I figured out we could disassemble it, cut down the frame, and re-assemble with the blemish cropped.  After some negotiations we got it for half price.  Here she is.

DSC_0062

And here is the blemish.  The scale is hard to tell, but the circle is about the diameter of a quarter, and there are some stains around it.

DSC_0064

The frame is simple extruded aluminum with plastic corners.  The canvas wraps around the frame and is held in place with plastic wedges.  A hack saw took a quick 5 inches off the width, and we were ready to re-assemble.

DSC_0067

Once put together I trimmed up the excess from the right side and installed it on the wall.  The picture added a lot of character without making the room feel any darker.

DSC_0061

DSC_0069

Always check the as-is section of ikea!  A few minutes of work got us an otherwise out of stock item for half price.