We had to destroy our lone hive. This was the hive that had been going like crazy and racking up a ton of honey. The one that survived the longest out of any of our hives, and was obtained for free from an infested owl box. I had been having increasing aggression problems with them. It was slowly building as the colony got larger. I haven’t been able to mow the back yard in a month because they would attack, and then stay mad for hours later. It was to the point that we couldn’t risk someone else getting hurt.
I will spare all the gory details of how we did it. Needless to say our backyard was a horror show, I have been stung nearly 30 times, and we are both drained from the ordeal.
We did manage to harvest about 30 pounds of honey. The spinner worked well again. Newspaper on the floor really helped keep it from being a slippery mess. The only major harvesting issue we had was that our electric hot knife died before we even got started. This was only the third time we ever tried to use it.
Sore, swollen from stings and sad at the loss of another hive.
I don’t normally post about the usual inspections of the hive, but today’s was worthy. We went out to check on the girls and oh boy had they been busy. Despite having had very little rain since the new year they are finding nectar somewhere. We had a 40 pound increase in the last 3 weeks.
Seriously busy as a bee. The previous time we checked they increased about 25 pounds in the same time. Not sure where they are finding it all, everything is brown in the area, but glad they are. We aren’t going to be able to harvest for a few weeks and everything was slammed full. Had to stick on another super. At this rate they will fill it too before we get to harvest.
I have gotten a lot of activity related to my Drill Powered Honey Spinner. In fact probably 90% of all the traffic I have ever received has been to that post. I guess it was a good idea! My explanation was pretty good, but could really be supplemented with a nice video. I finally found the time to shoot and edit one, so enjoy and thank you for watching.
We had our first full harvest of hive Ester. 20 frames went by really quickly and easily with our home built honey spinner. It was a bitter sweet harvest though. I am pretty sure our queen is dead. The hive population is very low, there is no capped brood, no signs of new brood, and we found a wax moth larva. We had 6 weeks straight of rainy days, and near the end a serious brood problem showed up. I couldn’t find any straight answer as to what it was. It must have been some serious problem with the hive/queen. Luckily some new friends from the beekeeping group might have a nuc for us. Hopefully they come through before I have to freeze all the frames and give up for the year.
Back to the harvest, look at all these gorgeous frames!
There are 10 more like this
After spinning
All our equipment performed really well, and we ended up with about 37 pounds of honey. That looks pretty serious when it is all in one 5 gallon bucket.
We bottled everything into 12 ounce bears to have enough small quantities to give away to friends and family. That worked out to 50 bears, each with their own smart little label.
Now time to enjoy some honey. Thanks bees!
Wax Refining
I used a plastic tub to catch all the decapping debris. There is a lot of honey mixed in, so a session sitting in the strainer is warranted. Once drained of honey, it went back to the tub, and through multiple soak and drain cycles before the water ran clear and free of honey.
I was able to pack the wax into a single jelly strainer. The strainer sat in an old pot and slowly melted away. Once completely melted the nasty jelly bag gets tossed, and the wax can go into old containers.
The finished product was 9.5 ounces of wax. It looks decent, but might need another strain. Next time I might break it up into multiple runs to see if that helps the cleanliness of the finished product. Still, it is perfectly good wax for use in all sorts of projects.
There comes a time in every beekeeper’s life where he or she will want to harvest some honey. This is usually done with a centrifuge extractor. These start at a few hundred dollars for a very cheap unit, and the price goes astronomical from there. I spent quite a bit of time and money building test articles and doing mini test extractions, but ended up with a really good design that can be had for 50 dollars and a minimal set of tools.
VIDEO UPDATE
Due to the attention on this post I felt a video was needed to help with some of the questions. Enjoy and thank you for watching.
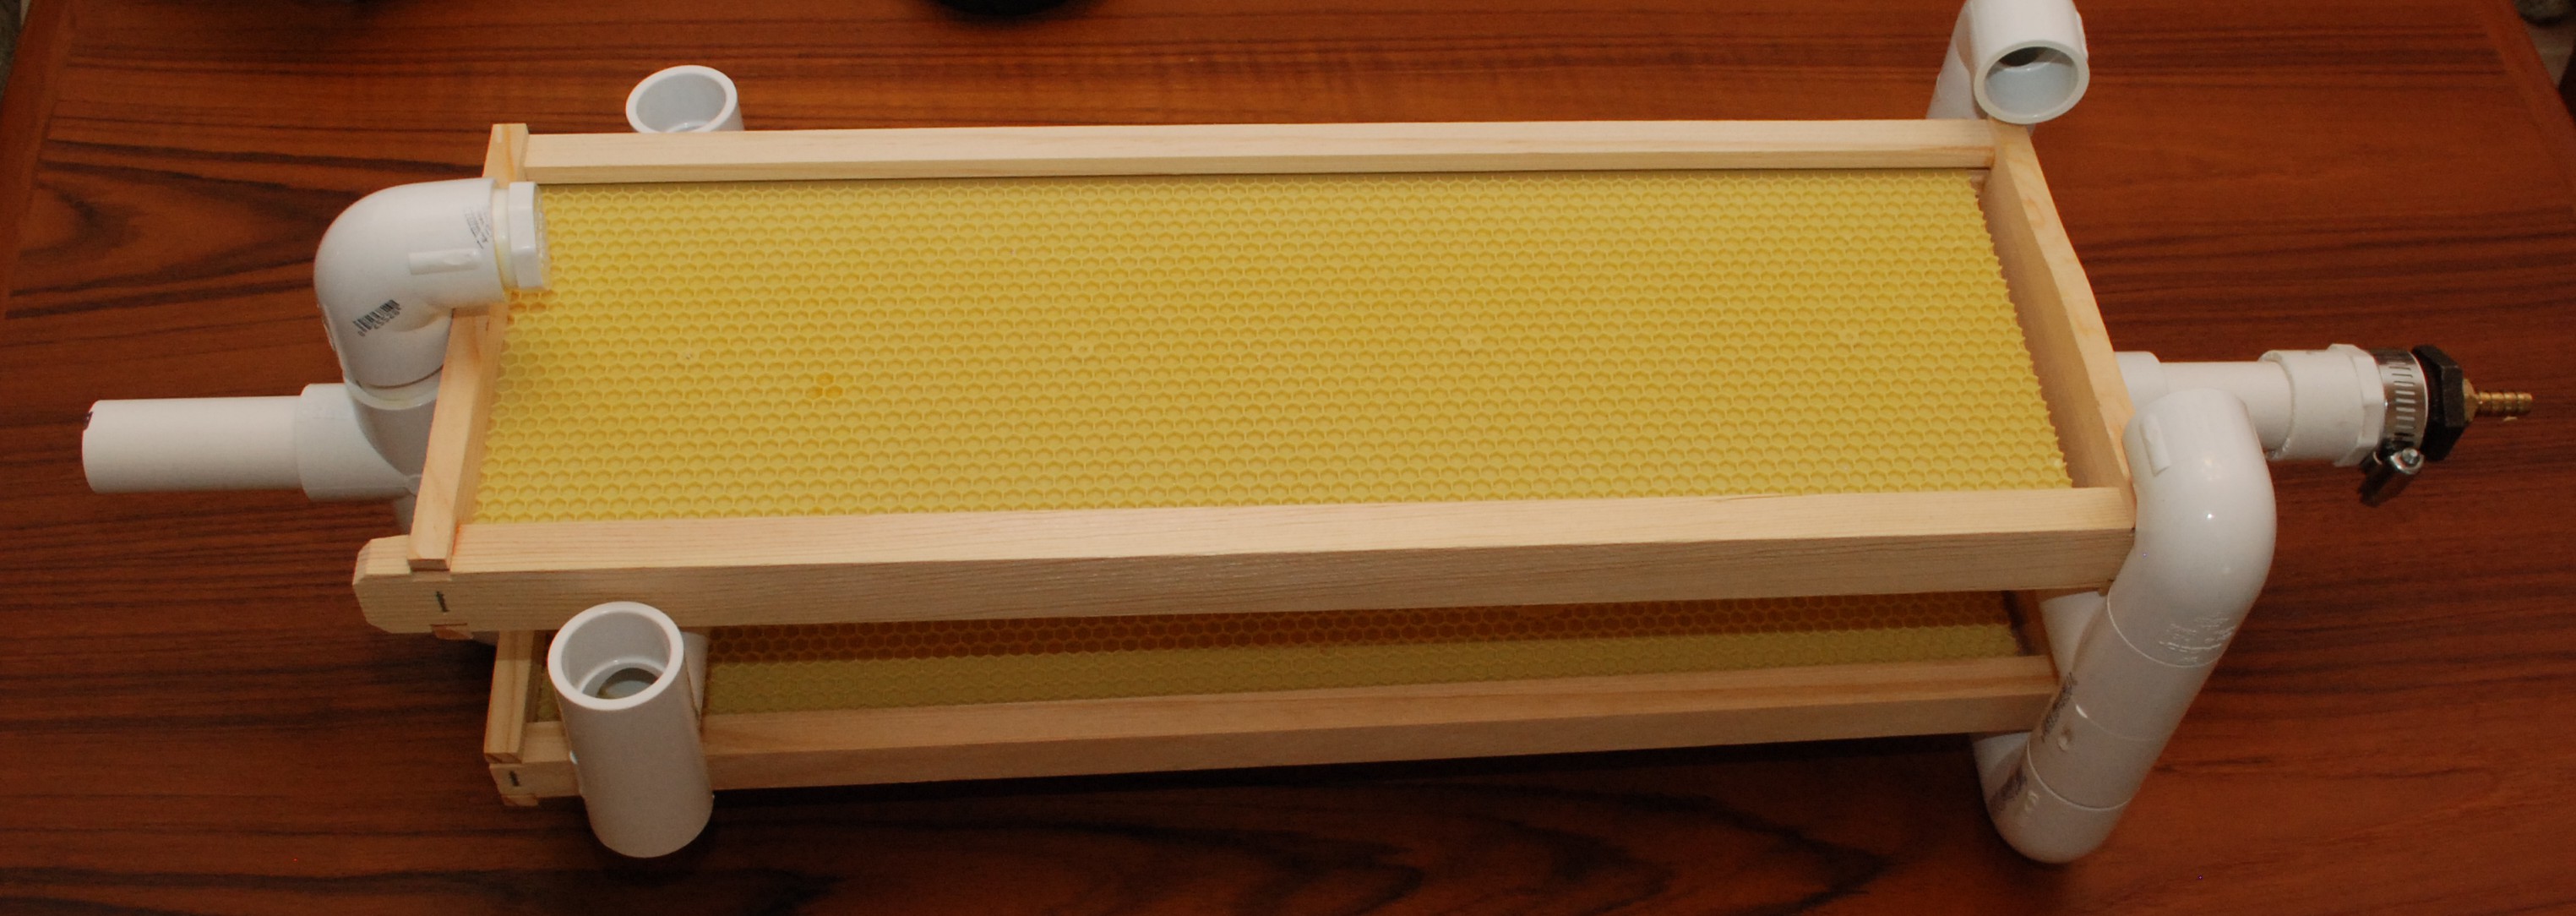
This spinner is specifically designed to hold medium super frames. Slight adjustments will be needed to make this work for shallow super frames. Does NOT work for large frames. The 5 gallon buckets are too small. Maybe find a larger trash can if that is your preferred frame size.
The above images show what a loaded out spinner looks like. The spinner now needs a container to catch all the honey. I really wanted to use 5 gallon buckets for their price and size. One bucket isn’t deep enough, so I cut the bottoms out to use them as height extenders.
I used a mix of firehouse pickle buckets and white food grade buckets I bought at the hardware store. I cut the bottoms off of two buckets to stack them inside each other to increase the height and allow for a good spin without messing up your kitchen.
The bucket with all the holes in the bottom holds the bottom shaft from the spinner and keeps it stable during a spin. The center hole is just big enough for the 3/4″ PVC pipe. The others are there to help the honey drip down into the white bucket with the honey gate.
The stack up is: White bucket with honey gate, red bucket with holes, and two bottomless buckets for height. It is a very small setup that will quickly process two frames at a time. I just did 20 frames with this tool and had a really good time with it. Best of all it doesn’t take up much space in the house.
The Spinner Build
You will need the following items for the spinner. I included the prices I paid for everything, though your prices may vary. Not included in the list below is the buckets and the honey gate. The white food buckets can be had for 4-5 dollars each at lowes. The firehouse pickle buckets can be had for 2 bucks each! They do require a bit of soaking to get rid of the vinegar smell though. Honey gates can be had for 5-10 dollars.
In total you will spend about 50 dollars on the whole setup. Filters, a capping knife, honey bears, and others will cost you more, but a whole extraction and bottling setup for under 100 dollars is very attainable.
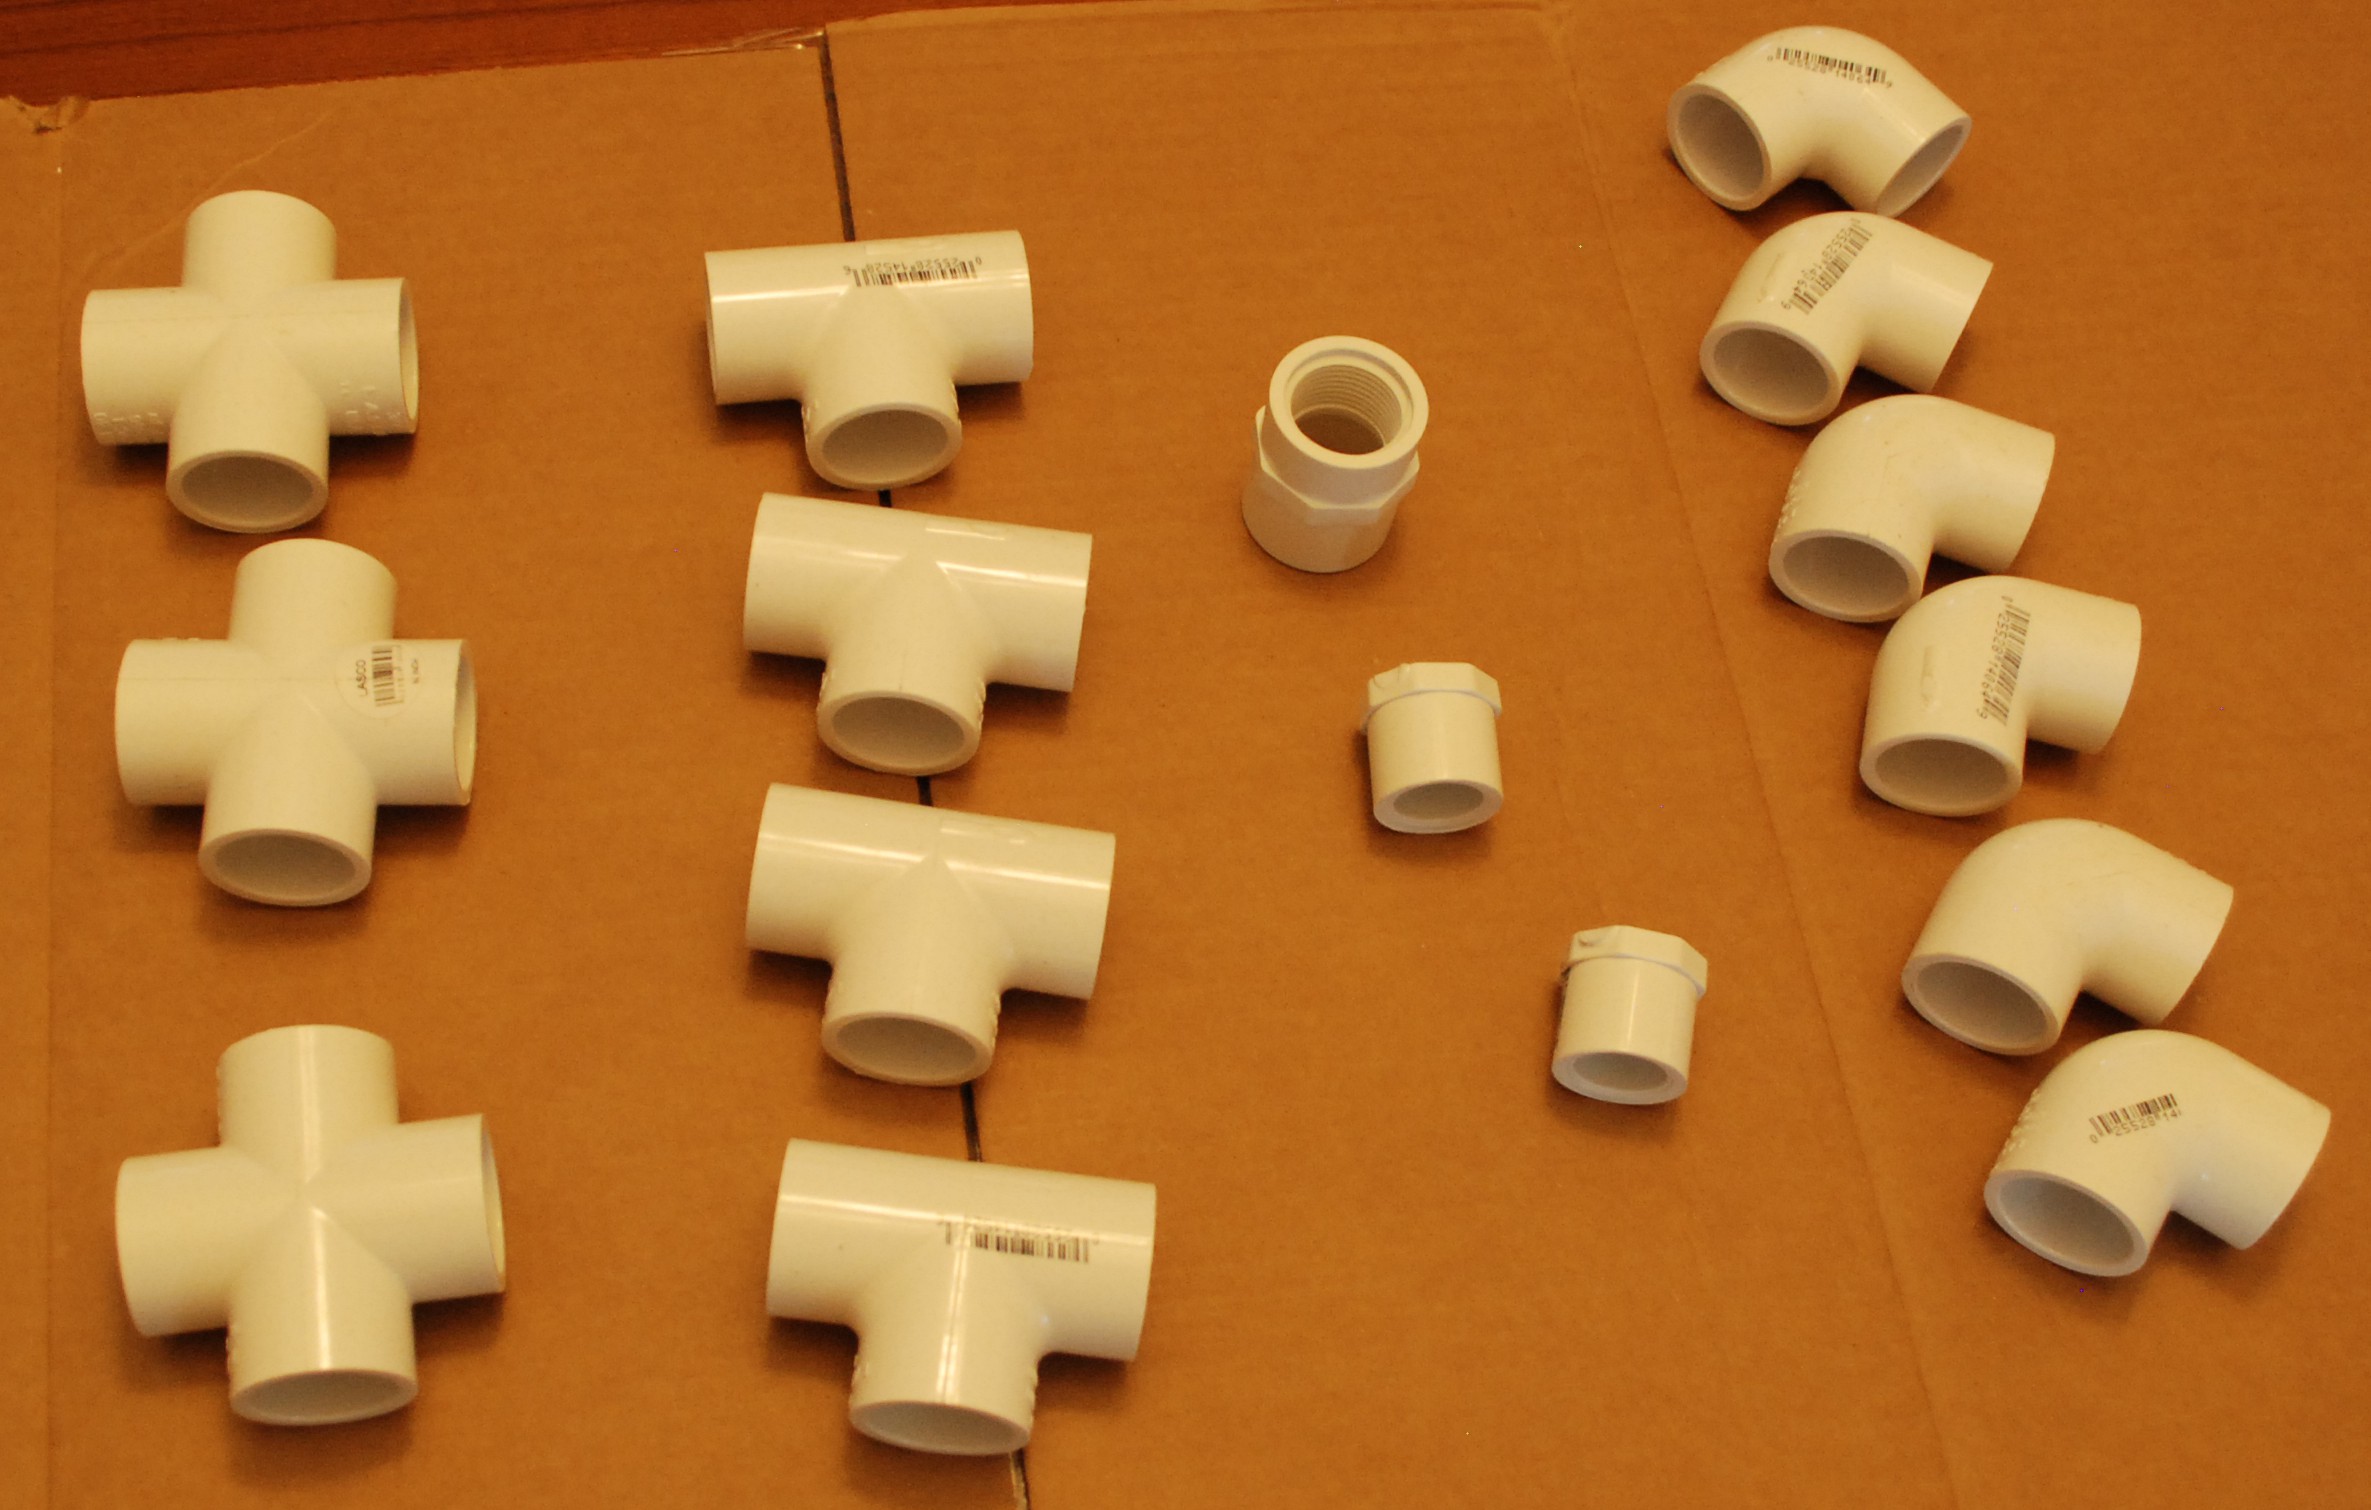
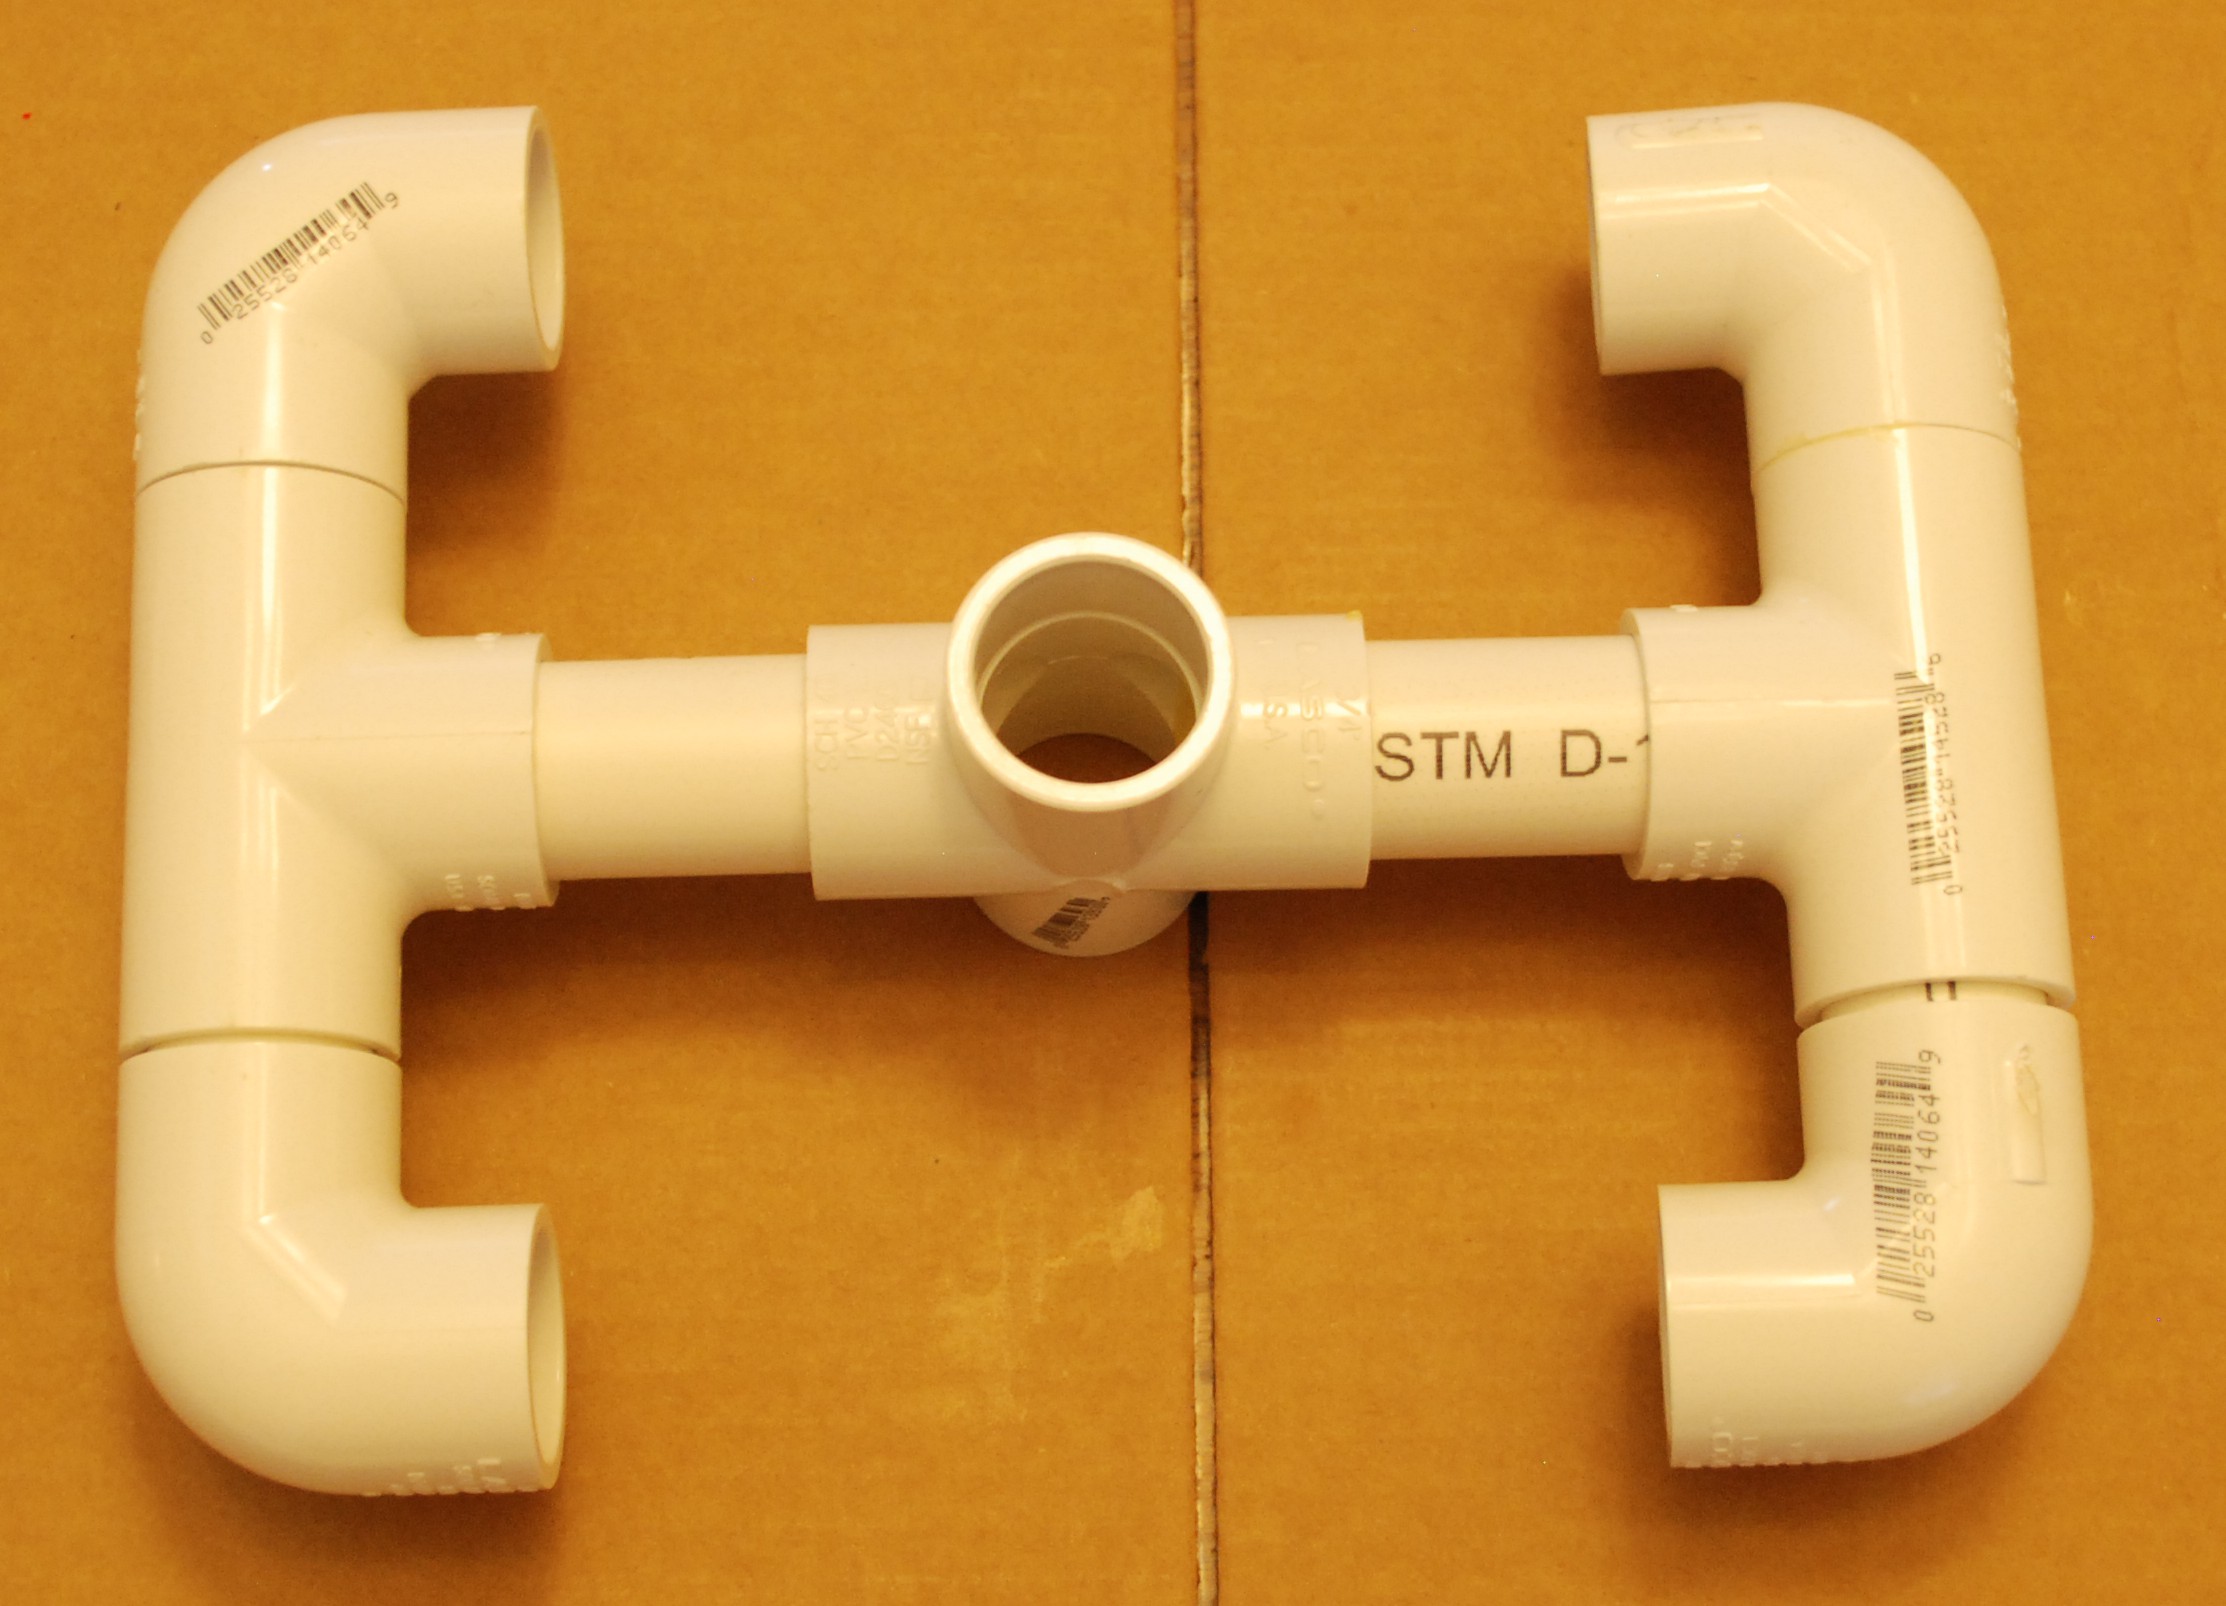
From a tools standpoint you will need PVC pipe cement, a saw or PVC pipe cutter, tape measure, and a marker. The pipe parts should look like those shown below.
UPDATE: Fresh PVC cement can be helpful. Fresh glue allows longer open working time than old glue. You only have a few seconds to get it right, so if your glue is old, get a new one.
While assembling the sections be mindful of how much cement you use. Too much will drip on your work surface, and will drip down inside to the sections you want to glue in the future. Work slowly and purposefully. Once you put two segments together, they are permanent in just a few seconds. Dry fit everything beforehand to make sure it all fits with your frame hardware.
UPDATE: Dry fitting is really important! Some stores may sell fittings with different sizes and depths. Dry fit every stage and check it often with your frames and bucket. Use multiple frames, as there can be variation in their construction as well.
Bottom Hooks
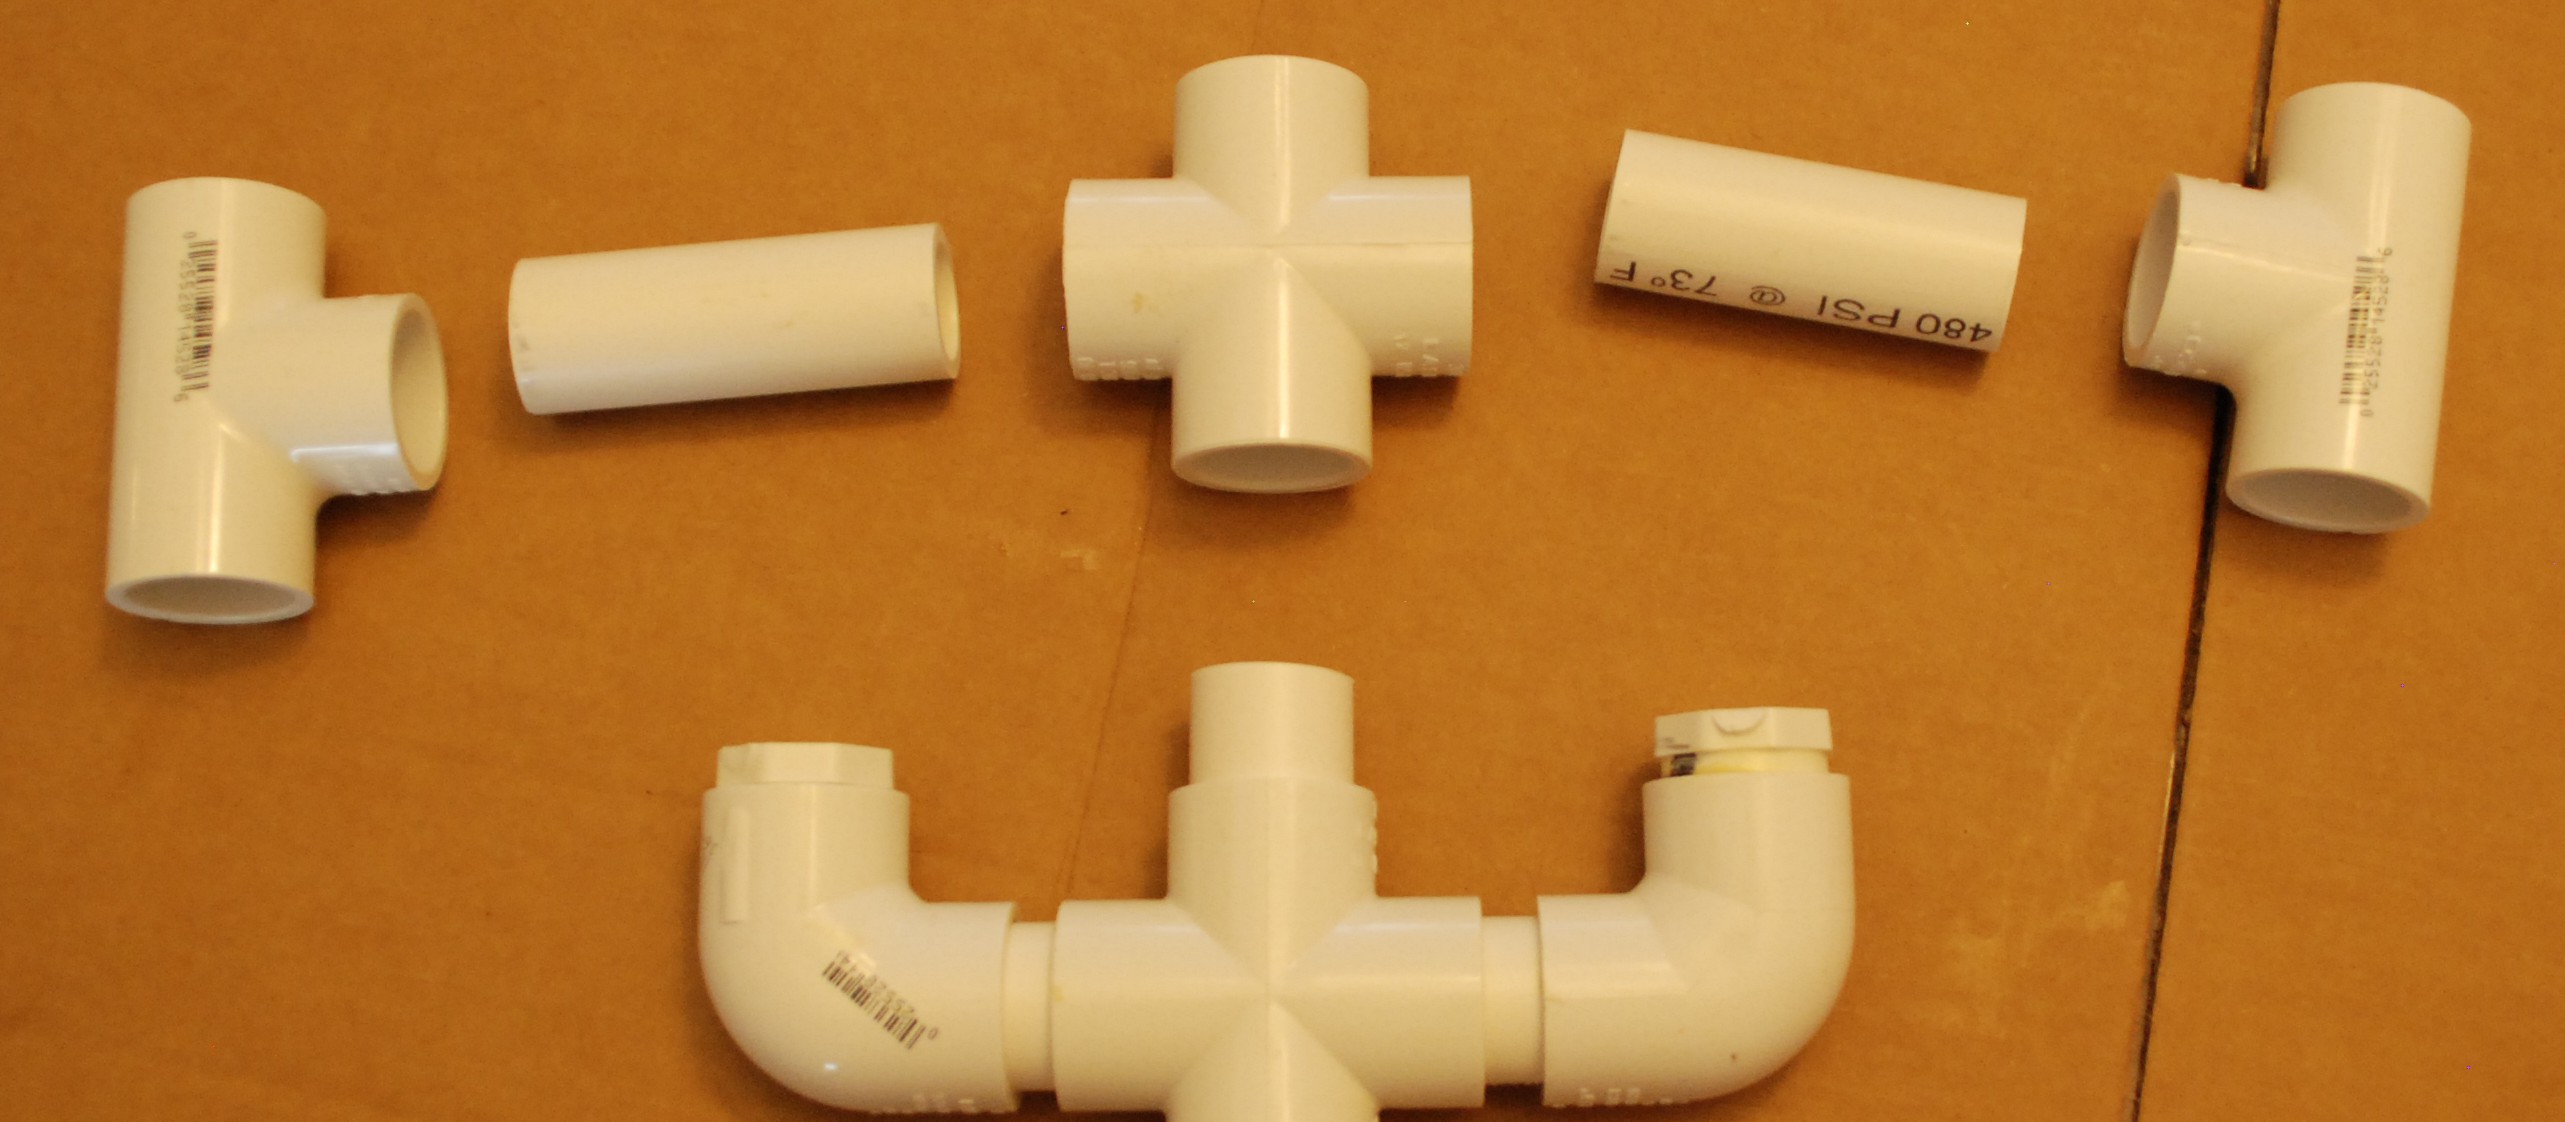
These features are the depth stops for the frames. Gather a cross, two elbows, two plugs, and cut 2x 1.75″, 1x 1.5″, and 1x 3″ sections of pipe.
The 1.5″ section of pipe will connect to the bottom guide, the two 1.75″ pieces will hold in the bottom hooks that keep the frames from sliding down any further. I used plugs to keep honey out of the lower section of the spinner. This is what the finished part should look like
Bottom Guide
Next comes a bottom guide to keep the frames from sliding left and right. This step requires a cross, two tees, and two 2.75″ pipe sections. Be careful with this step. Too narrow and your frame will not fit, too wide and it will not fit in the bucket.
Assemble the sections and attach it to the bottom hook as shown below. Now the frame will come down into the hook and be held from sliding left and right.
Top Guide
The top guide will hold the top end of the frame and prevent it from going out during the spin, and from going left or right. Gather a cross, two tees, four elbows, 2x 2.75″ pipes and 4x 1.5″ pipes.
It is probably best to assemble the two outer arms first, then attach them to the central cross.
Drill Post
A short 3 inch section of pipe and the threaded pipe fitting goes on top to allow for the drill to be attached. I chose 3inches for that length, but it could honestly be longer or shorter.
Central Post
A single 14.5″ piece of PVC attaches the top and bottom half. Dry fit this piece to make sure it holds your frames correctly. The two sets of guides should line up so that a frame can be slid down through the top guides into the bottom hook.
Drill Barb
A threaded coupling was installed at the top of the spinner earlier. Now comes the final piece of the puzzle. An iron pipe threaded adapter takes the size from 3/4″ to, I think, a 3/8″ female thread. That allows a brass barbed fitting to thread in. The brass fitting is small enough to fit into my drill. Most drills can chuck onto anything smaller than 3/8″ in outer diameter. I used a hose clamp around the PVC threaded fitting to help reinforce it. My dewalt drill runs it pretty well on the lower speed setting. Just accelerate slowly, and stop slowly and everything will be ok!
Update: A good alternative is to cut the barb off and use the remaining brass hex portion as a nut. Get an adapter for your drill and put the appropriate socket on there. Now you don’t have to tighten your chuck every time, just slip on the socket and drive!
There is a lot involved in extracting honey. You have to get the frames into your house without them being covered in bees, there is the removal of capping, the extraction, filtering and bottling. Lots of steps with lots of potential for disaster and hang ups if you are new. We are very new, so I thought a 2 frame mini test extraction would be worth a shot. The girls are busy filling up the empty frames we added a few weeks ago, so we picked two (mostly) ripe frames to test my home built extraction rig.
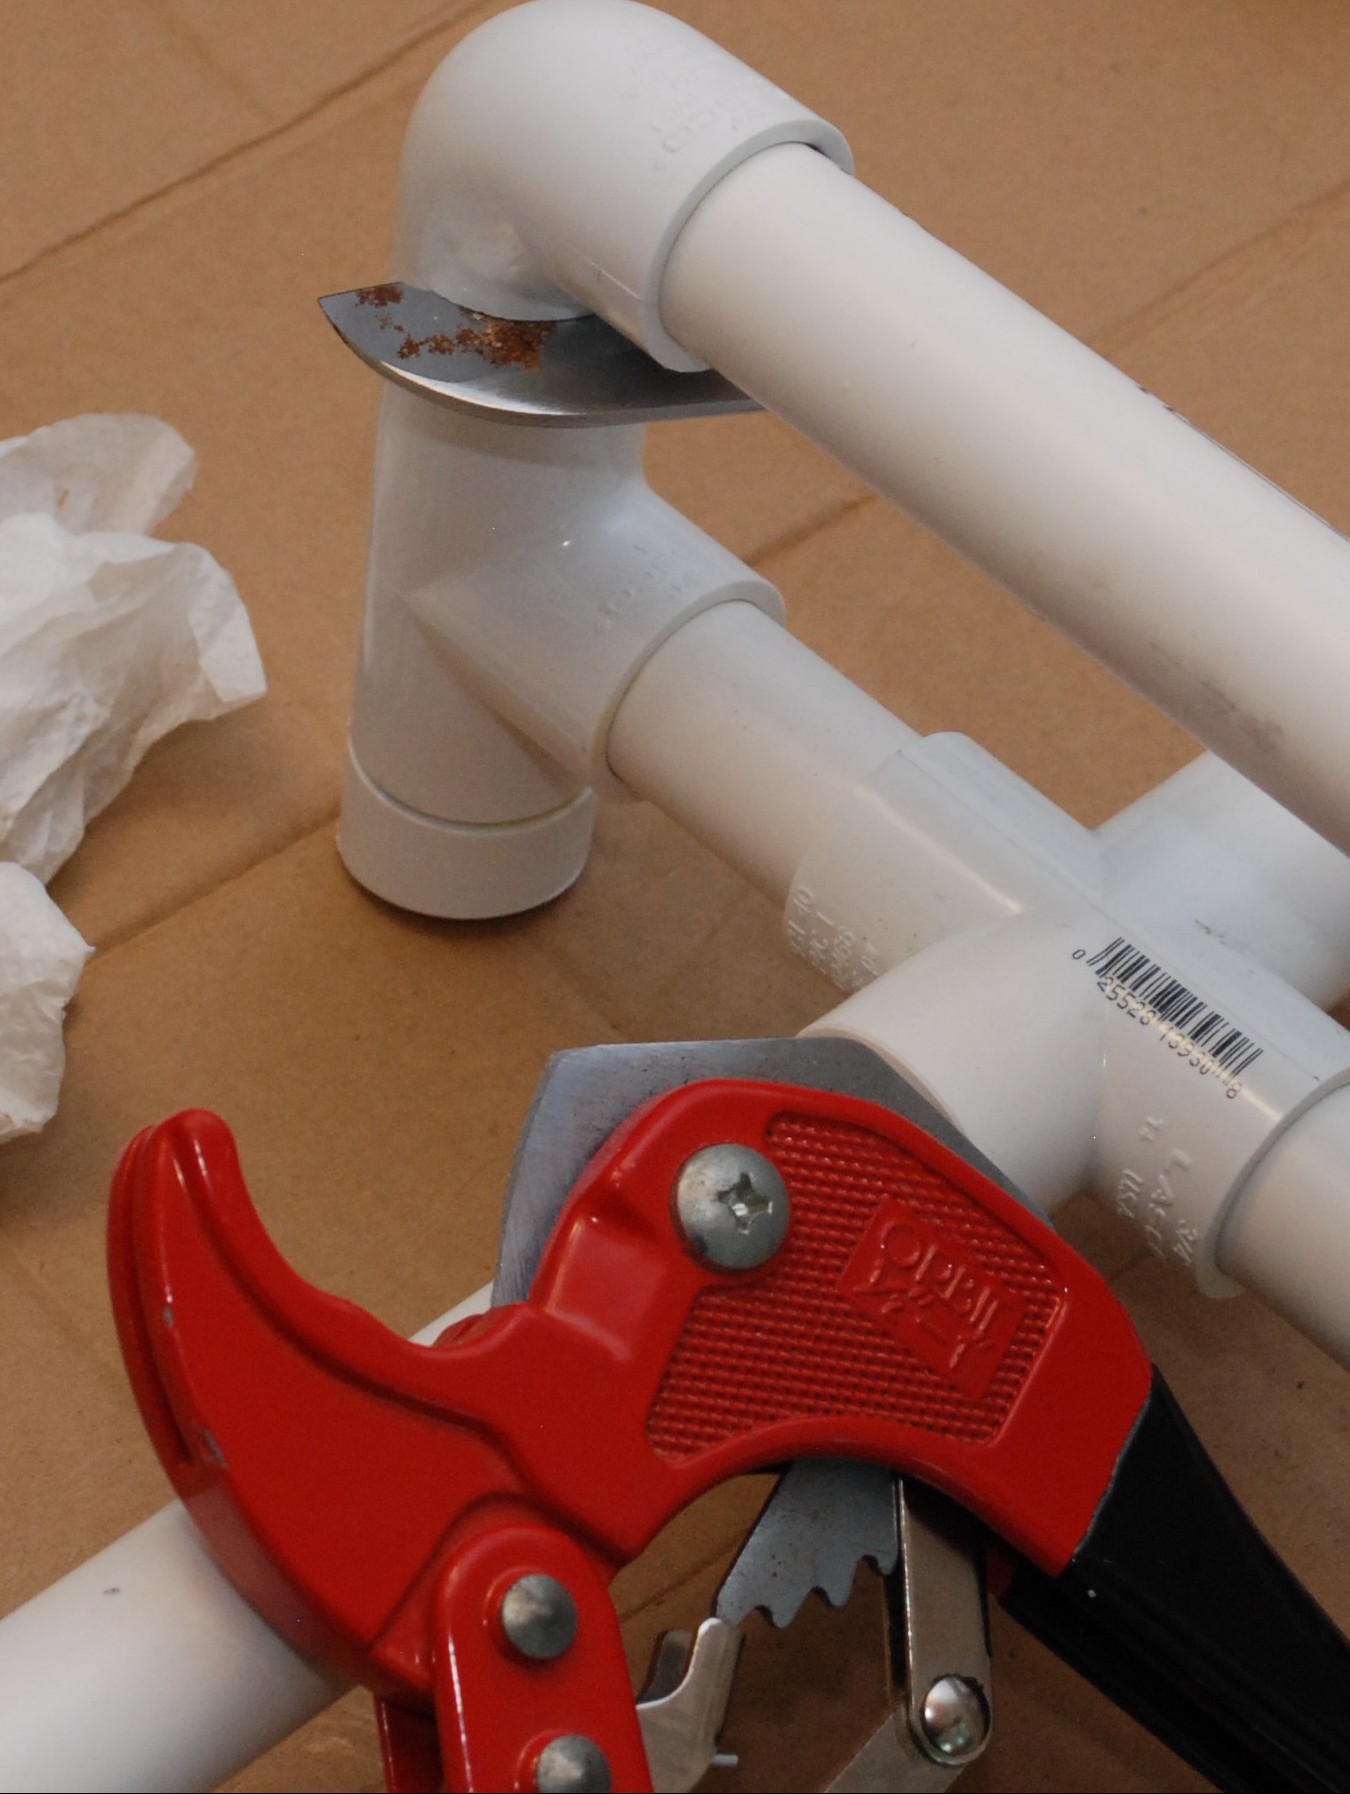
This is the spinner portion of the centrifuge extractor. I built it to go inside 5 gallon buckets so they would be easier to store. There was an issue though, I didn’t give myself enough room on the bottom set of guides, and it didn’t fit. So I started cutting and modifying and came up with an even better version that requires fewer parts.
While modifying I broke the blade off my PVC cutters =(
Now that I have learned how to properly build the bottom section I will make another and post it with full plans (parts list, lengths to cut, etc.). Until then, just see what the results are from an extractor that cost less than 50 dollars in parts.
The Extraction
We took a set of full frames, de-capped both sides with an electric hot knife, and gave them both a spin. The result was a pretty thorough extraction.
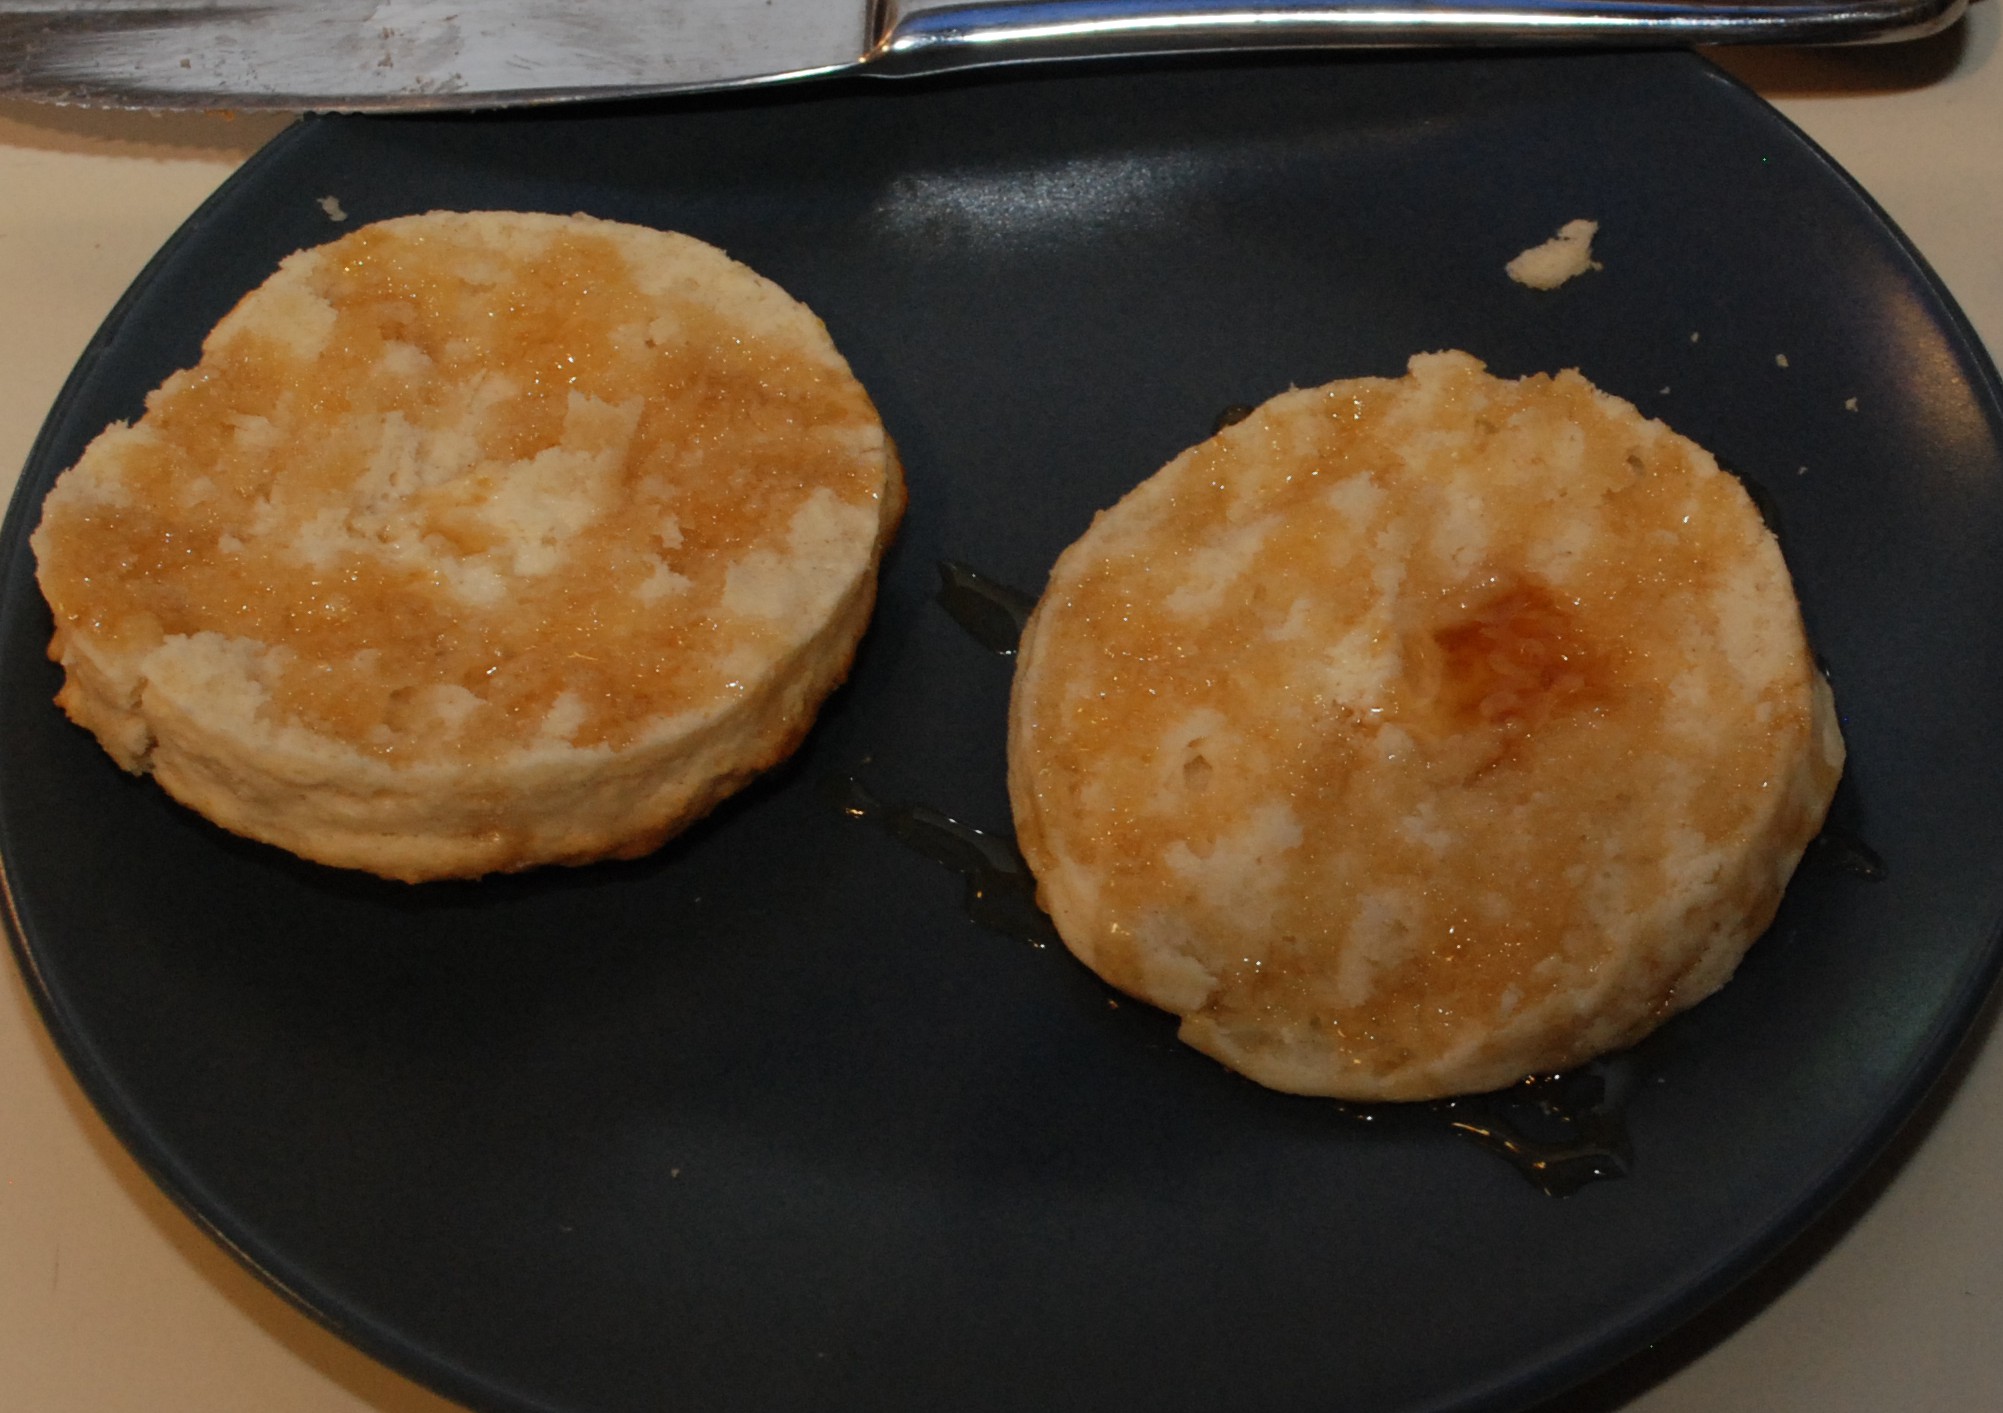
Once the honey settled and went through a filter we got some really amazing biscuits and honey.
One frame was completely packed on both sides. It lost 2lb 10oz going through the spinner. The other was a bit lighter to start with and still had some open cells. That one lost 2lb 1oz in the process. We were able to bottle about 3.5lb of honey and 1oz of wax. There is about a pound missing that probably got lost in the filters and side walls. That will probably happen for extracting 2 frames or 20.
Assuming you do a pile of frames you can expect around 2.5lb of honey per full frame, or 25lb per super. I have 2 supers full, and a 3rd on the way. Oh boy, that is a lot of honey.
Wax Refinement
After letting the cappings drain through the filters for a bit I put them in a tub and did a series of rinses and soaks. After a day of rinse and soak they appeared to be free of honey.
A jelly strainer bag turned out to be perfect for refining. It has a fine mesh on it, and you can toss it when done. Basically dump everything inside, put it in an old pot and set the stove for low. After a while the wax will all melt out and the junk will be left inside.
There will likely be some water in there from all the rinse cycles. No bother, it will separate from the wax naturally. Once you get everything melted, dispose of the bag and pour the pot contents into a form. I used an old yogurt cup.
The hot wax will separate and float to the top. Once cooled, break the wax out. I ended up with a fairly clean chunk of wax weighing just over an ounce. Bees are the best pets ever, thanks girls!!!