Clamp Racks

A year back I modified a set of buckets to hold my 12-24″ clamps.  It worked as a method to keep them in once place, but had some flaws.  They were tucked away, which means out of sight out of mind.  With all the bars going down into the bucket it was really hard to tell the length of the clamp when you wanted one.  I was able to de-clutter some wall space which gave me the opportunity to build wall racks.  One would think that clamp racks are really simple, and that not many mistakes could be made.  You can screw it up, and I did.

I wanted to try out french cleats, and I wanted them to be strong.  I didn’t have much 1″ thick lumber, so I went with 2x4s.  Big beefy cleats right?  This is stash busting at its finest.

Mistake 1
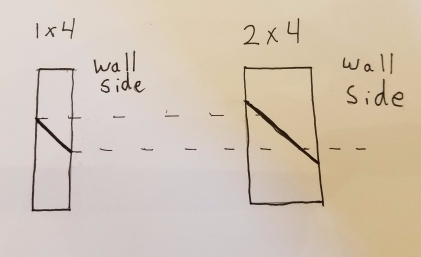
20170326_201149.jpgI thought 2x4s would make a great french cleat system.  They aren’t horrible, but they
aren’t great either.  Because of the thickness when you cut them on a 45 degree angle, you don’t get a lot of flat bearing surface left over.  A 1×4 would provide plenty of holding power, is easier to attach to the wall, and has more bearing surface to glue/screw to against the wall and tool holder.  I would also suspect that moving the weight out further from the wall transfers a little more load into trying to pull the screw out instead of shear loading it.  Might not be significant, but not something you want to do.

Mistake 2

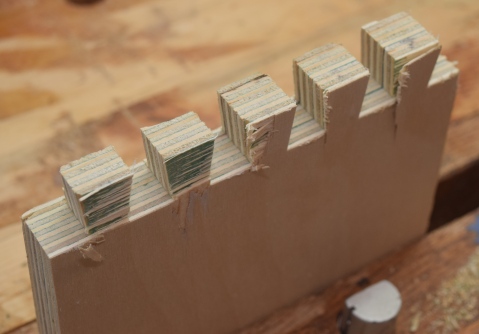
I had plenty of cabinet grade 3/4″ plywood around from my temporary counter tops.  Why not break out my old machine cut dovetail jig and go into production?  It was a little overkill for strength, but they would look nice and once I got the jig setup I could make lots.  Turns out plywood doesn’t play well when doing that kind of cutting.  The bit ripped off a lot of layers.  I could have sandwiched the part on both sides, but the novelty and speed of doing a lot of these was quickly evaporating.
DSC_0751

Mistakes 3 & 4

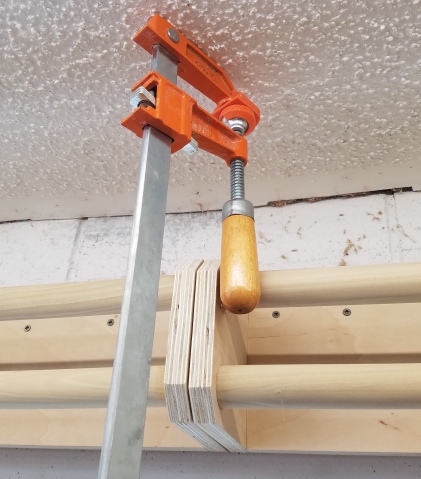
I mounted the cleats up high to maximize space and keep them out of my way when not in use.  I ended up with them too high.  When trying to place a clamp in the rack, it hit the ceiling before going in.
20170324_101943

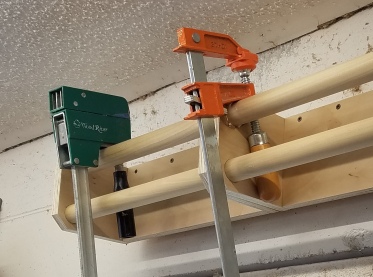
If I did rotate them to get them in, the double bars didn’t help.  I used that double bar trick on a small clamp rack at the end of my work bench.  Small clamps have a center of gravity that makes them want to rotate badly when hooked like this.  Big ones have enough weight down low that they don’t.  It was a waste of materials.
20170324_102149

To recover I removed the holders, and cut off the top bar.  That is a nice thing about french cleats, you can take them down to adjust or make modifications.  I also added a small bumper at the bottom to help with the loading path.  See mistake 1.
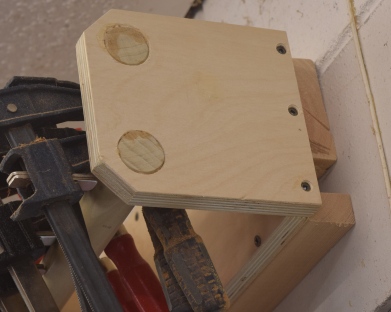
DSC_0749

It took a while, but the two foot long clamp rack was complete.
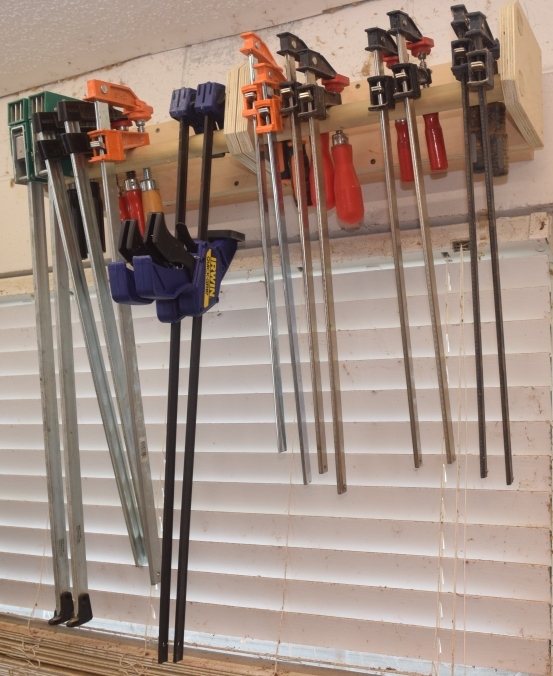
dsc_0748.jpg

Mistake 5

I had pre-cut material so that I could assemble lots of 14″ clamp sets with dovetails.  When the dovetails failed I started using screw.  That worked out, but the small sizes weren’t needed.  The dowels are plenty strong enough to hold the weight across 28″.  I just caused more work for myself and wasted materials.  I was able to use some of this stuff, but if I had tested the dowels for sag before hand I would have done all of them in one span instead of two.  Test next time.
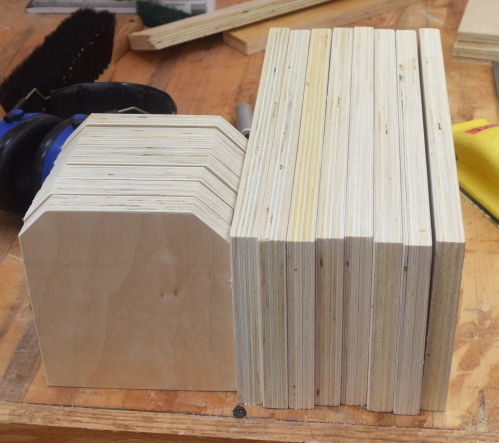
DSC_0745

Mistake 6

Almost out of the woods.  I made the classic “Measure once, cut twice, and still too short” mistake.  I always have problems when drilling holes for dowels.  I seem to always drill one size too big.  These aren’t 7/8″ poplar, they are 3/4″.  More material wasted, I need a tight fit for the glue joint.
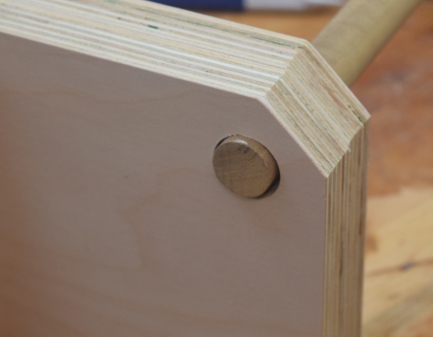
DSC_0750

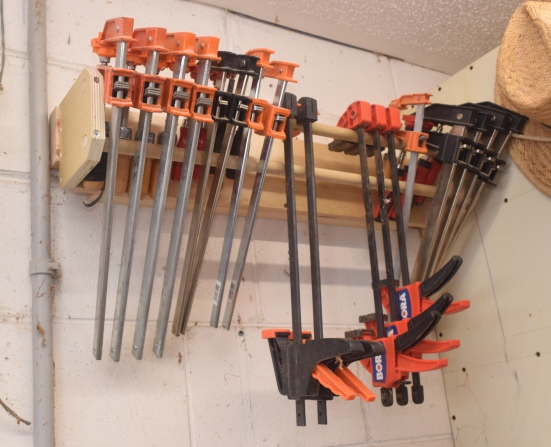
The next set avoided mistake 4, the second bar was really needed to keep everything from rotating, but got tied up with mistake 3 again.  It was up too high.  I had to remove the cleat and lower it down a few inches to get everything to clear the ceiling.
DSC_0753

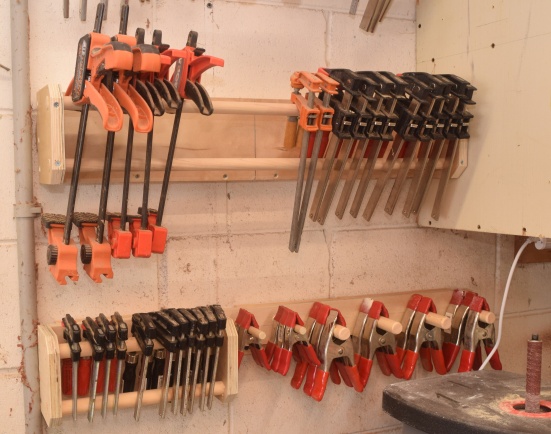
From here out it was actually pretty smooth sailing.  I used my limited stock of 1×4 to make more cleats and the racks came together well.  I even managed to dig my spring clamps out of the drawer and give them a nice home.  Bigger parts on the spindle sander might be an issue, but that is attached to a mobile base.  I can always move it out if need be.
DSC_0754

In the end it works wonderfully.  The fact that it took twice as long and 50% more material than it should have is going to be chalked up to learning.  8 years after starting this hobby I still have a lot of learning to do.

Pullup Bar

I have been doing kettlebell and bodyweight exercises consistently for over 6 months.  I love the speed at which it kicks my butt and have been getting progressively stronger at all the exercises.  Aside from a variety of bells none of it requires anything more than a small bit of space.  The two exceptions are pull-ups and Turkish get ups.  Pull-ups obviously require some kind of bar, and Turkish get ups involve large series of steps to take you from lying flat on your back to standing up straight with a kettlebell overhead.  It takes a bit of room.

The plan is to kick out my treadmill and build a dedicated kettlebell workout area.  I have a doorframe pull-up bar, but want to build a freestanding piece of equipment.  Might as well use this as a chance to do some woodworking.  Start with some nice (Super rough!) untreated 4x4s and get cutting.  Even though they were supposed to be kiln dried they were wet enough that my normal tenon saw bound up an inch or two in.  Had to break out a panel rip saw!

With guns that big my joints weren’t exactly surgically precise.  Along those lines I didn’t really have the right chisels for the job.  An old 2″ framing chisel helped, but my only other option was a 1″ bench chisel for chopping the waste out.  Still I was able to bang out some bridle joints to attach the upgrights to the feet.  Things were going swimingly enough I was able to shoot a little assembly vid!

DSC_0731

Before doing any glueups or serious trimming I assembled the uprights with the pull up bar at the height I thought appropriate.  This let me do some basic testing to see if I was on the right track.  It was shaky, but even without glue or fasteners it held me!  Last but not least it let me play with different widths to figure out what was right for me.


DSC_0736

I started trimming excess and planning out the rest of my parts.  A shelf across the back holds kettlebells when not in use.  The shelf is dovetailed so it helps keep the assembly square.  All that weight comes in a lot of handy!  The right angle joints between the uprights and the feet got glued and pinned for good measure.  Everything else is going to stay friction only so it can be disassembled.

I tried trimming everything down as much as possible so it wouldn’t take up any extra space inside.  It looks compact, but beefy.

DSC_0738

I made one critical flaw though.  Those pins on the backside are pretty thin, and any force on them by the tails puts a lot of shear force along the grain.  It is a recipe for splitsville.

Yup, I was doing some assembly and it popped off.  I tried gluing and pinning it back in, but only managed to destroy the piece.  If I had made the foot extend a few more inches past the tail it would have been strong enough to survive.  Lesson for next time.

I installed some angled pegs along the back of the uprights to give myself storage hooks for grip trainers and other items.  The whole thing goes into the house easily, and assembles in a few minutes.  The pull up bar itself was pinned with some 1/2″ dowels though the upright from front to back.  That will keep it from rolling or working its way out.  The shelf and those pins are just held in with friction and gravity.  Assembled the device is too big to get through any doors, but by using carefully planned joints, I can take it apart to get it in and out of the house.  A coat of boiled linseed oil offers some protection and adds color to the pine.

All the wooden joints creak and groan and shift a bit when doing pullups, but it is super sturdy.  I might drill out the pull up bar and upgrade from a 1-1/4″ to a 1-1/2″ bar at some point, but for now this works well.  Those pegs along the back hold my chalk, a towel, and grip trainers.

DSC_0756

Tampa Woodworking Show 2017


The Tampa Woodworking Show is back!  I went for the first time last year.  This year was similar in that I learned a lot, met cool new people, and spent way too much money on tools!

20170318_095724

The fun begins as soon as you walk up.  They had this trailer with a mobile wood mill on it again.  I managed to snag some video of them carving up a big cedar log.

How would you like to have one of those bad boys show up in your front yard and slice up a few trees?

There were classes going practically all the time, and I managed to make it to 6 different sessions.  I learned about finishing, turning, and molding making.  This guy was doing some really big and aggressive turnings.  All his AV equipment was constantly getting covered in shavings.

20170317_150933

My favorite housewright (ok, the only one I know) Ron Herman was back this year dispensing with some old school wisdom to constantly full classes.

20170318_151031

Did I mention I spent too much on tools?  It was hard not to, there were vendors everywhere.  Lee Valley would let you touch and play with everything.

20170318_150020

Saw stop did a demonstration of their saw saving a poor defenseless hotdog.  This is my win-the-lottery tool!20170318_103045

When it detects your finger (via capacitance?) it crashes a stop into the blade and pulls it down.  Must be seen to be believed.

They had one of the crashed blades to show how the mechanism works.

Moving up from there we had festool (more like festdrool amirite?, or something like festwo-wholepaychecks).  Everything they make looks great, but once again, I think a lottery handout might have to be involved before I get one.  This Aussie company makes a massive converting industrial wood transformer thing.

Giant slabs of gorgeous wood, CnC mills galore, and even a bag for the knitters in your life.

20170318_105413

One of these years I will have to travel to one of the bigger shows.  Maybe Atlanta first.

Botanical Fest 2017

Spring is in full swing here, and summer is probably just around the corner.  We are already starting to see 80+ degree highs pretty regularly.  That must mean it is time to hit the garden!  We usually kick things off with a visit to the local botanical festive.  This year it was moved and by my estimate was about half the size it normally is.  Very sad.  As a result we got no herbs and still have a number of empty planters.  Still, we got a lot of good plants!

Our big backyard planters I made were looking kind of sad.  All my attempts to grow clover kind of went kaput.  Only the pink flamingos were coming in nicely.

20170304_112916

20170304_112911

Some native friendly variant of Mexican petunia went into the right side bed while some blanket flower and Mexican heather went in on the left.  We transplanted the flamingos so they could spread more.

20170304_114621

20170304_114527

Even the back door planter got in on the action.  I found a tiny lime bush and some lavender for the bees.  This one still needs some help filling out.

20170304_114517

Out front didn’t see a lot of new flowers.  We were trying to pick up native sun happy pot friendly plants.  Not sure how successful we were, but here is some of what we got.

20170304_120749The sweet almond smells amazing and looks good in these cool new 90 degree pots we got.
There was a Florida friendly daffodil apparently and something called nemesia.  We probably need to fill out about 6-10 more pots out front for everything to look right.  Hopefully we will have another free Saturday soon to do more gardening.

Last but not least this little simpson stopper is hopefully going to grow up big and bushy to help cover up the trash cans.  Right now he is a runt, but a little water and a strong summer ought to fix that.


To The Best of Buns

16465569_1653277584969017_6315287317531590656_n(1).jpgAs if allowing two long eared fuzzy ingrates in the house wasn’t enough, I eventually relented to us hosting a temporary visitor.  A particular bun from the mean streets of Melbourne got picked up by a cop and needed a home for a short while so he could get fixed and make his way to the greater Orlando rescue group.  I was expecting an ornery skittish bad bun.  What I got instead was an incredibly sweet creature.  Someone either lost him or kicked this guy out.  Either way, they are losing out big time.

I have never been much of a pet or animal person.  Herbie changed how I feel about keeping animals a bit.  Every time I would open up the back door he would be pawing at the edge of the cage for pets.  I could scratch his nose, rub his ears, pet his side, and he would just lean in for more.  I was sick while we had him and sat in his cage quite a bit.  He came over and gave me lots of love and attention that helped take my mind off the cold.

This story ends in tragedy though.  We were supposed to have him for a month.  A few weeks to recover from his street injuries (a few bad scrapes on his side and back), a quick neutering from the vet, and then a few more weeks of recovery before going off to the main Orlando group.  Though he appeared quite healthy and healed from previous injuries, he did not survive the neutering operation.  Rabbits are very delicate and sedation for surgery is touchy.  Maybe he had other issues we didn’t know about.  Maybe he was very old.  Maybe we just got unlucky.  We will never know.

In the two weeks we had him he completely nuzzled his way into my heart.  I was even starting to think of a way we could keep him along with the other two we are beholden to.  In the short time he earned himself a few nick names.  Herbie was the name he came with, but he also went by Herbacious, Herbie The Love Bun, Herb-a-licious, Herbert Hoover (when food was around), and Herbert J Whiskers (when he was feeling formal).  Honestly I probably forgot a few at this point.

Though we never got him to a forever home, we can still give him a final resting place.  We had him cremated and collected his ashes.  I thought it would be fitting to build a little box for the occasion.


20170212_144546

Something this serious calls for the family wood.  These walnut pieces have been in my family for decades.  I cut a chunk off and decided to go for a bandsaw box.  I have never made one before, but thought this was a good time to try something new.

I didn’t make any layout marks, just went went with my gut and cut out the first things that came to mind.  First the overall shape is cutout, then the back comes off.  With that set you can cut out any number of drawers you please.  In this case, just one.  A similar thing happens for the drawer, only you need to cut a front and back before carving out the central drawer cavity.

Cutting and glue-up went smoothly.  I did only minor sanding and didn’t bother with finish.  A wealth of off cut pieces gave me plenty to make a drawer pull in the shape of an H.

20170215_191515

After a few weeks of waiting we got his ashes back along with a few paw imprints in clay.  We laid him to rest in his little hand made home under the orange tree in the back yard.  Maybe we should call it the Herbert J Whiskers memorial orange tree.

16230127_751708518314283_6814505707241472000_n(1).jpg