Late Summer 2019 Prints

Kind of a big span of time with a smattering of prints. I am always printing one little thing or another, but only occasionally remember to document them. Let the disjointed presentation begin.

Reciprocating Saw Spray Can Shaker

One of my weirder ideas that was spawned by being locked away waiting for a hurricane to come. Wouldn’t it be cool if you could use a saw to shake new spray paint cans for you? Turns out some folks weld something like this together and sell them on ebay. Not sure I want the full metal version, but a plastic one screwed down to a de-toothed saw blade would be ok. A large hose clamp keeps the can in place.

So far it has worked well the 2 or 3 times I have tried it. Probably one launched can away from it being my worst idea ever, but until then, it feels pretty clever.


Pole Scraper (Paint Handle Threads)

Also while waiting out the storm I had time to experiment with threads. Specifically I wanted to make threads that would go onto any standard mop/cleaning brush/paint roller/etc pole. I did some research and it is an ACME 3/4″ x 5tpi. Turns out Fusion 360 only had that diameter in a 6tpi version. I found a guide on their help area that tells you how to set up custom threads. (Link)

My first project was simple, but useful. I made a little scraper that would go on the end of some extension poles we had. I used it to go all around the house and scrap off the mud dobber nests that had built up all over the house. The printed plastic will not hurt anything on the house, and the extension pole lets me get to everything without leaving the ground. Now I can attach any kind of hook, grabber, poker, or whatever to an extendable pole.
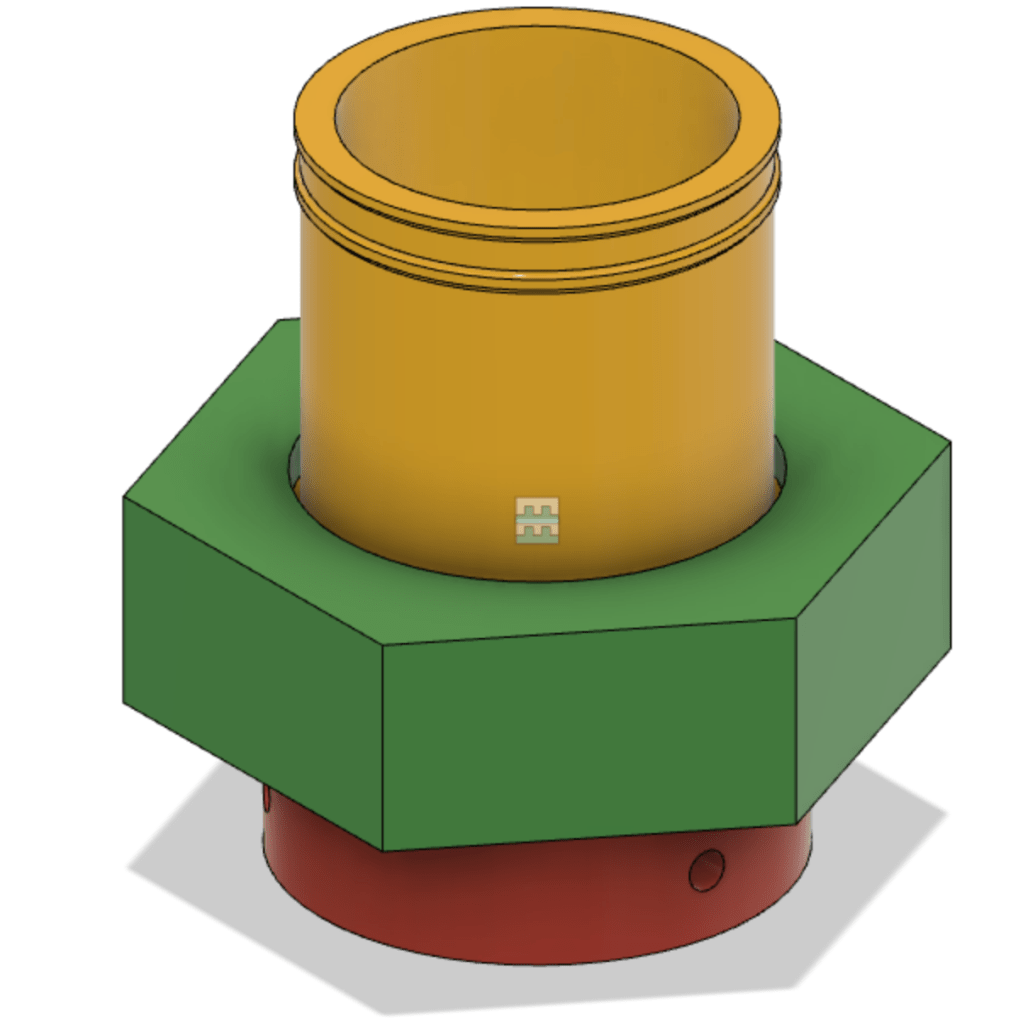
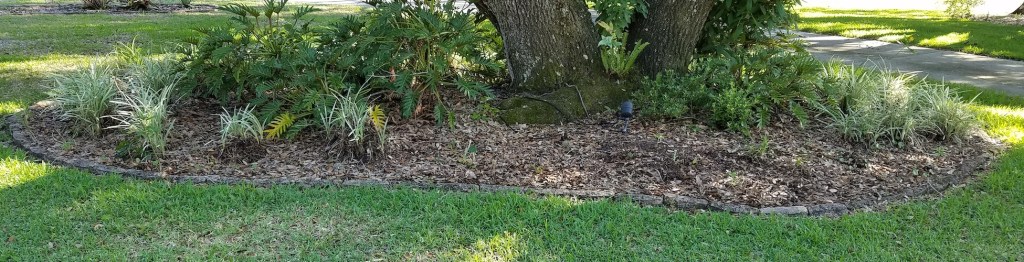
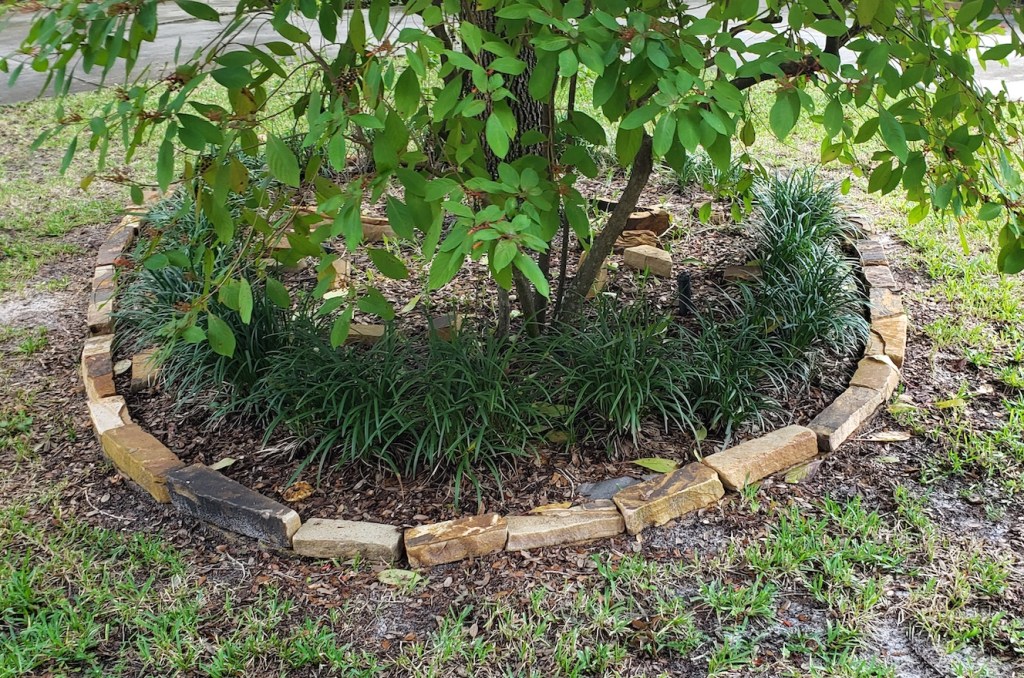

Calking Plug

While working on the rock project I went through a lot of tubes of landscape adhesive. I bought it in the large 28oz tubes (instead of your typical 10oz) because it is way cheaper per ounce that way. My big calking gun had issues sometimes though. The diaphragm in the back of the tube would fail, and I would end up with the plunger pushing through the glue. It almost ruined my gun.

The first time I thought it was a fluke. The second time I got kind of mad. Once the diaphragm fails, you basically can’t do anything with the tube and have to toss it. I cleaned the gun up again, and noticed that the plunger is quite a bit smaller than the inner diameter of the glue tubes. By only pushing in the center of the glue plug, it could be causing them to have a blowout more easily. I printed a larger disk that fits around the existing plunger, and just fits inside the tubes. After that, the glue tubes behaved themselves.


Inside Transfer Calipers

Sometimes you need to measure the inside diameter of something, but the shape makes it difficult to get that measurement. Inside calipers can help, but if going into a flared hole or other situation, it is not easy to pull the tool back out without disturbing the caliper distance. This simple design will produce the same dimension on either end. Stick it in a tapered hole, and just measure the part sticking out to know what that size is. A very special usage case, but I have needed one in the past, and with a little print time, I have one.


Wind Chime Clacker

The house came with a few really nice sounding wind chimes. They are blocked by the trees and screen, so they don’t chime often, but the long tubes make a deep soft song. The wooden clacker on one has fallen apart a few times. I keep gluing it back together, but the wood is really shot. I thought about making another wooden one, but wanted to try a printed one instead. It matches the diameter and thickness. The two halves are the same print just turned around to key into each other. This way I don’t have to untie anything, just glue it into place. The keyed insides align both pieces to center and add additional glue surface area. I am curious to see how long black PLA will last.

Phenolic Miter Saw Zero Clearance Insert

My 3D printed zero clearance inserts for the miter saw have not held up well. They don’t react well to heat and I only get a few dozen cuts out of them before cut tears start to appear. The plate has to be 1/4″ thick which makes it difficult to design for. I have used plywood in the past, but that is tough to make work right. I finally broke down and picked up some phenolic sheet. Phenolic is paper impregnated with a hard resin. The result is really stiff and slick.

I started by copying the insert that came with the saw and expanding it a little so it fits tighter in the opening. I made a test piece and when everything turned out ok I wrote the instructions on the master. First cut a piece of phenolic to rough size, attach the master, and trim it down on the router.

Once the shape is cut right I peel the master off and stick down the original saw plate. I use it to transfer the hole locations with a 3/16″ transfer punch. Transfer punches come in handy for just this sort of thing. Next I do a counterbore to give the screw head some place to live, then finally drill through the rest of the way.

The new plate is screwed into place, then I just make the first cut and voila, the zero clearance insert is complete. My first one had seen dozens of cuts without any issues. Hard to say how long these will last, but as hard as the plastic seems, it should be quite a while.

Swiveling Dust Collection Fitting

My dust deputy cart is doing a reasonably good job of helping me keep clean. One place that falls short is the hose that attaches to the inlet of the dust cyclone. The inlet part is tapered and the plastic is quite slick. A picture from my original post shows that I originally held it in place with zip ties. I moved on to a hose clamp, but that didn’t work either. It always gets twisted up during use, and it falls off constantly. I need a connection that can swivel and stay attached.

My solution to this issue is to 3D print a tapered ring with threads (red below). A loose tube butts up against that (yellow), and is held down by a nut (green). I did a cross cut shot to show what it looks like when assembled (lower right). My CAD software introduced a few new colors to confuse the issue.

I had a lot of blue filament lying around so I made everything out of that. The tapered base goes on and screws into place to keep it from falling off. I then screwed on the big nut to capture the 2″ hose adapter. The nut threads interfere heavily, so it won’t move without a lot of effort.

I tightened the nut down enough to form a reasonable seal, but loose enough to let it swivel. To connect the hose to the swivel section I again used a hose clamp. This time I printed and glued on a little handle so you don’t need a tool to loosen or tighten the clamp. Ask me in 3 months if I like it or not.

Orlando Maker Faire 2019

I went back to the Orlando maker faire again this year. First off, prusa printers showed up with a booth, and I got to meet the maker man himself. Josef Prusa!

After that it was all gravy. I saw some cool demos, battle bots, belt sander racing, some kind of go-cart/powerwheels racing series and a bunch of other things. This year had a lot more art and somewhat fewer techy things. I guess that is probably better for a wider audience, but didn’t have my attention as much. I will need to take more pictures next year, these were the only ones worth passing along.

Rolling Sink Carts

Now that my summer slog rock project is done, things have cooled down enough to get back into the shop. I am still refining the organization of my shop and turned my attention to the area around my sink. There was a pile of spray bottles and gallon jugs of cleaners scattered all over the place. I wanted to make a little set of carts that slide out to hold the junk.

The two carts sit low on either side of the sink and roll out to expose all their contents. These are already mostly full which means I either made them too small or I need to pair down the stuff I keep around.


I designed this project back in the spring based on a gallon jug of headlight fluid and two scraps of plywood I had. Thankfully 6 months later the jug was still the same size and the plywood was still there. The design is like a two shelf book case, only with no back. I made runners to go on either side of the shelf to prevent sag and keep everything from racking.

The assembly was mostly glue and brad nails, and once dry felt quite stiff. I gave everything a single heavy coat of polyurethane. I would typically use boiled linseed oil for shop furniture, but had some old urethane around and figured these would get splashed around the sink quite often.

I found really small wheels to put on the bottom. They don’t swivel, but I don’t need them to. The carts just roll in and out. Plus their compact size means I waste as little space as possible. Lastly I printed a beefy handle on top to help me grab and roll the loaded carts.

Stone Borders

I had a little project that involved 10 tons of Alabama strip rubble.

Our house came with some sections of the back yard that had gorgeous stone separating the flower beds from the rest of the yard. It has been around for a number of years and could use a little help in spots, but the age and moss make it look really wonderful.

The trick was that not all the beds had it. On top of that, out front they had used some really basic concrete border stones. It was done well, but compared to the really nice stuff in the back, it felt lacking.

I went through the yard and measured out every place where I thought I would want a stone border. Luckily the neighbors had info on where I could get more stone. I had to make a special order and buy it from Alabama sight unseen. I over-bought, but didn’t want to run out! My process was to dig up any border that was there, till the edge if needed, dig a trench about 6 inches deep, fill it with paver sand, and pound in the first layer of brick.

Along the side of the house I heavily altered the path of the bed to straighten the edge. It took a lot of tilling, but was eventually a nice rock bed. A lot of rain comes over that corner of the house, so the rocks should help prevent erosion.

After a lot of digging through the pile looking for the right stone I got more organized. I started unpacking the whole pallet and sorting the stones by size and whether they were good for the base layer, or not.

As the project went on I kept adding new areas to the list. Originally I wasn’t going to do any transitions from the flagstone walkway we have, but broke down and did it. Basically every place I found this black plastic boarder I dug it up and replaced it with a stone border.

I didn’t take many pictures of the process because I was too sweaty and covered in sand most of the time. The project started in mid May and didn’t finish until late October. Lots of evenings and weekends! All told I put down 8 or 9 tons of stone with another ton getting stored in the side yard, and some fraction of a ton being given away. That came out to around 550 feet of trenches dug for the stone to go into. Roughly 4 tons of paver base sand placed in the trenches to give the first layer a stable footing, and another 2-3000 pounds of sand to help fill in around the first stone. Because some of the rock borders got expanded I needed more egg rocks (looks like small river stones) to rejuvenate areas and fill them in. That was another 4 tons of rock. Speaking of which, here is what 60 bags of egg rock looks like in my suburban.

At 3000 pounds I was 50% over the stated cargo capacity. The suspension was completely bottomed out. Oops! Good thing I got all the other runs of rock and sand in 20-30 bag increments.


I don’t know how many hours I worked on it over the nearly 5 months, but I will never do that again! It was worth it all though. The new borders really help separate the various trees and beds from the rest of the yard, and the walkways look stunning with that rock border. I trenched everywhere and packed in the first layer. Once I had the first layer in everywhere, I came back and used landscape adhesive to glue on a second layer of stone. That gave the first layer time to settle in more with the weather.

The front turned out well, and I had enough to lay some of the longer more interesting looking stones along the walkway and edge of the driveway. At the end of this slide show you can see where I stored my extra stone for some future flowerbed expansion.

In the back we added all new border around the shed, expanded the area across the back of the pool deck and planted 2 new citrus trees.

  • 5 months of work
  • 550 feet of trenches
  • 10 tons of Alabama strip rubble
  • 5 tons of base and paver sand
  • 4 tons of egg rock

Did I mention it was a lot of work? I am hoping after a year or two that the rain will settle in the sand and make it all look a bit more natural. The colors of the stone are really pretty, but a few touches of moss would make it all just right.