Cutting Board Flattening tip

A lot of folks have shown how to make an end grain cutting board. I am not going to add a whole documented build to the pile. I will add one flattening tip to help save time and make a better product. A friend of mine is getting married, so that calls for a wedding present. What better device to induce marital bliss and/or arguments than a cooking implement? I would make him a vacuum if I could.

Enter some cherry from previous wedding presents and maple from the stash. I always clamp my cutting boards down to a piece of flat plywood with wax paper below. That keeps the bottoms good and flat for the next phase. That oak beam in the center is my clamp caul.

This one has a ton of squeezeout, but I put packing tape on my clamp cauls, so all is well. The problem: How to deal with all the squeezeout, and what do we do about the uneven top? Run it through the planer! That causes blowout at the back end. I selected the better looking sections for the gift, and used the spares to make a small board for myself. I ran it through the planer as-is to demonstrate the problem.

Lots of pieces of wood get chipped off at the end because the grain runs up and down and is unsupported. This is with a helical cutter head using very light passes. That is a best case scenario normally. It can often be much worse. Why do this at all? Well you get really fantastically flat tops in a hurry when you use the planer.

Tricky, so what do we do? Take a block plane and cut a little chamfer on the trailing edge that will be exiting the planer. Or both entrance and trailing edges so you don’t get mixed up. The cutter will be shearing off the last bits of fiber, but the chamfer will mean that happens a little ways back from the bitter edge. Here is the edge I put on the big board, it isn’t big. Just a 1/16″ chamfer. The results from heavy cuts are no blowout and a very clean flat top!

If you don’t have a block plane, I bet a sanding block would do it too. That means you can plane the top flat quickly and without risk of end blowout. Just make sure you don’t plane through your chamfer. I shipped the big one out fast enough I forgot to take a picture, but here is the little one after a number of uses in my kitchen.

Chamfer your cutting boards for planer success!

Cutting Board Wedding Gift

I am about 6 months late on this wedding gift, but better late than never! I wouldn’t normally add yet another post to the internet about making a butcher block cutting board, but this one had a few noteworthy mistakes I thought I would share along with a juice groove, which is a novel endeavor for me. Isn’t it funny how cutting boards call for half the clamps in your shop?

Lesson 1: Melamine Does Not Resist Glue

I had some spare plywood with melamine face that I thought would make a good glue up surface. It is flat and strong and the wood glue will not stick to it. Imagine my surprise when the board wouldn’t come off. I employed numerous wedges and was eventually able to break it free. I don’t know what they use to hold the face down, but my glue is better. I guess you need to wax it to prevent adhesion. I will go back to using wax paper like I did before.

Lesson 2: Helical Cutters Work Wonders

On a more positive note after scraping off the glue ridges I tried to send the board through the planer. Normally using a planer on end grain like this yields poor results. I had it shoot the board out of my last planer in pieces. My new helical cutter works wonders, the top looks gorgeous now.

Lesson 3: Watch Your Glue Up

I thought I was being really careful with this build. I measured and planned everything out so there was a 1:2:3 pattern to the size of the blocks in the board. That worked out, but I failed to flip the last piece properly when gluing. The pattern repeats on that last row.

Lesson 4: Juice Groove

I cut the last row off and re-sanded the end. Despite some minor road bumps this was going well. Time to press my luck even further and add a whole new feature! There are a lot of ways of doing a juice groove. Setting up stop blocks on the router table seemed to be quick, safe, and reliable.

I used that row that was cut off to experiment. You have to use a lot of pressure up against the fence or else the bit will wonder. Ok, now on to the real thing.

It was quick, it was safe, and it is certainly a groove. Not 100% reliable though. It looks straight everywhere, but overshoot exists at some corners. I don’t know if the stops shifted, or if my measurements were just off. Maybe I won’t be using this technique any more.

The Finish

Over all I would call the board a success. It came out slightly smaller than intended and the juice groove has a little wonder to it. Otherwise the oiling process made me very happy I with my efforts.

I kept pooling mineral oil on the top surface and let it soak in. That juice groove kept the oil from spilling over the edges. Eventually it saturated through all the way to the bottom side.

Cheese Boards (Part 2)

Cheese board madness continues.  Continuing from Part 1, I chopped down the remaining over sized boards into a pile of nicely sized cheese boards.

DSC_0087

They got a good sanding, a round over on the router table, and yet more sanding.  Who doesn’t love sanding.

DSC_0088

DSC_0089

I love how everything changes as soon as you hit it with oil.  Some of the purple heart turns brown, but otherwise everything else deepens, darkens, and becomes more wonderful.

Cheese Boards (Part 1)

In the beginning of December I took a look at my wood pile and decided to kill two birds with one stone.  First, get rid of a lot of one off boards I have lying around, and two, make a ton of gifts.  I made a big pile of handles for pizza cutters, ice cream scoops and the like on my lathe.  Every once and a while I want a quick gift, and bam, there it is.  Lets start with my smattering of wood.

DSC_0481

DSC_0482

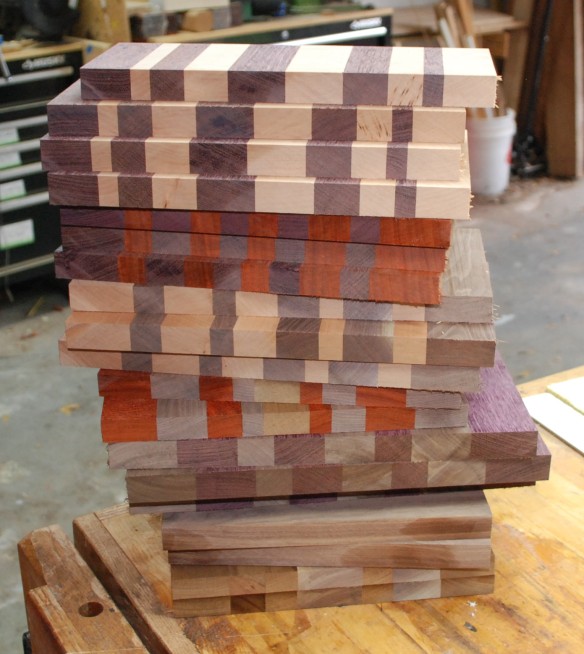
I later added my roasted hardwood to the pile.  Everything got planed down to an even thickness.  I started to take a picture of each board glueup, but I started going through them so quickly I forgot the pictures.  The plan was to run them through the thickness planer, so I didn’t need the top or bottom to be perfectly aligned.  This let me just use side clamps and ignore cawls.  It was quick and easy, and I had enough clamps to do 4 or 5 sets at a time.

I glued together everything I was going to make in three big waves.  Many of them I made long enough to cut into 2 or 3 cutting boards.  Much more efficient than doing each one individually.

After glue-up

After glue-up

Cleaned up from the power planer

Cleaned up from the power planer

I took about half the pile and moved forward.  I was running out of time before a big house renovation and wanted some to get finished before Christmas.  Everything got squared up on the table saw, and a nice round-over on the router table.

After a minimal sanding on the faces and round overs, they were ready to get oiled.  I like to use howard’s butcher block conditioner on these long grain cutting boards.  It has a little wax in it which works better for long grain in my opinion.  I love how the colors come out when you just start to hit them with oil.  Below is a shot of each one half oiled so you can see the before and after color.

DSC_0008

DSC_0009

I have already given most of these away, and will have to get started on the next batch soon.  I also plan on making a nice video to discuss the care and feeding of these cutting boards for anyone that has one.