Nuka Cola Sign

I have been a fan of the Fallout video game series for a good 20 years, since I first played the original game. Sometimes called Diesel Punk, imagine a retro-futuristic world imagined in the 1950s. Everything is nuclear powdered, sleek ray guns, cute suburban homes with tv dinners and a cold war that went hot. The game has a lot of back story and atmosphere including a soda brand called Nuka Cola that looks a lot like coke.

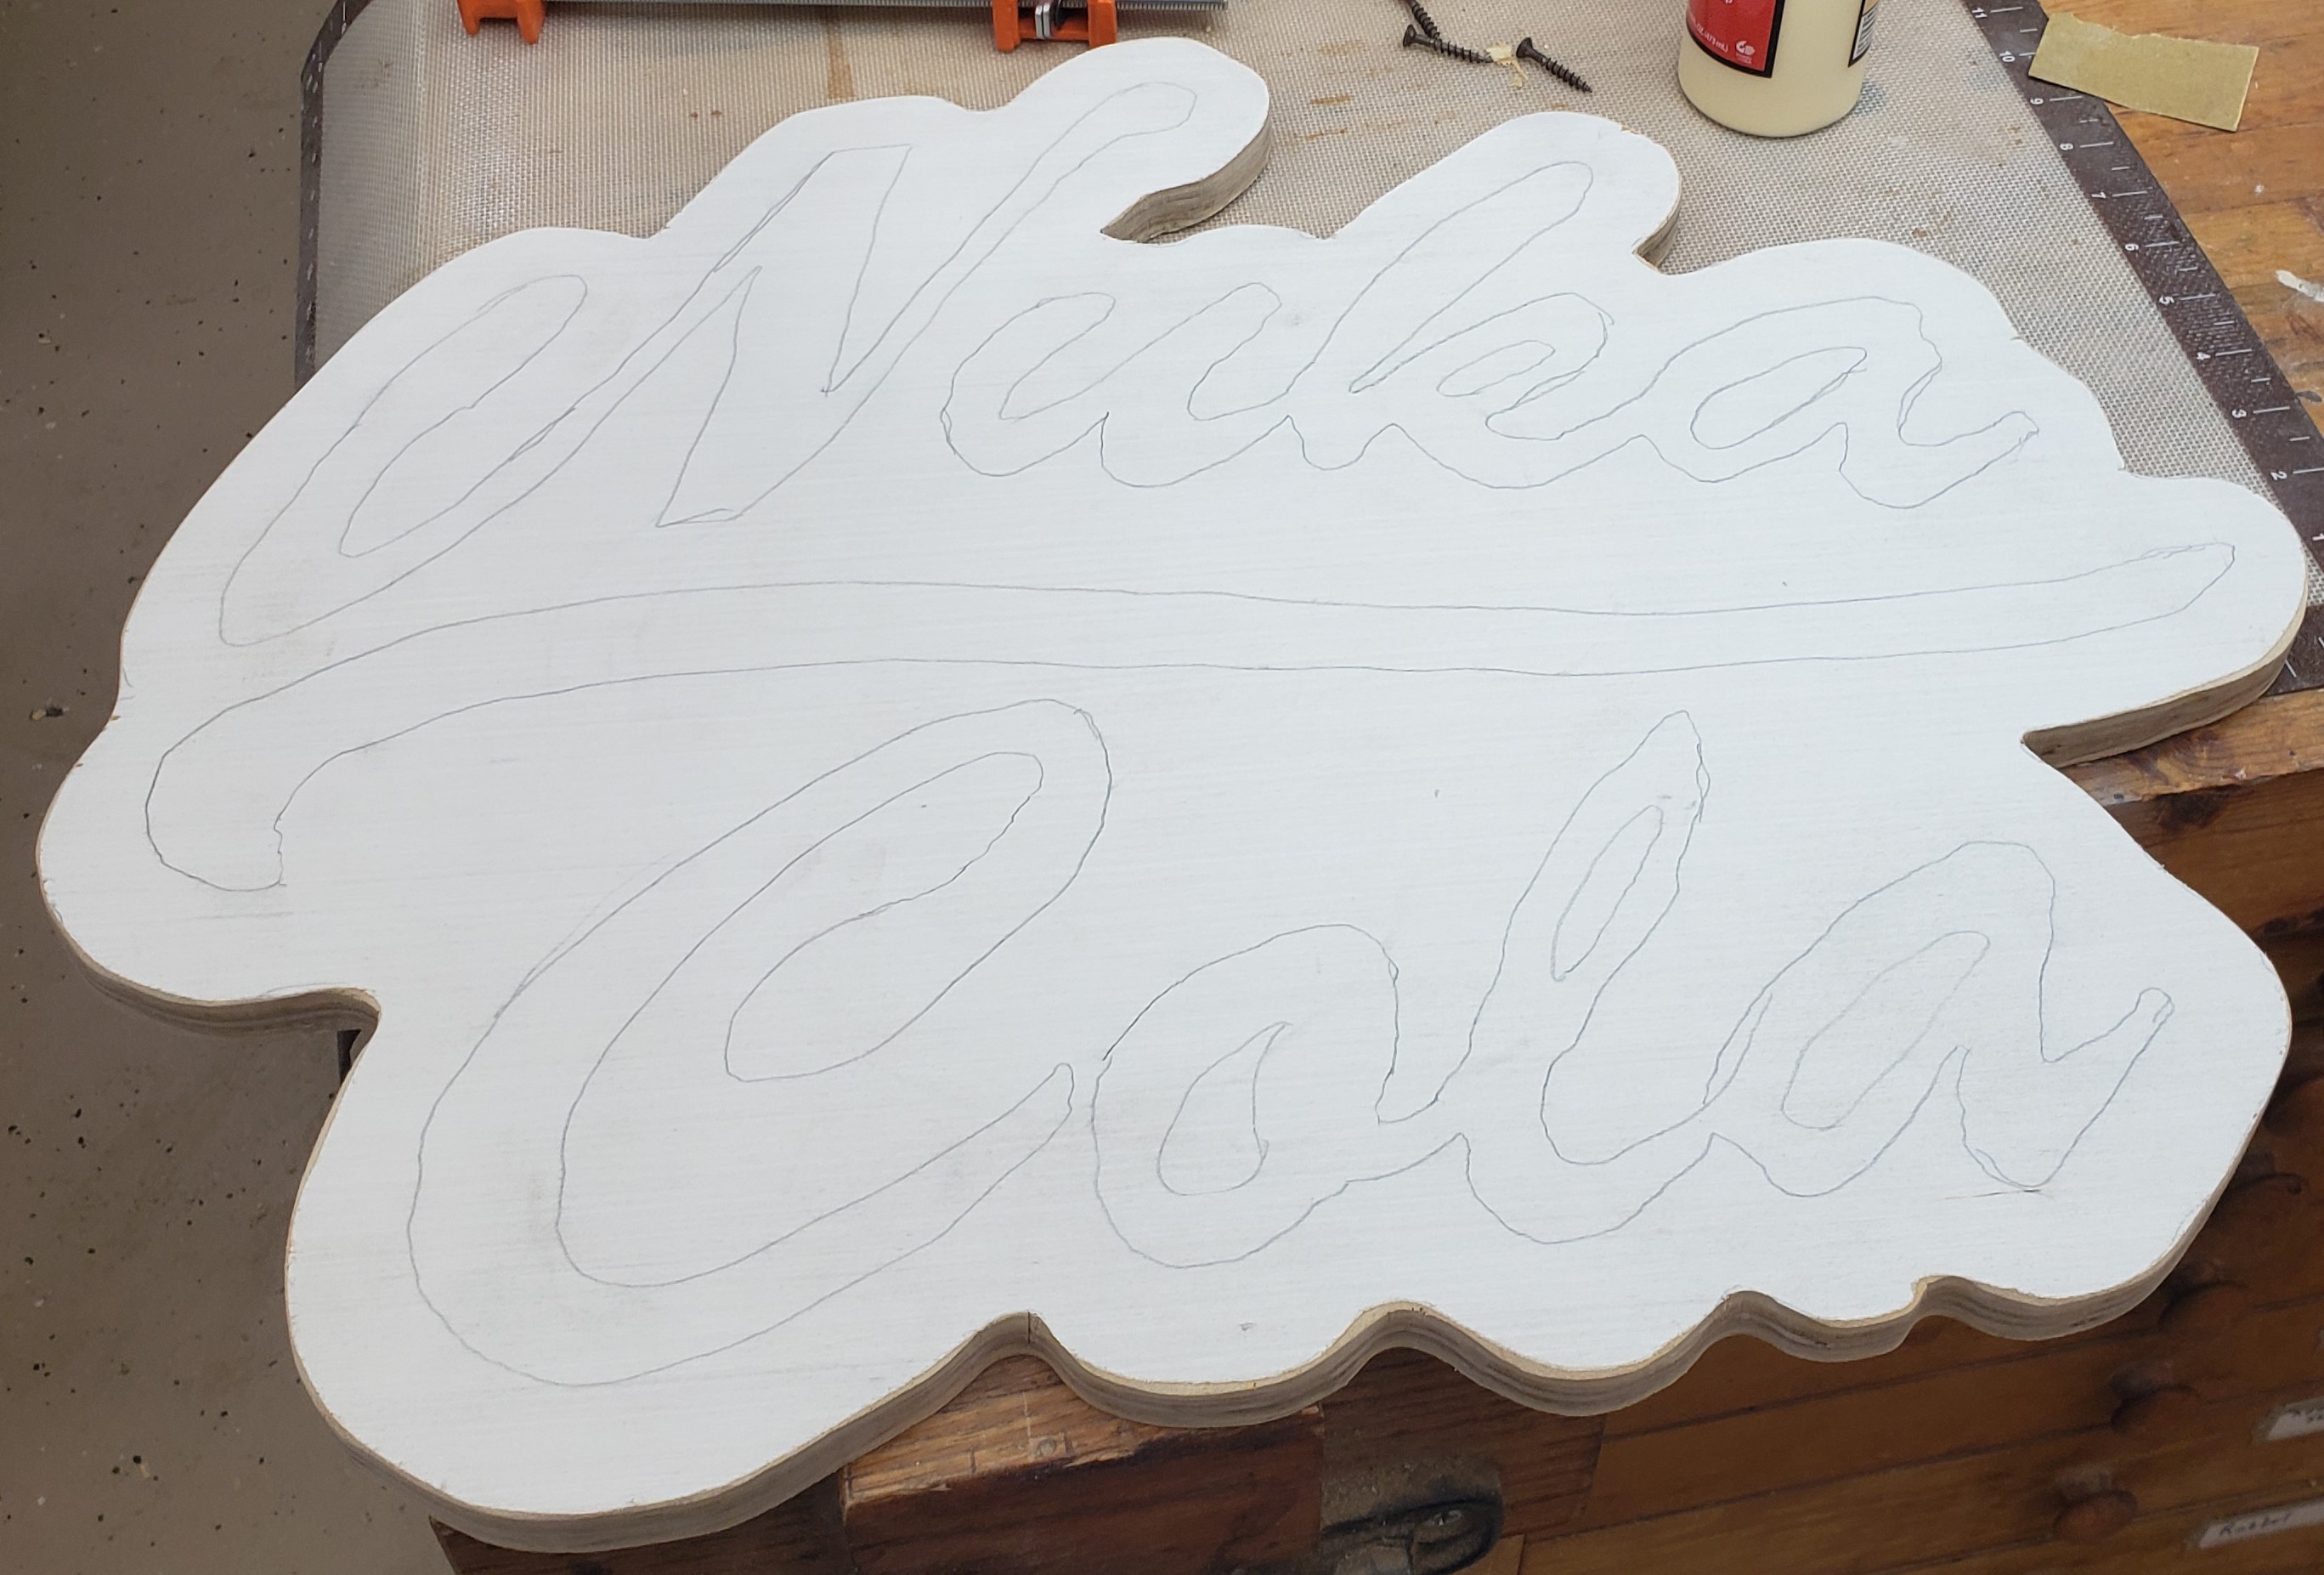
I am also a fan of this funny Russian guy that makes signs with lots of skill and few tools. He did a few different fallout based signs, so I had to follow his lead and make my own Nuka Cola sign. His methodology is simple. Project onto a piece of plywood with a cheap projector, trace, carve those lines in with a dremel so you can see them after you paint, then paint the various layers. I still managed to mess up a little. First up, the projection.

I found a rough text/logo of what I wanted and used inkscape to make the offset for the sign outline. I hand traced it and moved on to cutting the outline. It took a little special sanding to get it all straight and clean, but I was happy with the shape.

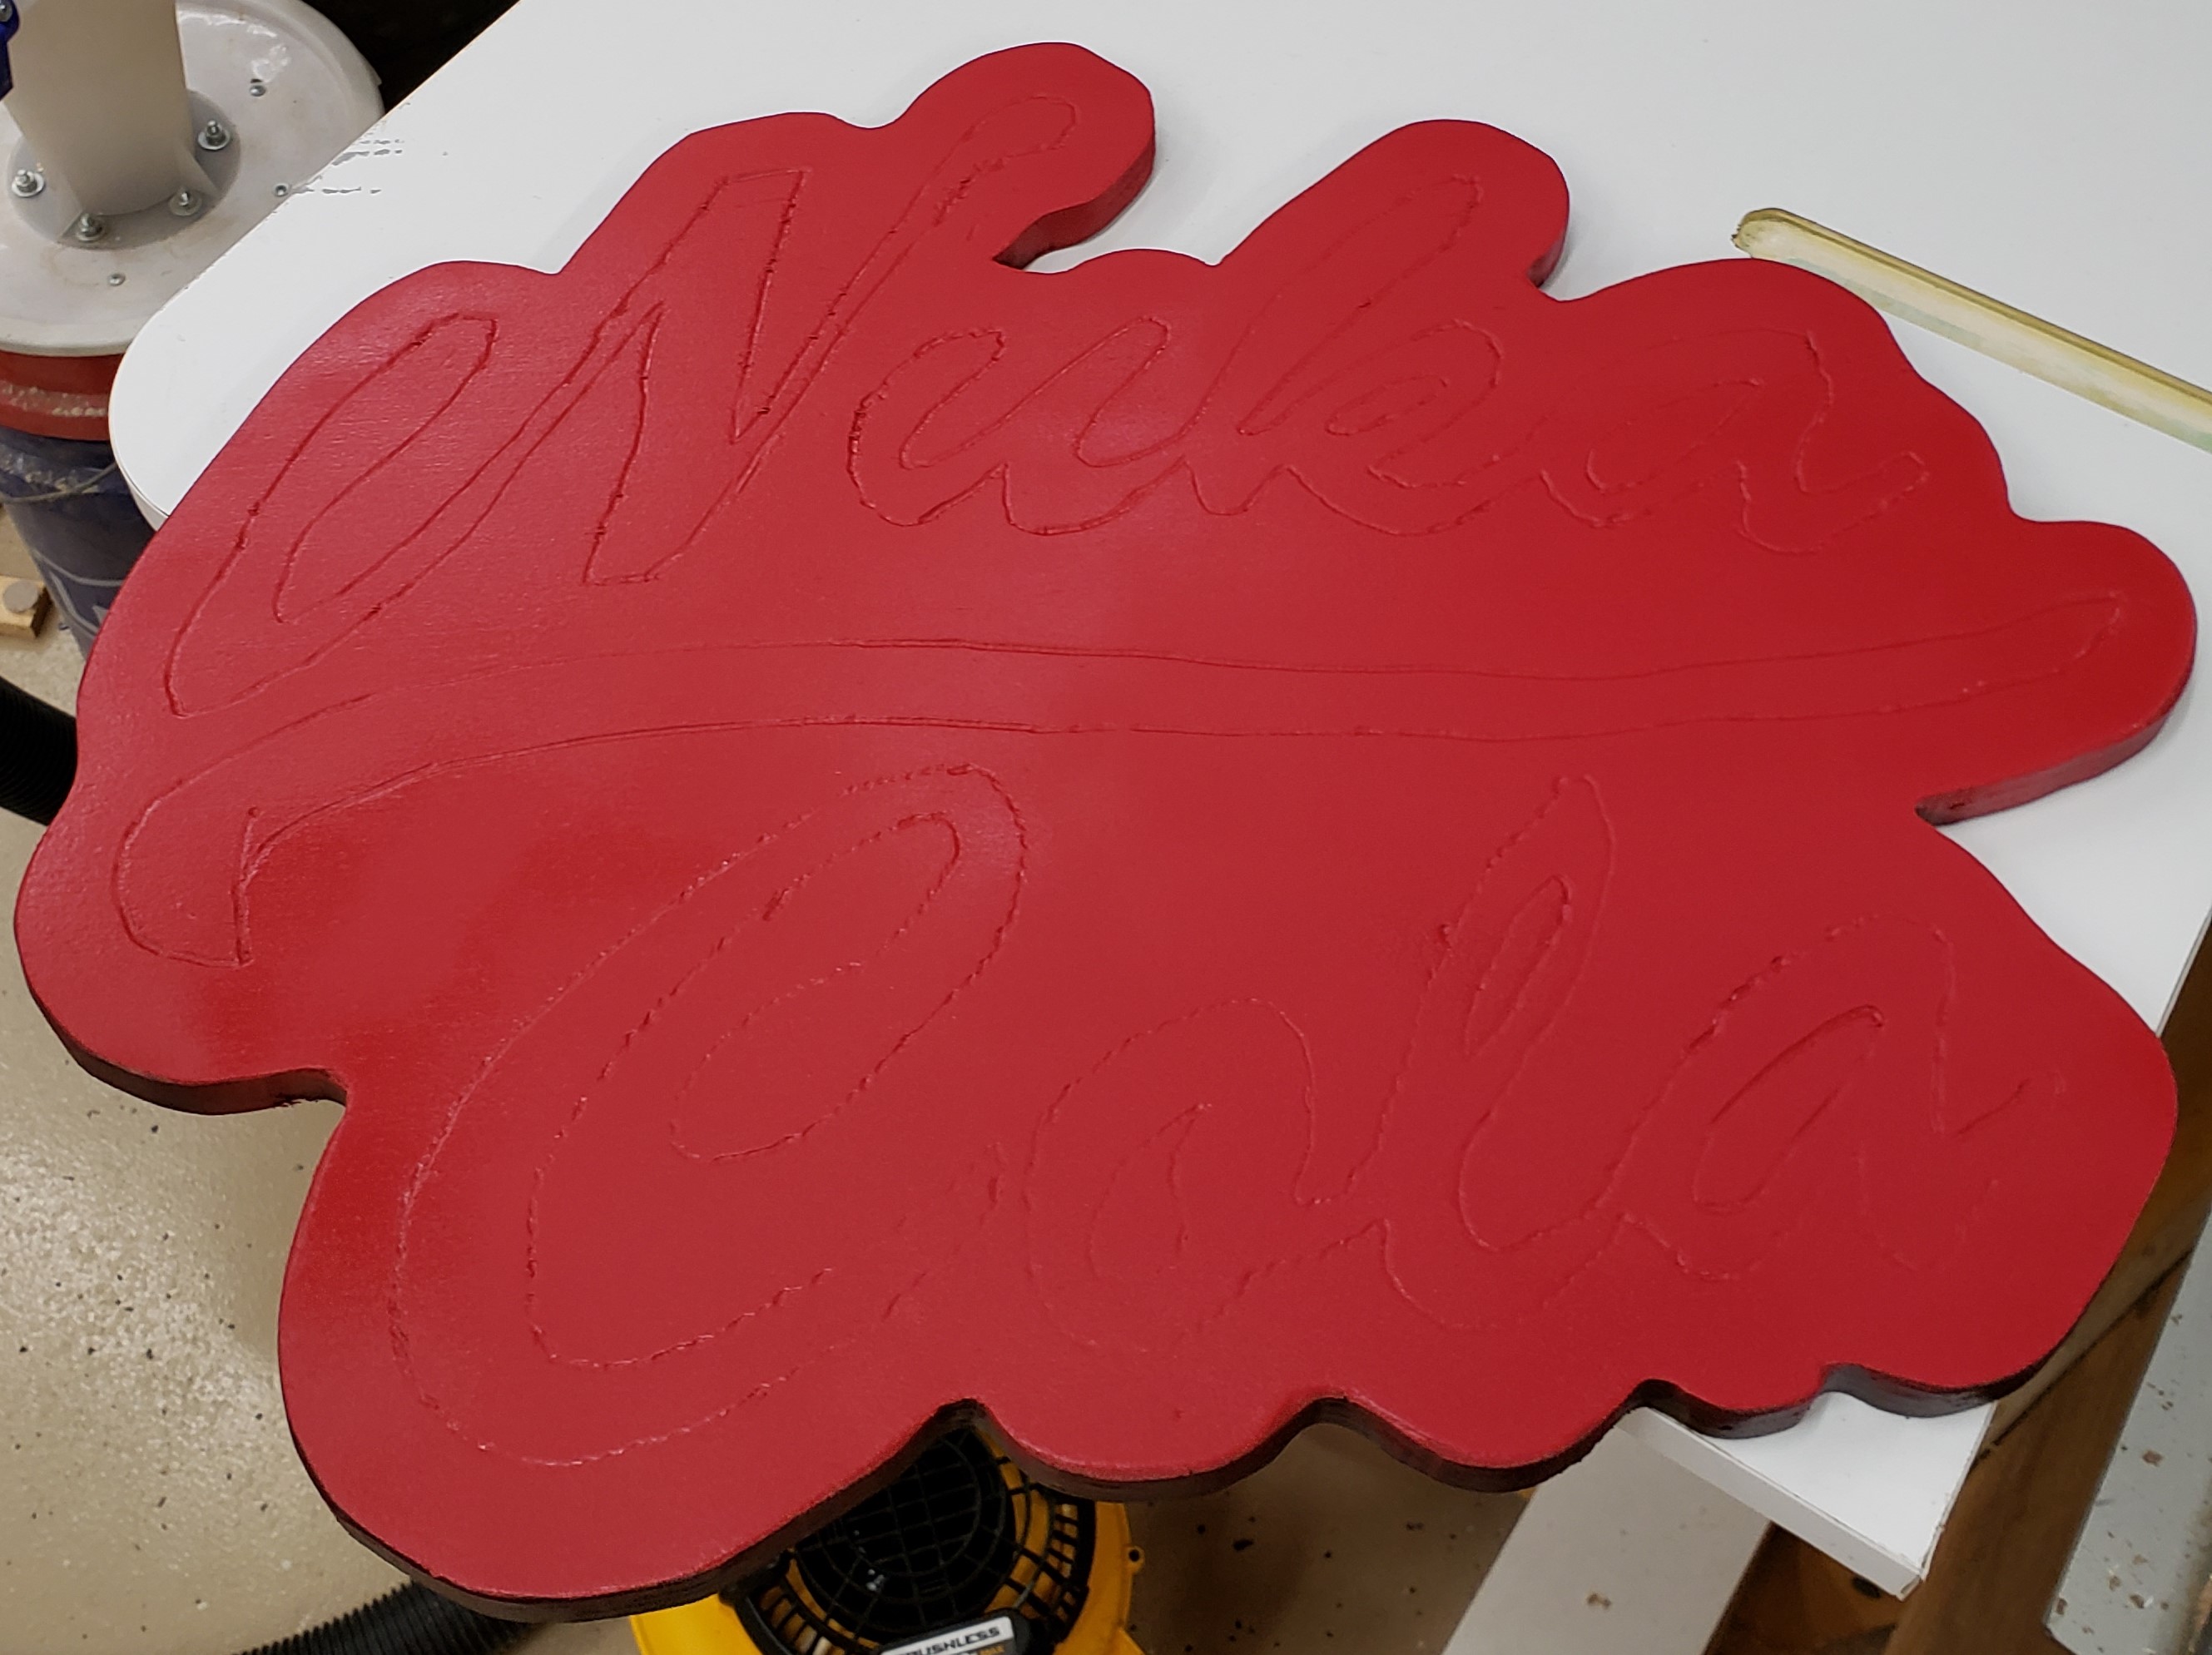
Next came the carving and a bit of an issue. The plywood I used was pretty light and I had trouble seeing how deep I was carving. I started with a small pointy burr, and moved to a much larger, too large, ball carver. Later when I painted it all, everywhere I touched was obvious, and the deeper cuts were obviously too much. Next time I might prime with a neutral color before starting the projection. It will make the pencil line standout better, and make the dremel lines more obvious.

With it painted, the base red coat it might be a bit more obvious how uneven some of the carving is. The jigsaw guy mostly back sprays with black to form a border. I did that too, but the complex shape in a few spots means I will have to go back and do it again after putting all the red down.

With the base of red down, you fill in the letters with white. I went for house paint and did 3 coats. It built up more texture than I wanted, a good quality craft paint might have been better. In the end it didn’t matter that much. The biggest issues was my wobbly carve lines that were too big in places. It kept my edges from being very crisp. It is hard to paint to a clean line when the guide is over an 1/8″ wide. A weathering trick he uses sometimes is to hit the finished product with a wire brush on a drill. Genius, it looks great.
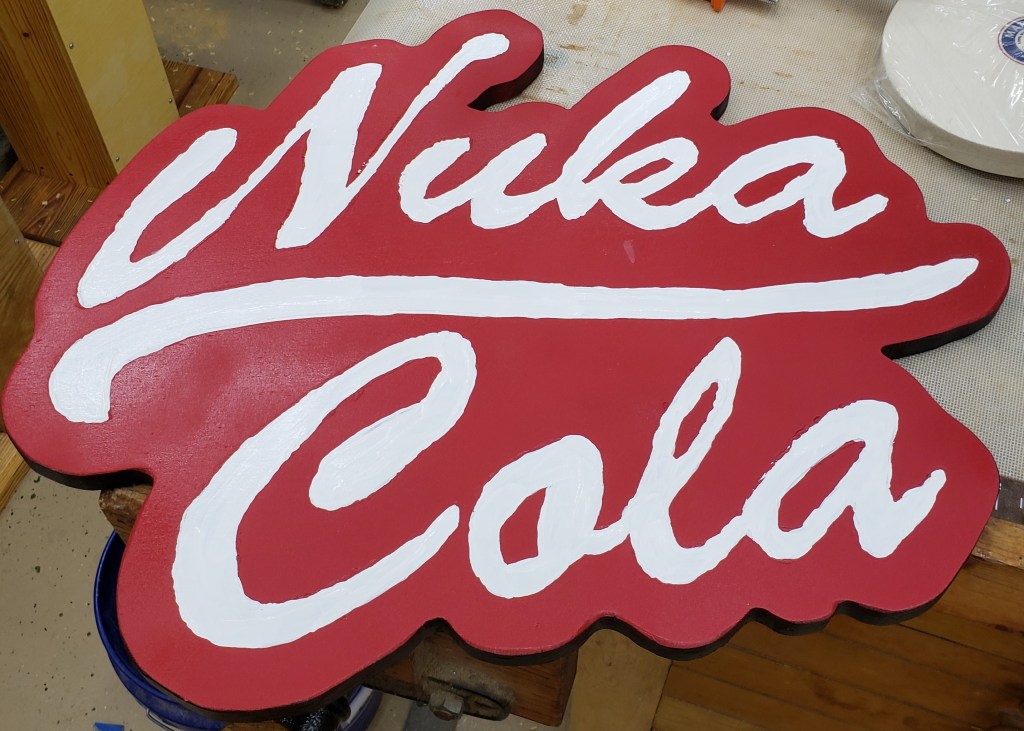
Overall I am really happy with the project, but I need to work on my dremel carving technique and hand painting. I have another sign idea in mind, so hopefully the lessons learned will be applied there. It looks great in my shop next to a metal fallout sign I got ages ago.

Fermented Hot Sauce

I learned about lacto-fermentation a month or two back and have been experimenting with it since. The principle is pretty simple. You cut up veggies of some sort, put them in a jar, cover with water, then add 2% salt by weight of the veggie and water. You can do sauerkraut and fermented hot sauces amongst other things.

My first attempt was with hot sauce. I owe most of my inspiration here from Ethan Chlebowski’s hot sauce adventures. He made 4 different hot sauces with the same ingredients, but different preparation methods. I am doing slightly different ingredients, and using fresh veggies to ferment.

I started with 3 poblanos(270g), 2 small jalapenos(40g) with some of the center removed and a number of garlic cloves(30g). Those all get rough chopped, thrown into a ball jar and covered with water. Weigh all that minus the glass jar weight and add 2% salt to the mix. I picked up lids that allow the mixture to burp the spare CO2, and prevent oxygen getting in. Also there are glass weights to keep the veggies submerged. It helps prevent mold. 9 Days later the jars were cloudy and smelled like pickly goodness.

I want this to be shelf stable if possible. The salt helps keep a lot of things from growing, and the fermentation part has created acid. If it is at or below 3 on the Ph scale, it should be shelf stable for a while. I picked up some test strips just for this, though I bet Ira and I can have a lot of fun with these in a few years. The strip looks to be 3 or less, so we are golden!

Next, you dump everything out into a blender and blitz like crazy. It whips some air in, but gets the mixture smooth. I strained it with a fine mesh strainer to get the chunkiest parts out.

This is where the most fatal flaw of my first batch came in. It is a really watery mixture at this point, and you want it to stick to your food. Xanthan gum is often used to add a little thickness. Check your favorite hot sauce, I bet it is in there. It can go wrong if you add too much though. I had about 500g of sauce, and it was suggested to use between 0.5 and 1g per 250g of hot sauce. Basically a 2-4% mixture. I did just under 2g, very hard to measure with a kitchen scale, and mixed it up in the blender. All set it went to the bottle.

The final grade is about a C-. It has a few major issues. I love garlic, but the raw garlic in this is really forward. The biggest problem is that it is too thick. Xanthan gum can make things kind of slimy if you use too much. I used way too much. The recommendation was not super helpful for some reason. It was ok at first, but after a day, it was a thick, but pour-able, slime. Time for a second version

Major lessons learned:

  • I used two pint jars, one quart would have been more efficient. Less room lost to the glass weight up top.
  • Use less garlic, it goes a long way in this sauce.
  • ~2% Xanthan gum solution is way too much. I need a new way to measure.

Round 2

Undeterred, I set off with a new batch and tried again. This time I altered the pepper mix used. 145g poblanos, 115g jalapenos, 16g garlic. Less garlic and more jalapenos. It all fit well into a quart jar with a little tamping to coax it all down. Fast forward 9 days of hard bubbling and things are looking cloudy and smell right. Same deal as last time, blend, strain, and measure. I was right at 500g again.

This time I was more careful about the Xanthan gum. I would prefer to have it too thin, than too thick. To get a finer measurement, I would have to go for volume. My scale doesn’t do fractions of a gram. Instead, I took a teaspoon of the gum powder and weighed that. It came out to just about 4 grams. I had to add a tiny amount to get the scale to click over. A 1/4 teaspoon should be a gram. I have 1/8, and 1/16 teaspoon measuring spoons. I used the 1/8 one as a safe start. I slowly sprinkled it in while the blender was on low, and it looks like that did the trick.

My newly minted Green Goblin sauce is spicy without slapping you down. You can taste the peppers and a good serving of garlic. It is a little thin, and I might try more gum next time, but this is a good spot to start. The first one foamed more because of the gum, and less this time prevented foaming. I gave away 3 bottles for people to test, and kept one for my own cooking. The green sauce is good, but I prefer red sauces mostly. I will have to track down more peppers and make something different next time.