Salsa Experiment 1

previous post explained my methodology for salsa experimentation.  True to that, I have started with my most experienced version of salsa.  Food processor cut, and pot cook.  I upped the size to make enough for a good canning.  In doing so, I think some of the quantities will have to be altered.  Other than that, the results were good.


Ingredients:

  • ~10lb of Roma Tomatoes
  • 8 Bell Peppers (multiple colors)
  • 2 Onions
  • 3 Bulbs of garlic
  • 1 Bunch of Cilantro
  • 8 Small Habaneros
  • 6 Limes
  • 1/4 Cup Vinegar (evens out heat, and important acid for canning)
  • 1 tbs Cumin

This worked out well and was a very tasty salsa.  I might up the habaneros next time, and cut down on the bell peppers.  It was a little wattery at first, and not quite enough spice.  I am a lightweight on spice, so add a lot more hotness if you are a fire head.

UDPATE: Now that I have eaten a pint or two of this I think it needs fewer bell peppers.  Next time I will drop down to 4-5 peppers and add a few more tomatoes.  The spice starts off mild and has a slow buildup after a while.


Tomato Core and Seed

A small tomato corer or melon baller does a great job of getting the stem end out, and de-seeding.  I find it is best to chop the tomato in half (top and bottom) and scooping out the seeds from there.  It is quick and easy if you have the tools.

Peppers

Peppers are de-seeded by first cutting them in half, and again use a melon baller to scoop out the seeds and white material.  Habaneros have most of their heat in the seeds and white center.  The flesh has some spice, but also a lot of flavor.  Use the baller to remove the center bits and keep the delicious flesh.  Also, WEAR GLOVES!  I had an interesting experience with inserting my contacts a full day after chopping habaneros with bare hands once.  Not pleasant.

Food Processor

The food processor is a wonderful invention of the modern age.  It does have a few issues though.  First, you really don’t want to overload it.  Putting too many ingredients in can cause some to become mush, and others to jump around on top un-chopped.  Every food processor has its limit, so start small, and work your way up until you find yours.  Never use the ON feature either, if you have a pulse button.  Pulsing manually helps keep things mixed up and aids consistency.

When doing salsa, I want some ingredients to be a little coarser.  Putting in only a single pepper, or 2-3 tomatoes at a time and doing a few quick pulses gives good results.  Again, If I threw twice that in and tried it the results would be all across the map.  I quarter the big peppers and onions before putting them in, while the tomato halves get thrown in as is.  Cutting these smaller to start with, might help the processor out.  I will try that in the future.

Cook Down

I cooked down the ingredients for 2-3 hours to concentrate flavor and reduce water content.  We had a party to get to, so some of this got spooned off and offered fresh out of the pot.  The rest was refrigerated and canned the next day.  I have done this a number of times with good results.  Sometimes you just don’t have a whole day to can.

Overall I am very happy with this salsa.  It only took about 2 hours to make from start to finish plus the cook down and canning.  The food processor and melon baller make things go quickly.  The texture is fine with a few monster chunks that didn’t get through the food processor right.  There was a lot of water, but this could have been from the high pepper content.  I would rate it a solid salsa with an easy prep and cleanup.  I think the pan searing will offer a bolder smokey flavor, and the mill might improve texture.  Still, this is a good go-to recipe for salsa.

-Chase

How to salsa… Not the dance

Let me start by saying that I love salsa.  It can be a wide variety of things with different techniques, ingredients, and styles.  I have experimented a bit with different versions of salsa and wanted to document a few key ways to make it.  First off, Pico De Gallo is delicious, but not what I am going for.  Pico is with fresh, uncooked, ingredients.  I am looking for a cooked salsa that I can can (in a jar) for future use.  Fun fact, salsa means “sauce” in spanish!

I am not going to do a lot of ingredient variation in my experiments.  I have a set of things that make a good salsa and want to focus more on the salsa making techniques than the ingredients.  Specifically how the vegetables are chopped or milled, and how they are cooked.  Texture is an important part of eating, and the process of cutting or smashing could release different flavors.  Similarly, the cooking method can impart or alter flavors.  I am going to break up the different techniques into a table and slowly check off each version, documenting as I go along.


 Vegetable Cutting

There are really three ways of getting this done as I see it.  Chopping by hand, food processor, and food mill.  The hand method can provide select sizing of ingredients, and not “mush” anything along the way.  It is very slow, and I like a finely chopped salsa.  That leaves chopping ingredients via a food processor and a food mill.  I have used the food processor with good results, but it can liquify the ingredients too much sometimes.  The mill will be new to me, but promises consistency.  I will be using this attachment to process the ingredients.

Cooking

The raw ingredients have to be cooked.  I have used two different techniques to cook them.  First is to chuck everything into a pot and cook it all down.  Easy, effective, and it mingles the flavors.  This works well for canning, because you have to heat everything up enough to can it safely.  The other way is to sear the ingredients on a hot cast iron skillet before combining.  I have done this with out any cook-down, and it yielded great results!  This would still require some time in the pot before canning.


I made a 2×2 salsa matrix to show how the combination plays out.  Think of it as some sort of salsa round robin challenge.  May the odds be ever in your favor!

Slide1

-Chase

Tomato Sauce (Italian)

I did a small test batch of tomato sauce a while back and was pretty happy with the results.  I tried to go big and make all the effort worthwhile.  While the results were quite good, I made a major mistake in the tomato selection.


Tomato selection is important

The large Tennessee tomatoes I got were good, and very reasonable in price.  There were also quite watery.  Not all tomatoes are created equal when it comes to sauce production.  An article I found after the fact has some good recommendations.   Though we differ on some techniques, I think he has the right idea on tomato selection.  My first batch was with roma tomatoes, and yielded more sauce despite being much less fruit to begin with.


In short, use roma tomatoes.  They are cheap and delicious and make good sauce.  That having been said, the new food mill did a bang up job of plowing through 25lbs of tomatoey goodness.  I am highly impressed with that tool.  I just wish it took up less storage space.  The other win was my tomato coring tool.  It does a fantastic job of getting the tough stem area out as well as any badly bruised or damaged parts.  It is a quick and efficient tool

I did 25lbs of tomatoes, 2 large cloves of garlic, a good haul off my basil plant (~1 cup chopped) and a few tablespoons of dried italian spices.  Next time I will wait till the sauce is closer to being cooked down to add the spice ingredients.  The yield was initially over 10 quarts of tomato sauce.  Once cooked down (8hrs!!!!!!!) to a good consistency, it was more like 3 qts.  That is a lot of water to cook out… never again.  I was going to can, but I think we can eat this as dinner for the week and freeze what little will be left over.

Lessons learned, that is what life is like.

-Chase

Apple Butter

Earlier I turned a pile of pink lady apples into sauce.  Half the sauce got canned and the other half went into the crock pot.  View post here on making applesauce.

The directions I originally got had the whole process taking less than 12 hours.  My first attempt took over a day.  They had recommended going low and being really careful not to burn the apple butter.  My crock pot was obtained well used (thanks mom!) at a garage sale when I got my first apartment.  It is old, at least one decade, and maybe multiple.  At any rate, it appears to run at a lower temp than the Pick Your Own directions would indicate.  Your mileage may vary.


Directions:

  1. Fill crock pot 2/3 full with applesauce, add 1-2 cups sugar and cinnamon to taste.
  2. Add remaining applesauce till crock is full.
  3. Set crock pot to High with lid propped up to let moisture out, stir occasionally.
  4. If you leave the house or go to bed, set to Low with lid still propped.
  5. Sauce will darken and reduce in volume.  Keep going till the desired consistency is achieved.

My crock pot took about 9 hours on high through the day, and then another 8 or so on low over night.  In the morning it looked pretty done.  I left it on low till I could eat breakfast and get around to canning.  It seems pretty forgiving on time, so don’t stress.

The sugar can be varied or removed all together if you are looking for a sweeter or healthier spread.  Cinnamon is a personal preference, but I used probably 2 tablespoons.


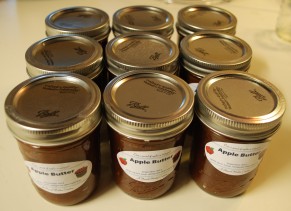
This batch yielded 9 half pint jars of apple butter.  Minus the numerous sample scoops I took for quality control… and breakfast.  The sound of jars sealing once out of the bath is a sound of pure joy!  Happy little pops as the seal comes down.

-Chase


Applesauce

I did a batch of applesauce about a month back, but turned 100% of it into apple butter.  In tasting some of the sauce, I realized how good just it is on its own.  I plan to make some more apple butter with this batch, but first I want some sauce to can for myself.

The short version of making applesauce is this: core and chop apples, boil them till soft, and run that through a food mill.  TADA, applesauce.  Add cinnamon if desired.  It is pretty darn good as is.  Cook it down with a little cinnamon and sugar in a slow cooker for apple butter.  More on that in another post.  More detailed information can be found at Pick your own’s website.  They have good information on canning in general.

Almost none of this requires special tools, per say, but they can help make the job a lot easier.  The one tool that most people don’t have is a food mill.  The food mill takes the boiled apples and smushes/separates the pulpy centers from the skin.  The food mill I have is this model: Victorio VPK250.  I highly recommend it.  For the price it seems reasonably well built, and it can churn through some apples like nobody’s business.  An apple cutter is cheap and makes processing the raw apples fast.

Enough talk, roll that saucy footage.

The water the apples were boiled in smelled great.  I thought it might be worth saving and drinking, but it had only a mild bland apple flavor.  Maybe if I boil it down it will taste more intense.  I should look up how to make apple cider.

Based on my past two runs of it seems to require about 1.5lb of apples to yield a pint (16oz) of applesauce.  This 25lb run filled my crockpot for applebutter, with enough left over for 9 pints of applesauce.  Seems how my canner can only hold 9 pints at a time, this worked out perfectly!  Next time, apple butter!

-Chase

Foyer/Dining/Front Room Renovation

Labor day week was a week of serious labor.  I renovated half of the great room in my house.  It is composed of the foyer, the front room, and a dining room.  The only surviving picture of the previous room shows the green walls.  There were small grey boring tiles in the foyer, and poor quality faux wood vinyl flooring in the rest of the areas.  The vinyl had been scratched by typical wear and the previous owner’s dogs.   About half the walls had some kind of splotchy skip troweling done to them.  It didn’t look good.

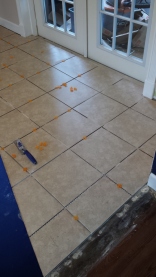
I re-mudded the walls with the texture issue and was able to get them flat enough for most people not to notice.  Various other holes were patched in the process.  Peeling up vinyl flooring is much easier when you rent a machine built for that purpose.  The remaining glue was a mostly hands and knees kind of job.  It took nearly a whole day to scrape it all clean.  Tile and paint went down with out too many issues, just a lot of backbreaking labor.  Last but not least I replaced the dog chewed blinds, all the baseboard, and repainted some of the existing dark wood trim to match the rest of the molding.

All in all it felt like an insane amount of work at the time, but in retrospect always seems worth the effort.  Now I just need to muster the time and energy to tackle the living room and kitchen.  The joys of home ownership!

-Chase