Drill Powered Honey Spinner Demonstration

I have gotten a lot of activity related to my Drill Powered Honey Spinner.  In fact probably 90% of all the traffic I have ever received has been to that post.  I guess it was a good idea!  My explanation was pretty good, but could really be supplemented with a nice video.  I finally found the time to shoot and edit one, so enjoy and thank you for watching.

Father’s Day Knives

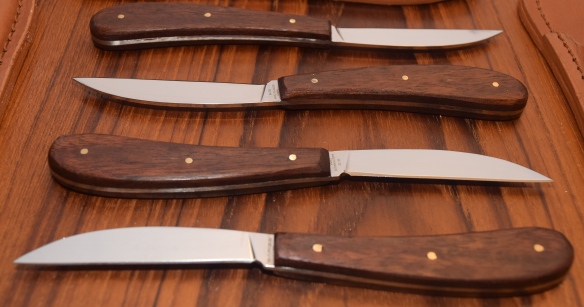
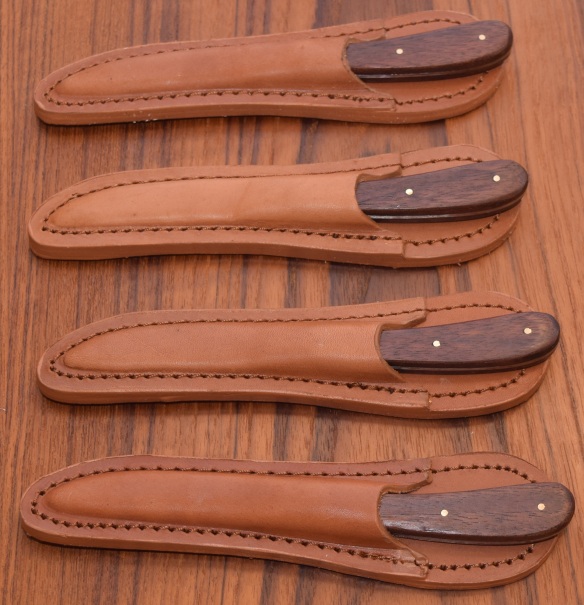
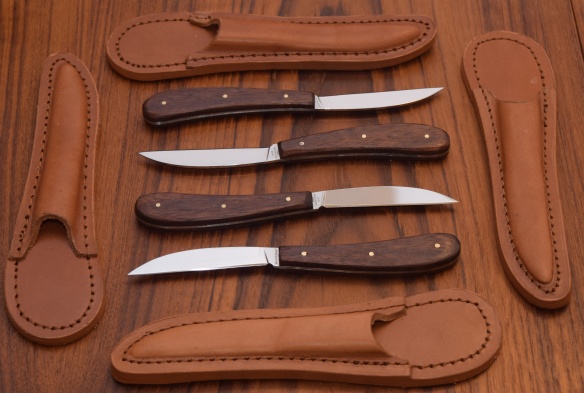
The family wood strikes again.  Mother’s day gifts one and two have already been delivered, and it is time for the dads.  I found these letter opener kits at woodcraft, and they include a blade, leather holster and brass pins.  All you have to do is make up the scales, bond them on, and sand away the excess.  It was actually that simple, and by going really slowly and carefully they turned out great.

I wanted three total.  One for my dad, one for my father in law, and one for me.  This is far enough out of my comfort zone that I bought a fourth kit to build first as a test article.  I have watched enough forged in fire to know that things can go wrong at the handle assembly.  Enter the family wood, and a thin slice via my bandsaw.

I cut down two small rectangles and held them together temporarily with carpet tape.  I clamped the blade on and match drilled the holes all the way through.  Once bonded on everything excess will have to get sanded, so I trimmed as close as I dared with my band saw.  The metal surfaces got a light sanding for bond strength and everything got a wipe down with alcohol.  I used T-88 which has a really long working time and high bond strength.

The next day the clamps came off, everything seemed solid, and it was time for the sanding.  I have a junky harbor freight 1×30″ belt sander.  It rattles and shakes, but really did the job.  First I went over with an 80 grit to remove everything sticking beyond the metal.  Once squared I went to 400, then 1000 grit belts to refine the shape and polish the metal interface.

It turned out really well.  The instructions wanted you to cut the scales to match exactly, then bond.  I figured this way guaranteed that everything fit smoothly, and if you used high enough grit, the metal could be put back to a polish.  I was right!


With one down and finished I had everything figured out to do the other three.  Doing them in a batch made things go quickly and efficiently.

My only point of confusion comes with the pin insertion.  Do you put them in the bottom scale, then install the tang, then the top scale?  It is hard to see if the pins are a little crooked, and everything is sticky with glue.  Pounding them in from the top with all pieces sandwiched means you are hitting the bottom scale’s holes blind.  I tried variations, and still haven’t refined that part of the build well yet.

The last picture on the right shows the first one with a coat of tung oil on it.  It looks good and feels smooth in my hand.  All of them turned out great, and the 4th one was kind of unnecessary.  I’ll bet I can find a worth recipient.
DSC_0288

DSC_0289

DSC_0292

Montreal Vacation

For a fun family trip we decided to head up north to Canada and visit Montreal for a week.  We are both big fans of Formula 1 racing so we picked up tickets and soaked up the sights and sounds of a great city.  What a neat place!  There is a lot of history involved in the city, and they celebrate it with statues and fountains everywhere.

They also posses a lot of public art and structures.  They hosted an olympic games and a world’s fair.  It has left them with some neat places to visit.

The food is to die for.  We ate a lot of great things from fancy restaurants to public markets.  We couldn’t leave without a few helpings of french pastries and poutine.  Cheese curds rock!

We barely scratched the surface with their museums, but did manage to spend some time at one art museum.  They had a display from Pompeii.  It had a lot of artifacts that have been excavated from the buried roman city.  Most interesting to me was the tools.  They were under a lot of construction at the time, so squares and plumb bobs were everywhere.  They were quite skilled with bronze.  Nearly 2000 years old, but some of those tools look serviceable.

Last but not least was the race.  We watched some of the practice, qualifying, and the entire race.  Our seats were near the first set of turns, and we got a great view of the race start.

20160610_104556

Montreal is a great town, and we can’t wait to return.

20160613_151629

Bun-servation Tower

Our bunnies are spoiled.  That much is certain.  They sit in our chairs on the porch constantly, and I think part of it might be that it gets them high enough above the screened in porch edge to be able to see the yard.  So, I built a bunny tower they could climb up in to chill and observe their domain.  It took a few iterations to get it right, so hold on.

First I thought a two level floor plan with ramps coming through the floor would work.  Take some 2x4s, notch them with fun hand tools, notch the plywood and screw it all together.  I wrapped the two levels in 1/4″ metal mesh to keep the buns from jumping out and hurting themselves.

And there it sat for weeks.  No takers.  I made the ramps too steep.  I saw one or two try to climb up, but they weren’t able.  Eventually I relented and made a longer gentler ramp for the first level that entered at the edge instead of the floor.  That went over well.

I couldn’t figure out how to save the top, so I eventually cut it off.  The ramp has a cleat every 4 inches.  I started with that, but they would slide on the plywood in between the cleats.  I added non-skid tread material in-between the cleats and they seem to be able to handle that really well.

wp-1465001666874.jpg

It is less of an eye sore with the second floor removed and the new ramp is working well.  As a bonus, I set the top section down, and they started using it.  We moved it back from the edge so they wouldn’t try to jump through the screen.  They have been using their carriers as a step to get on top.  I guess I should have gone with stairs instead of a ramp.

wp-1465001666869.jpg

In short, if you are going to build something for your buns, they are going to disapprove.  Just get used to it.  Aside from that, do any ramps at no steeper than around 1:2 rise to run.  My first ramp was closer to 1:1 and they couldn’t do it.  Use cleats and non-skid to help their feetsies.  Last but not least, they will chew on everything you make, so keep that in mind.

I am Tyrion the bunny, and I approve this message

wp-1465001666873.jpg