Meet My New CNC Router Mill, Limit Switch and Lighting Upgrade

Many moons ago I had a shapeoko 2 cnc router/mill, and loved it. The tool chain was horrible, but it was my first CNC device. I created all sorts of things with it until I got my 3D printer. My attention was diverted due to printing’s ease of use and versatility. Eventually I forgot all the feeds and speeds and tricks for using my shapeoko. The learning curve was steep and I never got around to it. It got sold when I found out we were having a kid. Fast forward 2 years later and I stumbled into where CAM and mill control was in the modern era. Things have improved a lot in the 8 years since I first picked up a mill.

This is a 3018. Stock the way I got it. There are many versions out there, and this one is the prover from sainsmart. It was a good deal around christmas, so I broke down and got one. Out of the box it does a decent job, but there are a few issues. There are limit switches you can install, but they reduce the travel by an inch in either direction. Pretty bad when the thing moves less than 7×11″ in the first place. It could use lighting, and their touch probe is way too thick. I’ll fix it.


Y Limit Switch

I’ll start with the Y limit switch. Y is front to back if you are looking at the device. Underneath, there were tapped spots for you to put the limit switch. It hits up against the bearing blocks to trigger the machine to stop. With those installed you get a lot less travel.

Instead I found some tapped holes that are off to the side but unused. I printed a bracket to hold the switches out of the way of the bearing blocks.

With that installed I printed a stop block that would activate the switch. The base plate is 30×30 aluminum extrusion, so an appropriate T-nut let me fix the block in place. I have it set to stop the stage right before the bearing blocks hit. I could have milled the switch mount and stop block, but am much faster with 3D printing right now.

Switch installed
Switch activated by stop block

X Limit Switch

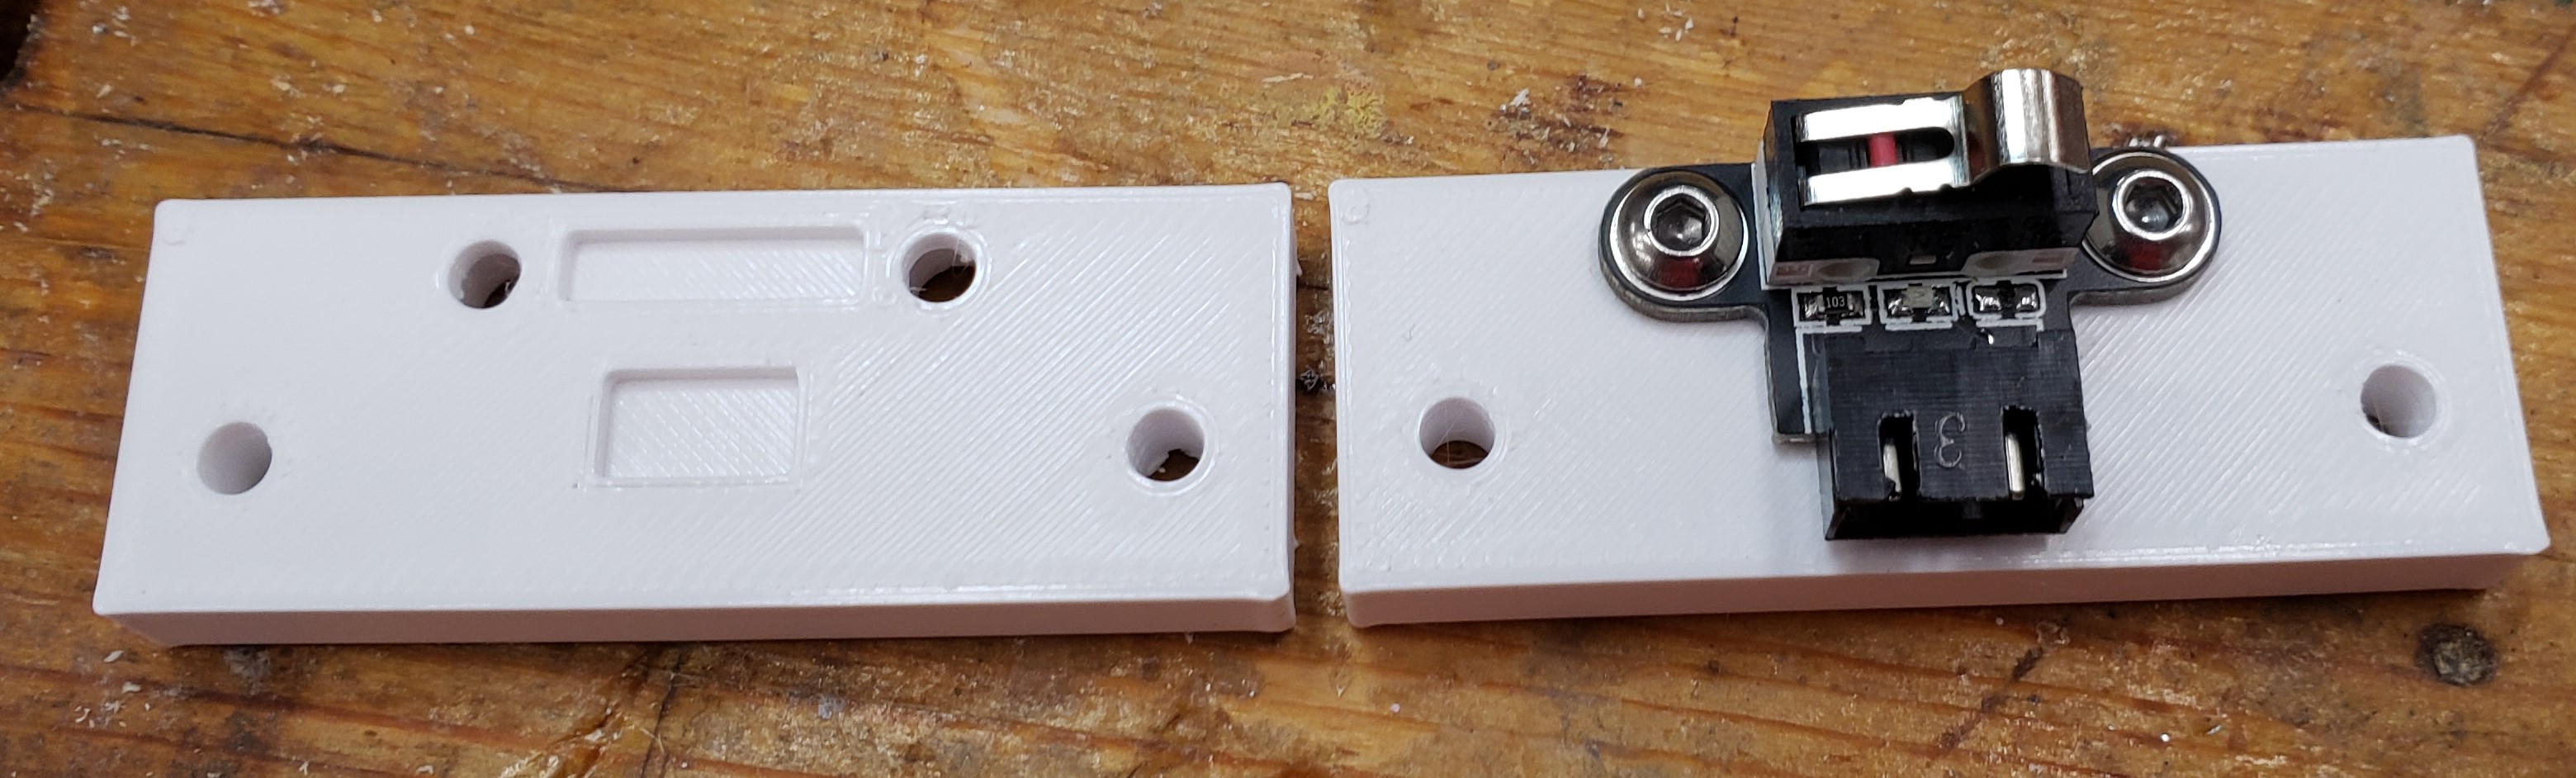
The Y limit was pretty easy, the X limit is going to be more invasive. Again, the position they want reduces left and right travel. I printed a tight spacer to keep the contacts off the aluminum side wall. I want the switch at the same height, but moved towards the back of the machine. I’ll drill and tap the side walls to mount my switches. I have to do it from the outside because I can’t get tools in around the extrusion and lead screws. Here is a switch temporarily installed with one screw on the outside.

I drilled and tapped the first hole, installed the switch, used a center transfer punch to mark the second hole’s location, then drilled and tapped that.

To make a stop block I drilled and tapped the back of the X carriage and installed another 3D printed block. The Z stops came pre-installed, and I didn’t see any way to modify them that would get me more travel. They let the stage use almost all of its small travel. My last mill never had limit switches. Now I can automatically home the machine each time and drive around without fear of impacting an end.


Lighting

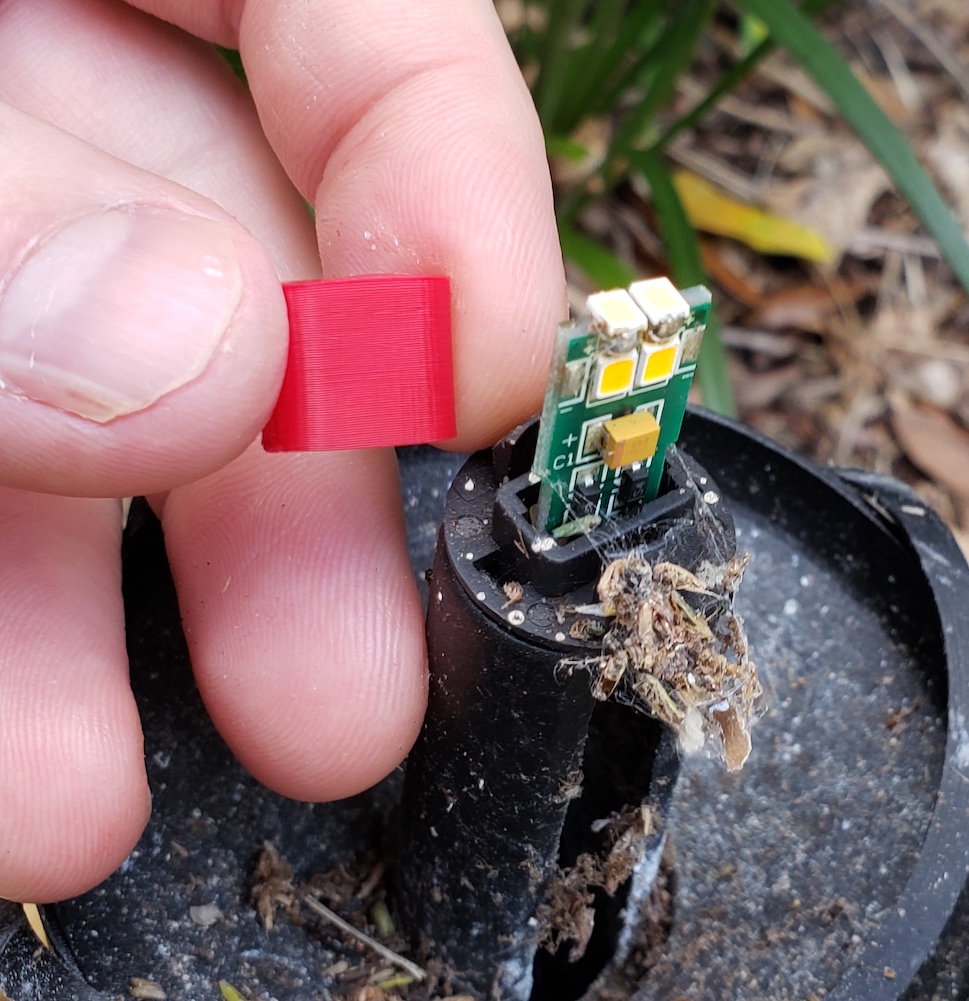
All good devices need a bit of disco lighting. Or at least something to tell you when the power is on. Power and USB are different, so you can be chatting with the USB, but having nothing move because the power is off. To remedy this, I soldered some leads onto the 24V input power switch. A buck converter dropped that to 12V to run my LED strips. The wiring is getting mess, but I just bonded the buck down to the outside of the electronics cover. It got its own little 3D printed cover (not shown).

I used 20×20 twist in t-nuts to mount the c-clips that came with my LED strip housings.

Here is the tool with the lights off and on. It kind of blows out the camera, but the extra lighting is really helpful to work with in person.


New Touch Plate

Last but not least, I made a new touch plate. The one it came with is pretty darn tall and you have to clip the positive lead to the router bit. Mine is 1/8″ brass, and I soldered the other side of the lead onto the motor housing. I don’t have the Z-travel to use their touch plate in most situations, while mine always slides in.

Original (left) touch plate vs my new one (right)

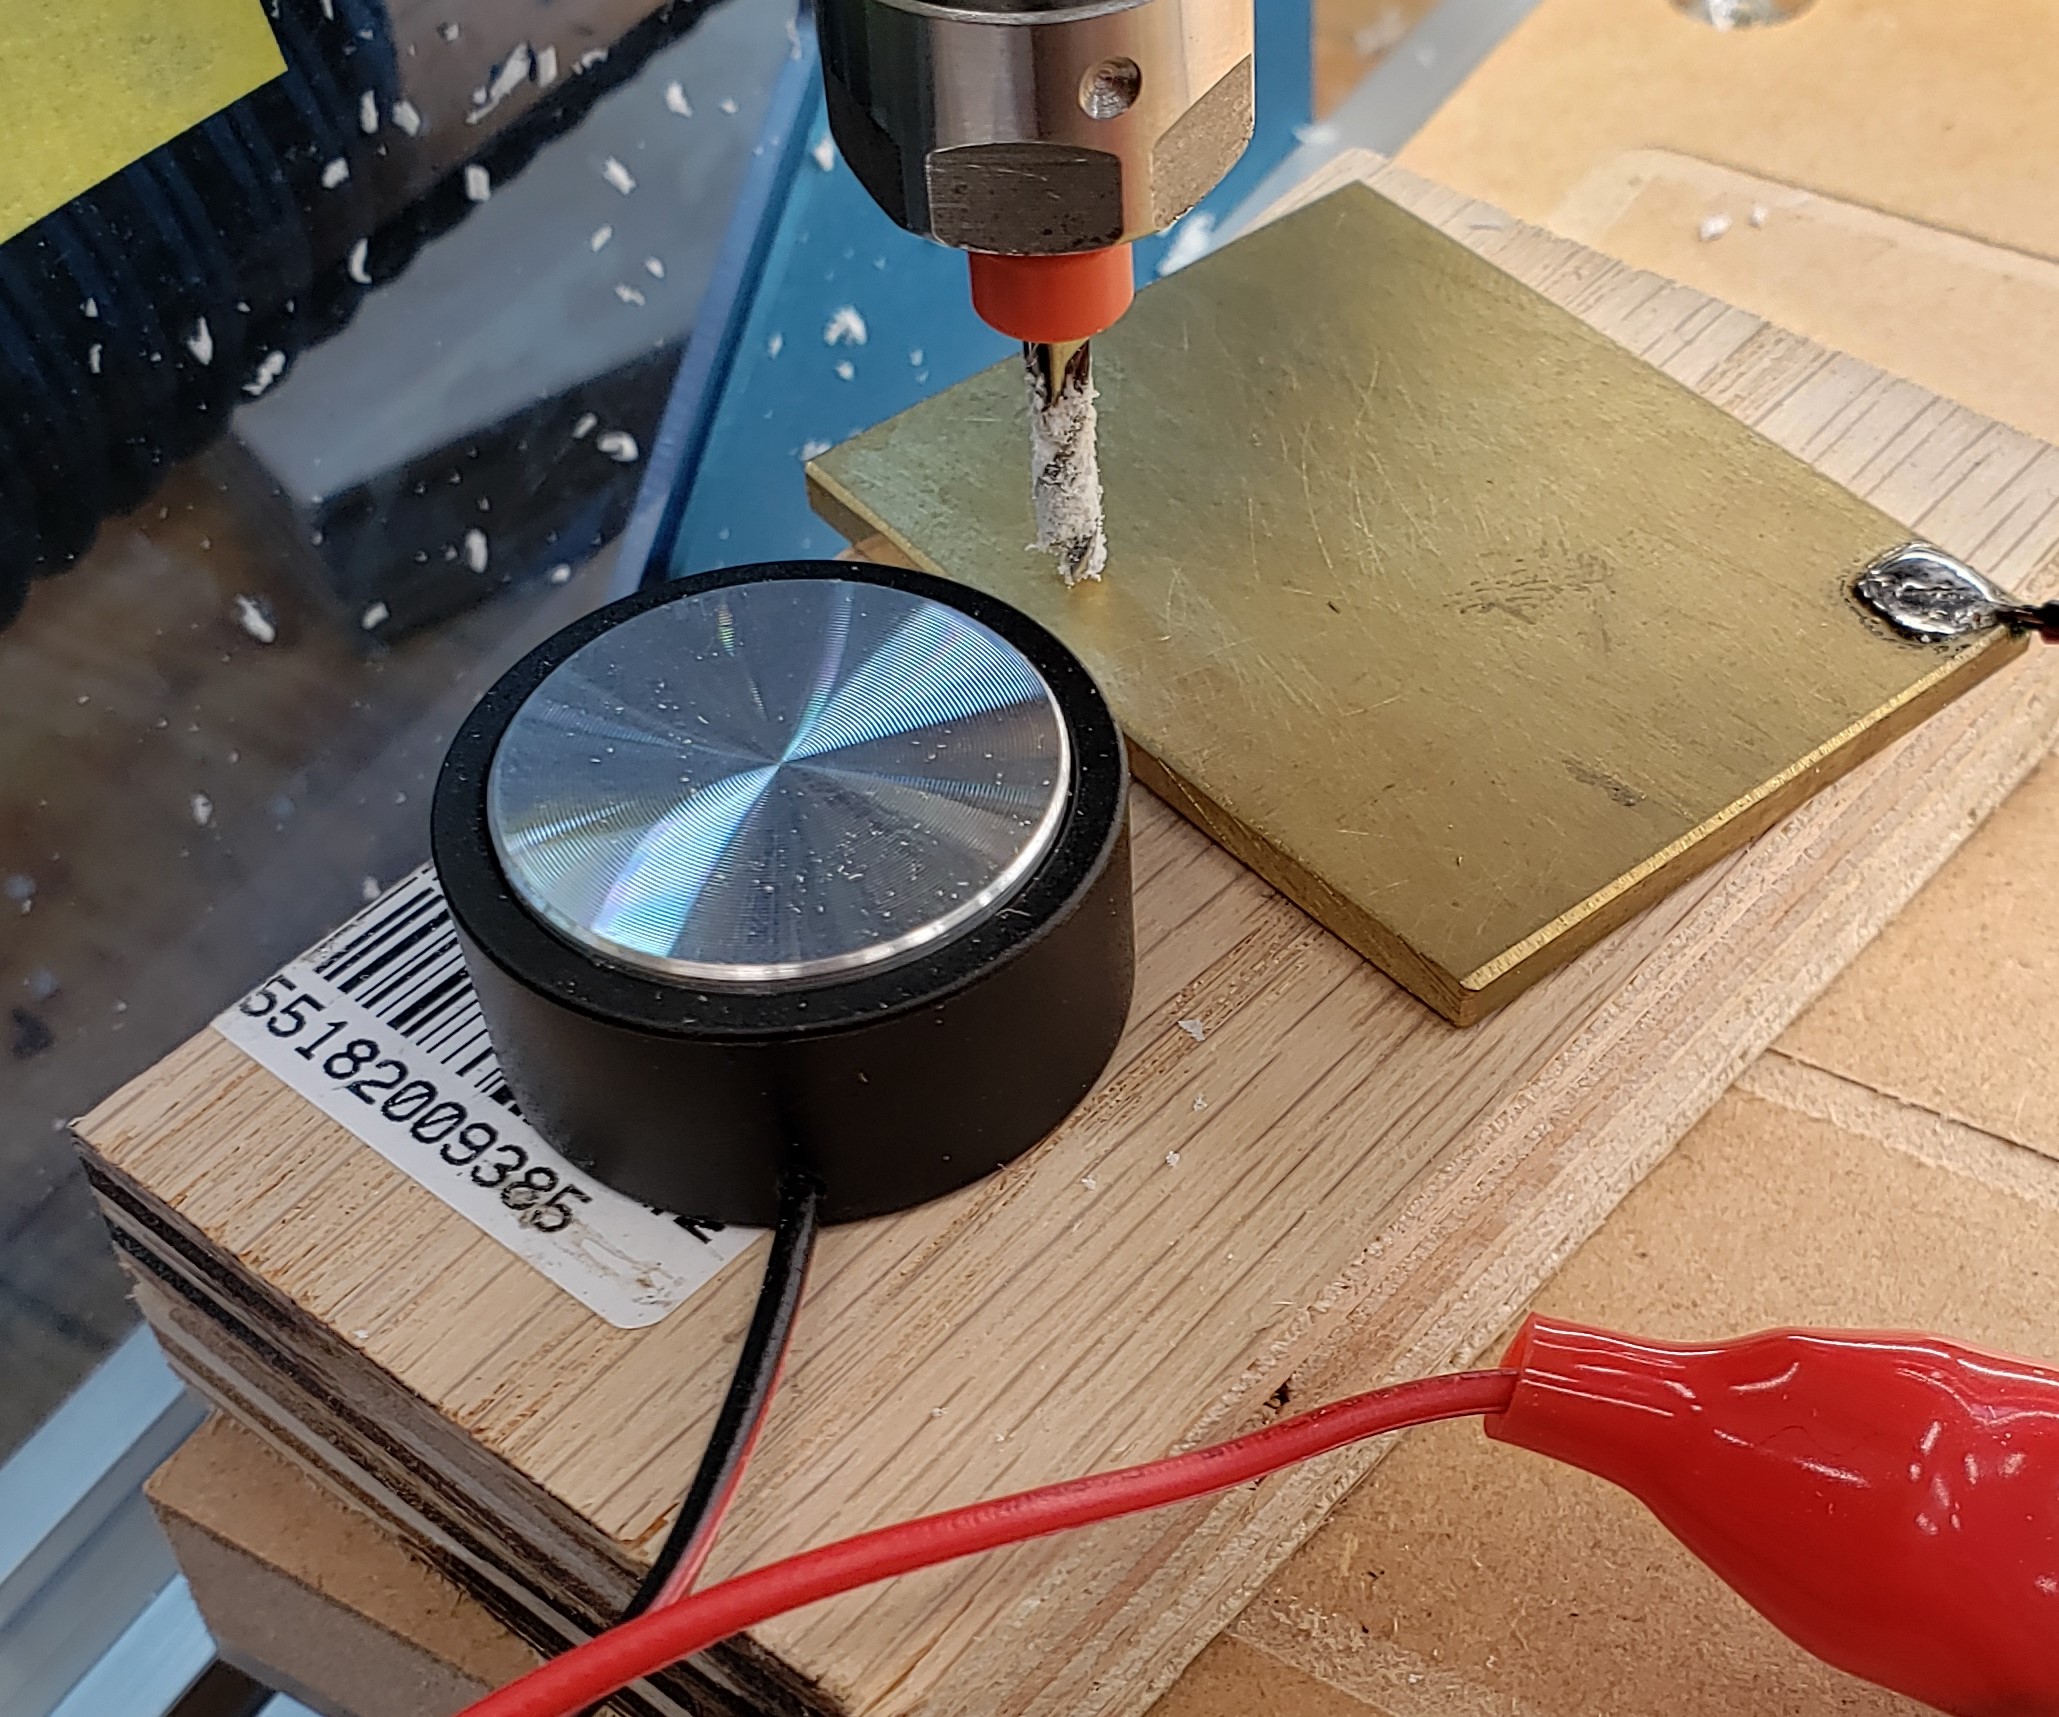
To keep it close and handy I milled a little holder out of some PVC material I had. I could have printed this, but it was a good mill exercise to get used to fusion 360. I have a long ways to go, and spend a lot more time on the CAM to cut this shape than I would on the slicer settings to print it. Now I can accurately find the Z distance between my bit and work piece. This is a big helper that my last mill never had.

Holiday Lighting

This is the second Christmas at our new house. Last year I didn’t get much decorating done because of how much there was to do still. This year has us in better shape from a maintenance standpoint. Last year I started with some printed cones to go around the carriage lights. I also had little inserts that went in the small lantern yard lights. I didn’t document those last year. This year I added the spotlights to the mix.

Cone Shades for Carriage Lights

I 3D printed some cone shaped shades that go around the LED light bulbs in our carriage lights. CFLs would likely be too hot for PLA plastic, and incandescent bulbs would melt everything for sure! They are a single layer thick which you can do with the vase setting on most bits of slicer software.

A single layer thick is going to make them delicate, but they spend most of their life in storage or hanging off a bulb. I printed enough to do all 3 lights as orange for halloween and have the two by the garage be red and green for Christmas.


Lantern Lights

I replaced all the incandescent landscape lights with LEDs really early on. That gave me the ability to add a color hood to each one. These also were a single perimeter width so they would be thin enough to let the light through.


Spotlight Colors

Instead of doing 3D printing alone I picked up some color gel plastic to filter the spotlights in our front yard. I figured this would handle the heat better and let a lot more light through. I printed rings to go around the LED spotlight bulbs. These were glued down to the light gels with E6000 and trimmed once cured.

The results were pretty spectacular. Our icicle lights are overpowering when shooting with my camera, but everything looks really cool. Lots of color all across the yard and front of the house.

At least it DID look good for the first few days. I noticed the reds were looking really pale. I pulled a few of the filters off to inspect. The reds must absorb more than the greens, it completely bleached the gel filter right where the emitters were. The green one got hot enough that the printed part deformed and stuck itself to the LED bulb. Clearly this is going to need a re-think. Next year. It is well after Christmas and I haven’t sat down to work on a solution yet.

I did print a canister that holds all the piece parts for next year. The cone lights stack inside each other to be really compact. The lantern bulb covers are tiny and jingle around the bottom. The spotlight filters are junk at this point, so they don’t need to be stored.

Kitchen Renovation Part 2

Welcome to Kitchen Base Camp Charlie.  It is starting to really look like something now!  The cabinets were not installed by me, so I can’t take any credit there.  I did install the lovely plywood countertops though.  The real countertop guy isn’t going to show up for weeks, so we had to make due.

There was always a light over the sink, but I tied in two more lights under the cabinets that flank the sink so they are all on the same switch.  Very bright now!

Similarly I ran wiring so the two lights over the microwave are tied in with the pantry and lights over the stove.  Now, with the switch for the stove and the one by the sink you have a considerable amount of kitchen lighting without even going to the main overhead lights.  It is a nice place to be with a lot more storage than before.  I’ll let the pictures do the rest of the talking.

Kitchen Lighting Upgrade

I have made the first salvo in the kitchen makeover war.  It needs a better name.  How about instead of the war of the roses it could be the war of the spatulas?  Any who, instead of leaving everything for the two weeks or so I will be doing our kitchen renovation, I am tackling small jobs that are easy and won’t involve a lot of backtracking.  For example, some of the lights can be installed now and left in place throughout the renovation.

First, what did I have to start with?  A fluorescent tube set over the sink, a hanging light trifecta over the stove, and on the ceiling, a spot light array.  I did the one on the ceiling a few years back, and the one over the stove when I first moved in.  The stove one looks nice, but doesn’t provide the best lighting.  The ceiling one is bright, but kind of harsh and the color temp isn’t great.

For above the sink I went with an under-cabinet LED light.  I want to put lights under the cabinets to the left and right of the sink.  I figured using the same light over the sink and under the cabinets would tie together well.  I found some with a good color temp and really high CRI.  I installed one as a test.  I love it and bought the rest of what I will need!  There is going to be a second one under the window, and one under each cabinet all connected to the same switch after the cabinets get installed.

dsc_0557

I went with a matching set of lights for the ceiling and over the stove.  They are the same style from the same company with 4 lights over the stove and 6 on the ceiling.  Frosted spot lights directed most of the shine downwards over the stove, while regular bulbs were used in the ceiling.  The modern “daylight” LED bulbs are amazing!

20161111_205007

The kitchen is already nicer to work in.  Next will be an early appliance delivery.  After that, I am out of things to do before starting a full kitchen destruction in ernest.