Modular Buffer Stand

While I was building my Anvil Stand I was also building this buffer stand. I love my bench grinder stand to death, and want to have my other grinder setup as a buffer full time. I read about a chisel sharpening technique called unicorn sharpening, and it calls for a buffer. I tried it, and it worked well for me!

I made a basic box shape out of 2x8s (pricey these days) and attached them to a piece of 2×12 left over from the anvil stand as a base.

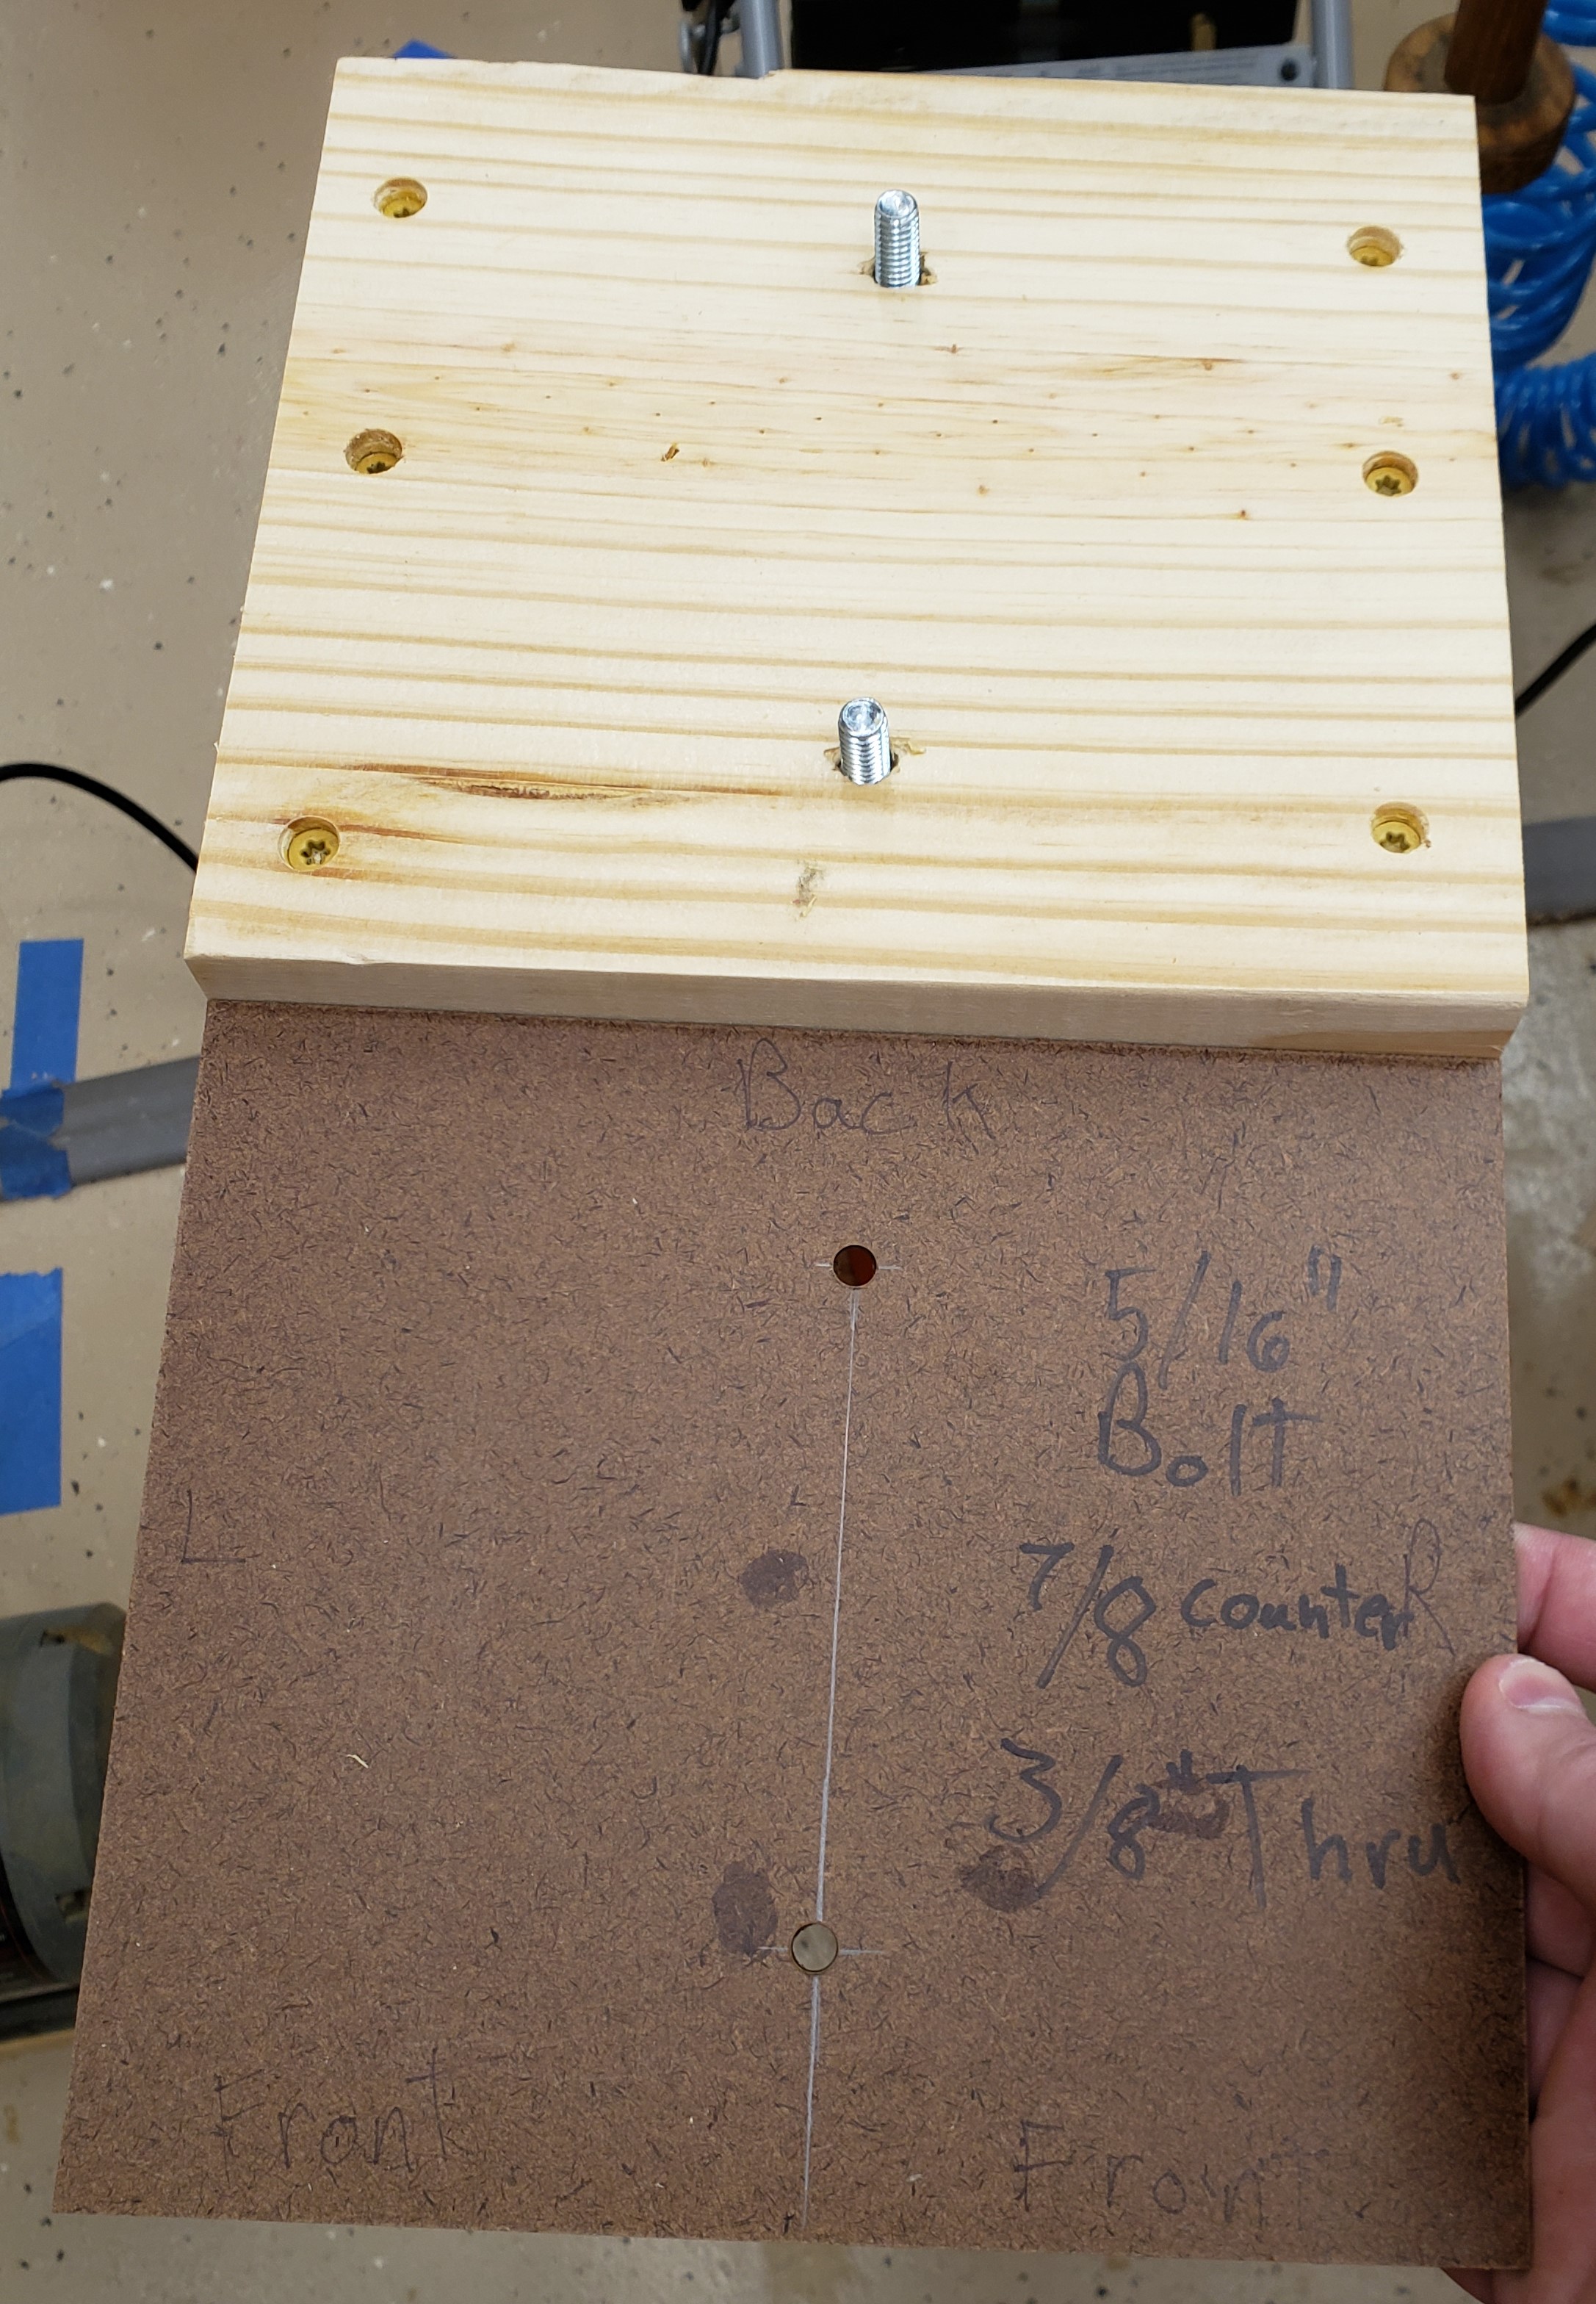
For the top I made a template out of hard board and labeled it with the orientation and hole info. Every tool base base that goes on top will have two T-Nuts embedded in them so 5/16″ bolts can come up from underneath to attach. That way you are always 2 bolts away from taking a tool off an installing a new one. I keep the template attached to the back of the stand so I can easily add new tools in the future.

Like the bench grinder stand I clad the cavity in plywood and filled it with sand. This shot is of it 2/3rd full, I had to go back to the store and get more sand because of all the filled projects I have been working on.

So I don’t have to go to the toolbox and remember which wrench is the right one every time, I made a palm wrench that fits the bolts. The bottom is rounded to make it easy to rotate in your hand for fast installing, and the outside hex shape lets you get good torque on it. A print like this can be surprisingly strong without any modifications and only 20% infill.

The buffer is all ready to go and looks great. It is weighty and stable while in use. I only have one tool attached now, but might get another grinder or buffer in the future. When I do, I’ll make another base and hang the unused tool off the side or back of the stand. Boiled linseed oil finished everything off.

Bench Grinder Stand

My workbench has seen heavy use with lots of projects coming and going. I wouldn’t change a thing about it. My one complaint is that the bench grinder gets used so much it is always attached. Bench space is consumed, grinding grit and junk is often covering the work surface and vibrations tend to shake things off the table. Time for a dedicated stand. I had a pretty good idea of what to build in my head, but took this as an opportunity to practice drawing. I drew a few versions, a full assembly process (I found a better and worse order of operations when doing that), and finally tried to do a few perspective drawings. My ability isn’t great, but practice makes perfect and the process highlighted some minor issues with my original idea.

I picked up an 8 foot 2×8 and started cutting out a basic stand. The very bottom is a 2×12 bit of scrap I had that was about the right size. I screwed it all together and placed a long section of 2×8 on top to hold the grinder and an adjustable tool rest. I found some rubber pads to put on the bottom to keep the stand from walking around and cut down on vibrations.

To keep this thing in place I wanted to add a lot of weight. Sand is about the best thing I can think of that is dense, cheap, obtainable, and easy to store. It is about 100lb per cubic foot in density, and costs <$5 for a 50lb bag. Screws and silicone calking hold plywood to the uprights, making an open topped box shape. The space accepted a full bag of sand. A piece of 2×8 and just sits on top of the sand in case I want to empty it out at a later date.

I bolted down the grinder and attached a veritas tool rest that was previously on a small hand operated grinder. I think it will serve me better here on this highly used tool. The stand is a good height, access is easy, and the weight keeps the vibrations down.