New Garage

We have been moved in about a week, but have spent all of that week cleaning up our old house to get it on the market.  Almost all the renovations that happened on the new house occurred at such a break neck pace that I didn’t document much of anything aside from a choice disaster.

That having been said, I wanted to say goodbye to my beloved garage.  9 years ago I moved in without owning a power tool bigger than a compact miter saw, and with less than a year of woodworking experience.  I added electrical outlets, lights, and a lot of sawdust to that place.  Many mistakes were made and lessons learned.

This slideshow requires JavaScript.

It was a packed mess, but I knew where everything was (mostly).  The new space is over twice the size.  You couldn’t tell in these shots because I had a temporary work bench setup for house renovations, tools everywhere, and the movers were pushing things in off the truck.  It is a tough place to navigate.  There is some built in shelving that helps for now, but might need to come out.  Also the previous owner had an office setup along the one wall.  Probably not going to stay in the long run.  Going to need to get the old house cleaned up and unpacked inside before moving onto the shop.

This slideshow requires JavaScript.

Plumbing Nightmares

I actually had a nightmare the other night about paint.  We owned a house and for some reason had cut out a huge part of a wall, but were going to put it back ourselves (lots of drywall work).  I looked at one of the remaining walls and the sheen of the paint used was all over the map, flat to gloss.  Someone started painting and accidentally mixed in streaks of black and other colors.  I awoke from that nightmare into one that might be worse.  A broken pipe in the wall.

The new house’s two spare bathrooms have pedestal sinks.  They look fine, but as I found out are dreadful to work on.  I think they must install all the faucet and drain hardware, then move them into position on the stand.  My simple faucet switch out turned into a total sink removal.

20180831_202009

But wait, there’s more!  Every supply valve in this house leaks when you touch it.  The valves are CPVC pipes with some kind of copper washer crushed on.  Impossible to remove.  In trying to get the valve apart so I could cut close to that copper washer I broke the cold line off in the wall.  This was at about 8:30 at night.  Crestfallen doesn’t begin to describe my state.

20180831_205919

Yeah, this little guy right here.  I don’t trust CPVC any more, and wish they had used copper instead.  I cut a hole in the wall and inspected.  The next day my oscillating multitool and I had made a big hole in the wall and repaired the pipe.

20180901_094540

Not exactly gorgeous, but no leaks and I could have the water turned on again.  With this big gash, reinstalling the pedestal sink was not going to happen.

20180903_110715

We picked out a nice little vanity that matched the rest of the bathroom to replace it.  The pedestal sink was high enough that a lot of drywall mudding and painting had to happen before the new vanity could be installed.  Friday night I broke the pipe off.  By Monday I had the pipe repaired, the wall patched primed and painted, and the new vanity in.  That is what a long weekend can do for ya.

In the mean time we removed the other bathroom’s pedestal sink and replaced it with a similar vanity, replaced both toilets, and took care of a half dozen other small things.  It will all be over soon.

New House, First Meal

We successfully bought our next house.  The renovations have begun amid work and a million other things.  I was digging through pictures and found the first meal I ever had at my current house.  The first meal at our new house is a lot better, and the surroundings are nicer too.  What a difference 9 years makes.

IMG_0876

20180807_113903

Sawhorse Sheet Goods Table

UPDATE: This setup served me well for about 6 months, but died this weekend.  When assembled it is a really sturdy platform.  Disassembled, the brackets are weak and prone to bending.  During the assembly process they are easily damaged as well.  I don’t regret having built it, but will be doing sheet goods differently in the future.

I will need a temporary work surface when renovating the new house, and have a lot of sheet goods and drywall to cut up.  I thought about building some sawhorses and adding on to them, but I don’t have much time.  Instead I started with two of these Burro branded horses.  Honestly, for 20 bucks a piece, these things are pretty good.  Made in USA, stackable, stable, and strong.  Just make sure you are choosy, not all were created equal.  Explaining the build will be easier with a before and after shot.

I want to put a full sheet of plywood or drywall on these and have the cuts be well supported.  That would require a structure almost a full 4×8 feet.  I used metal brackets to help it be a quick assemble and break down job.  Two 42″ 2x4s go across the saw horses.  The saddle brackets keep them upright and a right angle bracket on the edge holds a long support to tie the two horses together.

DSC_1411

Every time I use these as a cutting surface I am going to cut into the 2x4s a little.  I will adjust blade depth to minimize the damage, but I don’t want metal anywhere near the top surface.  The brackets that hold my middle support were too tall, so I cut them down.

DSC_1416

The table breaks down into 2 stackable horses, 2 supports that go on top of the horses, 2 long ones that go from horse to horse, and a center one to help prevent sag.  The only extra screws needed for assembly are at the four corners where the long stretchers meet the supports on top of the horses.  I made sure to install the screws low so the saw won’t catch them.  The horses still stack, even with those saddle brackets installed.

When I assembled this I didn’t screw any of the 2x4s down to the horse’s saddle brackets.  It all still felt stable.  A half inch sheet of plywood and a few screws should turn it into a sturdy temporary work bench.  All the drywall cutting I need to do will be aided by this big stable platform as well.   The assembled dimensions of the top are 44×84″.  Enough to support a 4×8′ sheet, but leave some room at the edges.

When the house work is done I will probably keep it as a way to break down sheet goods.  This will be a big upgrade over my current method of hanging them out of the back of the suburban.

Goodbye Garage

The wonderful wife and I are pulling up roots and moving.  Not far, just a few miles away, but our new dig will be bigger and better than ever.  I have lived in my fixer-upper for 9 years now and the time has come to move on.

When I moved in I had few tools and not much experience.  I ended up renovating the whole house and developing a strong passion for woodworking along with more tool junk than you can shake a stick at.  The garage has seen a lot of my screw ups and disasters, but with that, a lot of learning.  It has been a slow organic work of progress.  That and mostly a huge mess.

I started packing up right after taking these pictures and finishing off my drill press rebuild.  This is why I was so interested in it being mobile.  It was a little sad to start undoing all my hard work that got this shop to where it is.  To offset that, the new garage has over twice the square footage of my current one.  Lots of exciting posts to come in the future about new house renovations and shop setup.  Until then, goodbye old friend!

DSC_1403

DSC_1404

DSC_1405

DSC_1406

Hurricane Season Start

Hurricane season hasn’t started yet, but we already have our first named storm of the year.  Happy hurricane season everyone!  As of writing this it is still subtropical (I guess for specific weather nerd reasons it isn’t called a tropical depression), but expected to become a tropical storm.  As a wise guide once stated, it is never too early to start thinking about getting yourself ready for the storm.

I went around and found a few minor issues that could be a big problem if a storm were to hit.  These are easy to do now when I have free time, but would be stressful to complete when a storm is coming.

First up on the list, my screened in porch is getting old and one of the vertical supports broke loose.  It doesn’t hold the roof up, there are 4×4 posts for that, but buffeting winds would do a lot more damage with this part flapping around.  A few right angle brackets and metal screws secured it in place.


Second, I have a set of areca palms that have gotten too close to the house.  I probably shouldn’t have planted them that close in the first place, and might cut them out completely when they start pushing out the fence.  For now, I like them, but need them to be away from the house.  Again, under normal storms they aren’t a problem, but heavy winds could whip those fronds around enough to do real damage to the corner of the roof.


Last but not least my poor fence had another post shear off.  Not sure why they all happen on just this one side, but they do.  The left picture shows a distinct bend.  As it turns out the most bent post is actually rock solid, just not straight.  The one closer to the camera has broken off at the ground.  I left the broken post in place and sank another one next to it.  Everything is much more solid.  Thats it for now.  Time to enjoy a margarita and hope we have quiet season.

Maple Trim and Half Wall

There is a half wall in the foyer that was topped with a dark stained bit of pine.  I sanded it and panted it white to match the rest of the trim when I renovated that part of the house.  It sees enough use that interior house paint didn’t last long before scratches and stains got to it.  I wanted to install counter top material when the kitchen got re-done, but there was not enough quartz left over.

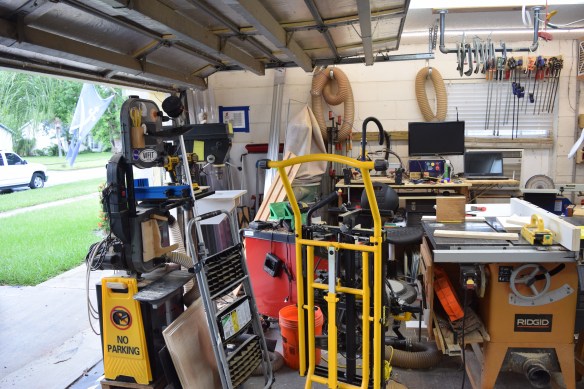
After nearly a year of the kitchen being finished I decided to tackle this project.  Instead of quartz countertop I went with maple.  I started by removing the old top and trim and cleaning up any issues around with the wall paint.

This job called for a 7.5 inch wide board that was 6 feet long.  The length wasn’t an issue but that width left me with few options at the yard.  This one is gorgeous with a lot of cathedral, some tiger striping and other character.  That makes planing it really tough.  After getting a lot of tear out in places I fell back to sanding.  It took forever, but I got the top very smooth.

DSC_0996

I needed trim for under this part and under a window between the dining room and kitchen.  I got a nice beading bit and went to town.  Thankfully before doing everything I experimented.  Having the bit start with just a little nick, then going for full depth on a second pass produced a lot less tear outs at the sharp corner.  Notice how crisp the line is in the top example, while the bottom one is jagged.

DSC_0997

With all the stock prepared I moved on to finishing.  I wanted to use a water based urethane from General Finishes.  It has sprayed well in the past and doesn’t yellow the maple, so it should match the kitchen cabinets.  The trick is we were due for days of cold, wind, and rain.  I moved everything inside and tried to pad the finish on.

DSC_0999

Having finished many pieces with oil based wipe on polyurethane, I can say that this stuff is no substitute.  It isn’t thin enough, but then dries too quickly and leave streaks.  I eventually switched to applying it with a foam brush.  That worked out the best overall, but still left a lot to be desired.

The two trim parts that go under the kitchen window had interference issues.  They used a lot of calking to hold down the quartz, and left a fillet underneath.  Instead of trying to cut it all out, I rather relived the back hidden edge with a chamfer bit.  The finish was indeed a good match with the cabinets.

DSC_1003

DSC_1002

After that success I installed the half wall and its trim.  Once again drywall’s tendency to be out of square made the miter joints a little off.  I fall for that every time.  They still look really good unless you get up close.  I used a combination of loctite power grab (fantastic stuff for installing molding), and my pin nailer to fix everything.  Pin nailers are perfect for these kinds of installations.

Rotten Fascia

Entropy and rot are a constant enemy to the homeowner.  There is no perfect prevention, only a delay of the inevitable, and dealing with it when it strikes.  I noticed the corner fascia on my porch  looked a little funny.  A bit of probing revealed a lot of water damage.

This is one of those few situations where an oscillating multitool comes in a lot of handy.  I made plunge cuts far away from the corner to give myself space to install new boards.  Chopping that out with a chisel would have been a chore.

Not great, but only the ends of those boards are rotted.  There is a bit of cross bracing behind those beams to give support for the motion light below, so it should be fine structurally.  I noticed the way the drip flashing was folded allowed for a big hole.  I bet water runs back under via that entry point.  I soaked all the surrounding wood in a few rounds of wood preservative to stop the rot and prevent further damage.

A few custom cut boards made a nice looking miter.  I filled the drip flashing hole with white caulk.  It looks funny, but it should act as a noticeable reminder to pay attention to that area in case the hole opens up again.  Multiple rounds of primer and paint later, and it is back together.  You can definitely tell something happened.  Just the texture of the wood alone is drastically different.  It beats a creeping decay of the roof line though!

20171231_135730


While on the subject of things needing painting, the number sign on our mail box was in poor shape.  All the finish was coming off the numbers and the fasteners were getting really rusty.

20171229_145426

I wanted to get new ones but the PVC board they were on had faded where the sun was exposed.  Even with a bit of sanding I couldn’t get past it.  They don’t sell this particular style any more, so I wire brushed the old finish off the numbers and gave them a new coat of black paint.

I found stainless steel screws that were close enough to the originals to fit in the numbers.  It ended up being a cheap fix if somewhat time consuming.  Can’t have the mail person judging our letters to be in disrepair!  Oh the joys of homeownership.

20171230_142058

Hurricane Shutters

As a wise hurricane guide once said, winter is a great time to think about hurricane season.  Two major issues were highlighted during our last Irma encounter.  Not being able to see out back was maddening, and I had no shutter plans for my garage window.

The window to my garage has a big honking AC unit in it for the summer.  The thing is too big and heavy to move when hurricanes come, so I need a custom shutter.  I wanted it to be made out of a single sheet of plywood, but the threaded studs are 4 feet apart at the outside edge.  I could have shifted the whole thing over, but instead I cut the sheet in half and did it in pieces.  It makes for an easier installation.

I used 3/4″ plywood which ended up being too thick, I couldn’t get enough purchase with the wing nuts.  I used a forstner bit to relieve the area enough for the nuts to hold.  Two cleats above the AC help stiffen the part and give a resting point for a center patch that ties the two halves together.

Everything got a coat of primer to make sure they stay in good shape while waiting out in the garage.  I reassembled everything to make 100% sure it all fit, and marked up some basic instructions.


20171231_114218On to the back porch.  I found polycarbonate panels that are similar to the metal ones we already have.  They don’t come in the right sizes, but with careful sawing they can be made shorter.  A center punch and 1/2″ drill bit put holes where you need them.  They aren’t as easy to see through as normal windows, but at least some light can get in and you could tell if the shed is still there or not.  Our back kitchen window has a full complement of clear shutters, and each back set of french doors has a single clear panel.

Ladder Feets

I have a trusty little 3 step Werner ladder that is great for doing work inside and outside the house.  It is small, light and provides enough height to be really useful without making you feel too high up.  I bought it when I got my house 8 years ago and have used it a lot since then.

20170929_111449

20170929_111455


The back two legs are basically straight tubes with rubber feet slipped on.  They did a good job keeping the ladder stable and level, but over the years the posts have pushed through the rubber.  The final straw was when I was doing something in the yard and the bag legs sank 6 inches down.

20170929_140541


I pulled the feet off and tried to salvage them.  The only real issue is the bars pushing through.  Maybe “re-soleing’ these shoes is all it takes.  I tried screwing down some plywood to the bottom, but ran into issues.  The post is only resting on its edge, and the squishiness of the feet means they want to wobble around a lot.  No good.

Time to ditch these feet and go with something new.  I would try to make it all in wood, but the post diameter is not close to any standard drill bits.  I want the new feet to fit tightly.  On to 3D printing!

The foot design resembles the original rubbery version.  The difference is that these will be hard.  I added a flat parallel to the bottom of the post.  The reason being is that when you fold the ladder up it only sits on the tips of these feet.  Probably a lot of the reason they pushed through.  This flat spot will help spread the load when stored and hopefully help it last longer.  The larger flat in the upper left picture is what touches the ground when the ladder is deployed and in use.

20171010_194300

I started with basic PLA, as a test, but they fit so well I am going to stick with the first prototypes.  I might make a higher infill PETG version in the future.  Until then the ladder folds up and stores well, and most importantly sits flat and stable when in use.