April-May Prints

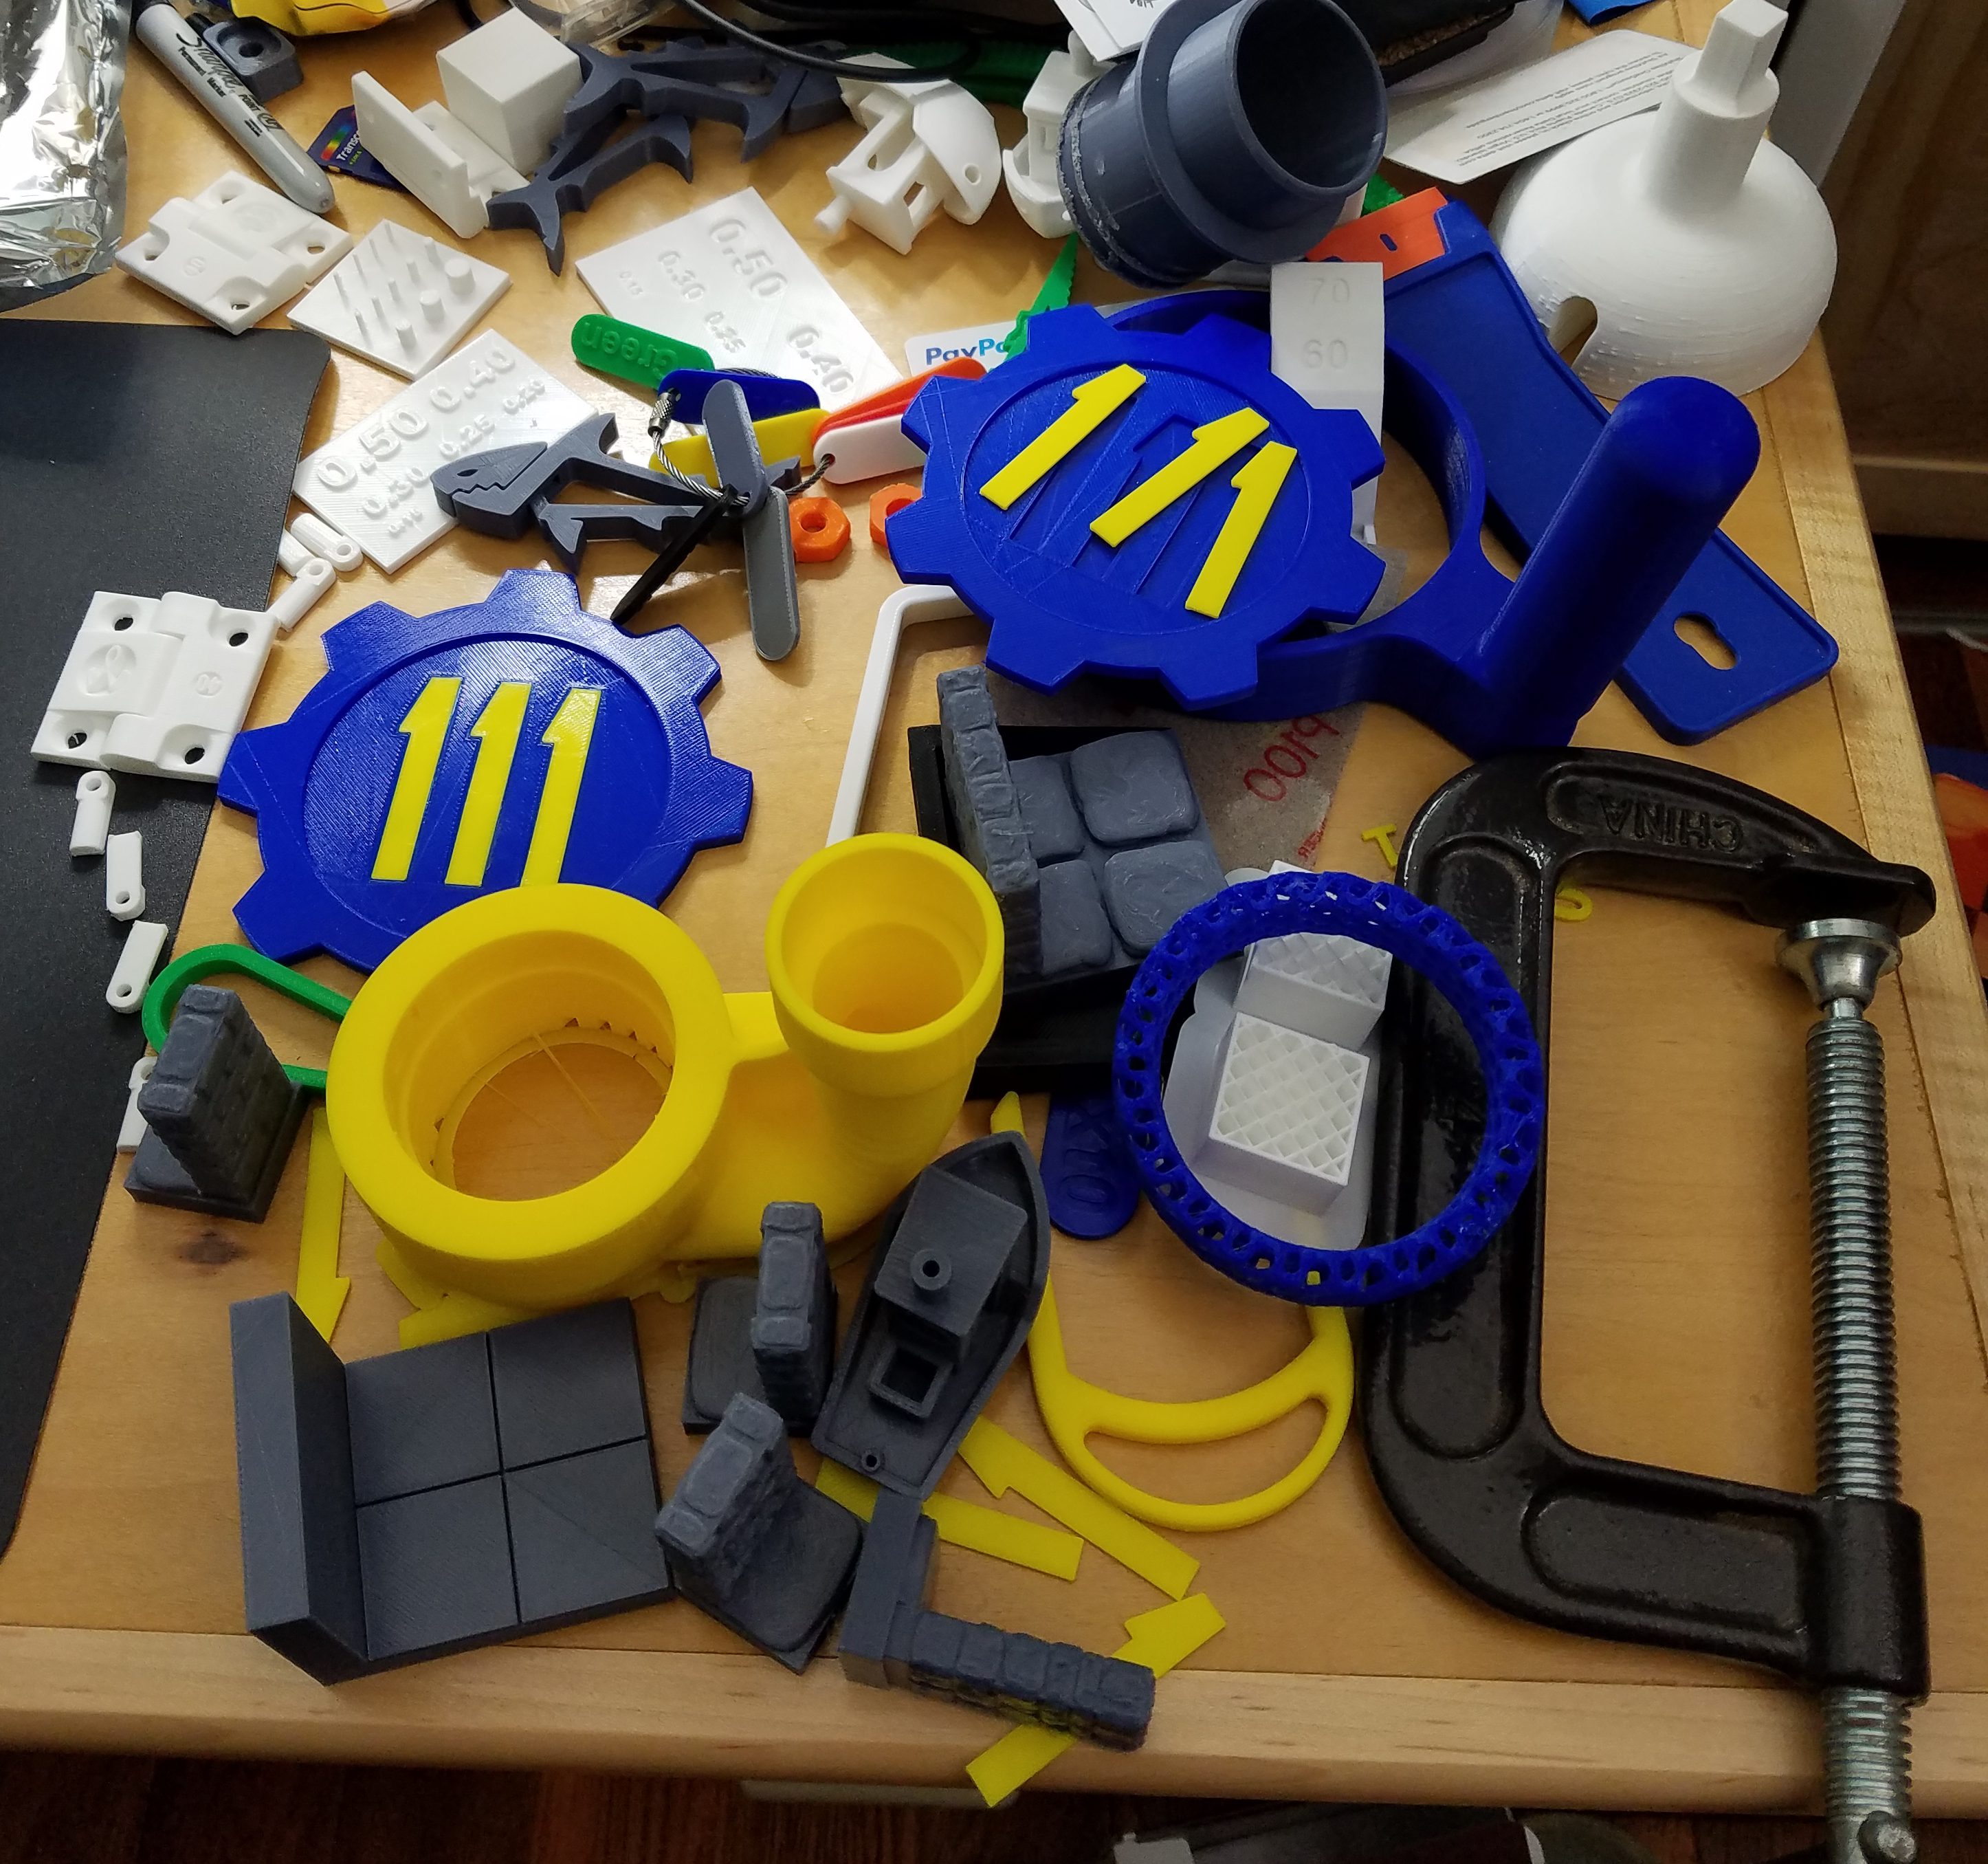
April was a pretty quiet month for printing because I knew the new printer was coming.  May turned crazy once I got the prusa up and running.  I already posted on my battery storage and drawer divers in another post.


Salt Grinder

A co-worker had a cool salt grinder that kept breaking.  He wasn’t able to get refurbs anymore, so off to printing we go.  The body is heavy stainless, but that center window is very thin plastic.  It falls over easily and snaps off the threaded area.  I printed a tapered part that threads and glues into the spot where the plastic window was.  In addition I made a little stand for it to sit in so you can’t knock it over as easily.


Tape Measure Pocket

I typically use a tape measure at the table saw to set the rip width.  It works, but I think a wooden ruler would be more reliable.  I printed a pocket for it to attach to my table saw side so it is always close at hand.


Wonderful Wooden Filament

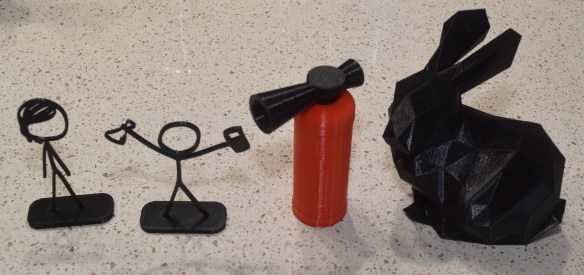
Not exactly the same as woodworking, but fun none the less.  They make wood dust filled filament.  It prints well and has a neat texture to it.  This stuff was made for printing baby groot!  I tried a set of benchy boats; one stained, one not.  It doesn’t appear to stain well, but made a great looking fidget spinner.


Desk Trophies

One of the criticisms of 3d printers is that they are only good for printing desktop trophies.  They are good for lots of other things, but yeah, they make awesome desk trophies!

DSC_0846


Bit Holders

Ok, back to useful prints.  I wanted to better organize my various driver bits, so I made these organizers with nice spacing for you to get fingers in and pick out the bit you need.  The markers are made using prusa’s multi-color print.  The one where you switch spools at a set Z height, not the one that changes color mid-stream.  I couldn’t do that on my last printer, but I am very happy it works on this one!  Too bad they don’t sell filament in dewalt yellow.


Mom Stuff

Don’t look mom, this is all going to be a surprise for you!  My mom wanted some altioid tin organizers and paint holders.  I figured she could also use pen/knitting needle/cable storage stuff as well as some funky knick knacks.
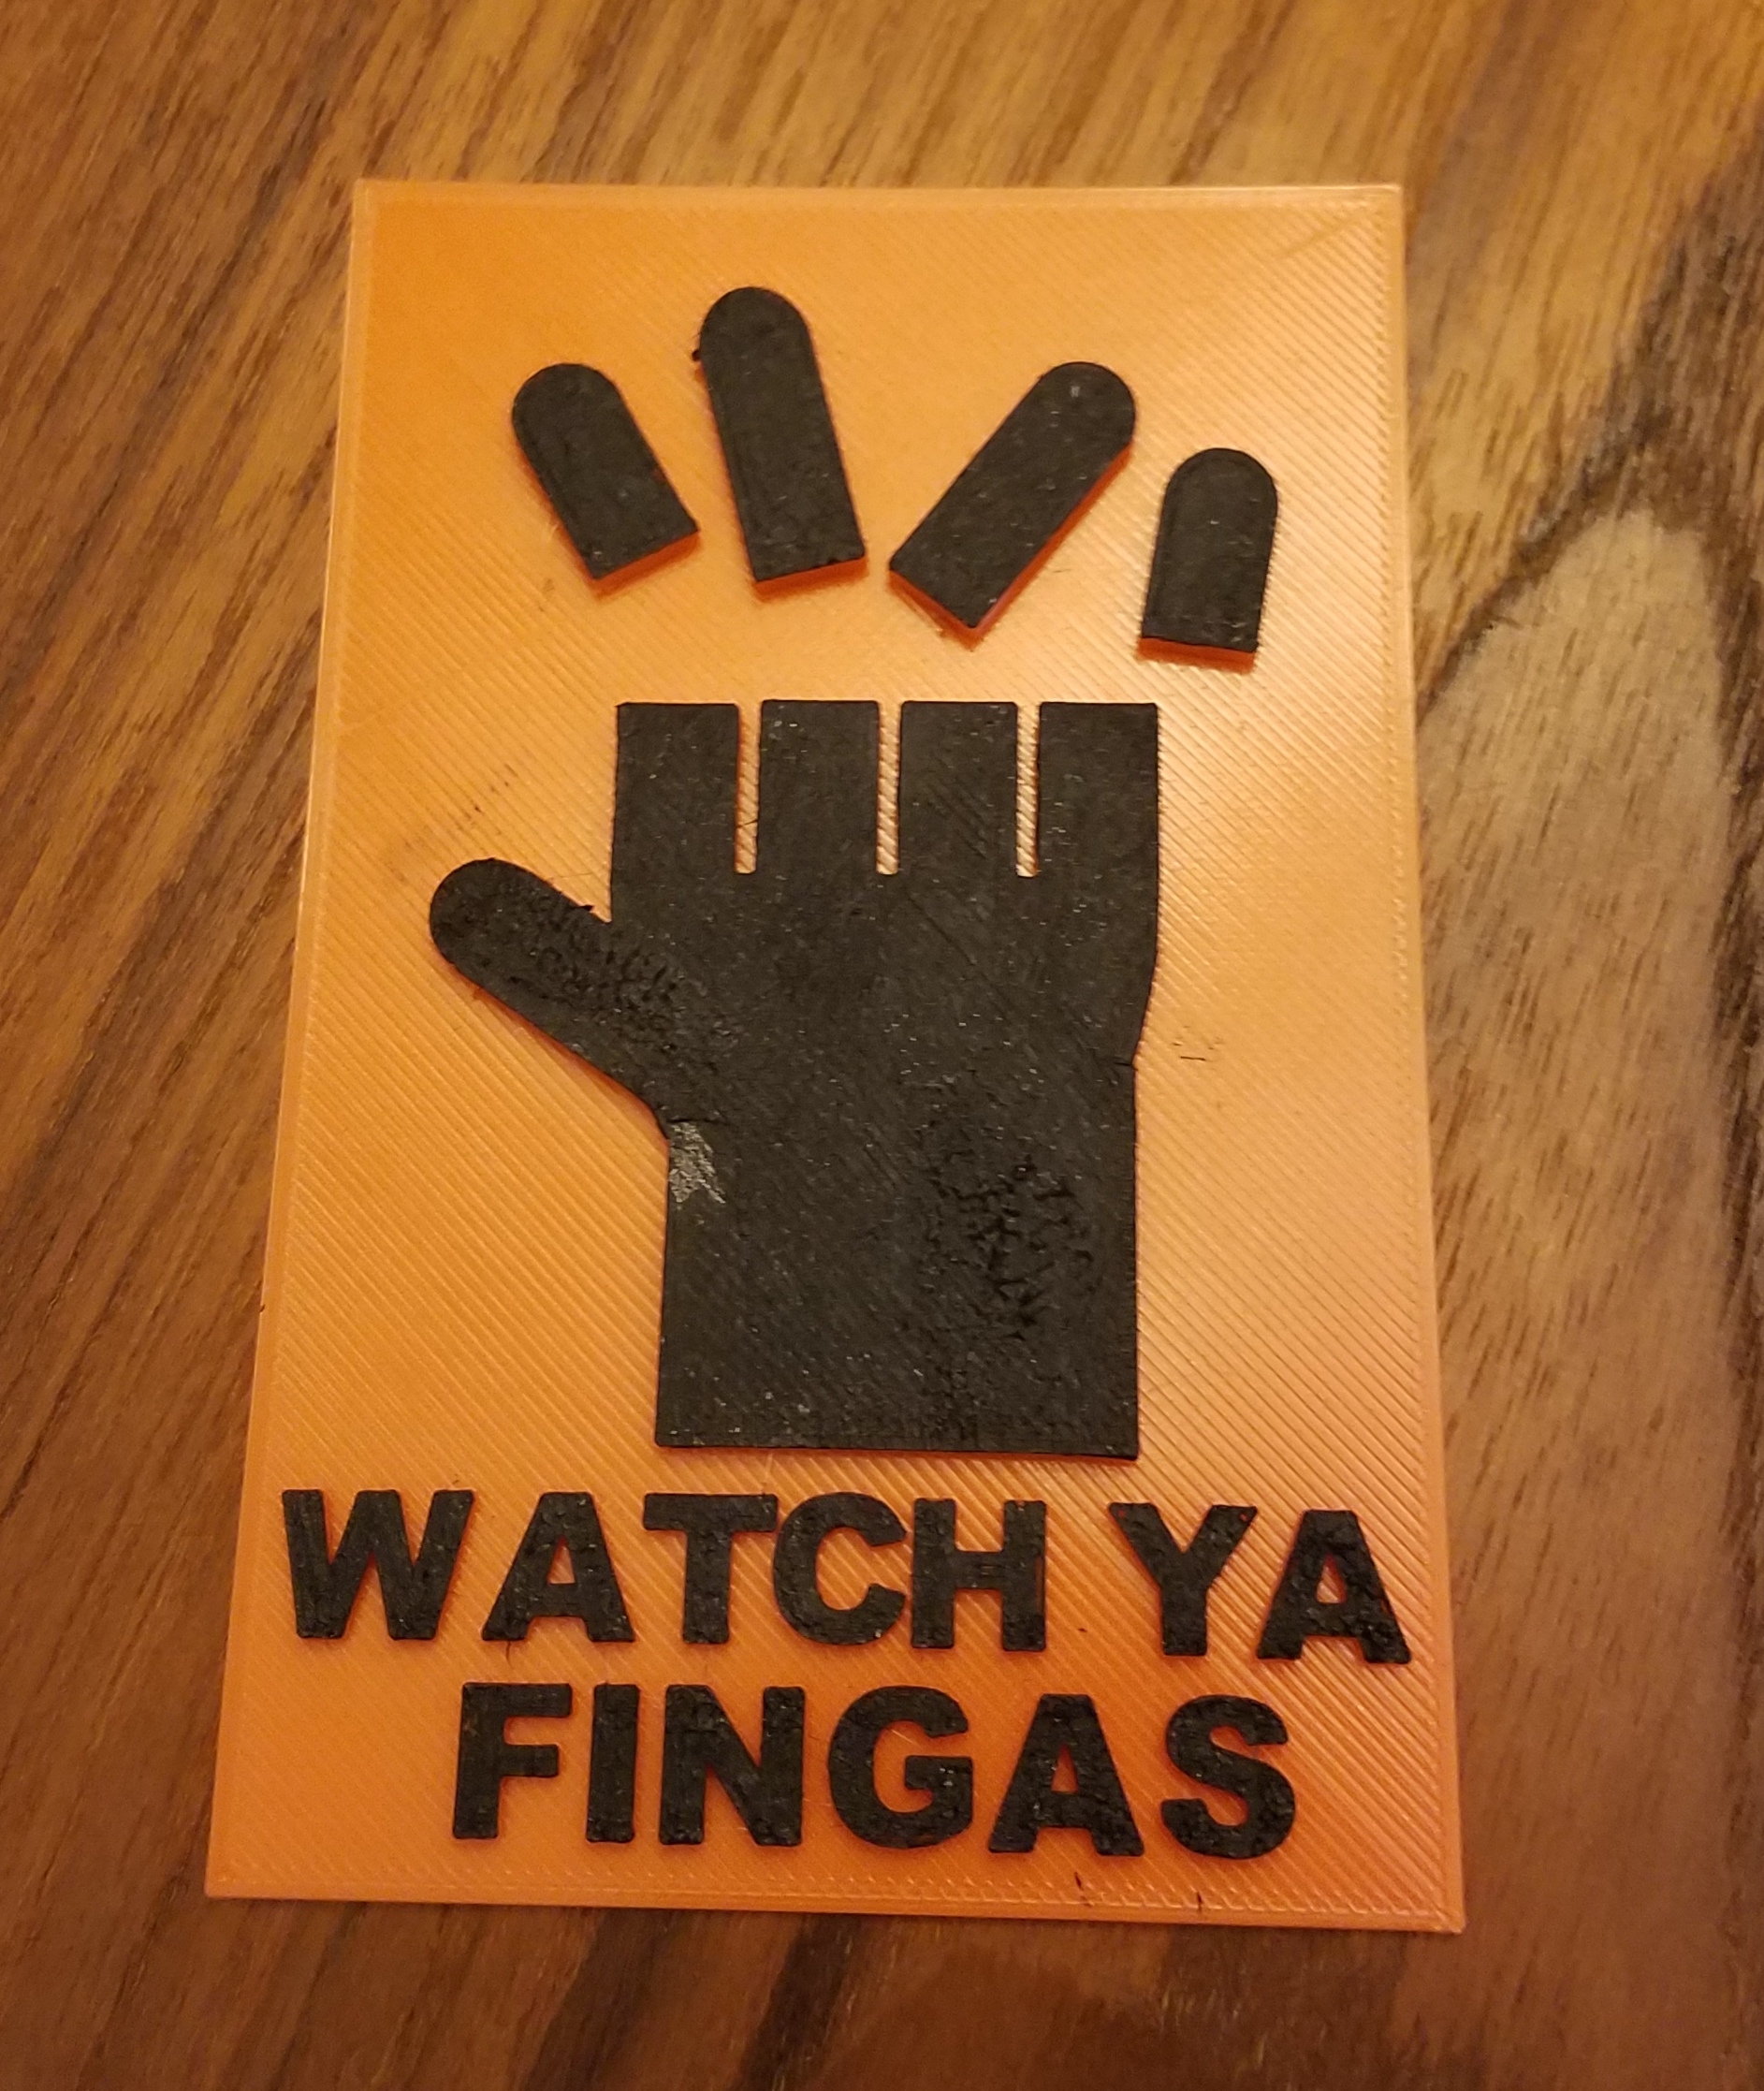
DSC_0853


Arbor Press

I picked up a cheap arbor press for pressing bearings, pressing printed parts, etc.  I made a number of arbor press fittings sized just for skate bearings and bolts.  They have a square hole that gives a perfect friction fit onto the arbor press end.  The printer also provided a nice glue on storage rack for my press ends.  I couldn’t help myself with the two color printing, and made a crush hazard sign.  Watch your fingers.  I should print some pirate flare and turn this thing into an ARRRRRRRRbor press.


Random

Last but not least I found a cool box on thingiverse for holding spare printer nozzles, a handle for turning reciprocating saw blades into short hack saws, and a penny powered fidget spinner.

DSC_0854

I probably forgot something, but that is enough for now.  Since getting the new printer I have printed for 136 hours, and pushed out over 800 meters of filament.  That is kind of impressive.  I can stop any time I want.

Prusa I3 MK2s Build

I finally got my new printer.  Nearly 2 months after purchasing it shows up the day after my birthday!  That is one serious adventure in a cardboard box.

20170510_174042.jpg

I rolled out some paper onto the dinner table and got rocking.  I couldn’t help but setup my gopro and get a time-lapse of the assembly.

The total build time was between 5 and 6 hours plus some tweak and tune time.  The first print had to be the prusa logo in honor of the great maker.

With it up and running I got to bootstrapping.  The kit comes very complete, and really is a wonderful printer.  That having been said, the little knob they included to run the interface isn’t great.  It rubs and is awkward to use.  Print a new one!

DSC_0830

A lot of my filament is from when I first bought the monoprice back last summer.  It spent a lot of time sitting out collecting dust.  Someone made a nice clip in dust filter that goes right on top of the extruder.

Next came a replacement for the spool holder.  The one included works, but you have to sort of bend it out of the way to get a new spool on.  Plus something with bearings would DSC_0832roll a lot smoother.  Any catches or resistance in the spool rolling could cause Z banding as the extruder fights to pull in filament.  Thingiverse had a great assembly that sits on top.  It included a printable threaded nut and bolt that turned out gorgeous!  Skate bearings pressed into the rollers so the spool rolls with little resistance.  A filament guide keeps it running true.

Speaking of spool holders, my one major disaster so far has been this print job.  Sometime over night the extruder actually pulled the spool off the holder.  Nothing broke except the filament guide (just print another).  It turns out the spool was wrapped poorly and kind of synched itself off.  Poor spool wrapping perhaps.

I monitor all my prints with a webcam and octoprint.  This works out well while on the other side of the house, or on the go.  The only trick is that I have to leave a light on after dark.  Instead of leaving the room lights on constantly I designed and printed some brackets for holding thin under-cabinet LED lights.  Serendipitously one light will fit in a slot the spool holder had.  Only a small printed wedge was needed to keep it secure.  The other two went on my bracket.  It clears the extruder at full height.

It is turning into a proper looking monster!  Let the print games begin.


Battery Charging Station

I am mildly obsessed with flashlights.  These flashlights take fancy 18650 lithium ion batteries that can be recharged.  I have a lot of light accessories, spare batteries from laptops, and other things that need storage and organization.  Similarly cameras tend to have their own specialized batteries that need storage and charging.  I built a flexible station to hold all my chargers in one place.  Later I added an extras organizer from a repurposed storage box.

I started with all the specialized chargers I could find.  Two for flashlight batteries and two for cameras.  I decided to go for the pedal board route.  Guitarists can have a lot of effects pedals for their instruments.  Instead of having them all splayed across the floor they tend to put them on a thin box using velcro.  The box has slits that allow cables to pass inside the box out of the way.

DSC_0813

I built it to fit a shelf in my office closet and made it wide enough to expand with new charger capacity if need be.  Nothing special, just some pine I had hanging out.  The chargers are held at about a 60 degree angle, and there is space in the back to strap down a power strip.

DSC_0814

I wanted it dark to help hide the dark cables and velcro.  I never have good luck staining pine, but mixed up a water based dye blend.  It turned out great!

DSC_0816

With velcro and power strip in place I could start attaching chargers.

DSC_0817

DSC_0818

A 4×1 outlet extender lets you plug in chargers that are supposed to go directly into a wall outlet.  I added a device called a blackout buddy.  Eaton makes them and they are red cross branded.  It plugs in and charges itself.  When the power goes out it turn on the light so can see.  Now when our power goes out I can find my way to the flashlight stash in the dark.  It fit like a charm on the shelf in my closet.

DSC_0819


Next up I pulled an old drawer storage box thing out of the trash.  It used to have board games in it, but was destined for the dump.  I thought the all-wood construction it was worth saving.  After re-gluing a few bad joints it was in good shape.

20170512_191052

The bottom drawer houses all the extra batteries I had from laptop pulls and random purchases.  I printed a number of organizers to keep them from touching.  Every organizer positively holds the battery in place so they can’t come out and can’t touch each other.  Keeping them from touching is an important part of preventing battery damage and fires.  Plenty of room left to store more batteries.

The middle drawer has random flashlight stuff.  O-rings, manuals, cases, etc.  I printed some dividers to hot glue down to keep the drawer from being a mess every time you open and close the drawer.

DSC_0823

Lastly I threw some of my DSLR gear in the top drawer because I never really had a good place for it.  3D printing and woodworking come together to help organize and support my camera and flashlight fixations.  What a gorgeous synergy!

DSC_0824


Feb-Mar 2017 3D Prints

Between travel, other projects, and a wounded printer, I haven’t made a ton of prints recently.  Here are the ones that bubbled to the top.

Bluetooth Antenna

I use bluetooth ear buds in my shop at nearly all times.  They are comfortable and go nicely under a set of ear muffs.  The bluetooth in my shop laptop has a really limited range.  Sometimes the EMI from power tools causes enough problems to interrupt the music.  I bought an external bluetooth dongle.  It worked better, but I found that raising it up away from the laptop and monitor made it work the best.

I used a pin contour gauge to try to copy the shape of my monitor.  It is a pretty complex shape and I didn’t quite get it perfect.  Still, a little hot glue holds the bracket on well and zip ties keep the USB extension held high and proud.  I was hoping it would look like a star wars droid antenna, but fell short.  Other than the visuals, it works like a charm.  Long range tunes without interruption.

Magnetic Door Holder

The weather is getting warm, but it is still nice enough to keep the doors and windows open.  The wind often catches the door into my shop and slams it shut.  I printed this bracket assembly and glued in magnets to hold the door open.  A large machine screw holds the two pieces together and allows some pivoting between the door and bracket.  I screwed it down to a mobile work bench, so the angle between it and the door can vary a few degrees.

String Trimmer Winder

I use a black n decker string trimmer for yard edging.  They come with spools (AF-100) that auto-feed the right amount of string and can be exchanged quickly when one runs out.  The trick is they sell for 6 bucks a piece.  Not a horrible price, but considering you can reload them for pennies, I had to find an easy way to do so.

There is a base that the spool plugs into, and a winder that chucks into a drill (1/4 nut and bolt required).  The base keeps the spool stable and guides the string while the winder lets you power through a whole spool in no time.

DSC_0771

DSC_0772

This one was complex enough to use that I made a short video explaining its use.  Thingiverse Link

Printer Rebirth

After months of being without a printer since the breakdown, I am back in business!

dsc_0665
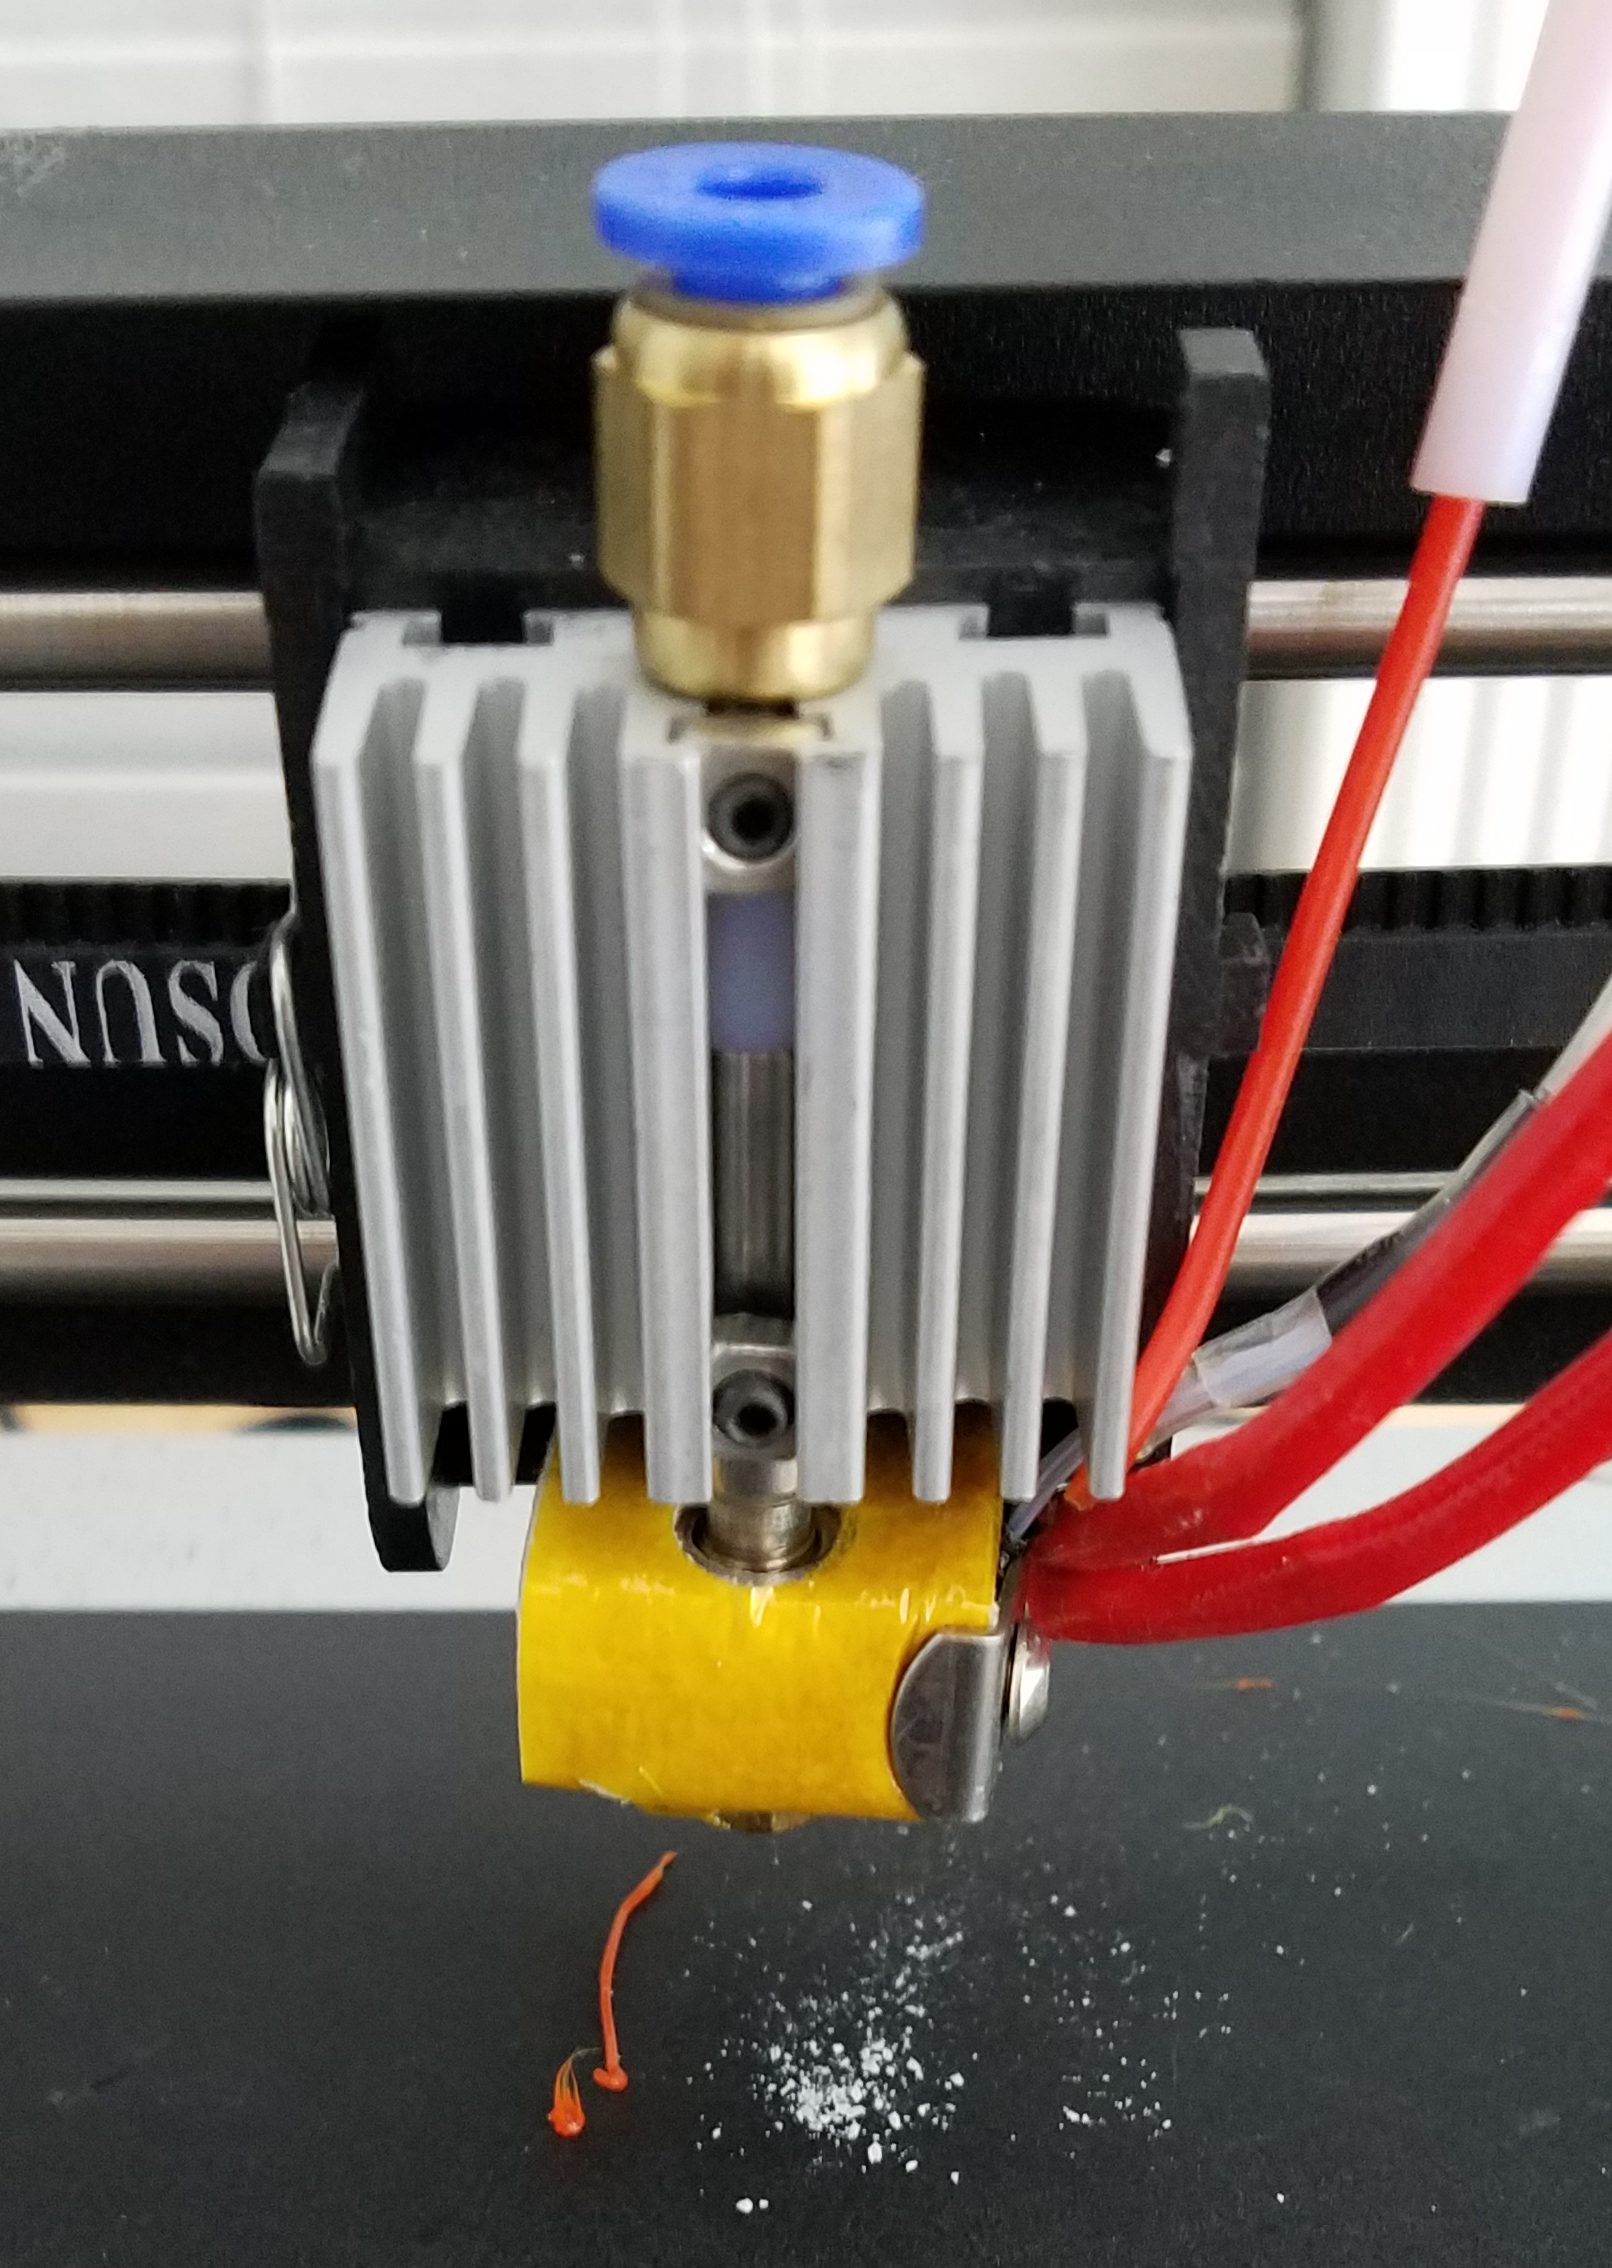
I was 99% sure that all it really needed was a new hot end.  Not sure what happened to the last one, but it would jam up no matter what I did.  Monoprice of course doesn’t sell new ones, and I didn’t want some cheap knock-off.  I didn’t realize it when I first had this problem, but it turns out E3D makes a “lite6” version of their famed V6 for half the price.  It can only do PLA and ABS, but that is all I ever wanted anyways.  Step one, remove old hot end with extreme prejudice.

I was able to reuse the heating element from the old system, but the thermistor is new.  This setup doesn’t have any part cooling fans so I bet the overhang performance will suffer dramatically, but at least it should work.

Some things that aren’t working out for me are power.  The old fan was 5V and got modulated by the micro-controller to change speeds for variable part cooling.  The new one is 12V and needs to be on all the time.  After some frustrating work with non-standard connectors, I ended up cutting out their connectors and directly wiring the given 12V supply to the machine with a power tap off for the hot end fan.  The fan power runs up the back, and the old 5V fan power just hangs out front.  I might use it to add a part cooling fan someday.

I learned a lot about how hot ends are made, and ended up having to completely replace the tubing on mine to get a full range of motion.  It is one ugly critter now.

wp-1484962752067.jpg

Ugly, but working!  I made a few of these small 1/4″-20 nuts as test pieces, and they turned out all right.  This wounded beast should keep me going till I can get something better and more permanent.  No more trying to print 24/7 now, just the things that I really want… This might be harder than no printer at all!

dsc_0674

Orlando Maker Faire 2016

I haven’t been to the Orlando Maker Faire in years, and wow was I missing out.  I volunteered for Matrix Flare because a co-worker was running it and they were doing great things for kids.  We were giving away thousands of LED lantern kits and helping kids assemble them.  They are basically LED throwies, but stuck inside a little plastic cup instead of thrown with a magnet.  The assembly was super simple, but for young kids it was a great into to making.  This was our booth.

20161022_094336

I wanted to take a picture or two showing all the kids making little LED lanterns, but we were swamped nearly the entire time.  For 8 hours I sat and helped kids from 3 to 63 assemble lanterns.  It was cool to watch the younger ones figure it out and have their own glowing lamp to take home.  For the brave we had a challenge of modifying the original lamp design to make it switchable.  Anyone that could would get one of a variety of 3D printed prizes.  We saw a lot of different solutions.

I eventually got some time to break away and check out the local displays.  Many of them were neat enough to warrant a short video.  Here was my collection.

Speaking of 3D Printers SeeMeCNC had one capable of prints a few feet in diameter, and 10+ feet tall.  The pikachu has a Jacob for scale, the angel was taller than he is.

One group was looking to build ISO containers that could print various materials.  I didn’t hear what the print dimensions were, but probably 6x6x15 feet or so.  Sounds like a neat job site tool to have around.

20161022_140000

There was Star Wars a plenty.  Lots of storm troopers running around, a really good sand person, Lego symbols, and RC R2D2s.

Other movie props were represented with a few groups that did recreation and reinvision.  This guy had a time machine that could drive around.

I always liked steampunk and they had plenty of booths dedicated to showing off steampunk props, leatherwork, and the reinvisioning of super heroes.

20161022_142721

Last but not least, check out these sweet wooden models!

20161022_144908

Speaking of wood, Darryl from Dread Knot Woodshop was doing some turning demonstrations.  I should have taken pics or a video, but was practically running to see everything and get back to the booth for more lantern time.  Next year, take 2 days to volunteer and see everything slowly!

Ding Dong My Printer Is Dead

Yeah, it is sad.  We had a great relationship at first.  It was wonderful and vibrant.  I was learning a lot about printing and creating new designs left and right.  Then things changed.  I needed to do some maintenance and started stripping threads.  The cooling fan started to croak, and the hot-end died.  I spent a lot of time trying to fix it, but don’t want to throw any more money at it at this point.

20160928_181921

Trying to open it up and grease all the rails was the first mistake.  I stripped some threads putting it back together.  I could be blamed for this, but I assemble a lot of equipment, and stripped threads are not common for me.  Once back together it seemed to be noisier than it was before.

Next the fan died and I spent a few iterations trying to get a good fan on there.  Unfortunately they don’t sell replacement anything, nor do they have specs online.  I got a good fan installed, but my print quality never really recovered.

20161014_183157

Benchy on the left had blobs and a lot of strings, but at least he finished.  Benchy on the right looked worse and never finished because of a nozzle jam.

20161005_064024I did a few rounds of clearing the nozzle jam, reloading filament, and then having another print jam.  I took apart the hot end section a few times.  The threads were starting to get bad on the nozzle, and the parts are held in with a very cheap set screw.  The upper brass piece accepts the boden tube.  It is a threaded tube fitting that just has a set screw pushed against it.  Not a robust design.  The threads get all messed up, and it doesn’t hold well.  After my 3rd or 4th jam, it jammed again, and kicked the boden fitting off entirely.  I came home to this.

20161014_171522

Thankfully it only chewed up a few meters of material, but I am frustrated.  From my reading, I likely have damage in the PTFE lining of my heat break.  I tried drilling it out a little, and cleaned up the nozzle, but still got jams.  I don’t know what the issue is, I am using gcode that worked fine a few weeks ago.  It is time for a new hot end, but I am done throwing money at this hunk of junk.  At least it taught me what I need to know to make an informed decision on my next printer purchase.


September 2016 Printer Wrap-Up

I have had my printer for a little over a month now, and boy have I been busy.  Something has come off the assembly line almost every day.  I got octoprint up and running within about a week of getting the printer, and it keeps a log.  I clocked in 325 hours of print time and over 450m of extruded filament.  Considering there were 720 hours last month, that is a lot of printing!

There was so much cool printing going on, that all I can do is hit the highlights.


Water Bottle Clips

I tend to carry water bottles around a lot at work and while doing stuff outside.  These clips help me keep water close at hand at all time.  Pretty blue custom clips.  Thingiverse link.


Flashlight Tail Stand

I have lots of cool tactical flashlights for warding off the darkness when our power decides to go out for the 2nd or 3rd time this month.  They have flat backs, but often don’t stand well on their tails.  Tail standing a good flashlight can provide great lighting to a whole room.  This print keeps them from being easily knocked over.  I will have to get glow in the dark material for next time.  Thingiverse link

20161001_085148


Watch Ya Fingers20161001_090131

I felt this needed to be in my shop somewhere.  While it isn’t my design, the painting was my idea.  I painted the raised surfaces with a foam brush and some acrylic paints.  Two coats made it look really snazzy.


Name Tag

I am going to be volunteering at the upcoming orlando maker fair for a co-worker.  She has a lot of great activities for younger kids, and I thought such an event warranted a custom name tag.  The letters were pressed in using my c-clamp method as demonstrated in a previous post.  Magnets keep it safely secured to my shirt.


RTIC/YETI Mug Handle

I got a RTIC mug for cheap on a daily deal, and have been using it a lot.  It keeps ice for ages, and doesn’t sweat a drop.  The handles are expensive, so why not print one.  I had to make a two part version because the others available didn’t fit on my little bed.  A single 1/4-20 bolt of 1″ length along with a nut is needed to combine the two parts.  Thingiverse link


Brackets

I was in the process of building an enclosure for my printer to add lighting and reduce the noise.  It was kind of a disaster for reasons I won’t get into.  A few things got designed specifically for that project.  I am not using them at the moment, but will find something for them later.  Thingiverse link to flat bracket and right angle bracket

20161001_201715

I did a stress test on the right angle brackets by printing some at 20 and 80% and loading until failure.  Turns out, it was 66% stronger with the greater infill percentage.


Badge Holder

Last but not least I printed a nice pretty blue badge holder for work.  I wanted everyone to know how crafty I am as soon as they see me.  Thingiverse link

20161001_201919


Everything Else

Honestly there are a ton of other things I printed.  Some designed by me, lots downloaded from others.  I can’t write up everything, so this is a pile of stuff I made this month that isn’t living elsewhere in the house, or hasn’t been given to someone yet.

20161001_205720

My name is Chase, and I have a serious printer problem.

Press Fitting 3D Prints

I have been expanding my 3D printer experience this past month and have done a number of press fit parts.  The general principle is to take a piece of hardware, measure it, and print a hole in that shape that ranges between that exact size, to less than 0.01″ smaller.  It depends on your printer performance.  Mine tends to undersize holes a touch, so printing the exact size of the hardware works well.

Once printed the hardware has to be pressed into place.  An arbor press would be perfect for this, but I don’t have one and am too cheap to buy one.  I used a C-clamp instead.  This video demonstrates a few uses of said clamp press.

Most of the parts were very specific to my needs and probably not worth uploading to thingiverse.  The only exception is the quick release plate for my tripod.  I didn’t see any online.  I need to come up with a version that captures a bolt while making it easy to use with your fingers.  That will take some thinking.

Printing For The Printer

It seems like when you get a fancy new tool you end up spending a lot of time building stuff for the tool.  Ideally it can build most of its own upgrades.  Most of my first projects on the CNC mill involved making better parts for it, and the 3D printer is no exception.  Printing for the printer.  Bootstrapping at its finest!


Tools

3D printers end up needing a few extra tools to succeed.  You can’t do everything with a printer, a computer, and your bare hands.  Printing a few small tools can make life a lot easier.

dsc_0516

Holes often come out under-sized and may have a little overhang issue, especially if printed horizontally.  A small set of drill bits is a good thing to keep around.  The red handle attaches to bits with a 1/4″ hex base and makes opening up holes a breeze.

dsc_0514

dsc_0515

You want prints to stick well to the bed during printing.  If they shift, the jig is up and the part is ruined.  The issue comes at the end when you want to pry the thing off a delicate print bed.  Careful work with a razor blade can coax them from the only home they have ever known.  The razor holder is not my design, but a popular choice on thingiverse.  The blade guard houses magnets and pops on easily to keep unwanted cuts to a minimum.  There are other designs available, but they needed magnets I didn’t have, so I made my own.  Thingiverse link.


Octoprint

Sneaker-netting a SD card between the computer and printer gets old, and all control of my printer has to come from the front knob.  Instead I grabbed a raspberry pi and installed the latest version of Octoprint.  It is amazing!  I can see what is going on and control things from any computer in my house, and even have it sending me updates via a messaging service.  I liked it so much I printed a little Octoprint statue in honor of the new service.

It was one of my first prints with support, and everything went really well.  The other fun thing it allows is a webcam to monitor the print visually.  You can even use it to take time lapse video of your prints.

Combine the fancy statue with a really nice pi cover and the print server has a proper home.

dsc_0517


Extruder Medallion

Last but not least, there has to be some decoration involved.  I saw that the extruder sits on top of my printer and spins slowly as the printer prints.  The extruder grabs the filament and slowly pushes it down into the hot end.  I figured it could use a little medallion.

dsc_0513

As you print the shaft spins and the rebel starbird goes round and round.  Enter another time lapse video.  Thingiverse Link to the medallion.