
After royally screwing up the inlay sign I made a few posts back I decided it was time to experiment with different inlay techniques. I had mixed success, but will share my current round of results here.
I started by milling some test shapes into a block of maple and sealing them with a few quick coats of spray lacquer. I thought I had a picture before applying any inlay, but apparently I do not. There is a section for each inlay technique.
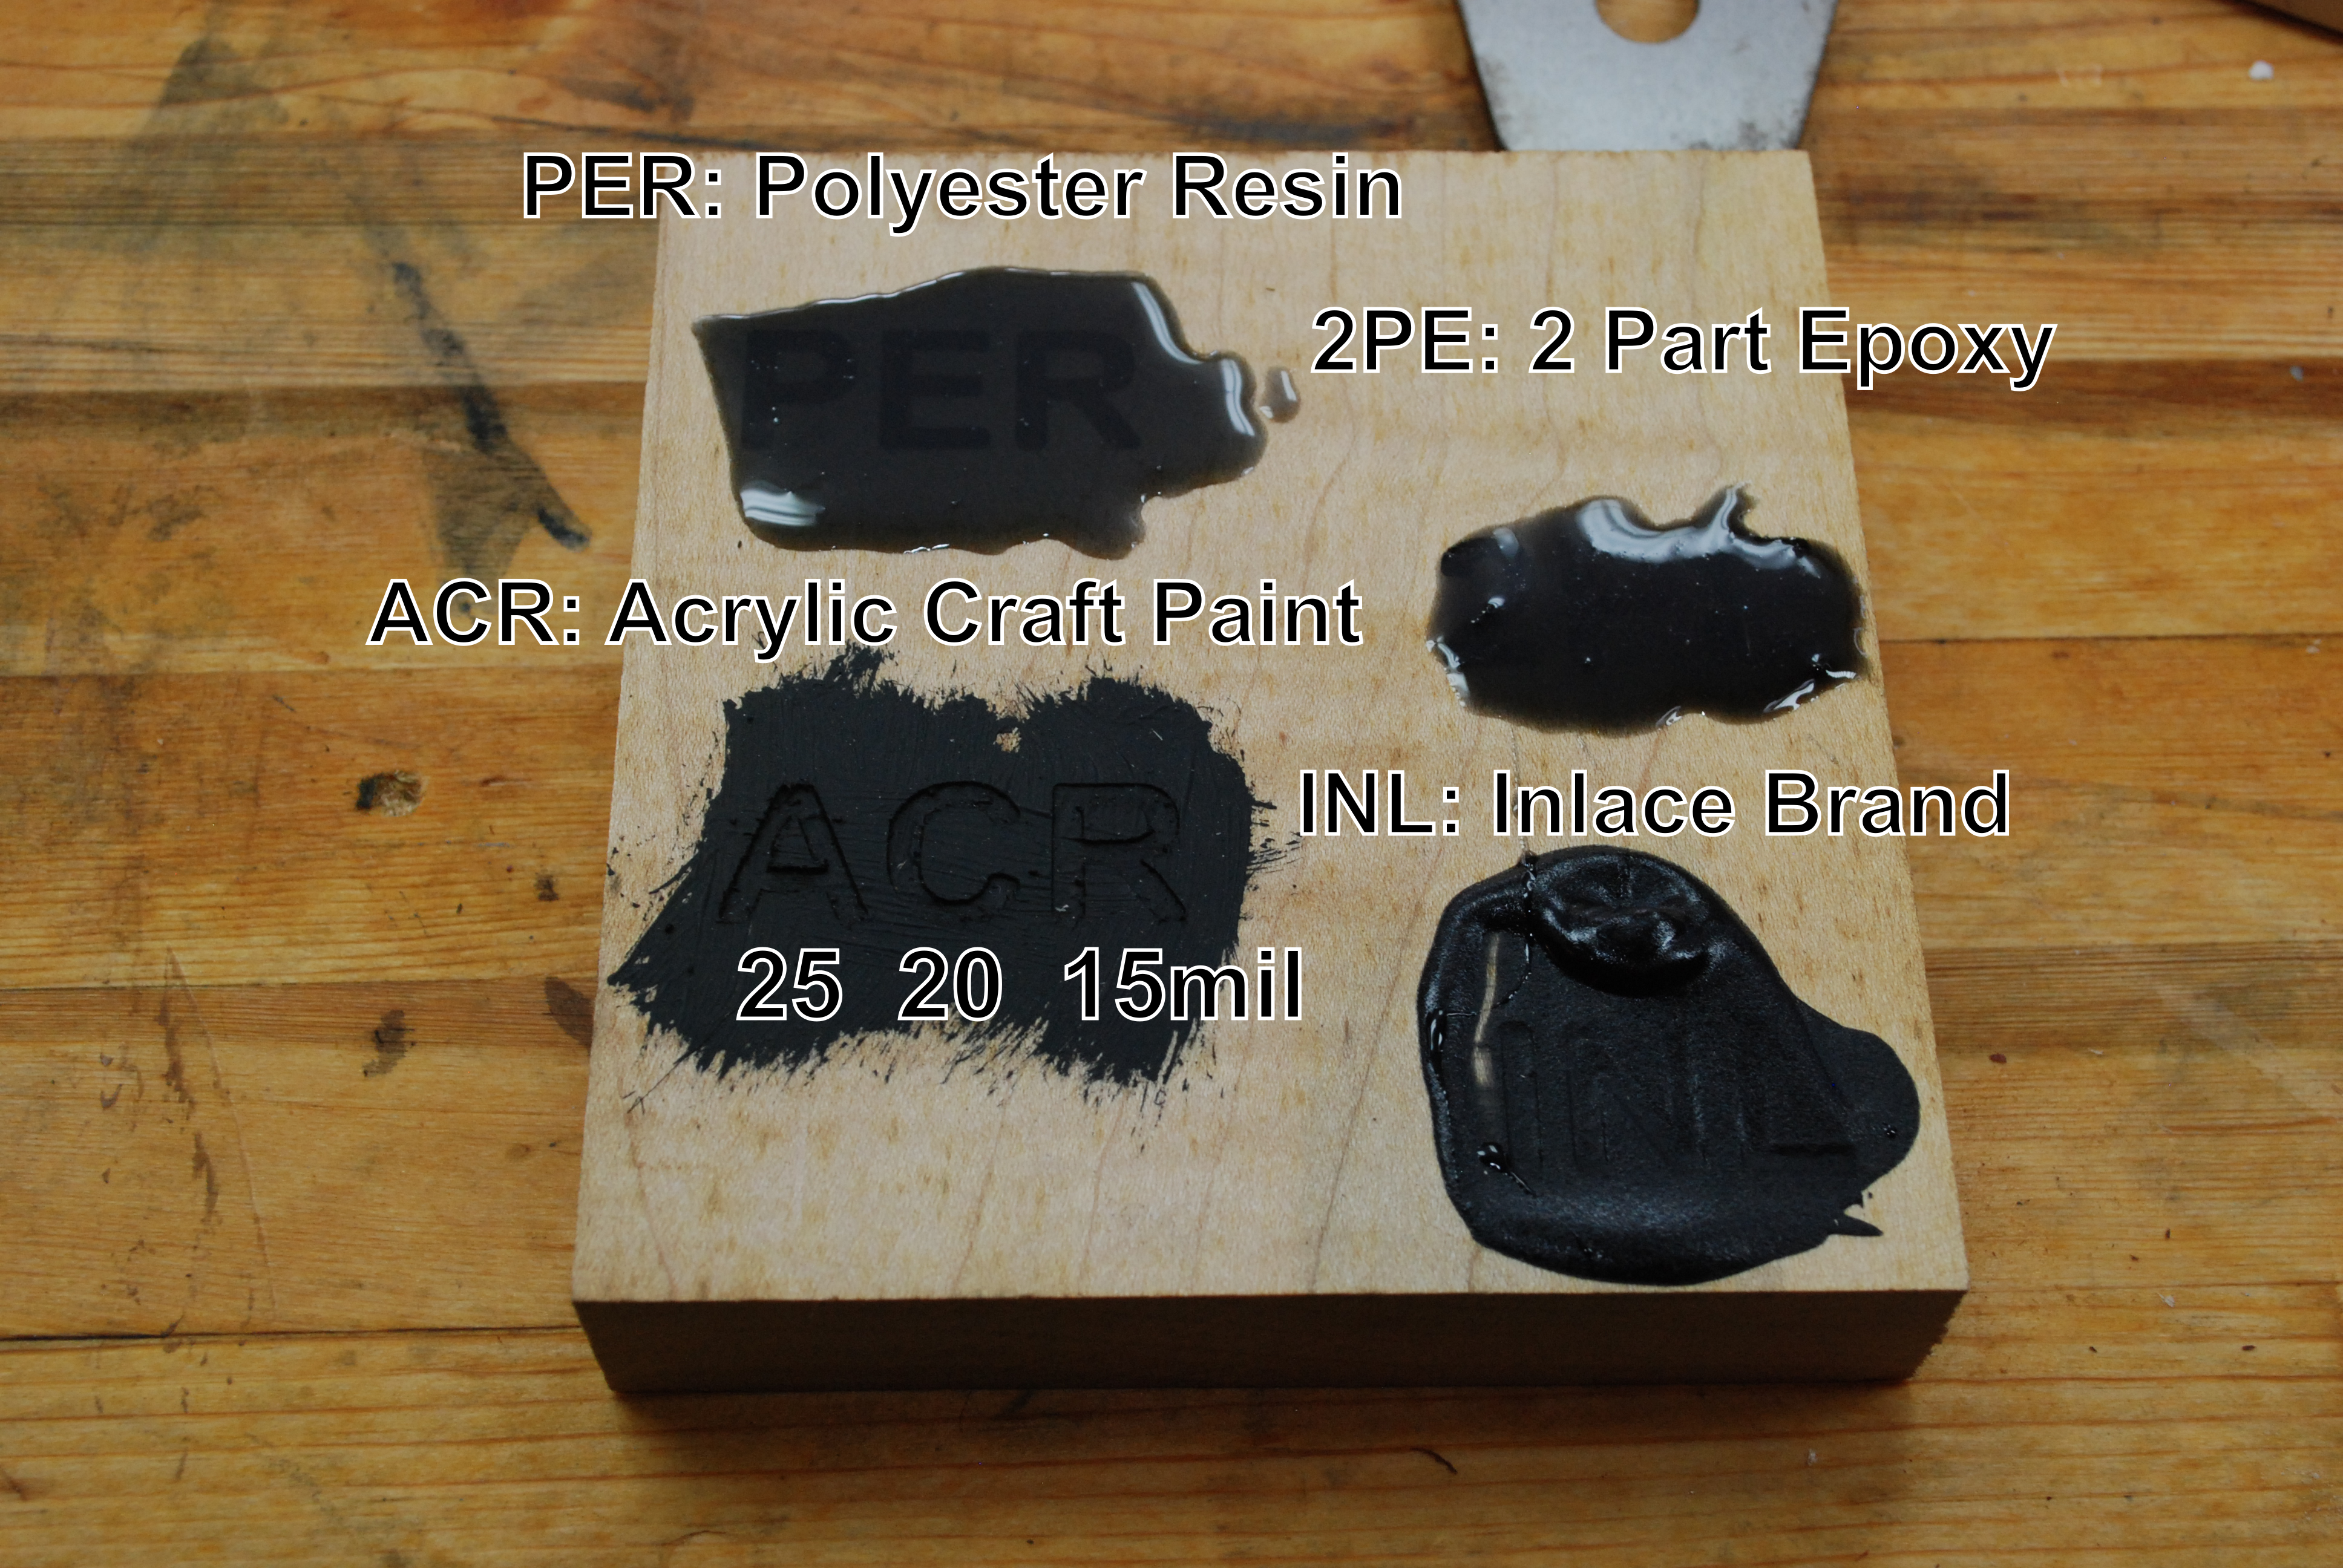
- Polyester resin with added “castin` craft” pigment
- Two part epoxy with added “castin` craft” pigment
- Acrylic craft paint like you can find in any craft store
- Inlace brand black inlay fill
Each section is made up of 3 letters. The left most letter is 25mil deep, the center is 20, and the right one is 15mil deep. I wanted to see how shallow I could go and still have the results turn out well.
My first observation is that the the castin` craft additive did poorly with both the epoxy and resin. For starters, it took a decent bit to get a good looking black. I was worried about adding too much, and you can see the polyester section is fairly translucent. Both were very soft and gummy. Attempted sanding mostly just pulled them out of their inlay pockets.

This is really disappointing. I bought a few different colors of the castin` craft stuff which I don’t know what to do with now. On top of that, I bought a container of polyester resin and don’t know what to do with that either… I really thought that was going to work.
There are a few bright spots. The inlace material looks great! It is pricey, but at least it works. The acrylic was promising. The picture looks bad because I over sanded it. Looking at the first picture, I barely put any acrylic paint down, just enough to cover the wood. The surface texture looked bad, so I tried sand the paint smooth and got too aggressive. Acrylic paint is a good option if I can get it to look smooth. It is easy to get ahold of, comes in lots of colors, and is color mixable. My next test will be to figure out how to apply paint thick enough so that it can be sanded to look smooth.

Pingback: Inlay Success (almost) | Kilted Craft Works