Cutting Board Flattening tip

A lot of folks have shown how to make an end grain cutting board. I am not going to add a whole documented build to the pile. I will add one flattening tip to help save time and make a better product. A friend of mine is getting married, so that calls for a wedding present. What better device to induce marital bliss and/or arguments than a cooking implement? I would make him a vacuum if I could.

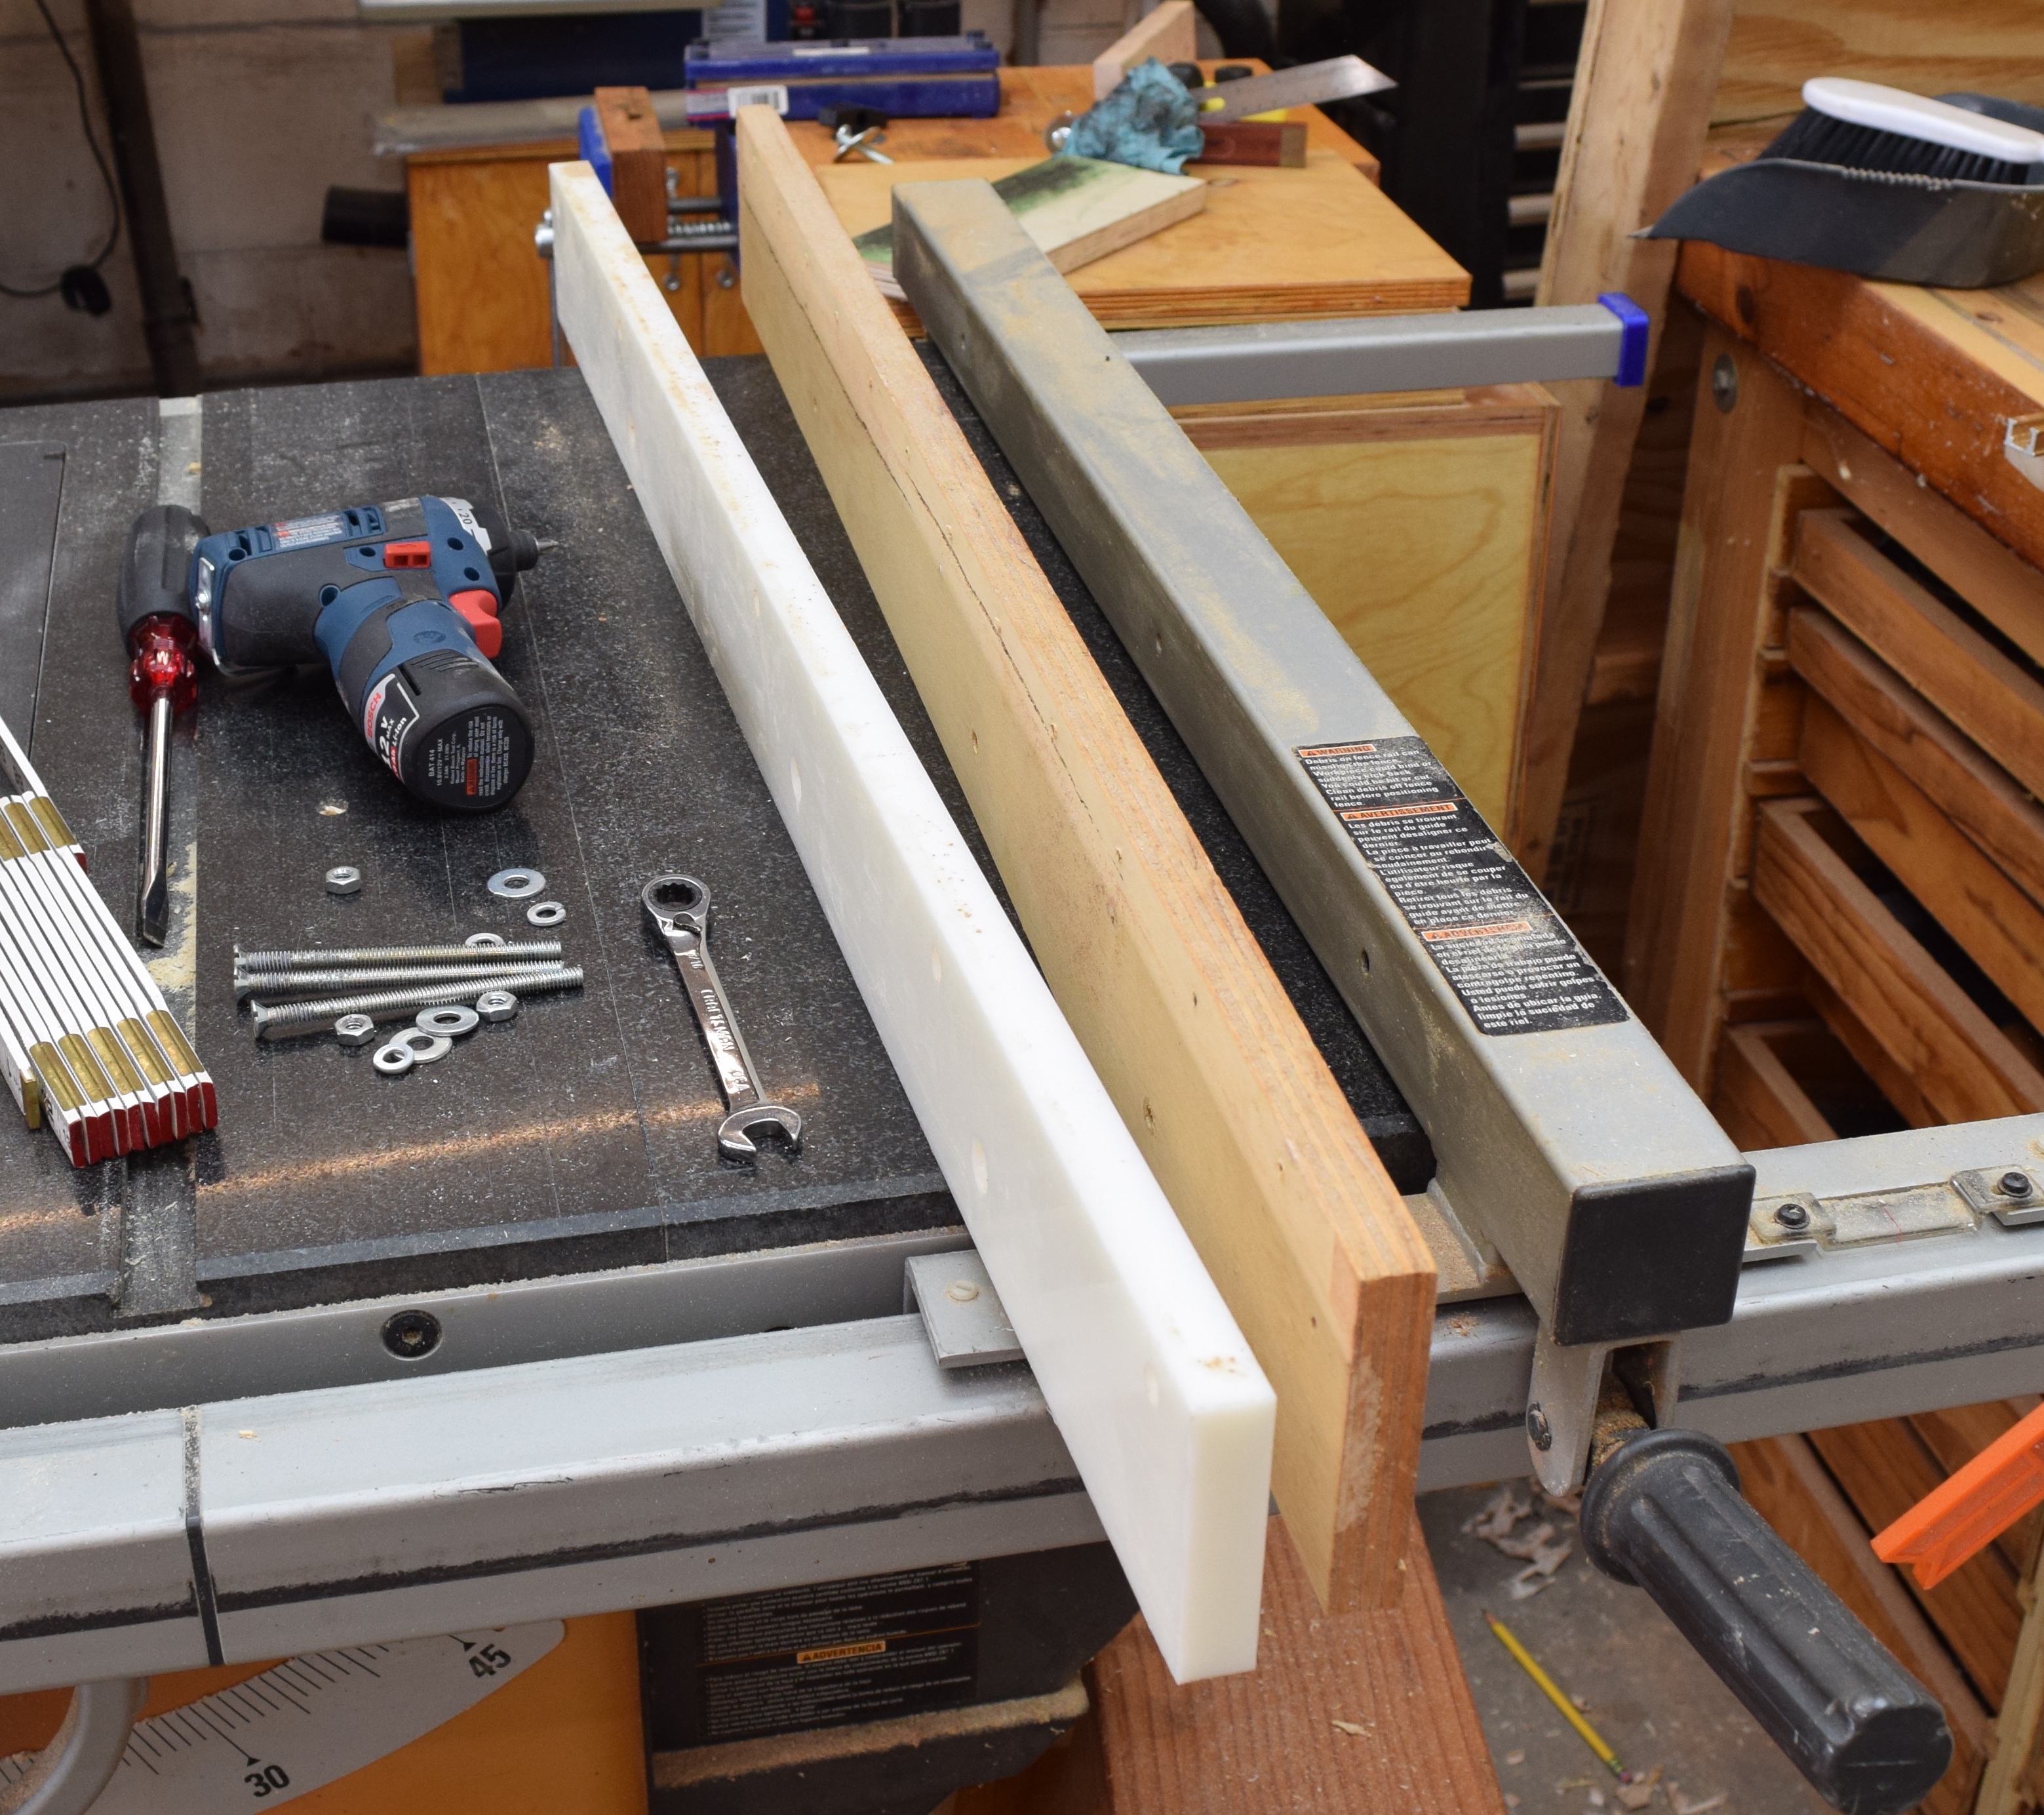
Enter some cherry from previous wedding presents and maple from the stash. I always clamp my cutting boards down to a piece of flat plywood with wax paper below. That keeps the bottoms good and flat for the next phase. That oak beam in the center is my clamp caul.

This one has a ton of squeezeout, but I put packing tape on my clamp cauls, so all is well. The problem: How to deal with all the squeezeout, and what do we do about the uneven top? Run it through the planer! That causes blowout at the back end. I selected the better looking sections for the gift, and used the spares to make a small board for myself. I ran it through the planer as-is to demonstrate the problem.

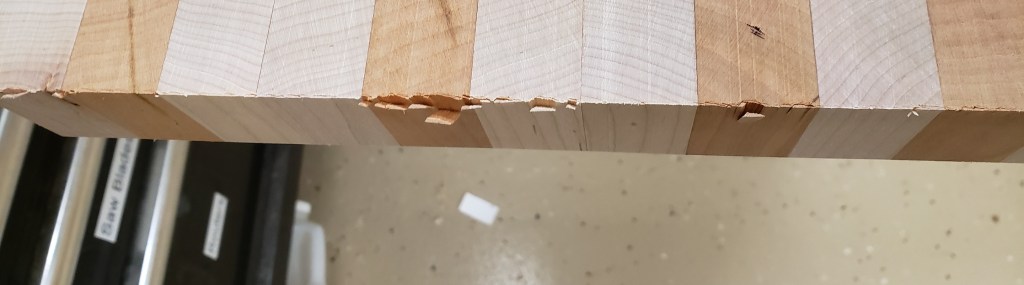
Lots of pieces of wood get chipped off at the end because the grain runs up and down and is unsupported. This is with a helical cutter head using very light passes. That is a best case scenario normally. It can often be much worse. Why do this at all? Well you get really fantastically flat tops in a hurry when you use the planer.

Tricky, so what do we do? Take a block plane and cut a little chamfer on the trailing edge that will be exiting the planer. Or both entrance and trailing edges so you don’t get mixed up. The cutter will be shearing off the last bits of fiber, but the chamfer will mean that happens a little ways back from the bitter edge. Here is the edge I put on the big board, it isn’t big. Just a 1/16″ chamfer. The results from heavy cuts are no blowout and a very clean flat top!

If you don’t have a block plane, I bet a sanding block would do it too. That means you can plane the top flat quickly and without risk of end blowout. Just make sure you don’t plane through your chamfer. I shipped the big one out fast enough I forgot to take a picture, but here is the little one after a number of uses in my kitchen.

Chamfer your cutting boards for planer success!

Maple Closet Shelves

I am starting to mix in house projects and longer term goals along with my shop infrastructure work. We pulled all the built in organizers out of the master closet when we were renovating. It was basic white particleboard and appeared to be rather old. We cleaned up all the walls and installed brackets that supported a continuous closet rod for hanging clothes. This gave both of us ample hanging storage space. The bracket is designed to have a shelf above it. I wanted something nice, and waited until now to build it.

Actually like a lot of my projects I started this a few months back and got side tracked by other house issues. I got the only 10 foot maple boards they had at the local lumber place and went to town planing them.

Buying rough cut wood is a bit like Forrest Gump’s box of chocolates. You never know what you are going to get. In this case, some cool mineral darkening and nice figure.

This is an interesting transition project. I started it with my old Hitachi planer and ended it with my new Dewalt planer. The old planer has been donated to a co-worker that is starting to fill out his shop and could put it to good use.

Goodbye old friend

With the boards cleaned and flattened I needed to work on the edges so I could joint them together in a panel glue up. I preserved the length as long as I could knowing that the ends would eventually get cut down some. Planing a 10 foot board by hand is hard work. I had to employ a helper to keep the board propped up. I haven’t had a power jointer in years, and I don’t see how it would have helped me in this situation.

After much time spent with my #7 jointer I glued the two shelves together and was ready to continue the flattening. This time with the new planer. The main reason I bought this one was because it was reviewed well, and there was an available helical cutter head for it. The two are a match made in heaven. No matter what, the thing produces a clean surface, no tearouts, and the carbide inserts will last a long time.

There is some really pretty figure in the wood. Another advantage of the new cutter head is that it makes really short shavings. You can see them wizzing around in the first stage of my dust collector window.

After a very minimal amount of sanding and clean up of the ends, I routed a round over on all the exposed edges.

With the boards in their correct shape I applied a coat of boiled linseed oil to protect the wood and give character. These will not see heavy use, so a tougher film finish shouldn’t be needed. The oil really pops out some of the birds eyes and other grain variation.

Unfinished above, oiled below

Once the oil soaked in and dried I installed the shelves. They don’t hold a lot now, but probably will as we collect junk in the future. With all the clothes in place you can barely see them. I almost wish I had used pine instead of this gorgeous wood. Oh well, it should be a good shelf for generations. The next owners certainly can’t say it was made of particle board and falling apart.

Table Saw Fence

I have had the same fence on my table saw for most of the life of the saw.  It is a bit of plywood and some UHMW plastic.  The plastic has great wear and friction properties, but was never that flat.

DSC_1073

I was looking for phenolic resin faced plywood as a replacement, but was coming up short locally.  It is available at the wood stores in Orlando, but they are far and charge a boat load of money.  I read about using cabinet grade plywood and applying formica to the front.  That is a lot of work, and bubbles could prevent flatness.

Instead I found out my local cabinet shop sells something called “White Liner” plywood.  It is nice birch plywood with a side covered in some kind of hard slick plastic.  It seems pretty durable and is very smooth.  I got a whole sheet for 58 bucks.  Cheaper than the 1/4 sheets the wood stores were selling the phenolic stuff for.

DSC_1072

I cut up 4 inch wide slices and doubled them up with glue to make a thick flat fence.  If the face gets damaged I could probably flip it over and redo the countersinks to keep using it.  I had so much material I made a pile of spares.  These could be used for sacrificial fences or whatever!

The new fence is very square to the table and parallel to the blade.  I have made some cuts with it, and life is good!


With nearly 2/3rd of the sheet left over I needed to get creative.  I use a piece of melamine in my planer to act as a flat surface to bridge the gaps between the fold out tables.  It makes for easier smoother cutting, but the inner particle board is starting to fall apart.

I cut up two pieces and glued them together using my table saw top as a good flat surface to clamp to.  This is thicker than my old one, but the planer can handle up to 6 inch thick boards.  No clue how I would ever get anything that thick into the planer, so I can sacrifice the depth.  A curved bit of plywood on the front acts as a stoping cleat so the sliding surface stays put.

It fits well and ought to stay really flat with the added thickness and quality material.  With a small touch of paste wax my planer has a new lease on life.