I have been a fan of the Fallout video game series for a good 20 years, since I first played the original game. Sometimes called Diesel Punk, imagine a retro-futuristic world imagined in the 1950s. Everything is nuclear powdered, sleek ray guns, cute suburban homes with tv dinners and a cold war that went hot. The game has a lot of back story and atmosphere including a soda brand called Nuka Cola that looks a lot like coke.
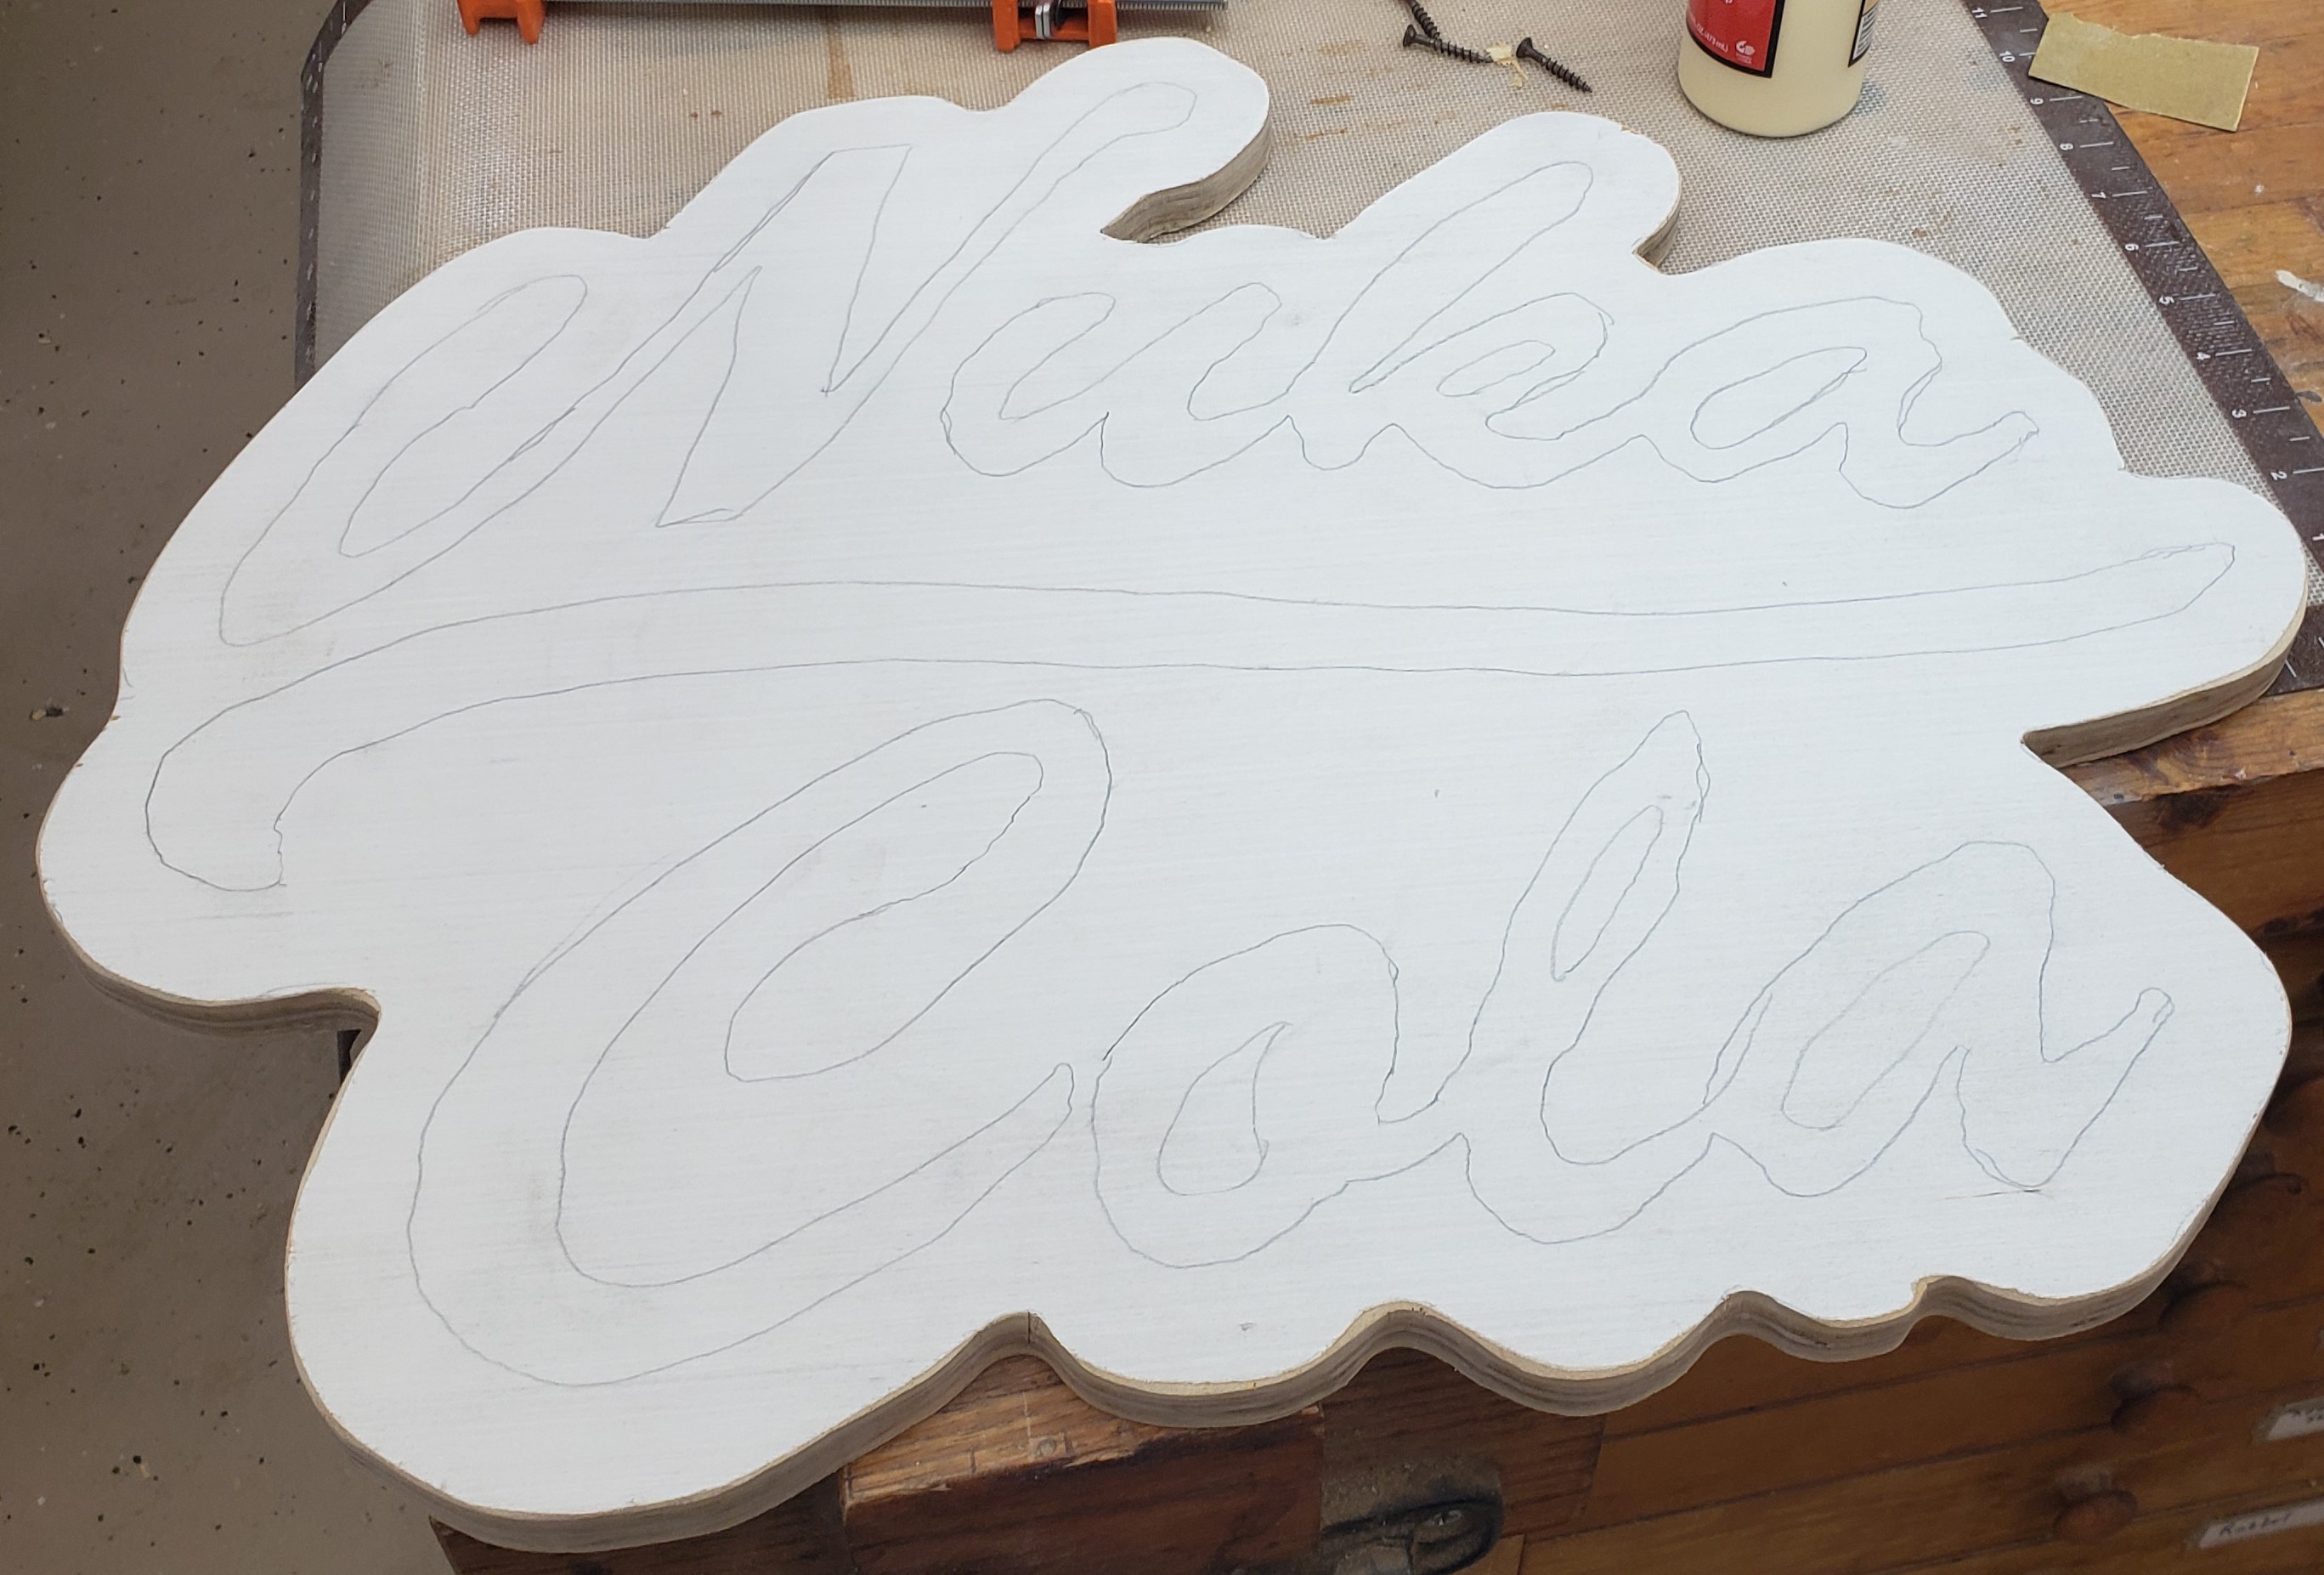
I am also a fan of this funny Russian guy that makes signs with lots of skill and few tools. He did a few different fallout based signs, so I had to follow his lead and make my own Nuka Cola sign. His methodology is simple. Project onto a piece of plywood with a cheap projector, trace, carve those lines in with a dremel so you can see them after you paint, then paint the various layers. I still managed to mess up a little. First up, the projection.
I found a rough text/logo of what I wanted and used inkscape to make the offset for the sign outline. I hand traced it and moved on to cutting the outline. It took a little special sanding to get it all straight and clean, but I was happy with the shape.
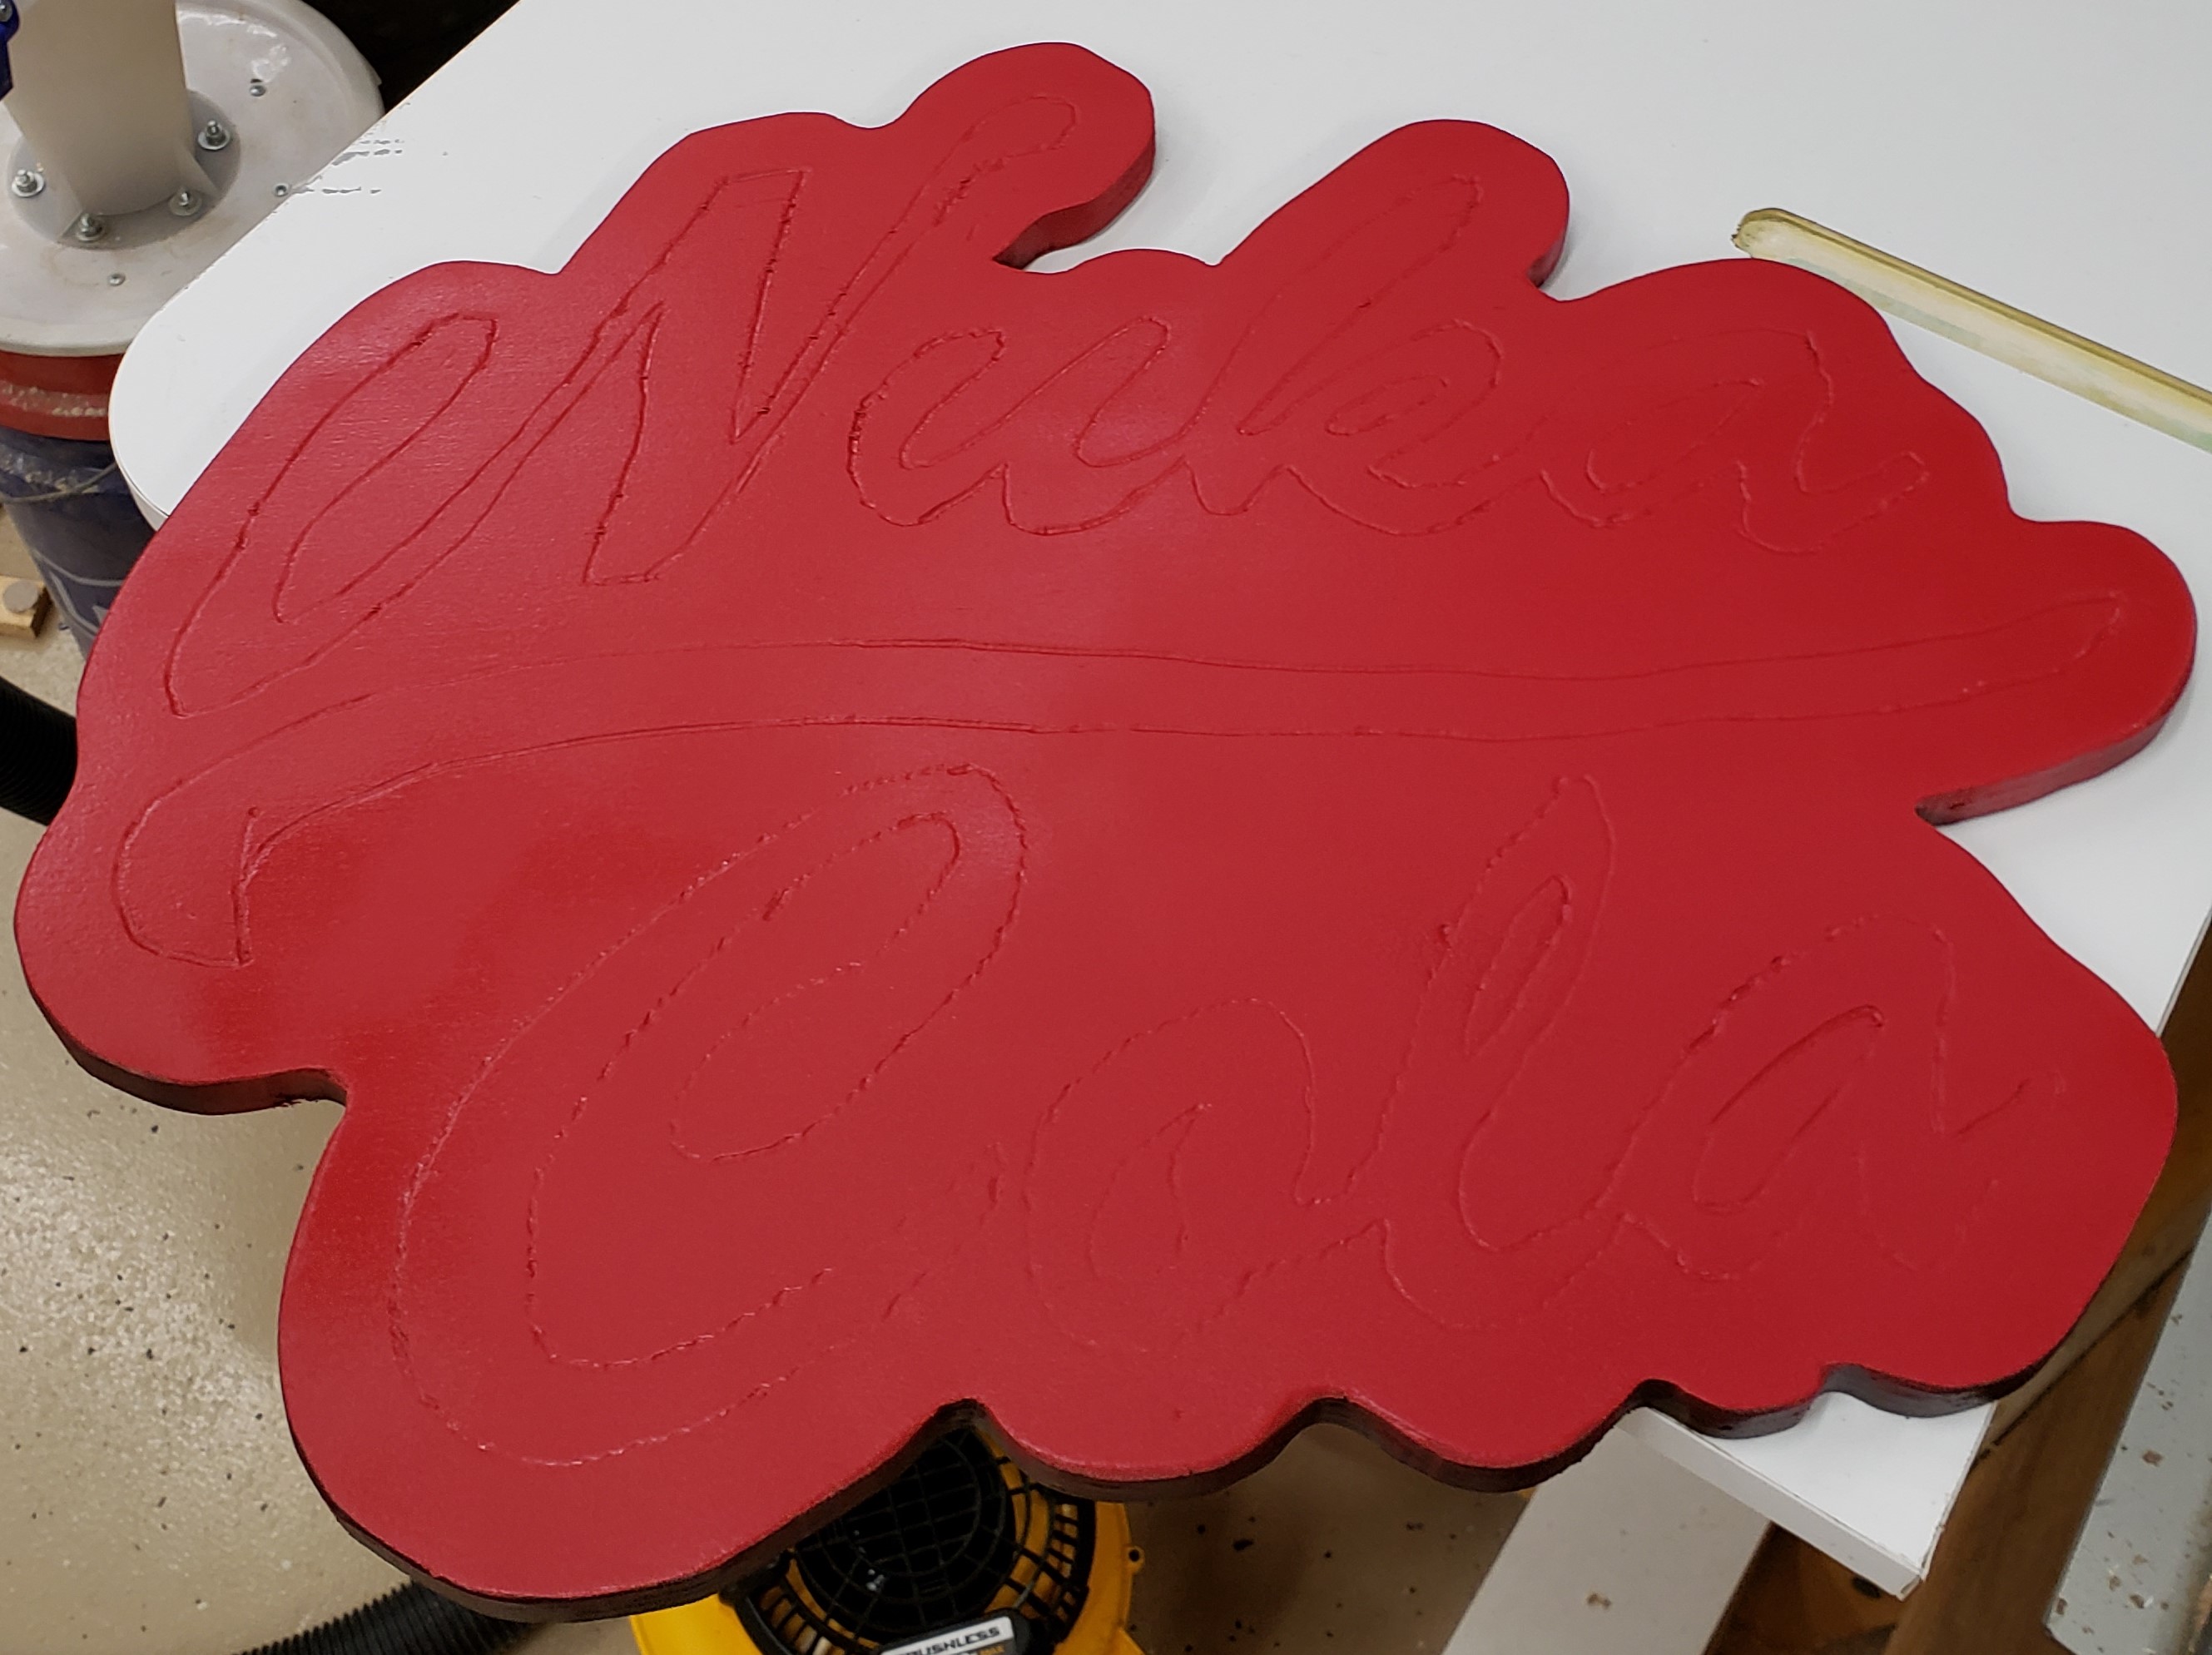
Next came the carving and a bit of an issue. The plywood I used was pretty light and I had trouble seeing how deep I was carving. I started with a small pointy burr, and moved to a much larger, too large, ball carver. Later when I painted it all, everywhere I touched was obvious, and the deeper cuts were obviously too much. Next time I might prime with a neutral color before starting the projection. It will make the pencil line standout better, and make the dremel lines more obvious.
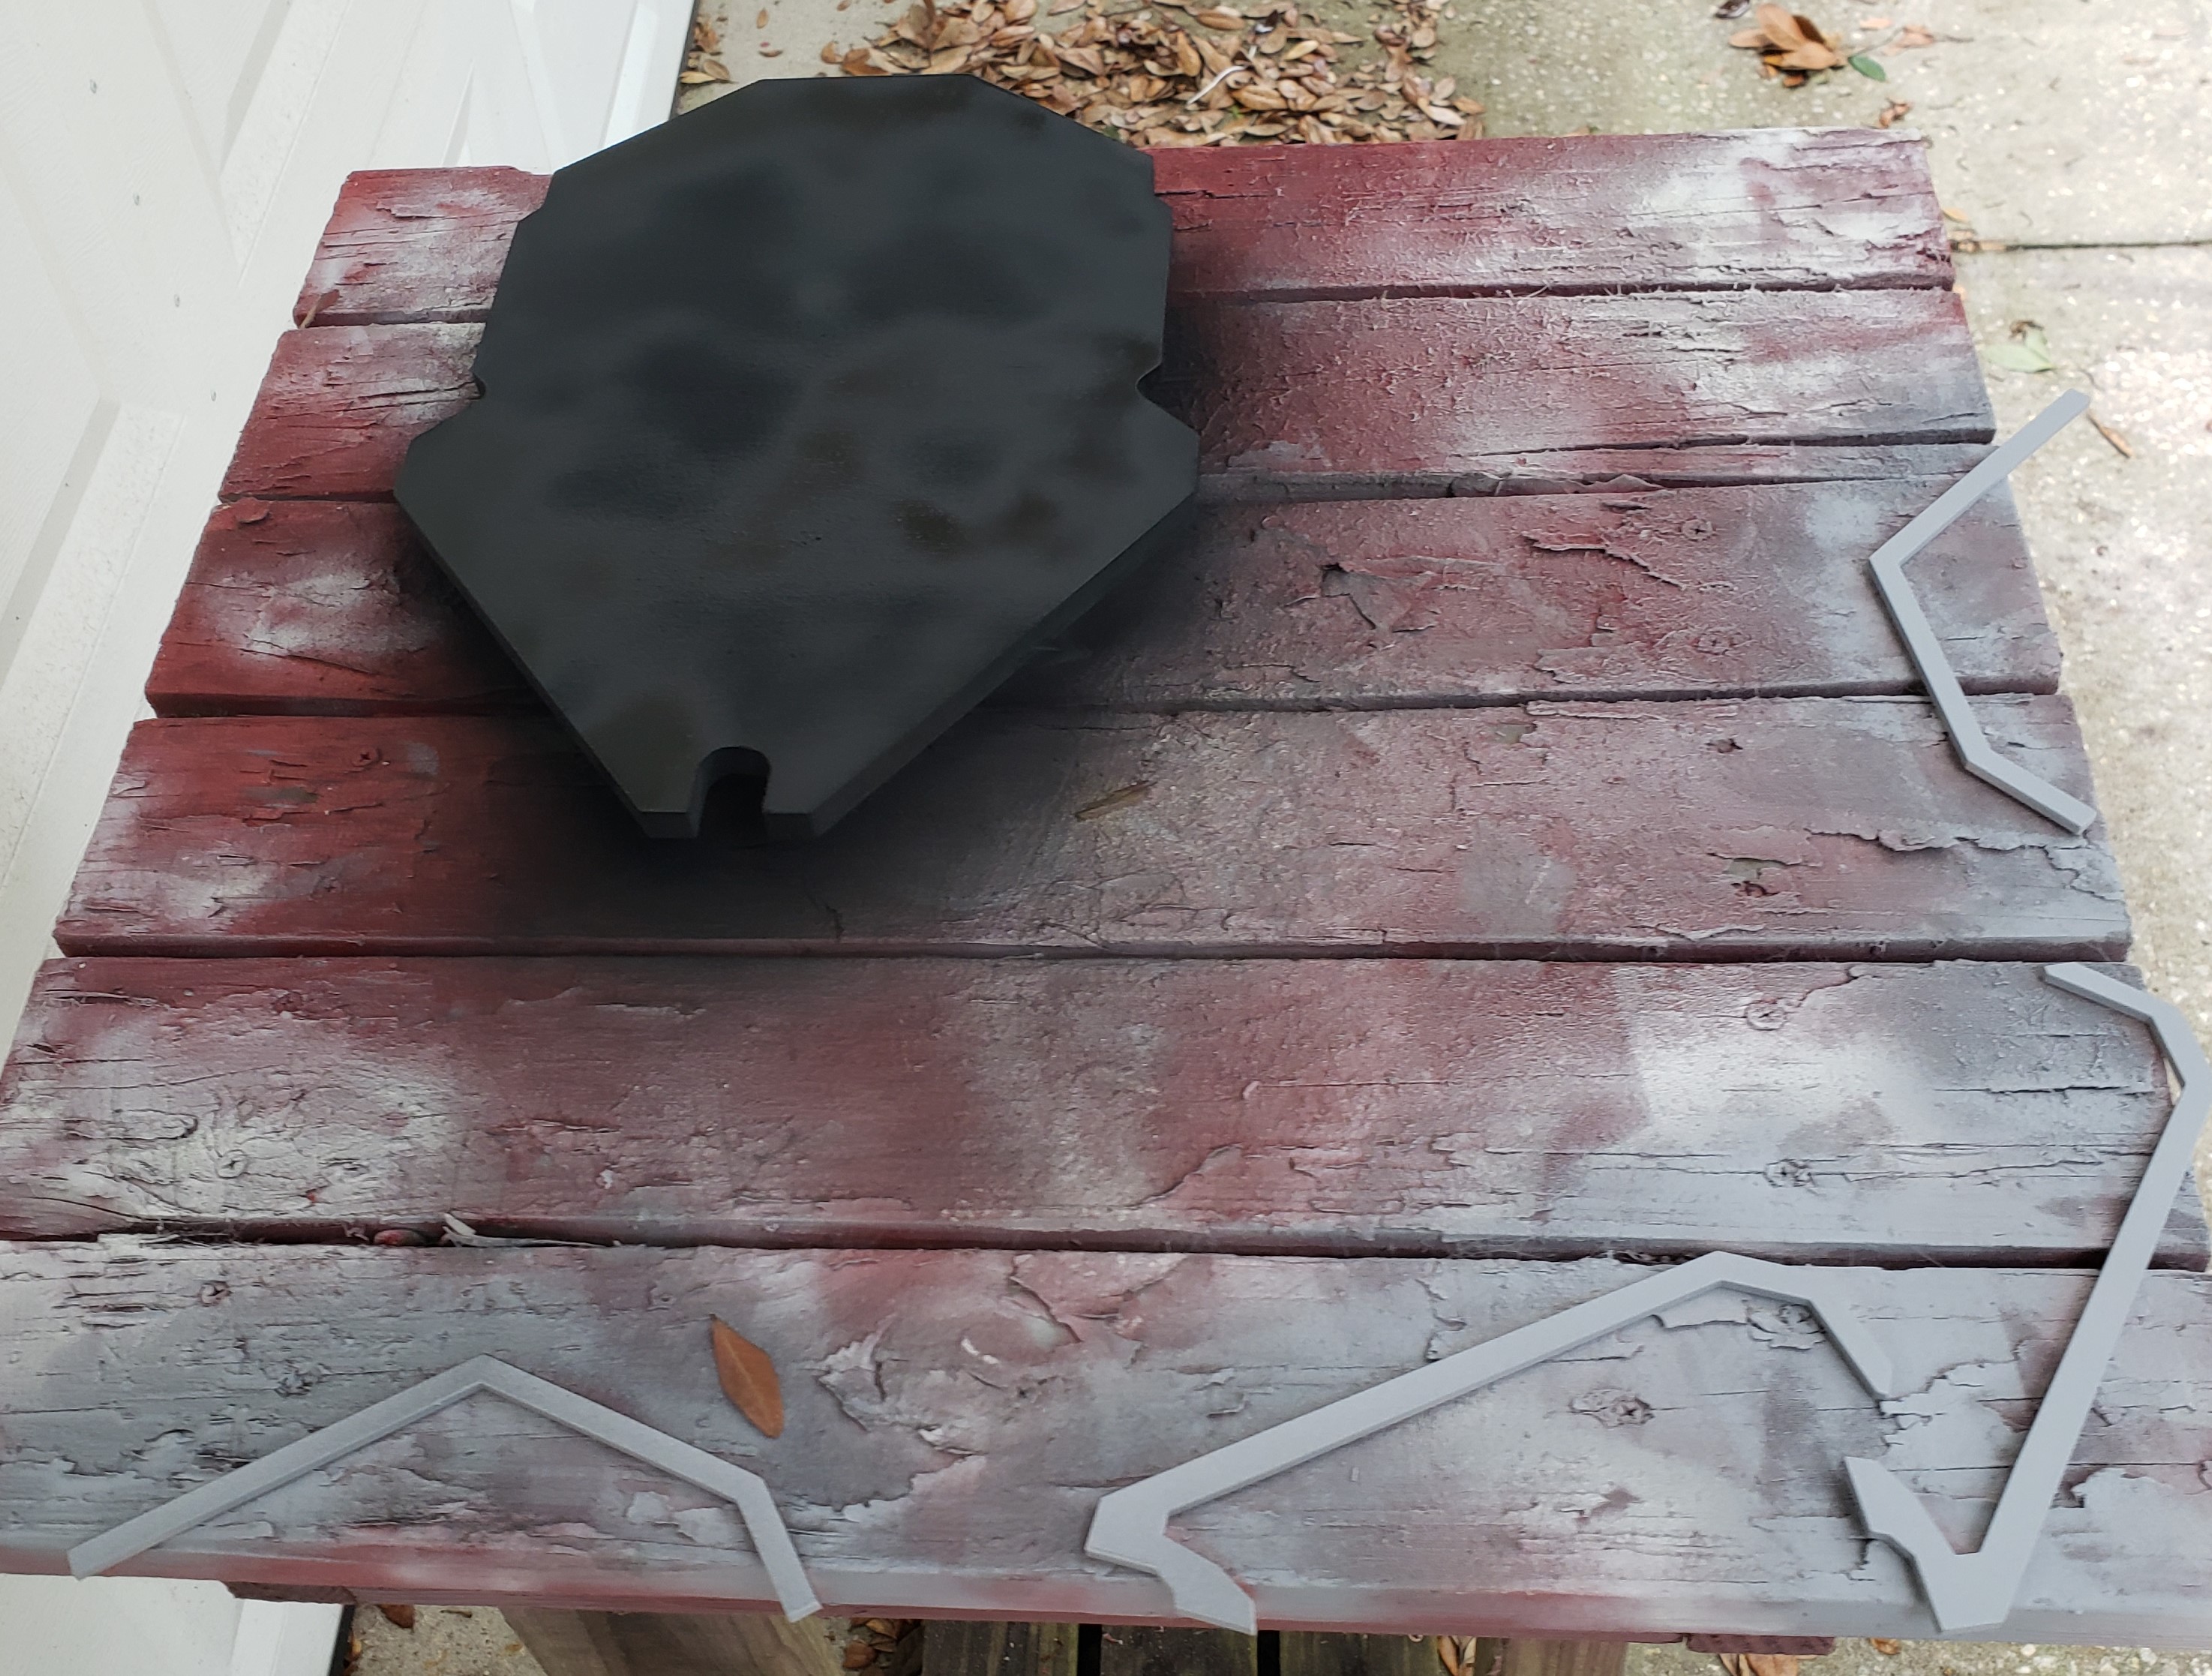
With it painted, the base red coat it might be a bit more obvious how uneven some of the carving is. The jigsaw guy mostly back sprays with black to form a border. I did that too, but the complex shape in a few spots means I will have to go back and do it again after putting all the red down.
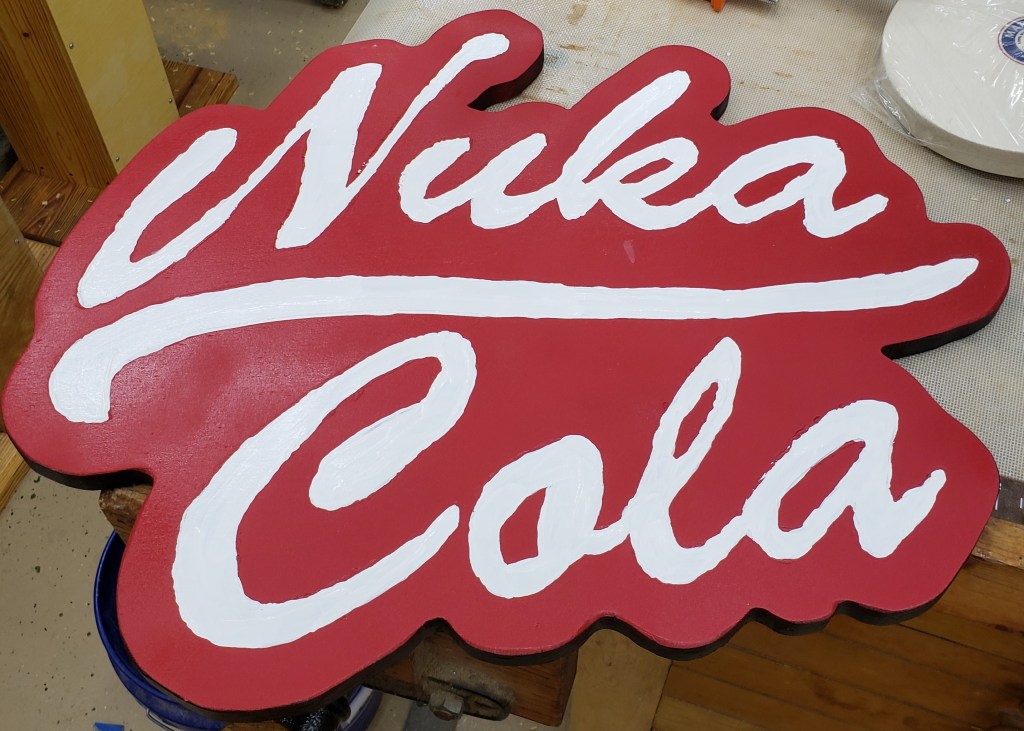
With the base of red down, you fill in the letters with white. I went for house paint and did 3 coats. It built up more texture than I wanted, a good quality craft paint might have been better. In the end it didn’t matter that much. The biggest issues was my wobbly carve lines that were too big in places. It kept my edges from being very crisp. It is hard to paint to a clean line when the guide is over an 1/8″ wide. A weathering trick he uses sometimes is to hit the finished product with a wire brush on a drill. Genius, it looks great.
Painting finished
Wire brush weathered
Overall I am really happy with the project, but I need to work on my dremel carving technique and hand painting. I have another sign idea in mind, so hopefully the lessons learned will be applied there. It looks great in my shop next to a metal fallout sign I got ages ago.
I learned about lacto-fermentation a month or two back and have been experimenting with it since. The principle is pretty simple. You cut up veggies of some sort, put them in a jar, cover with water, then add 2% salt by weight of the veggie and water. You can do sauerkraut and fermented hot sauces amongst other things.
My first attempt was with hot sauce. I owe most of my inspiration here from Ethan Chlebowski’s hot sauce adventures. He made 4 different hot sauces with the same ingredients, but different preparation methods. I am doing slightly different ingredients, and using fresh veggies to ferment.
I started with 3 poblanos(270g), 2 small jalapenos(40g) with some of the center removed and a number of garlic cloves(30g). Those all get rough chopped, thrown into a ball jar and covered with water. Weigh all that minus the glass jar weight and add 2% salt to the mix. I picked up lids that allow the mixture to burp the spare CO2, and prevent oxygen getting in. Also there are glass weights to keep the veggies submerged. It helps prevent mold. 9 Days later the jars were cloudy and smelled like pickly goodness.
Day 1
9 days later
I want this to be shelf stable if possible. The salt helps keep a lot of things from growing, and the fermentation part has created acid. If it is at or below 3 on the Ph scale, it should be shelf stable for a while. I picked up some test strips just for this, though I bet Ira and I can have a lot of fun with these in a few years. The strip looks to be 3 or less, so we are golden!
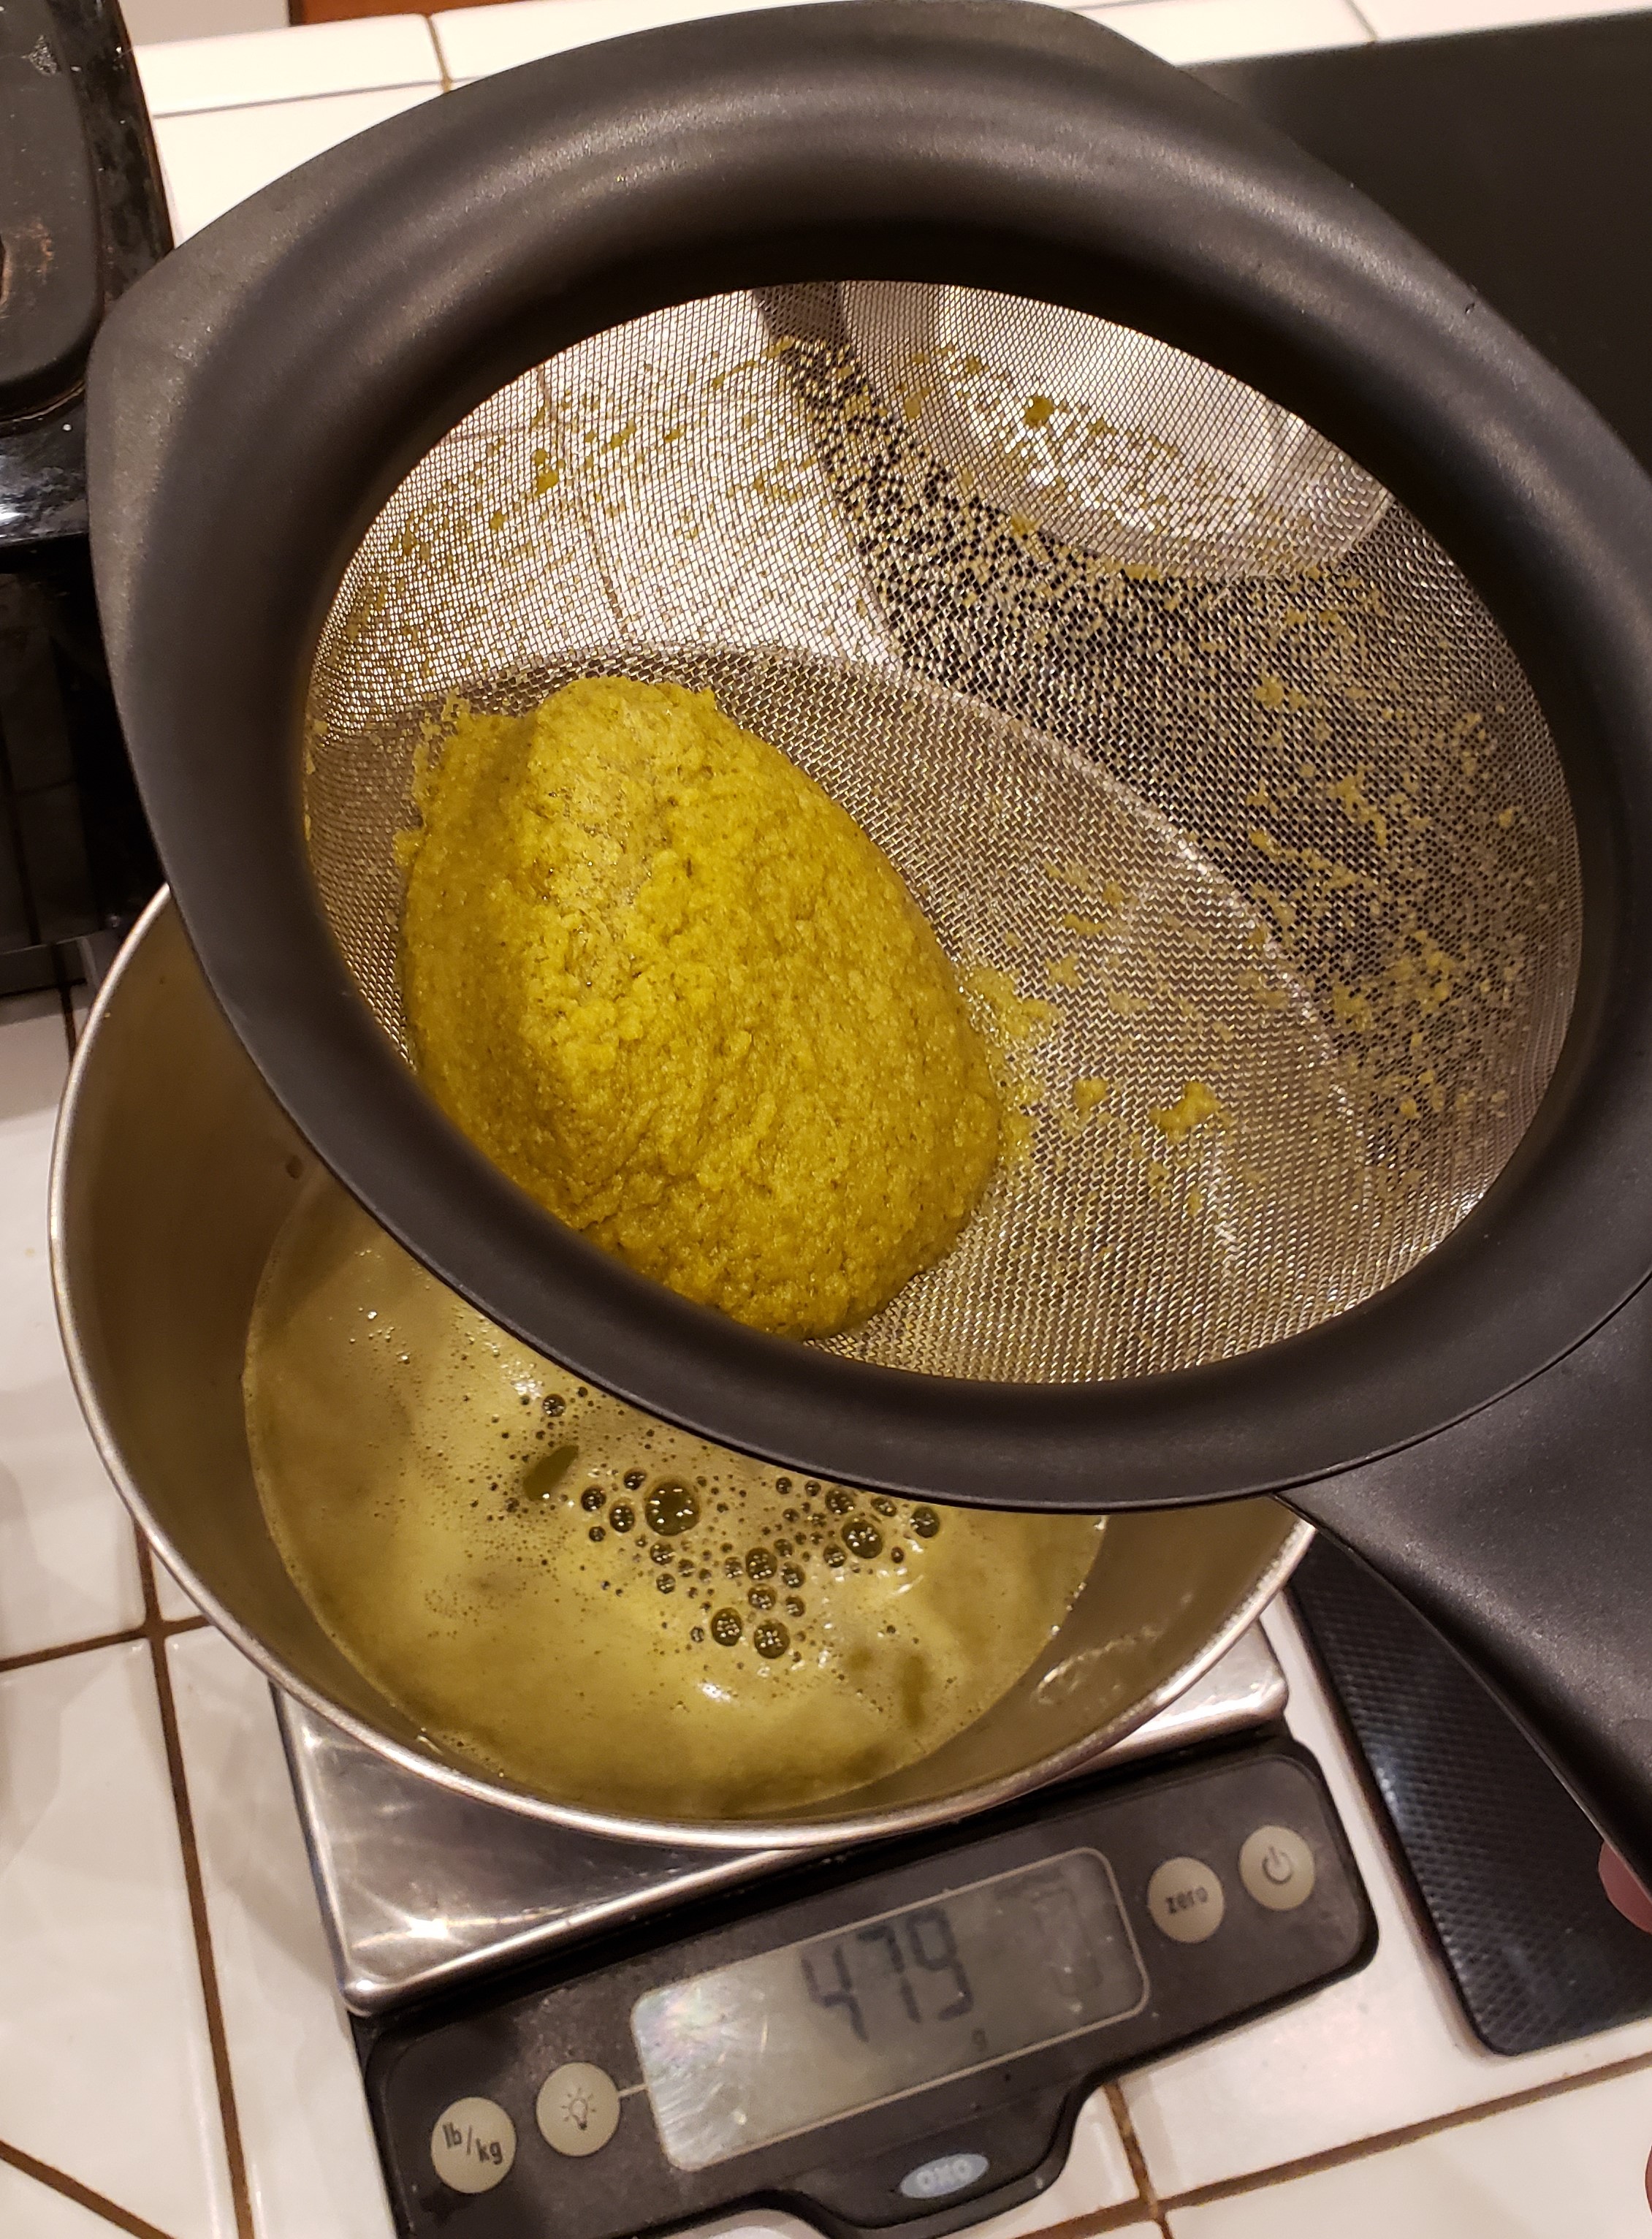
Next, you dump everything out into a blender and blitz like crazy. It whips some air in, but gets the mixture smooth. I strained it with a fine mesh strainer to get the chunkiest parts out.
This is where the most fatal flaw of my first batch came in. It is a really watery mixture at this point, and you want it to stick to your food. Xanthan gum is often used to add a little thickness. Check your favorite hot sauce, I bet it is in there. It can go wrong if you add too much though. I had about 500g of sauce, and it was suggested to use between 0.5 and 1g per 250g of hot sauce. Basically a 2-4% mixture. I did just under 2g, very hard to measure with a kitchen scale, and mixed it up in the blender. All set it went to the bottle.
The final grade is about a C-. It has a few major issues. I love garlic, but the raw garlic in this is really forward. The biggest problem is that it is too thick. Xanthan gum can make things kind of slimy if you use too much. I used way too much. The recommendation was not super helpful for some reason. It was ok at first, but after a day, it was a thick, but pour-able, slime. Time for a second version
Major lessons learned:
I used two pint jars, one quart would have been more efficient. Less room lost to the glass weight up top.
Use less garlic, it goes a long way in this sauce.
~2% Xanthan gum solution is way too much. I need a new way to measure.
Round 2
Undeterred, I set off with a new batch and tried again. This time I altered the pepper mix used. 145g poblanos, 115g jalapenos, 16g garlic. Less garlic and more jalapenos. It all fit well into a quart jar with a little tamping to coax it all down. Fast forward 9 days of hard bubbling and things are looking cloudy and smell right. Same deal as last time, blend, strain, and measure. I was right at 500g again.
This time I was more careful about the Xanthan gum. I would prefer to have it too thin, than too thick. To get a finer measurement, I would have to go for volume. My scale doesn’t do fractions of a gram. Instead, I took a teaspoon of the gum powder and weighed that. It came out to just about 4 grams. I had to add a tiny amount to get the scale to click over. A 1/4 teaspoon should be a gram. I have 1/8, and 1/16 teaspoon measuring spoons. I used the 1/8 one as a safe start. I slowly sprinkled it in while the blender was on low, and it looks like that did the trick.
My newly minted Green Goblin sauce is spicy without slapping you down. You can taste the peppers and a good serving of garlic. It is a little thin, and I might try more gum next time, but this is a good spot to start. The first one foamed more because of the gum, and less this time prevented foaming. I gave away 3 bottles for people to test, and kept one for my own cooking. The green sauce is good, but I prefer red sauces mostly. I will have to track down more peppers and make something different next time.
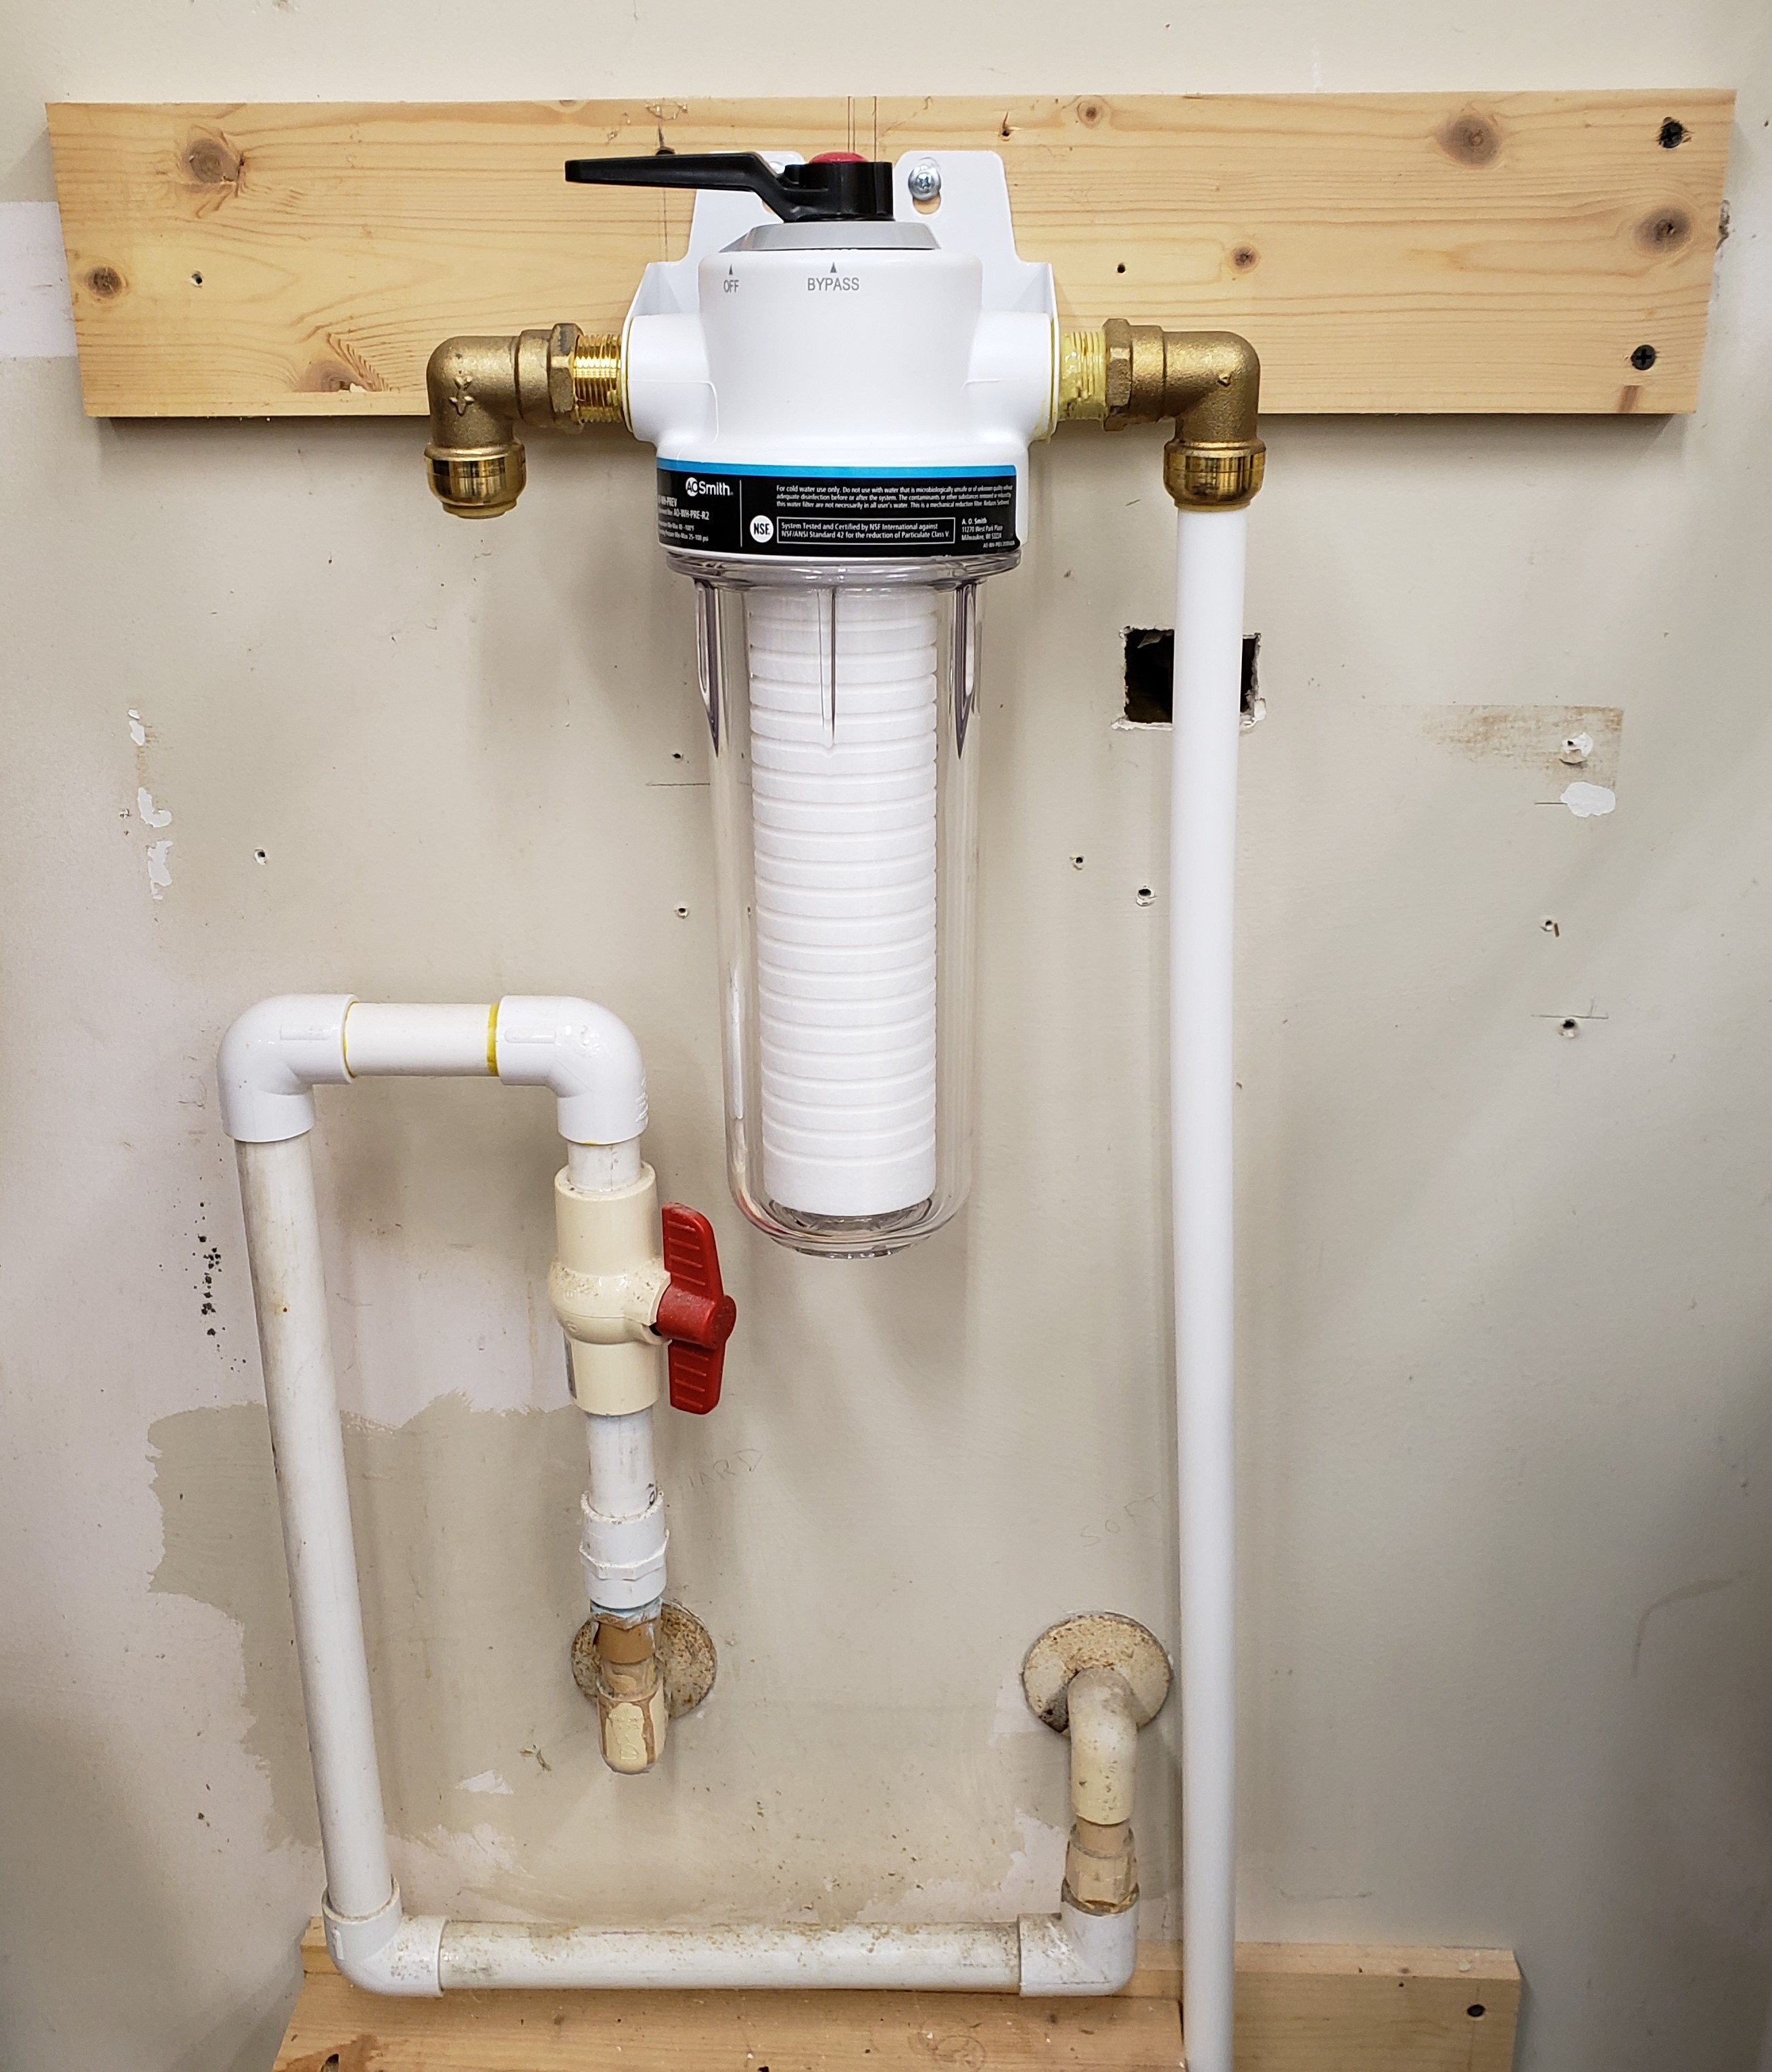
My house had a water softener system when we first moved in. It was leaking and I felt like the city water we get is pretty decent, so I had it cut out when some other plumbing work was getting done. Before moving in I replaced every supply valve, toilet, and faucet in the house. Since then, I have had all the sink aerators clog, two valves foul, and a toilet get so slow it takes forever to fill. That is in less than 3 years. I need some kind of filter. Should have left the water softener in place and repaired it. Oh well, now I know. I am going with a simple whole house water filter instead.
Here is what I was left with. 3/4″ and 1″ pipe, PVC and CPVC, lots of elbows and adapters. At the time I made a cover to go over it so I wouldn’t bang anything.
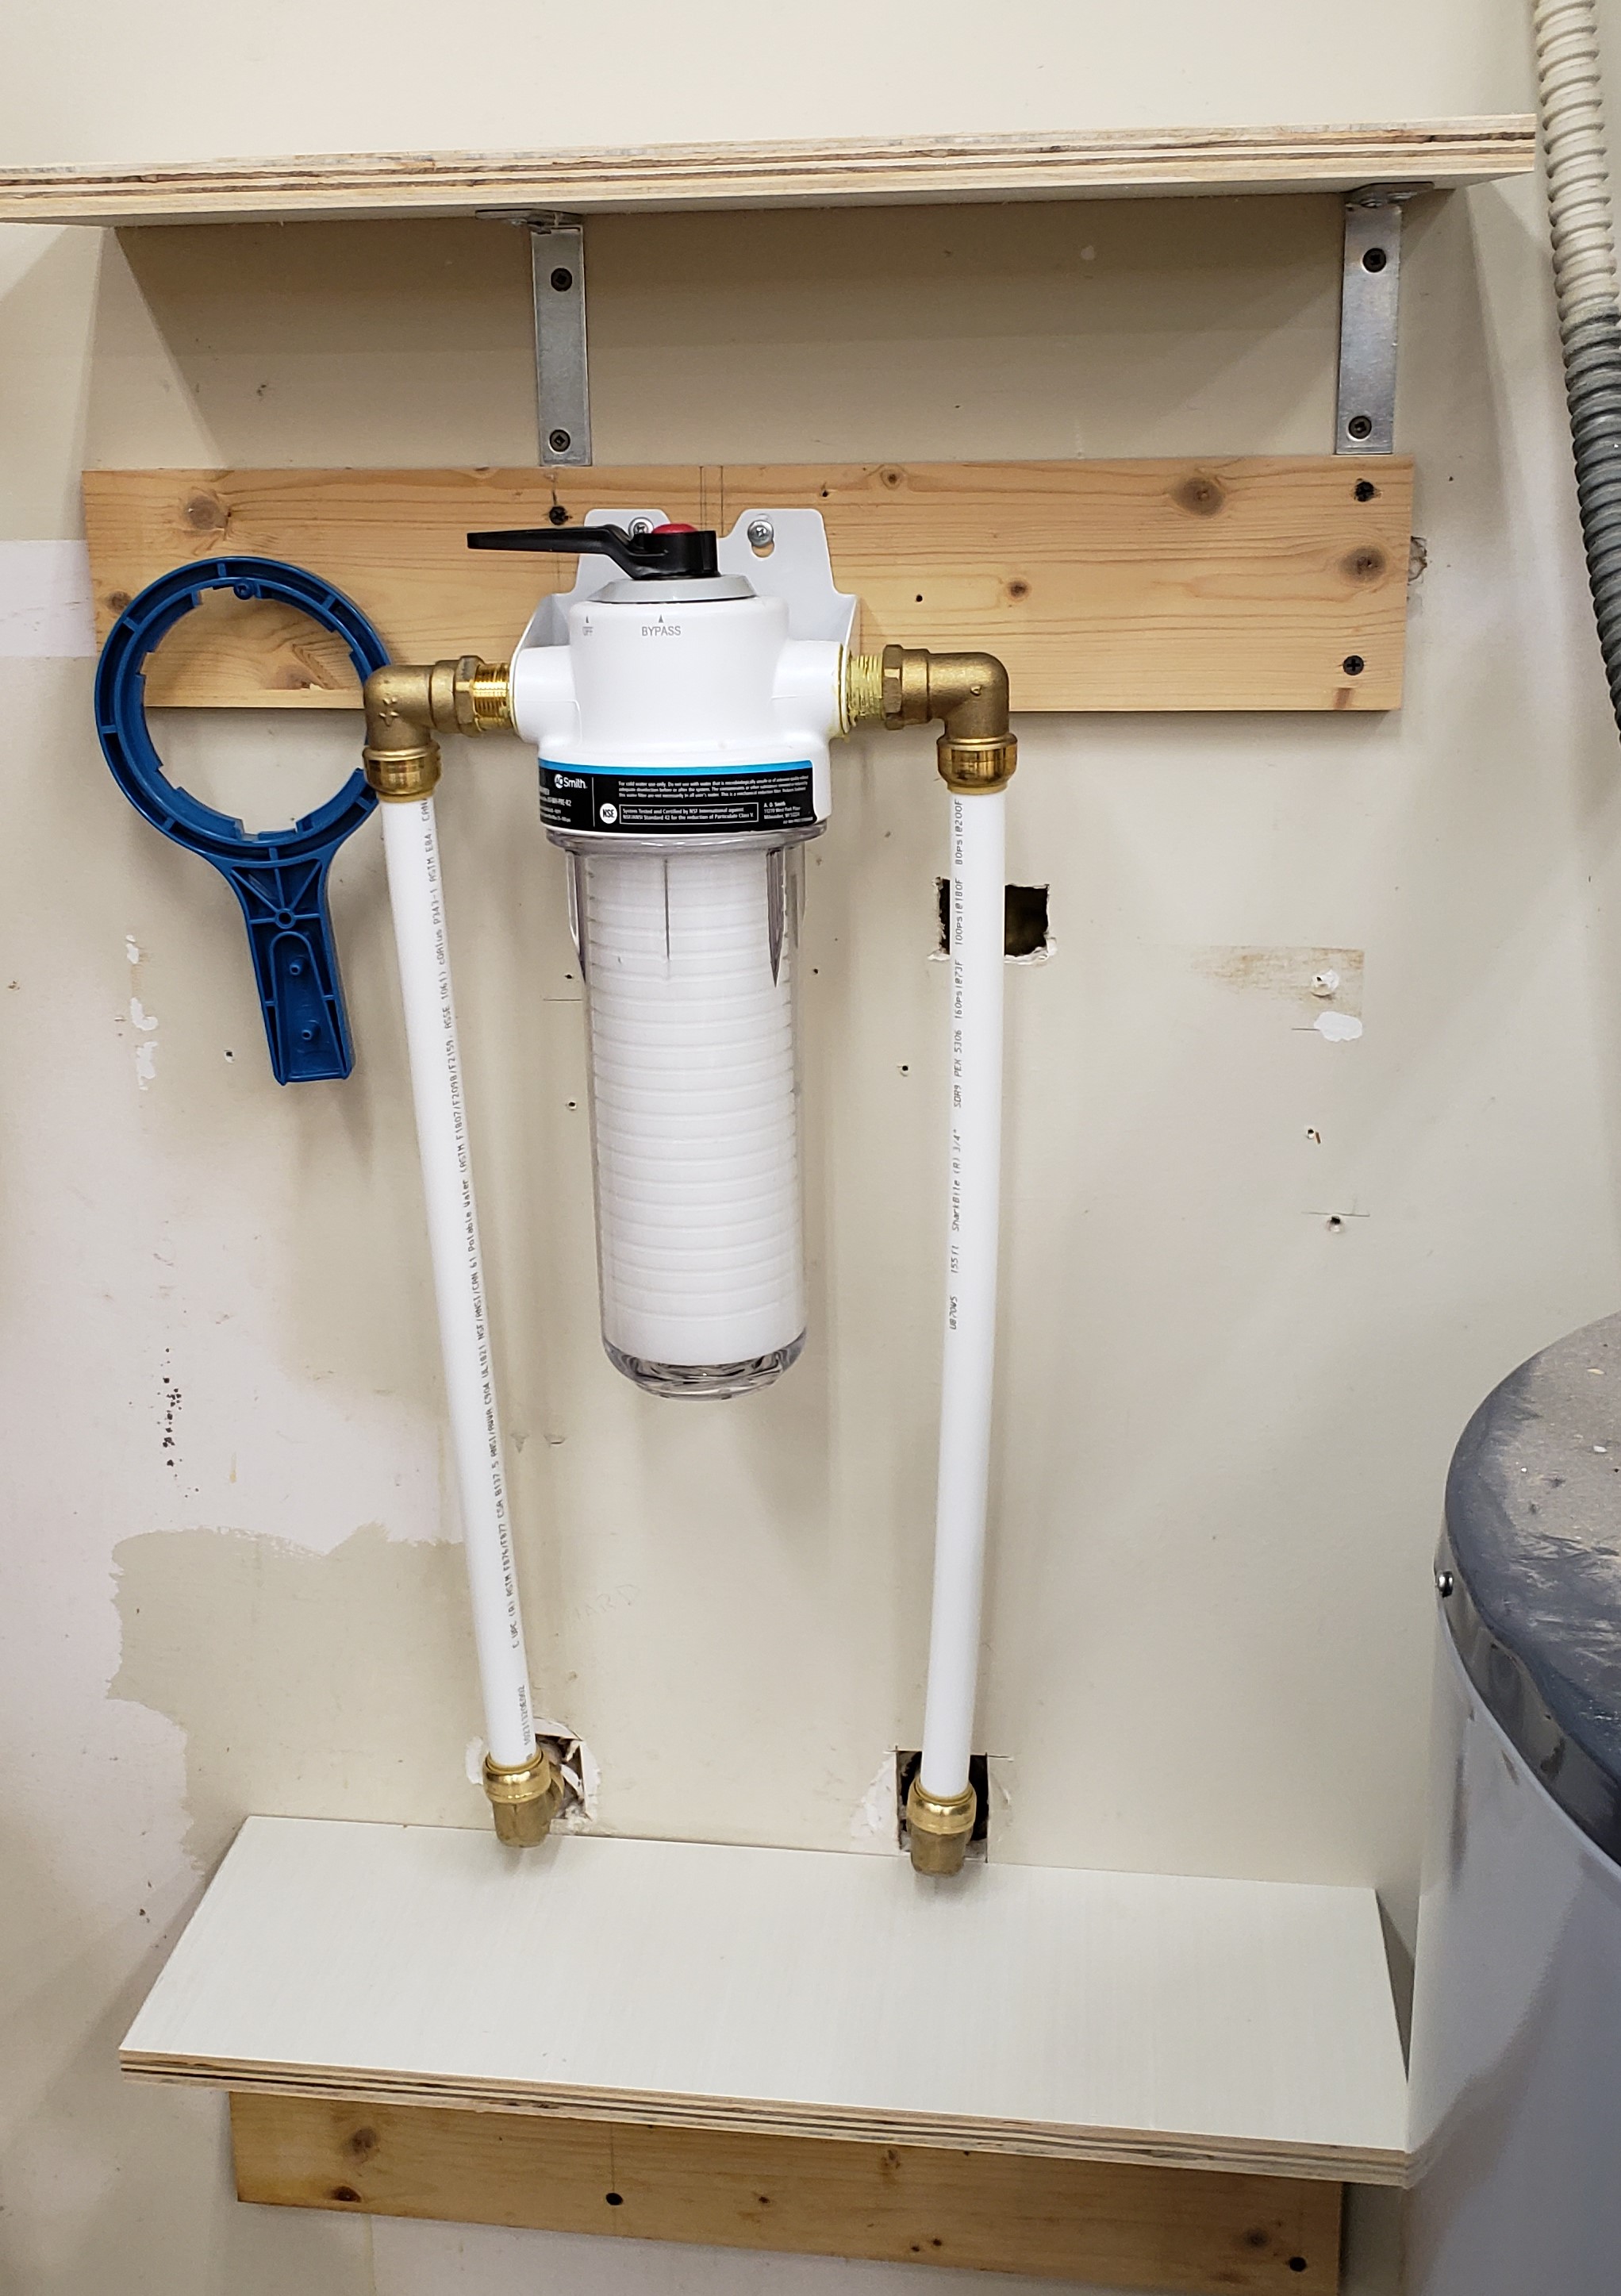
I started by moving the top plank of wood up to give me a good anchor point for the filter. I used pex tubing between the wall and filter to give me something a little flexible in case things didn’t perfectly line up. The shark bite fittings are expensive, but quick to assemble and make future repair easier.
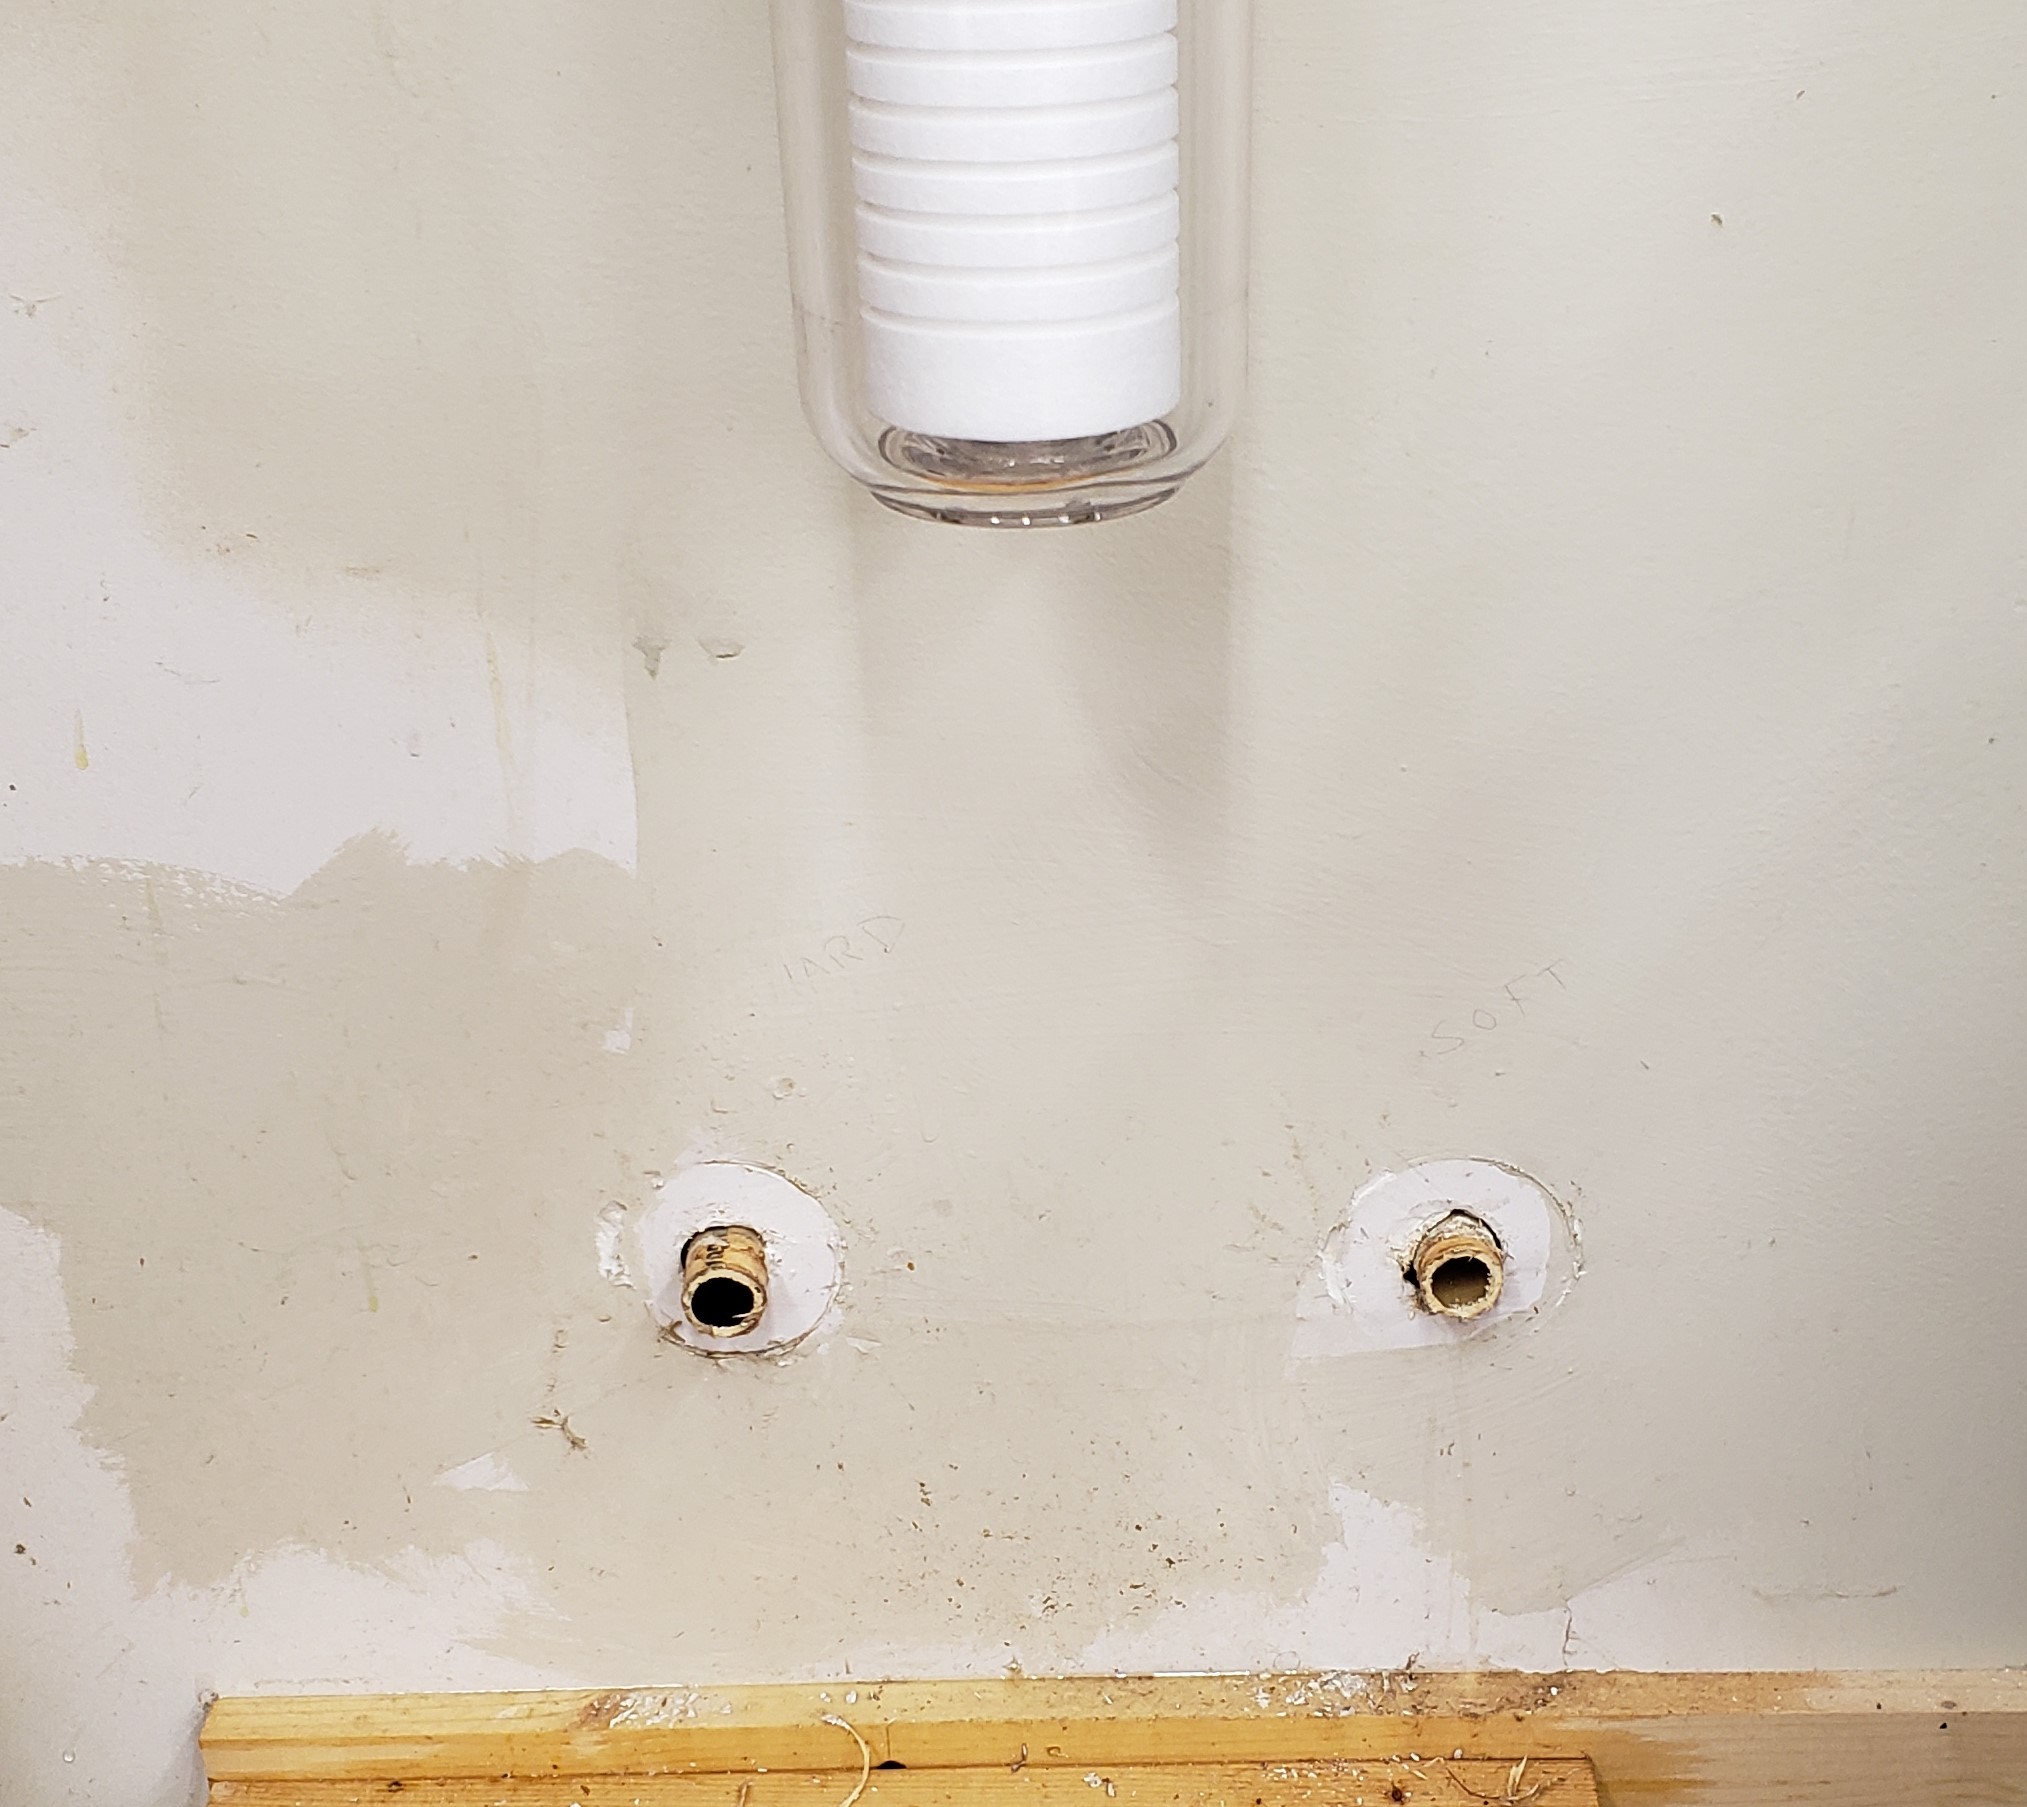
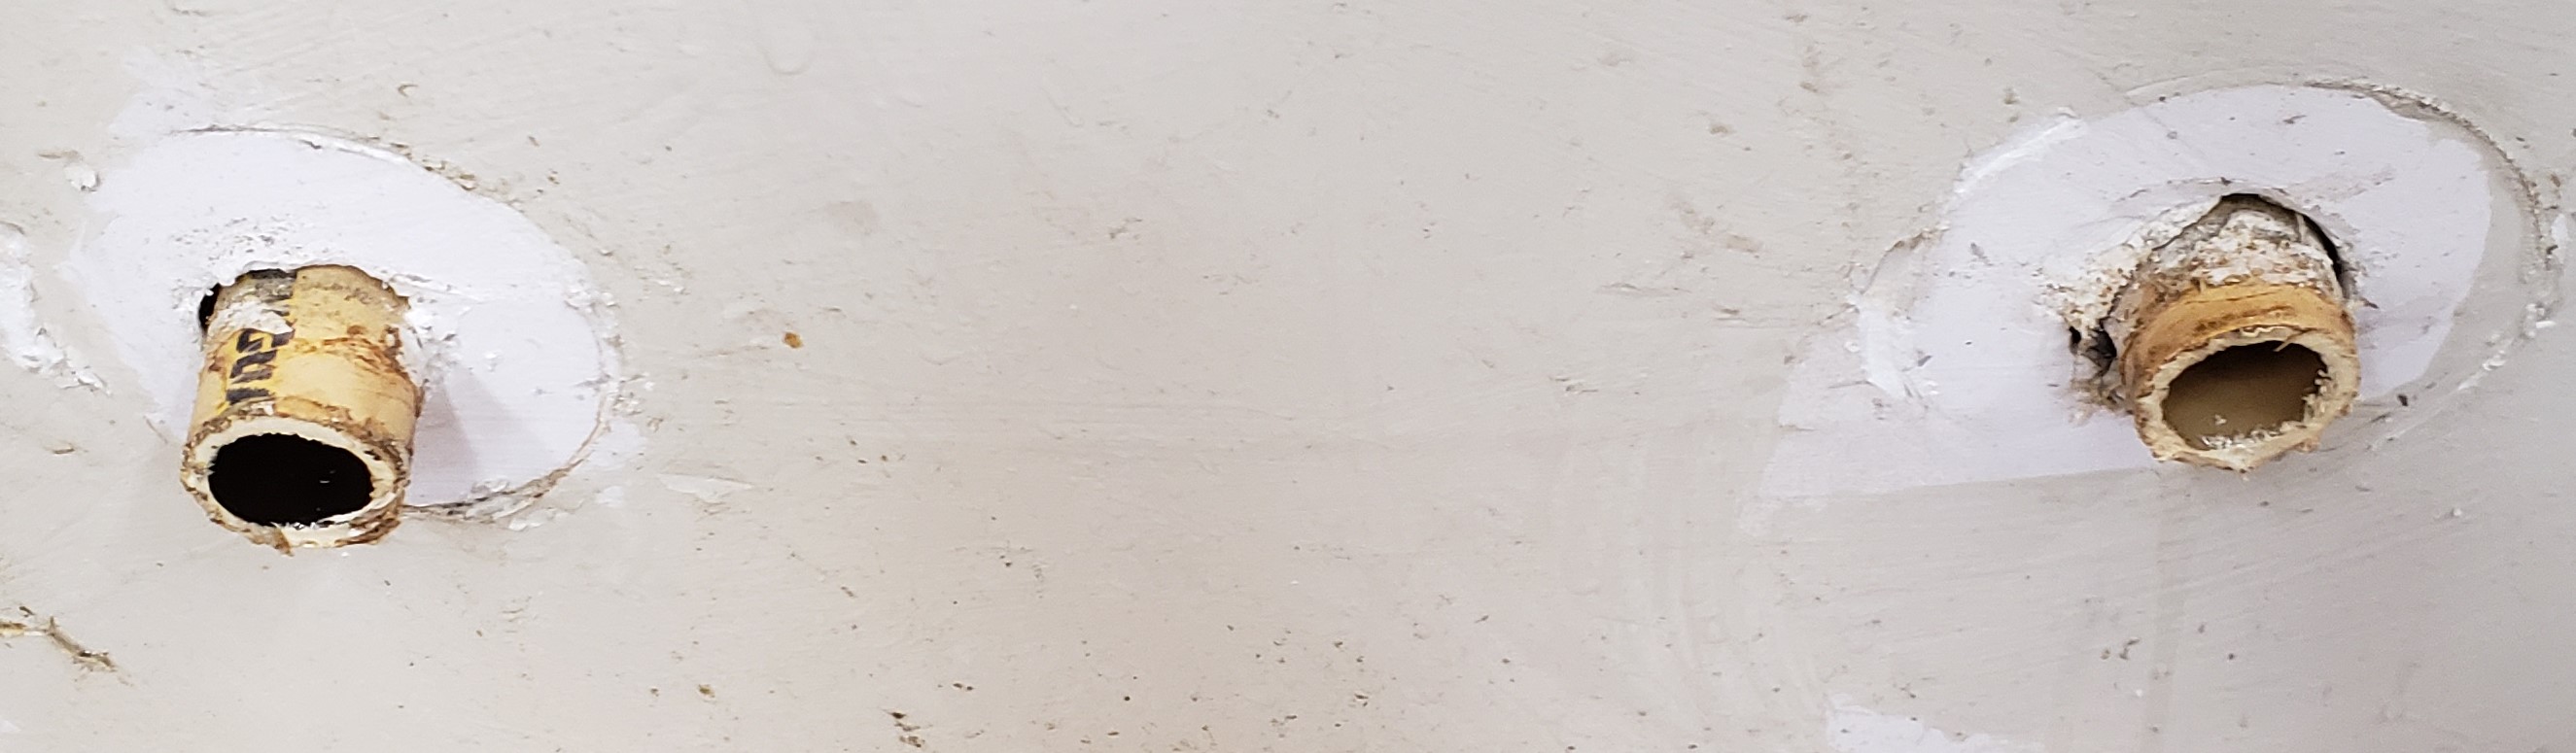
I installed the filter in location the weekend before and cut the plumbing when I had a full day to devote to it in case something went really wrong. I shut off the water and made the first incisions. I wasn’t left with much pipe coming out of the wall.
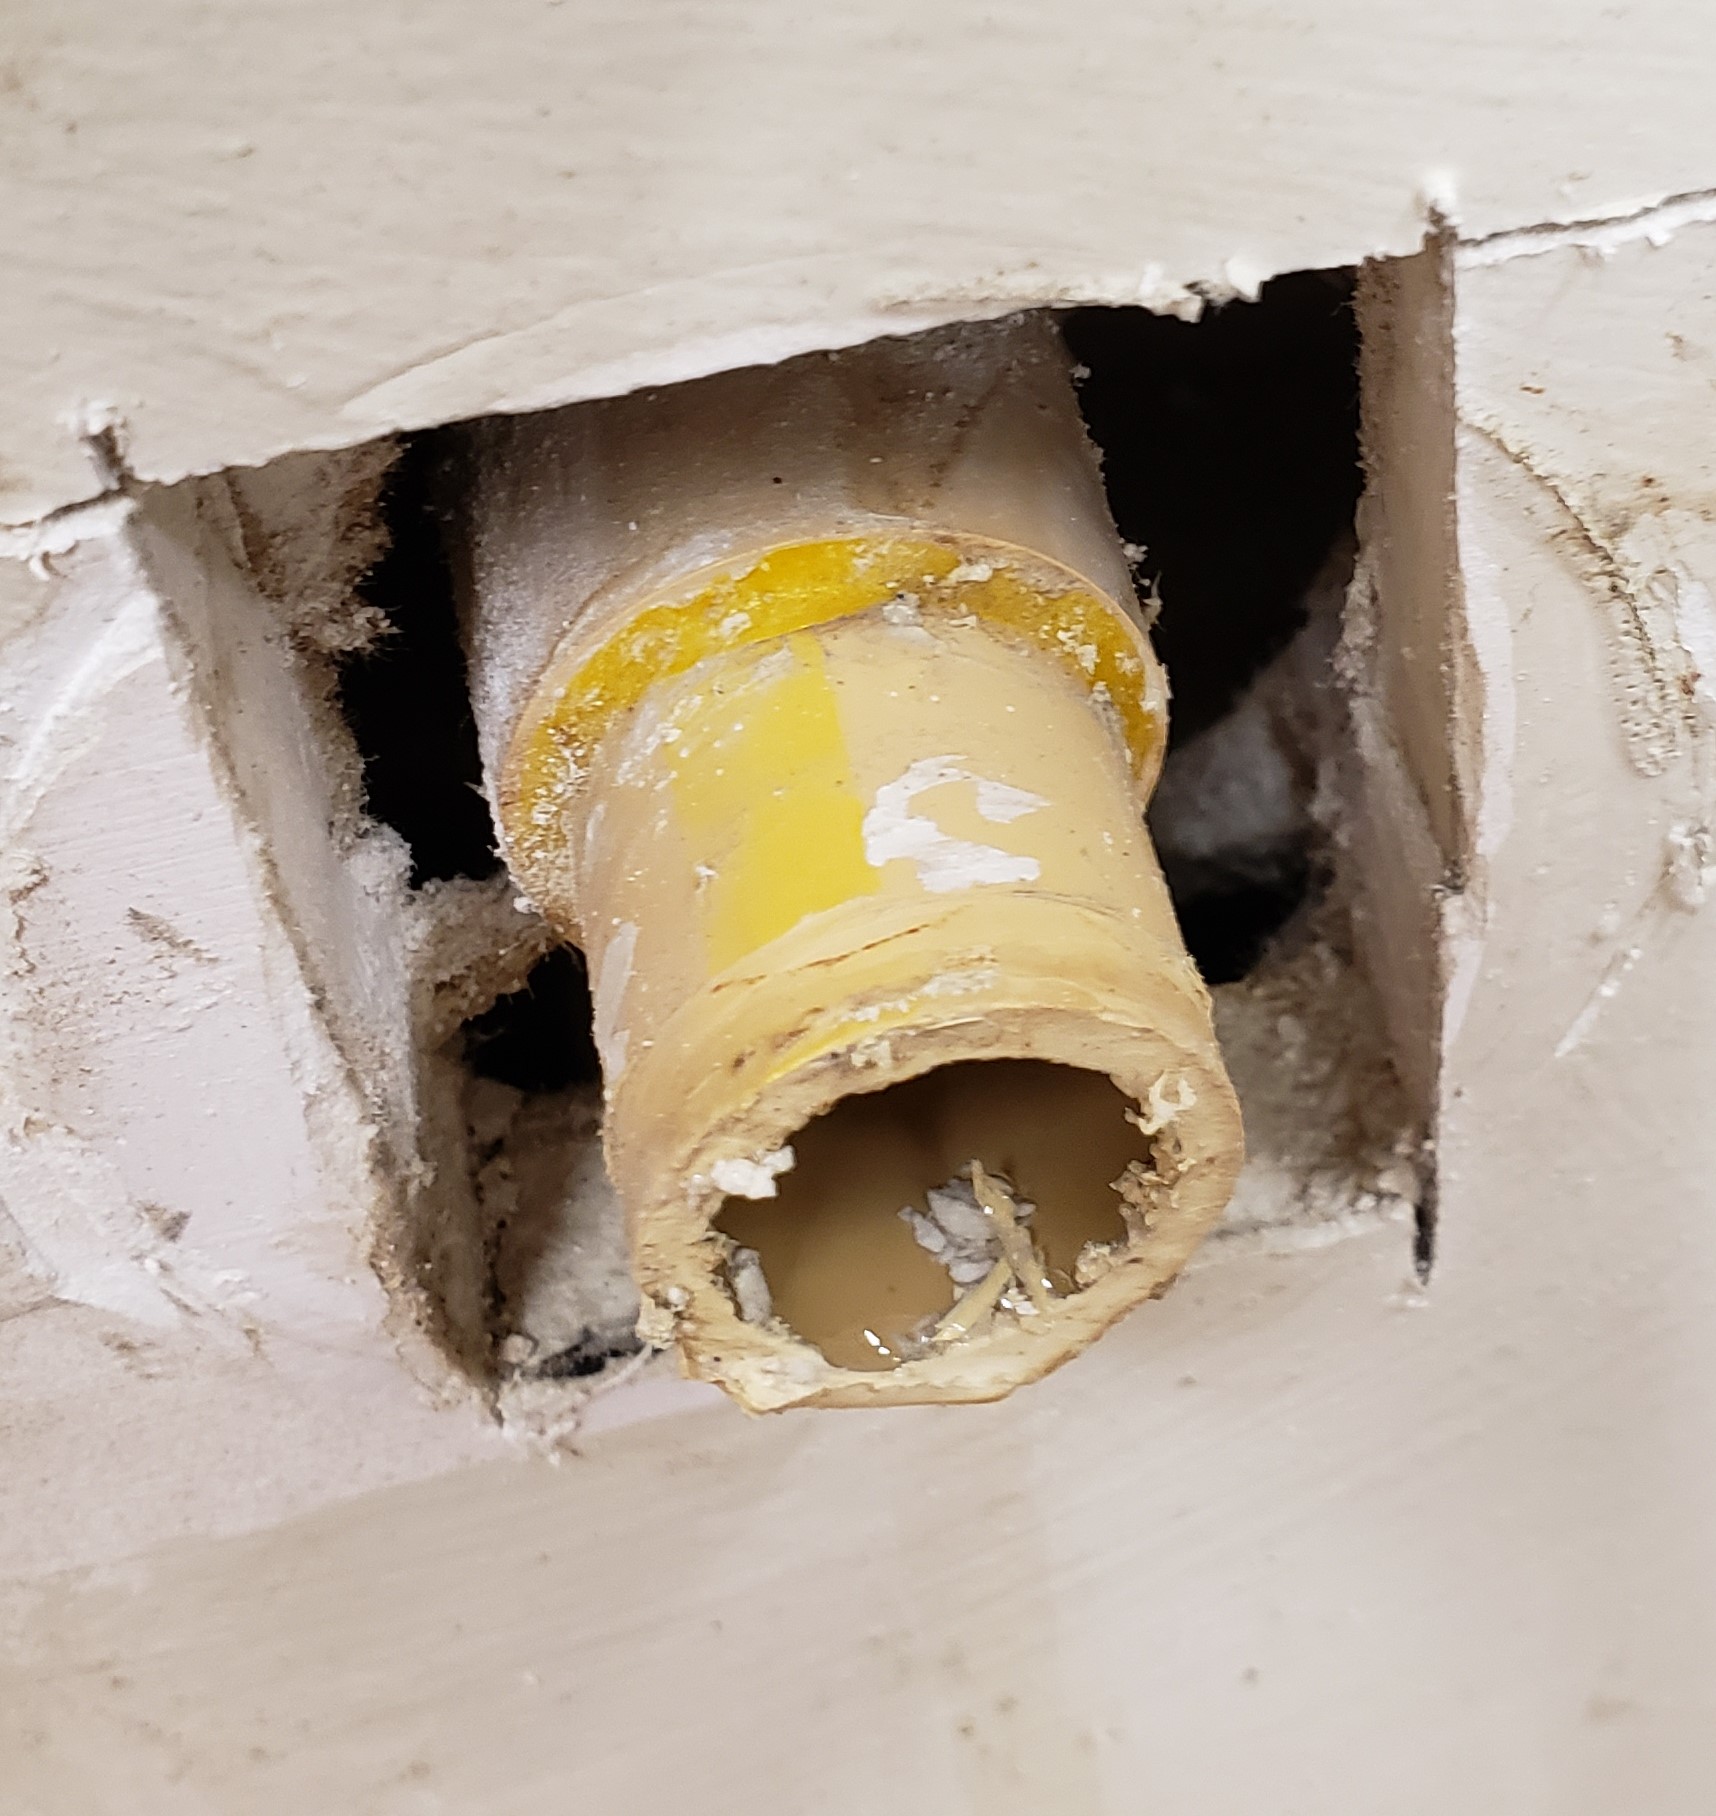
I used my oscillating multi-tool to cut the pipe as flush to the elbow as possible, and it came in handy again for opening up just a little drywall around the pipes. Turns out there is an elbow inside the wall on the right hand side. I have very little room to do anything here. Thankfully I measured and had enough sticking out to mate with my shark bite fitting. I don’t know that I can remove this fitting properly and will probably have to cut everything out of the wall if anything needs doing in the future. Then again, if this didn’t work I would be doing the cuts anyways.
The rest of the plumbing went quickly. I put everything in place, turned the water back on and checked for leaks. All good! I installed some shelves above and below the filter to keep my ladders from banging into anything important. They also give room for extra filter storage. I have a clear view of the filter whenever I walk in so I can see when it is getting full, and a mini white board to track the change date. Hopefully all my downstream plumbing is safe now.
My Bandsaw Circle Jig actually started out as an idea for a disk sander jig I saw in one of my woodworking magazines. They used a sliding arm with a screw adjuster to fine tune the diameter of the circle. I thought this was neat and it slowly evolved into the arm I made for my bandsaw jig.
I already had an arm with T-slot track in it from the bandsaw project, so I figured that would get used in both jigs. You could cut on the bandsaw, then fine tune on the disk sander. The construction method I used before applies well here too. 3D print a runner to go in the miter slot, start with a base of 1/4″ MDF, then attach 3/4″ MDF on top to guide the sliding arm. I CA glued the runner in place with it all aligned, and then screwed it in from underneath.
I don’t have any features to keep the adjustment arm locked down because the disk sander’s movement should push the work piece into the table and keep it stable. Hopefully that theory continues to work out for me.
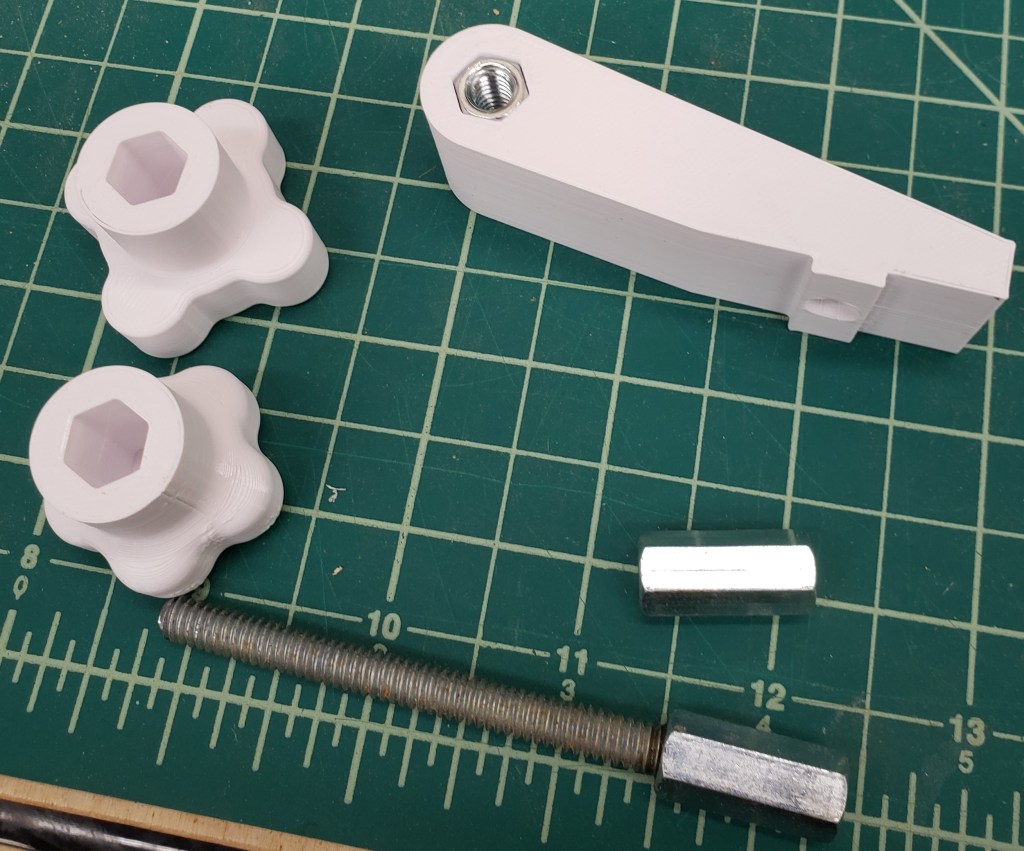
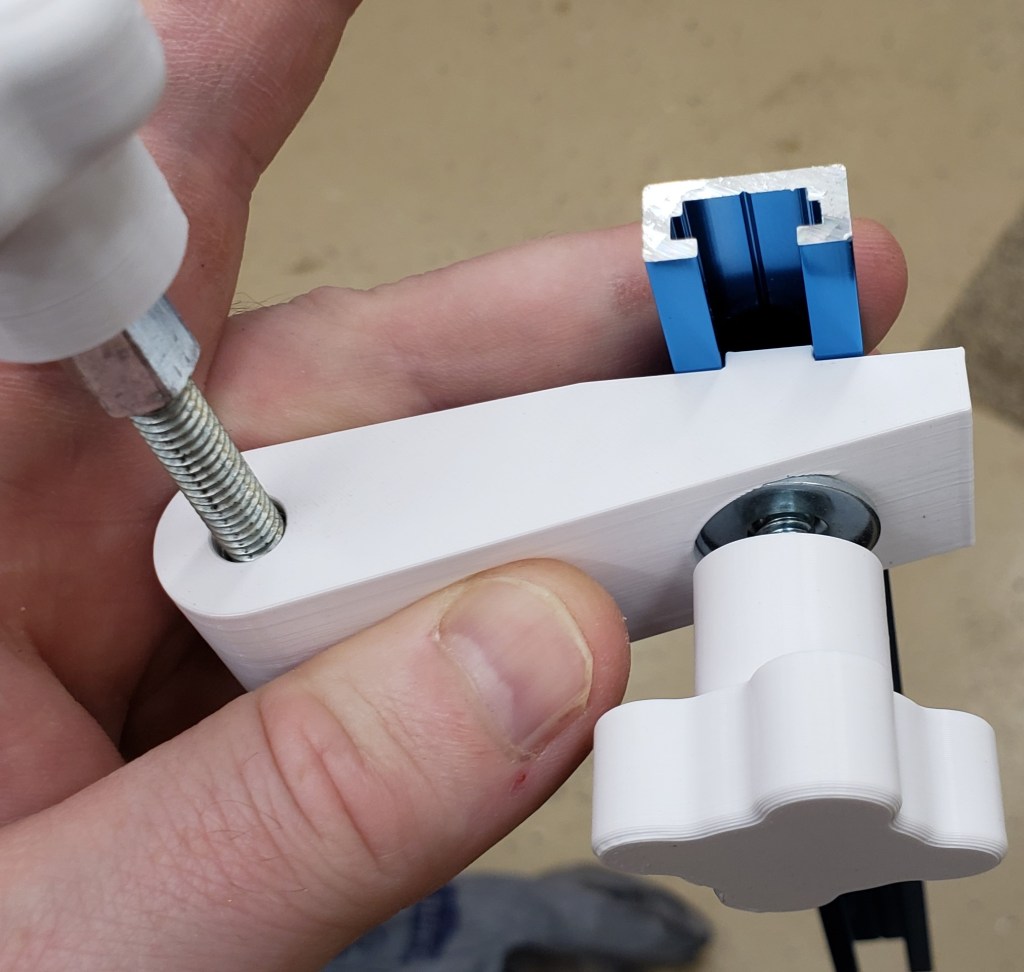
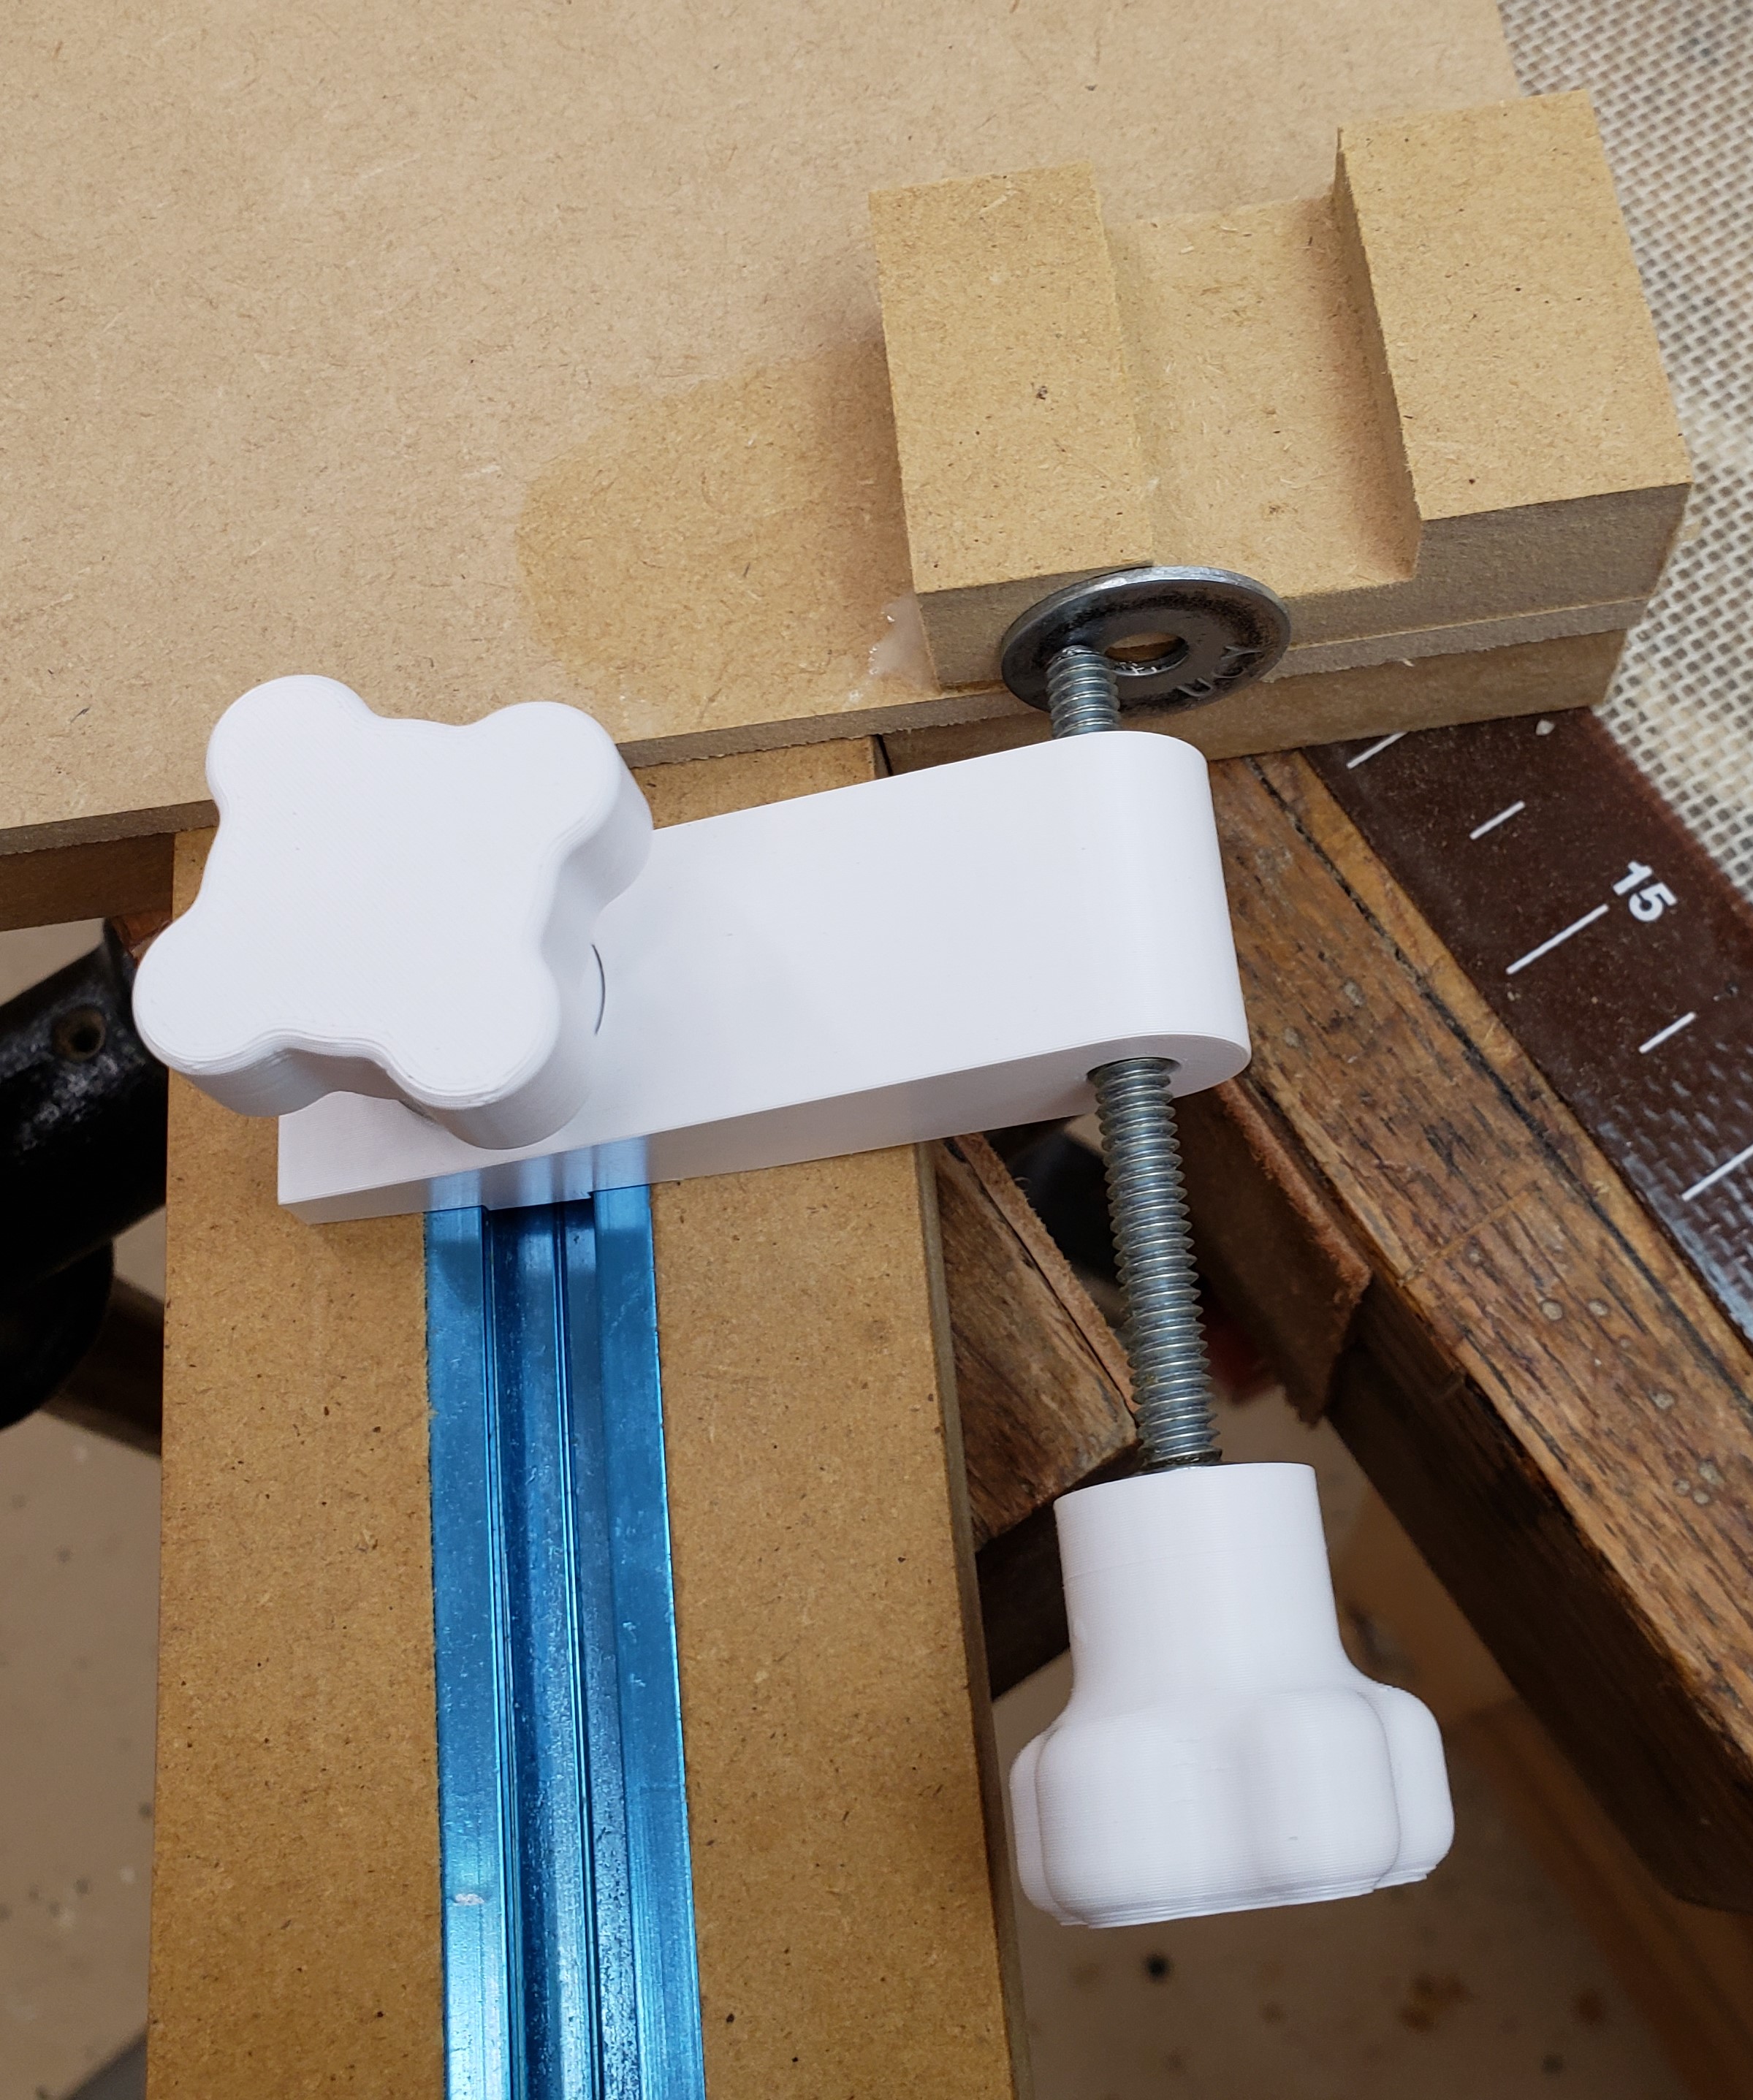
The new thing here is the adjuster. The wood magazine had something with a T-nut and bolt. It was fine, but I figured a printer could do better. The knobs were something I had designed earlier. Each holds a 1/4″-20 coupling nut. The adjustment screw is a bit of threaded rod with a coupling nut bonded to one side. The other was rounded via a drill and bench grinder. The knob will glue on to the nut and the rounded end will push up against a hard stop. Having it rounded should mean there is only point contact and will make for smoother more even adjustment.
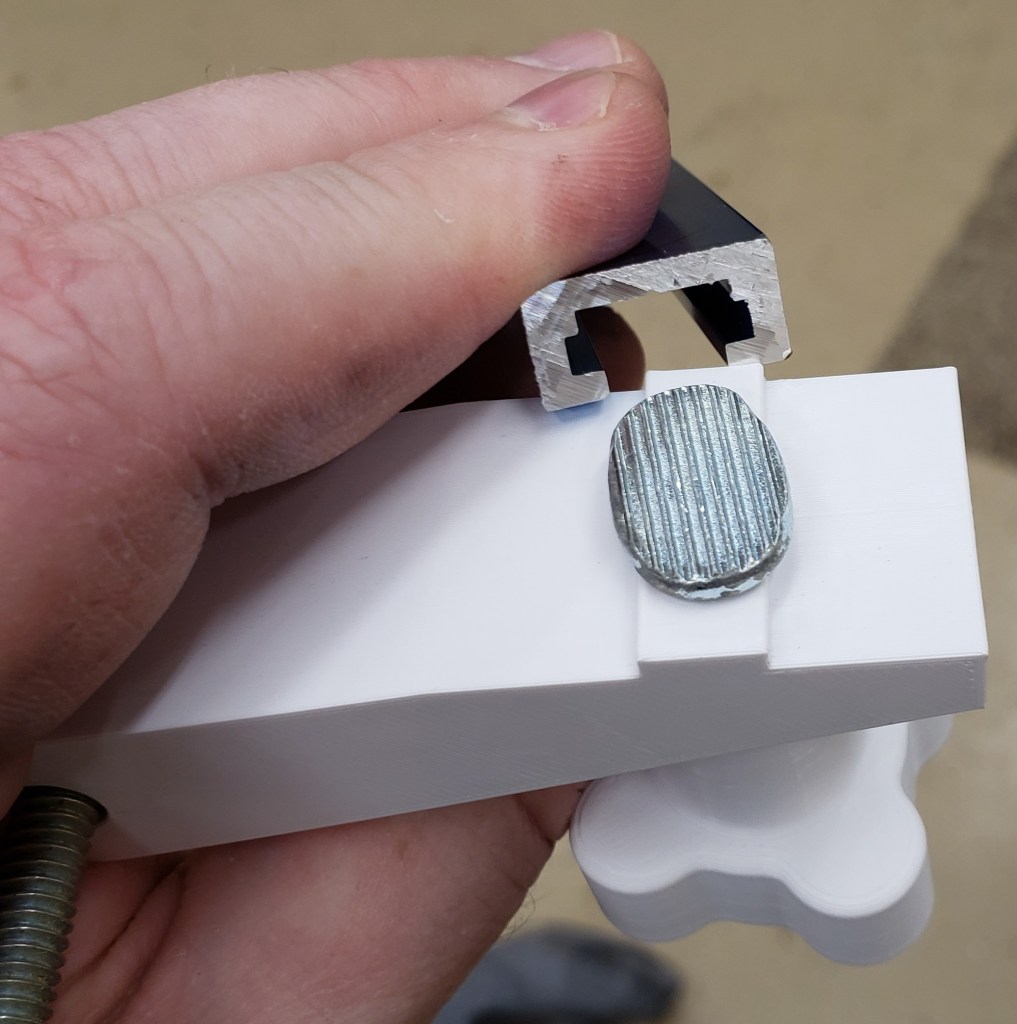
The adjuster uses a bolt in the t-track of the adjustment arm to clamp itself down in the rough position. I added a block to the bottom of the jig and bonded a big fender washer down for the head of the adjustment screw to contact. It should be a very firm stop and won’t wear easily.
Putting it all together, and with a few coats of polyurethane to keep the MDF stable, I tested it with another sharpening wheel. My last one was a little small, so I made a new bigger thicker one. The only thing to note is that doing heavy sanding in one spot will load up the paper badly. Sliding down the table occasionally will help even out the wear.
I have a router circle cutting jig from milescraft that works pretty well. It screws down a center and uses your router on an adjustable arm to make big circles. It does take a bit of setup though, and anything under about a foot in diameter is pretty awkward. There are loads of bandsaw jig ideas, so why not add mine to the pile? I think I have three things that are slightly unique in this design. Not revolutionary, but a bit different.
1. I started with a 3D printed miter slot runner. It is T shaped so once you slide it in the jig can’t come up off the table. Most folks make wood runners. Those are fine, but with printing it is a lot easier to dial in a T-slot so that the jig can’t lift. It comes with countersinks for #6 mounting screws.
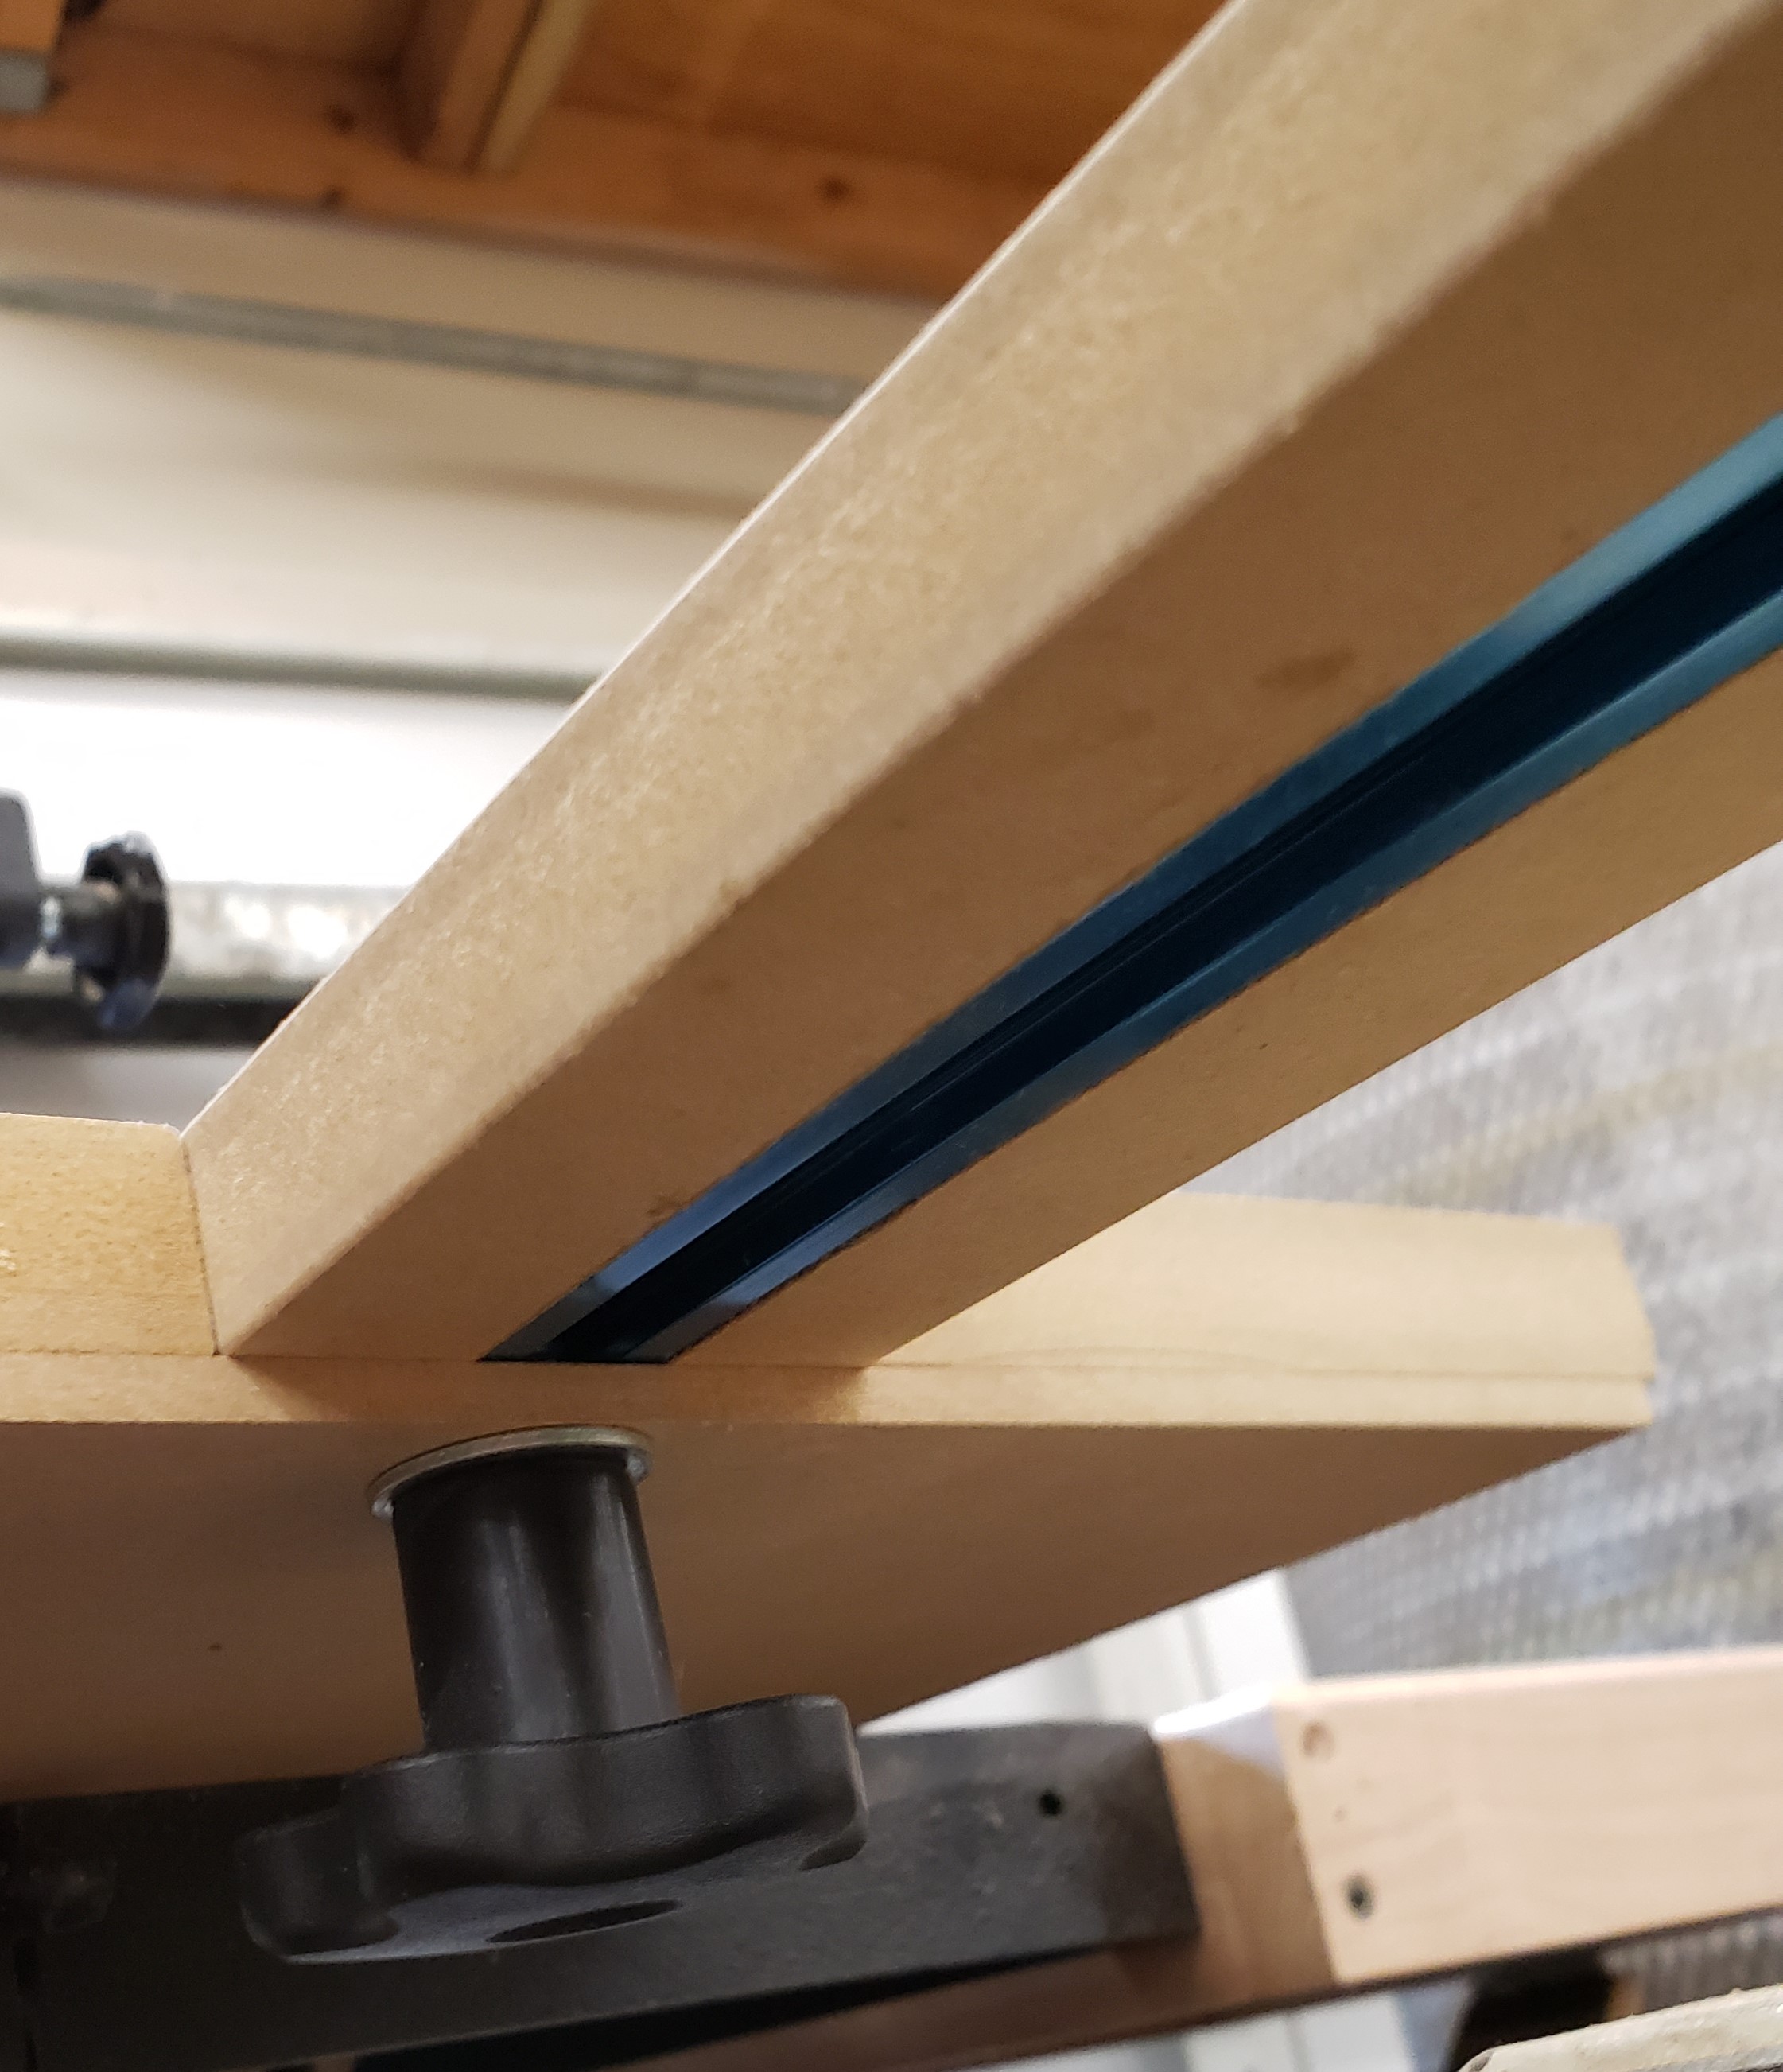
2. The jig needs some kind of sliding arm to hold the piece being circle cut and set the circle radius. Dovetail slots and all sorts of things are employed. I took a T-track and glued it into a piece of 3/4″ MDF. Even 1/2″ screws would have been too long, so I just used epoxy. It holds well. A look from underneath shows that a bolt and knob let you lock down the circle radius arm in position.
3. To hold the work piece, most jigs use a small nail sticking up from the adjuster arm. You would drill a small hole in the part and pin it on the nail in the jig. Instead, I wanted a more flexible solution. I cut a 1-1/4″ hold in the end of my adjustment arm so I could put in 3D printed holders. One is 1/2″ in diameter so I can cut a MDF circle for my buffer. The other has a countersunk hole so I can screw a small #6 screw into the work piece. Optionally, there is enough space there to double sticky tape the puck down and use the center hole for alignment. I can print all sorts of posts or pins to suit my cutting needs.
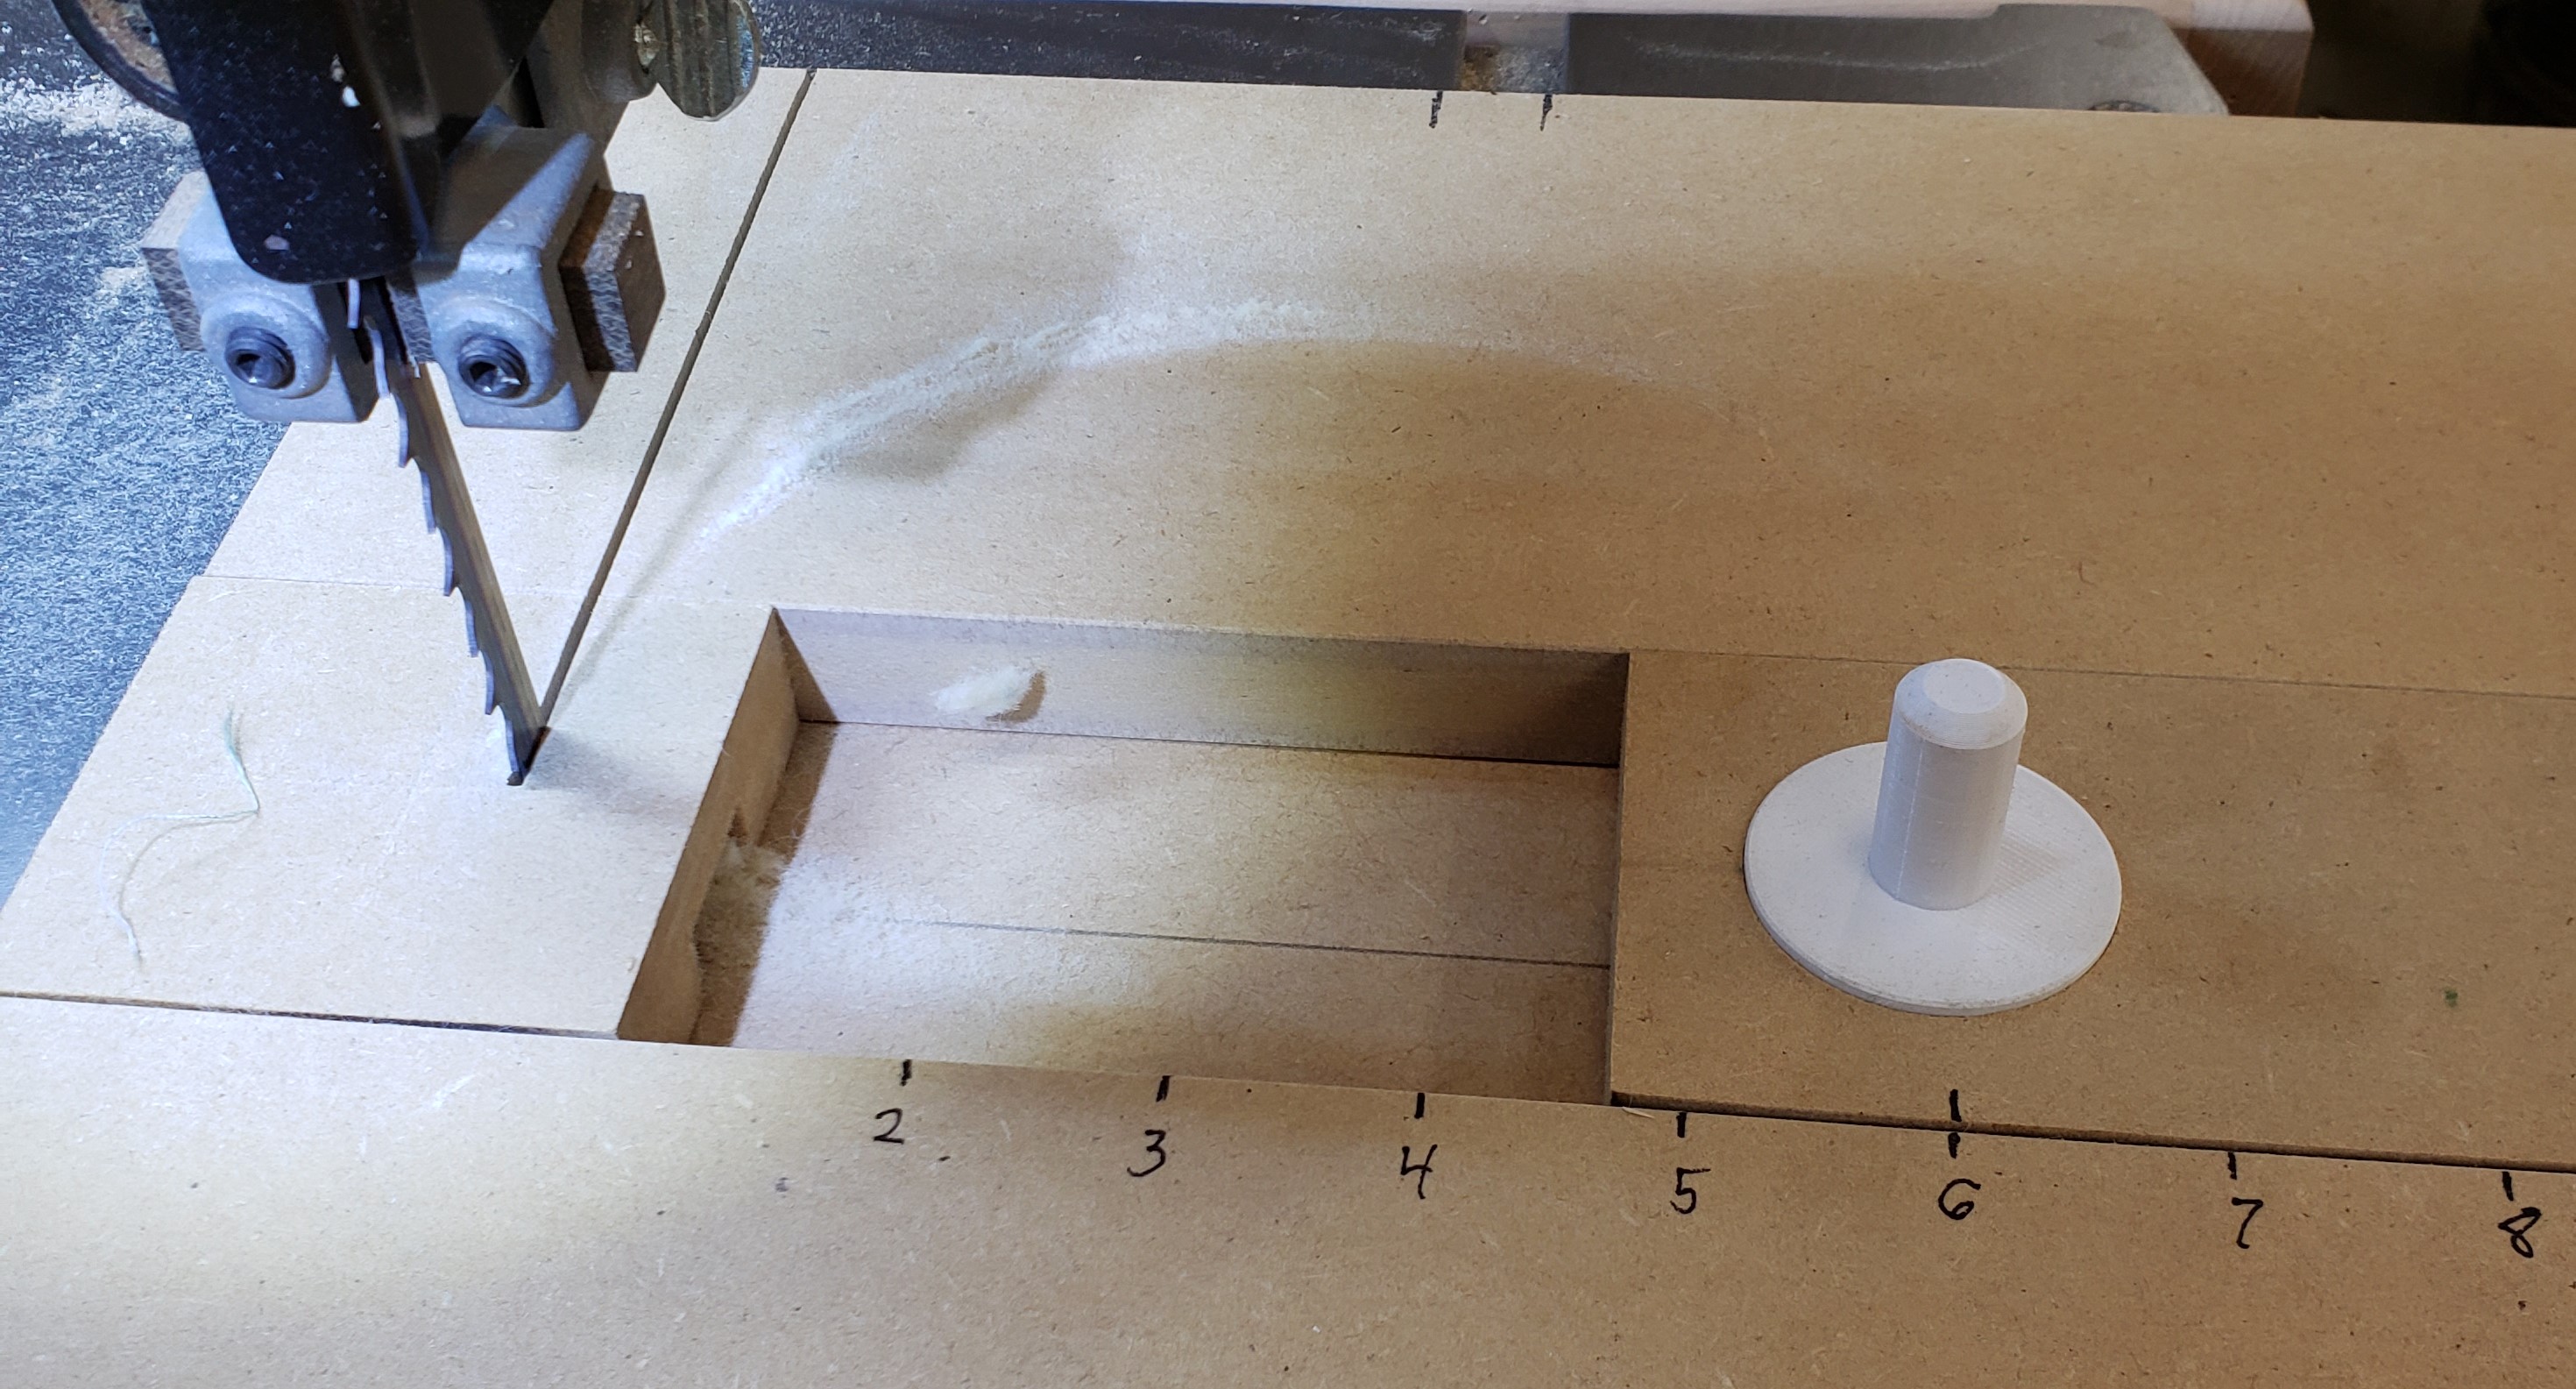
To put that all together, a piece of 1/4″ MDF was CA glued to the runner (temporary) and pushed into the saw till it reached the middle of the jig. I glued a little stop in front so it would hit the bandsaw bed and stop in the same place every time. I then glued on 3/4″ MDF around the centered adjustment arm. That gave me enough material to screw on, from underneath, the glued runner. That all got pushed in again to the saw to cut through the new 3/4″ MDF.
I did some measuring, marked our the rough radius locations, and coated everything in a few coats of thinned polyurethane. It struggles a bit with anything under a few inches in radius, but a different blade would help. Up to 2 foot circles are possible. Above that and I will go to the router jig. To try it out, I made a sharpening wheel for my buffer out of 3/4″ MDF.
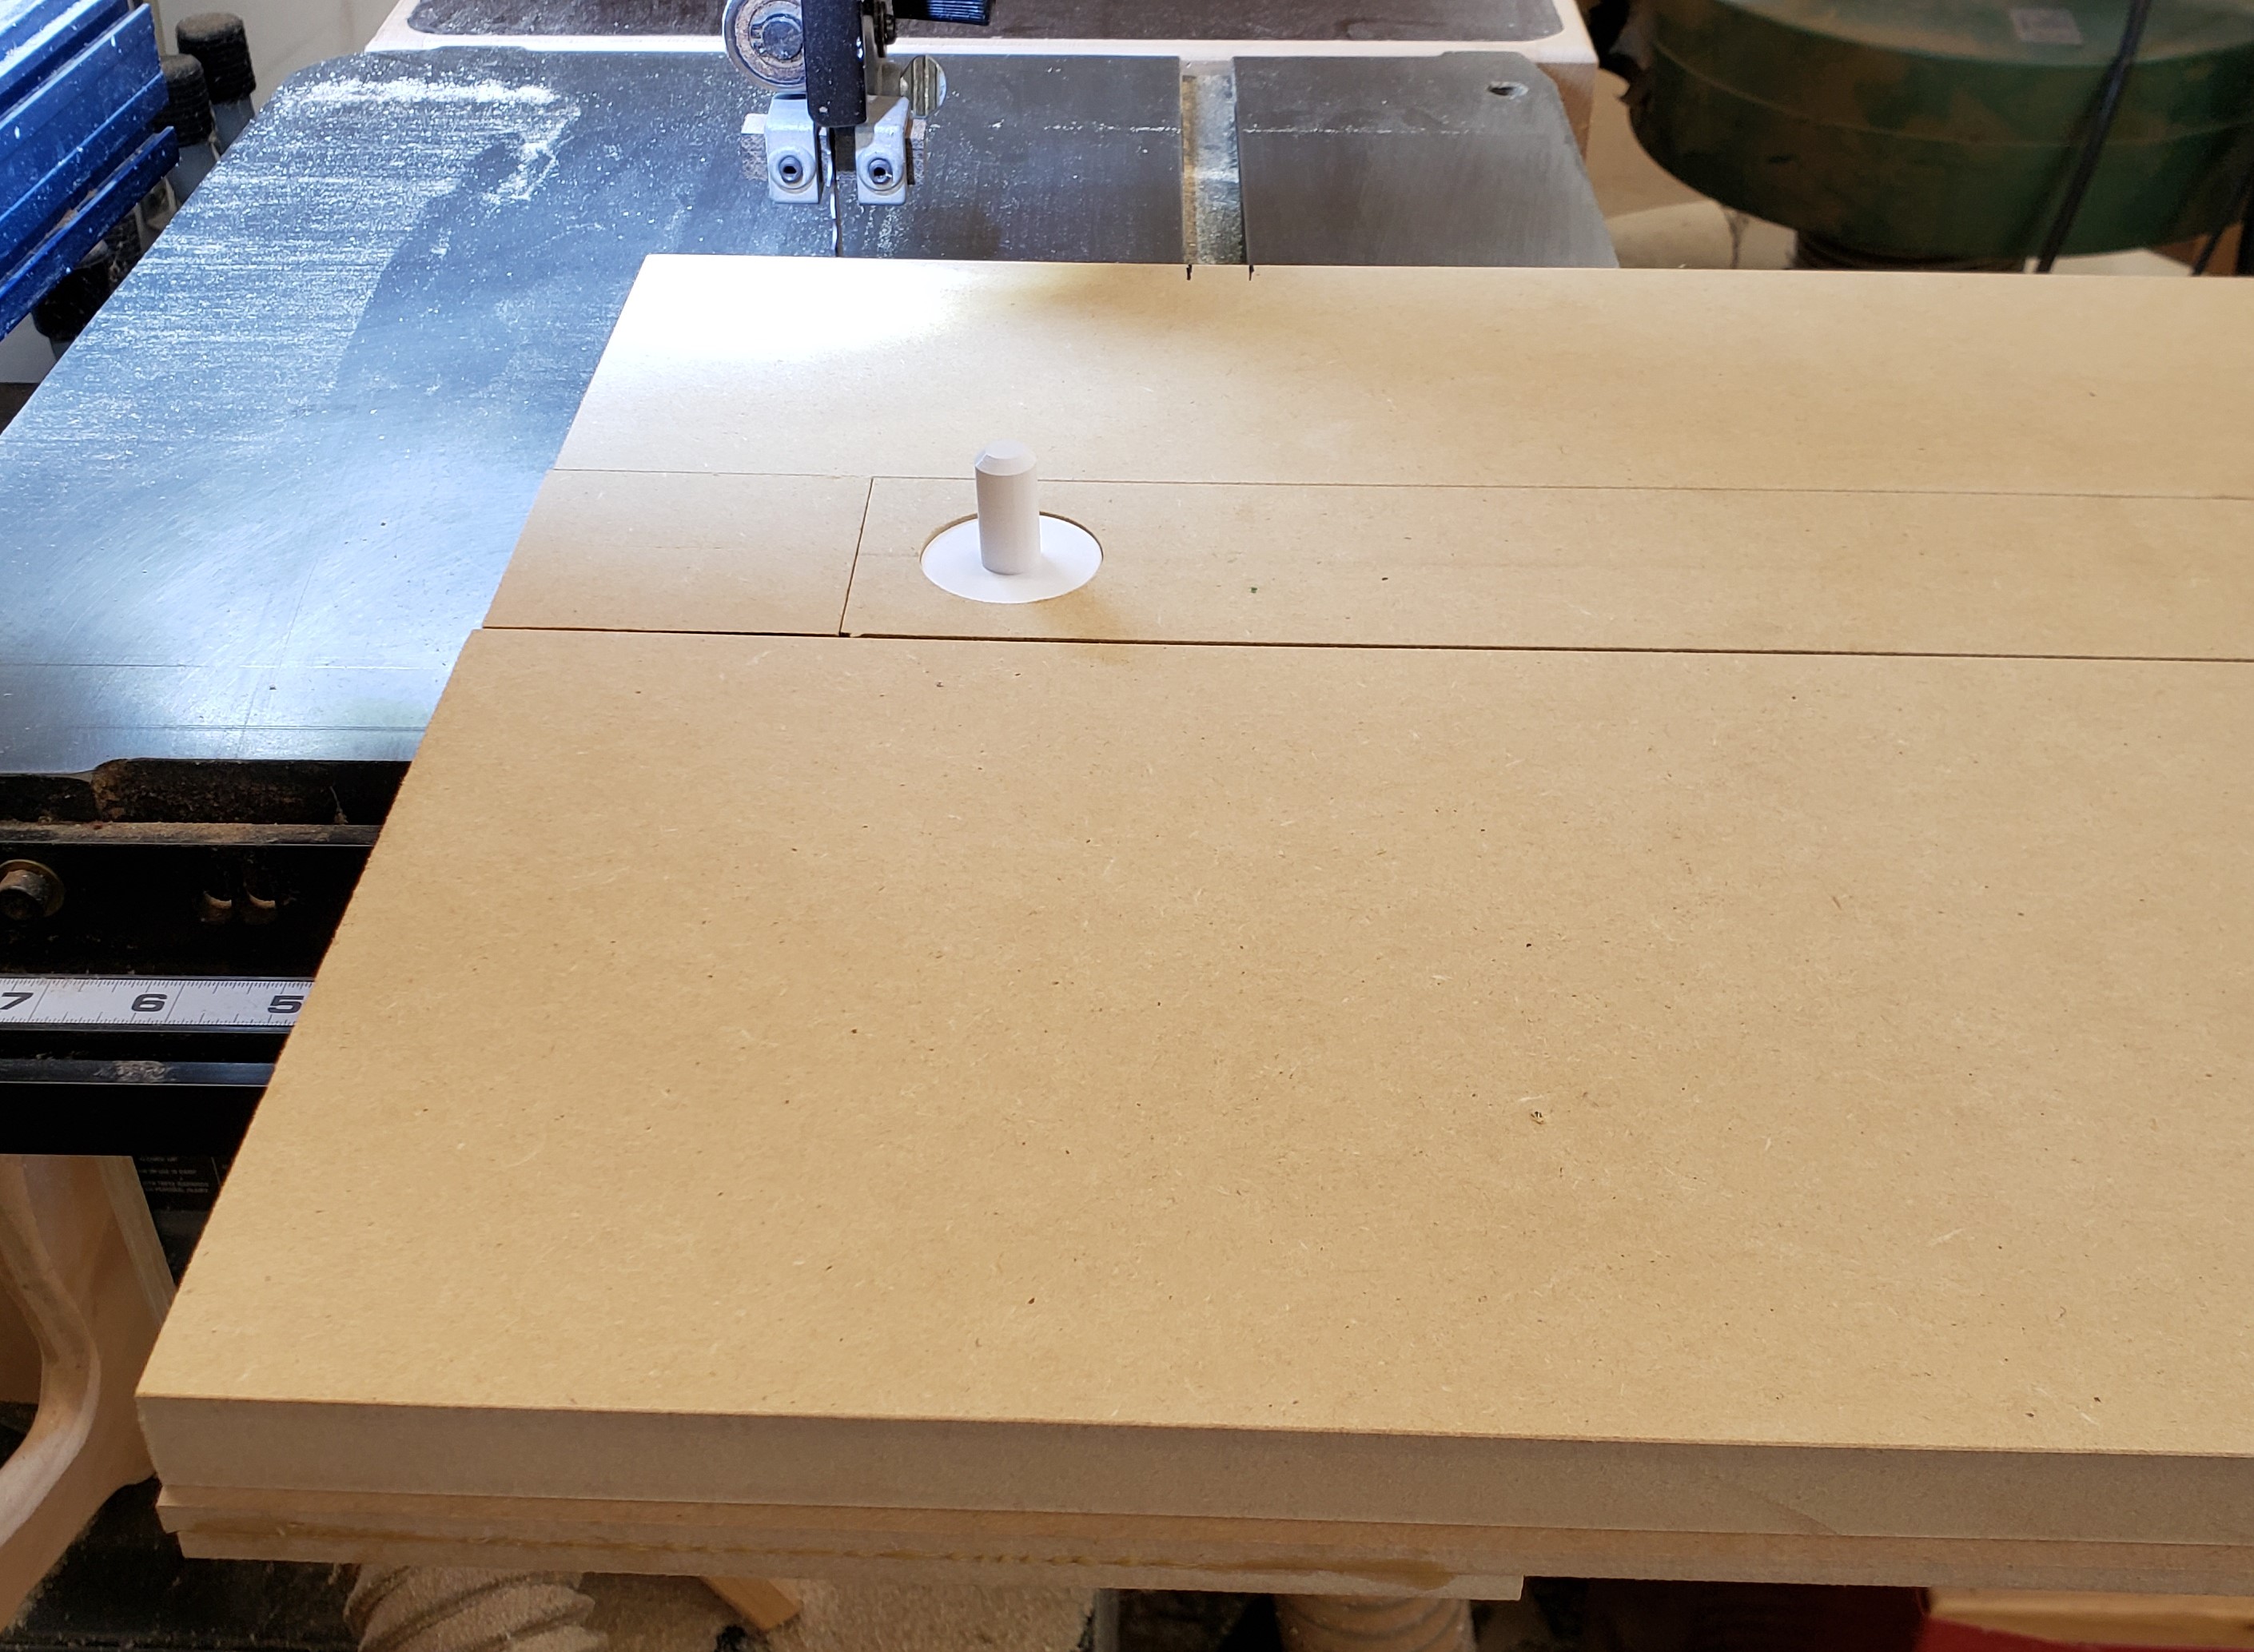
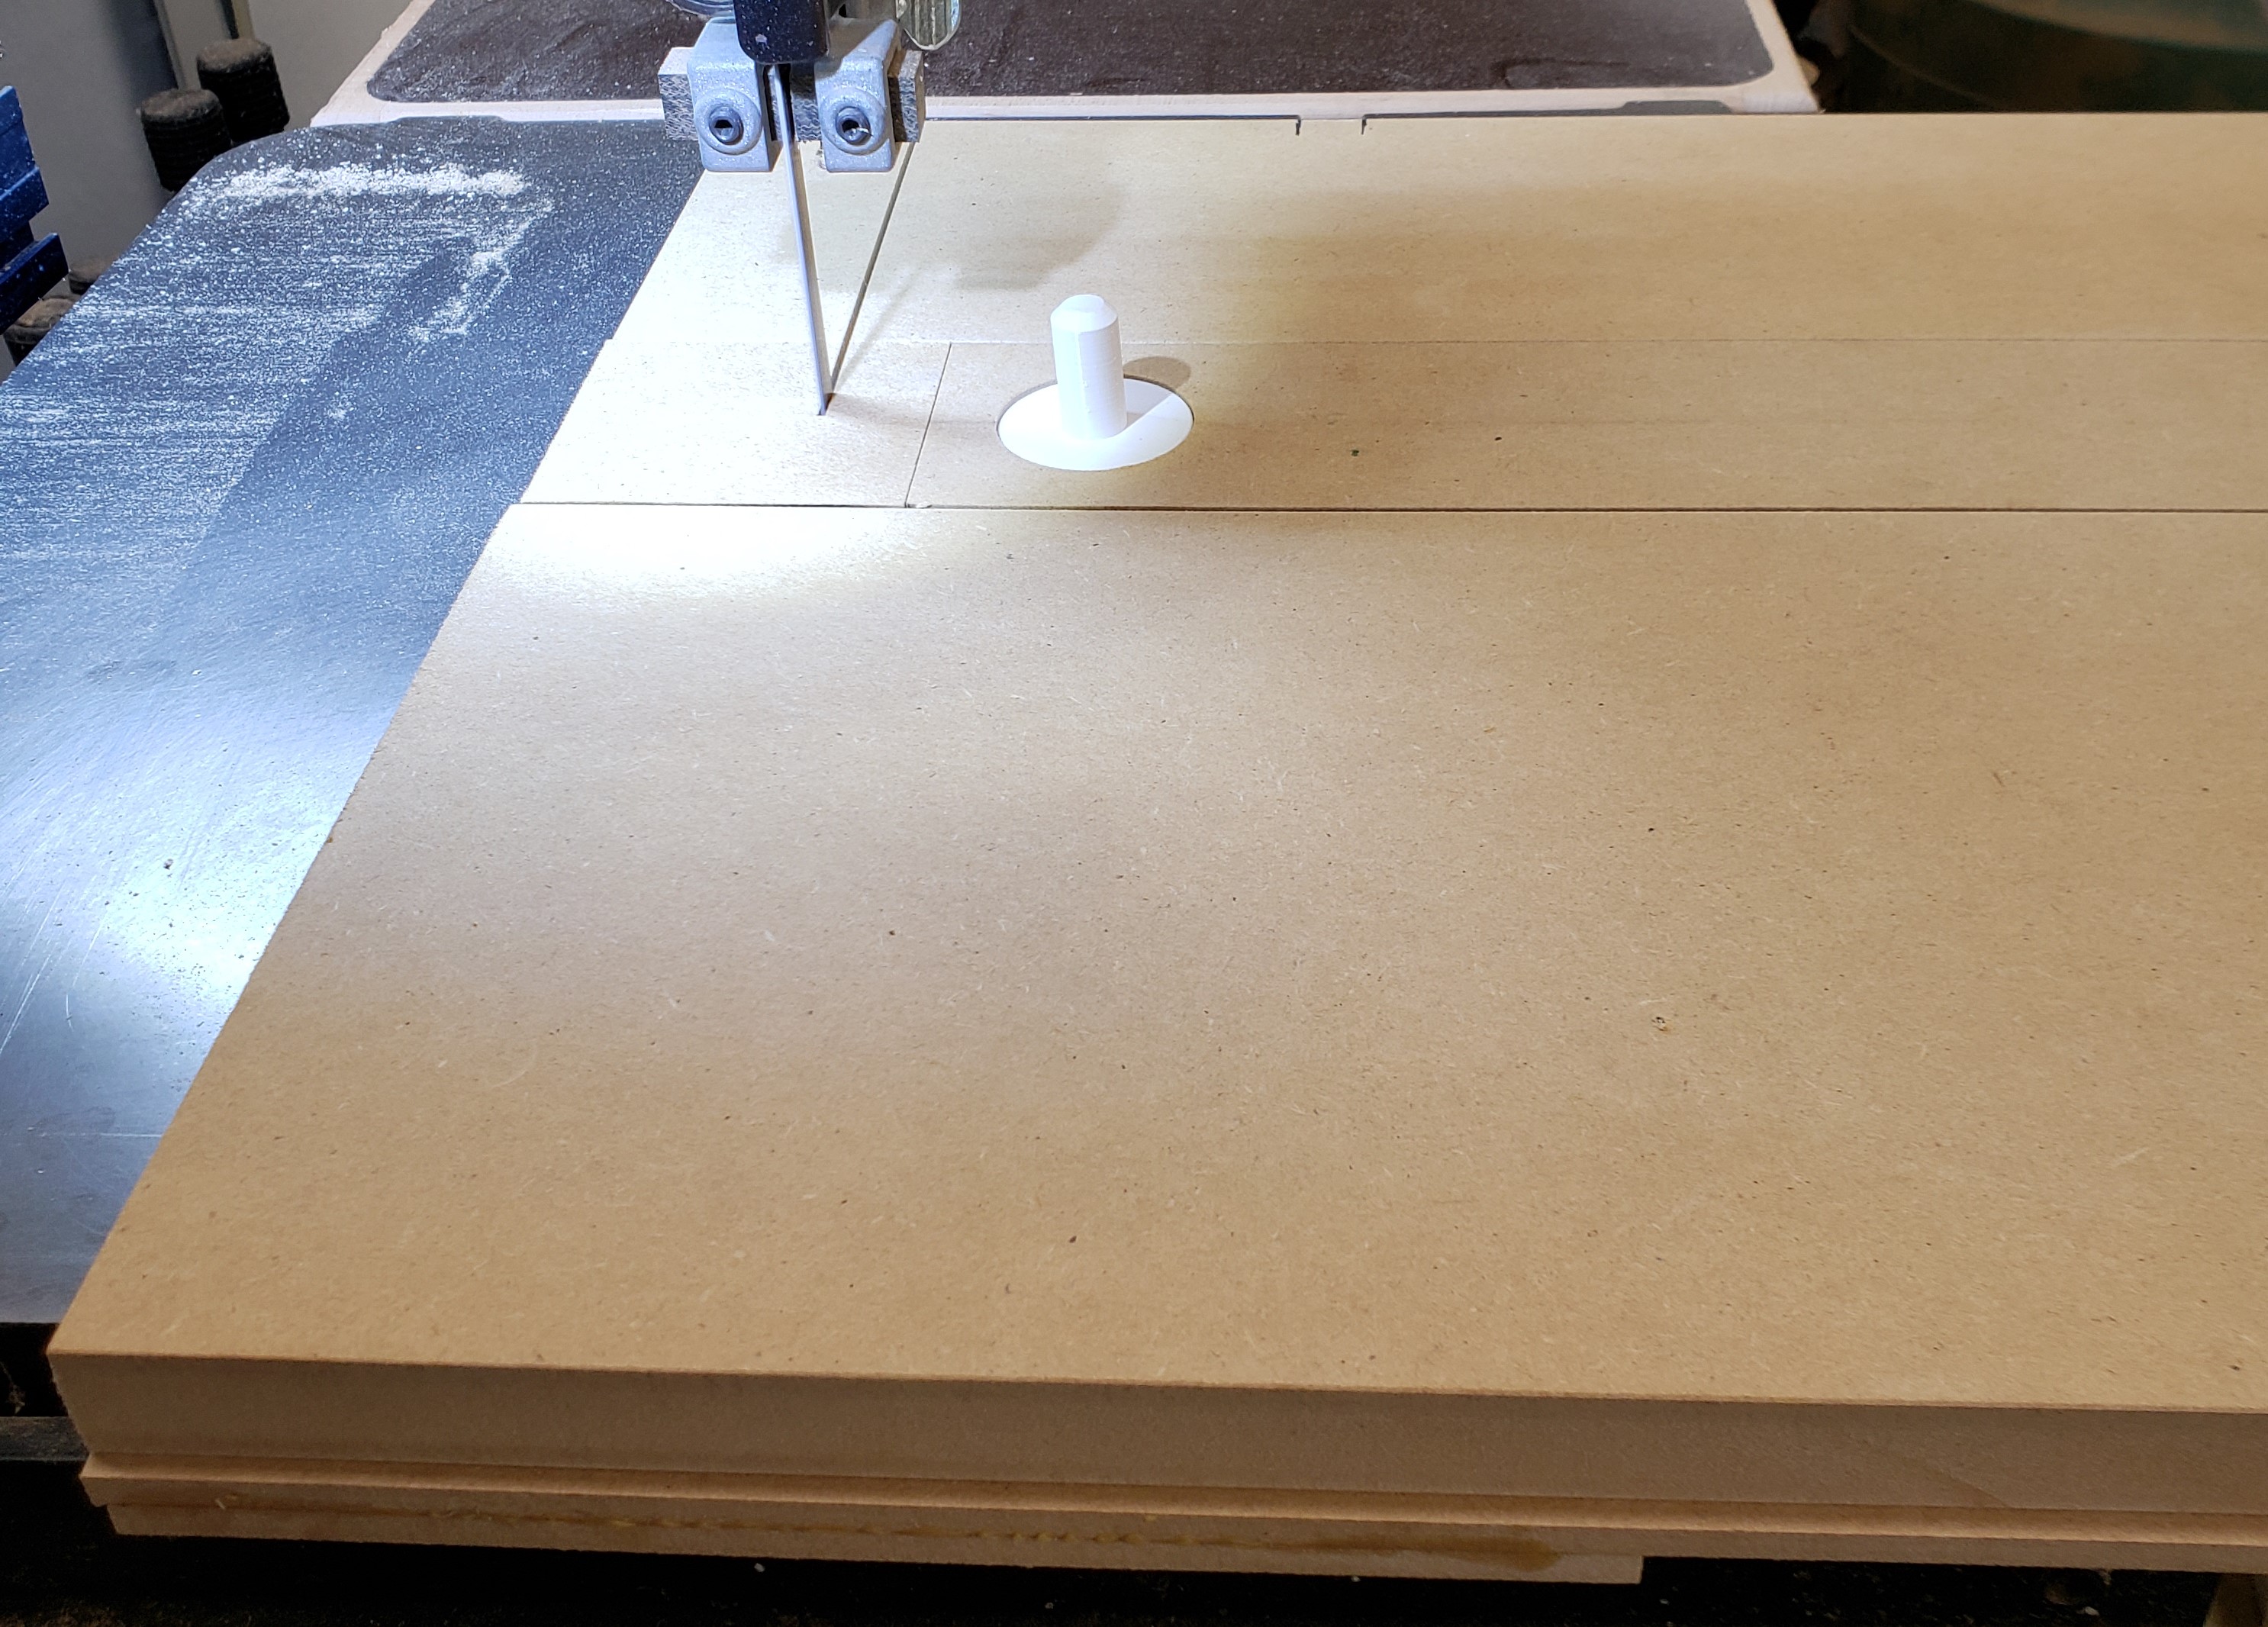
Set the runner to the appropriate radius and lock the knob
Install the square of material to be cut on the peg
While I was building my Anvil Stand I was also building this buffer stand. I love my bench grinder stand to death, and want to have my other grinder setup as a buffer full time. I read about a chisel sharpening technique called unicorn sharpening, and it calls for a buffer. I tried it, and it worked well for me!
I made a basic box shape out of 2x8s (pricey these days) and attached them to a piece of 2×12 left over from the anvil stand as a base.
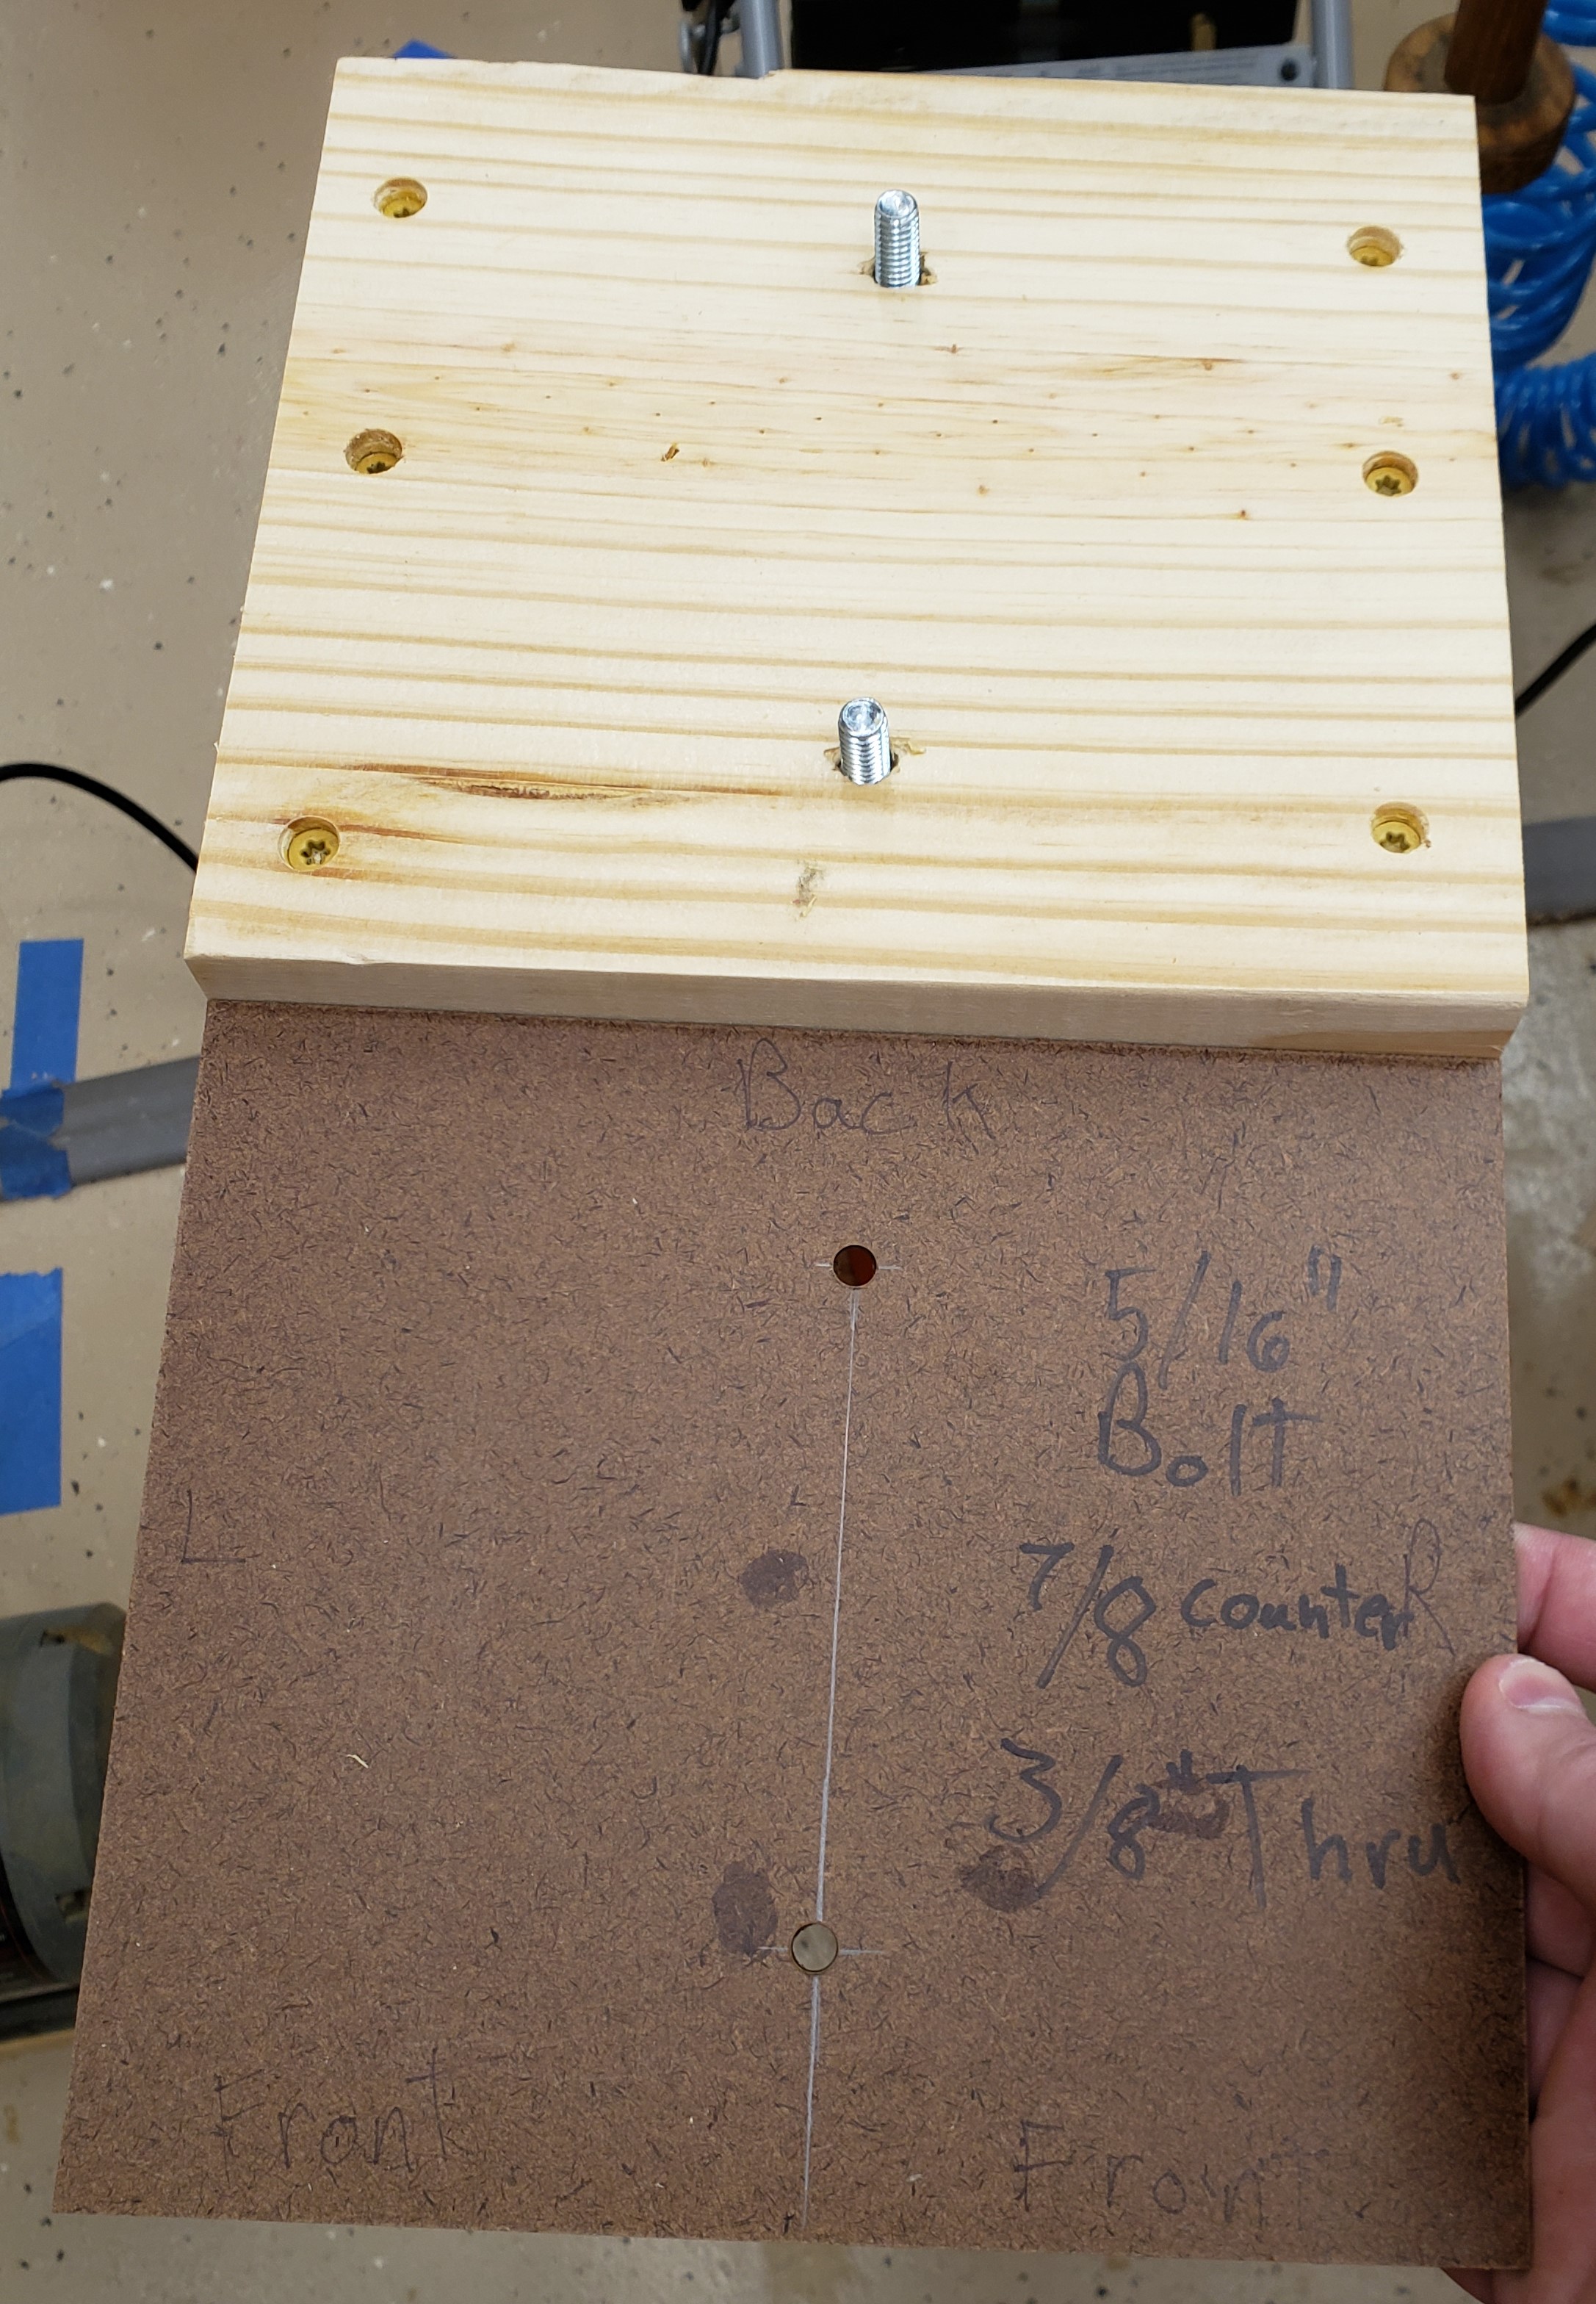
For the top I made a template out of hard board and labeled it with the orientation and hole info. Every tool base base that goes on top will have two T-Nuts embedded in them so 5/16″ bolts can come up from underneath to attach. That way you are always 2 bolts away from taking a tool off an installing a new one. I keep the template attached to the back of the stand so I can easily add new tools in the future.
T-Nuts on the top side of this base
Like the bench grinder stand I clad the cavity in plywood and filled it with sand. This shot is of it 2/3rd full, I had to go back to the store and get more sand because of all the filled projects I have been working on.
So I don’t have to go to the toolbox and remember which wrench is the right one every time, I made a palm wrench that fits the bolts. The bottom is rounded to make it easy to rotate in your hand for fast installing, and the outside hex shape lets you get good torque on it. A print like this can be surprisingly strong without any modifications and only 20% infill.
The buffer is all ready to go and looks great. It is weighty and stable while in use. I only have one tool attached now, but might get another grinder or buffer in the future. When I do, I’ll make another base and hang the unused tool off the side or back of the stand. Boiled linseed oil finished everything off.
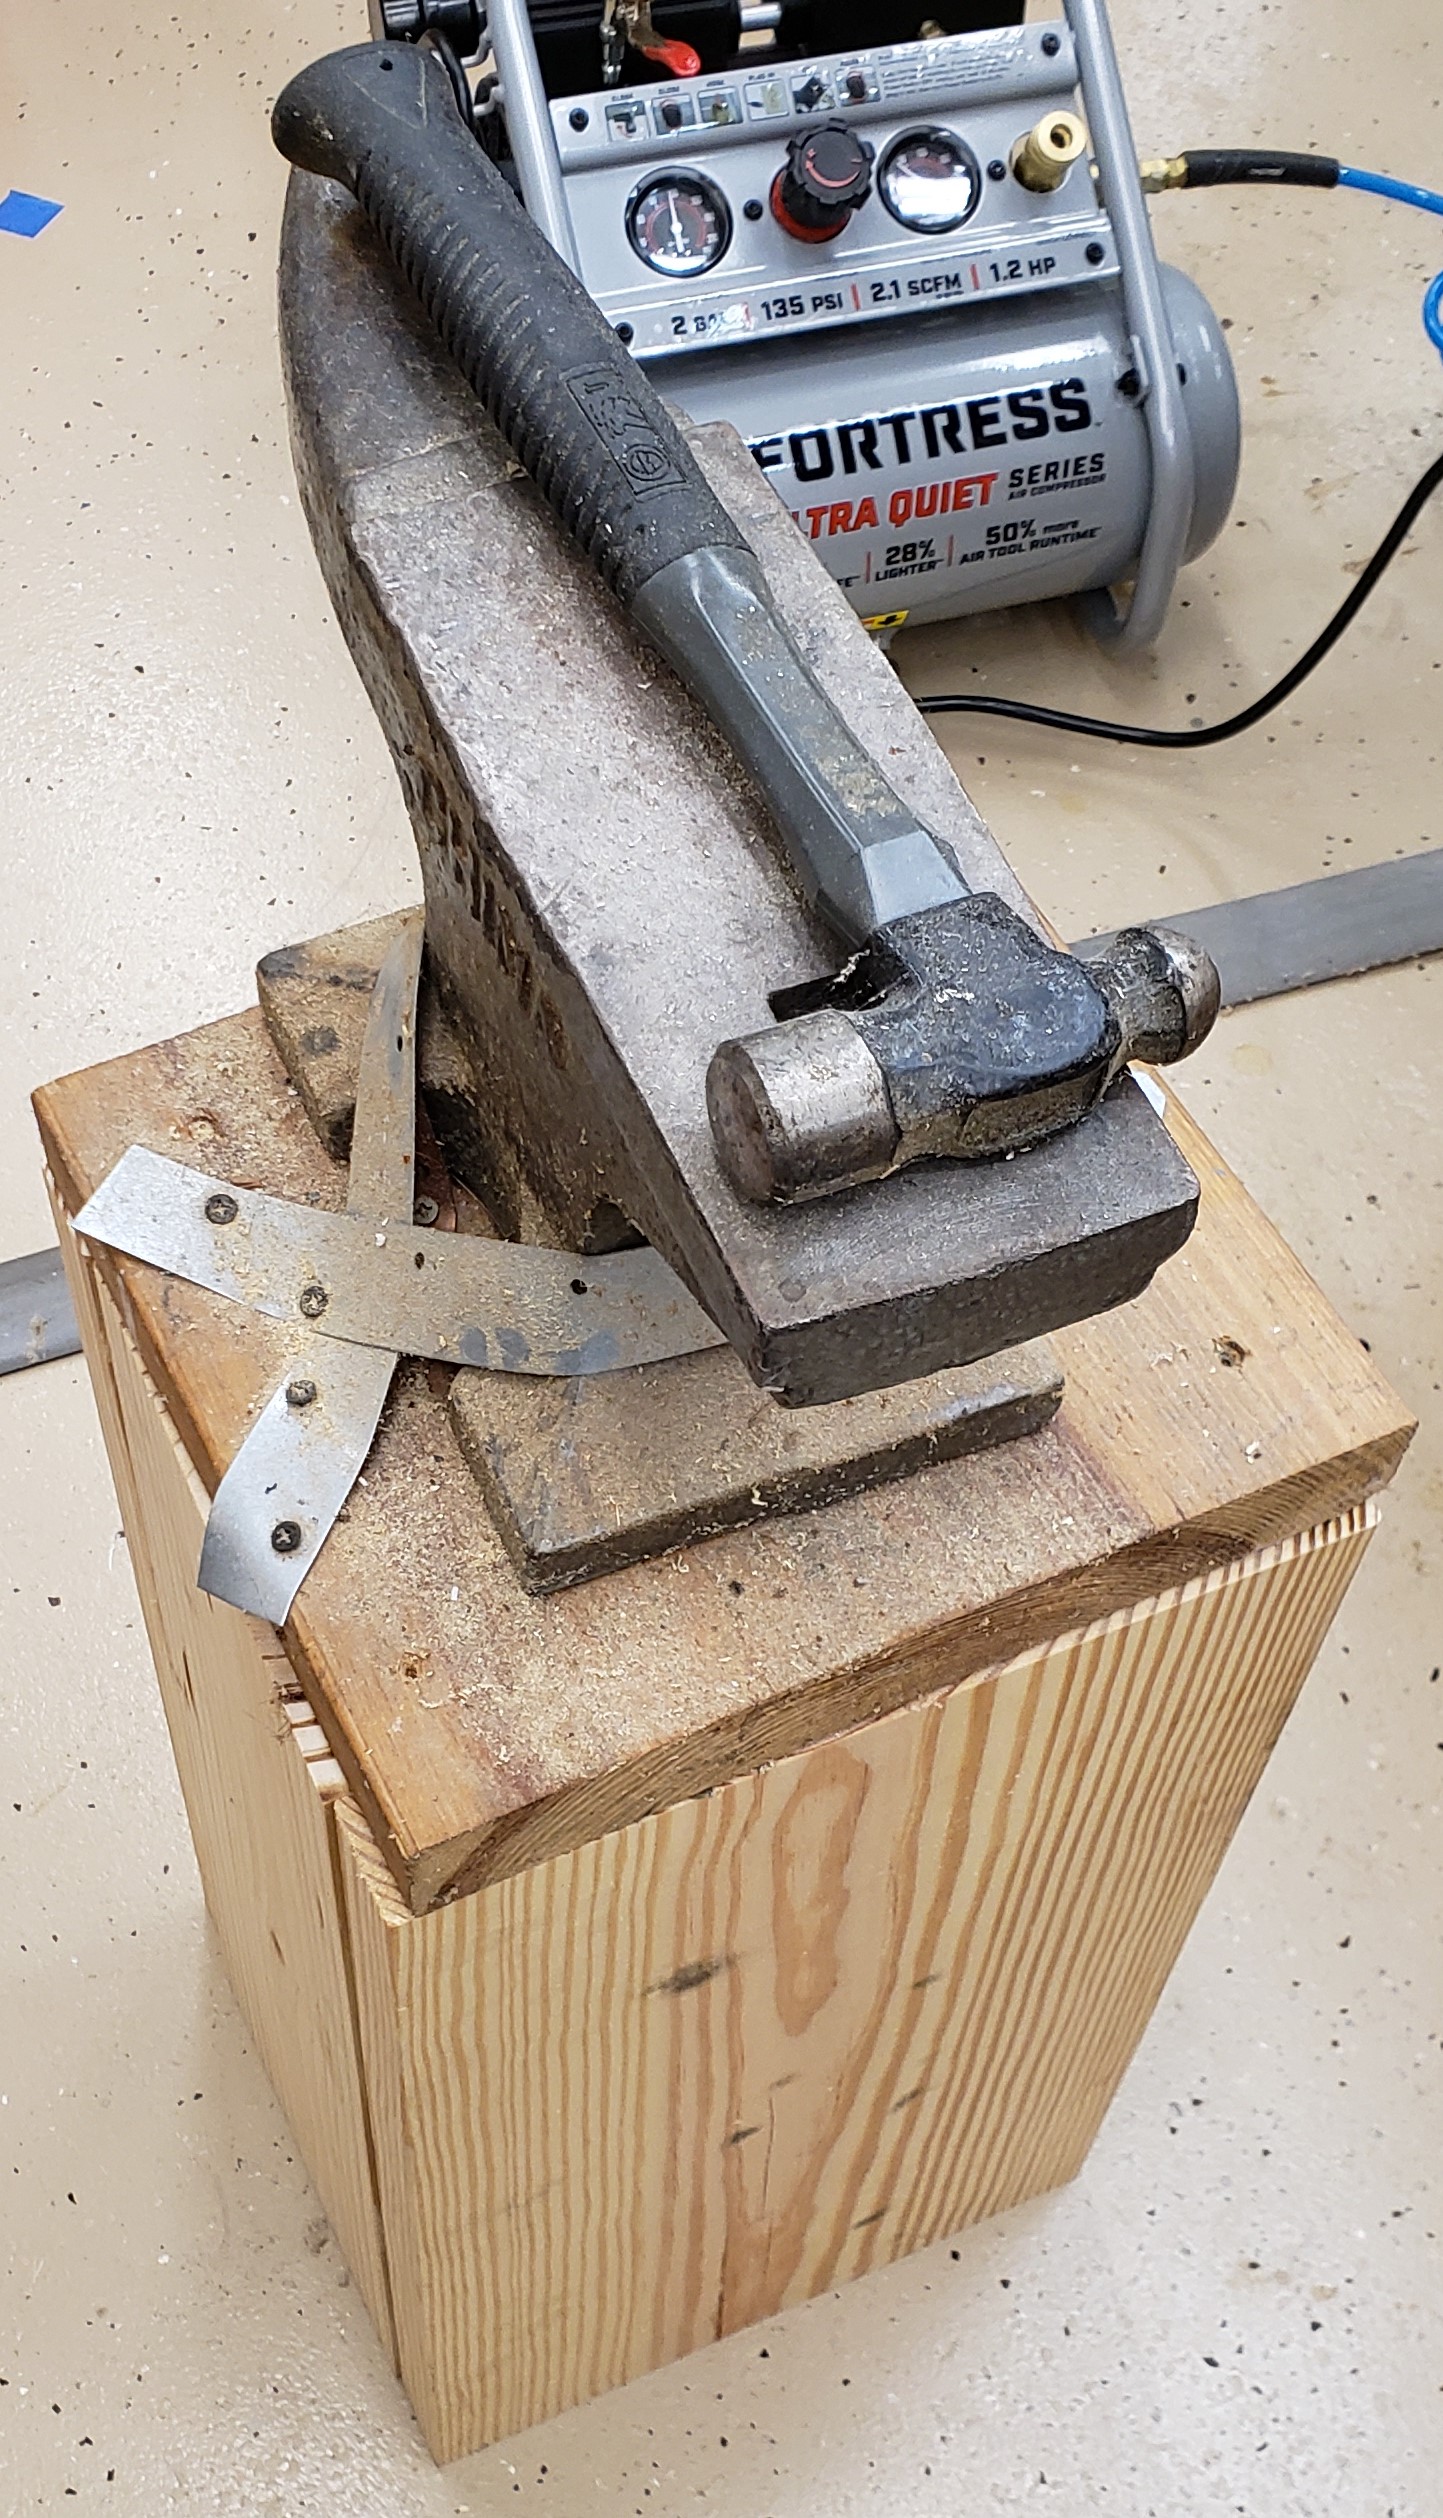
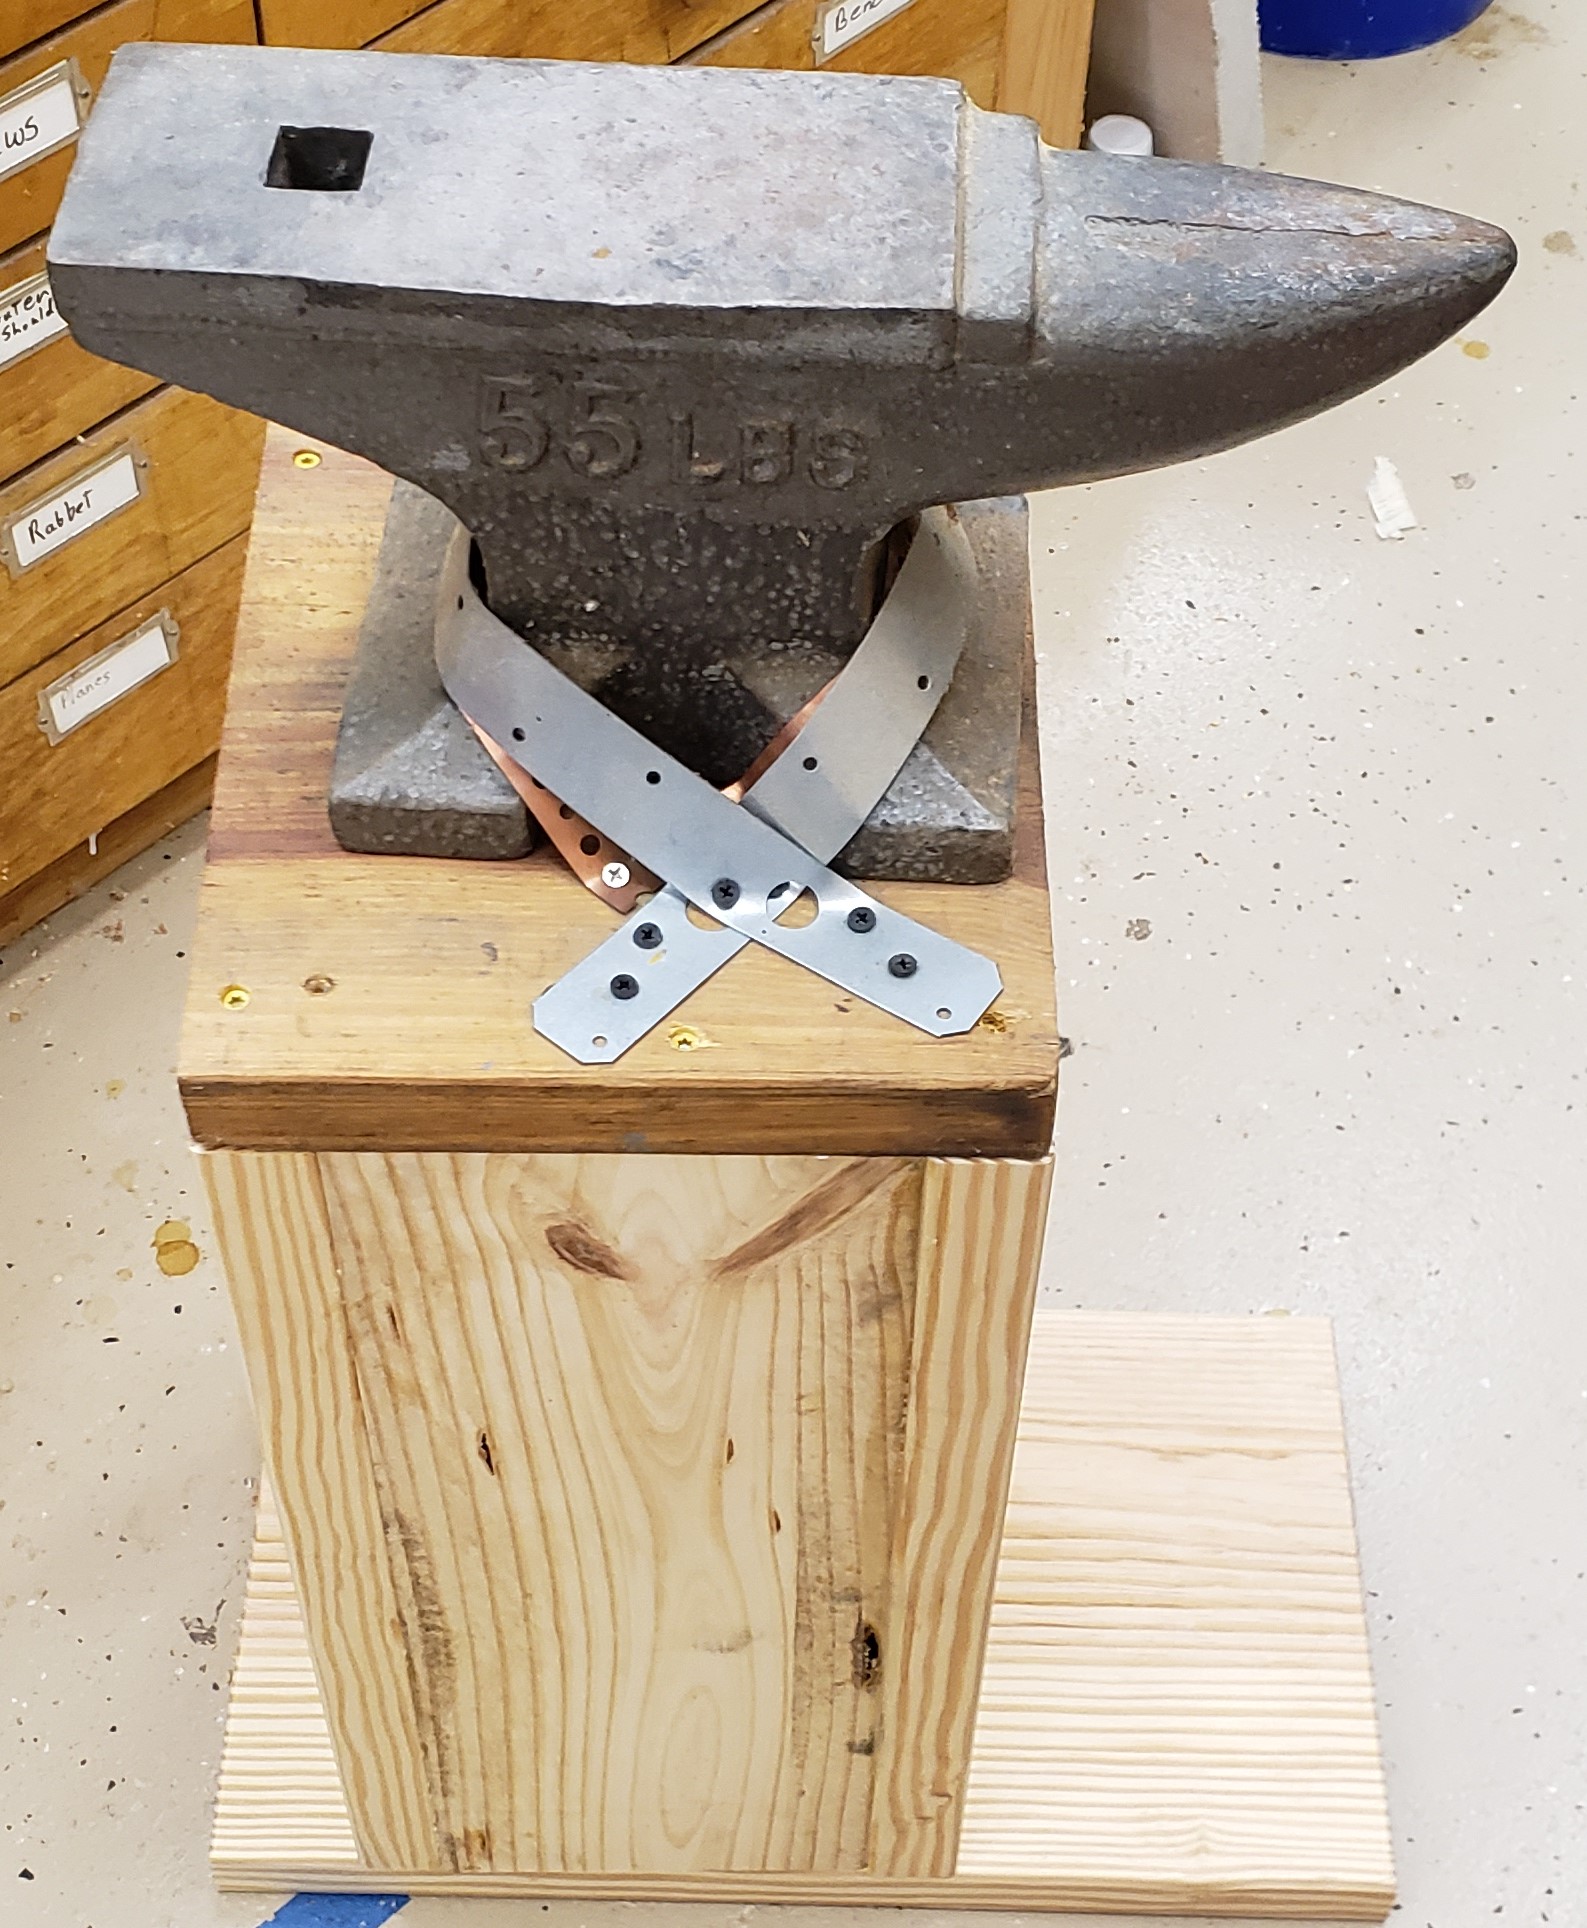
I haven’t done any armor creation or blacksmithing in a long time. That said, I still have the anvil and other tools for it. I have the anvil strapped to a piece of 2×12 that usually gets put either on the ground, or screwed to a bench for temporary use. It comes in handy for trying to tap something back together, or for banging out something. I felt after all these years it needed a proper stand at the right height.
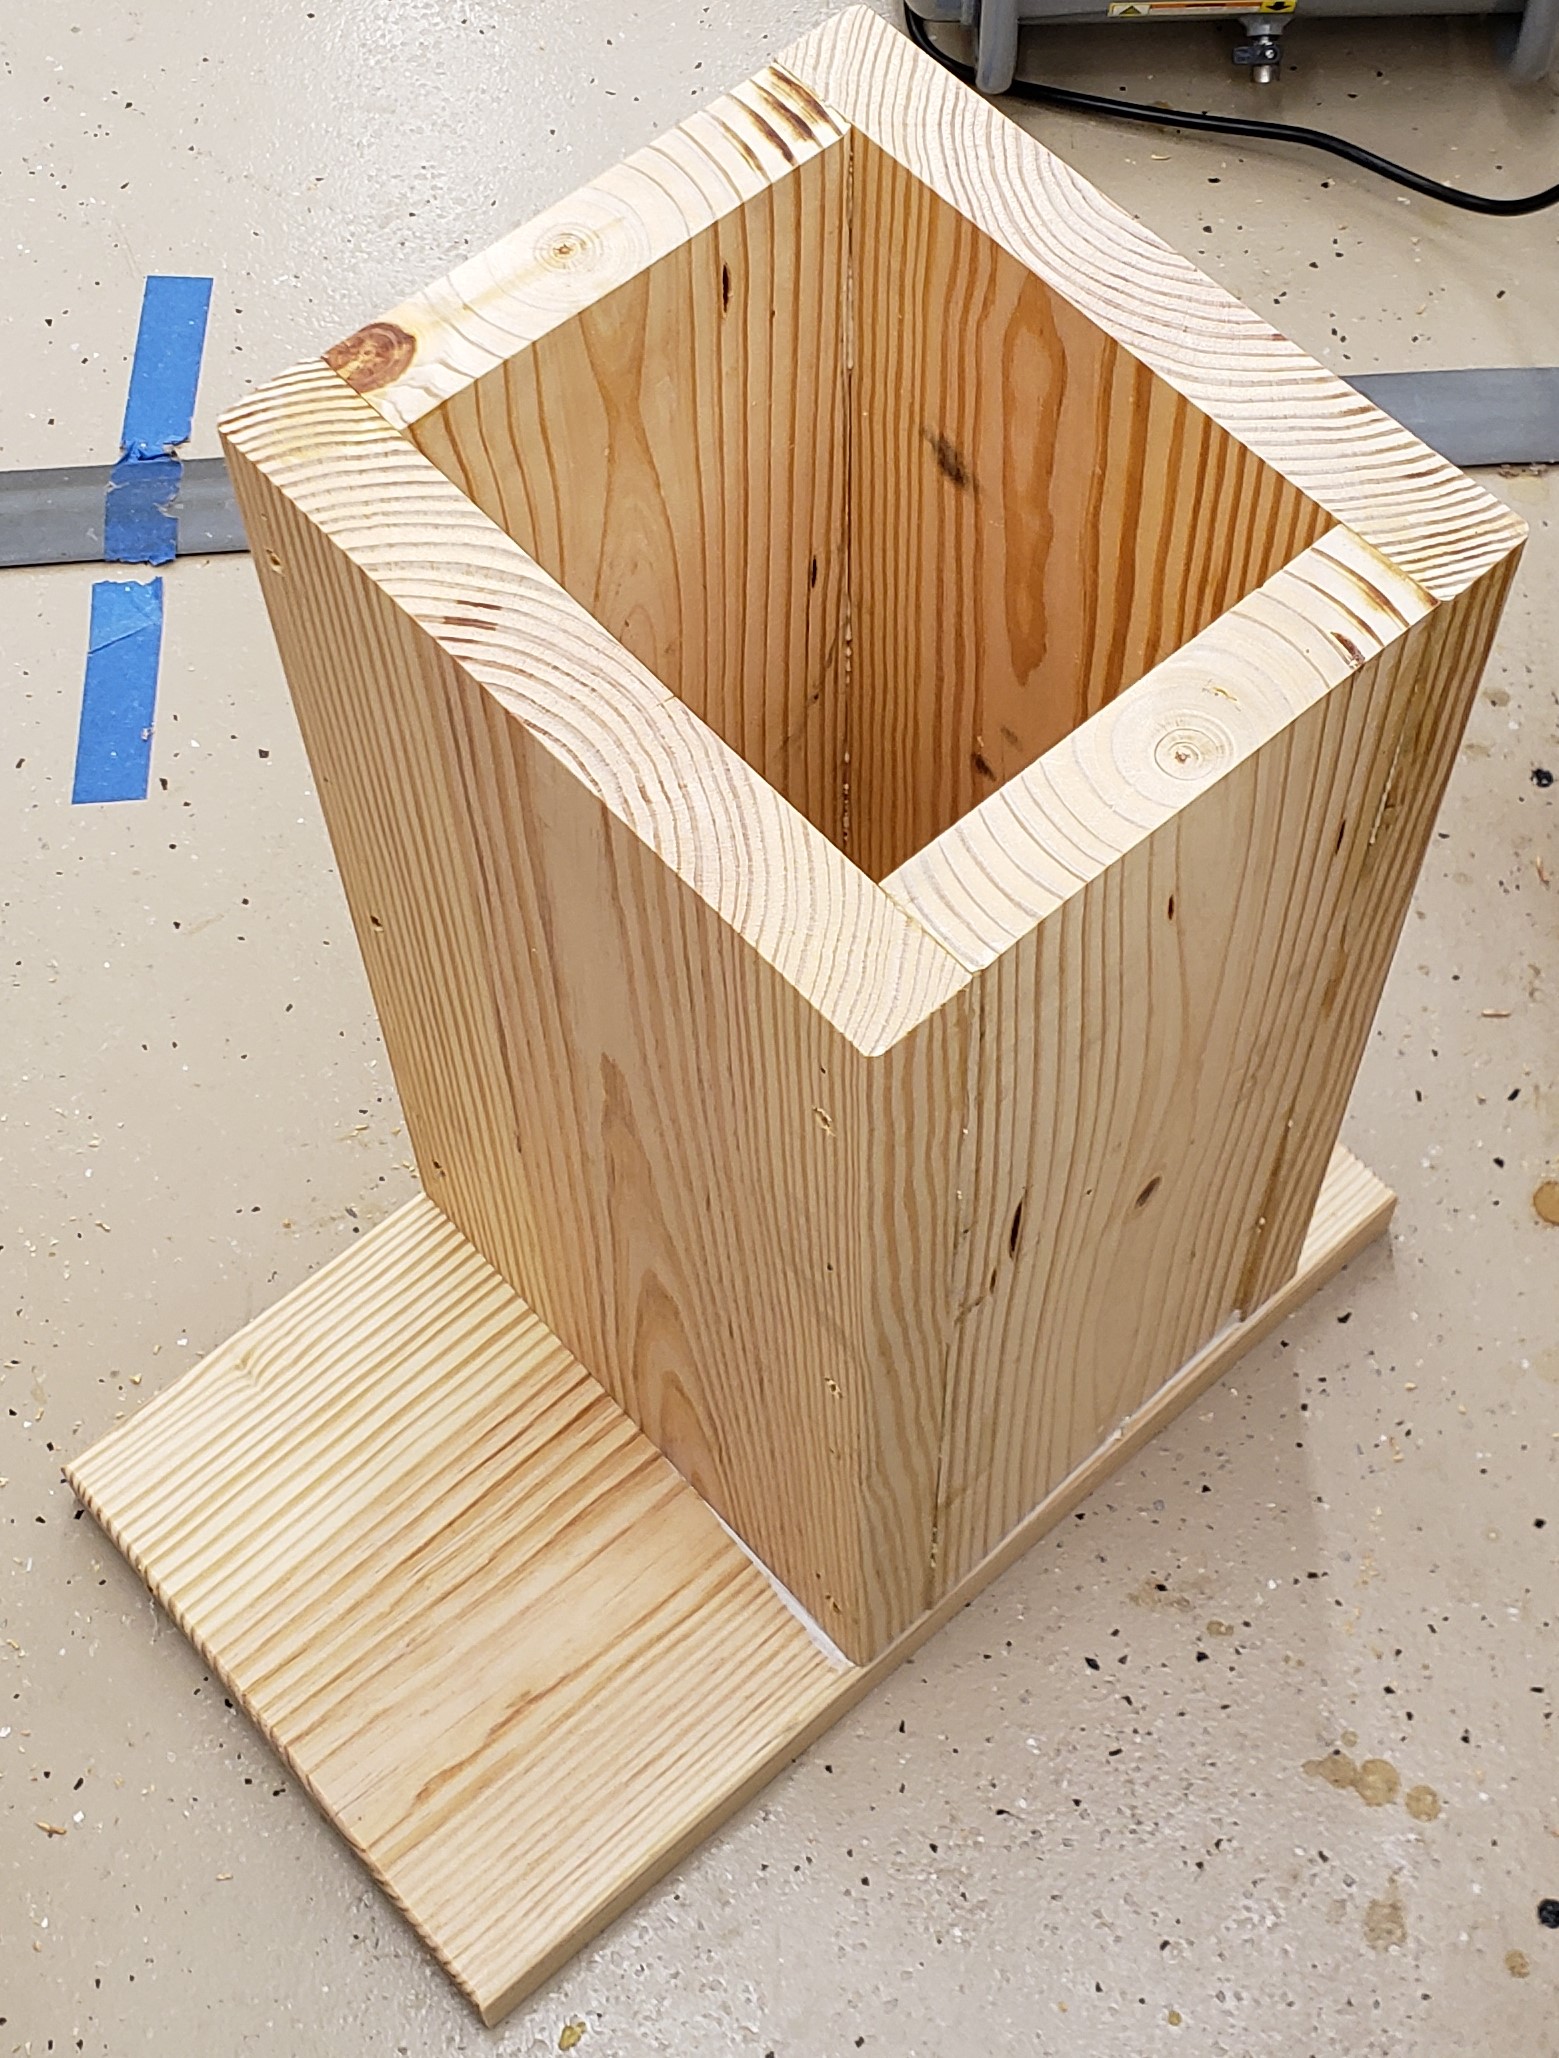
I measured the distance from the ground to my hand while wearing my shop boots and designed a basic box structure to hold the anvil. I made the base the width and depth of the already existing wood it was attached to. No reason to re-do that, it has been very successful.
I added a foot to the base. It sticks out the front so that if I am hammering away on the front of the horn, the whole thing won’t want to tip forward. Weight and stability are what we are after. I attached it with screws and construction adhesive to make sure no sand leaks out.
When the glue from the sides and the base all dried up I filled the center cavity with sand. It is cheap, adds weight, and helps deaden vibrations. I put in a whole 50lb bag, plus some extra.
I estimate it is about 30 pounds of wood, 60+ pounds of sand, and the anvil is 55 pounds. At roughly 150 pounds, this thing ought to stay put when you smack on it. I attached the top and had a usable anvil stand.
Last but not least I added my favorite shop finish, boiled linseed oil. Cheap, effective, and pine looks great after a few years of aging with it on. This thing will look really aged by the time Ira is old enough to ask about it. Maybe I will make up some story about it being rescued from some ancient site. That should work till he notices the epoxy coated torx head screws I used to assemble it.
I haven’t done a print grab bag in ages and realized I had a pile of fun and useful prints bouncing around. Let a montage of 3D printed goodness begin!
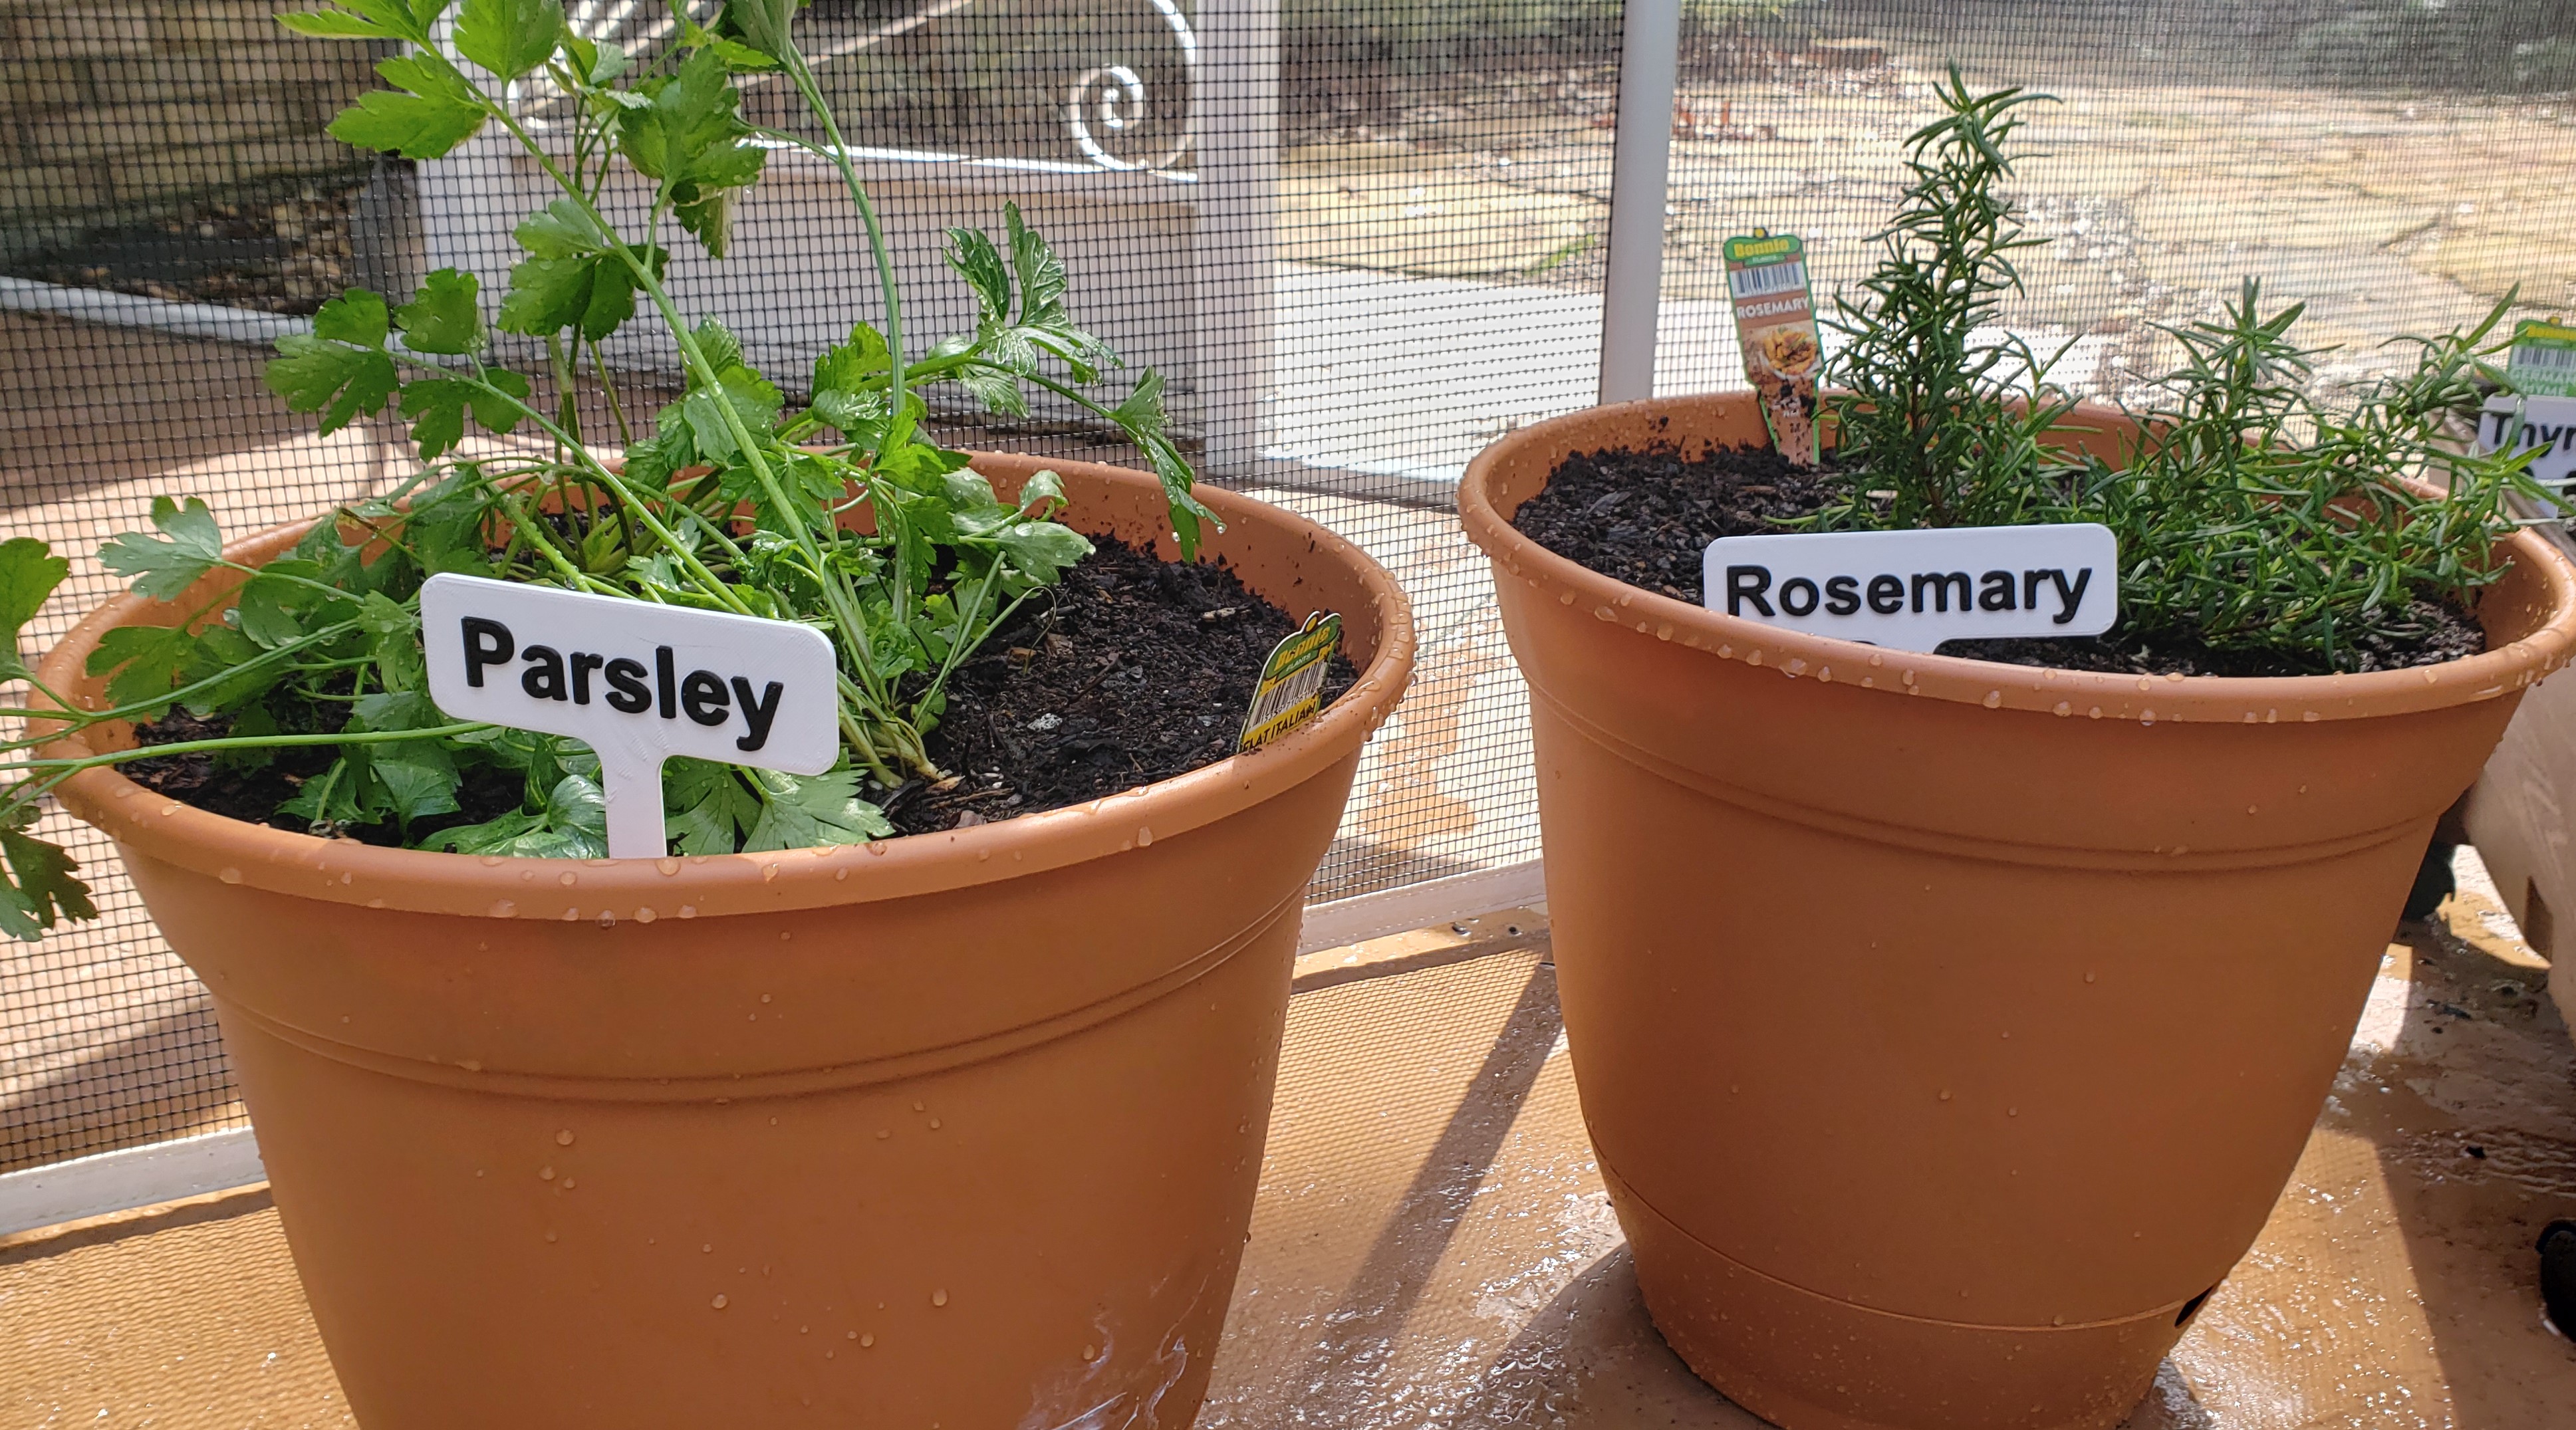
Plant Labels
Not super original, you can find a zillion of these online, but I wanted my own. First up, they are nice and big for me to read, and secondly, there is always something you have that isn’t in the list given online. The first set were just white with black paint marker coloring. I later started doing batches and swapping to black on the right Z layer to make the lettering pop.
Tool Holder
I always keep a big exacto blade and a few deburring tools around in my shop. They tended to float on my messy table top and get lost (part of the reason I have two deburring tools). In an effort to keep that area clean I made a tool holder that screws to the underside of the shelf. Previously unused space now keeps me better organized. It tilts back 10 degrees to keep them from vibrating out when I slam the door on that wall. No unexpected falling knives please!
Dispenser Bins
Sticking with the shop theme, I have a supply of semi-disposable items I always keep around. Popsicle sticks of various sizes and acid brushes are really useful for mixing, spreading or applying different substances. I used to keep them in loose piles or cups, but now I have a custom dispenser for each.
The basic design is the same in all, but with some modification to dimensions depending on what was being dispensed. The front wall slides in and has custom text for each one. A lid keeps the dust out and allows stacking. I printed them with 5% gyroidal infill and a hole in the bottom. That let me use sand to add weight, capping with epoxy. I have been using this trick a lot lately and love doing it. I used hot glue on the bottoms of each, then smashed it down on a silicone mat to make quick non-skid bottoms. The weight from the sand and the non-skid bottoms keep them from moving around easily. You wouldn’t want them to fall off the high shelf they are on.
Cross section of dispenser
Non-skid bottom made from hot glue
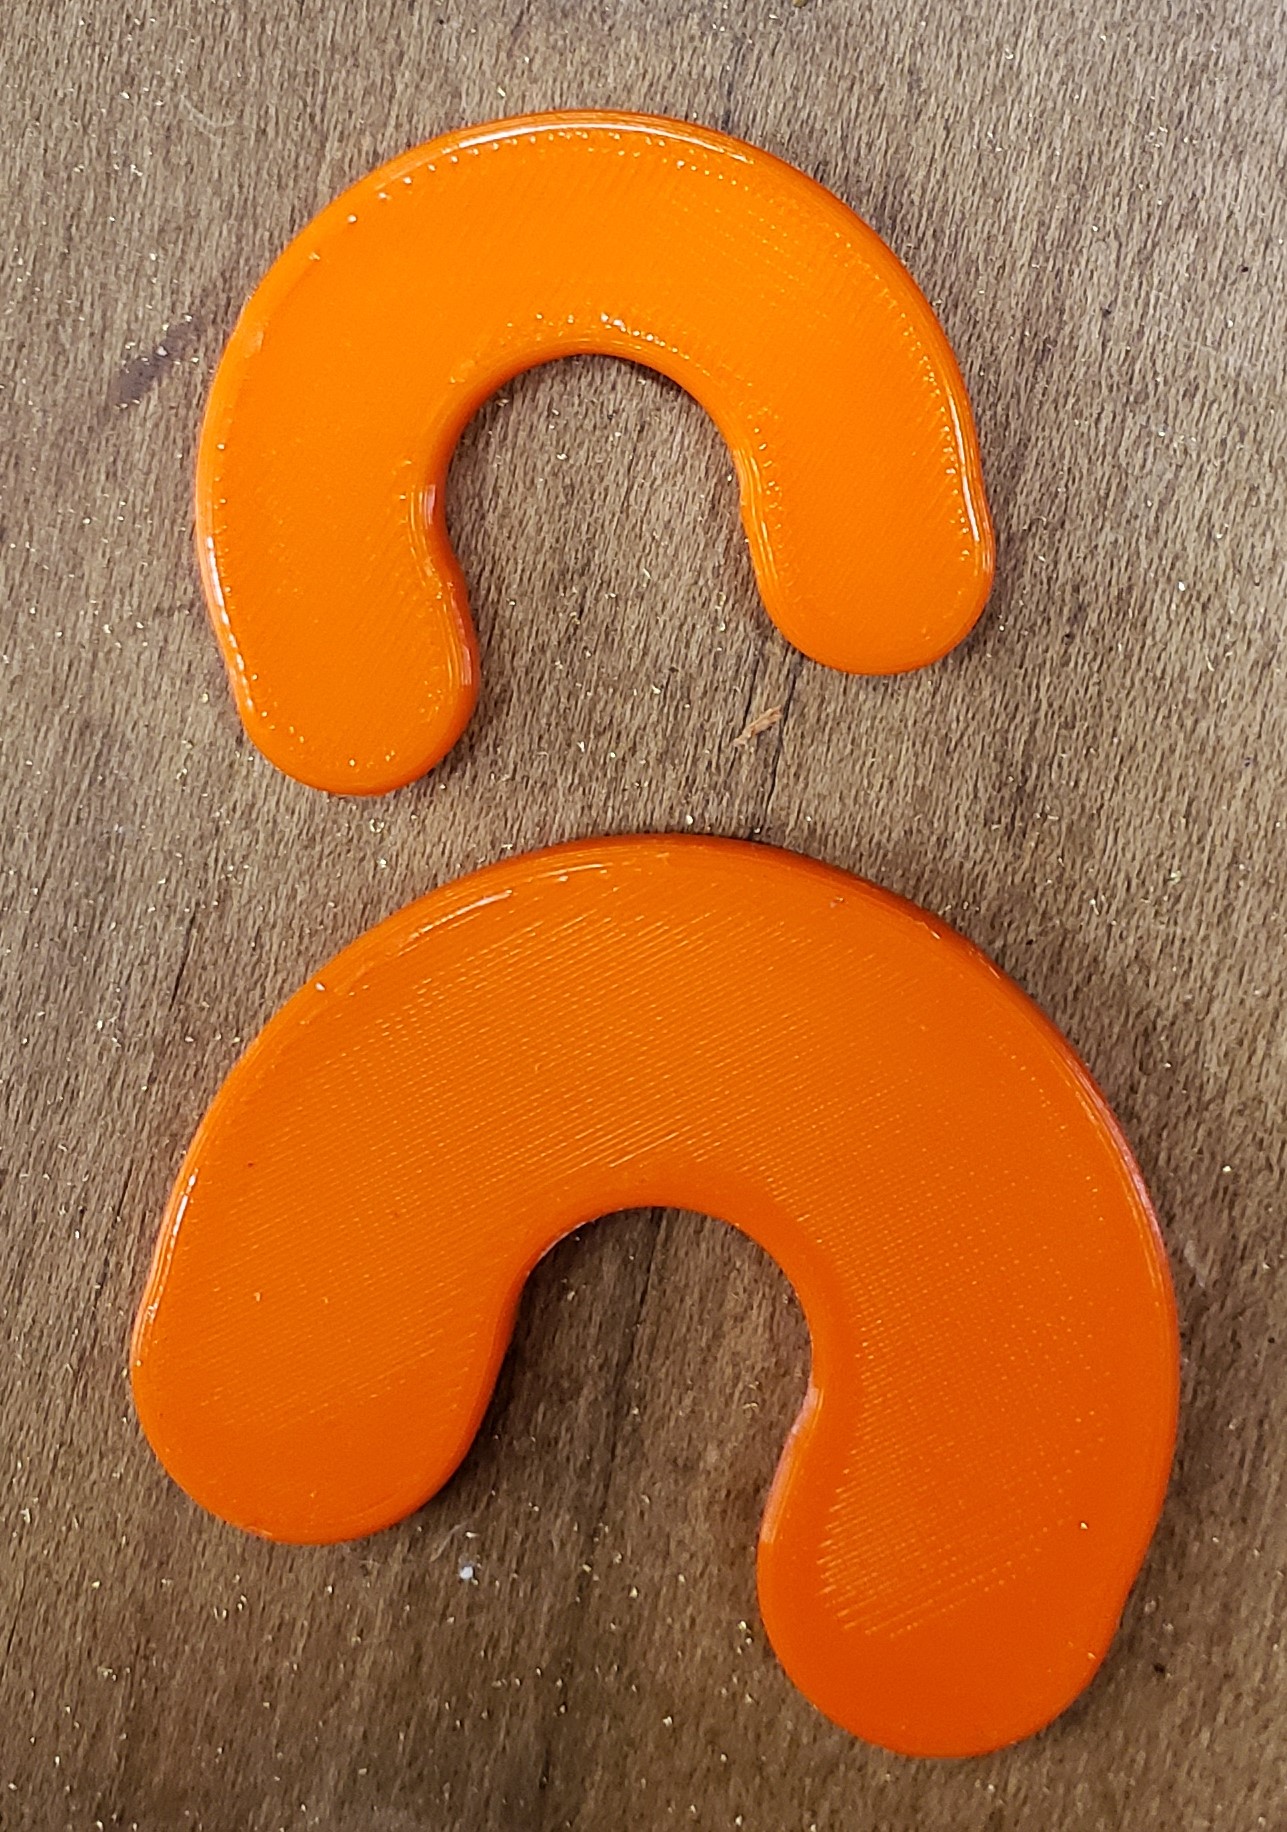
Shark Bite Remover
Shark bite fittings are a great plumbing invention. They fit over the 1/2″ cpvc plumbing in my house and mean the fittings can be replaced without cutting the pipe. I had a supply valve go bad in one location, and wanted to switch orientations in another location. No cutting required! The trick is, getting them off is a beast. You have to push in on the release sleeve, twist and pull. All while being gentle and not stressing the pipes too much. They sell little C clips to make it easier, but I lose them and they aren’t comfortable on your fingers. Enter some printed ones.
I printed LOTS of these and sprinkled them throughout my plumbing supplies. They have more finger surface than the store bought ones, so you can get a better grip. Plus they are thinner. I found myself having to replace a fitting that didn’t have much pipe sticking out. These thin ones got in there, the store bought wouldn’t fit.
Chess Set
Moving from the shop into the house, my wife has been playing chess a lot recently. She wanted a chess set so I made one out of sparkly galaxy black filament and marble filament. I printed each one hollow, filled with sand, and capped with epoxy. The board is a set of 4 tiles printed with a color change from black to white. I put it all on a piece of MDF. That part wasn’t brilliant. I started with black polyurethane then tried to move on to spray paint. I still don’t have a good MDF painting technique apparently. The edges endlessly suck up what ever you put down. That part will probably get remade at a later date.
To hold all the chess pieces I made a box with sliding lid. The fit is good enough that it kind of blends in when fully assembled. Embossed along the sides are a symbol of each chess piece type.
Moon Lamp
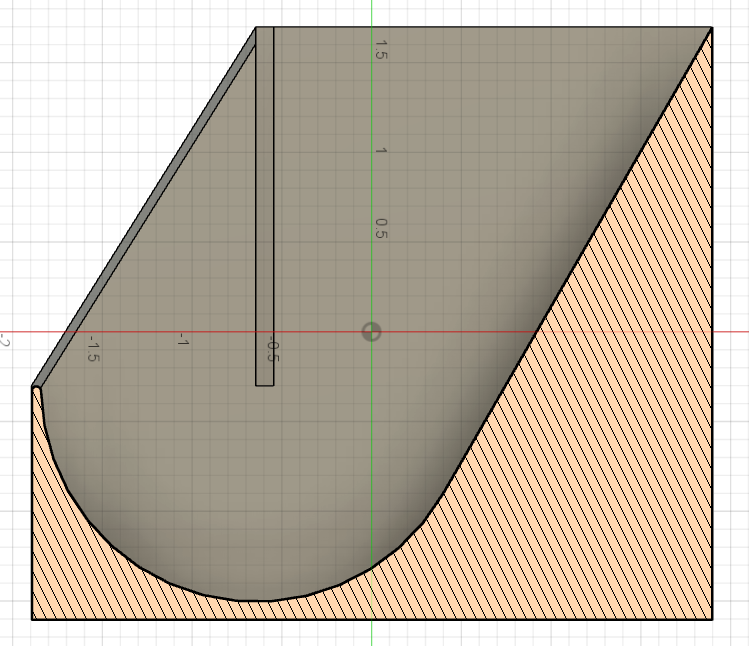
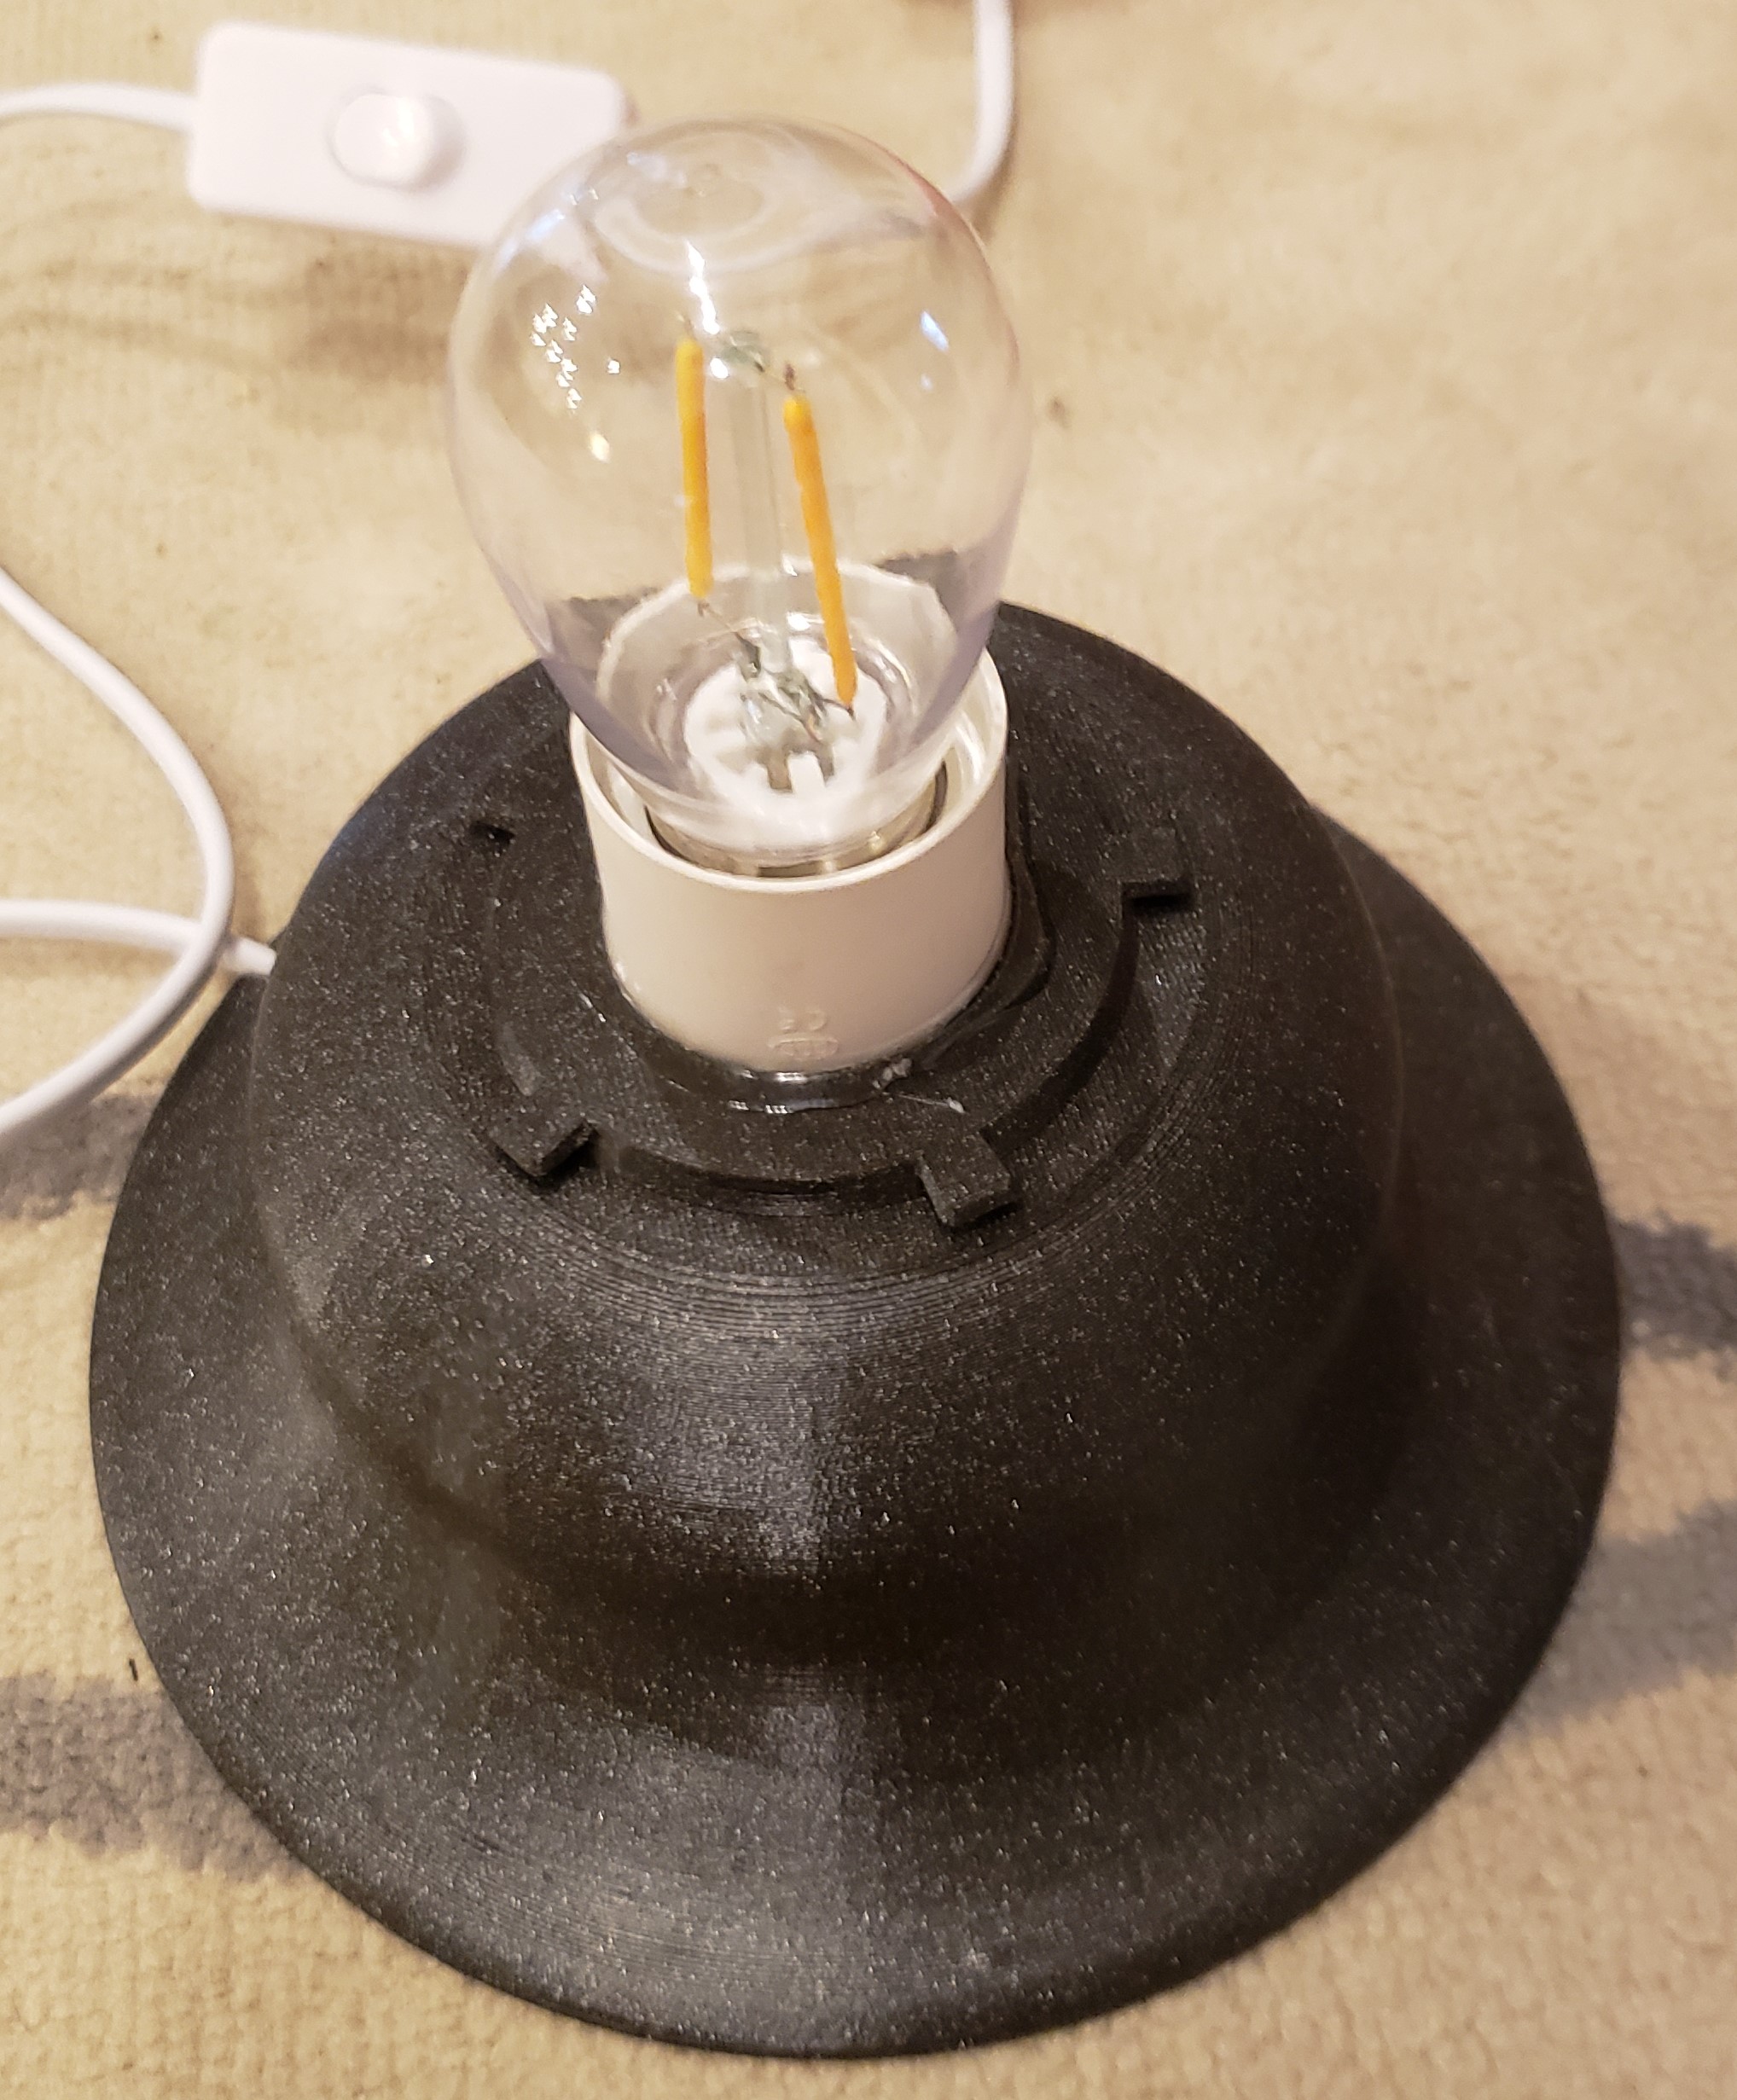
This moon lamp design comes in many flavors online. Thingiverse My implementation isn’t that unique. I did copy the spline shape used to attach the moon, and made my own base to hold the bulb. The base was once again filled with sand and capped. Now the lamp is quite hefty. The main challenge of this job was that the moon print took about 3 days. I accidentally interrupted one attempt when it was 90% complete… oops. The base is 6.5″ in diameter and the moon a little over 8″.
Monitor Picture Holder
Last but certainly not least, I got this cool frame for fathers day. I wanted to keep it close by, and for some reason the top of my monitor jumped out at me as the perfect location. A simple print later, and there was a perfect space for the frame to sit. The little guy is always on my mind, and now always on my monitor.
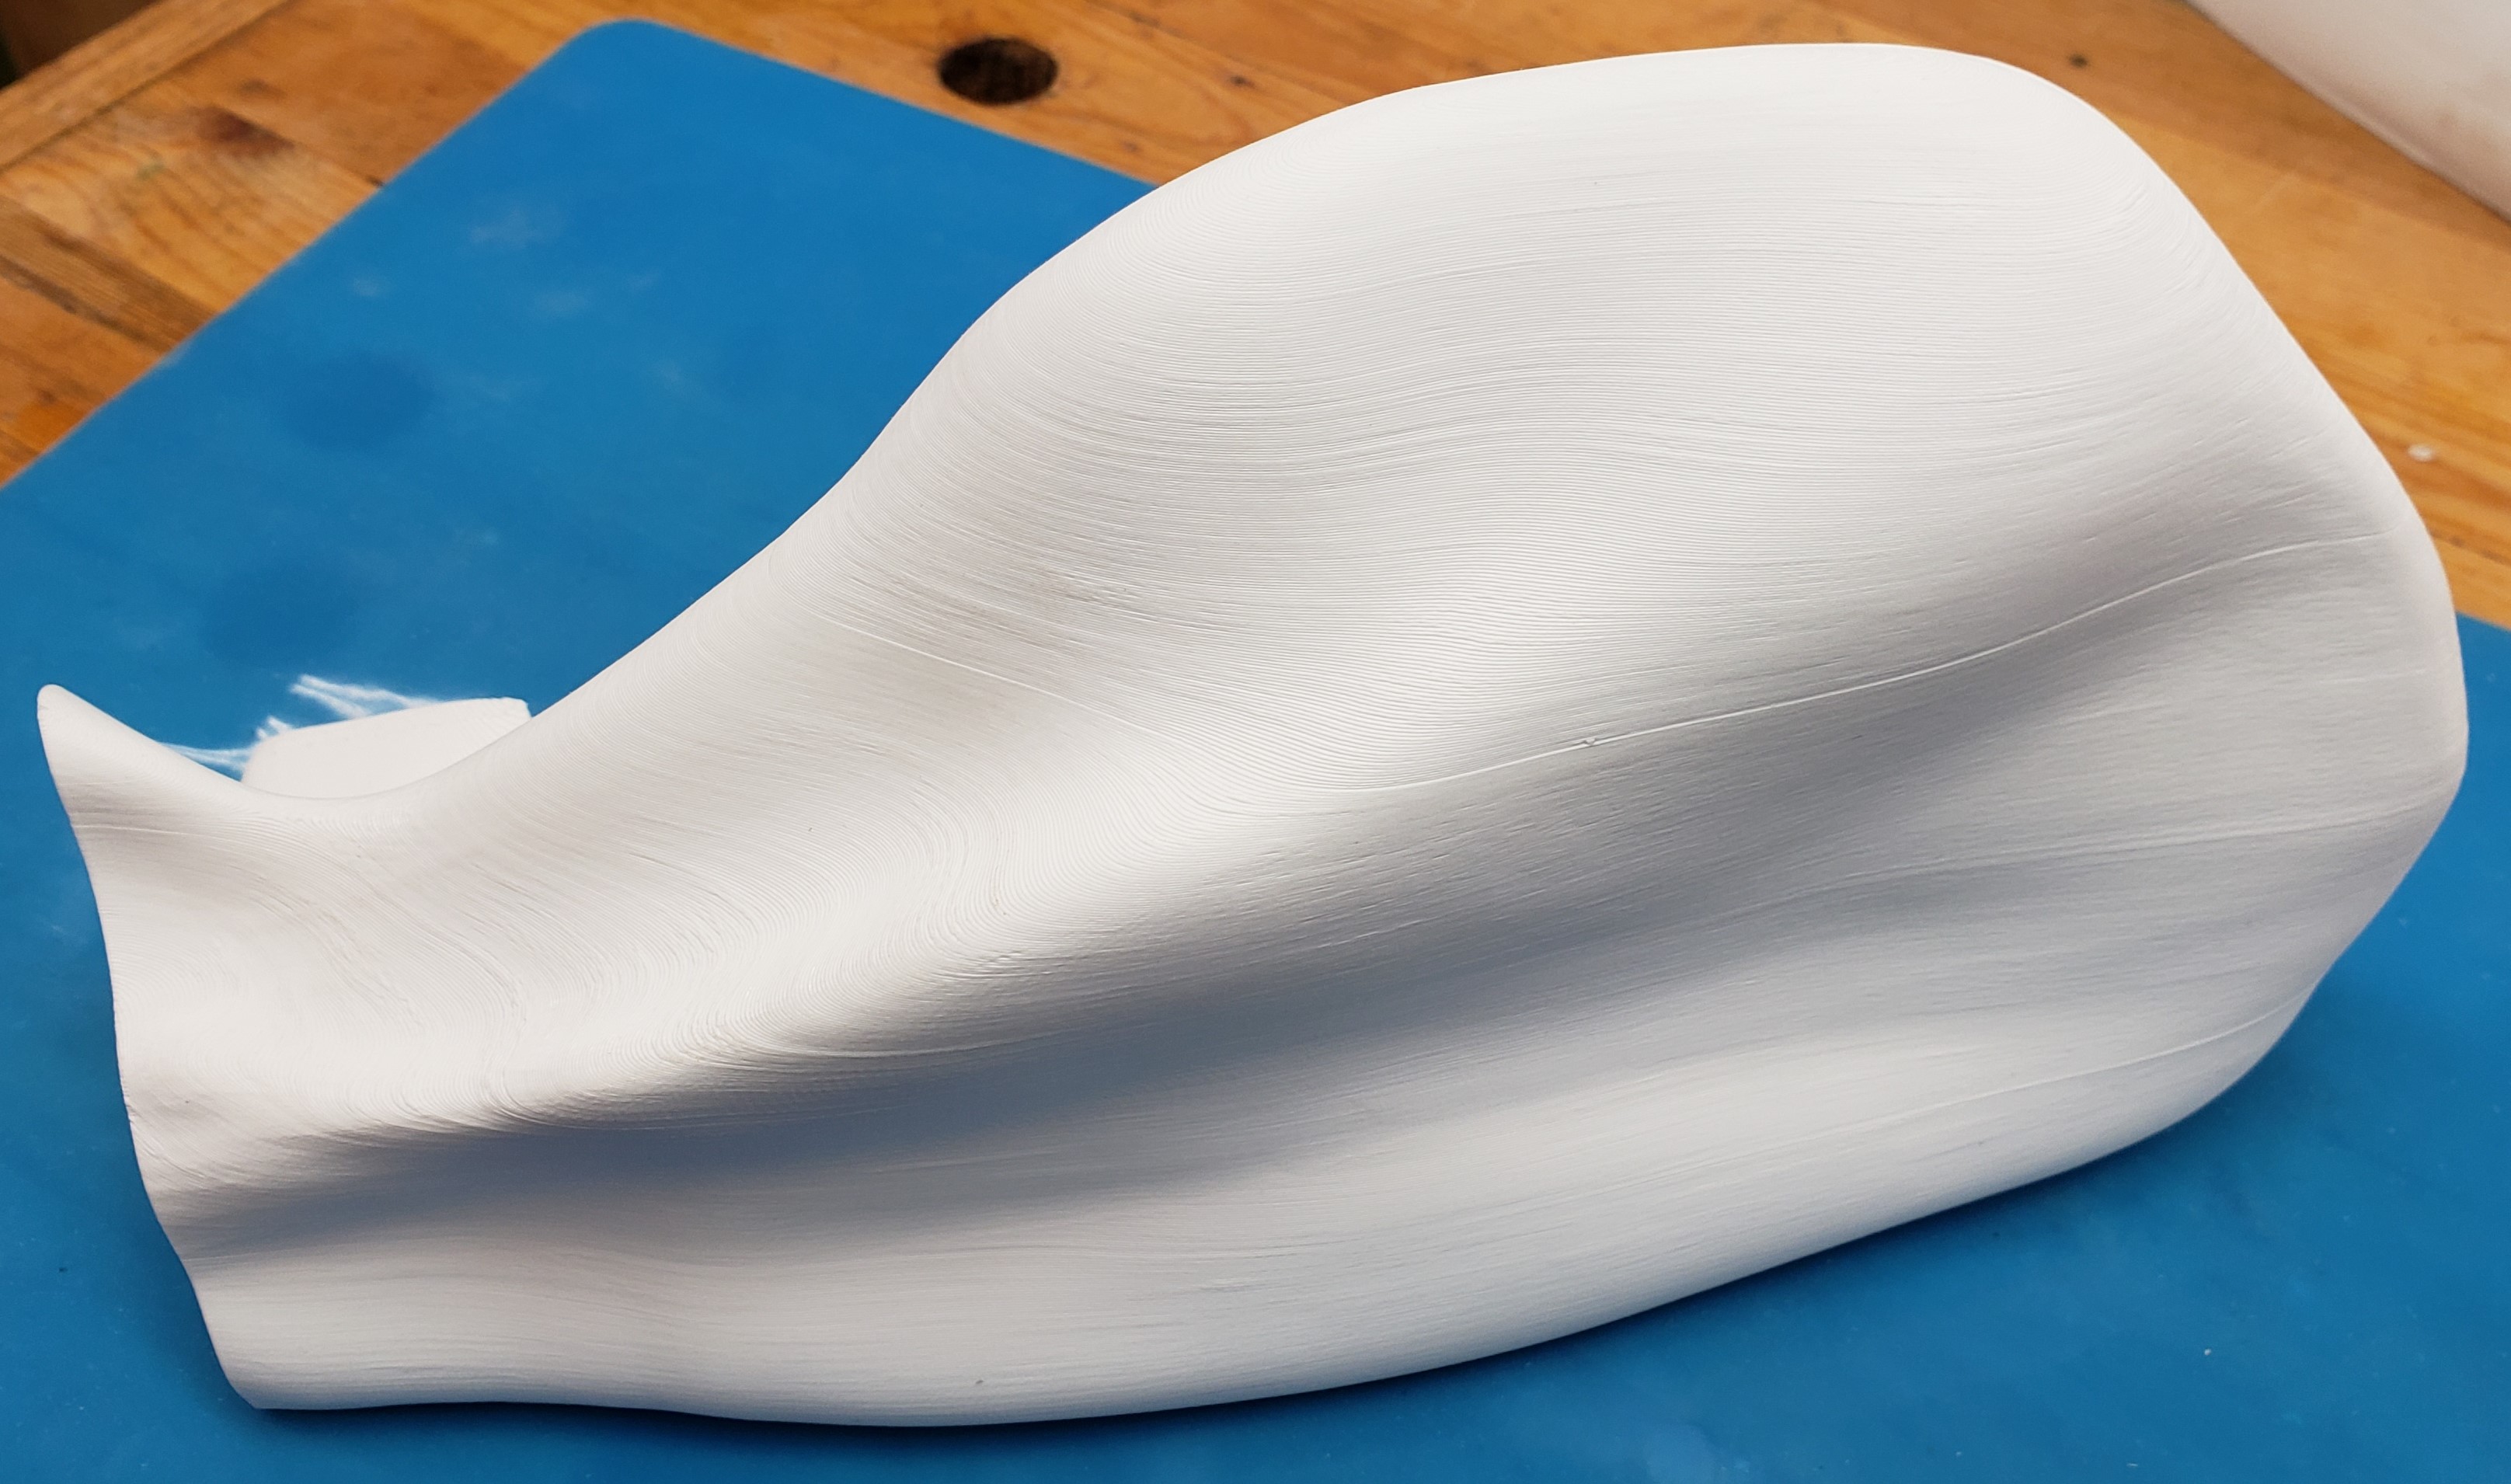
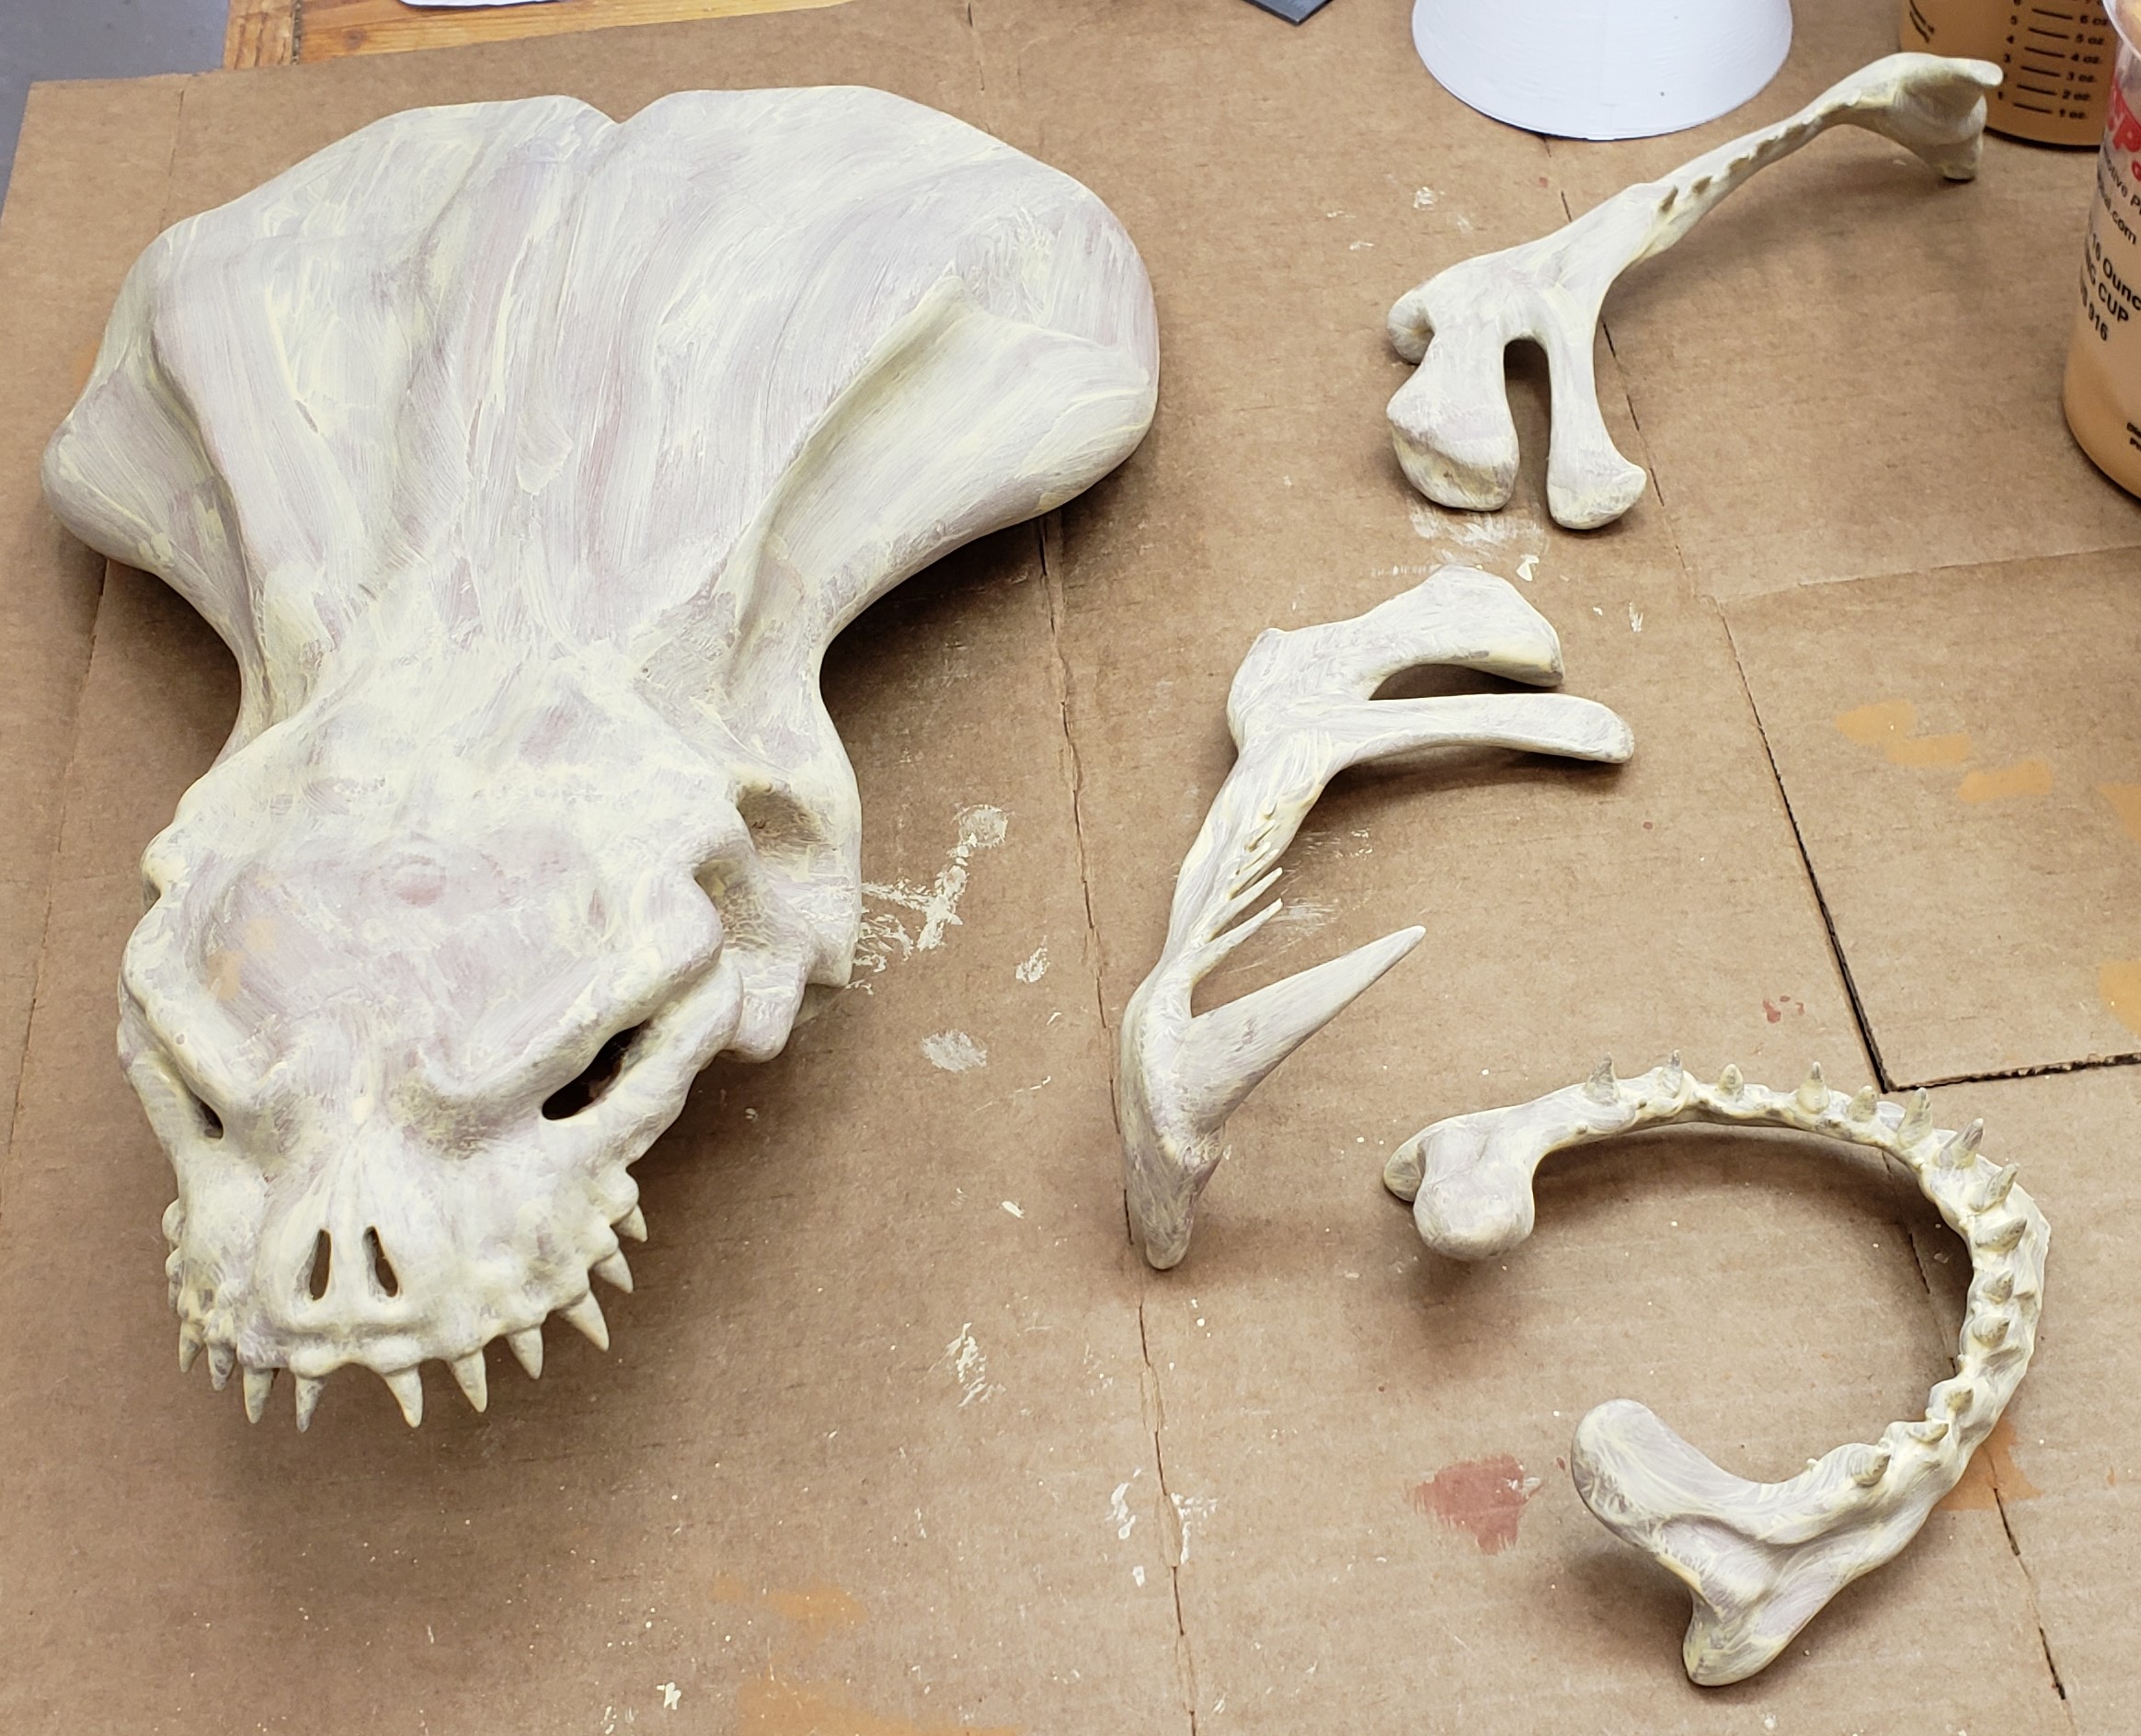
I have been working on this project slowly in the background since probably October. Early on, I was unable to finish printing the parts because of a mysterious heat creep issue. After a few months I had that sorted, and went on to figuring out how to smooth my prints. That went through a few iterations, then it was on to painting. Lots of trial and error, but with really good final results. Over this project I learned a lot about the hot end of my printer, came up with a new-to-me smoothing technique, and picked up an airbrush and taught myself to use it.
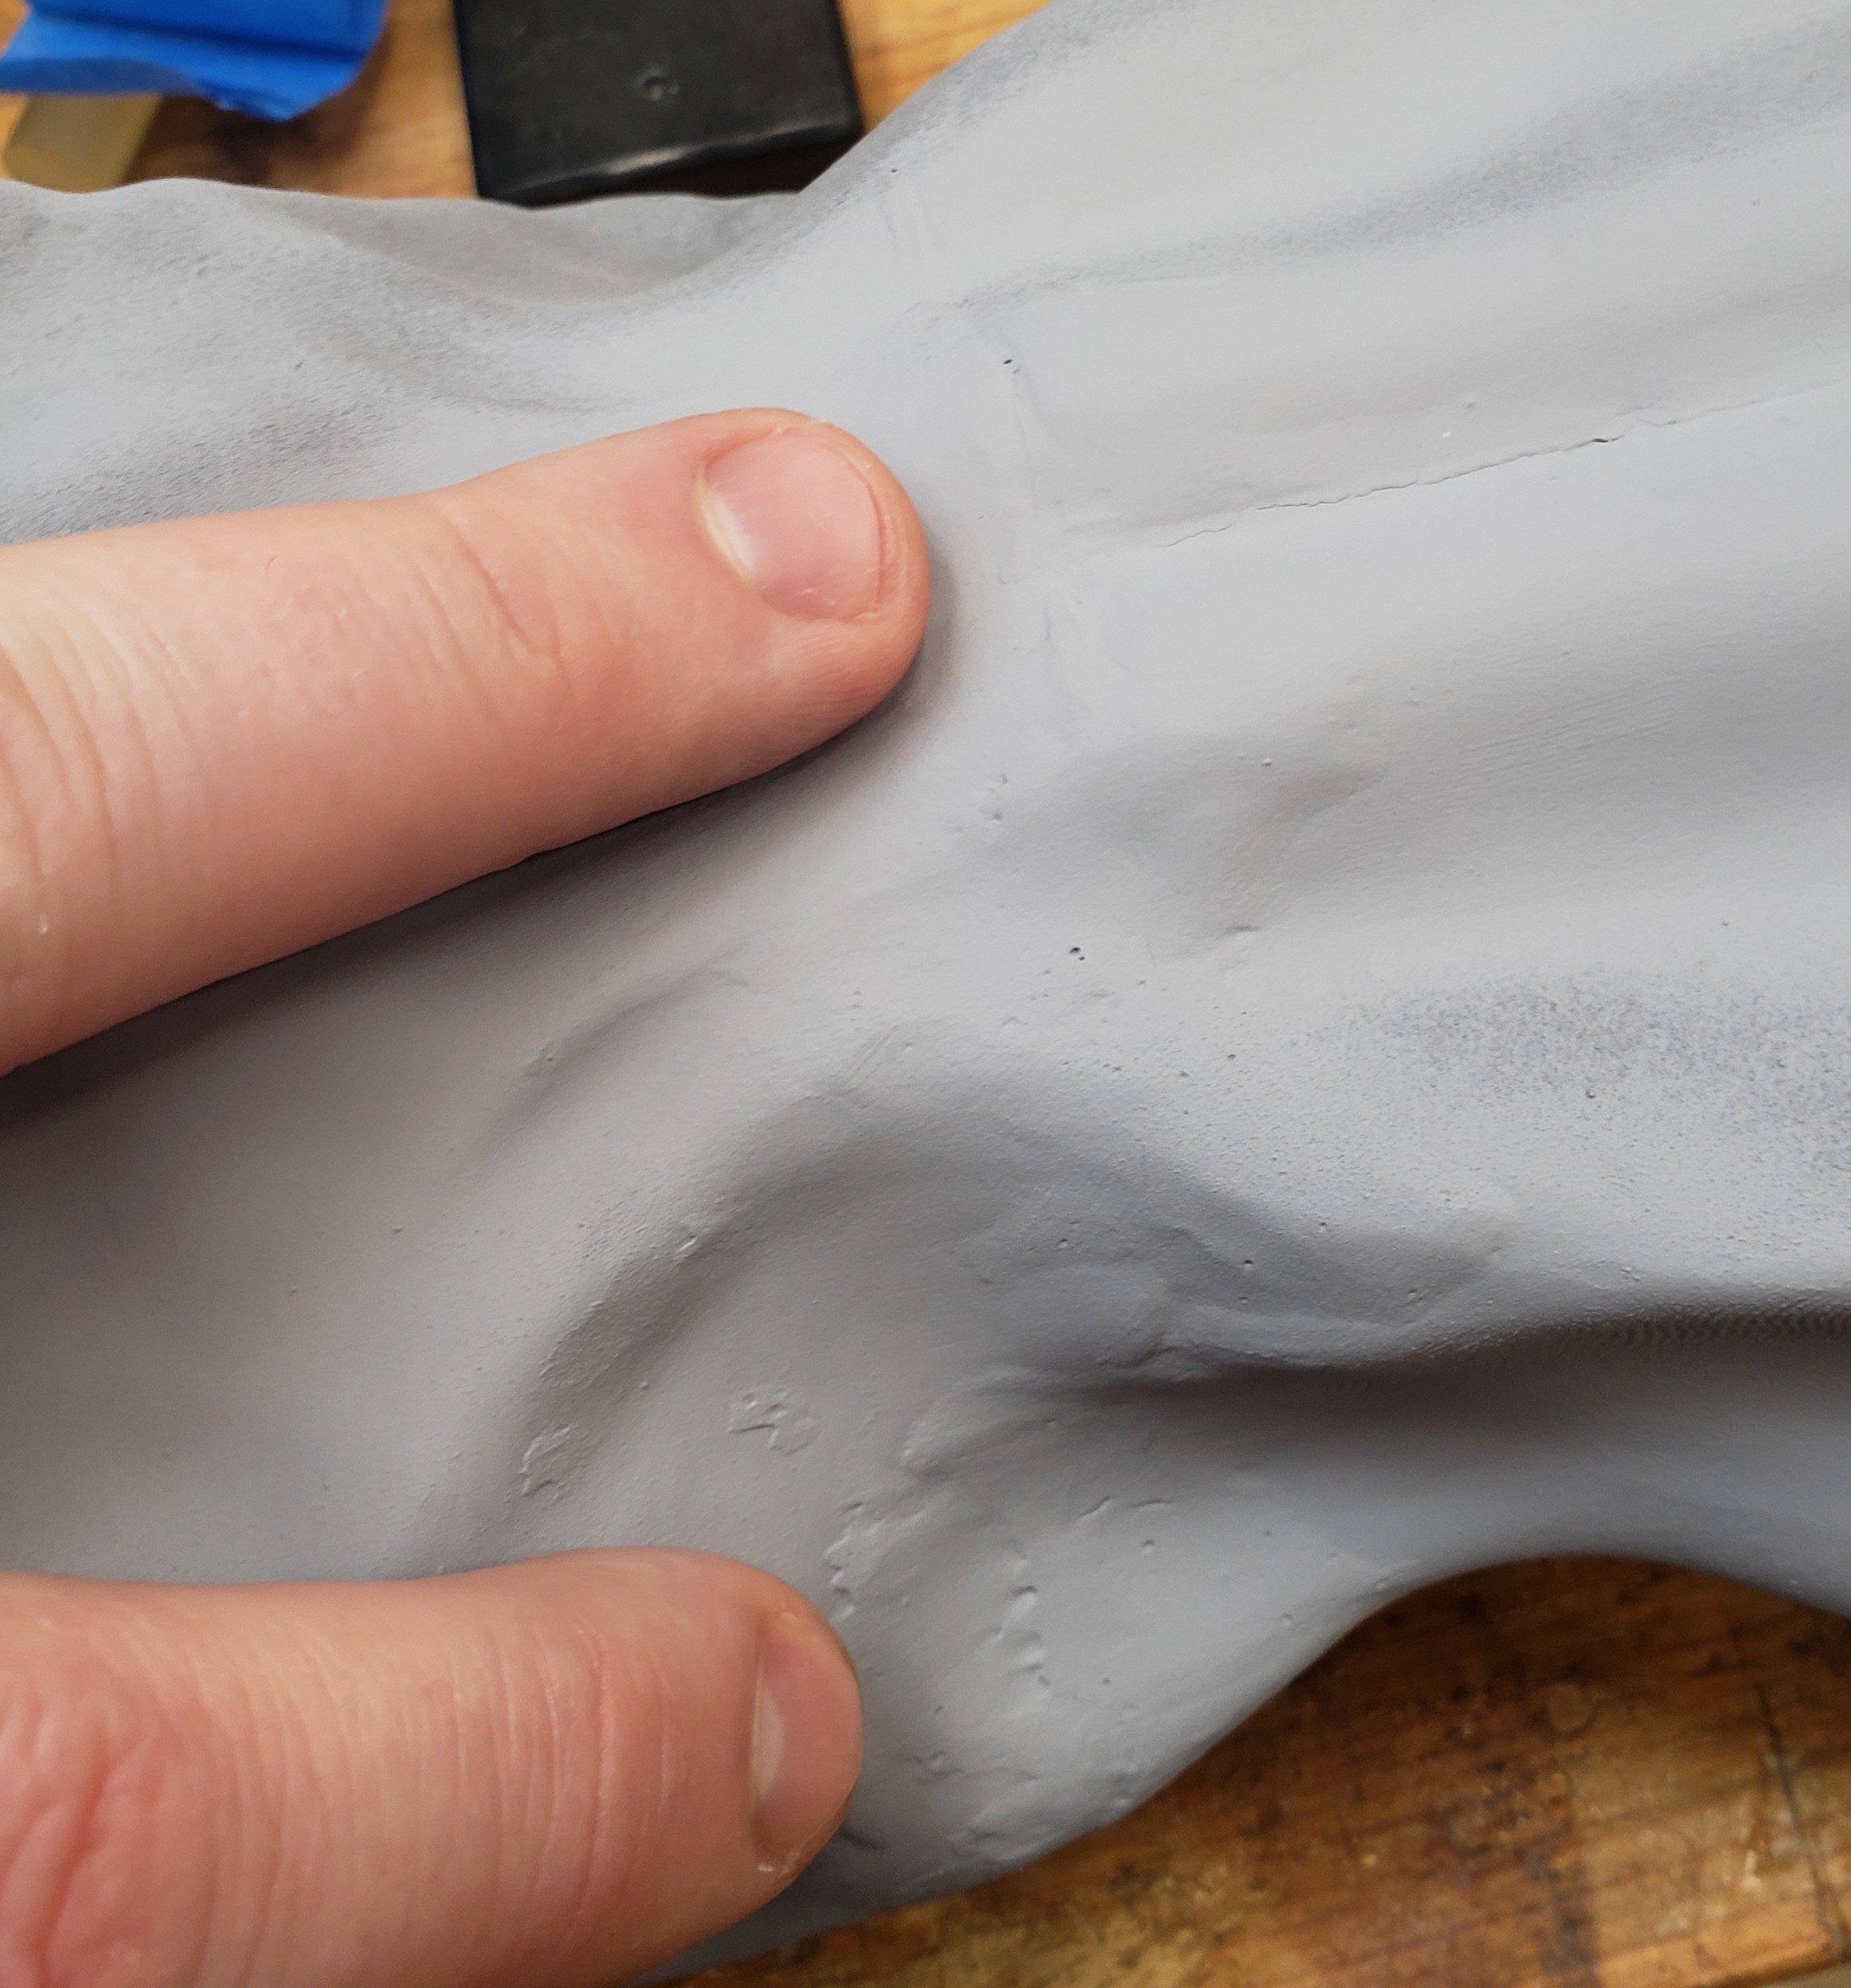
My first challenge was to smooth out the prints. The head came in 3 parts and I decided to smooth each one individually, then glue them together. Probably would have gone better the other way as we shall see. I spent a lot of time with sanding sponges, power tools and air erasers. Nothing worked well to bring down the surface roughness. My printer issues were really starting to bite me. I hit upon an idea with epoxy coating. They make special two part epoxies for over-coating FDM prints. I figured a slow two part I already had available was probably good enough. Below is one of my tests. Left side bare, right side coated.
Two part epoxy works well, but has a few draw backs. You tend to have to mix big batches, then really get working once they are cooking. It adheres well and is thick enough to hide most layer lines. Drips are an issue and once you have it in place, it can run and sag till the stuff starts to kick off. It was way better than endlessly sanding and priming, but still had some issues. Another test piece below.
I did some more research and found that printer resin is another possible option. I picked up a small bottle and a 405nm light and got to work. The results are great. It a good thickness as is, but can be thinned with IPA if desired. The trick is that you want to completely coat an area, then cure. Painting on more resin will make it hard to blend as the new stuff stays on top of the cured stuff. The resin has as much working time as you want, so you can take your time, go thin, then cure when you are ready. The part should be wiped down with a bit of IPA afterwards to clean up the sticky residue. The resin used below is black, but is transparent enough it is hard to see the effect.
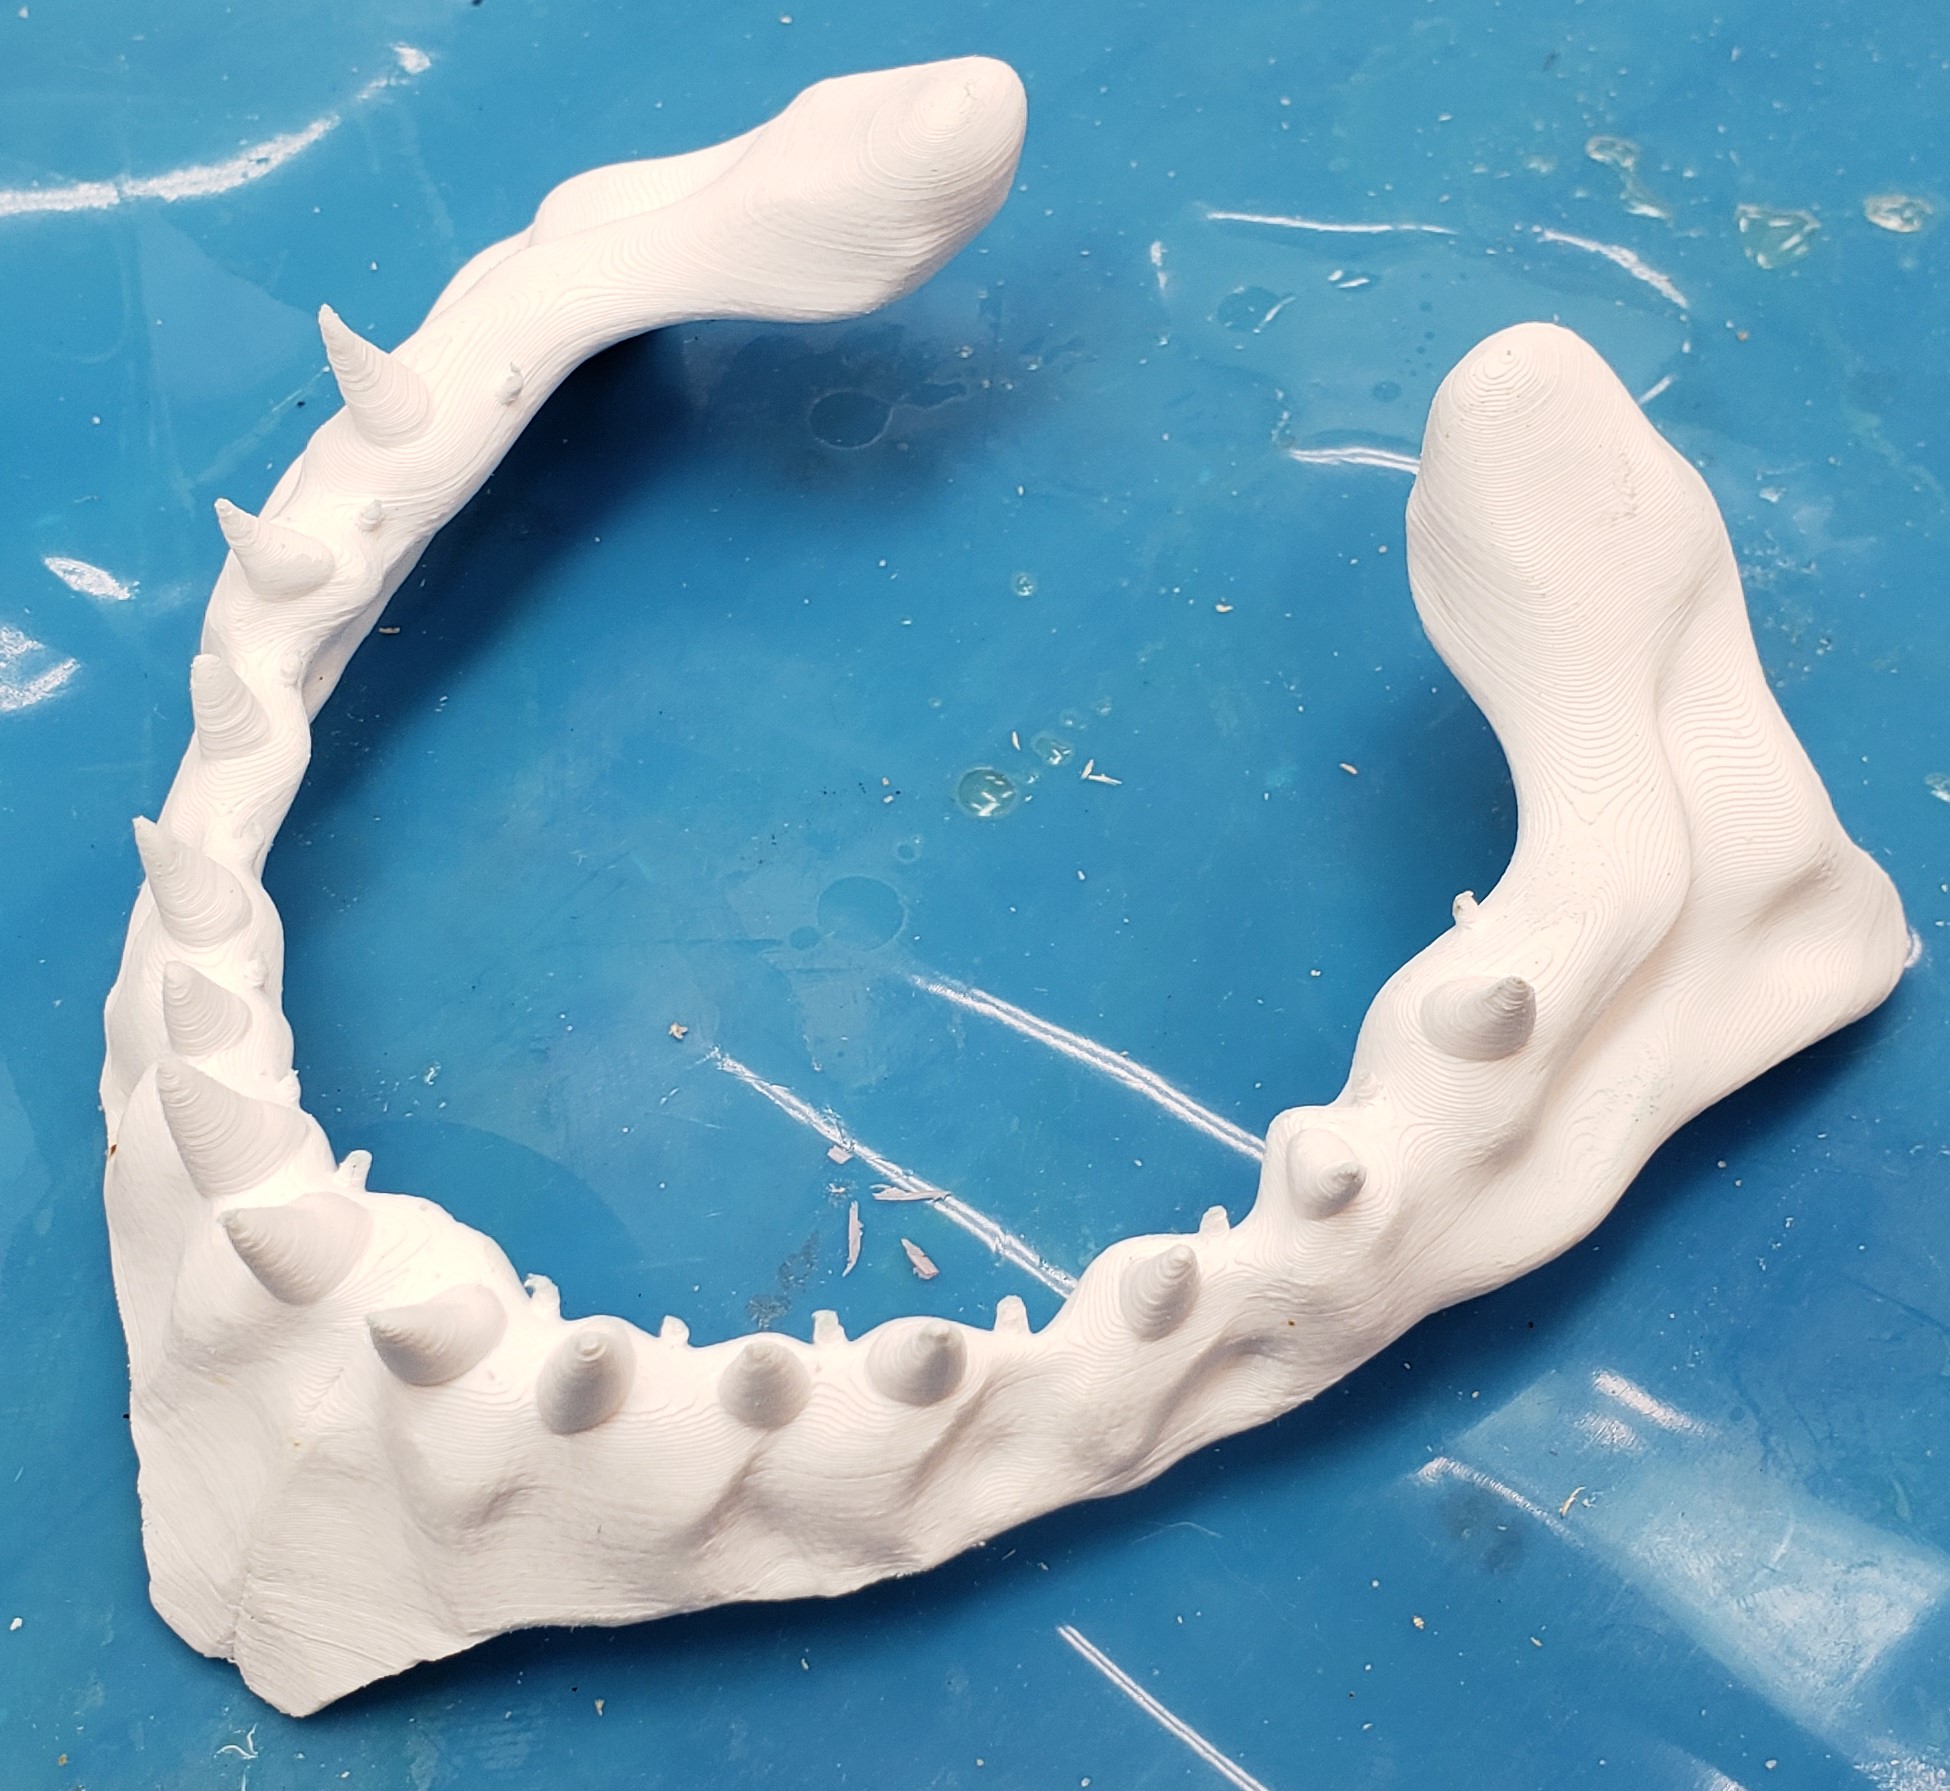
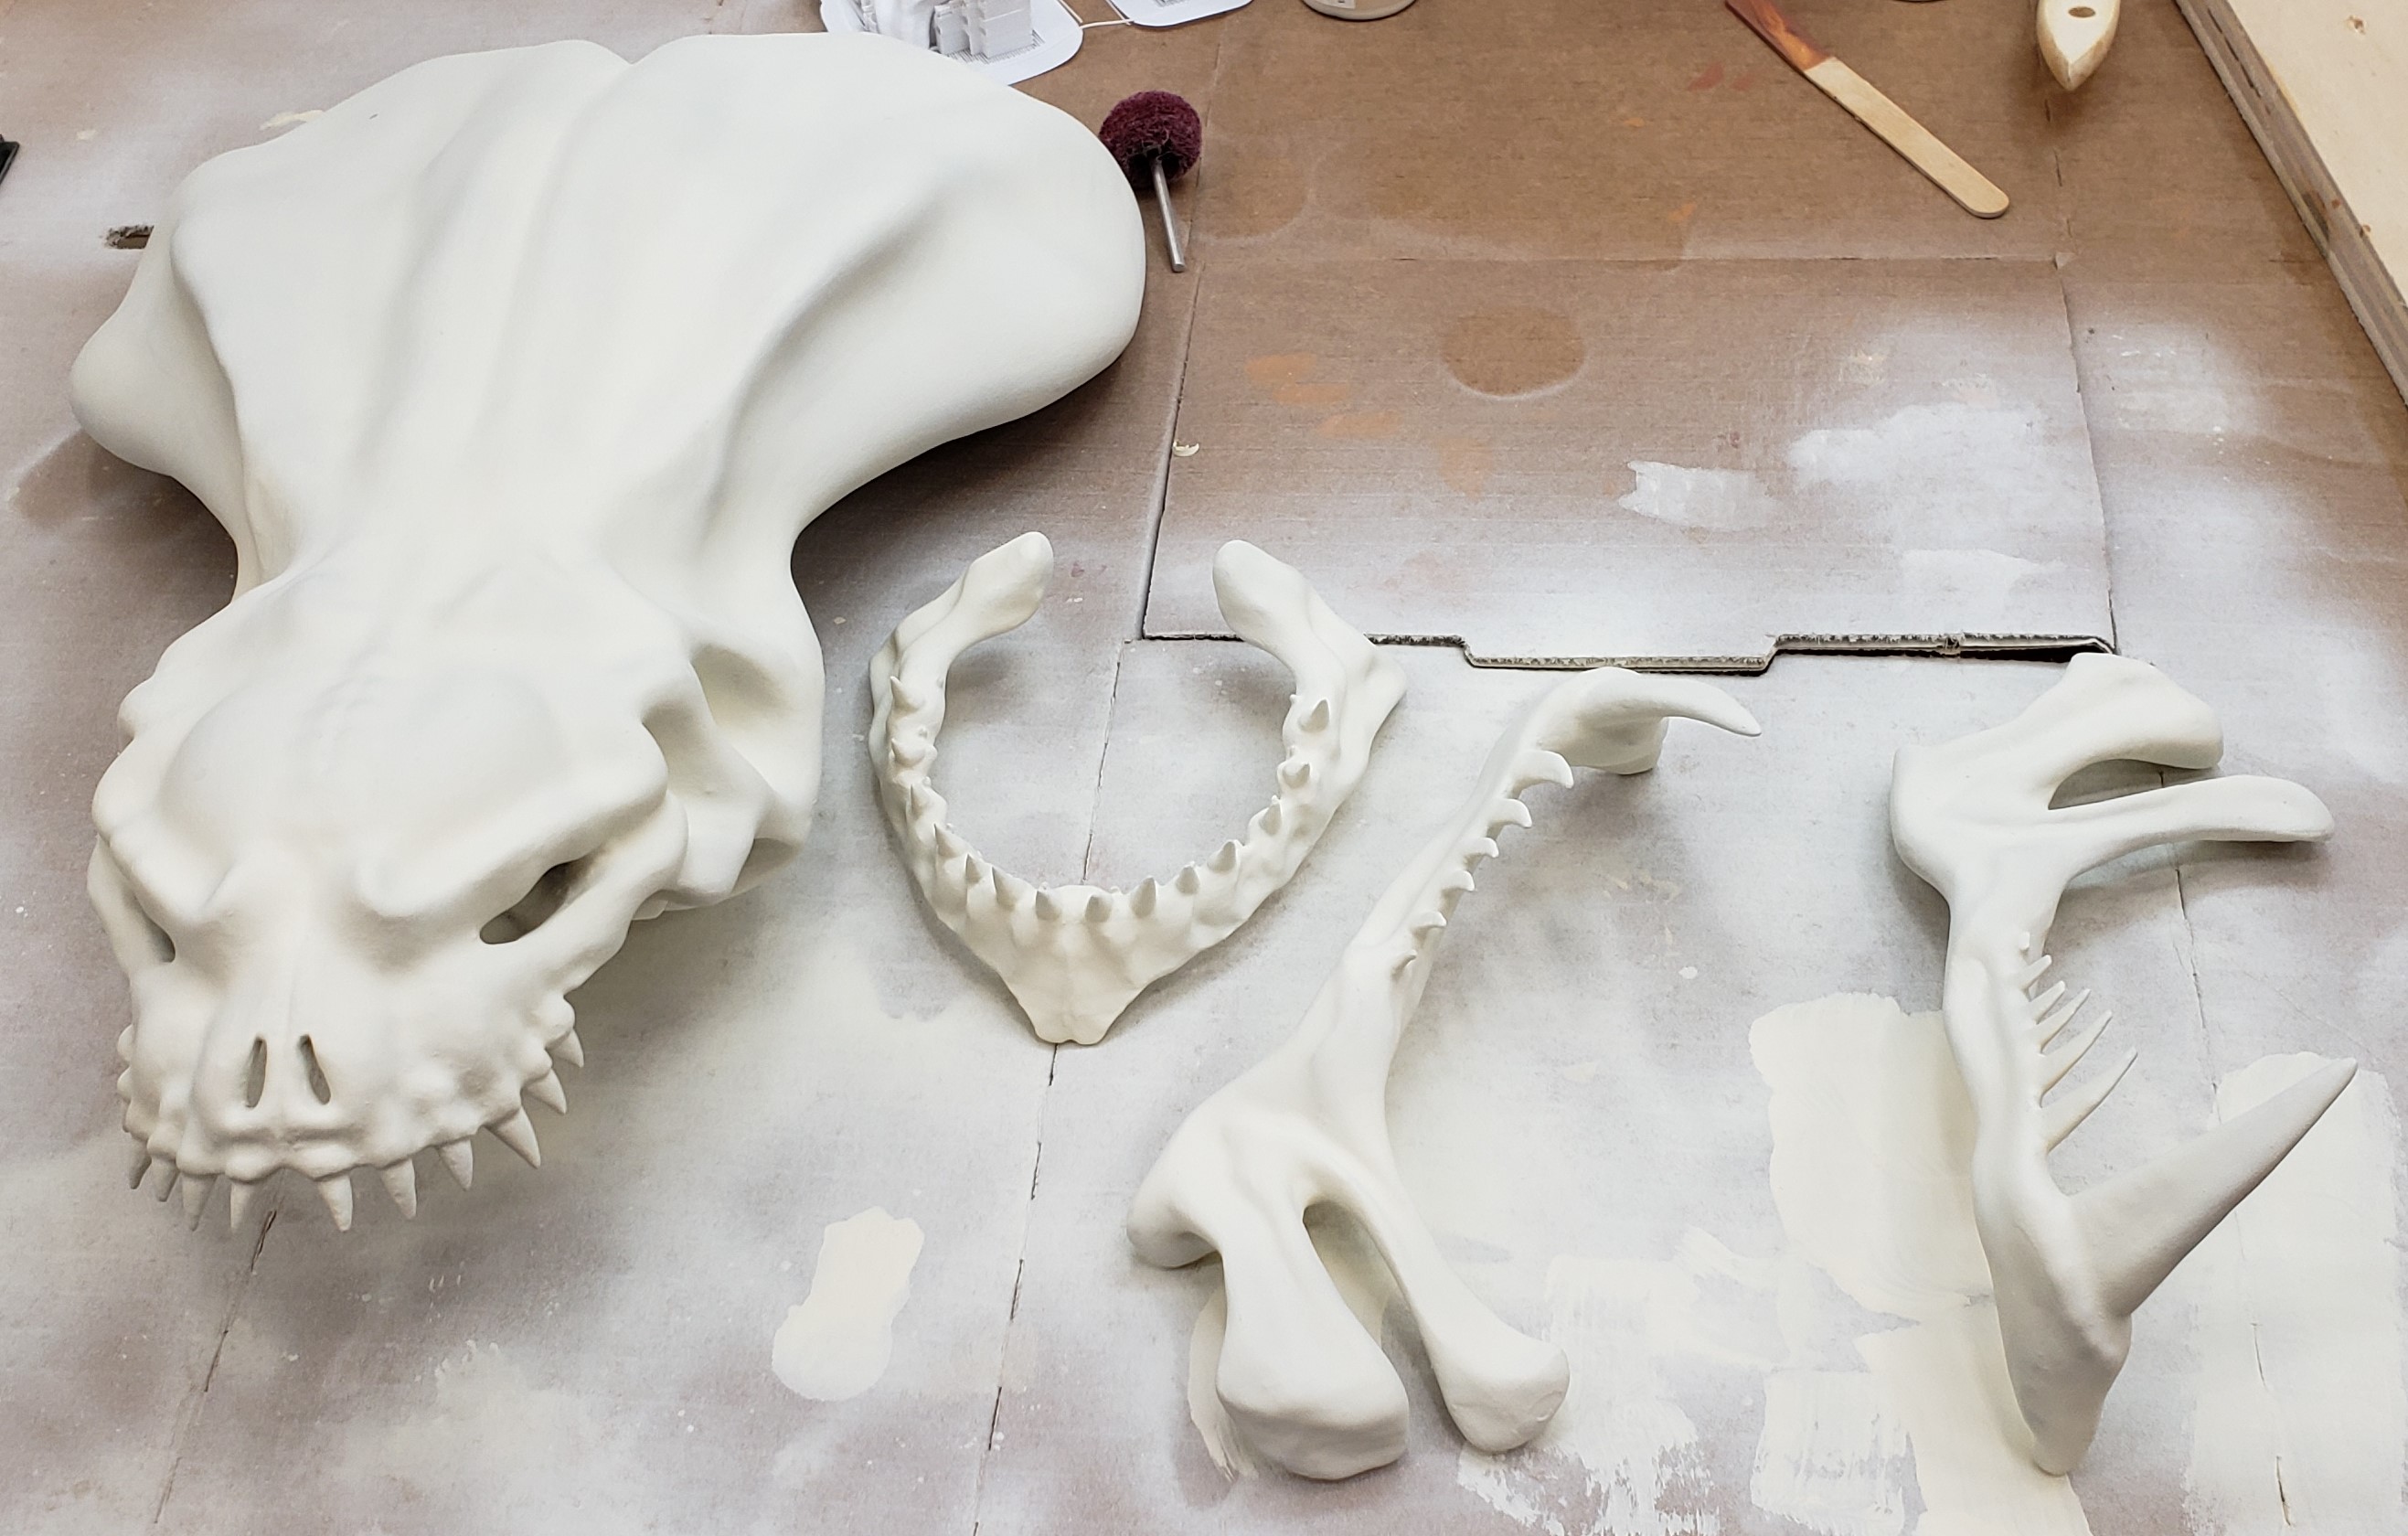
With the major parts coated and smooth, I glued everything together. There was some bed warp, so I had major gaps to fill. I used bondo spot putty. It is hard to apply smoothly, and takes a bit of sanding to get flush. It sands much faster than the resin parts, so if you get too aggressive, you make valleys. Plus, resin doesn’t stick to it, so this part was pretty tricky. I need to find a better gap filling solution. UV resin won’t cure deep enough and is too thin.
I sanded and thought it all looked good, but the bondo still wasn’t smooth in spots.
You can’t hide anything once the primer goes down. That flat color shows all. After countless rounds of filling, sanding and re-priming I got it good enough. Next came the paint.
I am not much of an artist, and this is where I got out way over my skis. I had some basic craft paints, so I tried to make a bone color. The first was way too dark, and the second went on looking like streaky junk. My paint strokes were adding up and looking really awful.
Some peas for help on the internet got me the idea that I needed to try airbrushing. I had never done it before, but a basic cheap airbrush was about 40 bucks, and I already had the compressor. Plus, the cheap paints I was using had very little pigment. I went to slightly better craft paints that came in the color I wanted. The results were becoming much better.
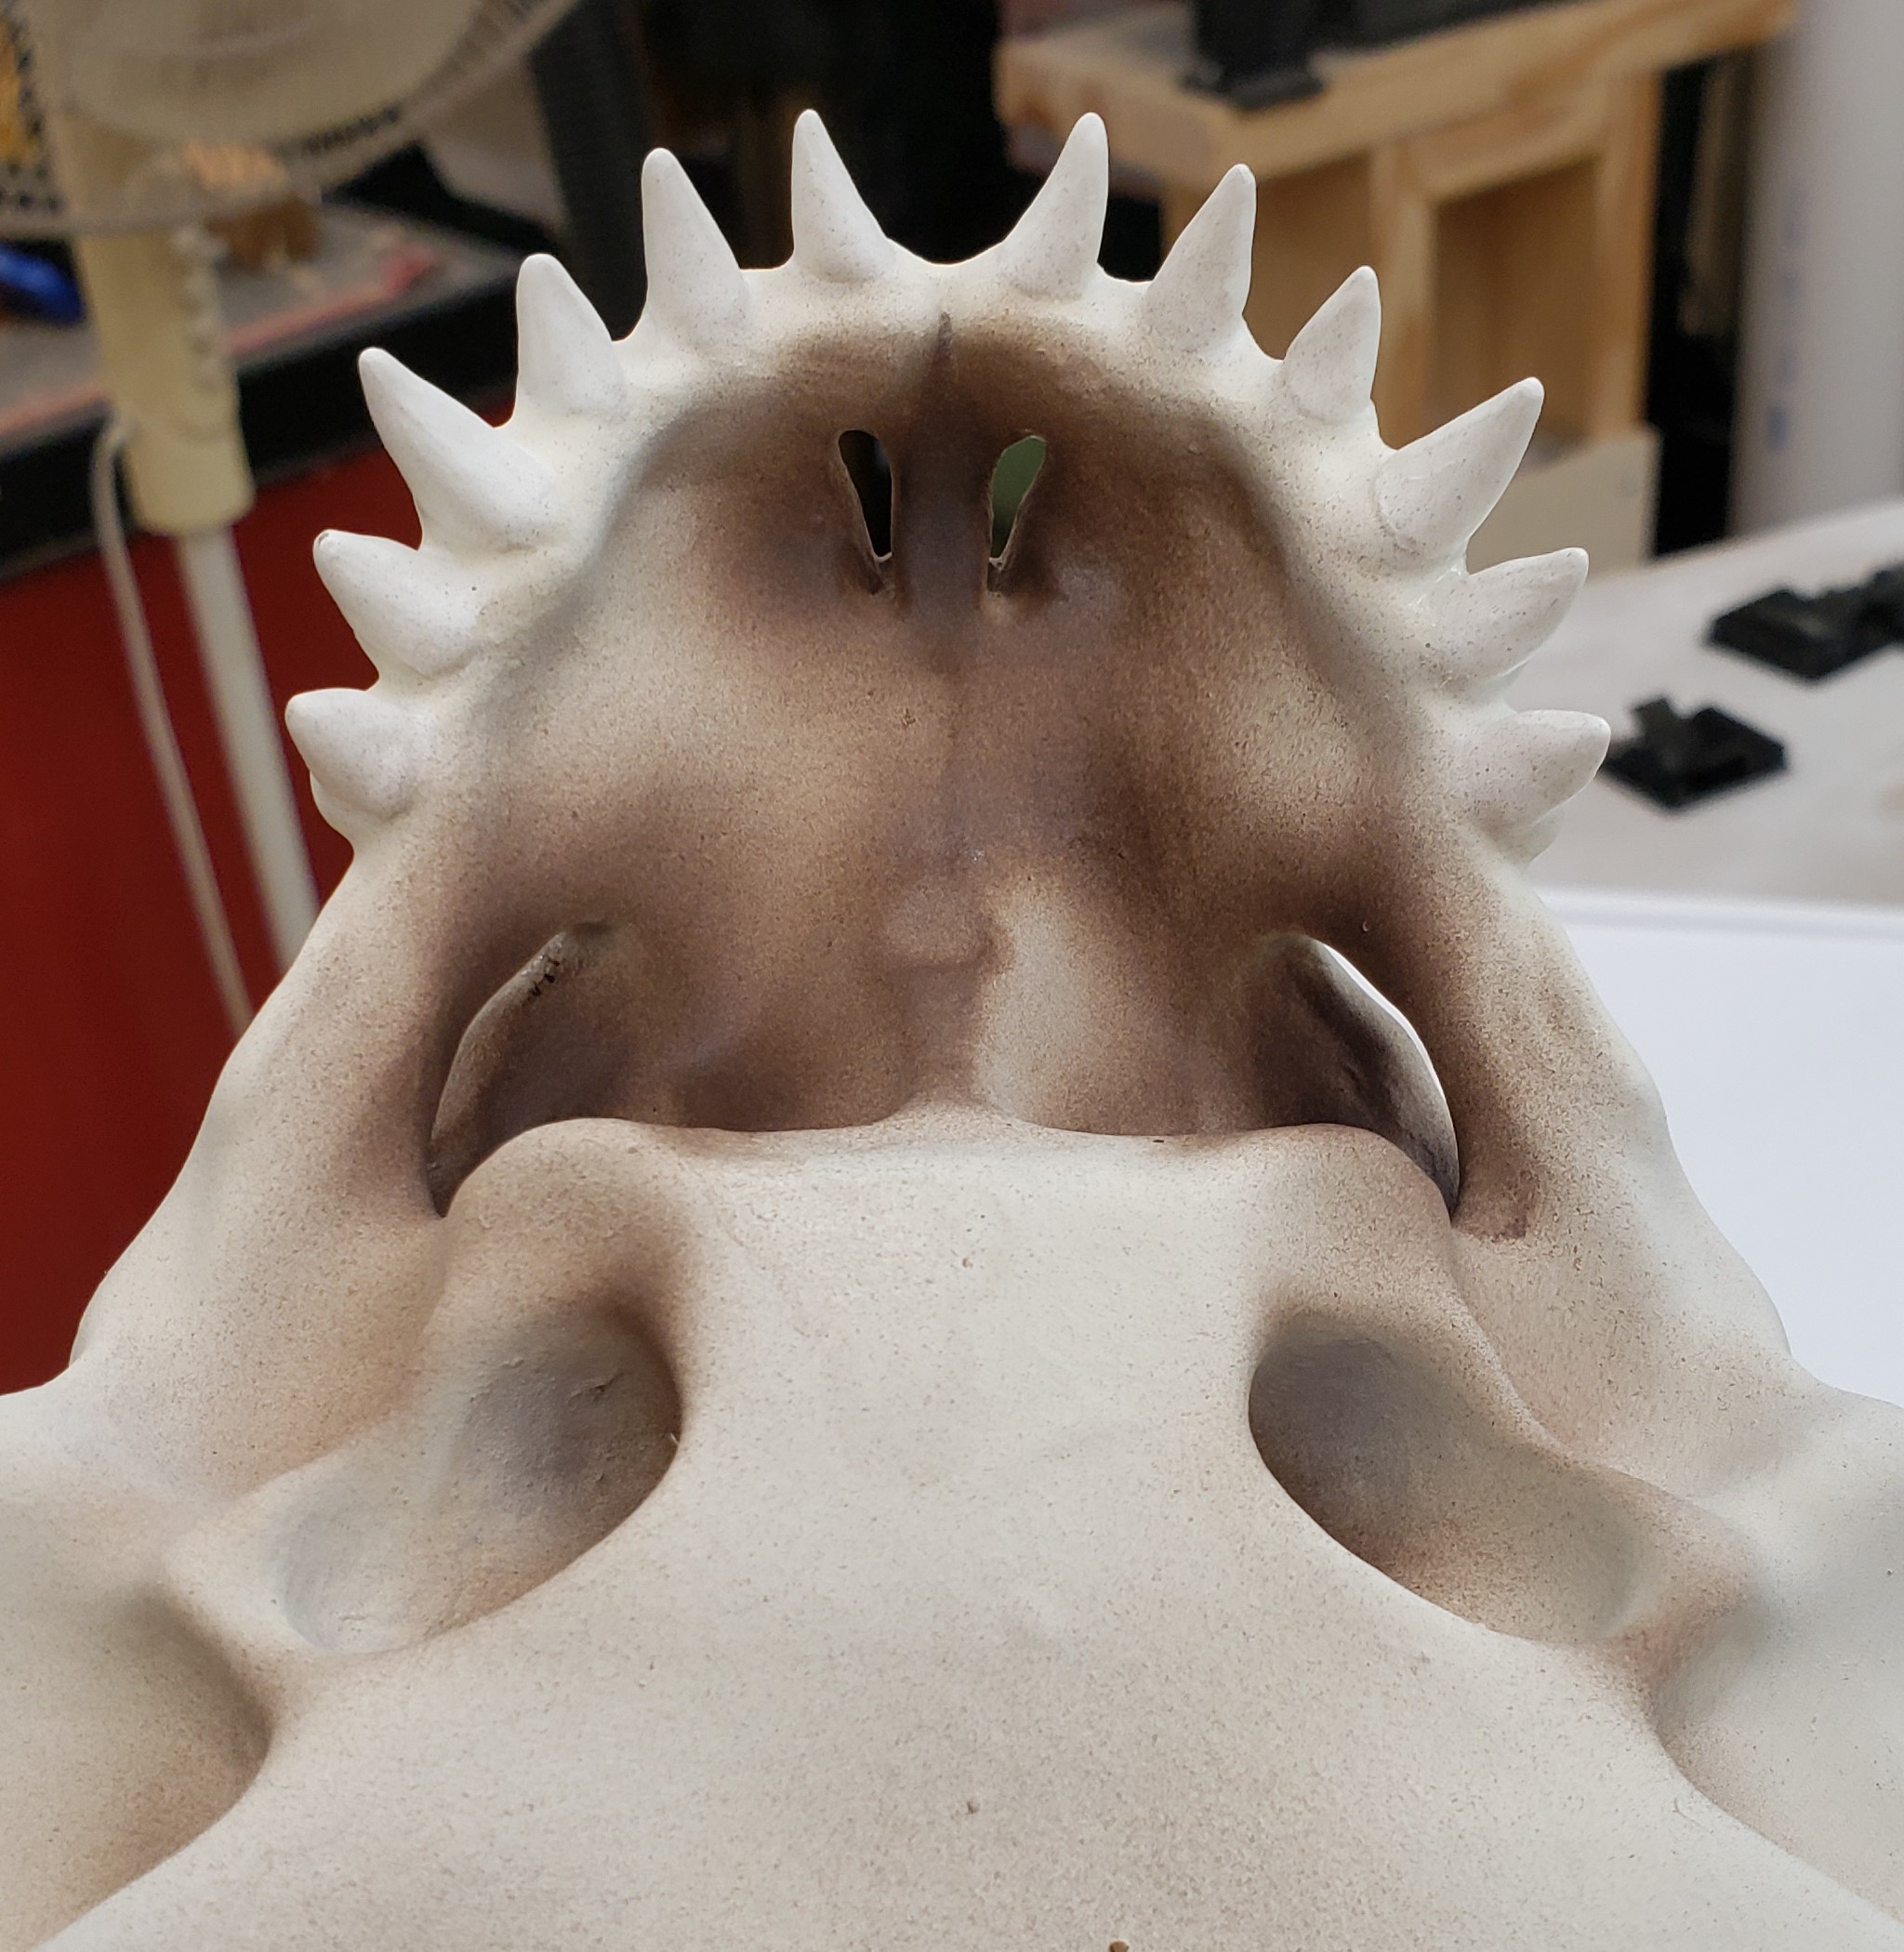
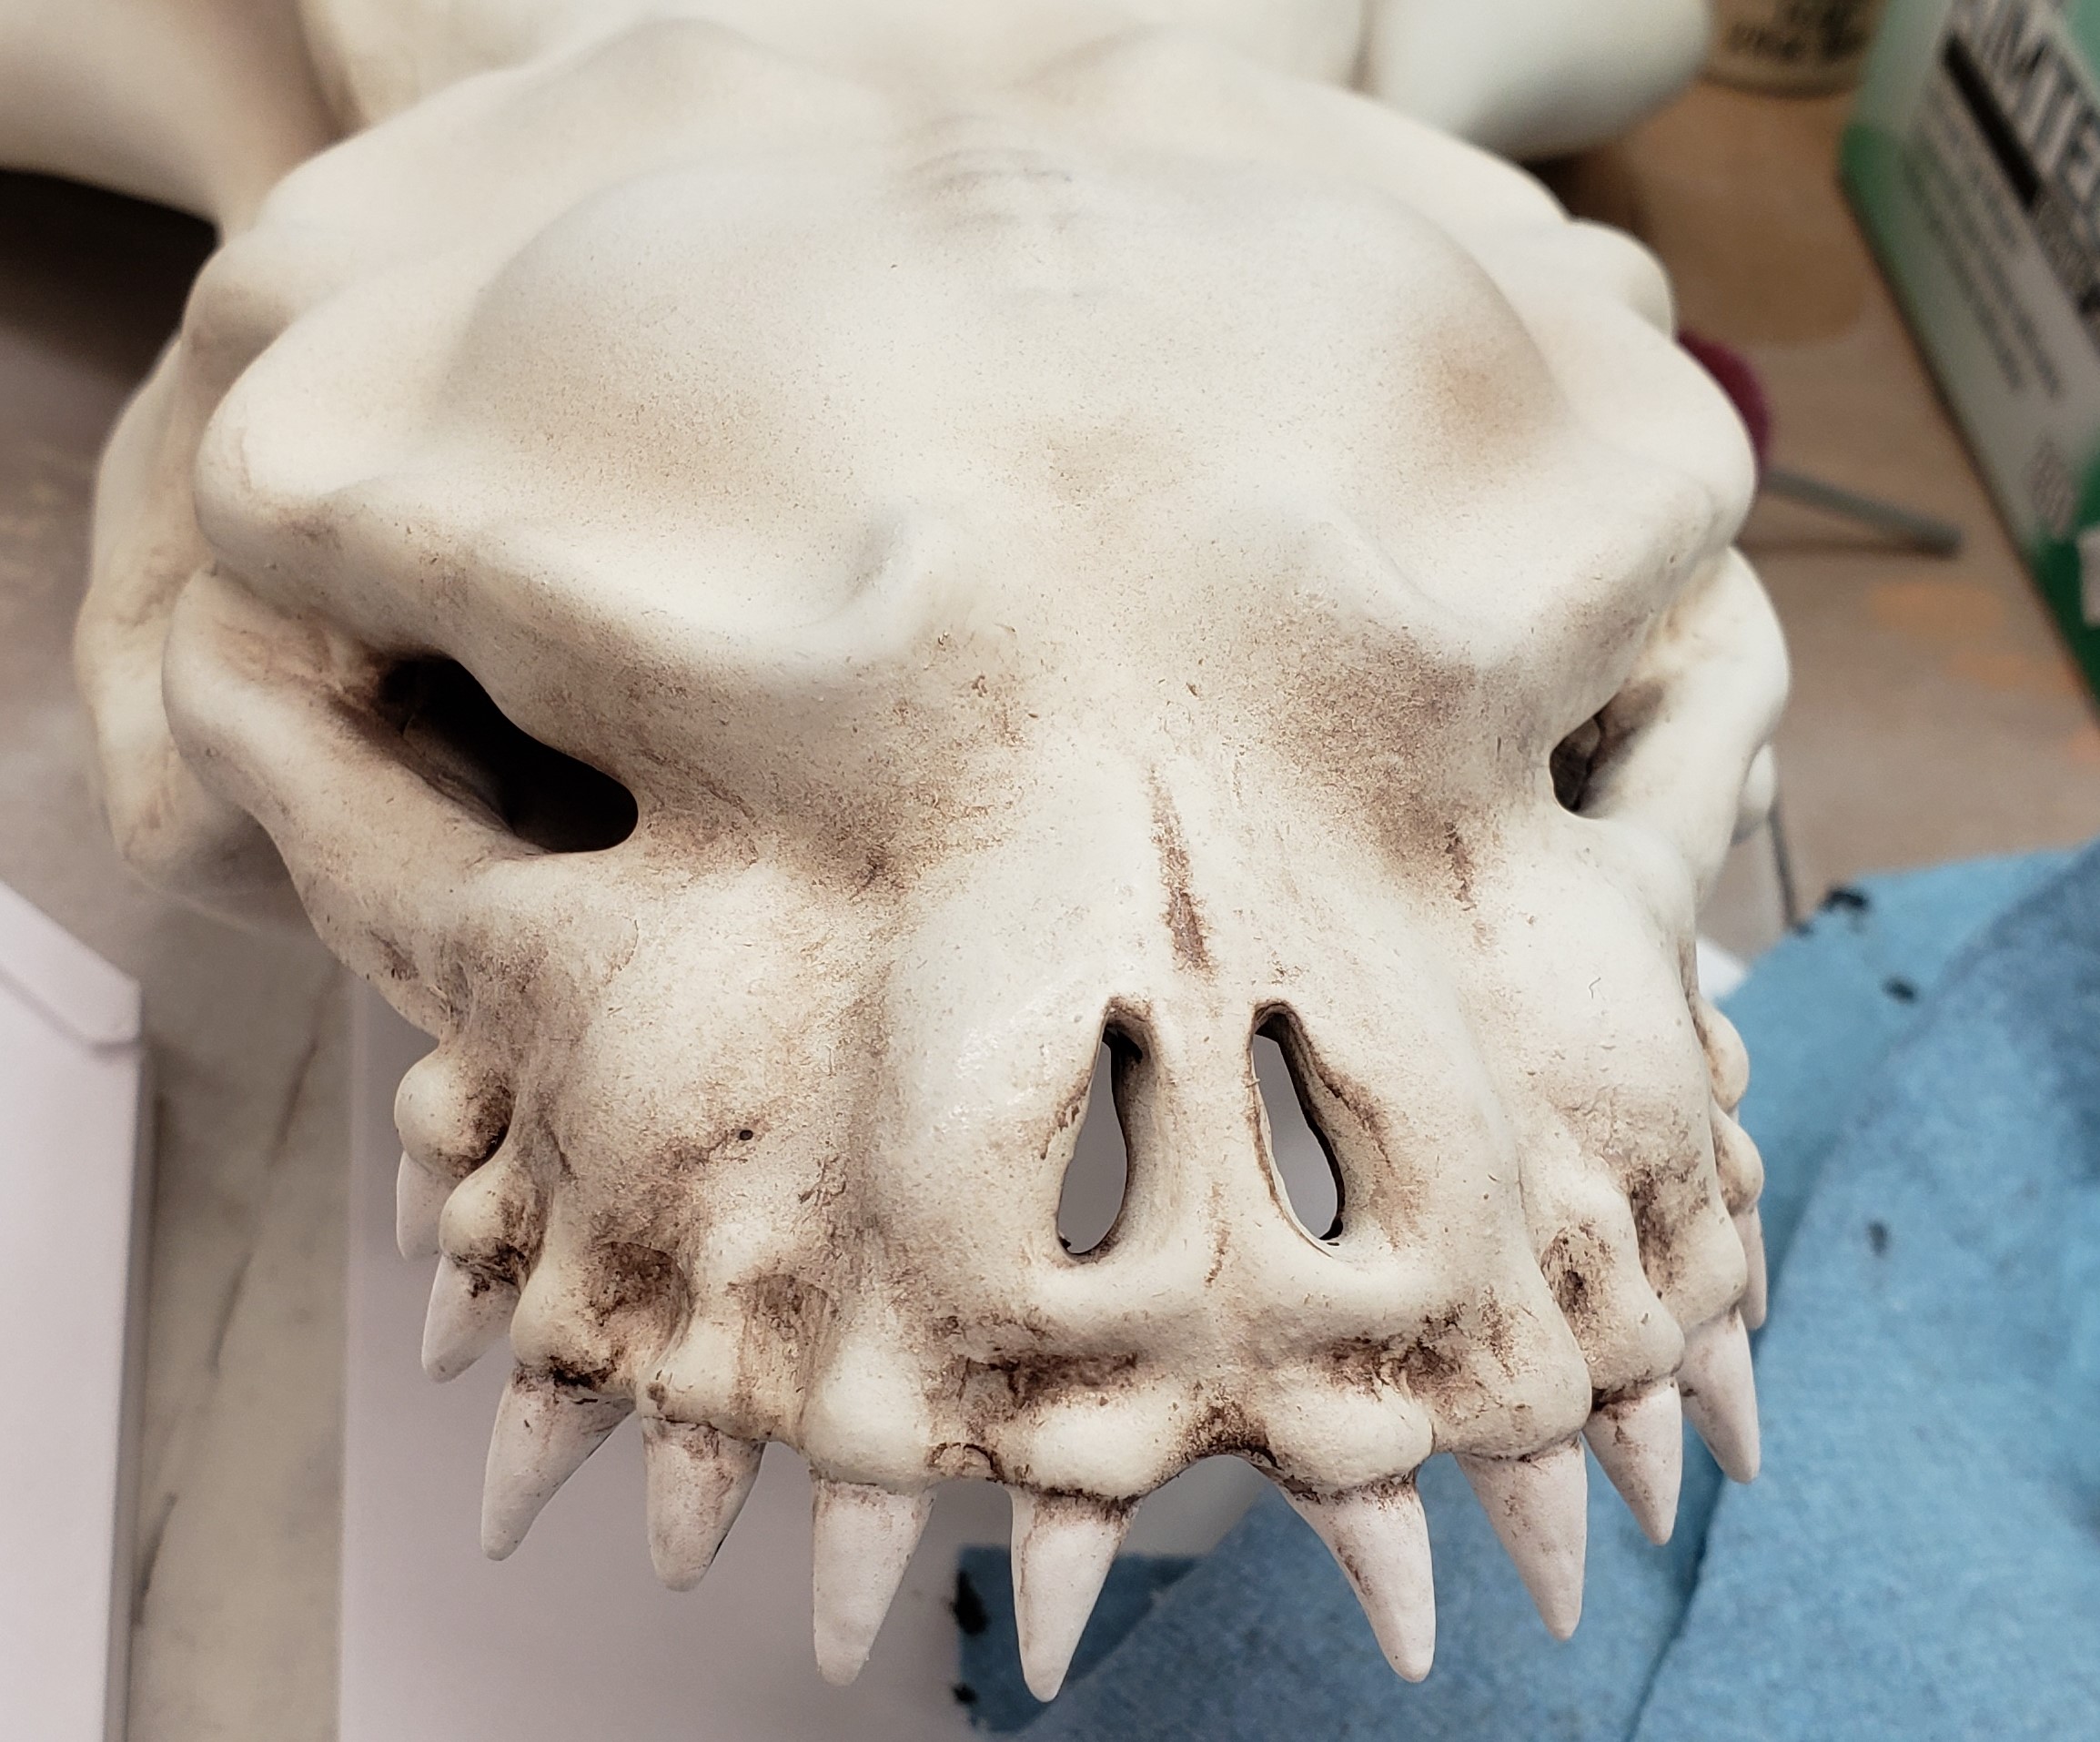
Airbrush puts down a soft subtle amount of paint that you can easily add to. The acrylics were very matte, and that matched the bone look perfectly. After getting a base layer of everything down I went ahead and mixed a darker color for shadows.
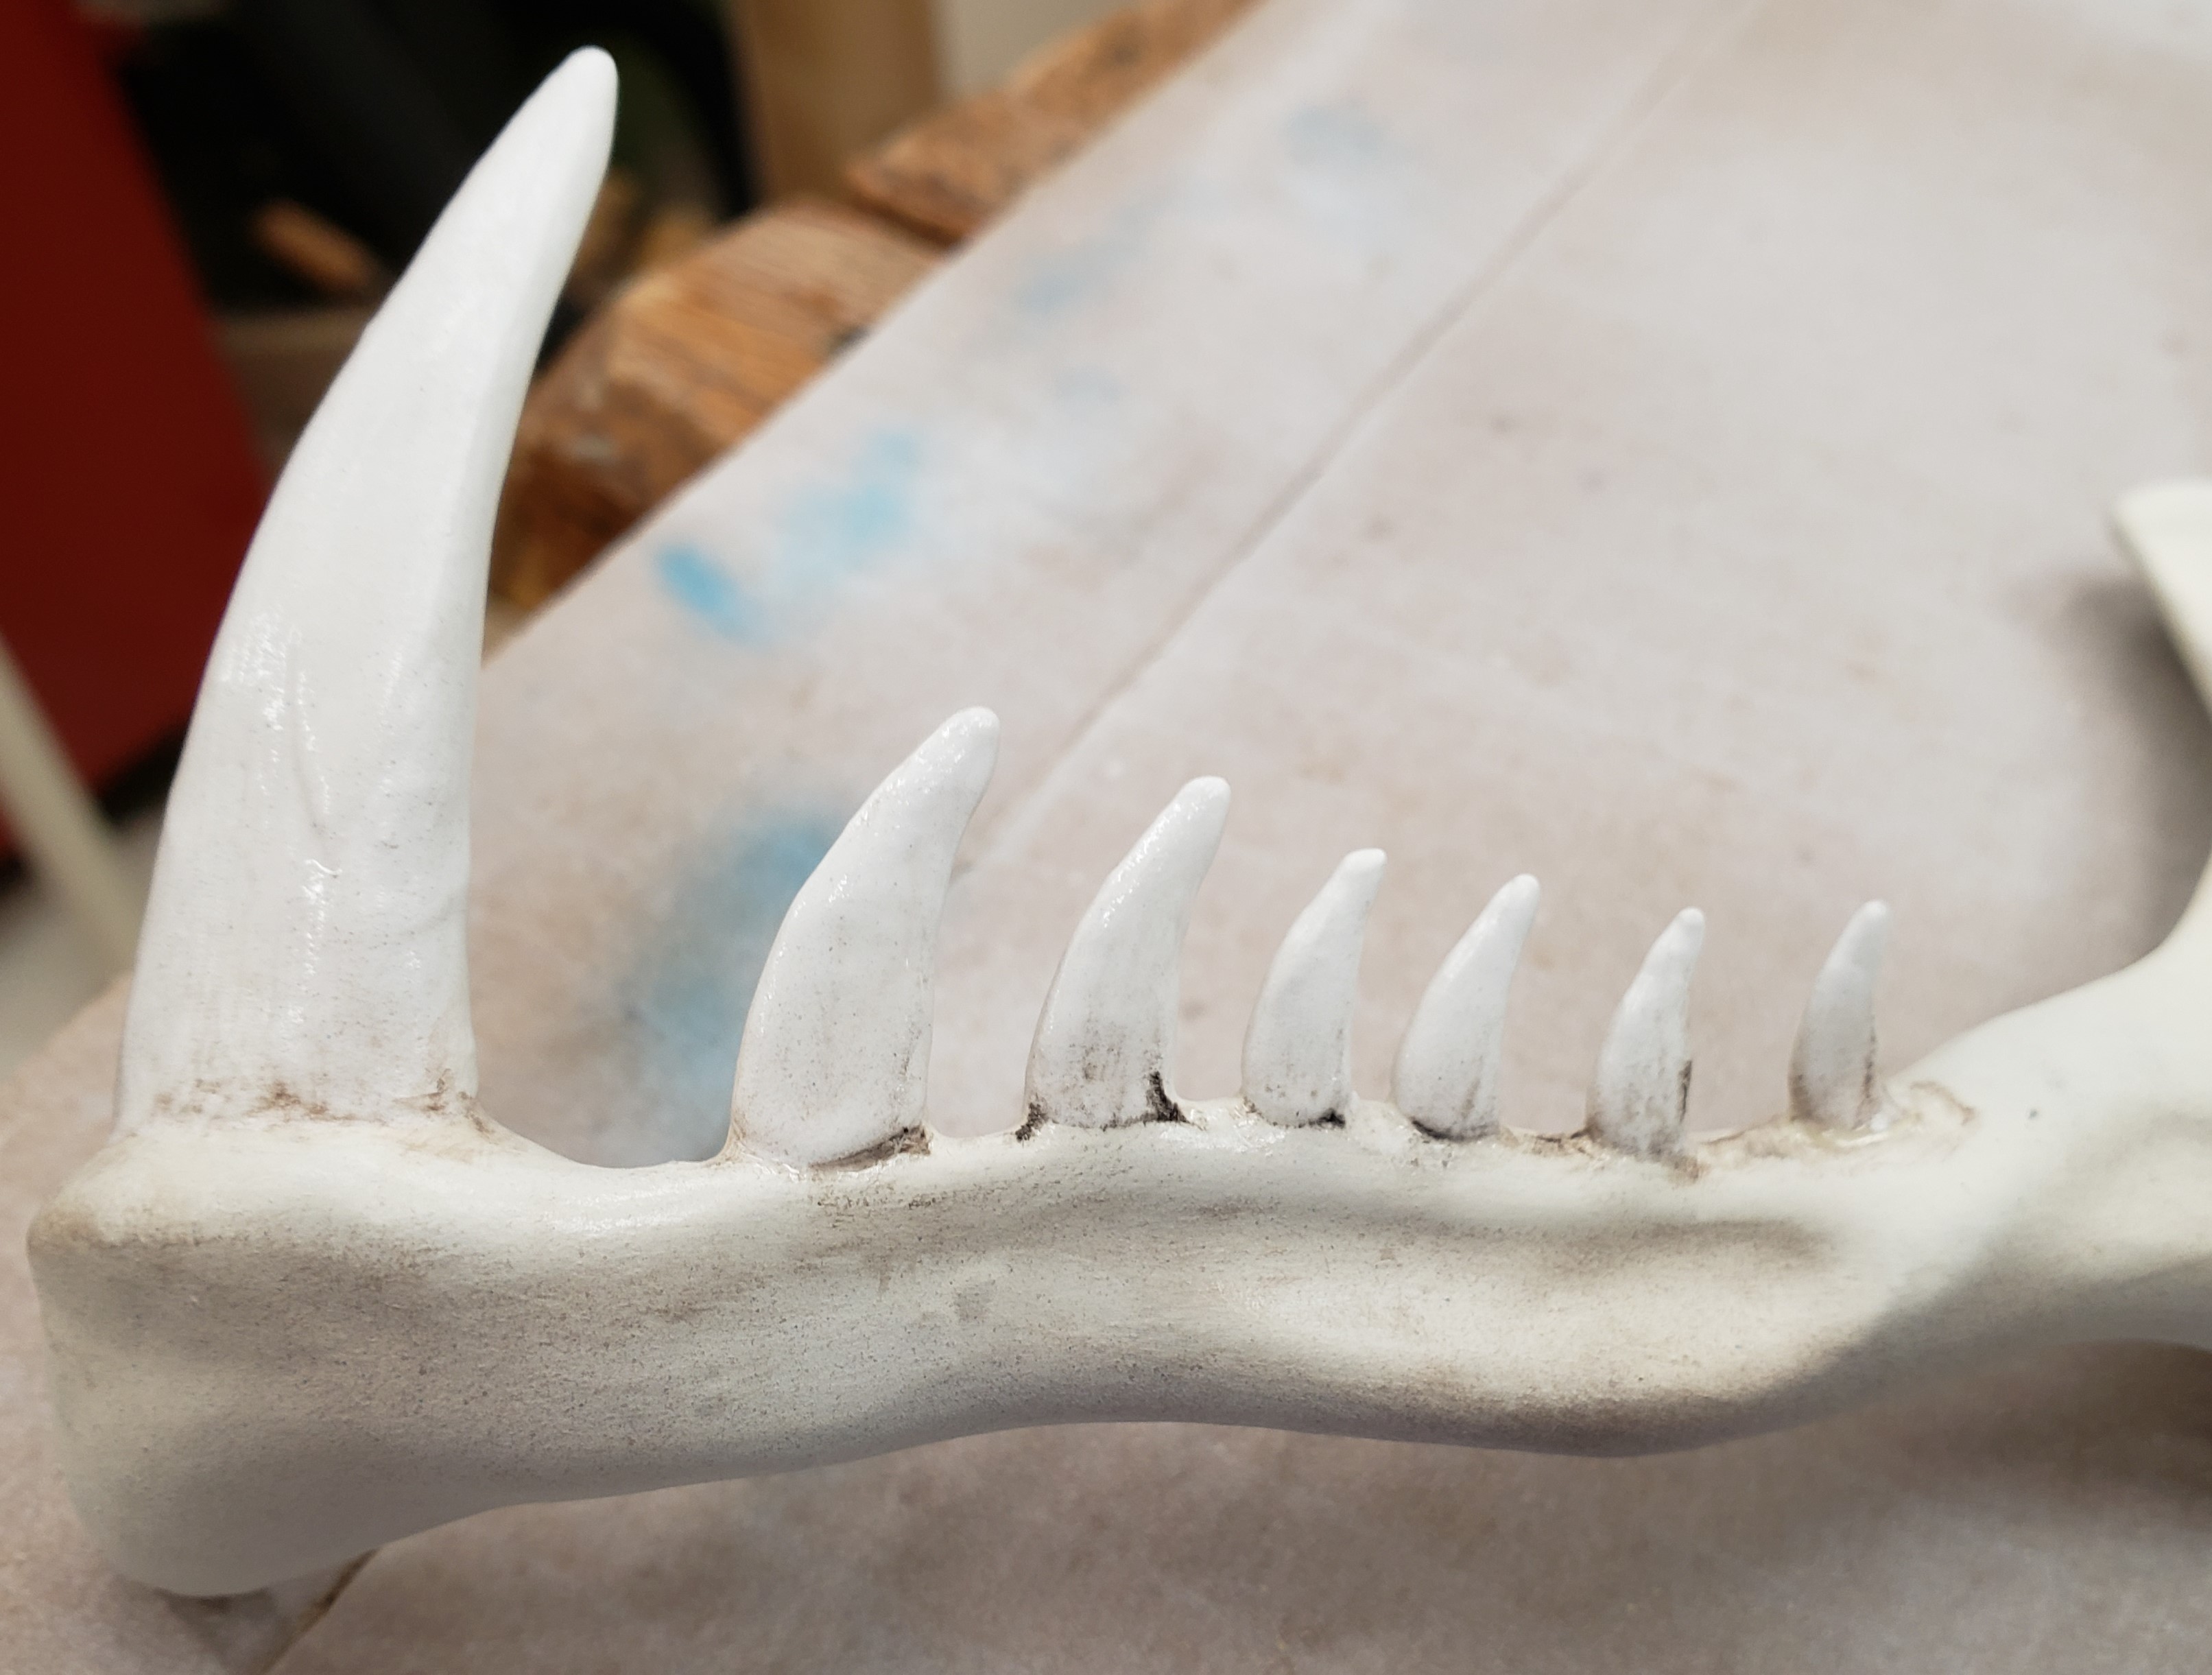
After that I mixed white with a glossing agent and made the teeth whiter and shiner. It didn’t show as well as I had hoped, but the effect is still there a little in the end.
Lastly, I mixed up a really thin dirt color and started doing a weather/wash coat. I got a little carried away and the thing ended up being more dirty than I had originally set out to use. It was hard to stop though, it looked so cool. I spent extra time cleaning off the high spots and ridges so they looked a little polished, while the valleys were dirty.
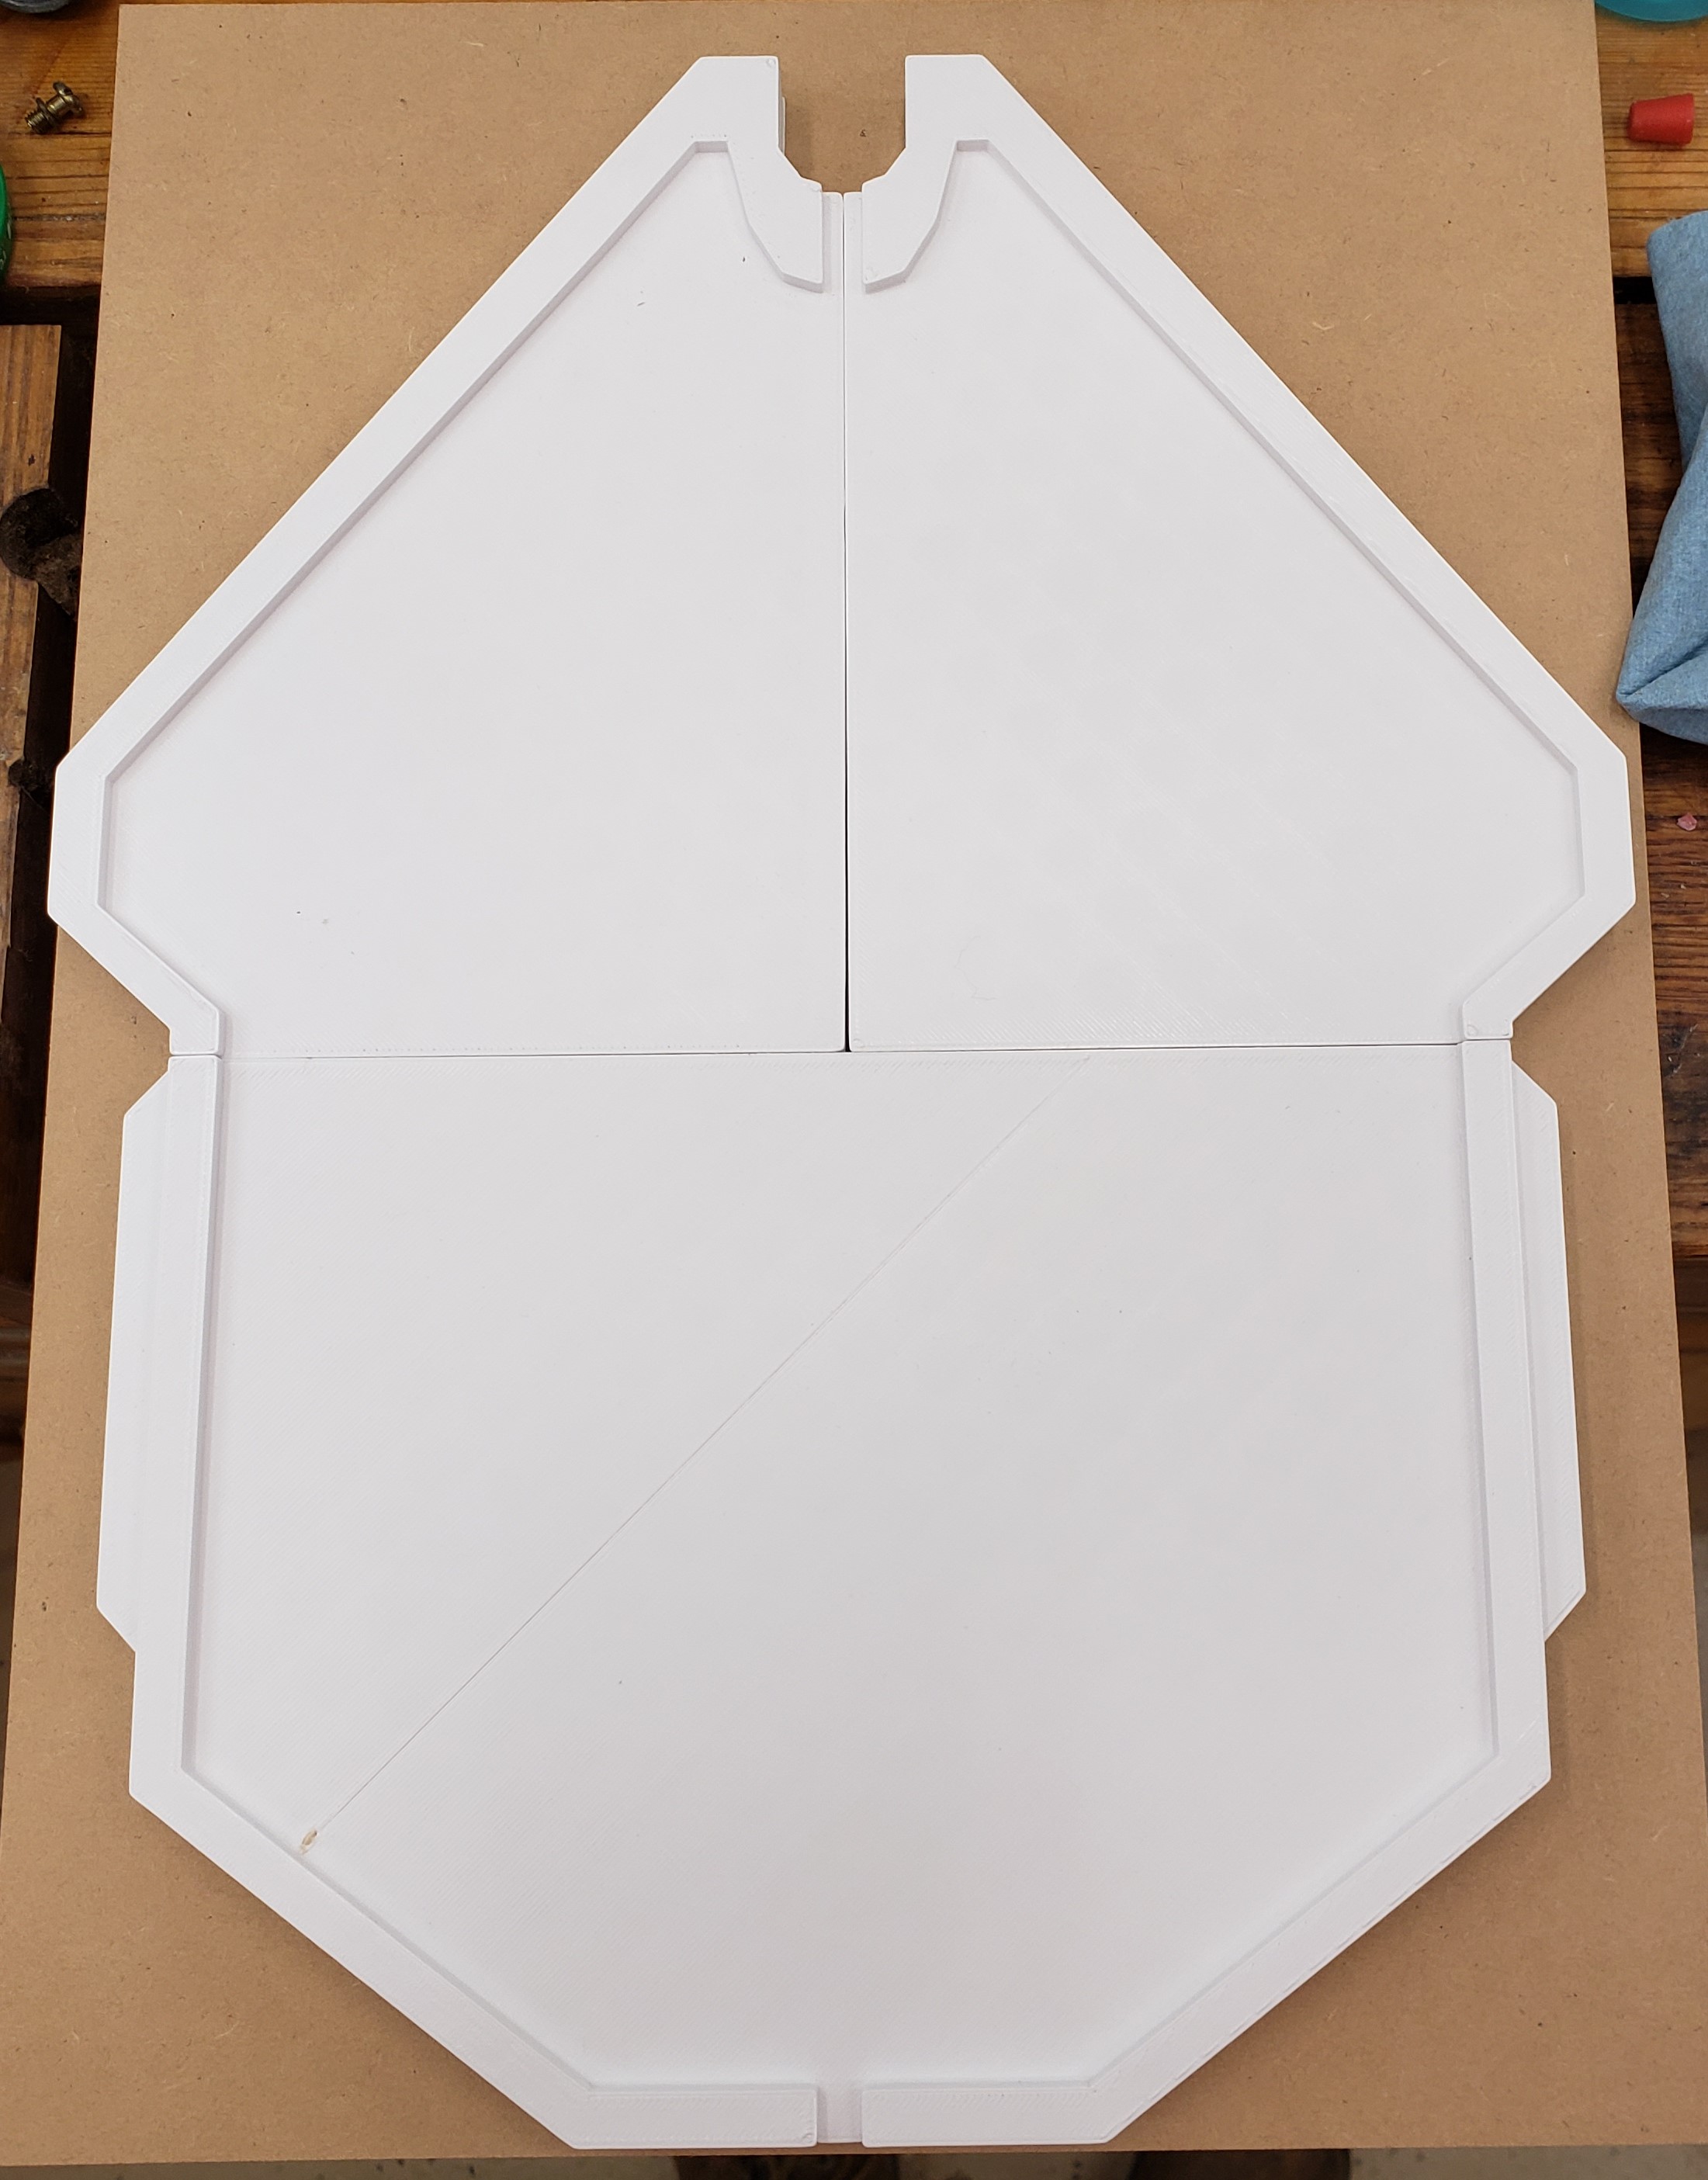
I had the head and mouth parts complete, but needed a mounting plaque. I found a design on thingiverse someone made, but needed it a lot bigger. I cut the print into multiple parts. Instead of trying to glue them together and hide the seams, I taped them down to MDF, and used the print as a router template.
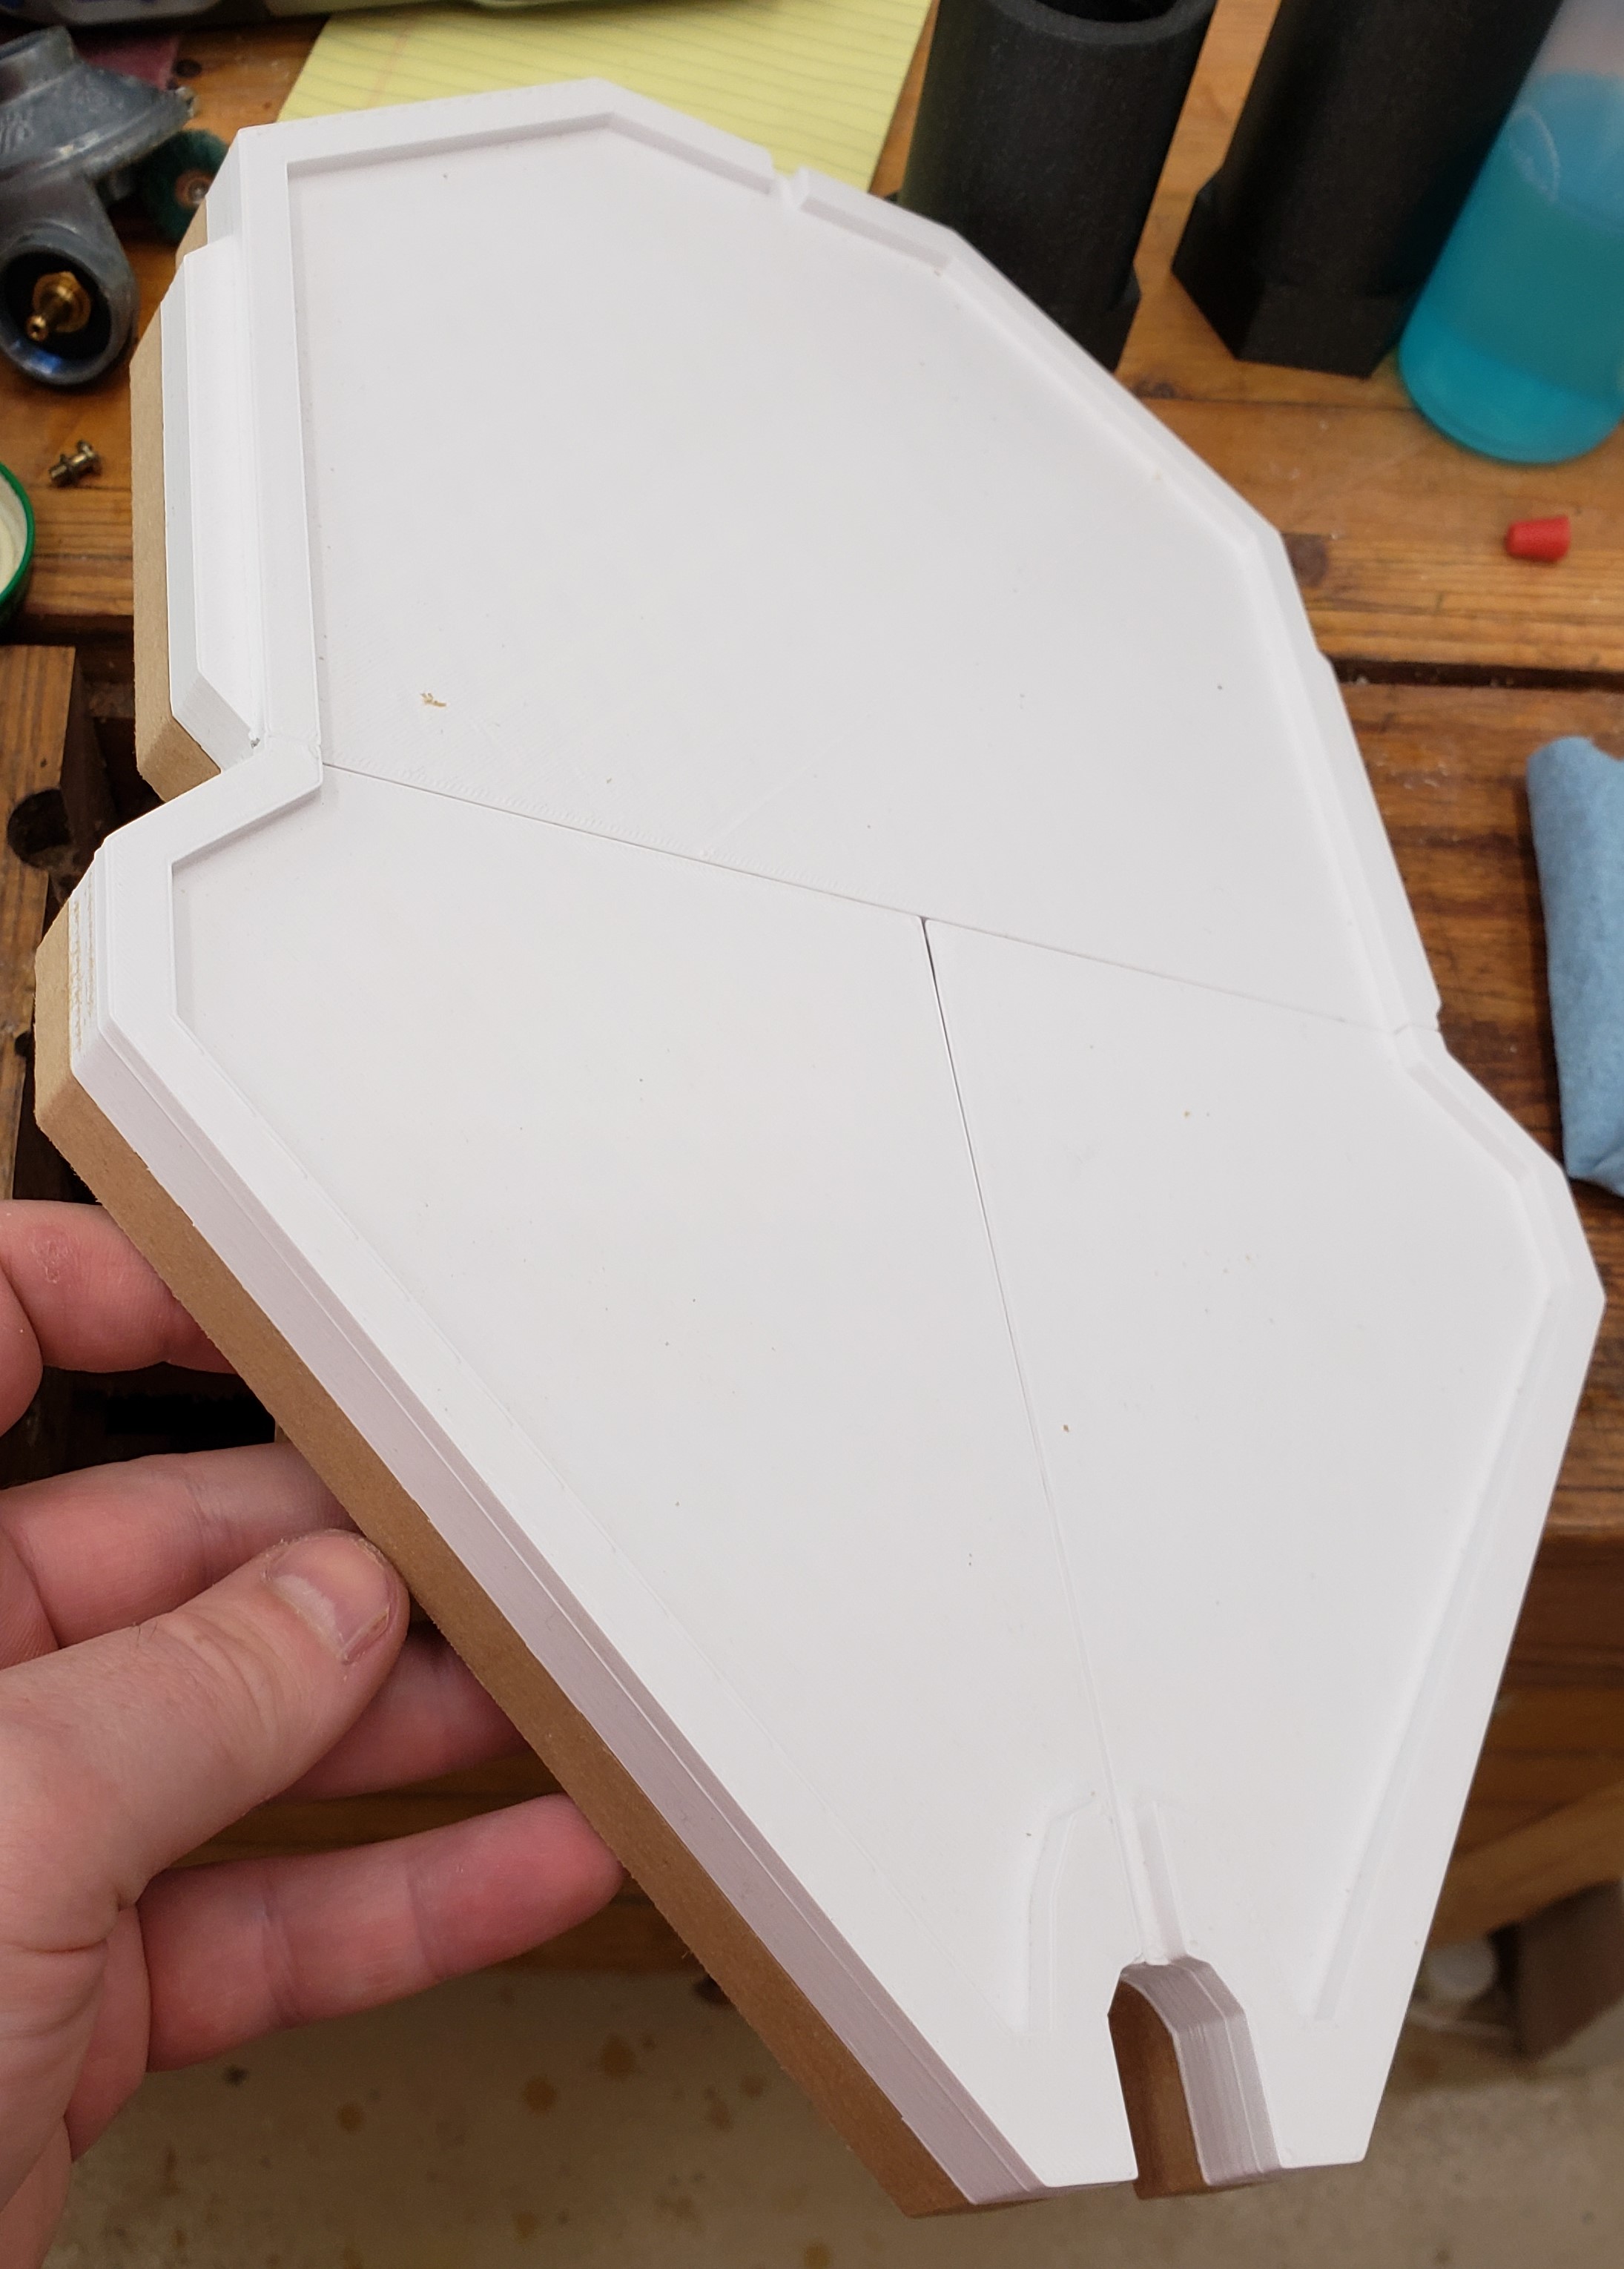
I used the slicer to cut off those raised bits, with a few alterations, and printed them separately to glue on later. They need to be smoothed, but I already had a plan for that. To keep them from getting to saggy or organic looking I used my airbrush to spray on the resin. It could be very thin and juuuuuust fill in the lines without breaking up any crisp edges. You have to make sure the fill job is good, once the primer goes on, resin won’t stick, so you have to fill and sand the rest of the way.
The MDF took paint like a thirsty beast. I eventually had to use bondo filler on the edges to seal them up.
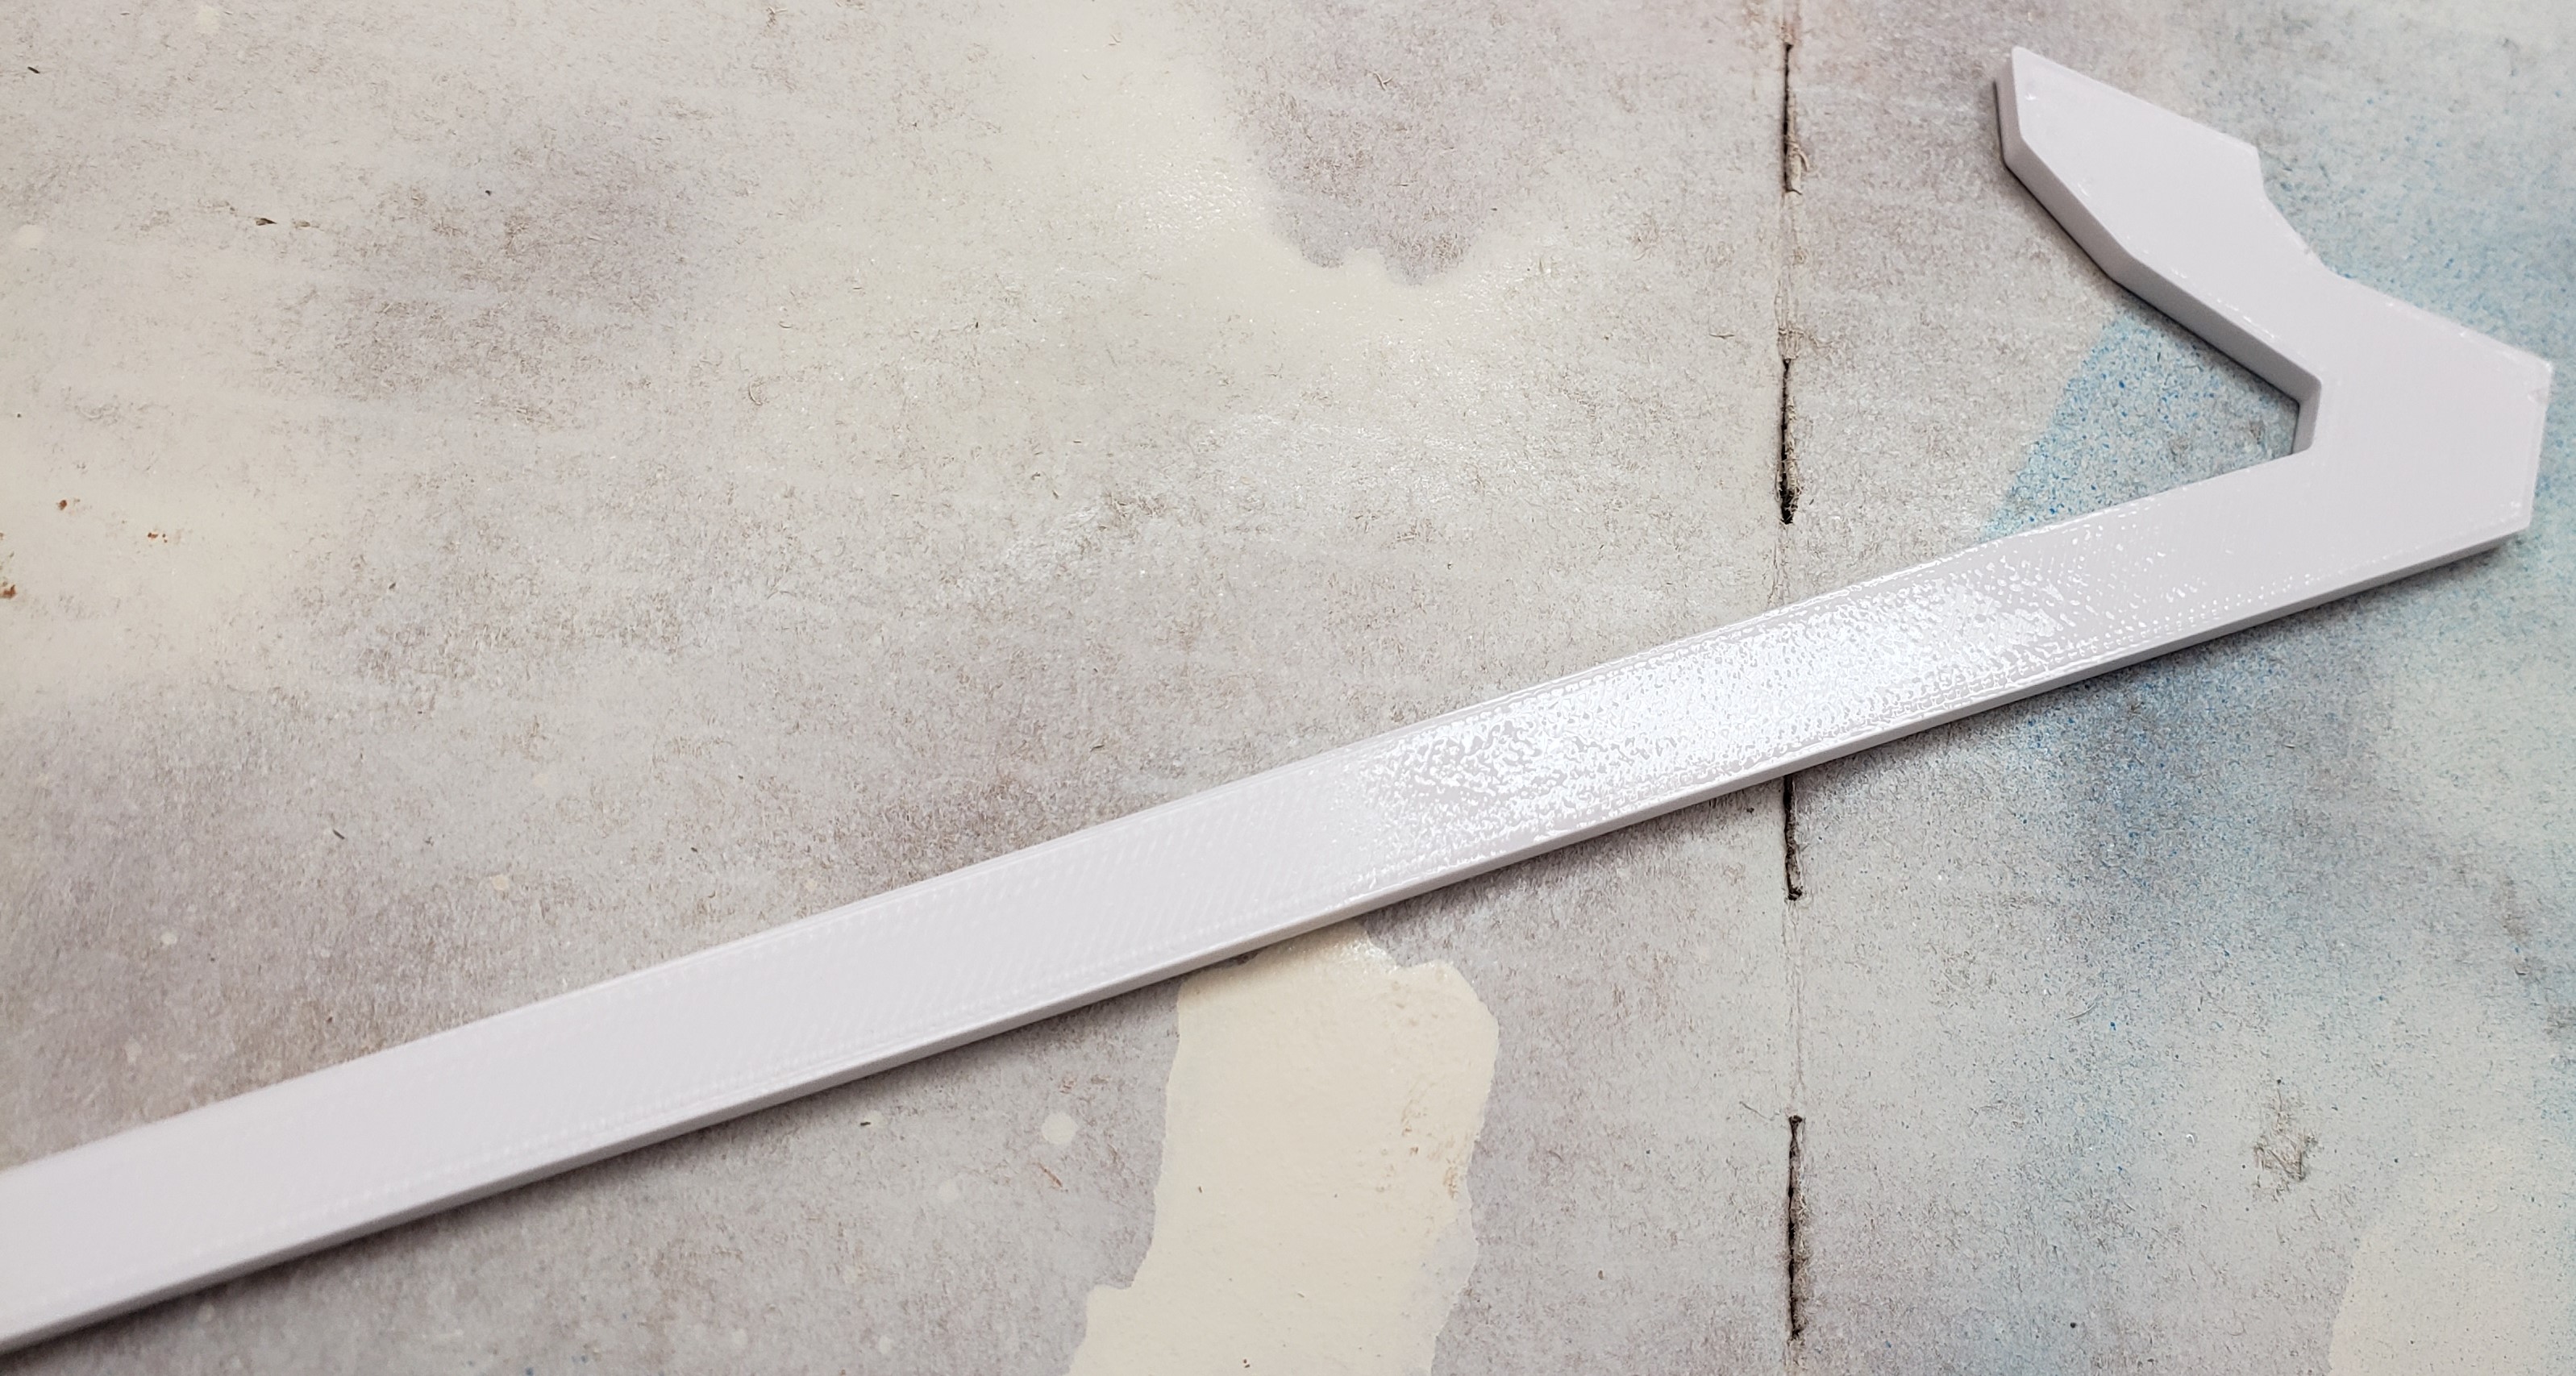
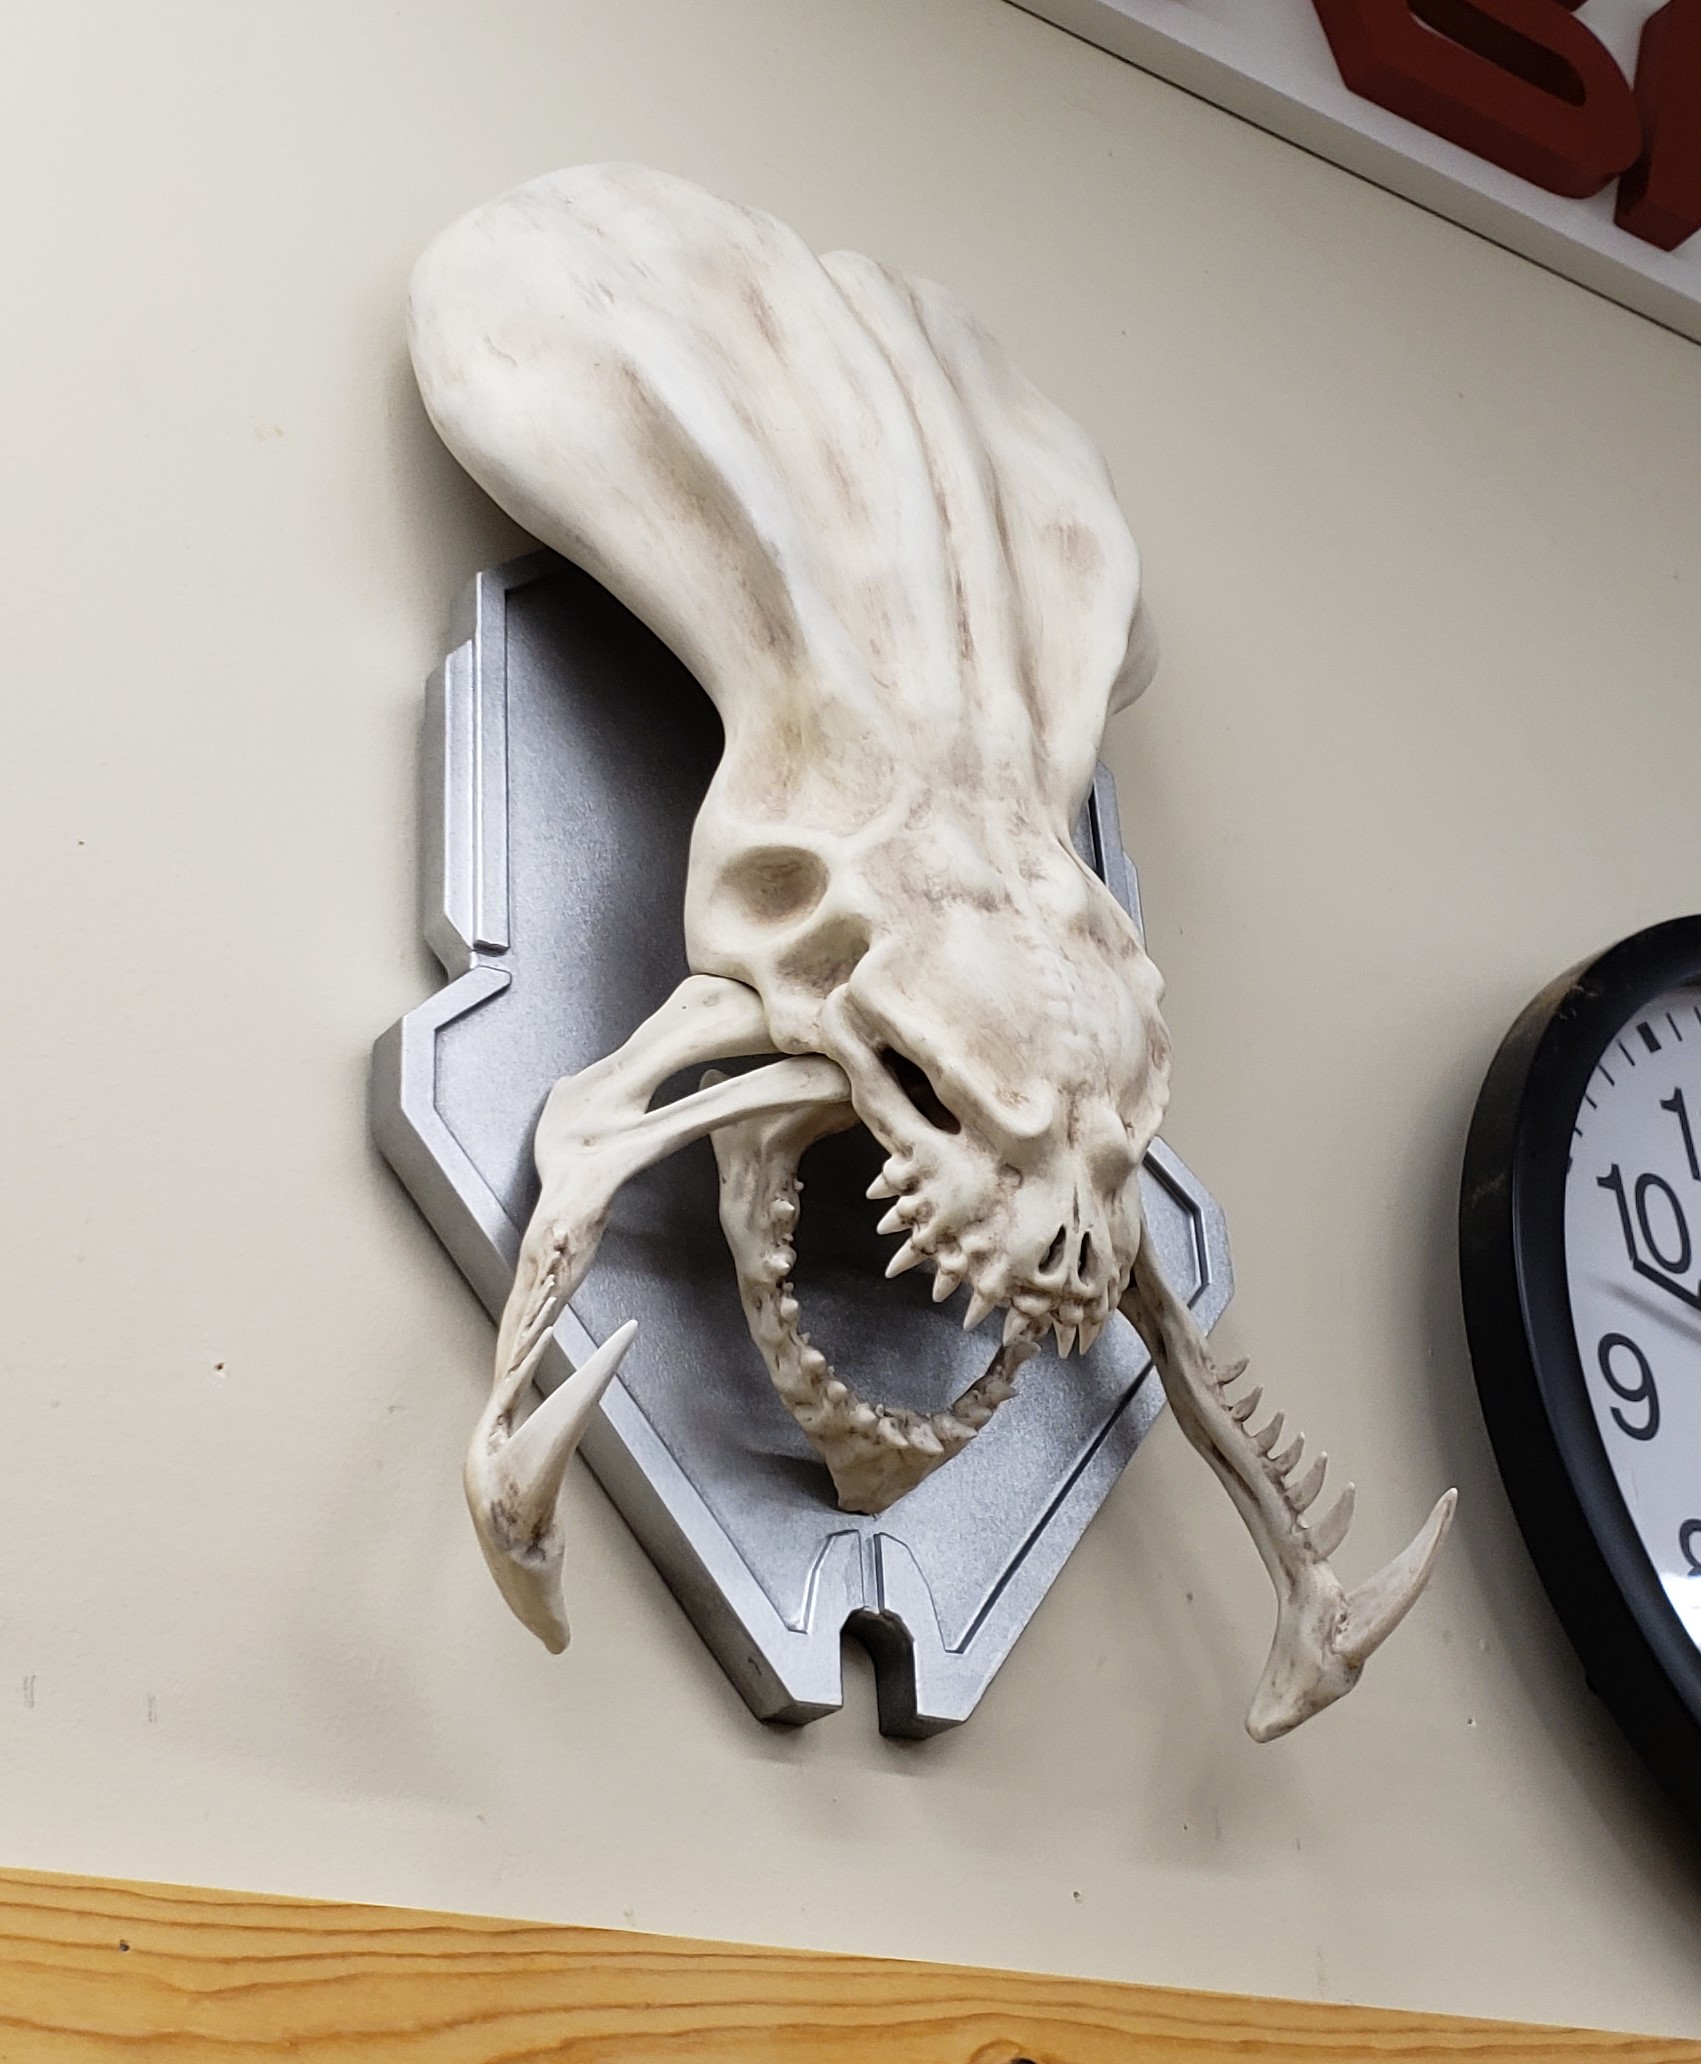
Finally it got some silver spray paint with a few black brushes and accents. I am getting better at this whole painting thing! The head was glued down and hanging hardware added.
A small story to start: I moved into my previous house, and it had a large white enameled kitchen sink. It was really scratched up and always yellowing. I hated it. It took years, but I finally redid the kitchen and got a nice under-mount stainless sink. It was wonderful. Always looks clean, scratches don’t show, easy to take care of. Fast forward to the new house. The kitchen sink is molded as part of the counter. It is a beige off white, is kind of scratched up and always looks dingy. Plus it is a 3 sink unit and not very efficiently laid out. I hate it.
It will be a lot of years before we get around to completely redoing the kitchen, so time to get cutting and install a new sink. There aren’t many options at this width, but I found a company that makes a big double sink large enough to fit inside the opening the old sink will leave behind. A jigsaw, a circ caw, a grinder, and a pile of dust later I had the old stuff removed. I would have taken a picture, but as I was cleaning my little portable vacuum fell through the hole and hit the hot water supply.
Goosh! It made a crazy geyser! That was unexpected. I drilled big holes in the baseboard and set a massive fan going to try and dry it all out. I always keep extra CPVC fittings around for this kind of thing, but my pvc cement was completely gelled. A trip to the hardware store later I got the supply repaired and had the water back on. The rest of the install was pretty straight forward till I got to the garbage disposal.
Really hard to capture in this photo, but there is water dripping from the bottom of the motor housing. I guess my garbage disposal was on the verge of death, and the move pushed it over the edge. OK, time for a new garbage disposal. This whole project was more than I bargained for.
I left it all open for an extra day or two to make sure no new leaks showed up, but by the end of the weekend I was confident everything was working well.
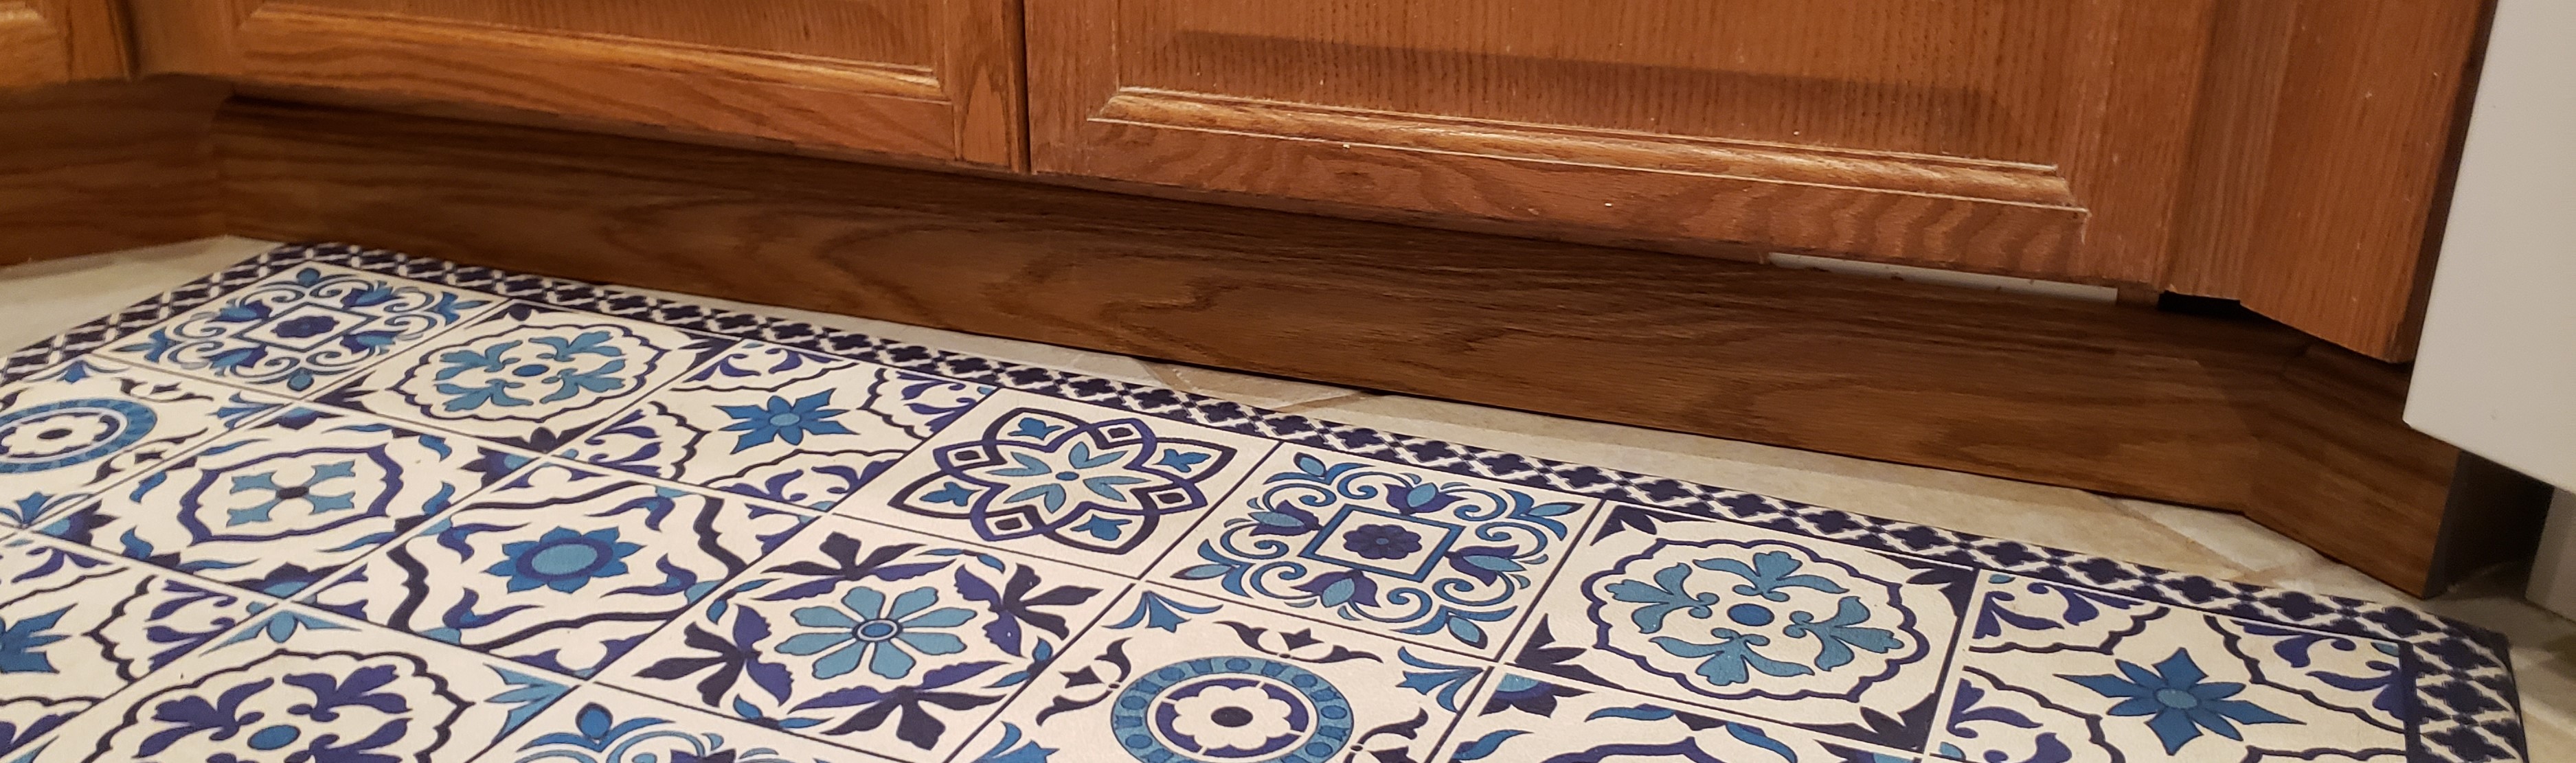
The top looks great, but the toe kick is trashed from where I ripped it out to get everything dry underneath. Lowes has some plastic trim that is finished in a way that matches my cabinets really well. It is molded base board instead of flat toe kick, but you have to get down really far to tell the difference.
With that repaired I turned my attention to the inside of the cabinet. Our previous organizer didn’t quite fit because of the new drain layout. I picked up some PVC trim wood to make a shelving system out of. I clamped the two uprights together and ran a matched pair of dados to align and support the shelves. The shelves were held in with PVC cement like you use on piping and a few exterior grade screws. Very sturdy, and it will never rot!
To finish it off, I 3D printed a number of little cubby boxes designed to hold stuff like sponges, glasstop cleaning stuff, and other common under sink items. I have plenty of room for more storage and everything is easy to get to. Kitchen happiness!