Saw Bench Pair

In an effort to increase my use of hand tools I need a better way to saw big boards.  Right now I can only cut smaller things on my work bench.  If anything needs ripping, or a bigger board needs cross cutting it has to go to either the chop or table saw.  With that, I present my saw bench set!

DSC_0052

I can’t take credit for the design, it is a rough copy of Chris Schwarz’s.  The one on the right is called a saw bench, and the left is a saw horse.  Most saw horses are hip high, so I will call this guy a mini horse!  I made the mini horse a lot shorter in length because I didn’t think I needed to be as big.  Hopefully I am right!  I started by chopping everything to rough length and gluing together two 2x4s for the top of the bench.

DSC_0016

The top was then planed smooth, had a vee cut in the front for ripping clearance, and was notched vertically to allow for the legs to have room to inset.  My first set of notches were pretty rough, but by the end of this build I had some very clean looking ones.  I set all the joints for the legs and the spreaders that ran front to back then assembled.  I waited until after the first glue up to make the spreaders that went left to right.

The bench was made over a number of evenings as I made mistakes and tried out different techniques.  By the time I got to the mini horse I had a good plan on what to do, and was able to knock out all the joinery in just a few short hours.  It turned out a lot better than the bench.  I wish I had started with it, then moved onto the bench.  You may notice that the top is shorter in the last picture.  I realized the extra length isn’t helpful and cut it down.

Once everything was assembled I set about trying to level the legs.  I had left the bottom of each leg square and figured I would saw them parallel to the ground once assembled.  Each leg has a 10 degree flare with respect to the ground.  Trying to saw each leg at 10 degrees once the thing was assembled was a bear.  Next time I will not plan to do any sawing on something like this after it is built.  Once I did manage to level and set the feet, I applied a coat of boiled linseed oil and called it finished.

I have had trouble explaining how useful these are to people.  Words don’t really do it justice, and even pictures don’t tell the full story.  I shot a video of me using the bench because of a few conversations I had when people asked what I was building.

As summer sets in here in Central Florida it gets harder to spend time out in the shop.  Luckily for me I have a window shaker in my garage.  I can keep it at a reasonable temperature in there with the AC on, but can’t run any big tools.  Summers are a great time to work on lighter activities such as dovetails.  I will use this summer to renovate a pile of saws and drills I have waiting.  Some just need sharpening and some need serious rehab.  I will call it my Summer Saw Stravaganza!

Improved Mite Measures

After my disastrous attempt at trying to track the mite population in my hive I took a closer look at what I was trying to do.  The bottom board is slotted, but does not have any method of sliding in a sheet or board that will keep the bees out.  I have to build some kind of lid on the trap so that the bees can’t get in.

Online I see a reference to number 8 hardware cloth pretty regularly.  It is a wire mesh that has 8 wires per inch, or ~1/8″ gaps.  The bees can get through 1/4″ mesh.  My hardware stores only sold the 1/4″ in hardware cloth, so I had to fall back to aluminum screening.  It feels sturdy and will not get chewed up by insects.

I went with a similar cheap bottom board as before with a single sticky paper sheet tacked down.  The lid is a simple 1×2 perimeter with the aluminum screening stapled on top.  Nothing pretty, but it fits under the hive and keeps the bees out and the mites in.

I tested it out for a 5 day period under the hive, checking occasionally to make sure no bees were being harmed.  It worked well.  In 5 days of usage I counted 5 mites on the sheet.  My current rate of 1 mite per day will help me keep tabs on what the mite population is doing.  Up down or steady, I should have a decent finger in the wind.

wpid-20150531_100035.jpgI wouldn’t suggest placing this trap out much longer than a week.  A lot of little bugs got in there, and the hive is always dropping debris.  As it was, it took a magnifying glass with light to really make sure I could tell the difference between a dark spec of debris and a mite.

Lastly as a bonus of sorts, when I pulled the thing out it was covered in about a dozen small hive beetles.  Horrible as it is to see them, I was able to carry them away from the hive and smash every one.  I wonder if they are attracted to the pollen and other junk left behind by the bees.  Could this make a good out-of-hive trap for SHB?  Who knows, but I will be sure to observe the hive beetles every time I use this trap.

Chalk and Magnet Board

Chalk boards are big now.  Not sure why, I can’t stand chalk.  Chalk markers exist though, and those are pretty cool with me!  Our fridge is stainless and doesnt allow for the typical magnet and picture collection that I am used to.  I combined the new trend and my old fridge problem to make a magnetic chalk board.

I cut down a sheet of metal to 18in x 24in.  I picked up a spray can of chalkboard paint from valspar to give it the right surface.  The metal got a light sanding to rough things up, then a wipe down with alcohol to clean everything up.  1 coat of primer and a few coats of chalkboard paint and it looks like a disaster.

DSC_0007The spray chalkboard when on really patchy and irregular.  I tried sanding it a bit between coats to help even things out, but it isn’t going to happen.  I flipped the piece over, sanded cleaned, primed, and then switched to rolling on chalkboard paint from a can.

DSC_0006This looks much better, but it took 3 coats.  The first didnt appear to like the primer coat.  It had a crazed look to it after drying.  I just kept putting on coats until it had consistent coverage.  I took some decent looking walnut and made a frame.  No pictures of the progress, but it is a basic miter frame.  The metal plate fits in an inside groove.  After gluing it all up I used a lot of epoxy on the backside to keep the metal from bowing or rattling around when writing on it.  Tung oil is the finish.

The can of paint said to coat with chalk, then wipe off as a finishing move.  Once cleaned up I threw up some pictures and magnets and it looked perfect!


8in Cedar Planter Boxes

We have been bringing home a ton of plants this spring.  Most of them are even still alive too!  Having the flower bed areas covered in rocks lets us do all sorts of potted plants.  Pots get expensive and often aren’t big enough, so I decided to make some customized cedar planters.  First grab a pile of cedar and start cutting.

DSC_0054

I cut 8in boards to 24in length and made some 8in end caps.  It turns out a cedar 2×4 is actually 2 inches by 4 inches.  When you rip them in half they are still a decent chunk of wood.  I took the fronts of each box and milled an “H” into it.

DSC_0055

A touch of spray paint highlighted the letters nicely.  I used a hand plane to remove the excess spray.  The box construction is pretty simple.  I screwed the long segments together and tied the sides and ends together through the 2×2 chunks.

DSC_0056

With cedar wood, epoxy covered screws and a coating of thompson’s water seal, they should last a while.  I moved our two basil plants into one box.  The one on the left was in a plastic pot that never drained well.

DSC_0001

For the other boxes I had help picking out the plants.  Looking around the plant section at lowes I found a pile of bees on the mexican heather.  They seemed to whisper, “pick this one!”

wpid-20150419_112856.jpg So mexican heather for us!

DSC_0005Lastly, as I was standing in the checkout line a monarch butterfly was making a visit to a pile of scarlet milkweed near by.  That came home with me too.  By the time I got around to planting it was looking a little sad.  Hopefully regular watering will perk it back up.

DSC_0002

The 8″ boxes are a decent medium size.  They totaled about 20 bucks a piece for the materials.  Next I will probably make a set with doubled or tripled up 6″ boards.

Half Lap Canning Crates

The pile of half-pint jars is starting to pile up in our home, so it is time for half-pint crates.  A while back I built some pint crates with dovetails.  They were good looking, but rather time consuming to build.  This time around I decided to break out my old No 78 rabbet plane and do all half laps.  First, the wood!

DSC_0028

I used 1/4″ plywood for the bottom, and was able to hide that plywood by using the right sized rabbet on the bottom.

DSC_0030

Rabbets with the grain are an absolute joy.  Simply clamp the wood in a front vice, start at the far end, and shave away.  The half laps were another story all together.  Even with a spur and a relatively sharp blade, there was a lot of chatter, tear out and fence wander.

DSC_0047The fences of my old plane did not want to stay put.  I tightened everything as much as I dared, but feared damaging old cast iron threads.  The result is that a lot of the half laps are gaped.  It might be worth carefully making a master part, in the future, so I can go back and reset my fences as needed.  Until then, here are some bottomless boxes!

DSC_0048I went nuts recently and bought a pile of old style cut nails from lee valley.  I put these crates together with “fine finish” cut nails.  They performed well and did not cause splitting even though they were close to the edges.

After a good coat of boiled linseed oil I cut some vinyl blackboard stickers out and put them on the fronts.  It makes finding your desired jam easier.  They aren’t as nice looking as the dovetailed crates, but they are very functional.  Besides, crates aren’t supposed to be super fancy!

These canning crates were brought to you by my Stanley No. 78!  80ish years old and still kicking some butt!

DSC_0049

Wedding Present Table

Some good friends of mine are getting married and I couldn’t be happier for them.  I am trying to start a tradition where I make a nice wedding present for friends that get married.  A majority of my friends are already married, but better to start late than never!

I asked them what they wanted and got 3 answers:  A table to put keys and stuff on near their front door, a shoe rack, or a wine rack.  I chose to combine the first two and drop the 3rd.  My initial plan was done in sketch-up.  Other than a shortening of the legs due to an unfortunate accident I went with all my original dimensions.

Screen Shot 2015-03-19 at 9.43.52 PM

I don’t model every mortise and round over in sketch-up, instead using it as a way to get the general look and feel of the project and to get a rough cut list.  A trip to the local cabinet store turned up some nice looking red oak, but only 4/4 thick.  It was enough to get started with, but I eventually had to go to Orlando to get the 8/4 (thats 2 inches).  Luckily it was combined with a trip to do a suit fitting for said couple’s wedding!

DSC_0016 Resized

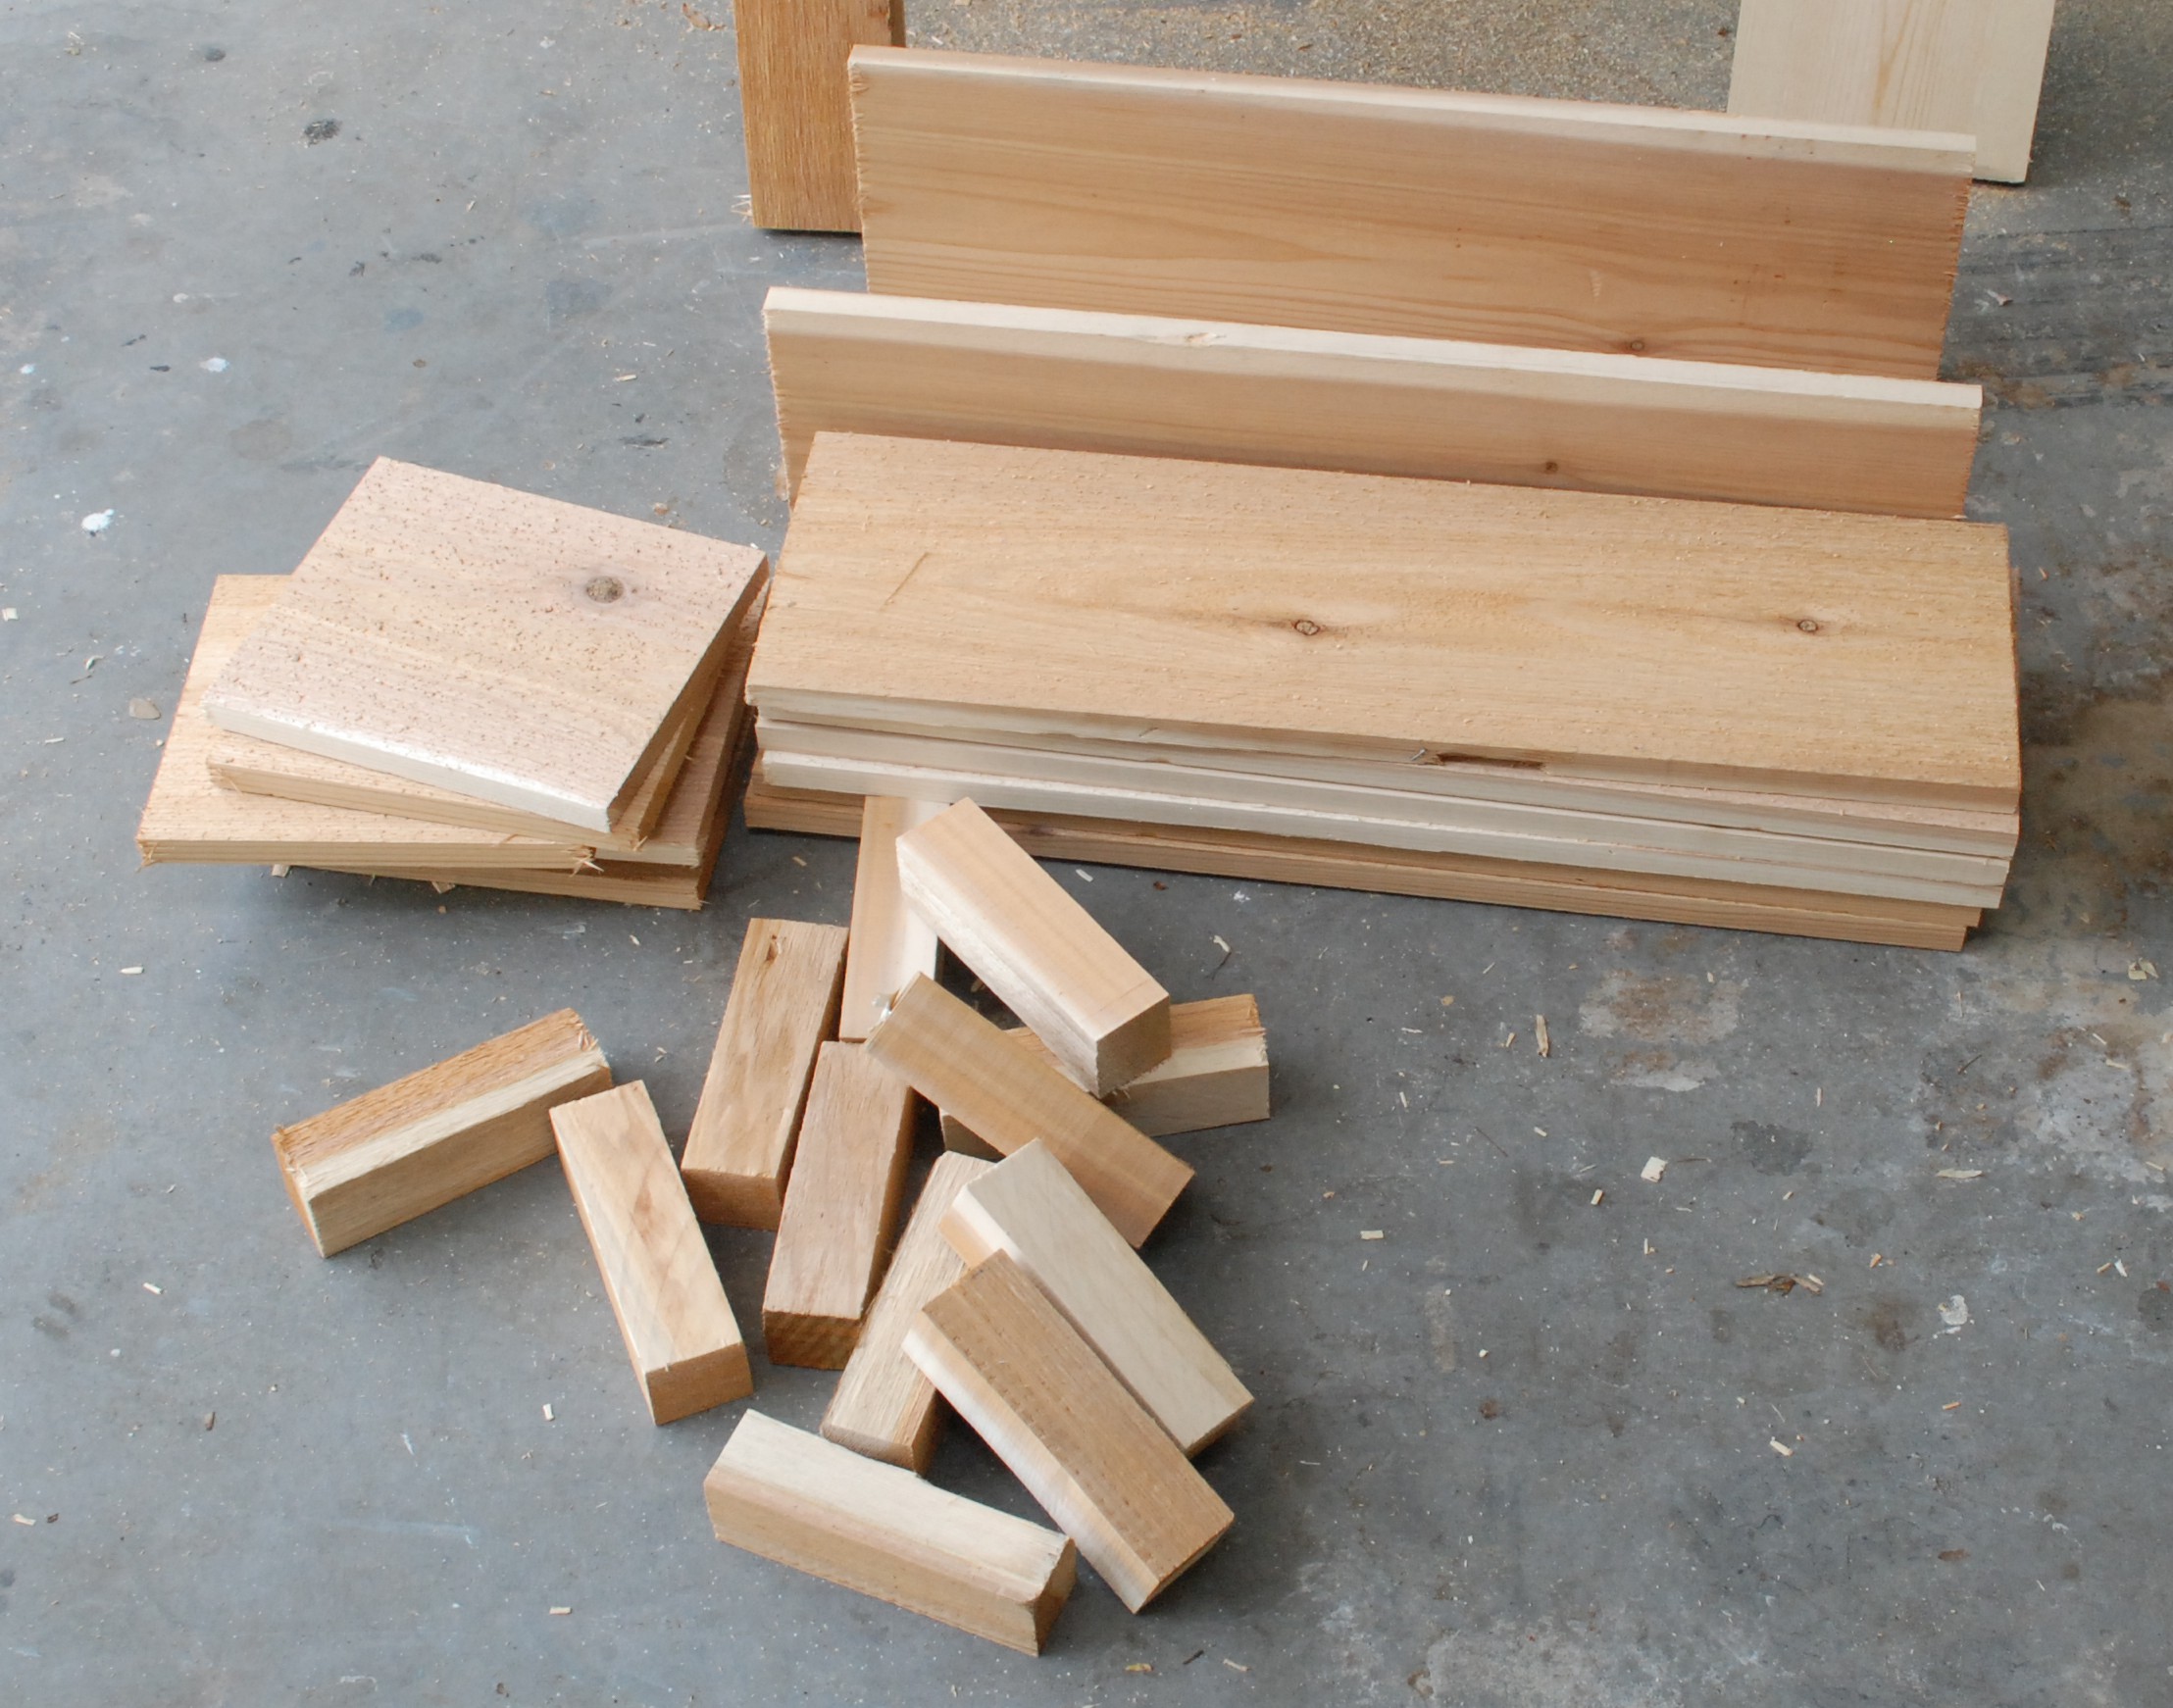
I cut everything out and ripped it to rough width using my table and chop saw.  Other than a router for the top edging, and a CNC mill for the “G” everything was done by hand.  I started this project in early January and managed to lose a number of pictures in that time.  I am missing quite a bit of my mortise and tenon work and the beading process.  Still, there are enough pictures to get the idea of how it all went together.


Top

I got to use my shiny new Woodriver number 7 my parents got me for Christmas.  It did a fantastic job of jointing the edges for glue up.  The rubbed glue joint held really well and is completely invisible except for grain changes.  Power jointer eat your heart out!  A run with the router gave a really nice multi-curve edge.  I don’t have enough molding planes or experience to try this part out by hand


 Apron

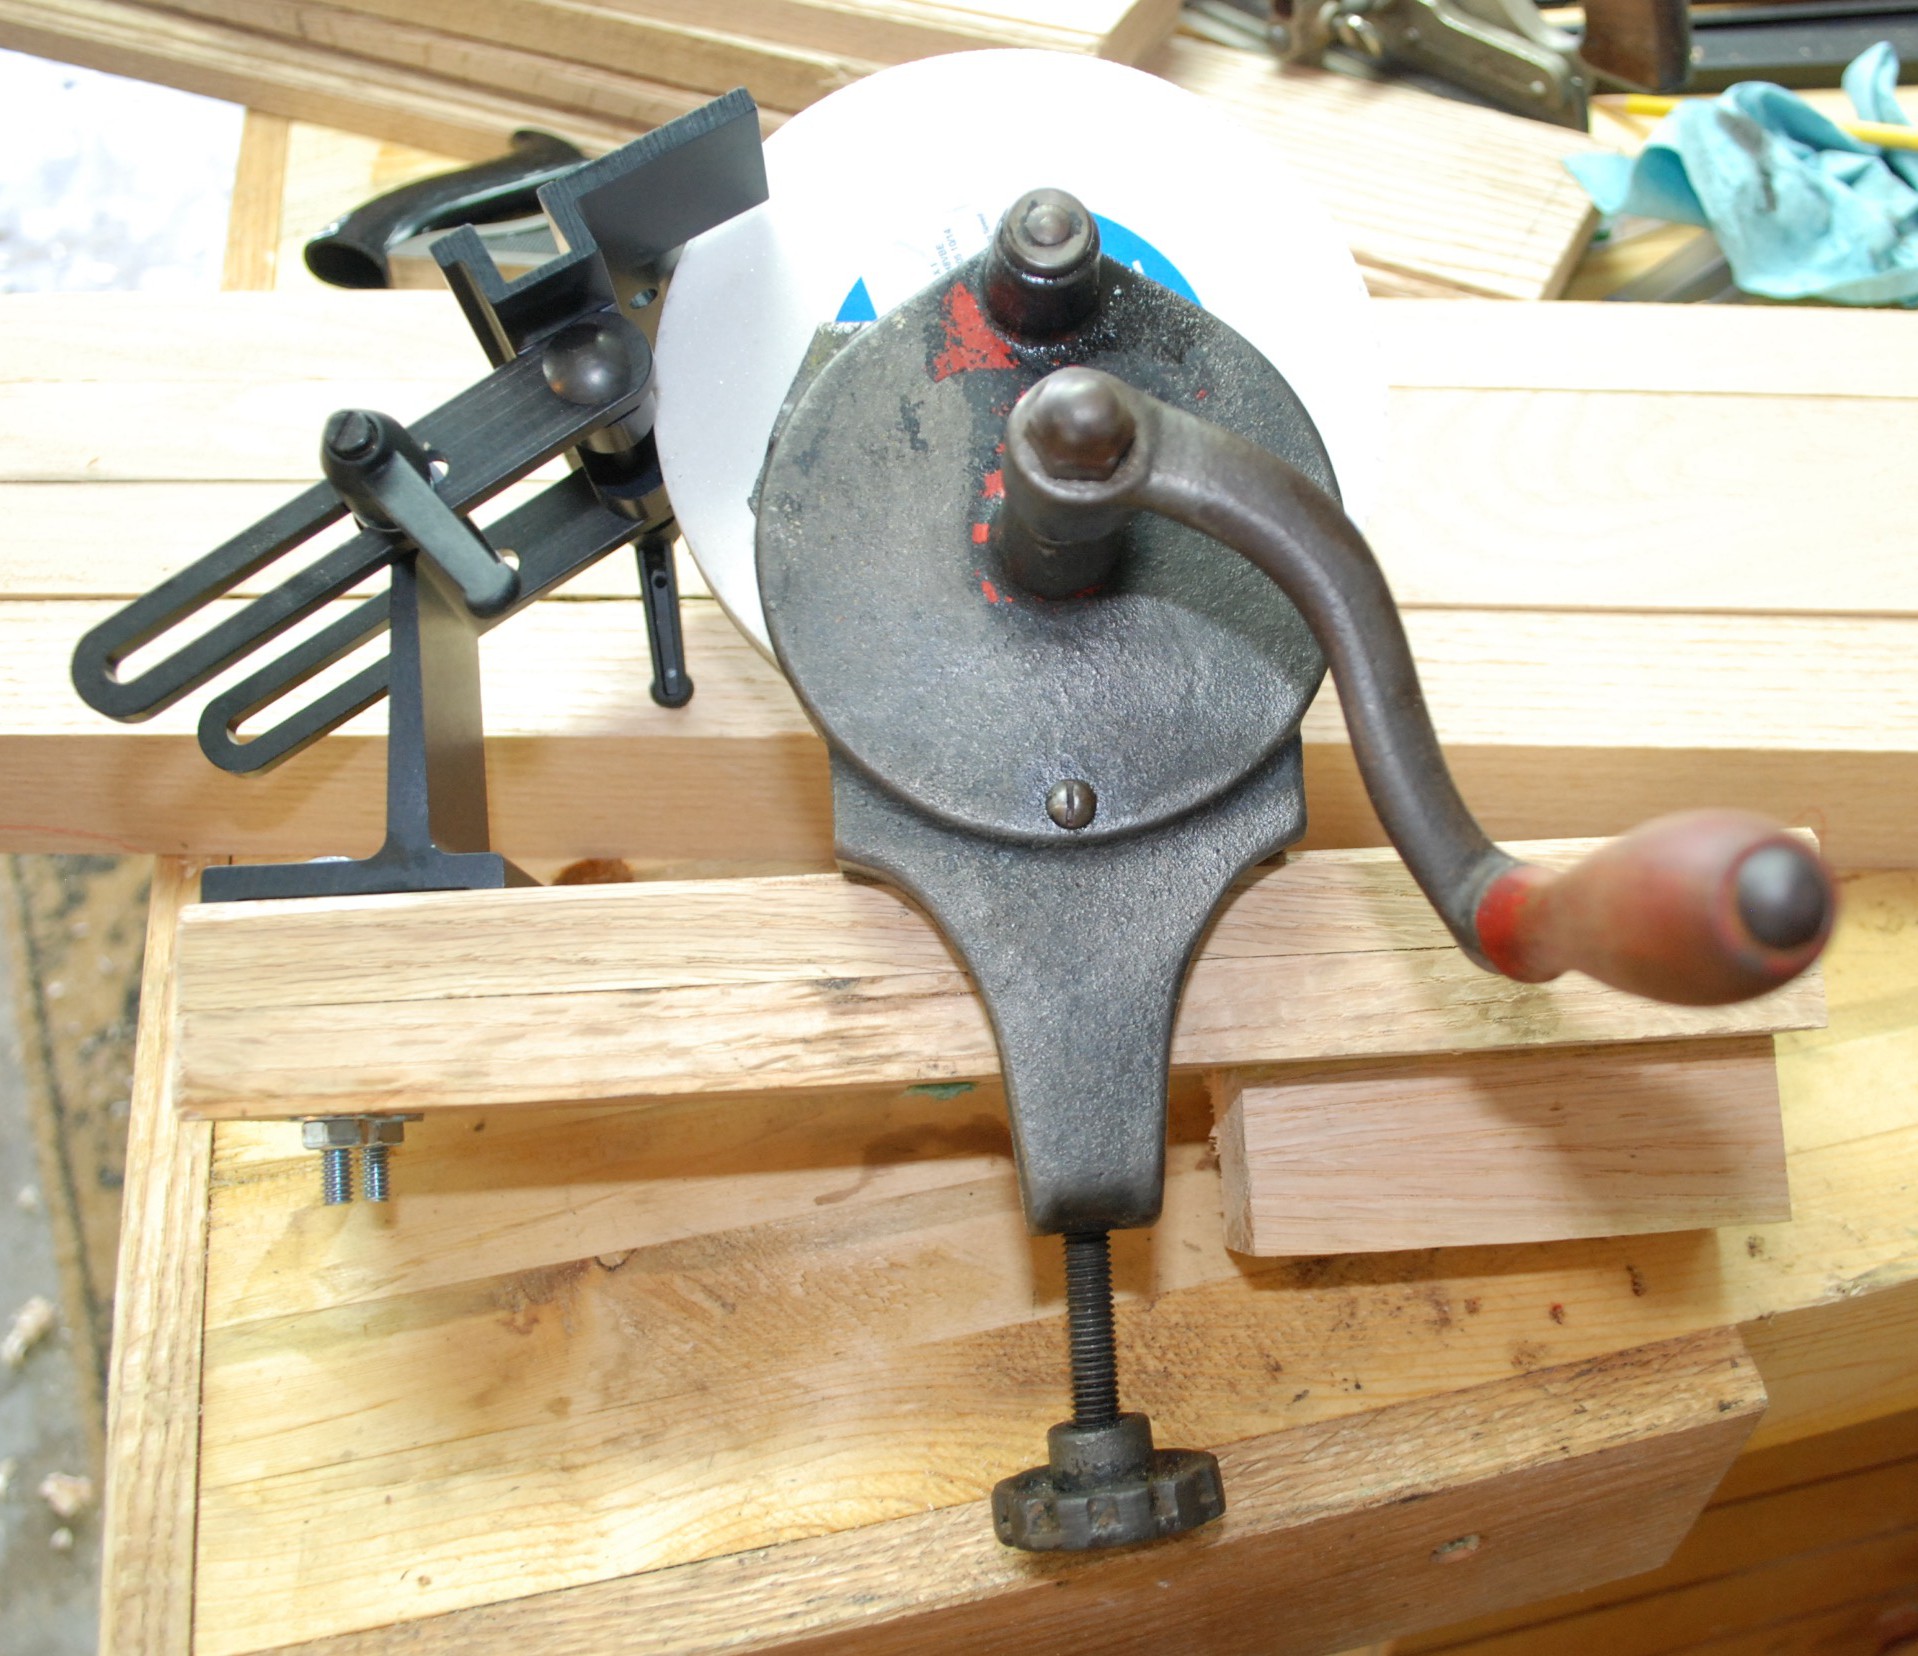
I was quite proud of the bead along the bottom apron edges.  It was done with a beading iron in my No 45 combo plane.  Planing off the bottom flat bit makes it look better.  One shot has two beads, one before and one after planing off the flat.


Mortise and Tenon

I am missing a lot of the photos of cutting the mortises, but I made a lot of mistakes and they are rather rough.  I used a rabbet plane and cleaned them up from the picture, but they still weren’t great.  My little rip dovetail saw wasn’t quite up to the task of cutting those cheeks.  Hopefully a full tenon saw is in my future.

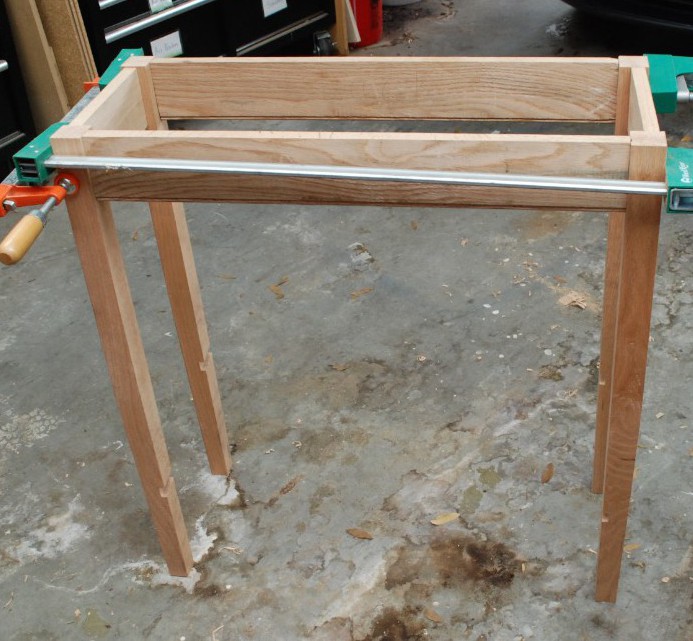
I squared the legs up well enough that they could be mortised.  I initially tried using pencil mark my parts to keep the organized, but ran across a really good idea by John over at Woodworks by John.  Mark the joining parts with letter stamps.  After much trimming and swearing the table stands!


Legs

I had already cut out the legs and squared them to do the mortises.  Next I cut them to length and did a taper on the outer two surfaces.  It starts about 24″ up and drops down to make the bottom of the foot about 1″ square.  Tapering is a lot of work!

Once I got the tapering complete I was able to cut the grooves for the bottom shelves.  I assembled each side with apron and laid out each cut with a long ruler so I could get both legs.  The sides were cut down with a saw, then removed most of the waste with a chisel.  The final depth was handled with a router plane.  What a great looking job, I did something like this over a year ago before I had a router and this turned out 10 times better!  Next time I will taper last.  Everything had to be shimmed up to hold still because of the leg taper.

This is where a huge issue came in.  I cut the left side and it turned out pretty well.  Next I moved on to the right half and cut the left half again.  Lighting makes the grooves a bit hard to see.

DSC_0462 Resized

Two left sides… crap.  I set down my tools and went inside to do something else.  I had invested hours into each leg.  I was able to turn lemons into lemonade though.  The table was set to be just over 40″ tall, which after assembling feels too tall.  Two sets of shoe shelves would be useful, but looked a bit more cluttered than one.  I decided to cut the bottom set of shelf grooves off, and re-taper the legs.  Work work.  Here is the new shortened version along with one of a few piles I had to sweep up while making this thing.

DSC_0491 Resized

DSC_0455 Resized


Bottom Shelf

I assembled the bottom shelf along with the top in a similar manor.  I really wanted to bring in some decorative accents here.  Carving is out of my skill set, but the mill can do wonders.  How about a nice scripty G in the center of the shelf?  Done!  Their last name starts with G.

DSC_0511 Resized


Assembly

With all the parts cutout and shaped properly I went about finish planing every surface smooth and clean.  Some of the oak got squrley and left me with tear out.  I don’t have a high angle plane, and I am crap with a cabinet scraper so they will have to remain as a finishing “feature”.

To keep the top on I am using small clips that fit into slots on the apron and screw into the top.  They will allow the large top to have moisture movement without trying to pull the base apart.

DSC_0513 Resized

There are a lot of surfaces that needed gluing and seconds matter when glue is drying.  I did a number of test fits and got all my clamps at the ready.  The glue up went smoothly!  A short rounded over piece glued to the bottom shelf will keep shoes from sliding off.


Doweled Shelf

The bottom shelf sits in a groove.  The weight will be held well by the groove, but few glue surfaces means it could break free.  I went ahead and drilled out the legs/shelf and glued a 3/8″ dowel in to help improve the hold.  A small block plane got the dowels down as smooth as a baby’s bottom!


Finish

A dark finish was requested and I have had some great results with minwax’s stain on oak.  I think the grain pops really well, and I had a lot of the stain around.  Once completely dry I sprayed the top and base with multiple coats of general finish’s high performance water based coating.  What a great product.  That stuff goes on like silk and dries smooth.  Spraying can be a pain, but the results are worth it.

Over all, there were mistakes made, lessons learned, and a lot of sweat.  I was able to finish a few days before the wedding and delivered it to the happy couple.  May the table last for a century, and may your love last longer.

Did I mention it comes with a lifetime repair warrantee?

Bee Hive Base and Table

One step closer to getting the hive started.  In addition to the purchased parts I already have, I wanted to build a few things.  First is a base that will get the hive up off the ground to stay high and dry in our driving rains.  Step one, start with some assorted lumber.

DSC_0423
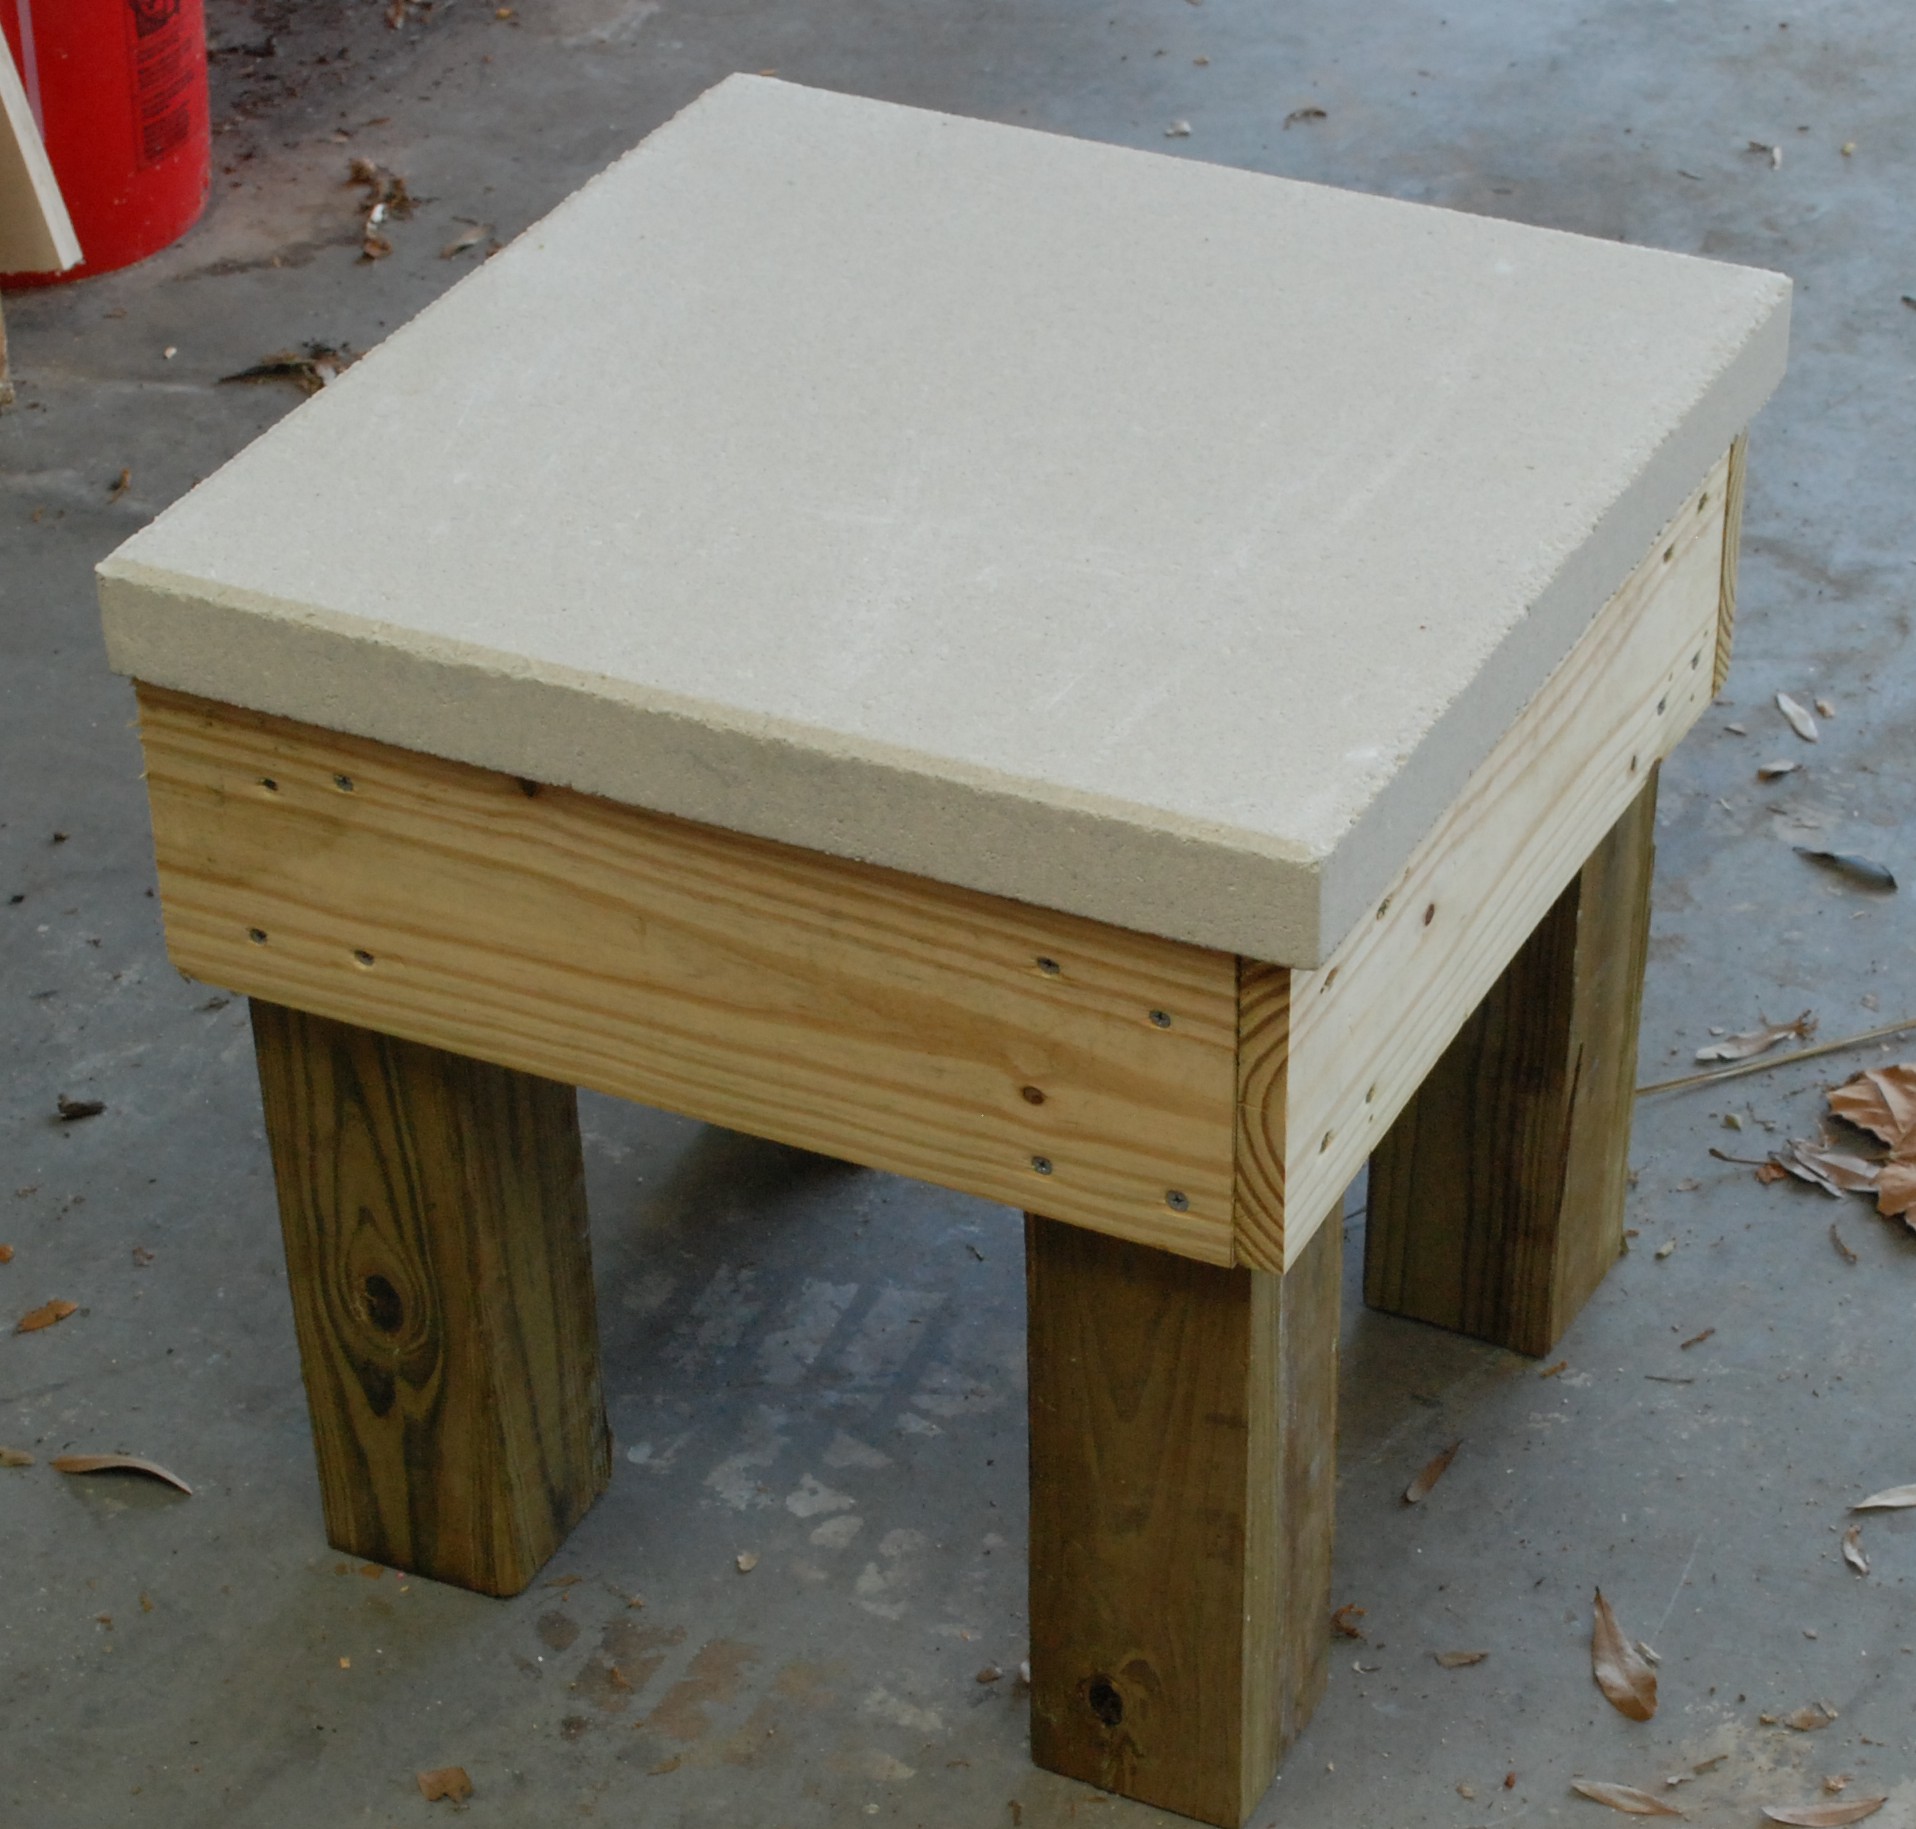
Screw together vigorously with epoxy coated exterior screws.  Impact drivers help make stuff like this go quickly.  I love my dewalt!

DSC_0425

The legs are probably overkill, but I wanted weight and stability.  A 20 inch paver forms the top.  That will not rot and should help keep the whole thing still.  The sides don’t look pressure treated next to the legs, but they are.  The total cost for this base with paver top is 15-20 dollars.  I threw some of the hive hardware on there to make sure it all sat right.  This is gonna be great!

DSC_0426

To go with the base I made a working table.  I want a place to put tools and hold frames as I shuffle them around the hive.  The table’s construction is similar to the base but 36″ tall, and with support arms.

DSC_0428One set of arms is the right width to hold a few frames, and another set is notched for a tool tote.  I haven’t made the tool tote yet, but there appears to be enough equipment involved to justify building one in the future.  Next comes prepping the ground area and then BEEEEEEESSS!!!  Probably still a few weeks though.

No bee puns were harmed in the making of this blog post.  I can’t make any promises next time.

Scrub Plane + GoPro = ScrubPro?

I said I was going to spend some time getting to know the video software and not just jump into making things.  And I have a really big, for me, project that I need to get done by a certain friend’s wedding date…  Well, maybe just one little video while I work on said project wouldn’t hurt.

I needed to do some thicknessing on a few legs, so out comes the scrub.  Why not attach a gopro?  I used one of the flat adhesive mounts, suck some magnets to it, and put that on the top end of the iron.  Next time I need to angle down a little more.  Still, I am pretty happy with the results.  It is a plane’s eye view of how to rapidly remove wood.

Ultrasonic Tool Cleanup

I have been doing a lot of old tool cleanup lately.  Maybe half of it ends up on my blog because I doubt anyone wants to see yet another number 4 cleanup.  My technique hasn’t really changed since I first posted about it.  Maybe there is a better way however.  Maybe the power of ultrasonics can speed up the cleaning of old tools a thousand fold!  Or not as we shall see.

My subject is a Number 9 1/2 block plane, a pretty common model.  I picked it up from an antique store for a reasonable price.  All the parts were present, but they were very full of dirt and rust.  Specifically the adjustable shoe was completely stuck.

Now previously I would just soak it overnight in the ole Evapo Rust.  This time I put it in an ultrasonic cleaner with Evapo Rust.  The results were…. CRAP!  After nearly an hour of going in an out of the cleaner I had what appeared to be a wet plane with ever so slightly less junk.  A bit of google searching seems to indicate that rust removal is a big thing with ultrasonics.  My cleaner is an old all stainless unit I got from a surplus place years ago.  Time for a shaming!

wpid-20150111_183914.jpg

That should teach it a lesson.  Oh well this block plane and all its parts completely filled the basket.  I would never be able to clean anything bigger.  So much for time saving technology.  A new large unit would probably due the trick, but those are expensive.  I should just be patient and let em soak overnight.

There we are, no rushing this process I guess.   I’ll leave the flattening and sharpening for a later date.  While I was working on my big secret woodworking project I might as well soak something else.  I got an mixup of heirloom twist bits and brace accessories over christmas.  They look rough now, but a trip through the Evapo Rust cures all!

After the rust bath a soaking in WD-40 and a quick scrub with a scotch brite pad does a good job of getting into the twist areas.  After the block plane, the twist bits and another small project the tub of rust remover was starting to look like the black lagoon!

wpid-20150111_183941.jpgThe liquid is completely opaque.  I hope that in a few days the sediment will fall out to the bottom and leave a clearer liquid at the top.  If not, I will pour it through a coffee filter to keep the junk from contaminating my main supply of Evapo Rust.

Hand Grinder

As part of a big haul of heirloom (my great grandfather) tools I got a hand grinder.  It will hold a 6 inch wheel, clamps to a surface, and gets powered by tacos and coffee.  Gorgeous!

DSC_0398 Resized

It was pretty dirty when I started in on it.  A little brushing with a brass brush got rust and dirt all over my newly cleaned work top.  So much for a pristine work surface.

DSC_0399 Resized

I didn’t really bother with any rust conversions.  It wasn’t very rusty, just mostly dirty, and I was worried about getting wet stuff into a nook and not being able to get it back out again.

A flat piece of wood with a nice cleat attached served as a good base to clamp to.  I started with a single layer of oak, but later doubled up because it warped too much under heavy grinding.

DSC_0403 ResizedTime to accessorize!  I picked up a grinding set from lee valley.  The veritas set came with a soft 150 grit cool grinding wheel, Adjustable tool rest, blade holding jig, and angle setting guide.  I have to say it was pricey but feels really well put together.  Link to the product.

DSC_0023 Resized

I had to cut off the loop that would hold the original tool rest.  It was a simple right angle bit of metal with a screw to hold it in place.  With this upgrade I don’t think it will be missed.  To test it I pulled out an old Ohio Tools chisel.  It was part of a small lot purchase from ebay.  I really wanted the mortise chisel but wasn’t sure what to do with this guy.

DSC_0024 Resized

Still, no reason to get rid of it.  Ohio Tools made good stuff, and it was a socket chisel.  Instead of making another bench chisel I could use a skew chisel.  I don’t own any, and this guy requires a lot of grinding no matter what.  Lets get it clamped up and going.  The blade holder jig has pins that help hold the blade either square or at a 30 degree angle.  Handy for grinding a skew!

I was able to keep a finger on the back of the blade and control pressure while feeling for heat.  The slow speed and a close finger meant that heat damage was not an issue.  The whole process took a while.  150 grit leaves a great surface that will only need a bit of work at the stone, but moves slowly when trying to make a radical change.  I might use my power grinder to rough in something like this next time.

DSC_0029 Resized

A somewhat shiny new skew chisel for me all by hand, what a great feeling.  It is so satisfying to take old misfit tools and give them a good home.  Well, more of a work home.  No rest for the wicked!

As I mentioned earlier the single board was not stiff enough under heavy grinding.  The gearing ratio means it takes a good bit of force on the handle to keep the wheel spinning quickly.  I glued up another layer and put everything back on.  A quick test showed that this was what the doctor ordered.  Very stiff and very ready for its next job.  The whole thing sits on a shelf and gets clamped into my front vice when needed.

DSC_0034 Resized