Major Hive Weight Increase

I don’t normally post about the usual inspections of the hive, but today’s was worthy.  We went out to check on the girls and oh boy had they been busy.  Despite having had very little rain since the new year they are finding nectar somewhere.  We had a 40 pound increase in the last 3 weeks.

Screen Shot 2017-05-20 at 1.16.47 PM

Seriously busy as a bee.  The previous time we checked they increased about 25 pounds in the same time.  Not sure where they are finding it all, everything is brown in the area, but glad they are.  We aren’t going to be able to harvest for a few weeks and everything was slammed full.  Had to stick on another super.  At this rate they will fill it too before we get to harvest.

20170520_131912.jpg

Battery Charging Station

I am mildly obsessed with flashlights.  These flashlights take fancy 18650 lithium ion batteries that can be recharged.  I have a lot of light accessories, spare batteries from laptops, and other things that need storage and organization.  Similarly cameras tend to have their own specialized batteries that need storage and charging.  I built a flexible station to hold all my chargers in one place.  Later I added an extras organizer from a repurposed storage box.

I started with all the specialized chargers I could find.  Two for flashlight batteries and two for cameras.  I decided to go for the pedal board route.  Guitarists can have a lot of effects pedals for their instruments.  Instead of having them all splayed across the floor they tend to put them on a thin box using velcro.  The box has slits that allow cables to pass inside the box out of the way.

DSC_0813

I built it to fit a shelf in my office closet and made it wide enough to expand with new charger capacity if need be.  Nothing special, just some pine I had hanging out.  The chargers are held at about a 60 degree angle, and there is space in the back to strap down a power strip.

DSC_0814

I wanted it dark to help hide the dark cables and velcro.  I never have good luck staining pine, but mixed up a water based dye blend.  It turned out great!

DSC_0816

With velcro and power strip in place I could start attaching chargers.

DSC_0817

DSC_0818

A 4×1 outlet extender lets you plug in chargers that are supposed to go directly into a wall outlet.  I added a device called a blackout buddy.  Eaton makes them and they are red cross branded.  It plugs in and charges itself.  When the power goes out it turn on the light so can see.  Now when our power goes out I can find my way to the flashlight stash in the dark.  It fit like a charm on the shelf in my closet.

DSC_0819


Next up I pulled an old drawer storage box thing out of the trash.  It used to have board games in it, but was destined for the dump.  I thought the all-wood construction it was worth saving.  After re-gluing a few bad joints it was in good shape.

20170512_191052

The bottom drawer houses all the extra batteries I had from laptop pulls and random purchases.  I printed a number of organizers to keep them from touching.  Every organizer positively holds the battery in place so they can’t come out and can’t touch each other.  Keeping them from touching is an important part of preventing battery damage and fires.  Plenty of room left to store more batteries.

The middle drawer has random flashlight stuff.  O-rings, manuals, cases, etc.  I printed some dividers to hot glue down to keep the drawer from being a mess every time you open and close the drawer.

DSC_0823

Lastly I threw some of my DSLR gear in the top drawer because I never really had a good place for it.  3D printing and woodworking come together to help organize and support my camera and flashlight fixations.  What a gorgeous synergy!

DSC_0824


Sharpening Station

Sharpening is one of those things that you know you should do often, but always gets put off.  It is often said 90% of your problems with hand tools can be fixed by proper sharpening.  I am getting better at free hand sharpening, and getting less lazy over time.  It is hard to always have some dedicated space to sharpening though.  I read an article in Fine Woodworking Magazine where someone suggested using a basic tool box plus custom top as a sharpening station.  It is portable to follow you around the shop, and has all the right stuff where you need it.  Instead of buying something I decided to stash bust and build one.

I have a ton of 3/4″ plywood around from my temporary kitchen counter tops, and some left over spares from the cabinet installation.  I turned them into a 16×16 open fronted box, along with a few drawers.

Given that the case and drawers would be short I didn’t want to use my normal method of attachment.  This typically involves building the drawer to just below the inside width of the box, and using pine as runners.  It is quick and easy, but the drawers fall out if you pull too far.  Instead I went with metal slides, and got to use my new drawer install tools.

I picked up a slide install tool and drawer guides from rockler.  They help a lot, but are a little awkward to use.  I wish I had do more research before buying.  I think kreg might have a better system.

Instead of using some kind of gripy surface to hold all the various plates and stones in place I went with a small vise.

On the left is a small work surface with bench dog clamps to help hold sharpening plates.  It is offset to the left to prevent drawer interference.  On the right is a small granite surface plate I had.  I added a protective cover to it eventually (seen in later photos).  Now I can use whatever method of hand sharpening best fits the situation of the tool.

DSC_0795

I built 3 sets of drawers to start with because it was all I thought I would need.  Then I found enough stuff to add a 4th drawer.  Once that was built and installed I found enough for a 5th.  I probably have too much sharpening junk.

The project ended up stretching out over a month as I worked on other things and came back with more ideas.  In that time I used a few different pieces of plywood for the front face of the drawers, so they don’t match well.  I did cook up a cool side caddy for honing fluids though.

DSC_0801

In all I think I am going to like it.  It rolls nicely, tucks away under one of my other benches that didn’t have a use for that space, holds a lot of stuff in the drawers, and even has space on the bottom shelf for my work sharp tool box and saw sharpening clamp.  The only thing it might need is weight in the bottom to help with stability.  Now I have no excuse not to sharpen early and often.

DSC_0794

Easter Brisket Saga

How can one lowly Brisket turn into a whole saga?  Well gather round, because I have a tale of how much misery and woe a single slab of beef can cause.  Ok, it wasn’t that bad, but there was a lot of water all over the kitchen floor.

This story starts off innocently enough.  A boy and his brisket.  15 pounds of beefy goodness.  I had read about cooking a brisket via sous vide, then smoking it.  You get the tenderness of sous vide, with natural smoke flavor added.  Smoking briskets is hard, they are easy to dry out in the thinner flat area.  This should be easy!

I gave it a nice trim, set the fat cap to roughly the right thickness and then sprinkled generously with salt and pepper.  It is like putting on a fancy tuxedo, only for food.

DSC_0777

DSC_0779

Plan A

Next I cut it up, stuffed it in big ziplocks and tried to fit everything in my usual food grade polycarbonate container.  Oooohhh  might not be big enough.  The point is sticking up inches out of the tub.

DSC_0780

Plan B

No big deal, I have one of those fancy modern soft coolers.  People do sous vide in coolers right?

DSC_0781

It looks all snug and warm in its soft jacket.  Zip everything up and come back 24 hours later!

Wait, what is that dripping sound?  Why is the cooler leaking?

It turns out the cooler is only rated for 120F, not 155.  So the liner glue let go and started leaking everywhere.  I pulled out my hard plastic cooler and dumped everything in.

Plan C

Plastic coolers are definitely ok to work with.

Why is there water everywhere?  Oh great, the drain plug was out.  At this point I was running around like a mad man trying to sop up the gallons of hot water.  No pictures exist.

This container will work, but it is huge.  It needs at least 5 gallons to get everything covered right, and there is no good way for the sous vide cooker to live in there.  Normally they cut a hole in the lid so the electronics can be outside.  This will hold for now, but I need a…

Plan D

Run off to the supermarket and come back with a styrofoam container.  Big enough for a brisket, but not a monster like my big cooler.  It can definitely handle the high temp (you put boiling hot coffee in the stuff after all!).  I modified the lid on the band saw and we were back in business.

DSC_0786

A few hours later I walked by and water was all over the floor.  Apparently the foam is porous enough to let a little bit of water weep through.

DSC_0787

Plan D-2

Re-enter the plastic tub I tried using from the beginning.  It is only weeping a cup every hour or two.  I can keep it full for the time needed, and this tub should keep the floor dry.

DSC_0788

The Next Day

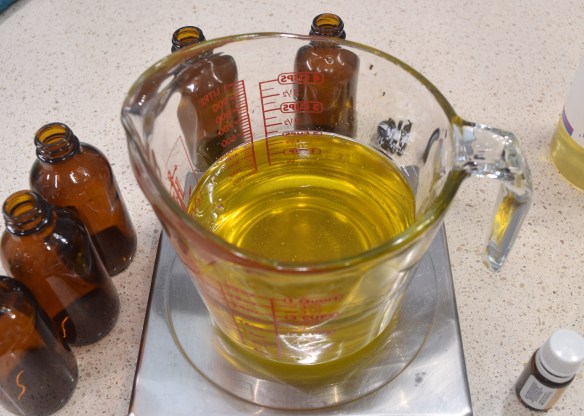
I made it through the night without spilling any more water on the floor.  The brisket actually turned out looking pretty.  Dark, soft, and ready for the smoker.  After another application of the tuxedo treatment that is.

Because the beef is already completely cooked there is no need to smoke all day.  Only a few hours to impart some nice flavor.  I went for about 3.5 hours on a low smoke.

DSC_0791

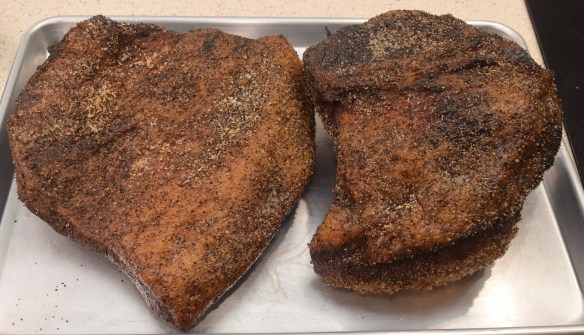
They are nowhere near as dark as they would be had they been smoked all the way through.  Still, they have been nice dinners for the week.  Reasonably moist, and pretty tender.  The fat is rendered perfectly.  That kind of melt in your mouth velvet feeling when you eat some of it.  I need a new container scheme if I want to do this again.

Sharpening Plates

There is a sharpening system known as scary sharp.  It typically involves adhering sand paper down to glass plates.  Start at a high grit, and sharpen your tool down through the grits.  It is perfectly valid, and can give you a great edge.  The only issue is the cost of sandpaper adds up.

If you only have a few tools to sharpen, it works great.  Sometimes you want to clean up a really rough ebay tool, and don’t want to use a nice diamond stone on a rusty hulk.  Flattening water stones is rough work, and best done with disposable sand paper.  They can help flatten issues on cast iron tables.  Basically lots of good uses.

I have some decent diamond stones, but still wanted some glass plates to do occasional sharpening and clean up with sand paper.  I went to a local glass company and told them I wanted 1/4″ 4×10″ float glass for this purpose.  I ended up paying 50 bucks for 9 plates.  The edges are a little rough, but not sharp.  Just not pretty.  They even put nice little square foam pads as feet.

20170416_093116.jpg

I am tickled pink at how nice and affordable these were.  I don’t plan on using them a lot, but at the price I got how could I not go for a pile?  This is probably a stash beyond life expectancy!  I would urge woodworkers and tool users that need to sharpen flat objects to go to their local glass shop and see what they can do.  A little super 77 spray adhesive to stick the paper down, and a sharpie, and you are in business.

Pre-Shave Oil

A while back I made a few batches of pre-shave oil.  It went over well and has served my skin nicely since.  It is time to make more!  After having used both numerous times I think the menthol was not a great choice.  It has too much of a cooling effect which is not what you want in a warm shave.  This time will be sandalwood only.

Step 1: Gather up some brown bottles, measuring and mixing supplies, and the oils.

DSC_0774

Step 2: Mix 2 parts castor oil, 1 part olive oil, and a generous dash of your favorite essential oils for aroma.  The two oils have quite a different shade of yellow at first.  They get almost cloudy when mixed until they mix completely, then it is all clear again.

DSC_0775

Step 3: Bottle with a tiny funnel and put a zazzy logo on them.  I wanted to use the phrase “For a shine that is hard to beat… and look directly into”, but it didn’t fit on the label.

DSC_0776

Feb-Mar 2017 3D Prints

Between travel, other projects, and a wounded printer, I haven’t made a ton of prints recently.  Here are the ones that bubbled to the top.

Bluetooth Antenna

I use bluetooth ear buds in my shop at nearly all times.  They are comfortable and go nicely under a set of ear muffs.  The bluetooth in my shop laptop has a really limited range.  Sometimes the EMI from power tools causes enough problems to interrupt the music.  I bought an external bluetooth dongle.  It worked better, but I found that raising it up away from the laptop and monitor made it work the best.

I used a pin contour gauge to try to copy the shape of my monitor.  It is a pretty complex shape and I didn’t quite get it perfect.  Still, a little hot glue holds the bracket on well and zip ties keep the USB extension held high and proud.  I was hoping it would look like a star wars droid antenna, but fell short.  Other than the visuals, it works like a charm.  Long range tunes without interruption.

Magnetic Door Holder

The weather is getting warm, but it is still nice enough to keep the doors and windows open.  The wind often catches the door into my shop and slams it shut.  I printed this bracket assembly and glued in magnets to hold the door open.  A large machine screw holds the two pieces together and allows some pivoting between the door and bracket.  I screwed it down to a mobile work bench, so the angle between it and the door can vary a few degrees.

String Trimmer Winder

I use a black n decker string trimmer for yard edging.  They come with spools (AF-100) that auto-feed the right amount of string and can be exchanged quickly when one runs out.  The trick is they sell for 6 bucks a piece.  Not a horrible price, but considering you can reload them for pennies, I had to find an easy way to do so.

There is a base that the spool plugs into, and a winder that chucks into a drill (1/4 nut and bolt required).  The base keeps the spool stable and guides the string while the winder lets you power through a whole spool in no time.

DSC_0771

DSC_0772

This one was complex enough to use that I made a short video explaining its use.  Thingiverse Link

Clamp Racks

A year back I modified a set of buckets to hold my 12-24″ clamps.  It worked as a method to keep them in once place, but had some flaws.  They were tucked away, which means out of sight out of mind.  With all the bars going down into the bucket it was really hard to tell the length of the clamp when you wanted one.  I was able to de-clutter some wall space which gave me the opportunity to build wall racks.  One would think that clamp racks are really simple, and that not many mistakes could be made.  You can screw it up, and I did.

I wanted to try out french cleats, and I wanted them to be strong.  I didn’t have much 1″ thick lumber, so I went with 2x4s.  Big beefy cleats right?  This is stash busting at its finest.

Mistake 1

20170326_201149.jpg
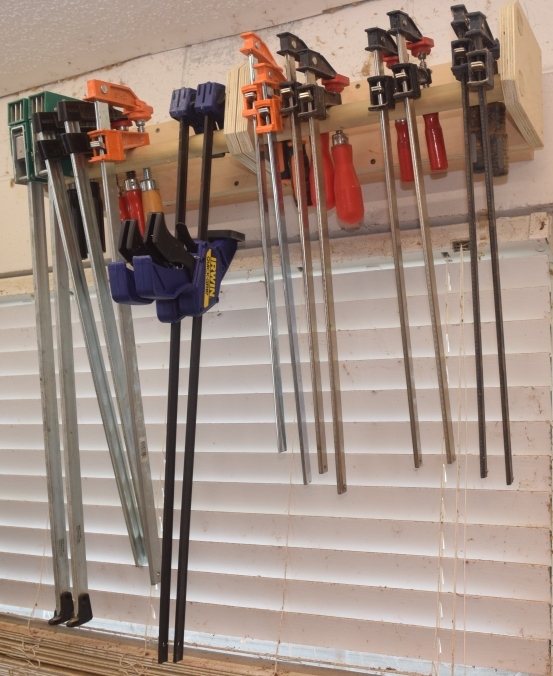
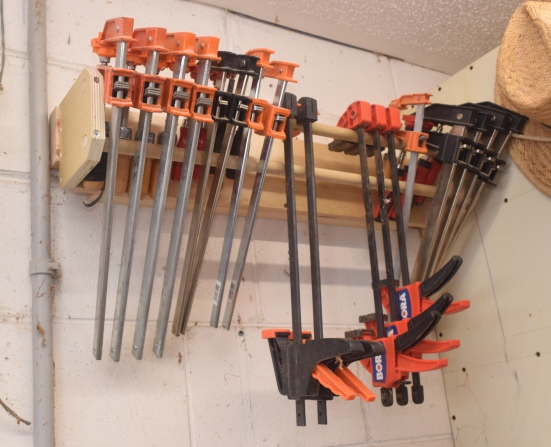
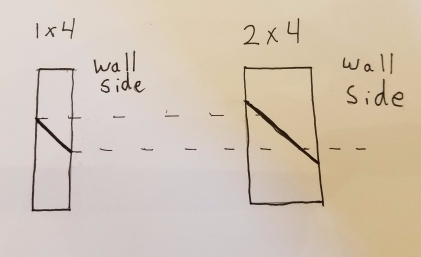
I thought 2x4s would make a great french cleat system.  They aren’t horrible, but they
aren’t great either.  Because of the thickness when you cut them on a 45 degree angle, you don’t get a lot of flat bearing surface left over.  A 1×4 would provide plenty of holding power, is easier to attach to the wall, and has more bearing surface to glue/screw to against the wall and tool holder.  I would also suspect that moving the weight out further from the wall transfers a little more load into trying to pull the screw out instead of shear loading it.  Might not be significant, but not something you want to do.

Mistake 2

I had plenty of cabinet grade 3/4″ plywood around from my temporary counter tops.  Why not break out my old machine cut dovetail jig and go into production?  It was a little overkill for strength, but they would look nice and once I got the jig setup I could make lots.  Turns out plywood doesn’t play well when doing that kind of cutting.  The bit ripped off a lot of layers.  I could have sandwiched the part on both sides, but the novelty and speed of doing a lot of these was quickly evaporating.

DSC_0751

Mistakes 3 & 4

I mounted the cleats up high to maximize space and keep them out of my way when not in use.  I ended up with them too high.  When trying to place a clamp in the rack, it hit the ceiling before going in.

20170324_101943

If I did rotate them to get them in, the double bars didn’t help.  I used that double bar trick on a small clamp rack at the end of my work bench.  Small clamps have a center of gravity that makes them want to rotate badly when hooked like this.  Big ones have enough weight down low that they don’t.  It was a waste of materials.

20170324_102149

To recover I removed the holders, and cut off the top bar.  That is a nice thing about french cleats, you can take them down to adjust or make modifications.  I also added a small bumper at the bottom to help with the loading path.  See mistake 1.

DSC_0749

It took a while, but the two foot long clamp rack was complete.

dsc_0748.jpg

Mistake 5

I had pre-cut material so that I could assemble lots of 14″ clamp sets with dovetails.  When the dovetails failed I started using screw.  That worked out, but the small sizes weren’t needed.  The dowels are plenty strong enough to hold the weight across 28″.  I just caused more work for myself and wasted materials.  I was able to use some of this stuff, but if I had tested the dowels for sag before hand I would have done all of them in one span instead of two.  Test next time.

DSC_0745

Mistake 6

Almost out of the woods.  I made the classic “Measure once, cut twice, and still too short” mistake.  I always have problems when drilling holes for dowels.  I seem to always drill one size too big.  These aren’t 7/8″ poplar, they are 3/4″.  More material wasted, I need a tight fit for the glue joint.

DSC_0750

The next set avoided mistake 4, the second bar was really needed to keep everything from rotating, but got tied up with mistake 3 again.  It was up too high.  I had to remove the cleat and lower it down a few inches to get everything to clear the ceiling.

DSC_0753

From here out it was actually pretty smooth sailing.  I used my limited stock of 1×4 to make more cleats and the racks came together well.  I even managed to dig my spring clamps out of the drawer and give them a nice home.  Bigger parts on the spindle sander might be an issue, but that is attached to a mobile base.  I can always move it out if need be.

DSC_0754

In the end it works wonderfully.  The fact that it took twice as long and 50% more material than it should have is going to be chalked up to learning.  8 years after starting this hobby I still have a lot of learning to do.

Pullup Bar

I have been doing kettlebell and bodyweight exercises consistently for over 6 months.  I love the speed at which it kicks my butt and have been getting progressively stronger at all the exercises.  Aside from a variety of bells none of it requires anything more than a small bit of space.  The two exceptions are pull-ups and Turkish get ups.  Pull-ups obviously require some kind of bar, and Turkish get ups involve large series of steps to take you from lying flat on your back to standing up straight with a kettlebell overhead.  It takes a bit of room.

The plan is to kick out my treadmill and build a dedicated kettlebell workout area.  I have a doorframe pull-up bar, but want to build a freestanding piece of equipment.  Might as well use this as a chance to do some woodworking.  Start with some nice (Super rough!) untreated 4x4s and get cutting.  Even though they were supposed to be kiln dried they were wet enough that my normal tenon saw bound up an inch or two in.  Had to break out a panel rip saw!

With guns that big my joints weren’t exactly surgically precise.  Along those lines I didn’t really have the right chisels for the job.  An old 2″ framing chisel helped, but my only other option was a 1″ bench chisel for chopping the waste out.  Still I was able to bang out some bridle joints to attach the upgrights to the feet.  Things were going swimingly enough I was able to shoot a little assembly vid!

DSC_0731

Before doing any glueups or serious trimming I assembled the uprights with the pull up bar at the height I thought appropriate.  This let me do some basic testing to see if I was on the right track.  It was shaky, but even without glue or fasteners it held me!  Last but not least it let me play with different widths to figure out what was right for me.


DSC_0736

I started trimming excess and planning out the rest of my parts.  A shelf across the back holds kettlebells when not in use.  The shelf is dovetailed so it helps keep the assembly square.  All that weight comes in a lot of handy!  The right angle joints between the uprights and the feet got glued and pinned for good measure.  Everything else is going to stay friction only so it can be disassembled.

I tried trimming everything down as much as possible so it wouldn’t take up any extra space inside.  It looks compact, but beefy.

DSC_0738

I made one critical flaw though.  Those pins on the backside are pretty thin, and any force on them by the tails puts a lot of shear force along the grain.  It is a recipe for splitsville.

Yup, I was doing some assembly and it popped off.  I tried gluing and pinning it back in, but only managed to destroy the piece.  If I had made the foot extend a few more inches past the tail it would have been strong enough to survive.  Lesson for next time.

I installed some angled pegs along the back of the uprights to give myself storage hooks for grip trainers and other items.  The whole thing goes into the house easily, and assembles in a few minutes.  The pull up bar itself was pinned with some 1/2″ dowels though the upright from front to back.  That will keep it from rolling or working its way out.  The shelf and those pins are just held in with friction and gravity.  Assembled the device is too big to get through any doors, but by using carefully planned joints, I can take it apart to get it in and out of the house.  A coat of boiled linseed oil offers some protection and adds color to the pine.

All the wooden joints creak and groan and shift a bit when doing pullups, but it is super sturdy.  I might drill out the pull up bar and upgrade from a 1-1/4″ to a 1-1/2″ bar at some point, but for now this works well.  Those pegs along the back hold my chalk, a towel, and grip trainers.

DSC_0756

Tampa Woodworking Show 2017


The Tampa Woodworking Show is back!  I went for the first time last year.  This year was similar in that I learned a lot, met cool new people, and spent way too much money on tools!

20170318_095724

The fun begins as soon as you walk up.  They had this trailer with a mobile wood mill on it again.  I managed to snag some video of them carving up a big cedar log.

How would you like to have one of those bad boys show up in your front yard and slice up a few trees?

There were classes going practically all the time, and I managed to make it to 6 different sessions.  I learned about finishing, turning, and molding making.  This guy was doing some really big and aggressive turnings.  All his AV equipment was constantly getting covered in shavings.

20170317_150933

My favorite housewright (ok, the only one I know) Ron Herman was back this year dispensing with some old school wisdom to constantly full classes.

20170318_151031

Did I mention I spent too much on tools?  It was hard not to, there were vendors everywhere.  Lee Valley would let you touch and play with everything.

20170318_150020

Saw stop did a demonstration of their saw saving a poor defenseless hotdog.  This is my win-the-lottery tool!20170318_103045

When it detects your finger (via capacitance?) it crashes a stop into the blade and pulls it down.  Must be seen to be believed.

They had one of the crashed blades to show how the mechanism works.

Moving up from there we had festool (more like festdrool amirite?, or something like festwo-wholepaychecks).  Everything they make looks great, but once again, I think a lottery handout might have to be involved before I get one.  This Aussie company makes a massive converting industrial wood transformer thing.

Giant slabs of gorgeous wood, CnC mills galore, and even a bag for the knitters in your life.

20170318_105413

One of these years I will have to travel to one of the bigger shows.  Maybe Atlanta first.