DIY Foaming Hand Soap

I don’t know when foaming hand soap became popular, but I have been buying it for a while.  I love the instant lather versus regular liquid soap, but never liked how expensive it was.  Not that it is a huge expense, but what can I say, I am cheap!  Luckily I did some searching around and found out how cheap and easy it is to make.  Now that I know, I am kind of pissed that I have spent so much money for what is 95% water all these years.

DSC_0280

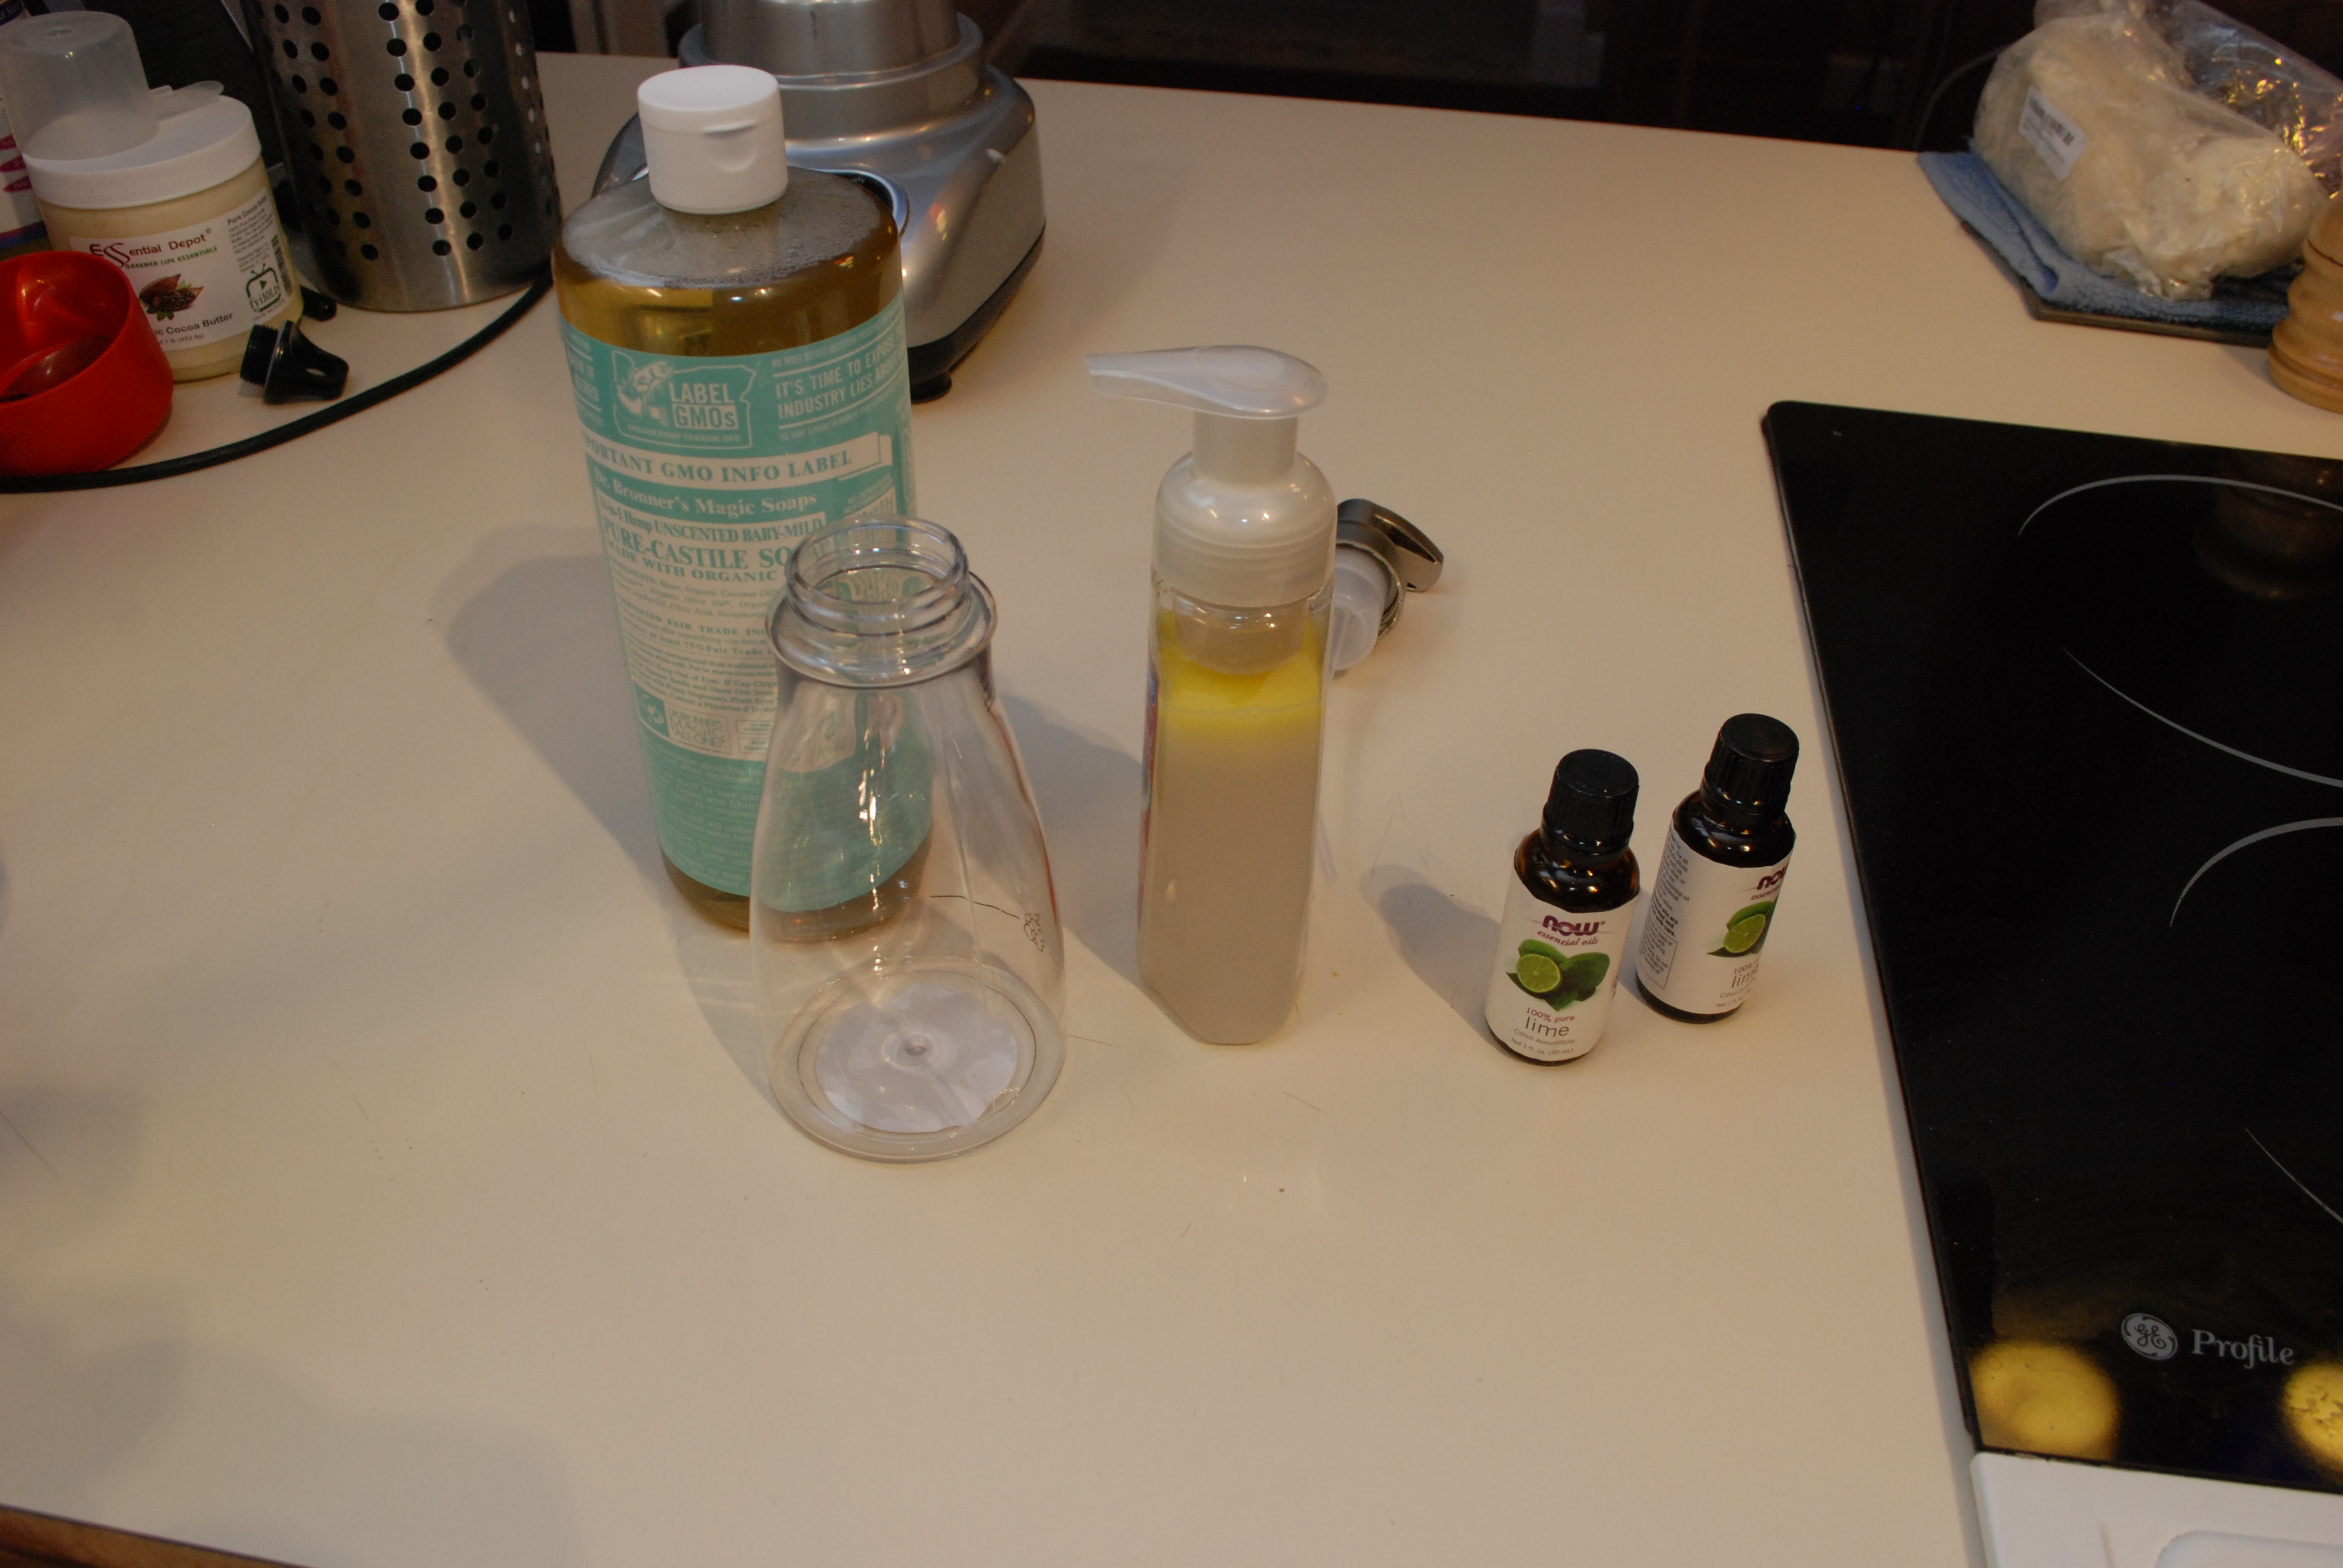
I made a few small experimental batches based on my reading and I think I have the ratios and process right.   Grab your dispenser of choice.  Pictured above is an old store bought foaming pump that we bought and have refilled for years, and a new one from amazon.


Directions:

Fill 2 Tablespoons of castile soap (olive oil based soap concentrate) for every 8 ounces of soap required.  Add any desired essential oils.  I used lime oil, because limes rock!  15 drops per 8 ounces of soap is a good place to start.  Swish those two around in the container to mix, then gently fill the rest with water.  Done!  (Note, I modified the recipe slightly, see the update below)

DSC_0281

You can make large volumes of the stuff for quick fills later.  Use the 2 Tablespoons of soap, and 15 drops of oil to 8 ounces of fluid rule to make as much as you want.


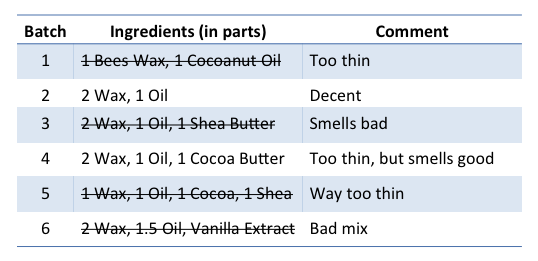
My first batch was a festive peppermint hand soap.  I started with water, then added the other ingredients.  They didn’t mix as easily as doing the soap and oil first, so I would recommend main ingredients first, then water.  Also on my first batch I added a teaspoon of olive oil.  Some sources recommended it, some didn’t.  It didn’t mix well, and a left vs right hand wash comparison with my non-olive oiled batch doesn’t seem to show any differences.  Maybe because it didn’t mix well?  If you want to try adding the olive oil, do it first, and get it combined well with the soap before adding water.

The bottle looks great in my bathroom!  All these hand made soaps are translucent for some reason.  The store bought ones are clear…  Probably the soap acting as a surfactant has emulsified the essential oil.  AKA, lots of tiny drops of oil in suspension make it look “cloudy”.  Commercial ones must use alcohol based perfumes or something.  Any who, both work great as a hand wash, leave a light smell, and provide a good lather.  The picture above shows peppermint on the left, and lime on the right.  The size and foam differences have more to do with the pump than the soap I think.


UPDATE!

I played around with a few more batches and have come to a different conclusion about the oil.  It seems to help keep the soap and water mixed together better.  Otherwise the soap wants to separate to the bottom.  Also, the cloudiness fades with time.  The final recipe is as follows:

Mix the following ingredients per 8 ounces of water.

  • 2 Tablespoons of castile soap
  • 1 Teaspoon of olive oil
  • 15ish drops of essential oil

Mix those all together really well in the container and add the 8 ounces of water slowly.  TADA!  You made foaming hand soap.


The Final Stache Wax

My great wax experiment has finally come to an end.  No, I didn’t shave, but I did settle on a recipe.  Lucky magic batch number 7.  It was the 7th iteration of my tests.  3 parts bees wax, 1 part cocoa butter, and 1 part cocoanut oil.  For long term use I pored the melted concoction into an empty deodorant container and lip balm tube.  The deodorant one will sit in the bathroom for daily use and the lip balm ones can be carried in my pocket or left in a drawer at work.

In finishing up the pour process I accidentally knocked over one of the larger containers.  It splashed all over the glass top oven, but nearly instantly solidified.  Once it cooled a bit I pulled the sheet off whole.  I could remelt and repour into the container, but why not just save for later.  I broke the sheet up and threw the pieces in the beeswax ziplock for next time.  Handy!

Update 10/28/2018:  Not sure if I lost that broken up piece or just used it already.  I made a batch starting with 50g of wax, then doing 16g each of the butter and oil.  It filled one deodorant dispenser with a tiny bit left over.  Scale accordingly.


Tractor and Engine Show – Fall 2014

There is a group in Florida called the Florida Flywheelers.  They are a crazy bunch of people that got together, bought a lot of land in the middle of nowhere Central Florida, and stuck a huge pile of old tractors, engines and other cool stuff on the property.  A few times a year they open it up for everyone to come see.  There is a village area with permanent structures that display the restored goods, and a large vendor area.  People bring all sorts of cool things to show off and sell.  Some is junk, but there are some diamonds in the rough.

First, to start off with a bang, there is the Snow Engine.  It was made by the Snow company and was used to pump natural gas originally.   I got a video of the thing running.  The flywheel is 12′ in diameter, and there is a double opposing piston running it.

Too cool!  it was loud and smelly and awesome!  There were also endless rows of small hit and miss engines.  They spin up a fly wheel with a single bang of the piston.  As the power is used and the flywheel spins down it sets off another ignition to bring it back up to speed.

In the village area there was a saw mill that would run from time to time.  They could take a whole log, align it, do any desired rotations and index for the next cut all with levers.  Now that is what I call serious woodworking!


I was on the lookout for old woodworking tools.  I had a long list, and picked up a number of things I was looking for.  Disston rip saw, wooden rounding plane, a pristine Stanley no99 side rabbet plane, mortise chisel, millers falls egg beater drill, and a pair of sturdy old scissors.  In all I spent about 50 bucks for everything.  On ebay it would have cost many hundreds.  I might have to make a big post about cleaning up all my spoils at once.

wpid-20141107_213701.jpg

Beyond the big showey things and woodworking tools there were all kinds of little displays of tools, cars, tractors, engines, pumps, alpaca, knick knacks, and old rusty junk!  I am going back next time.  We blew past a ton of stuff that might be worth looking at, I missed all the different parades, and only watched one small tractor pull.


Moustache Wax (Part 2)

After my first round of moustache wax creation I had a lot of testing ahead of me.  Some batches were way too thin, and some had odd smells.  The table below is my conclusion from round 1.

Slide2

For starters I am going to nix the shea butter, but keep the cocoa butter.  The shea smells kind of funny to me and makes the wax very soft.  The cocoa smells good, though it is hard to tell if has any other beneficial effects.  The vanilla did not mix well or add anything.  Even the best batch had too little hold in my opinion, so the next round is going to need more bees wax for stiffness.  Take number 4 and increase wax!

In addition to playing with the amount of bees wax I decided to try petroleum jelly as an alternative to the cocoanut oil.  Many of the recipes I read about used it. Here is the list of things I will try in round 2.

Slide1

I used the same procedure as last time, measure out ingredients with a scale, then combine in a small double boiler using a glass measuring cup as the inner pot.  It makes pouring easier!  Everything went well, and my new pile of candidates look great!

DSC_0102 DSC_0103

I have lived with these for about two weeks now.  My main conclusion is that the petroleum jelly isn’t as good as cocoanut oil.  It doesn’t spread or hold as well.  Right now I am leaning heavily towards number 7.  8 might have slightly better hold, but is much harder to work in.  9 is way too hard.  I may try mixing 7 and 8 to see what an in-between looks like.  Til then I have ordered containers and more wax to make a big batch for the long haul.

DIY Moustache Wax (Part 1)

I entered into a beard off with a co-worker earlier this year.  We both stopped shaving at the beginning of August, and will not do so again until sometime in December.  We had an agreement that small trimming could be done for cleanliness.  I don’t like my moustache getting into my mouth, or tickling my upper lip.  One option would be to trim, but figured why not train it!  So I picked up a tiny comb and some moustache wax.  This is where my problems set in.

I have tried a hand full of different waxes available online, because I can’t find any in town.  All with the exception of one smelled so bad I couldn’t bring myself to apply them.  These things sit right under your nose for goodness sake!  Many of them are quite pricey too.  10-15 bucks for on ounce or two.  That is rich considering it is mostly bees wax.  How about I make my own?

I did some reading and found a whole host of recipes out there with a lot of different ingredients.  EXPERIMENT TIME!!!  Bees wax on its own is too hard to use, so oils are added to soften.  I used the following ingredients:  Bees Wax, Shea Butter, Cocoa Butter, Cocoanut Oil, and Vanilla Extract.  The ratios for the first 6 batches are:

Slide1Everything was measured out with a scale and combined in a double boiler.  I went through the week using one each day and recorded my thoughts.

  1. Way too thin and easy to spread.  Not enough hold for my course stache.
  2. Decent consistency and hold.  No bad smells.  This one has potential.
  3. Too little hold and the Shea doesn’t smell good in my opinion.
  4. Not enough hold for my liking, but the smell was light and pleasant.  With more wax, this could be a good one.
  5. Practically melted off my fingers.  No go!
  6. The vanilla extract didn’t mix well.  Oil and alcohol.  Anything I add should be oil based if I want to influence the smell.

In all it was a good round.  If nothing else, number 2 is probably an acceptable substitute for my previously preferred wax, and at a tiny fraction of the cost!  I kind of liked the cocoa butter additive.  My next round will be variation on that version with more wax.  I might try a round with petroleum jelly instead of cocoanut oil.  That seems to be a popular alternative to the cocoanut oil.  Until next time, let it grow!