Printing With Supports, DC Fittings

I started off wanting to create more custom dust collection fittings.  This time for my router table.  I need something to go from the back of the fence to the dust hose, and take a tight 90 degree turn.  I quickly came up with a 3D design that smoothly transitioned between the two diameters.

Screen Shot 2018-04-05 at 7.03.43 PM.png

This isn’t a simple print.  Previously I used a PVC elbow to make the turn, but I wanted to work on my support skills. The shape starts large on the left, but gets smaller on the right.  That means very little is ever touching the print bed.  I knew this would require a lot of support material to work, but thought it would be a good challenge to fiddle with support settings so that bottom surface was as smooth as I could get it.

Screen Shot 2018-04-05 at 7.09.30 PM.png

The slicer software shows in green the support material.  I can only print one material at a time.  What it does is tries to make a very sparse little structure just below the main model surface.  The printed model will droop a little bit, but hit the support and not droop any further.  If you get it right, the bottom looks good, but is able to be broken away from the support.  That is the theory at least.  In practice, anything I have printed with support has looked horrible on the bottom.


I started with the default settings that were recommended for my printer.  Instead of printing the whole thing I only let it print the bottom bit just past the support.

DSC_1200

It made it out alive, but looks rough.  The bottom layers are pretty loose and separated from each other.  Could I improve on this?

DSC_1202

Not really as it turns out.  One trick is to reduce the print temperature.  If it is cooler it will solidify faster and not droop as much.  I also tried modifying that support surface to be more solid so it would offer smoother support.  On every one, the edge would peel up and get caught by the nozzle.  They all failed at roughly the same spot.  No big deal, go back to the settings I started with.

DSC_1203

The left one was the original settings, and the right one had the support structure even closer than before.  All of them fail in the same way, that thin bit on the bottom right bends up and catches the nozzle.  Printing the support with no gap would make it hold well, but might make removal difficult.

DSC_1204

Ok, the print didn’t fail, that thin bit was firmly stuck down, but the support structure is welded on there.  Time for a re-think.


I wanted elegant, but now I am going with simple.  Instead I printed a tube to connect to the hose, a tube to connect to the router, and a block with a swept section that connects the two.  5 minute epoxy is the universal force that binds us together.

This lets me print each segment in the ideal orientation and then put them together later thus maximizing the ability of the printer in each situation.  The final result works well.  So much for increasing my supported print skills.

DSC_1192

DSC_1193

Green Power Station

DSC_1186I have a poor solution to storing my yard tool batteries.  I never developed a clear place for them, so they ended up piled onto the cart that holds all my drill press junk.  That seems to be the story of my organizational life.  Either make a place for something, or expect it to be awkward and always in the way.

No more, I am going to clean this up a bit and make a specific place for these chargers.  Behind the drill press is a good location.  It is right next to the garage door and easily accessible when I am mowing.  I had a few ideas for mixed wood and printed brackets in my head and decided to use this as an opportunity to try something.

Angled braces are doable in wood, but can be a little tough to make symmetric.  This printed bracket ties the two pieces together well and should be able to support a massive amount of weight.  I don’t need it to in this case, but it was a good test.

They are green because I had some older green filament I wanted to use up.  Might as well go green on everything.  The wooden parts got a spritz of some well matching green I happened to have.

Once dry the brackets made installation pretty simple.  It holds the mounting plate at a consistent 45 degree angle and is pretty strong even with only one side installed.  I mounted the top charger so I could figure out impingement free placement for the lower charger.

DSC_1189

The L piece the two chargers attach to has a notch in it so it will hang on a lip on the red toolbox below my drill press.  The drill press area is still a hot mess, but this ticks one problem off the list.

20180401_152746.jpg

Smoker Rehab 2018

Two years ago I pulled my old smoker out and gave it a complete overhaul.  It needs a little help again.  Nothing dramatic, but the paint is chipping up with rust blisters in places.  Best to get to that before they become dramatic.

A heavy grit flap sander pad on my angle grinder did a good job of cleaning off the paint and exposing fresh metal.  I think I used a wire brush last time, but this works a lot better.  So much better in fact that it revealed a lot more bad paint than I had originally thought.  I had sites all over the smoker that needed grinding and repainting.

Out came the high temp primer and paint.  I basically ended up repainting 75% of the smoker.  That was a lot more dramatic that I set out to do, but I figure it is a lot cheaper than having a rusted out smoker.

With it safe from the elements for a few more years I had one trick to install.  I wanted to customize the front fold out table.  I figured some kind of Florida BBQ sign was in order.  I was going to make it look like a caution road sign, but then thought that would reflect poorly on my cooking.  Watch out for this guy’s food!

I would historically use my mill to cut a stencil from thin plywood or hardboard.  I haven’t used it in ages and need to spend a day on repairs and re-learning how to use it.  Instead I tried to 3D print a stencil.  It can make finer curves and lines anyways.

DSC_1177

I sprayed the back with some light hold adhesive hoping that would keep spray paint from seeping under while letting me pick the stencil back up.  I masked around it and sprayed away.

DSC_1178

The edges weren’t as clear as I had hoped, so for the BBQ letters I sprayed more adhesive and make sure to rub it onto the grill table really hard.  That probably would have gone ok, but I sprayed too much paint and it seeped under.  Multiple lighter passes would have worked better.  I used too much adhesive and it left residue on the table.  I will wait a few days for the paint to really cure well before hitting it with a solvent.  I also didn’t mask enough and got a little over spray on the grill.

DSC_1181

Up close it has a lot of issues, but from afar it isn’t bad.  All lessons learned for next time.  Maybe in 2 more years when it needs another paint touch up I will have a better plan for branding it.  The smoker will be 11 years old at that point!

Sander Dust Collection Fittings

This falls into yet another “project I started over a year ago” category.  Not sure how it fell off the radar, but it did.  Dust collection is a wonderful thing to have, but there appear to be no standards.  Every piece of equipment has a different hose size.  I wanted to plumb my two main bench-top sanders together in a clean and easy way.

I started by adapting the back of my spindle sander to a PVC elbow, and then to a ribbed segment that would accept some flexible hosing.  5 minute epoxy is all you need to join the plastic pieces.

I cut a small length of hose and attached another hose coupler.  One side is ribbed to keep the hose from coming off, the other is smooth.  The hose slides on and off easily, but seals well enough to be a good vacuum.  I printed some mounting blocks that have a path through them to pass zip ties through.  This holds the coupling down without any complex clamp mechanisms.

DSC_1133

Similarly I went to the stand that has my disk/belt sander and attached hosing so I could get to it on the side of the machine.

DSC_1132

Now the vacuum built into the disk/belt sander can service both it and the spindle sander with just a quick re-plumb.  Cheers to less dust in my lungs!


Work Sharp Freehand Sharpening

I printed a freehand sharpening guide for my Ken Onion Work Sharp, and found it works a lot better than the guides that come with it for odd knife and handle shapes.  Honestly at this point, it is the only way I sharpen with this tool.

Don’t own a 3D printer, no problem.  Just cut a block of wood with the desired angles and sight down the edge of the wood.

Waterstone Saddle

I have a norton 4000/8000 grit waterstone that I use for most of my finer sharpening.  It is a good stone, but requires soaking before using, needs frequent flattening, and you have to squirt water on it often when sharpening.  I have made many messes on my bench while using the stone to sharpen and decided to try something else.  Operating it at the sink makes the most sense.  I had a long piece of UHMW plastic that would make a good starting point for a waterstone saddle.

DSC_1093

The plastic is rigid, impervious to water, and left over from my table saw conversion (aka free).  The tricky part was how to hold it down.  I want it to be removable so screwing it down wasn’t an option.  I went around and around thinking about it until I just printed something.

Two of these funny hook shapes sit really snugly on the top rim of my garage sink.  A dab of hot glue on top held the plastic plank in place temporarily.  I flipped it over and screwed the hooks on from the under side.  You can screw into UHMW plastic, but you want to pre-drill and not over tighten.

With a really solid platform established I printed some cleats to keep the stone in place.  I used the same hot glue trick to tack the cleats so I could drill and screw them without any sliding around.

DSC_1097

DSC_1098

DSC_1099

I have used this a few times since making the saddle and it works well.  I might add some kind of lip to keep sprayed water and swarf from dripping outside of the sink.  Otherwise this keeps the waterstone in its natural aquatic environment.

While I was working on all of that I printed a rag hook that clips on under the lip of the sink to keep an old shirt nearby but out of the way for drying hands.  Printing fixes everything.

Sharpening: Flat Back Jigs

I don’t always build sharpening equipment, but when I do I go overboard.  With a more stable work station I can get deeper down the sharpening rabbit hole and focus on doing better work.  I am trying to take sharpening from an afterthought to an everyday part of my woodworking.  This post’s focus is going to be on flat backs.

It is important to have flat chisel backs and for the last inch or two of your plane irons to be flat.  Pushing down on a small area gives me hand cramps after a while.  I always want to cut corners in this area, but need to get better.  Ideally when human frailty becomes a process issue I would advocate for robotics.  I am not that rich, so a helper jig will have to do.

I started with the idea of embedding some magnets in a block of wood sized right to fit in your hand.  Instead I found this magjig switchable magnet.  It has a lot of force when you rotate the knob and align the magnets.  I thought about woodworking a handle of some sort, but printing turned out to be a lot easier.

The magnet is be better than hands even without the printed parts, but they help spread the force over a larger area of the chisel, and makes for a better handle.

DSC_1060

I made a gif of it in action.  It holds really well and lets me put downward pressure across the chisel while controlling the back and forth motion.  This works well on wider chisels, narrow ones don’t take long to flatten.  Added to thingiverse.

Flatening Gif


Plane blades are a lot wider and thinner.  That makes the magnet option harder.  This jig I found in a popular woodworking article won’t have that issue.  I started with a quite lovely short piece of maple.

DSC_1064

I used to never make a jig out of anything but the cheapest material I could find.  Now I am starting to get the idea of the jigs being tough and good looking themselves.  That having been said, I made a complete hack job of this slot.  It was an odd size so none of my chisels quite worked.  I drilled out a little pocket so my handle bolt wouldn’t spin.

A big mushroom handle on top lets me grip with the whole hand and have a lot of control and force.  The slot allows for a wide range of plane blades to be clamped.

It probably isn’t the best mirror polish the back of a plane blade has ever seen, but it is hands down the best I have ever done.  Plus, it is a jack plane, so perfection isn’t exactly required.

DSC_1071

DSC_1084

I played around with the jig for a while before applying a finish.  I made a second hole on the other side to move the handle closer to the edge.  That seemed to control a little better.  Adjustment there might be nice in the next version.  The bolt that clamps down the blade was an issue too.  I could only tighten so far before the head would spin.  Sometimes the blade would want to rotate.  I thinned a scrap of maple and cut another pocket.  Now there is wood on metal instead of metal on metal (no chance of damaging the blade), and I can tighten to my hearts content.

Lastly a touch of tung oil made everything look gorgeous.  This thing will probably be black with grinding good in a month, but for now it is gorgeous.

DSC_1085

DSC_1086

Bunny Defense Network

Our two renegades rabbits are always looking for exploration and adventure.  Often they try to find it beyond the barriers we put up to keep them out of certain areas.  At first, opening up their exercise pen and placing the edges against the wall corralled them enough.  Now, they realize they can shove and move the fencing enough to get beyond.  I need a way to anchor the fence so they stop venturing beyond designated borders.

I started with sort of a three way corner thing to sit on the other side of the fence.  I wanted to add weight so the brace would be harder to move.  Boxing in the one leg segment and filling it with sand made the whole thing quite heavy.  I glued on a lid to keep from spilling sand all over the house.  I left off finish because I figured the little devils darlings would figure out how to chew on it through the fence.

This 20180114_162217
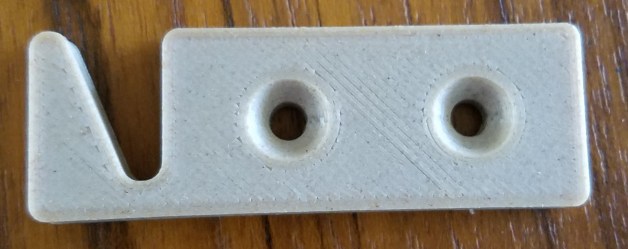
all started when I had an idea for a simple 3D print that would hold the fence segments if you screwed them to something sturdy.  It seemed like a good idea, but eventually needed another iteration.

DSC_1037The brackets looked pretty good in wood filled PLA and held the fence well.  The issue I ran into was when it came to actually holding the little beasties beauties back.  On the first night they rattled it enough to knock two of the rungs off their hooks.  It only took them a few hours to figure out how to chew on my new creation as well.  Good thing I left off the finish.  I was going to need a deeper hook to keep them from breaking the fence section loose.

DSC_1039


In thinking about the design, it became apparent that the right half of that hook wasn’t needed.  The wooden upright would act as one side of the hook, I just needed to provide the other side.  I increased the hook size and stripped the part down till it was the bare minimum of what was needed.

DSC_1041

A few clear grippy bumpers on the bottom along with the sand mean it is impossible to shift this thing.  The new hooks ought to make it very difficult to disconnect the fence unless you are a human.  The whole thing tucks neatly next to a piece of well protected heirloom furniture.  Tyrion has been heavily inspecting and disapproving of my work since its installation.  Their hunger for items you value knows no bounds.


Wireless Backup Camera

I stuck an empire logo on my suburban and jokingly named it the stormtrooper.  It has the right color scheme, and I hoped the name would mean it couldn’t hit anything.  That didn’t work, and it backed into a neighbor’s car.  Nothing serious, but a backup camera would have been useful.  Here is one now!

20171230_153433

Finding a spot on the suburban that would let me see well, but not get broken off the first time I loaded up lumber was a little tricky.  This spot doesn’t give the best view but should be out of the way.

The unit I got was wireless.  I just needed power for the in-cab unit, and to tie into the reverse lights for the camera assembly.  I pulled the tail light off and found a lot of wires.  The green is positive for the backup light, the black wires are all common grounds, and that brown wire looks a lot like a black wire if you are too excited and cut before you should.  I used heat shrink solder connectors.  They self seal and make a nice slim connection.  I added tape to each as an extra layer of protection.

I snaked my own wire down into the bumper area before the kit arrived and it turns out they gave you 10 miles of wire to deal with.  I wrapped up the transmitter and extra wires with a lot of zip ties and stuck it in the cleanest secure spot I could find.

20171230_153413

I don’t know how long it will take for water to get into these electronics and ruin the whole setup, but considering the vehicle is 17 years old, a lot of other things will break down first.


Back in the cab you just need to plug the screen in to 12V power.  It will come on when you go into reverse.  Hey presto, it works!

20171230_150328

Now I need to find a spot to stick it and hide the 12 miles of power cable.  The kit came with a suction cup bracket that was supposed to go on your dash.  Mine is so high that anything on it would obstruct vision.  Instead I printed a wedge shape to go between this blank spot next to the environmental controls.  It angles the screen towards the driver by 10 degrees.

3M’s VHB tape will make anything attach to just about anything else.  It is expensive, but good stuff.  A layer on either side of my PETG (should survive the high heat of Florida’s summer) wedge fixed the screen in place.

20171231_094800

I was able to stuff most of the extra cables in a pull out ash tray below the screen.  Everything looks tidy if decidedly out of place.

Cookie Monster Box

Nothing says cookie cutter storage like a box with cookie monster emblazoned on the front.

DSC_0993

I ended up making a lot more cookie cutters themed after various marvel movie heroes and eventually figured a storage container was warranted.  This design features a snazzy ogee at the bottom to help strengthen the box and make it look a lot less boring.  A flare near the top helps add strength for the lid to slide in and out and adds another decorative bit of flair.  For typical storage it is much easier to buy a plastic shoebox, but when you need personalization, 3d printing small boxes is an option.  Now I just need to wait for all those sweet pressed cookie experiments to roll my way.  Link to the box on thingiverse.

DSC_0995